
How to generate an “add-to-calendar” link for your emails
When attendees register for an event you’re hosting, a confirmation email is key in getting them to show up. But here’s a kicker—you can bump up your attendance rates even more by adding a little magic to your emails with an “add-to-calendar” link.
You might think, “That sounds great, but my event platform already does that.” True, but those emails aren’t likely to reflect your brand or give you much opportunity to personalize content. That’s where creating your own “add-to-calendar” link comes in.
Luckily, it’s fairly straightforward to put add-to-calendar links in emails you create in your marketing automation platform (MAP). And when you do, you’re in the driver’s seat for everything from branding and design to frequency and content.
Here’s what we’ll be covering today:
- What is an add-to-calendar link?
- The benefits of calendar links
- Our favorite calendar link generators
- Different methods for creating calendar event links in your emails
What is an “add-to-calendar” link?
Simply put, it’s a link allowing your attendees to easily add your event to their calendar with just one click. This makes it convenient for them to stay organized and keep track of any important details related to the event. Plus, it serves as a reminder for them to attend and increases the chances of them actually showing up.
The benefits of “add-to-calendar” links
Before we dive into the technicalities, let’s quickly go over why “add to calendar” links are a must-have for email marketers.
- Enhanced user experience. Providing a direct link to add an event to their preferred calendar app makes it easier for recipients to save and remember important dates.
- Increased audience reach. With “add to calendar” links, you’re not limited to users of a particular calendar app—anyone with an internet connection and access to an email client can add your event.
- Improved attendance rates. By simplifying adding events to their calendars, you increase the chances that recipients will attend your event.
Our favorite calendar link generators
Ready to add a “magic” touch to your emails? Here are two popular platforms that allow you to easily create “add to calendar” links:
- Parcel’s Calendar Link Generator: A user-friendly tool for generating .ics files that work with Google, Outlook, Yahoo, AOL, and Microsoft Office 365. It’s super straightforward—drop in your event details and you get a link ready to be embedded in your emails.
- Amit Agarwal’s Calendar Links: Similar to Parcel’s Calendar Link Generator, it’s a user-friendly tool that lets you customize the appearance of your link. It works with Google Calendar, Outlook, Microsoft Office 365, Android, Apple, and Yahoo Calendars.
Different methods for adding calendar links in your emails
Ready to get started? Here are a few different methods for creating your own calendar event links in your emails.
Method #1: Create an ICS file
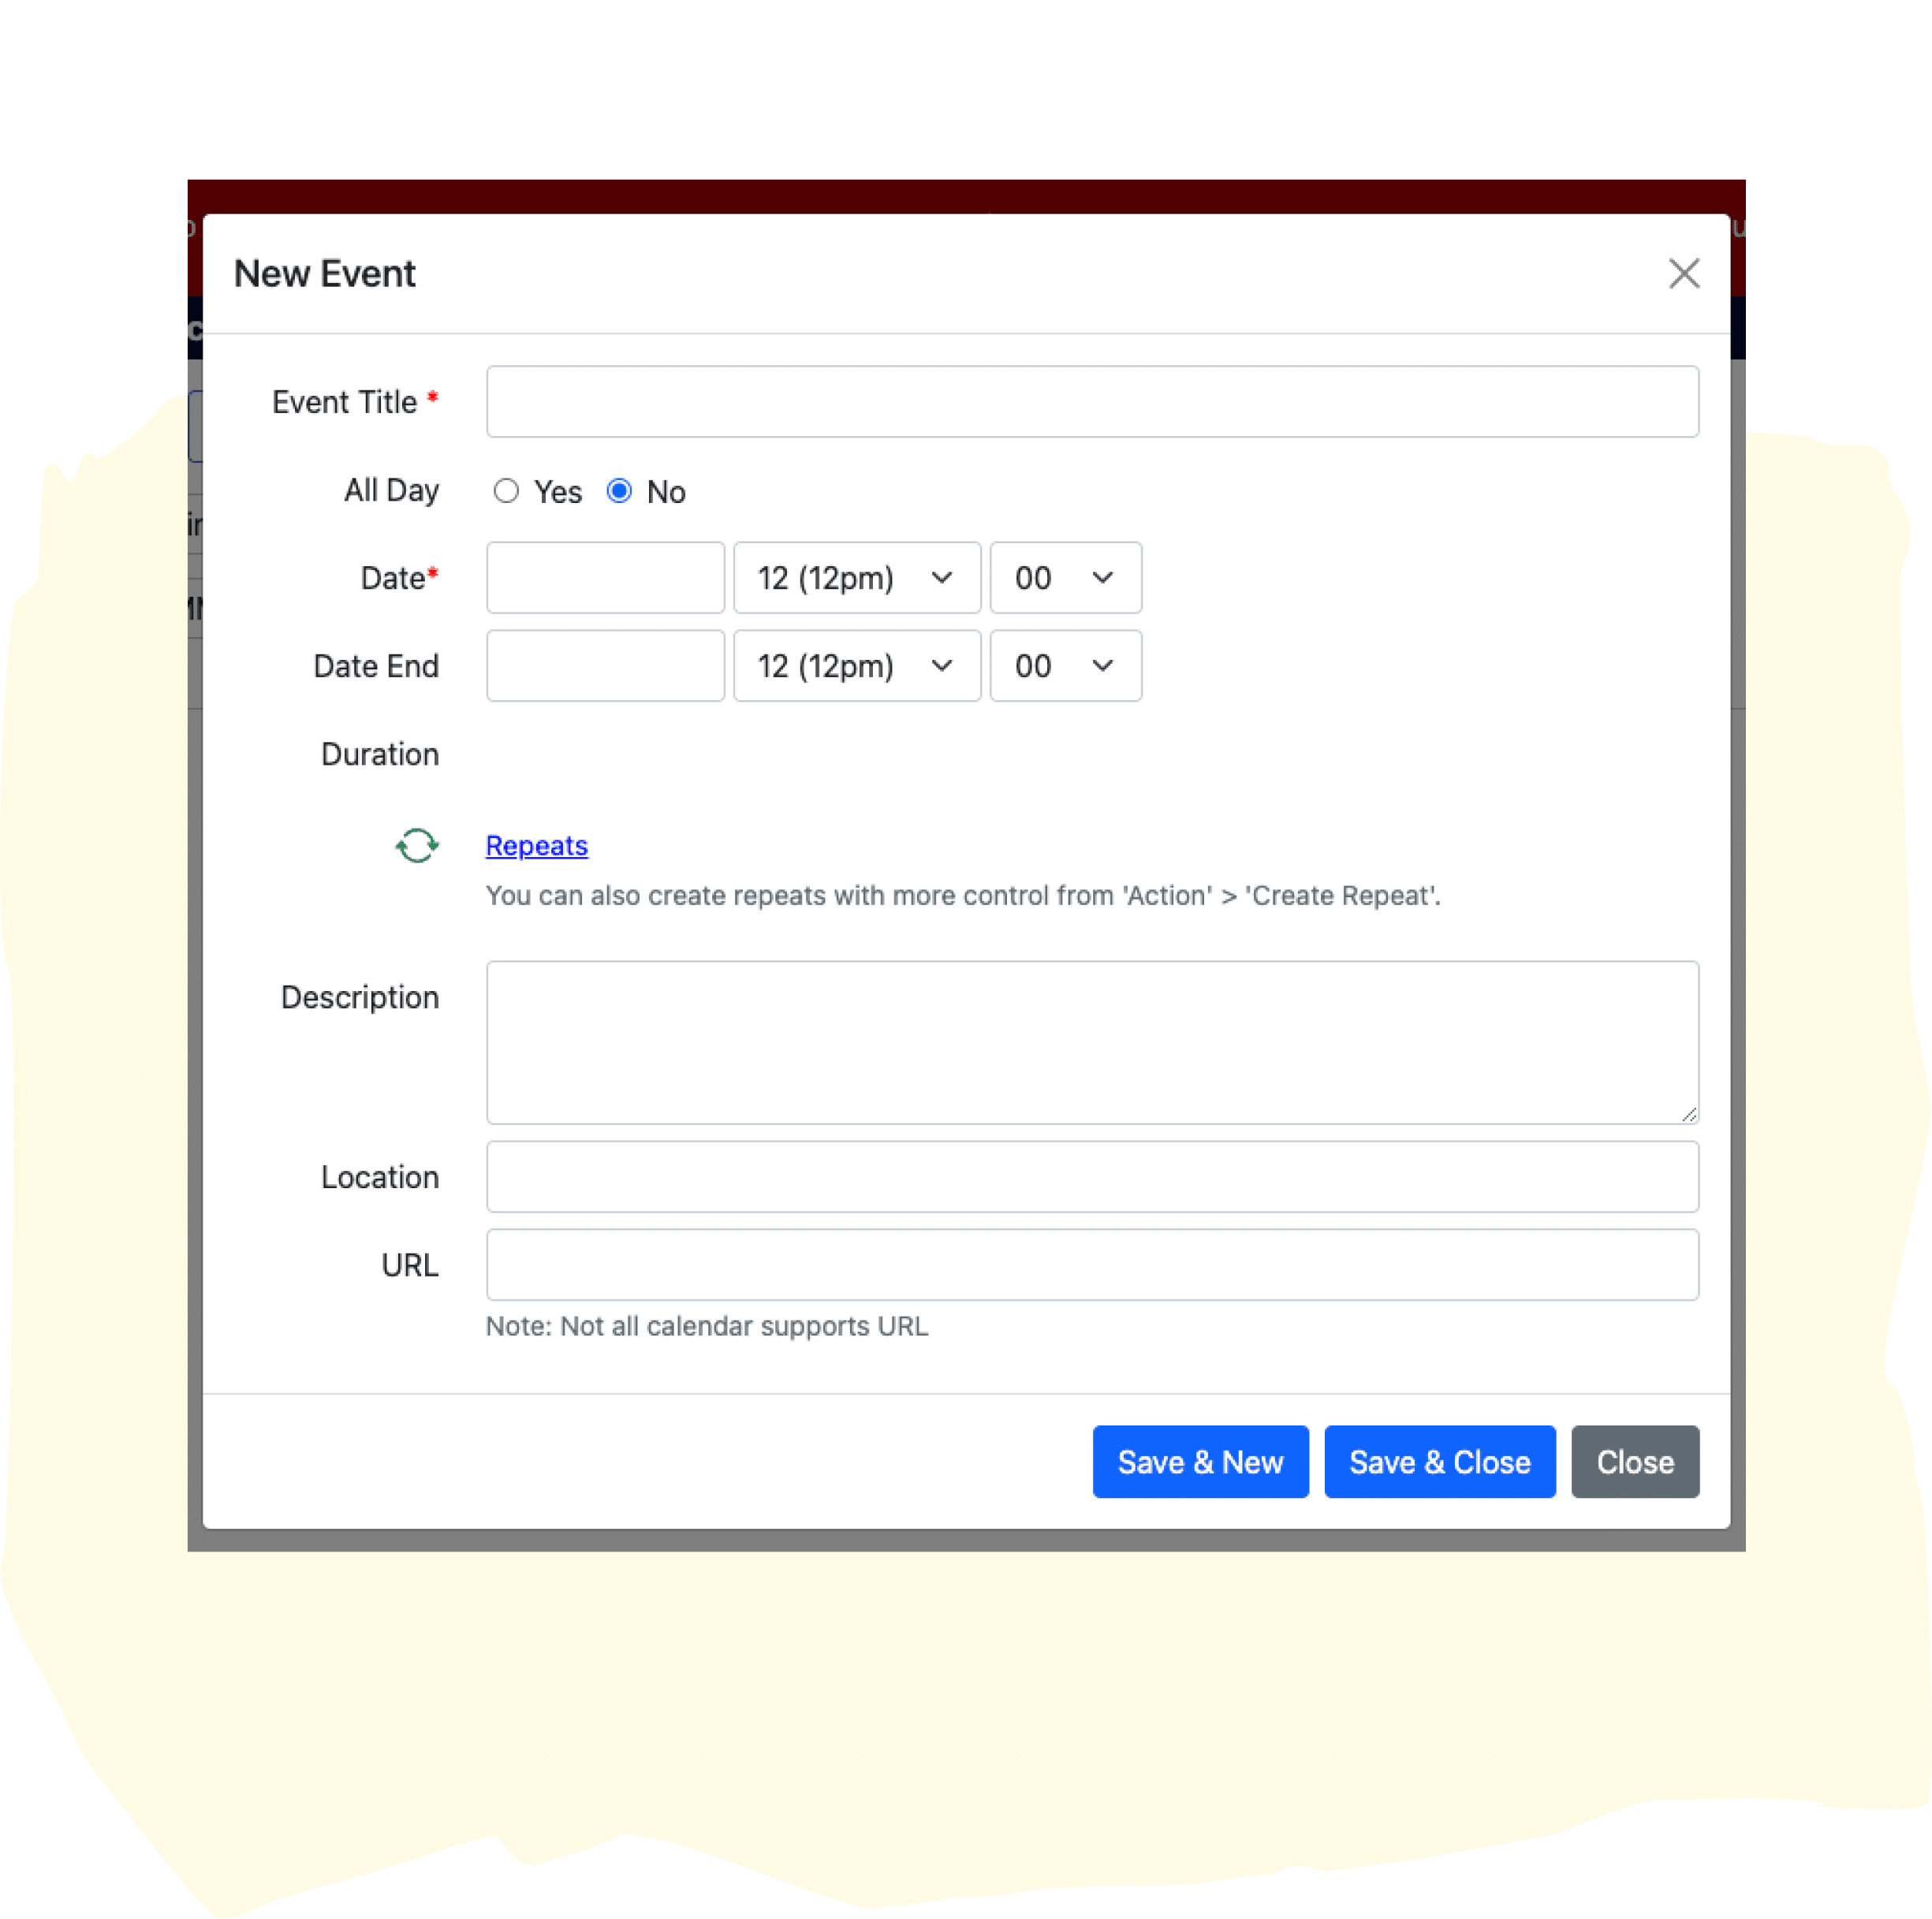
One of the most common ways to place events on a customer’s calendar is with an iCalendar or ICS file. Not to be confused with Apple’s iCal app, ICS is an open standard for exchanging calendar information, and nearly all calendar applications accept it.
Here’s a friendly step-by-step on how to create an ICS file:
- Create an ICS file for your event using a tool like Parcel’s Calendar Link Generator we mentioned earlier. It’s straightforward and doesn’t take much time.
- Download the ICS file, then upload it to your file servers to generate a download link.
- Create a call-to-action (CTA) button in your email for the recipient to download the ICS file. Make it eye-catching and simple like “Add to My Calendar.”
The big plus? ICS files work with most calendar applications out there—Google, Outlook, AOL, Yahoo, Microsoft Office 365, and Apple Mail—so there’s really no need to lose sleep over personalizing your email based on customer email clients.
The flip side? Well, there’s a bit more for your customer to do. They need to download the ICS file and then upload it to their calendar. Many devices will prompt you to automatically add this file to their calendar upon opening, but there still might be some friction.
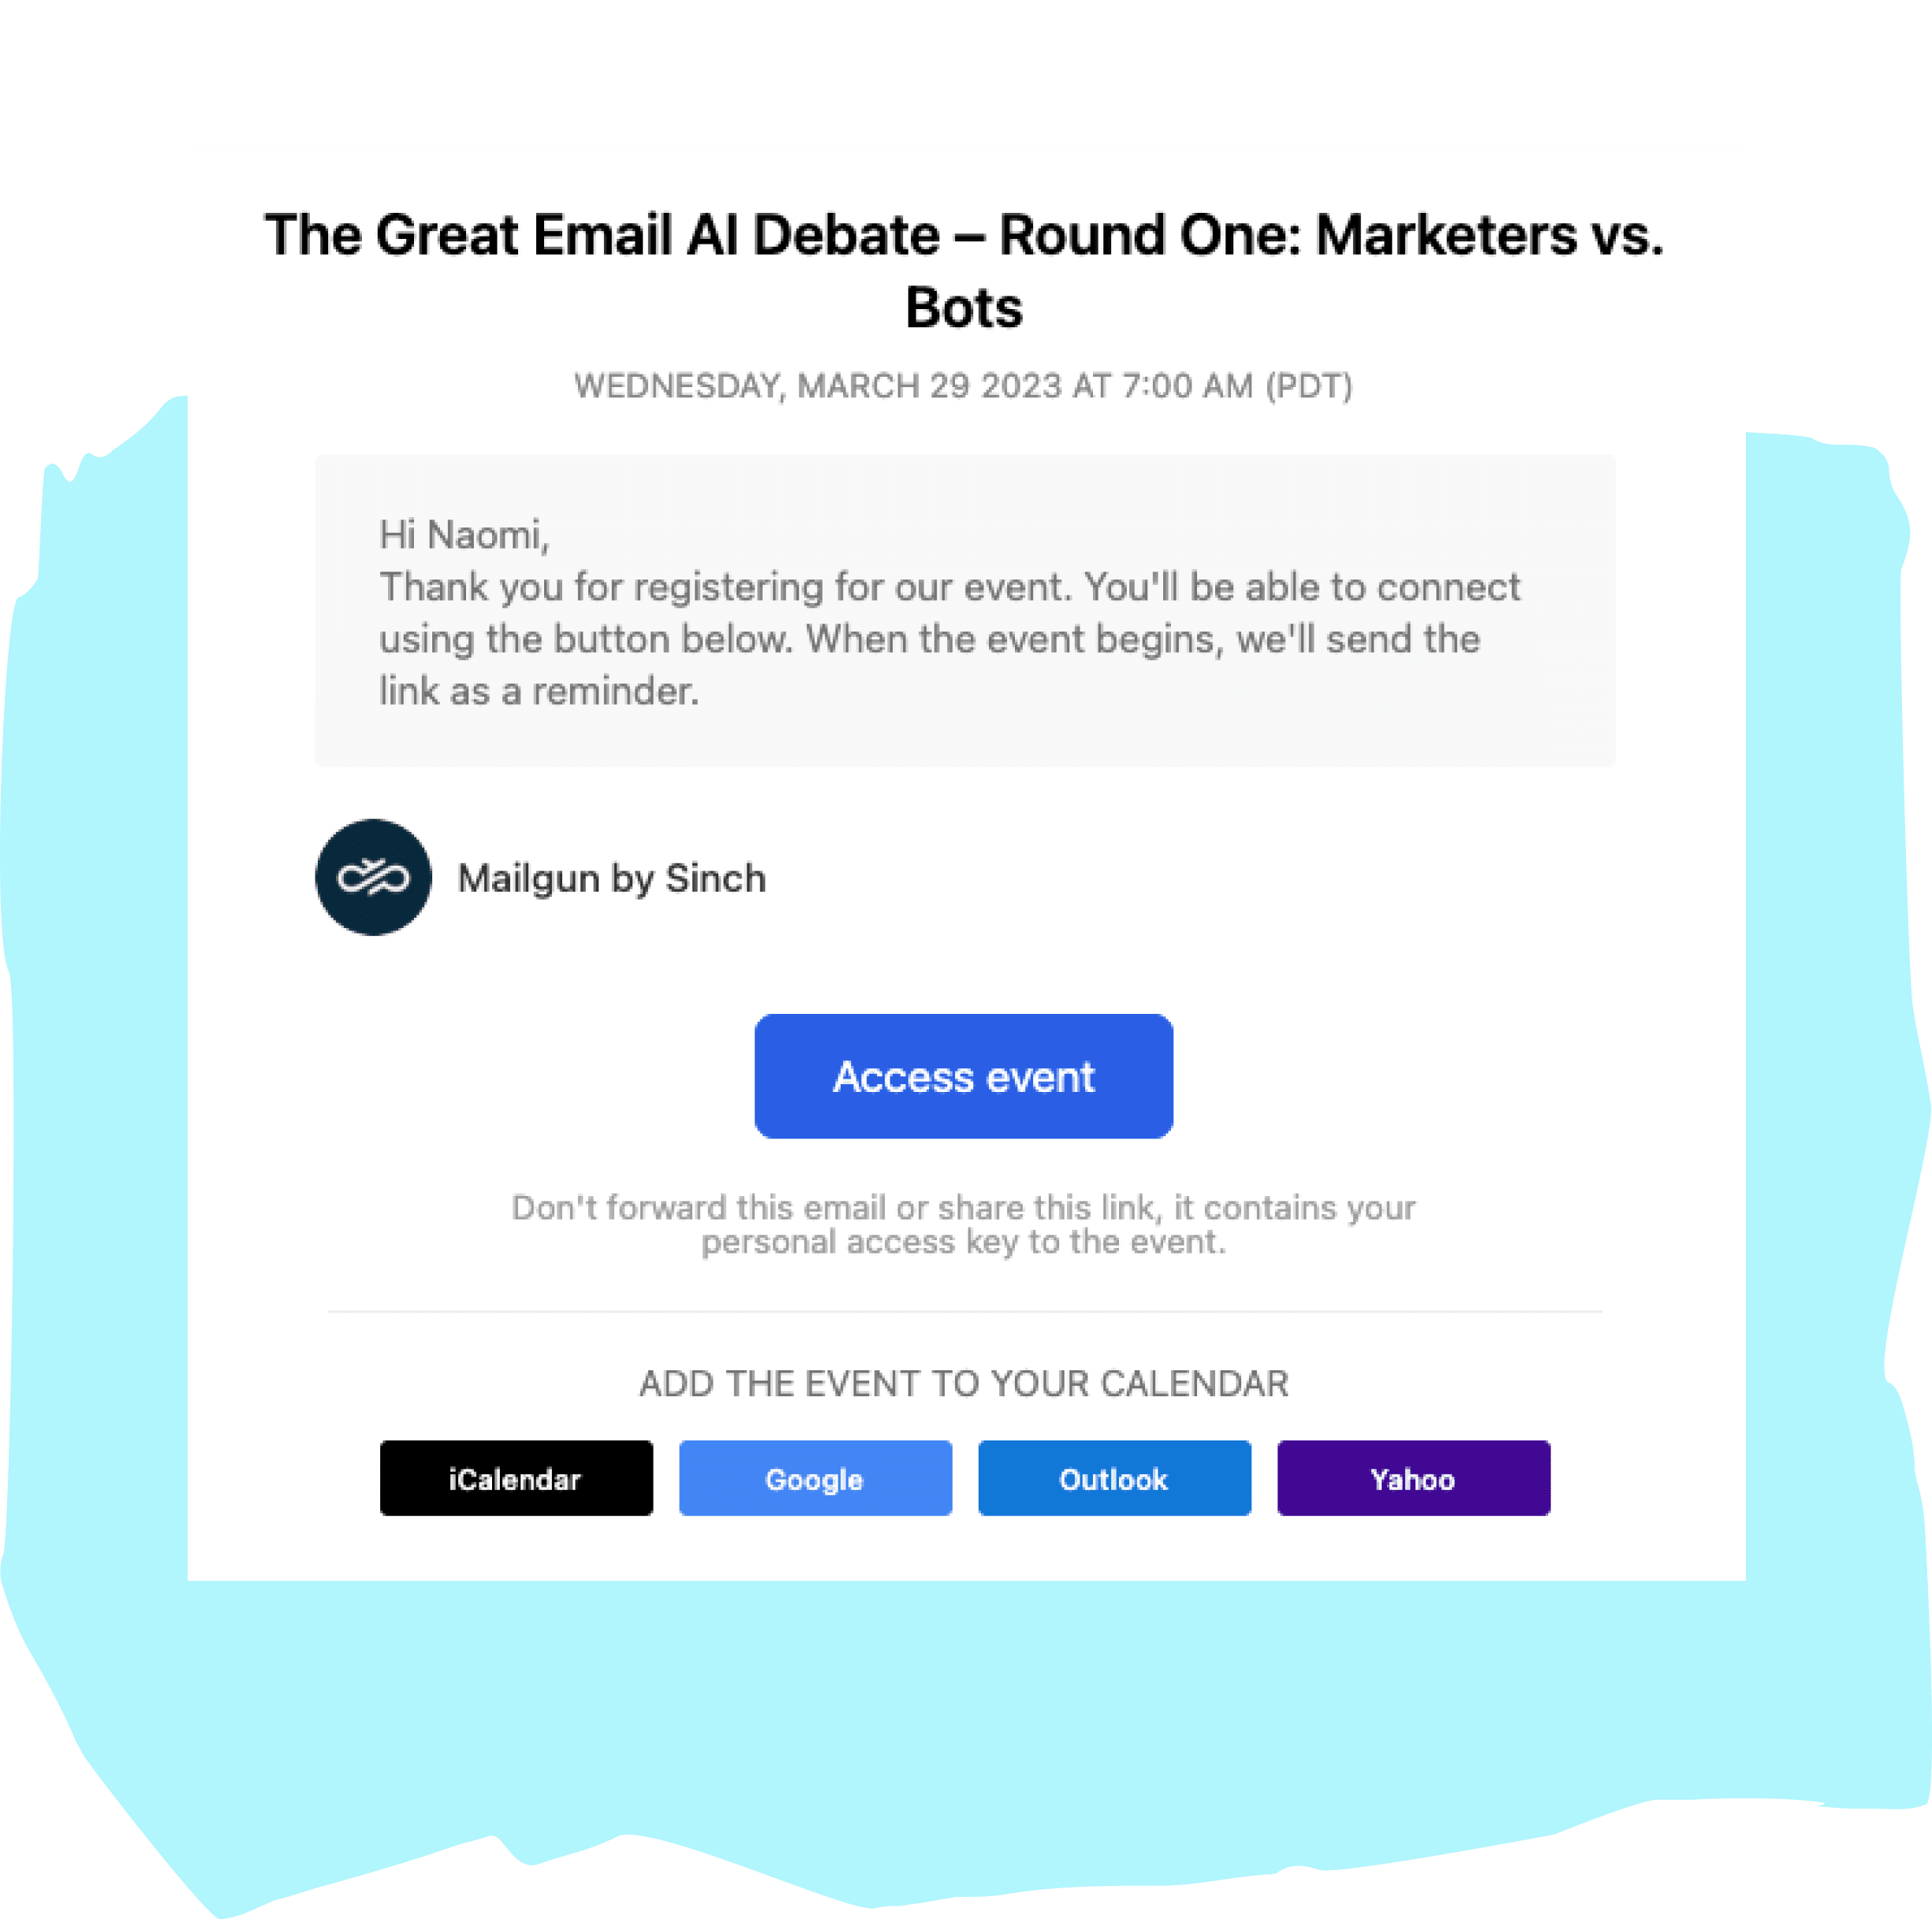
Method #2: Use an add-to-calendar link
An add-to-calendar link creates a seamless experience for your customers—they click the link, and voilà, their calendar app opens up with your event details neatly filled in. Notably, these links are compatible with many of the most popular calendar applications, like Google Calendar, Outlook.com, and Microsoft Office 365. However, it’s important to note that not every calendar app is in on the fun—Apple Mail and Outlook are not yet compatible.
Here’s how to create add-to-calendar links for your emails:
- Generate add-to-calendar links for each specific calendar application using a handy tool such as Amit Agarwal’s Calendar Links (mentioned above).
- Craft eye-catching CTA buttons in your email that connect to the respective add-to-calendar links you’ve set up.
When it comes to integrating these buttons into your emails, you’ve got a couple of choices:
- Use Liquid to customize your email, ensuring each recipient sees the appropriate add-to-calendar link based on their email client. You can set a fallback option with no link for those using calendar apps that don’t play nice with add-to-calendar links.
- Display all add-to-calendar button options, allowing your subscribers to choose their preferred calendar application and add the event without leaving your email.
Tailoring each email to match the recipient’s email client enhances the user experience significantly. However, if tinkering with Liquid isn’t your cup of tea, or you need more resources, displaying all calendar link options ensures you’ve got all your bases covered, providing a straightforward solution for every attendee.
Method #3: Create calendar links using webhooks
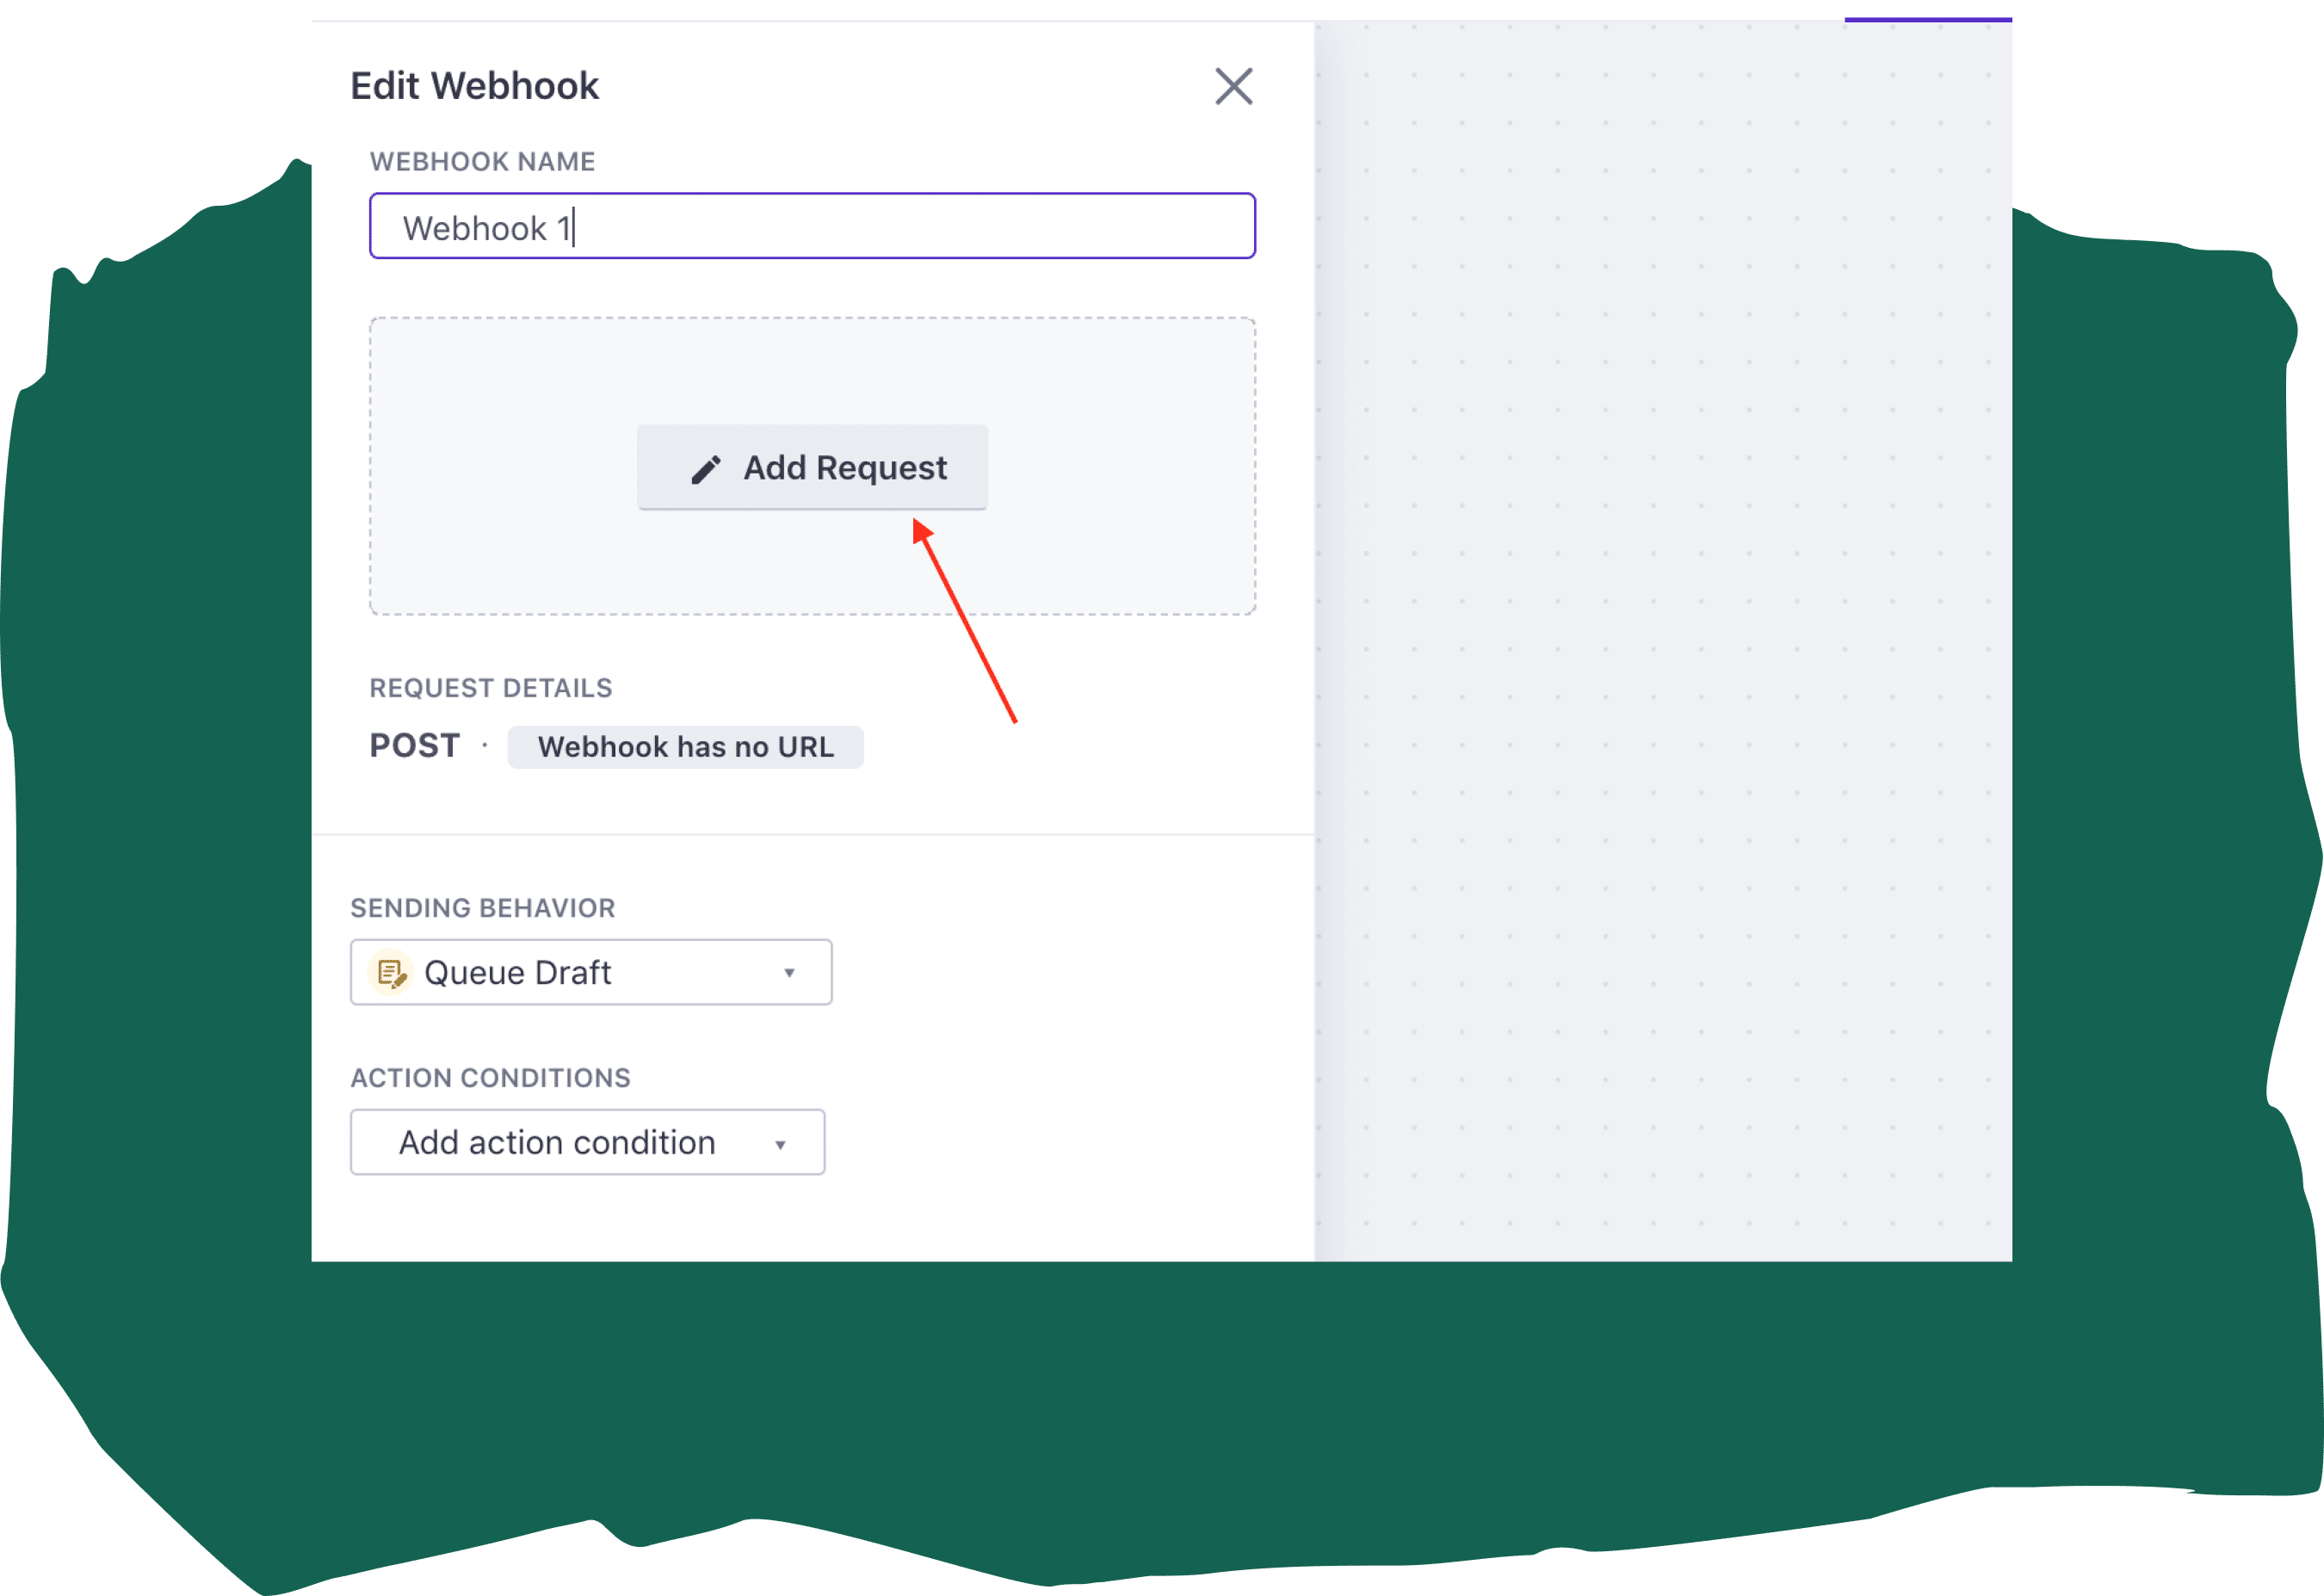
For a more streamlined approach, you can use webhooks to connect to your event platform’s API, generating the calendar link automatically, saving time and reducing the need for manual input.
To set up the calendar event webhook action:
- Make an API call; refer to your event platform’s API documentation for details about the API endpoint, required customer profile data, and body content.
- Use Liquid to set a customer profile attribute and indicate the specific data from the API response you want to include in your email. In this case, you’re looking for the add-to-calendar links. How you set this up will vary depending on how your API returns the data.
- Send a test API call; this will show you the response the API returns and allow you to verify the webhook is working.
- In your email, use Liquid to personalize the email with the customer profile attribute you set in the API call.
By integrating webhooks in your email strategy, you can automate the process of adding event details to your recipients’ calendars, enhancing the user experience and boosting attendance rates for your events. This method offers convenience and ensures that your emails are personalized and relevant, making it easier for your audience to engage with your content.
Look at this detailed guide and walkthrough video to see the process in action.
Method #4: Launch a webhook-triggered campaign in Customer.io
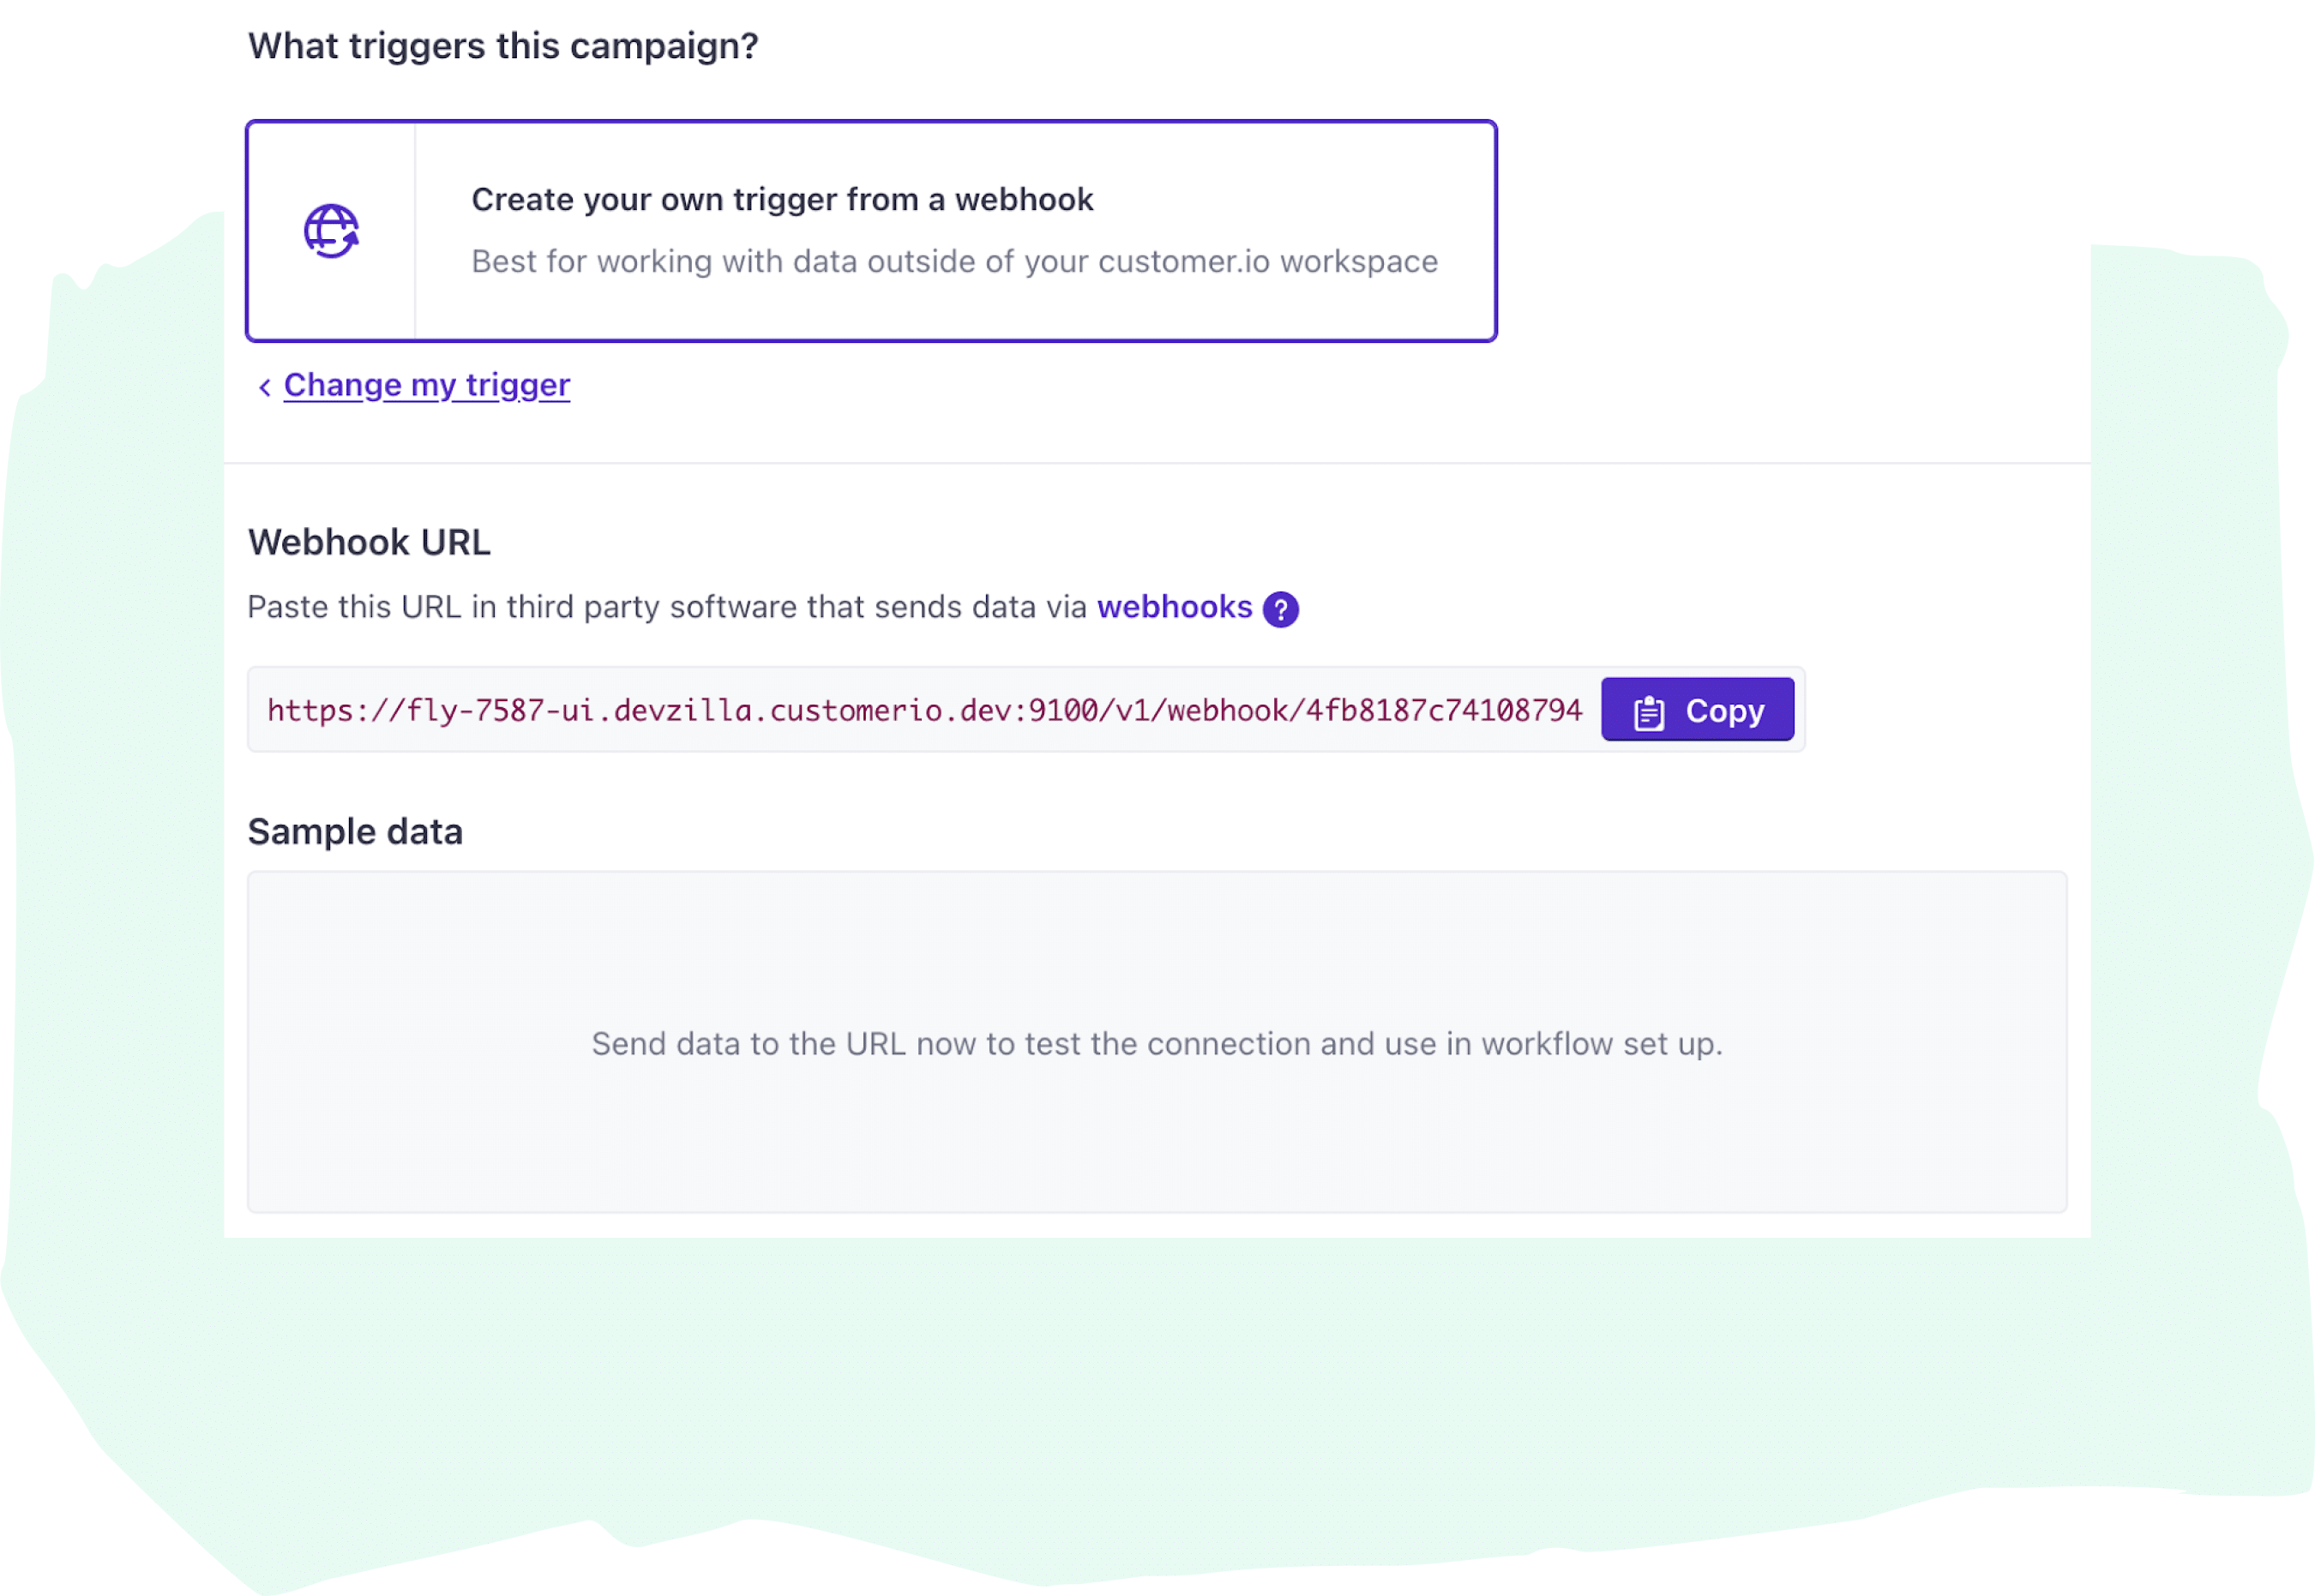
If you use Customer.io Journeys, there’s an even easier way to automatically bring data from your events platform into emails: webhook-triggered campaigns. If your event platform’s API has an add-to-calendar API endpoint, you can pull that data into your emails and personalize them using Liquid.
You simply provide a webhook URL from Customer.io to your event platform’s API. Then, your event platform will automatically send data to Customer.io, which you can use in any campaign.
Here’s how to set it up:
- Start by creating a campaign inside of Journeys.
- Select Data arrives via webhook for the trigger.
- Add a webhook URL from your event platform’s API to the campaign settings.
- In the email content, use Liquid to personalize and populate with event data based on the data received from the webhook.
This method eliminates manual input or coding since everything is automatically pulled from your events platform and inserted into your email. This results in a seamless and personalized experience for your recipients, making it easier to drive engagement and increase event attendance rates.
Customer.io pro tip:
Customer.io also offers detailed guide and walkthrough videobuilt-in integrations with popular event platforms such as Eventbrite, Livestorm, and Crowdcast, making it even simpler to incorporate event data into your emails via webhooks.
That’s a wrap
From the straightforward elegance of add-to-calendar links to the automation superhero powers of webhooks, it’s all about making life easier for your recipients—and boosting event attendance rates while we’re at it.
Remember, the goal is to create a frictionless, pleasant experience that makes your audience feel valued and understood. With tools like Customer.io at your disposal and a bit of creativity, there’s no limit to how you can personalize and optimize your event communications. Whether you’re a code wizard or prefer keeping things simple, these methods offer something for everyone.