How to Build a Round-Robin Assignment for your Inbound Sales Funnel
Imagine you run a sales team. Every time a new lead comes in, you want to assign that lead a salesperson, and you want each salesperson to get the same number of leads overall. A quick solution would be to randomly assign a salesperson—in the long run, that would equally distribute your leads. But on a day-to-day basis, some salespeople will get more and others less—just like when you flip a coin, sometimes you get five heads in a row.
Instead, you can assign the salesperson using a round-robin. Cycle through the list of salespeople to ensure equal distribution, so each one gets assigned a lead in turn. In Customer.io, you can set up a round-robin easily using Snippets; here’s how!
Step 1: Create Your Snippets
We’ll need to create two snippets: a counter and the list of salespeople. Each time a new lead comes in, we’ll add 1 to this counter Snippet, signaling that we should assign the next salesperson on the list. Then, using the value from the counter, we’ll select a salesperson from the list Snippet.
To create these Snippets, go into your Workspace Setting >Snippets. For this guide, we’ll call the counter snippet lead_round_robin and set its initial value to 0.

For the list of salespeople, you’ll want to create a structured snippet listing out the members of your sales team, giving each person a numerical value, called index in this example. When lead_round_robin is equal to a salesperson’s index, they’ll be assigned to that lead.

The snippet value must be structured as valid JSON—be sure to match the formatting below or check your formatting using a JSON validator tool.
[{"index":"0","name":"Aaron Aaronson"},{"index":"1","name":"Betty Bettison"},{"index":"2","name":"Charles Charleson"}]Step 2: Create Your Campaign
Once you’ve created the snippets, build a campaign that will handle the assignment. Depending on your set up, this could be an Event-triggered Campaign when an event like New Lead occurs, or a Segment-triggered event when a lead enters into a certain lead status.
Step 3: Update Your Counter Snippet
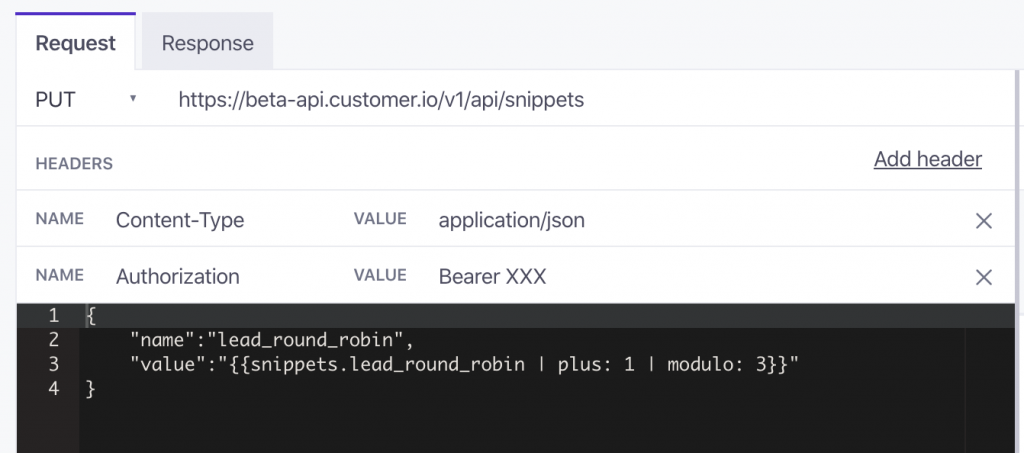
In this campaign, the first step is to increment your counter snippet’s value to reflect that a new lead has come in. To do this, add a new Webhook action to your workflow. Update the request to PUT and use https://beta-api.customer.io/v1/api/snippets as your request URL. This API endpoint allows you to update your Snippets programmatically, which we’ll use to increase our round-robin counter.

To authorize this Webhook, you’ll need an App API key for the workspace where you created your snippets. You can find or create an App API key by going to Account Settings > API Credentials > App API Keys. Once you have it, create a new header with the name Authorization and the value Bearer YOUR-APP-API-KEY-HERE.
In the body of your Webhook, you’ll want to specify the name of the snippet counter you set up in step 1. For the value of the snippet, you want to take the current value and add one. Using the modulo liquid logic tag you’ll be able to control how many people on the list are cycled through. In our example, we have three salespeople, so we use modulo: 3.
{
    "name":"lead_round_robin",
    "value":"{{snippets.lead_round_robin | plus: 1 | modulo: 3}}"
}
Step 4: Assign Your Attribute
We’re now ready to assign a salesperson. Create a new Attribute Update workflow action right after your Webhook action. Set the Attribute Name to the attribute you use to record salespeople’s assignments. With the list snippet you made, use a liquid logic for loop to decide which salesperson gets the lead.
{%for ae in snippets.aes_round_robin %}{% if ae.index == snippets.lead_round_robin %}{{ae.name}}{%endif%}{% endfor %}Voila! Now each time a new lead comes in, you’ll automatically assign them to the next salesperson on your list, ensuring an equal distribution of leads among your sales team from the get-go.