Upgrade from 2x to 3x
This page details breaking changes from the previous major version of the SDK, so you understand the development effort required to update your app and take advantage of the latest features.
What changed?
This update provides native support for Data PipelinesCustomer.io’s customer data platform, helping you capture data from your sources, transform it, and send it to destinations where you can act on it. Data Pipelines is also the preferred integration path for your Customer.io workspace, as it supports all of our Journeys features and other destinations that rely on your data. as a part of the Customer.io SDK. While this represents a significant change “under the hood,” we’ve tried to make it as seamless as possible for you; much of your implementation remains the same.
This move also adds two additional features:
- Support for anonymous tracking: you can send events and other activity for anonymous users, and we’ll reconcile that activity with a person when you identify them.
- Built-in lifecycle events: the SDK now automatically captures events like “Application Installed” and “Application Updated” for you.
- New device-level data: the SDK captures the device
nameand other device-level context for you.
Data Pipelines represents a different integration path than previous versions of the SDK. You’ll do some additional setup in Customer.io and use new credentials in your SDK. But when you’re done, you’ll be able to use your app data’s in both Customer.io and other downstream destinations—like your analytics platform, data warehouse, or CRM. All that and you’ll be prepared to accept new features and improvements that we roll out in the future!
Using Data Pipelines with outside destinations can increase your bill
Using the SDK the way you use it today—just sending data to Customer.io—doesn’t cost anything extra. But, sending your data to other destinations like your analytics platform, data warehouse, etc may add to your monthly charges.
Upgrade process
You’ll update initialization calls for the SDK, the in-app messaging module, and the push module. The in-app and push modules are now required.
As a part of this process, your credentials change. You’ll need to set up a new data sourceA source is a website or server that you want to capture data from—it’s a source of data! in Customer.io and get a new CDP API Key. But you’ll also need to keep your previous siteId as a migrationSiteId when you initialize the SDK. The migrationSiteId is a key helps the SDK send remaining traffic when people update your app.
When you’re done, you’ll also need to change a few base properties to fit the new APIs. In general, identifier becomes userId, body becomes traits, and data becomes properties.
1. Get your new CDP API Key
The new version of the SDK requires you to set up a new data sourceA source is a website or server that you want to capture data from—it’s a source of data! in Customer.io. As a part of this process, you’ll get your CDP API Key.
- In Customer.io, go to the Data Pipelines tab. On the Connections page under Sources, click Add New.
- Select the Mobile: iOS source and then click Add Source.
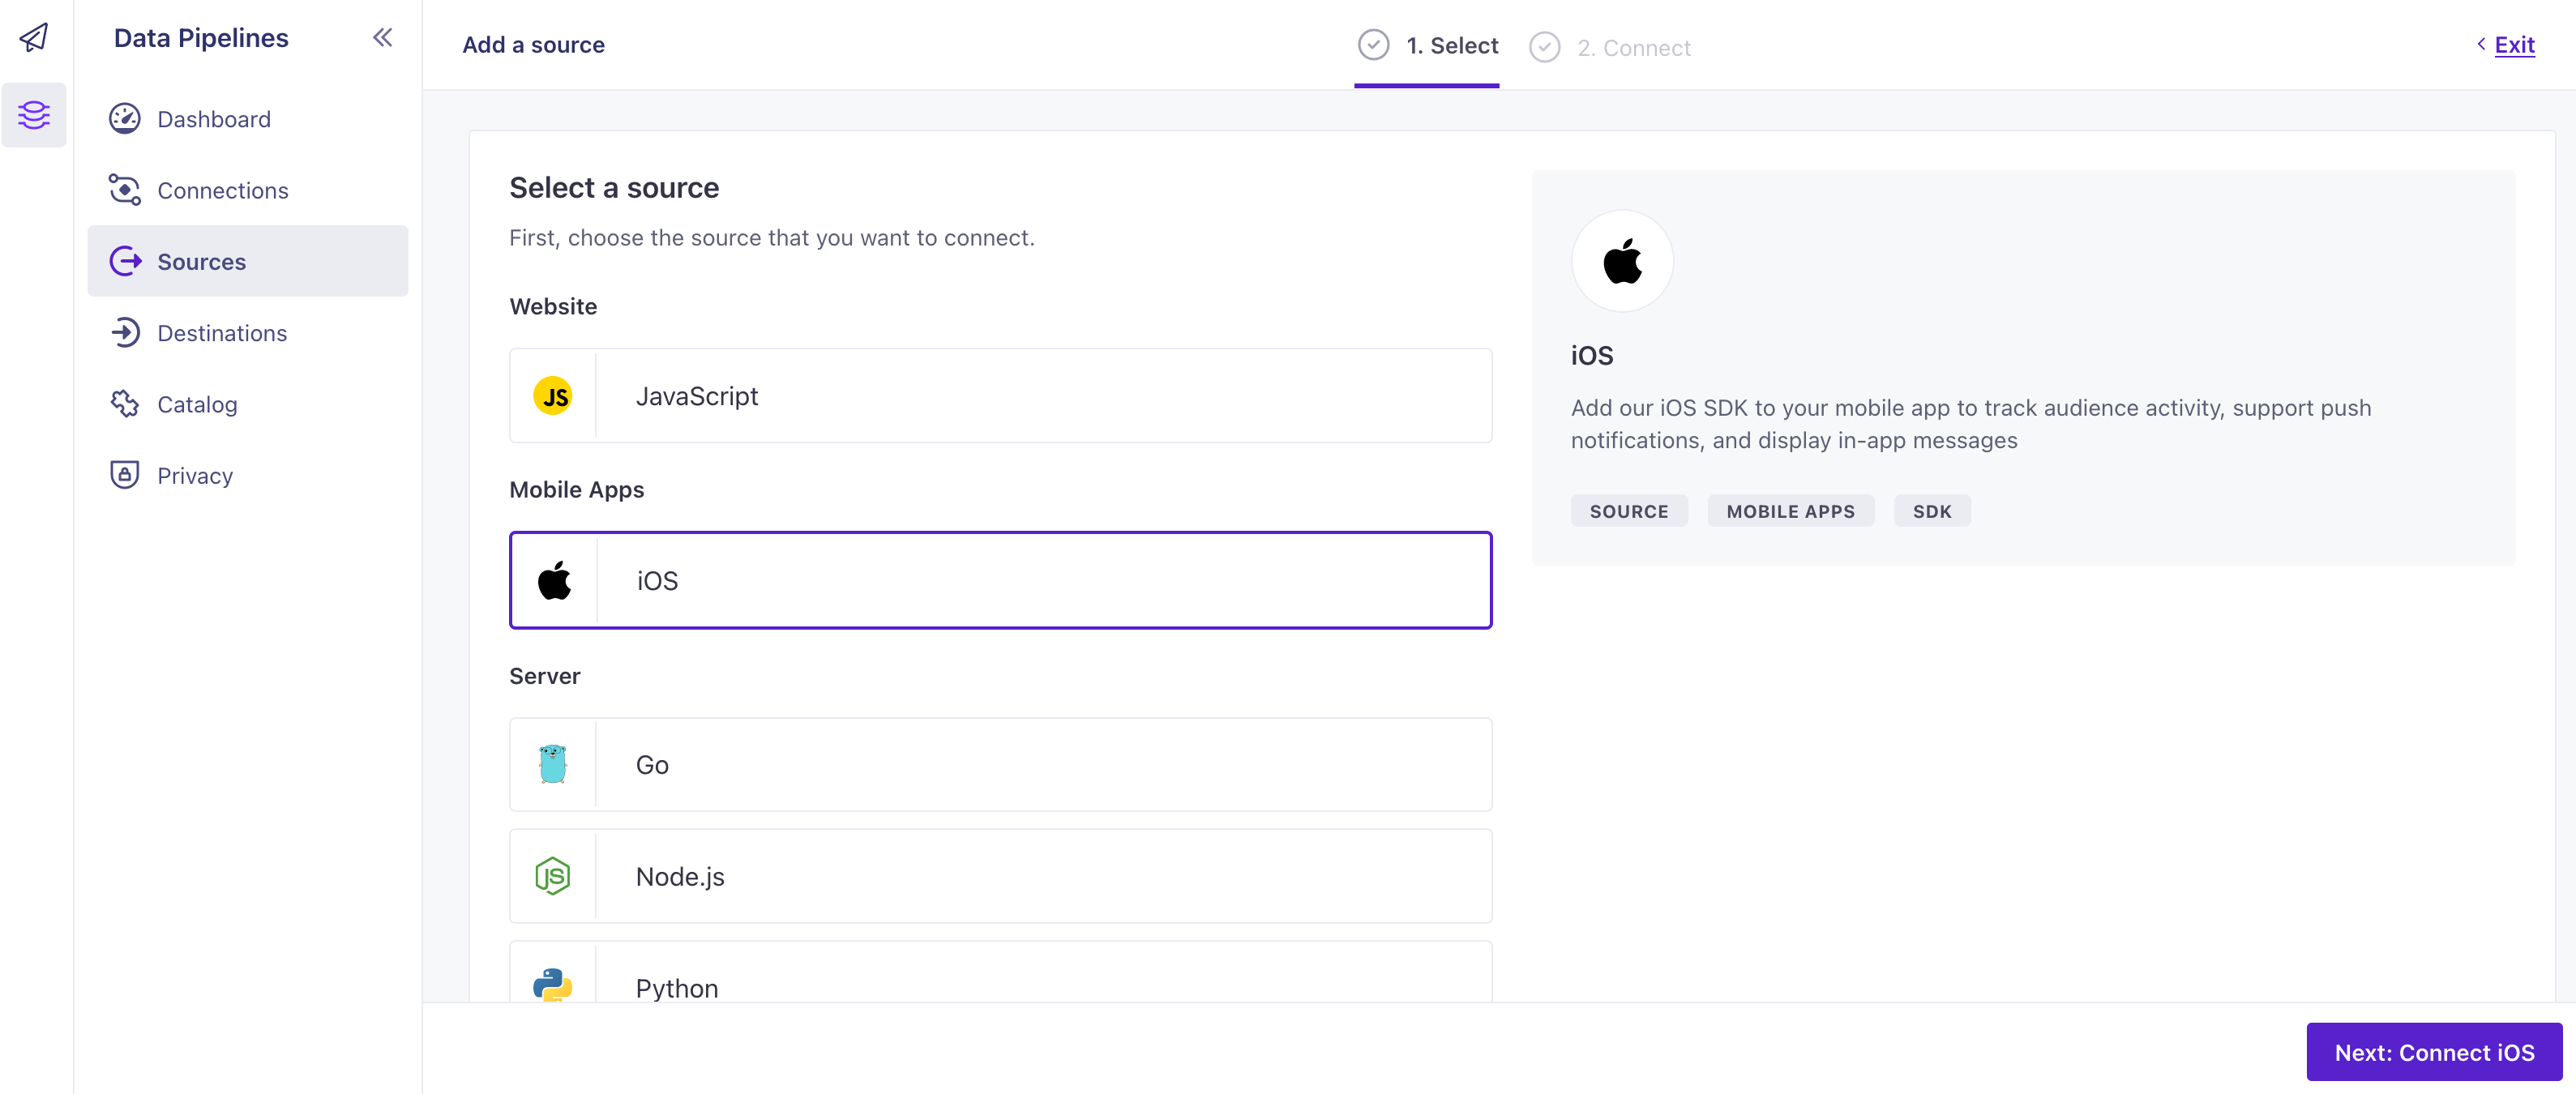
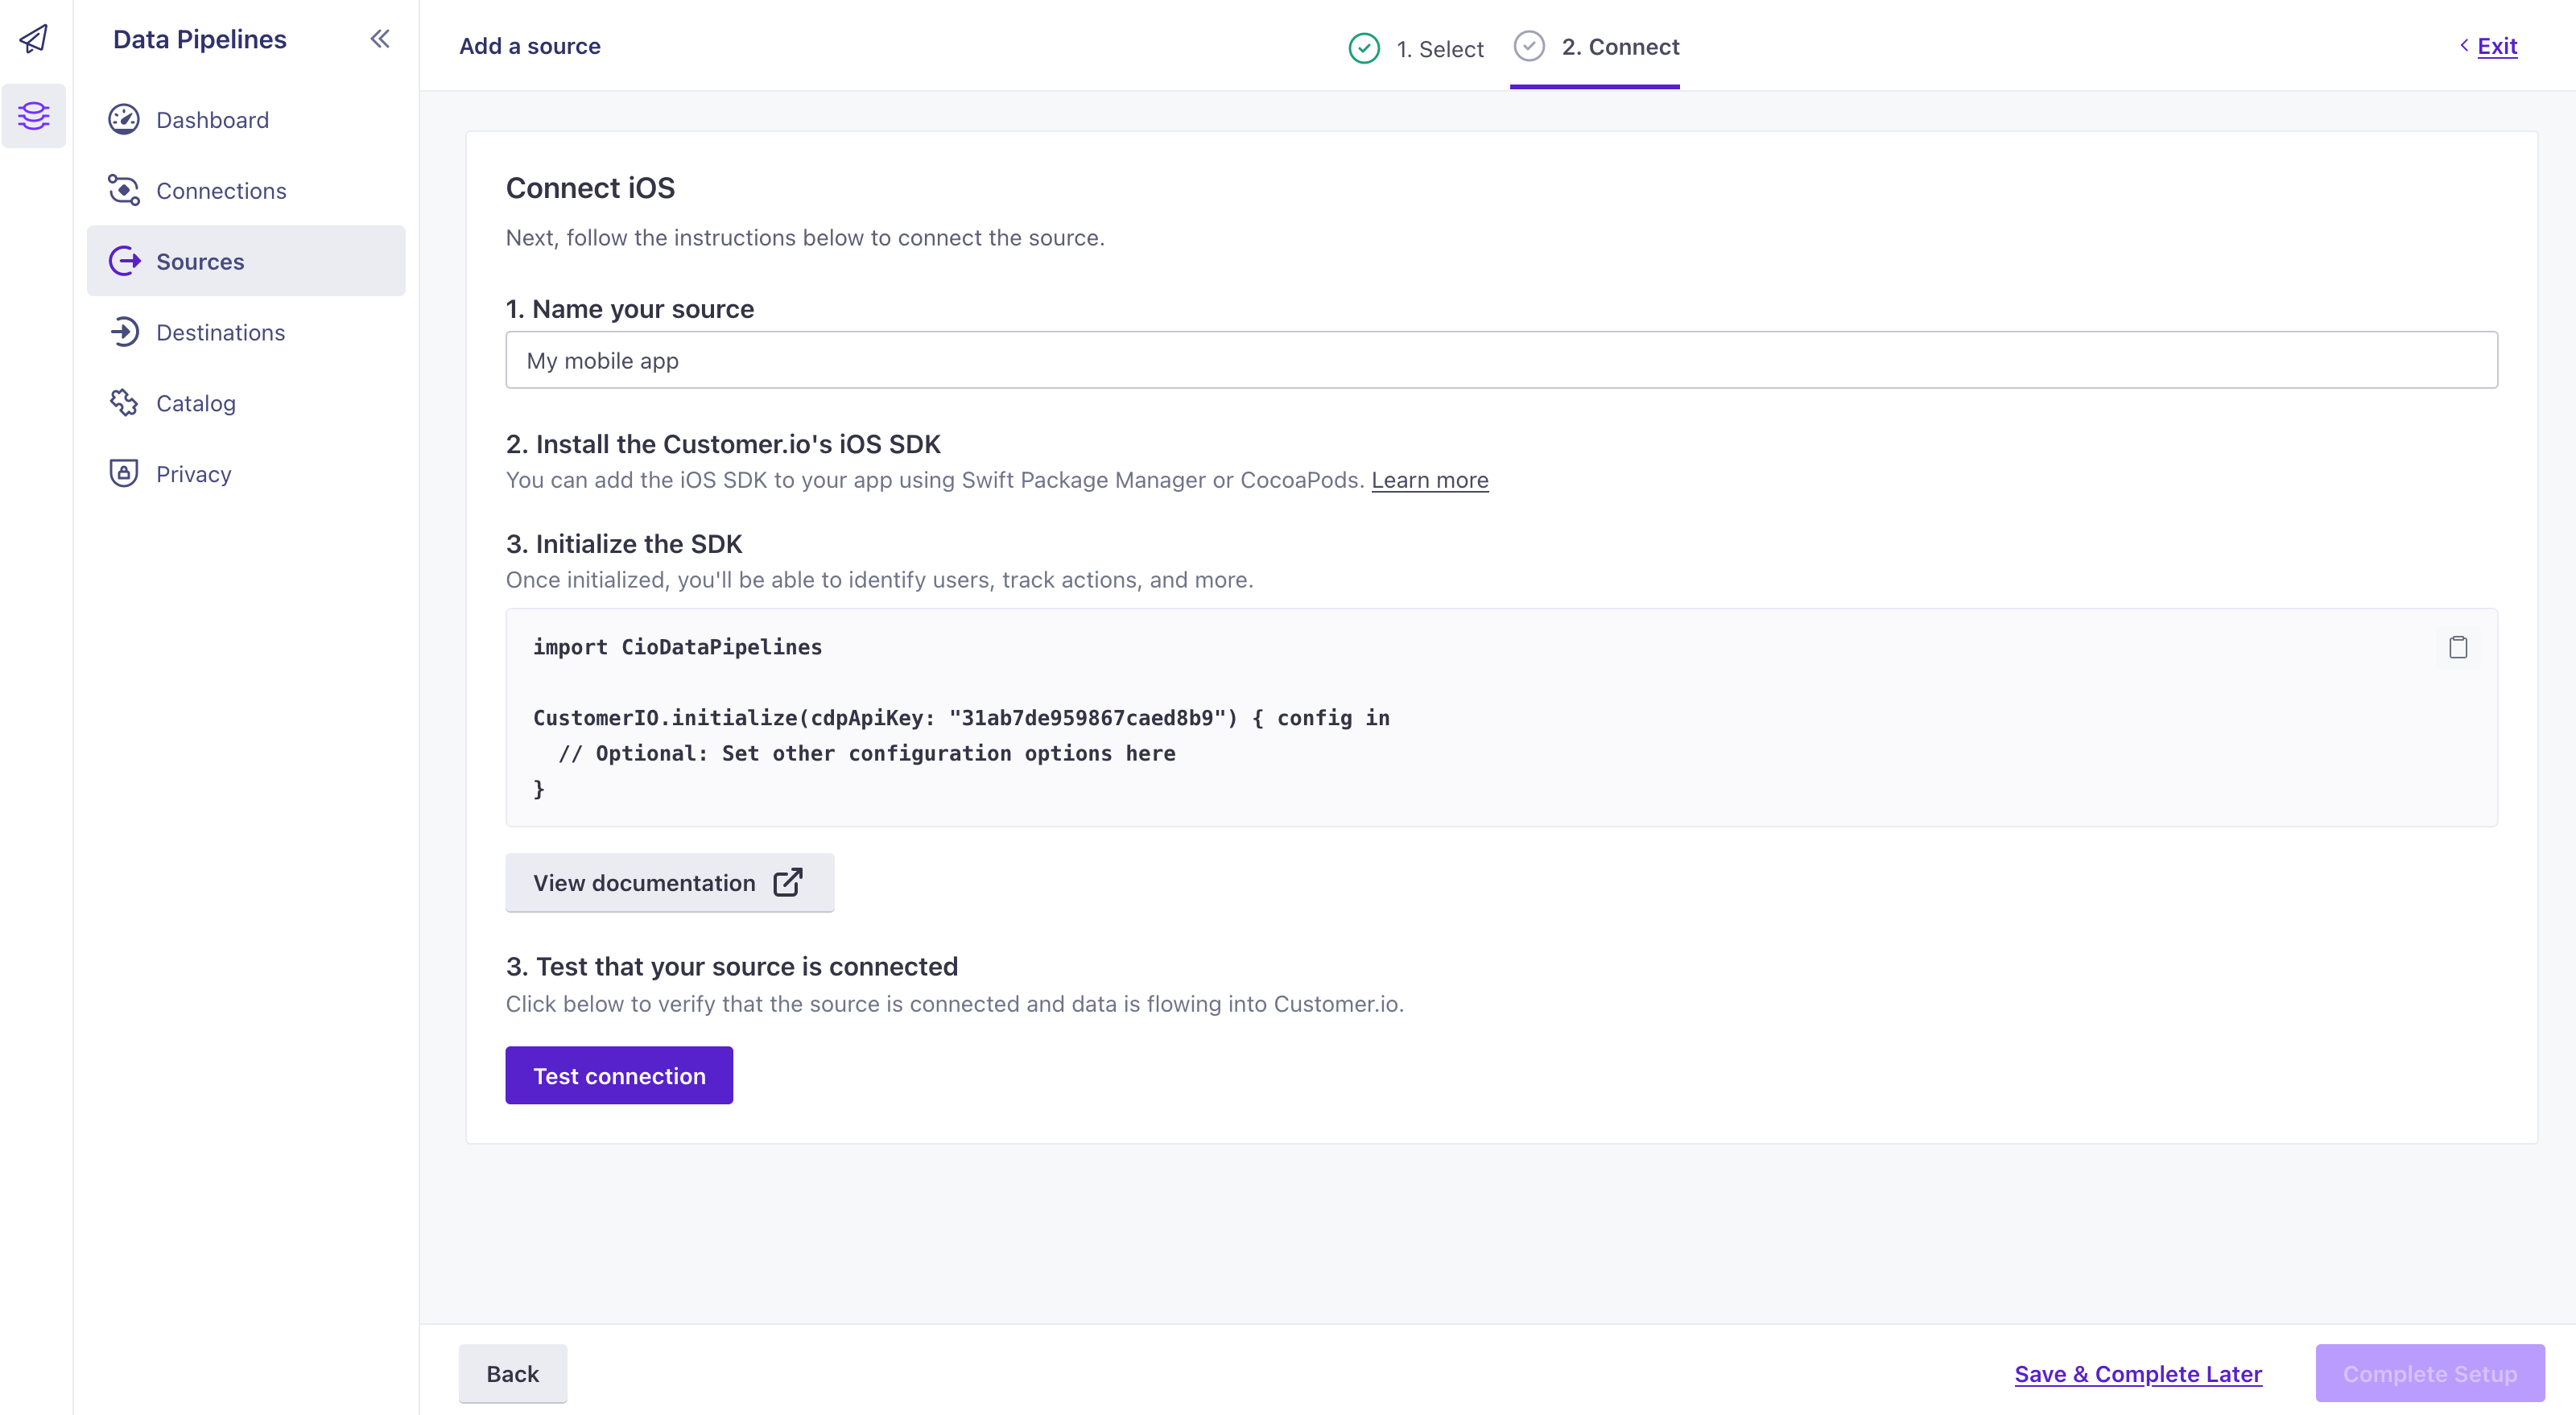
- Enter a Name for the source, like “My iOS App”.
- We’ll present you with a
cdpApiKeythat you’ll use to initialize the SDK. Copy this key and keep it handy. - Click Complete Setup to finish setting up your source.
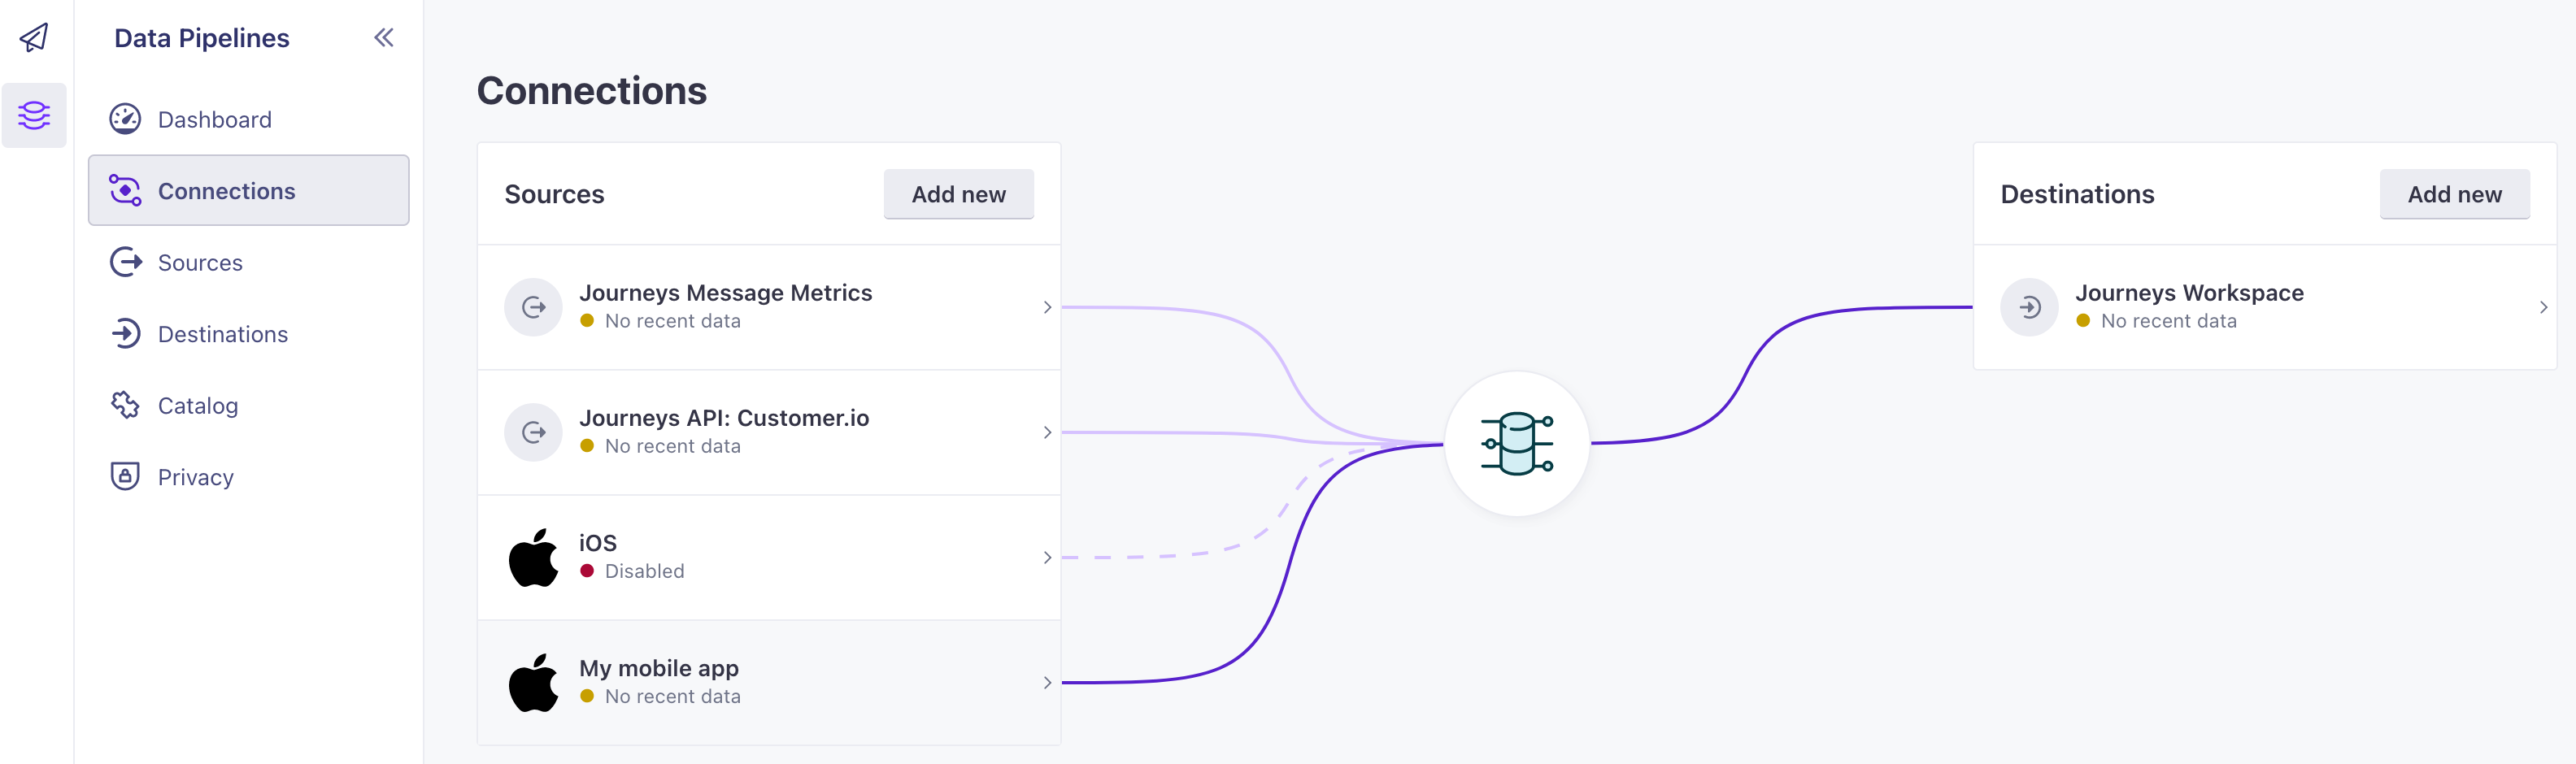
Now your connections page will show that your iOS source is connected to your Journeys workspace. Hover over a source or destination to see its active connections.
2. Import CioDataPipelines instead of CioTracking
We’ve replaced the CioTracking package with CioDataPipelines. You’ll need to update your import statements to reflect this change.
If you see errors like Missing required module ‘CioTracking’, you can remove the package in XCode under Frameworks and Libraries.
// replace import CioTracking with:
import CioDataPipelines
3. Update your initialize calls
You’ll initialize the new version of the SDK and its packages with SDKConfigBuilder objects instead of a CustomerIOConfig. A few of the configuration options changed. In particular,
cdpApiKeyreplacesapiKey: this is a new key that you got from Step 1migrationSiteIdreplacessiteId: this is the same key you used in the previous version of the SDK. You need to include this property to send remaining traffic when people update your app.autoTrackUIKitScreenViewsreplacesautoTrackScreenViews: functionality is unchanged; we simply renamed the option to reflect support for UIKit and not SwiftUI.- If you’re in our EU region, make sure that you uncomment the
.region(.EU)line in the sample below. Your config must include this property to send data to our EU data center.
import CioDataPipelines
import CioMessagingInApp
import CioMessagingPushAPN
import UIKit

@main
class AppDelegate: UIResponder, UIApplicationDelegate {

    func application(_ application: UIApplication, didFinishLaunchingWithOptions launchOptions: [UIApplication.LaunchOptionsKey: Any]?) -> Bool {
        // Override point for customization after application launch.

        let cdpApiKey = YOUR_CDP_API_KEY
        let siteId = YOUR_SITE_ID

        let config = SDKConfigBuilder(cdpApiKey: cdpApiKey)
            // uncomment the line below if your account is in the EU region
            // .region(.EU)
            .autoTrackDeviceAttributes(true)
            .migrationSiteId(siteId)
            //replaces autoTrackScreenViews
            .autoTrackUIKitScreenViews()

        CustomerIO.initialize(withConfig: config.build())

        // Initialize messaging features after initializing Customer.io SDK
        MessagingInApp
            .initialize(withConfig: MessagingInAppConfigBuilder(siteId: siteId, region: .US).build())
            .setEventListener(self)
        MessagingPushAPN.initialize(
            withConfig: MessagingPushConfigBuilder()
                .autoFetchDeviceToken(true)
                .build()
        )

        UNUserNotificationCenter.current().delegate = self

        return true
    }
import CioDataPipelines
import CioMessagingInApp
import CioMessagingPushFCM
import FirebaseCore
import FirebaseMessaging
import Foundation
import UIKit

class AppDelegate: NSObject, UIApplicationDelegate {
    func application(_ application: UIApplication, didFinishLaunchingWithOptions launchOptions: [UIApplication.LaunchOptionsKey: Any]? = nil) -> Bool {
        // To set up FCM push: https://firebase.google.com/docs/cloud-messaging/ios/client
        // FCM provides a device token to the app that
        // you send to the Customer.io SDK.

        // Initialize the Firebase SDK.
        FirebaseApp.configure()

        let siteId = YOUR_JOURNEYS_SITE_ID
        let cdpApiKey = YOUR_CDP_API_KEY

        // Configure and initialize the Customer.io SDK
        let config = SDKConfigBuilder(cdpApiKey: cdpApiKey)
            // uncomment this line below if your account is in the EU region
            // .region(.EU)
            .migrationSiteId(siteId)
            .autoTrackDeviceAttributes(true)
            //replaces autoTrackScreenViews
            .autoTrackUIKitScreenViews()


        CustomerIO.initialize(withConfig: config.build())

        // Initialize messaging features after initializing Customer.io SDK
        MessagingInApp
            .initialize(withConfig: MessagingInAppConfigBuilder(siteId: siteId, region: .US).build())
            .setEventListener(self)
        MessagingPushFCM.initialize(
            withConfig: MessagingPushConfigBuilder()
                .autoFetchDeviceToken(true)
                .build()
        )

        // Manually get FCM device token. Then, we will forward to the Customer.io SDK.
        Messaging.messaging().delegate = self

        UNUserNotificationCenter.current().delegate = self

        return true
    }

    func application(_ application: UIApplication, didRegisterForRemoteNotificationsWithDeviceToken deviceToken: Data) {
        Messaging.messaging().apnsToken = deviceToken
    }
}
4. Update your NotificationServiceExtension
You need to initialize the push module with the Data Pipelines CDP API Key. Update your NotificationServiceExtension (using the appropriate push package, APN or FCM).
If you previously initialized the SDK using CustomerIO.initialize, you can remove that now. You only need to initialize the push package.
// use MessagingPushFCM if FCM is your push service
MessagingPushAPN.initializeForExtension(
  withConfig: MessagingPushConfigBuilder(
      cdpApiKey: "YOUR_CDP_API_KEY"
  )
  .build()
)
5. Update your identify, track, and screen calls
Our APIs changed slightly in this release. We’ve done our best to make the new APIs as similar as possible to the old ones. The names of a few properties that you’ll pass in your calls have changed, but their functionality has not.
identify:identifierbecomesuserIdandbodybecomestraitstrack:databecomespropertiesscreen:namebecomestitle, anddatabecomesproperties
// CioDataPipelines replaces CioTracking
import CioDataPipelines
//identify: identifier becomes userId, body becomes traits
CustomerIO.shared.identify(userId: "USER_ID", traits: ["age": 30])

// track: data becomes properties
CustomerIO.shared.track(name: "Purchase", properties: ["product": "shirt"])

// screen: name becomes title, data becomes properties
CustomerIO.shared.track(title: "Cart", properties: ["source": "link"])
import CioTracking

// identify
CustomerIO.shared.identify(identifier: "USER_ID", body: ["age": 30]) {}

// track
CustomerIO.shared.track(name: "Purchase", data: ["product": "shirt"])

// screen
CustomerIO.shared.track(name: "Cart", data: ["source": "link"])
Configuration Changes
As a part of this release, we’ve changed a few configuration options. The MessagingInApp and MessagingPush modules also now take their own configuration options.
DataPipelines configuration options
For the base SDK, you’ll use SDKConfigBuilder to set your configuration options. The following table shows the changes to the configuration options.
| Field | Type | Default | Description |
|---|---|---|---|
cdpApiKey | string | Replaces apiKey; required to initialize the SDK. This is the key representing your Data Pipelines sourceA source is a website or server that you want to capture data from—it’s a source of data! | |
migrationSiteId | string | Replaces siteId; required if you’re updating from 2.x. This is the key representing your previous version of the SDK. | |
autoTrackUIKitScreenViews | boolean | false | Replaces autoTrackScreenViews; functionality is unchanged. We simply renamed the option to reflect support for UIKit and not SwiftUI. |
trackApplicationLifeCycleEvents | boolean | true | When true, the SDK automatically tracks application lifecycle events (like Application Installed). |
MessagingPush configuration options
You need to initialize the push package in both your AppDelegate and NotificationServiceExtension files. In your AppDelegate, you don’t need to pass options. You can simply pass MessagingPushAPN.initialize().
But, in your NotificationServiceExtension, you’ll need to pass the cdpApiKey to initialize the push package.
MessagingPushAPN.initializeForExtension(withConfig: MessagingPushConfigBuilder(cdpApiKey: "CDP_API_KEY").build())
| Option | Type | Default | Description |
|---|---|---|---|
autoFetchDeviceToken | boolean | true | When true, the package automatically fetches the device token for push notifications. |
autoTrackPushEvents | boolean | true | Automatically track opened and delivered metrics based on push notifications. |
showPushAppInForeground | boolean | true | Show push notifications when the app is in the foreground. |
MessagingInApp configuration options
When you initialize the CioMessagingInApp package, you must pass both of these configuration options.
| Option | Type | Default | Description |
|---|---|---|---|
siteId | string | The Site IDEquivalent to the user name you’ll use to interface with the Journeys Track API; also used with our JavaScript snippets. You can find your Site ID under Settings > Workspace Settings > API Credentials from a set of track API credentials; this determines the workspace that your app listens for in-app messages from. | |
Region | .US or .EU | .US | The region your Customer.io account resides in—US or EU. |

