Authentication
To use the SDK, you’ll need to get two kinds of keys: A CDP API Key to send data to Customer.io and a Site ID, telling the SDK which workspace your messages come from.
To get your SDK keys and send data to the right places, you’ll need to set up your app as a data sourceA source is a website or server that you want to capture data from—it’s a source of data! in Customer.io, and route it to your workspace. The SDK lets you route data to any number of destinations, but you must connect it to your workspace destination to send data, like the people you identify, the events you track, and so on, to Customer.io.
If you haven’t already set up your app as a data source in Customer.io, do that first.
API Keys you’ll need
- API Key: This key, shown in code samples as
cdpApiKey, lets you send data to Customer.io. You’ll need it to initialize the SDK. You’ll get this key when you set up your mobile app as a data sourceA source is a website or server that you want to capture data from—it’s a source of data! in Customer.io. - Site ID: This key tells the SDK which workspace your messages come from. You’ll use it to initialize the
CioMessagingInApppackage and send in-app messages from your workspace. If you’re upgrading from a previous version of the Customer.io SDK, it also serves as themigrationSiteId.
Get your API Key
You’ll use your write key to initialize the SDK and send data to Customer.io; you’ll get this key from your mobile app’s data sourceA source is a website or server that you want to capture data from—it’s a source of data! in Customer.io. If you don’t already have a mobile data source, you’ll need to set one up.
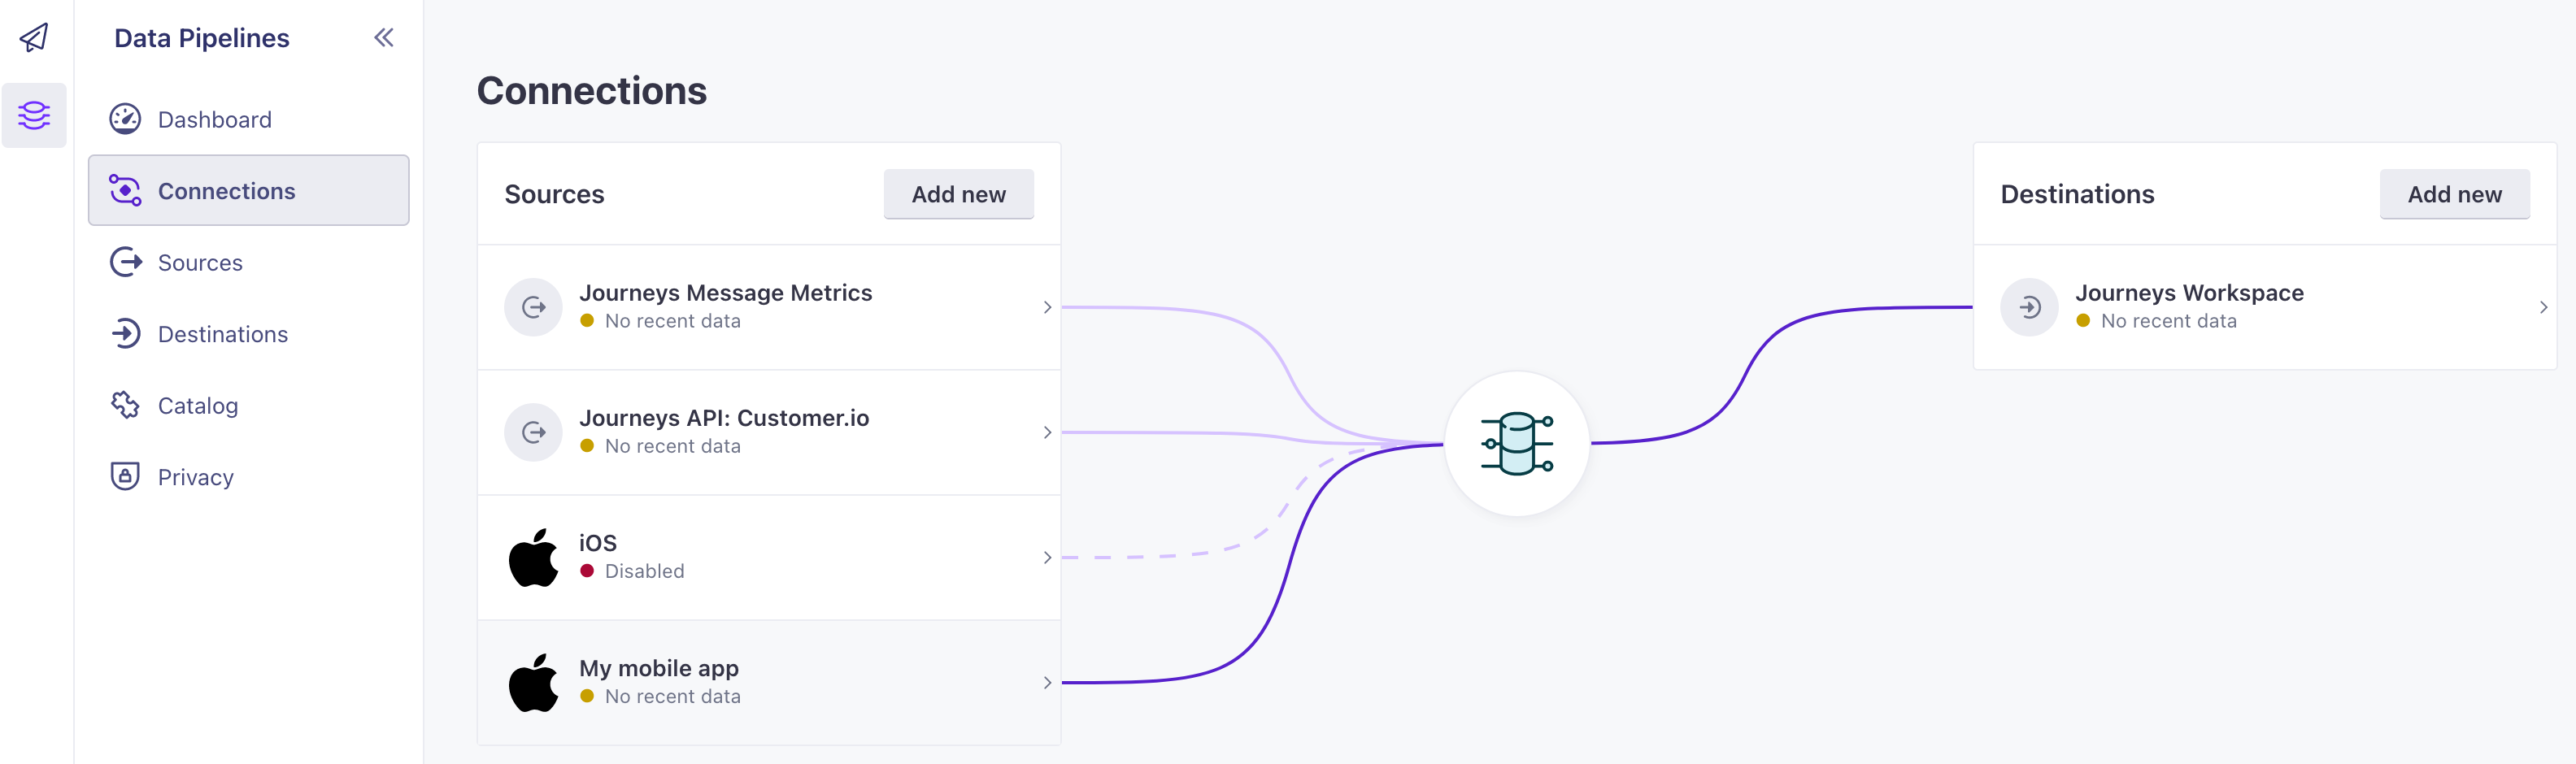
- Go to the Data Pipelines tab.
- On the Connections page under Sources, select your iOS source. If there is no iOS source, see Set up a new source below.
- Go to Settings and find your API Key. Copy this key into your initialization call. If you’re upgrading from a previous version of the SDK, you should keep the
siteIdthat you used in previous versions as themigrationSiteIdin your config.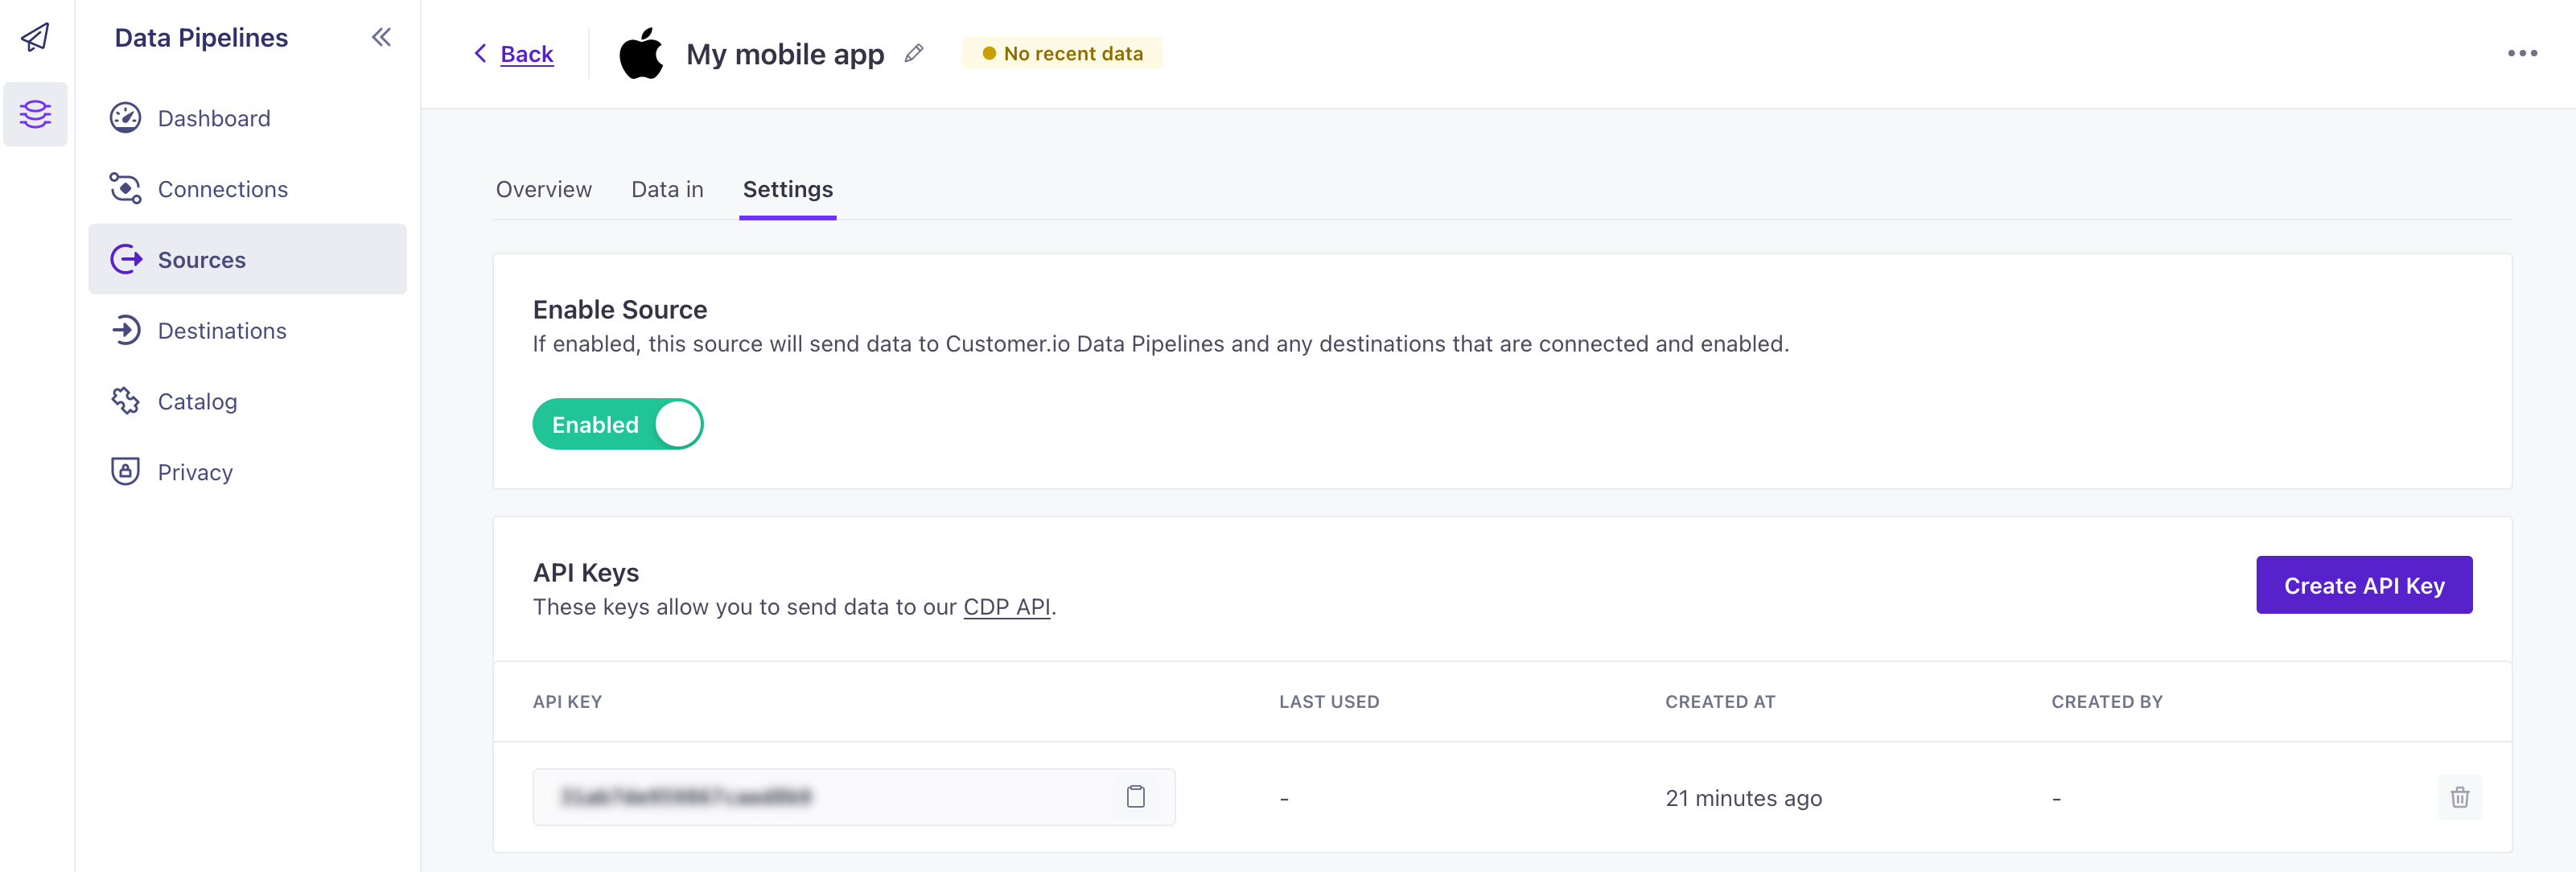
 func application(_ application: UIApplication, didFinishLaunchingWithOptions launchOptions: [UIApplication.LaunchOptionsKey: Any]? = nil) -> Bool {
     ...

     let config = SDKConfigBuilder(cdpApiKey: "YOUR_CDP_API_KEY")
         .migrationSiteId(YOUR_SITE_ID)
         .autoTrackDeviceAttributes(true)

     CustomerIO.initialize(withConfig: config.build())
 }
You’re not done yet
You still need your Site IDEquivalent to the user name you’ll use to interface with the Journeys Track API; also used with our JavaScript snippets. You can find your Site ID under Settings > Workspace Settings > API Credentials to initialize the CioMessagingInApp package and to support people updating your app from a previous version of Customer.io SDK. See Get your Site ID below.
Set up a new source
If you don’t already have a write key, you’ll need to set up a new data sourceA source is a website or server that you want to capture data from—it’s a source of data!. The source represents your app and the stream of data that you’ll send to Customer.io.
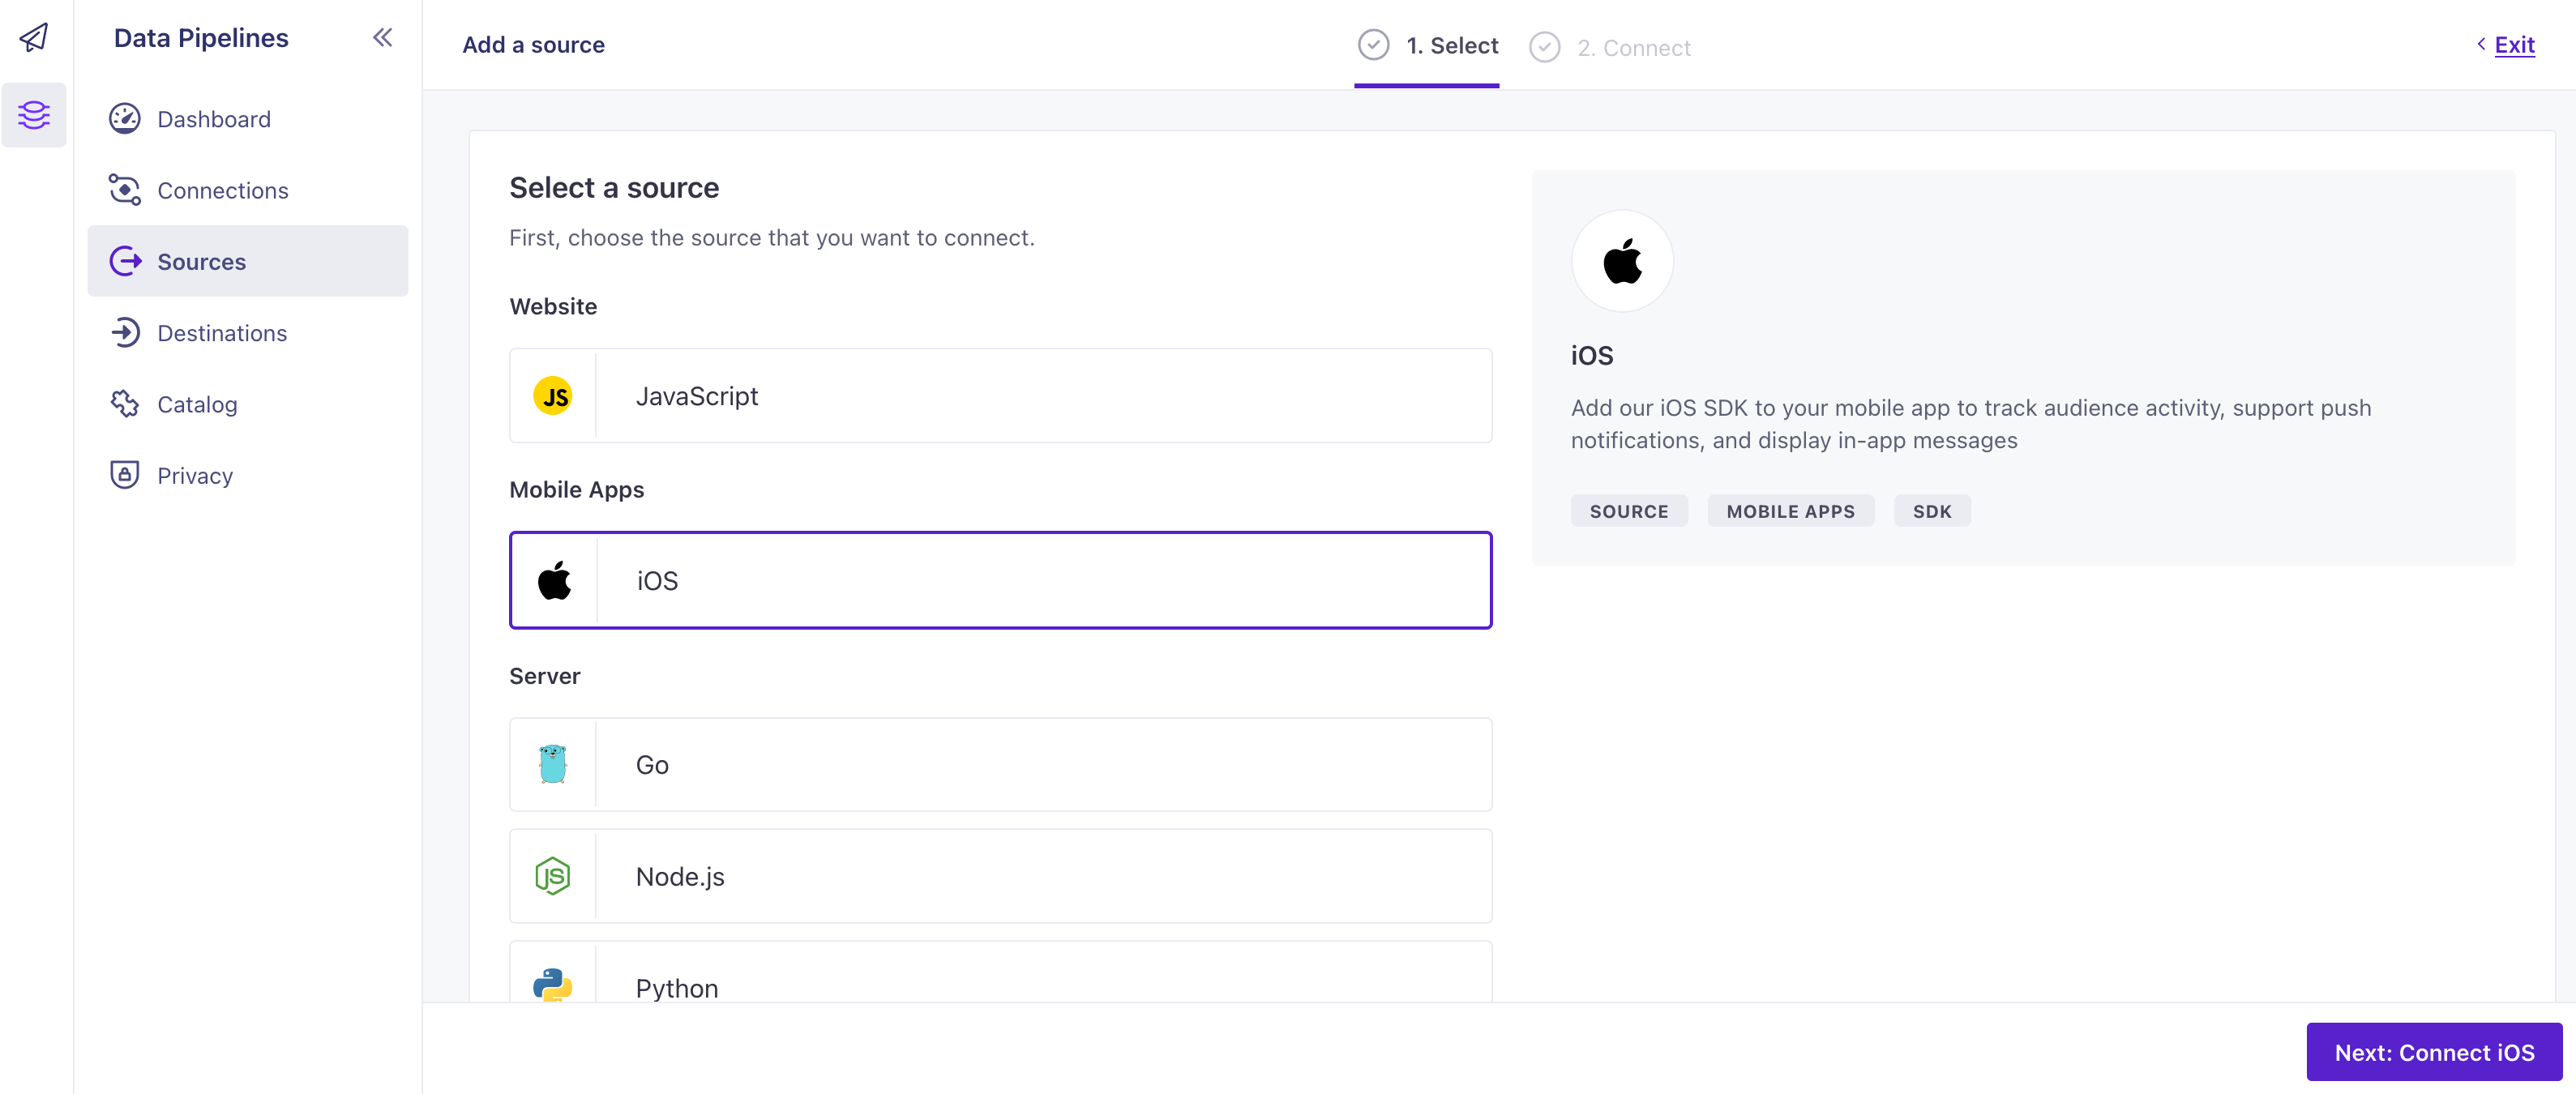
- Go to the Data Pipelines tab. On the Connections page under Sources, click Add New.
- Select the Mobile: iOS source and then click Next: Connect iOS.
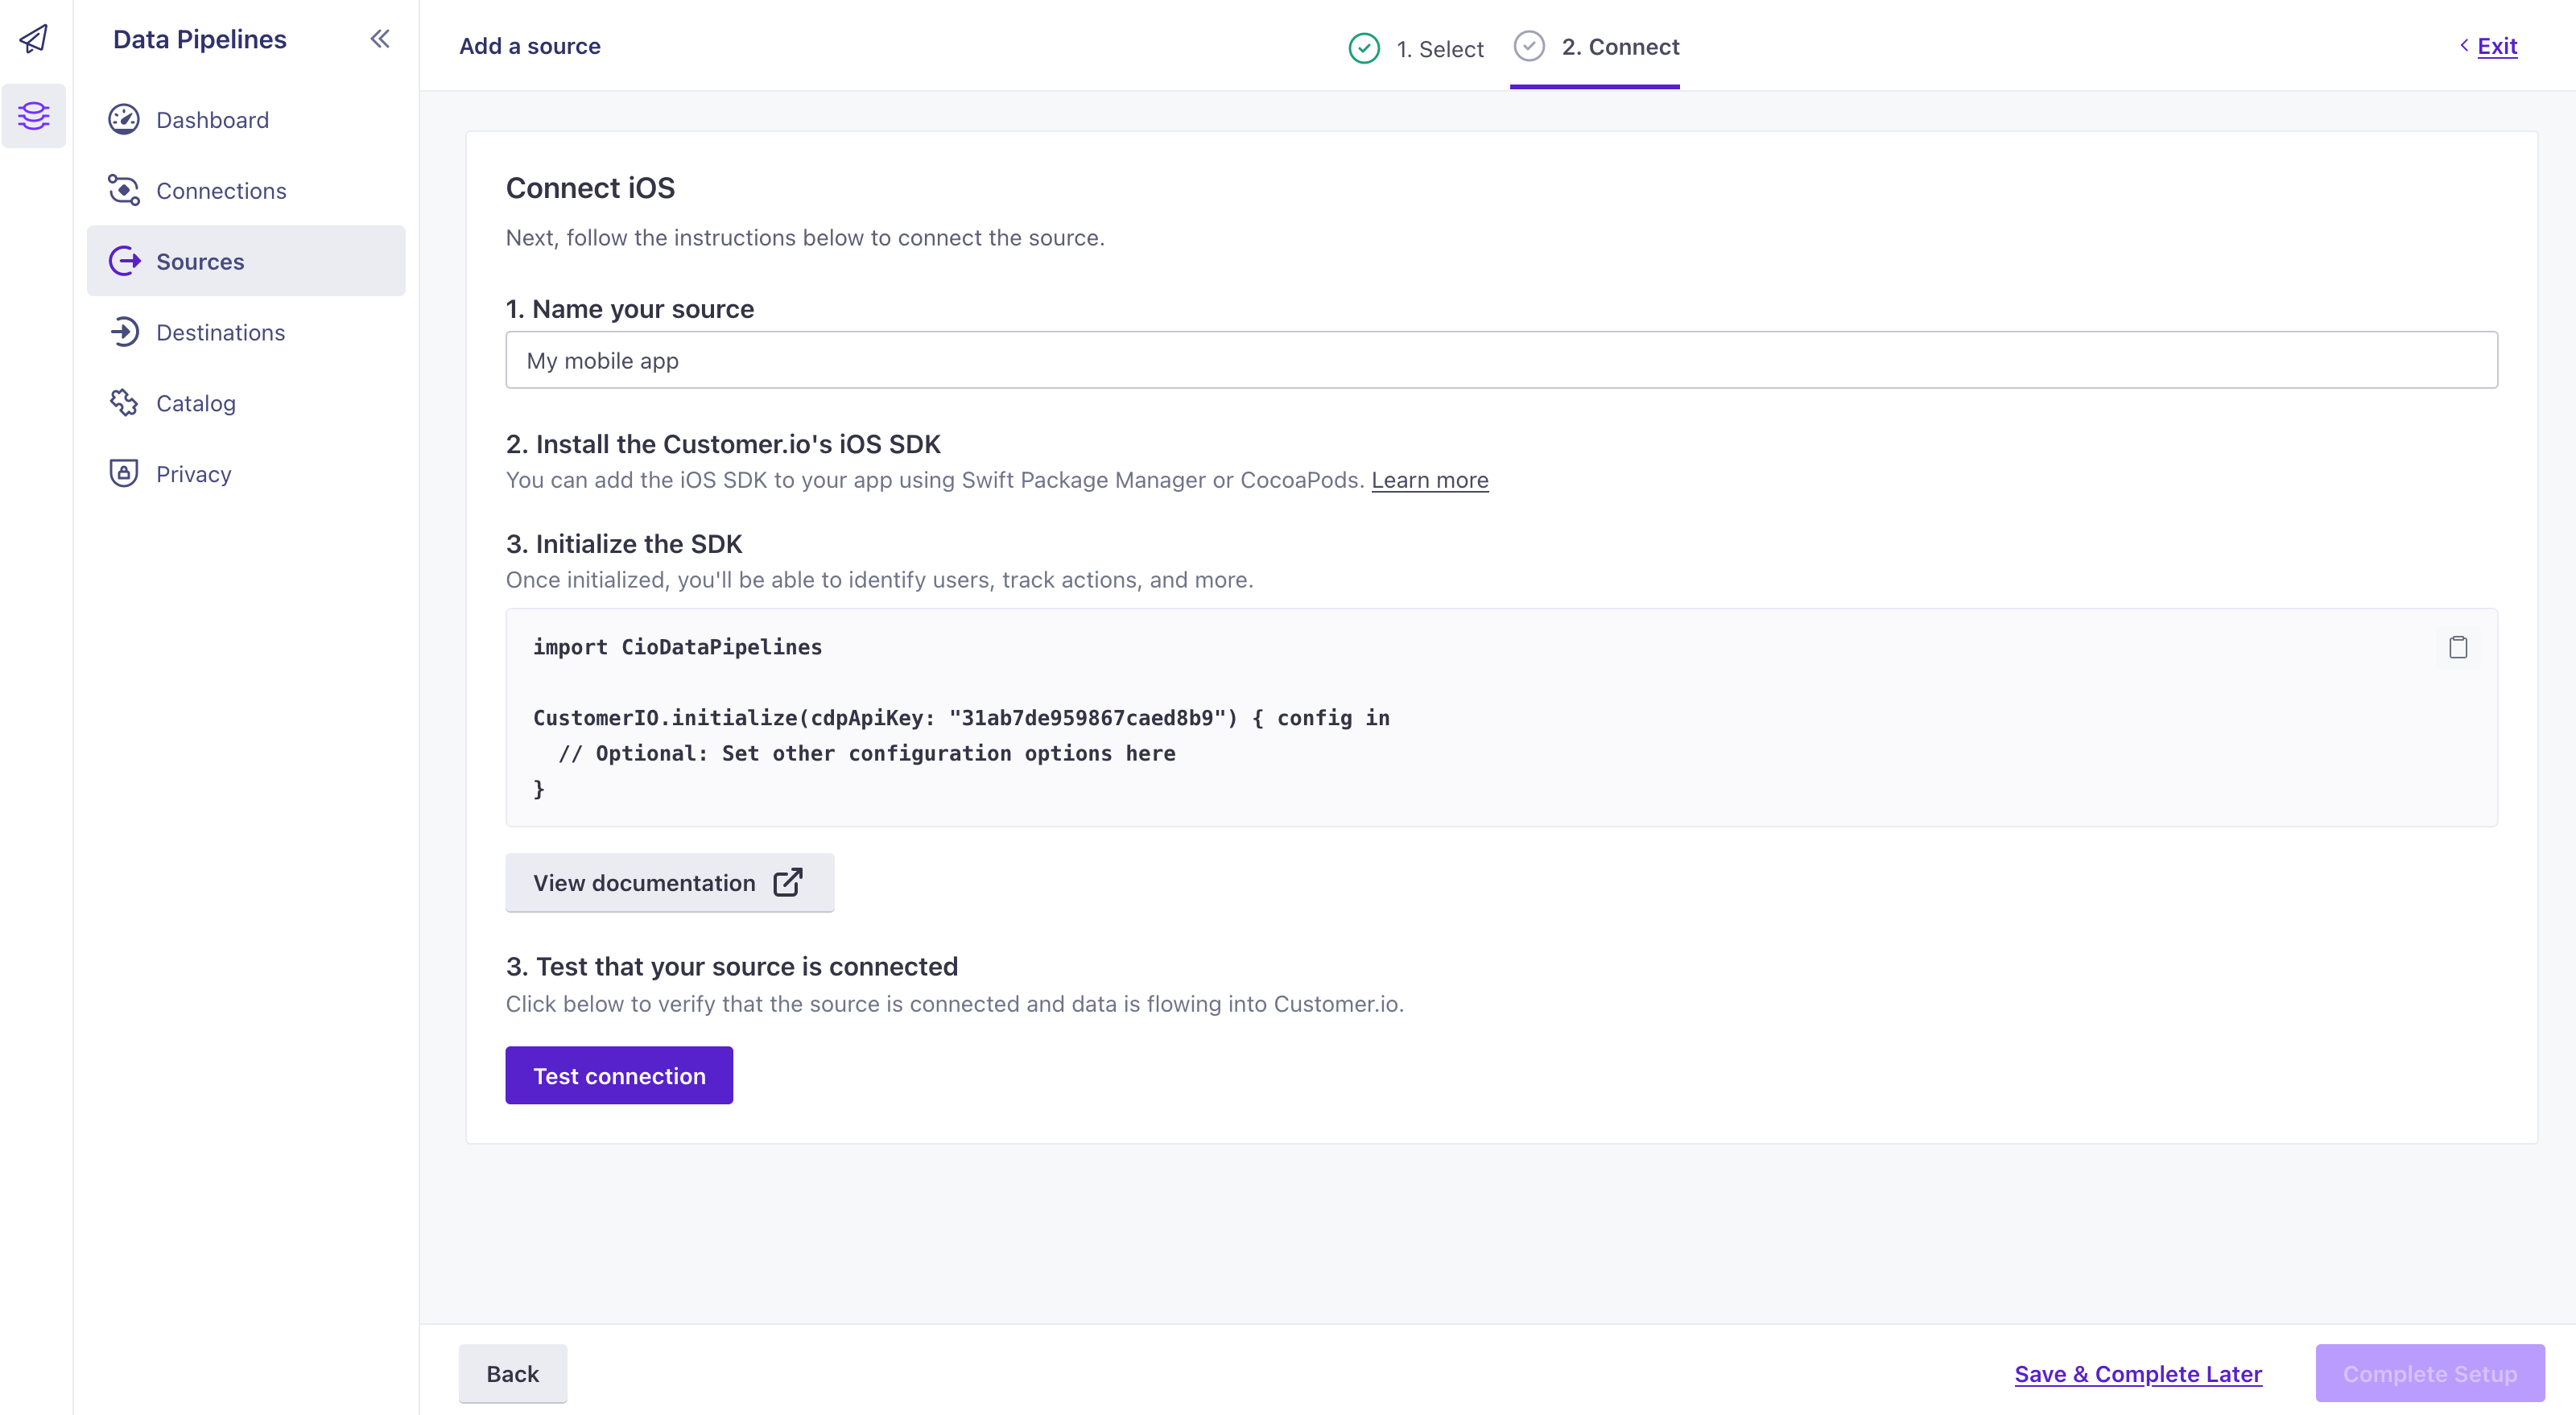
- Enter a Name for the source, like “My iOS App”.
- We’ll present you with a code sample containing a
cdpApiKeythat you’ll use to initialize the SDK. Copy this key and keep it handy. - Click Complete Setup to finish setting up your source.
Now the Connections page shows that your iOS source is connected to your Journeys workspace. Hover over a source or destination to see its active connections. You can also connect your iOS source to additional destinations if you want to send your mobile data to additional services—like your analytics provider, data warehouse, or CRM.
Get your Site ID
You’ll use your Site ID to initialize the CioMessagingInApp package and send in-app messages from your workspace.
If you’re upgrading from a previous version, my can also set your Site ID as your migrationSiteId. This key is used to send remaining tasks to Customer.io when your audience updates your app.
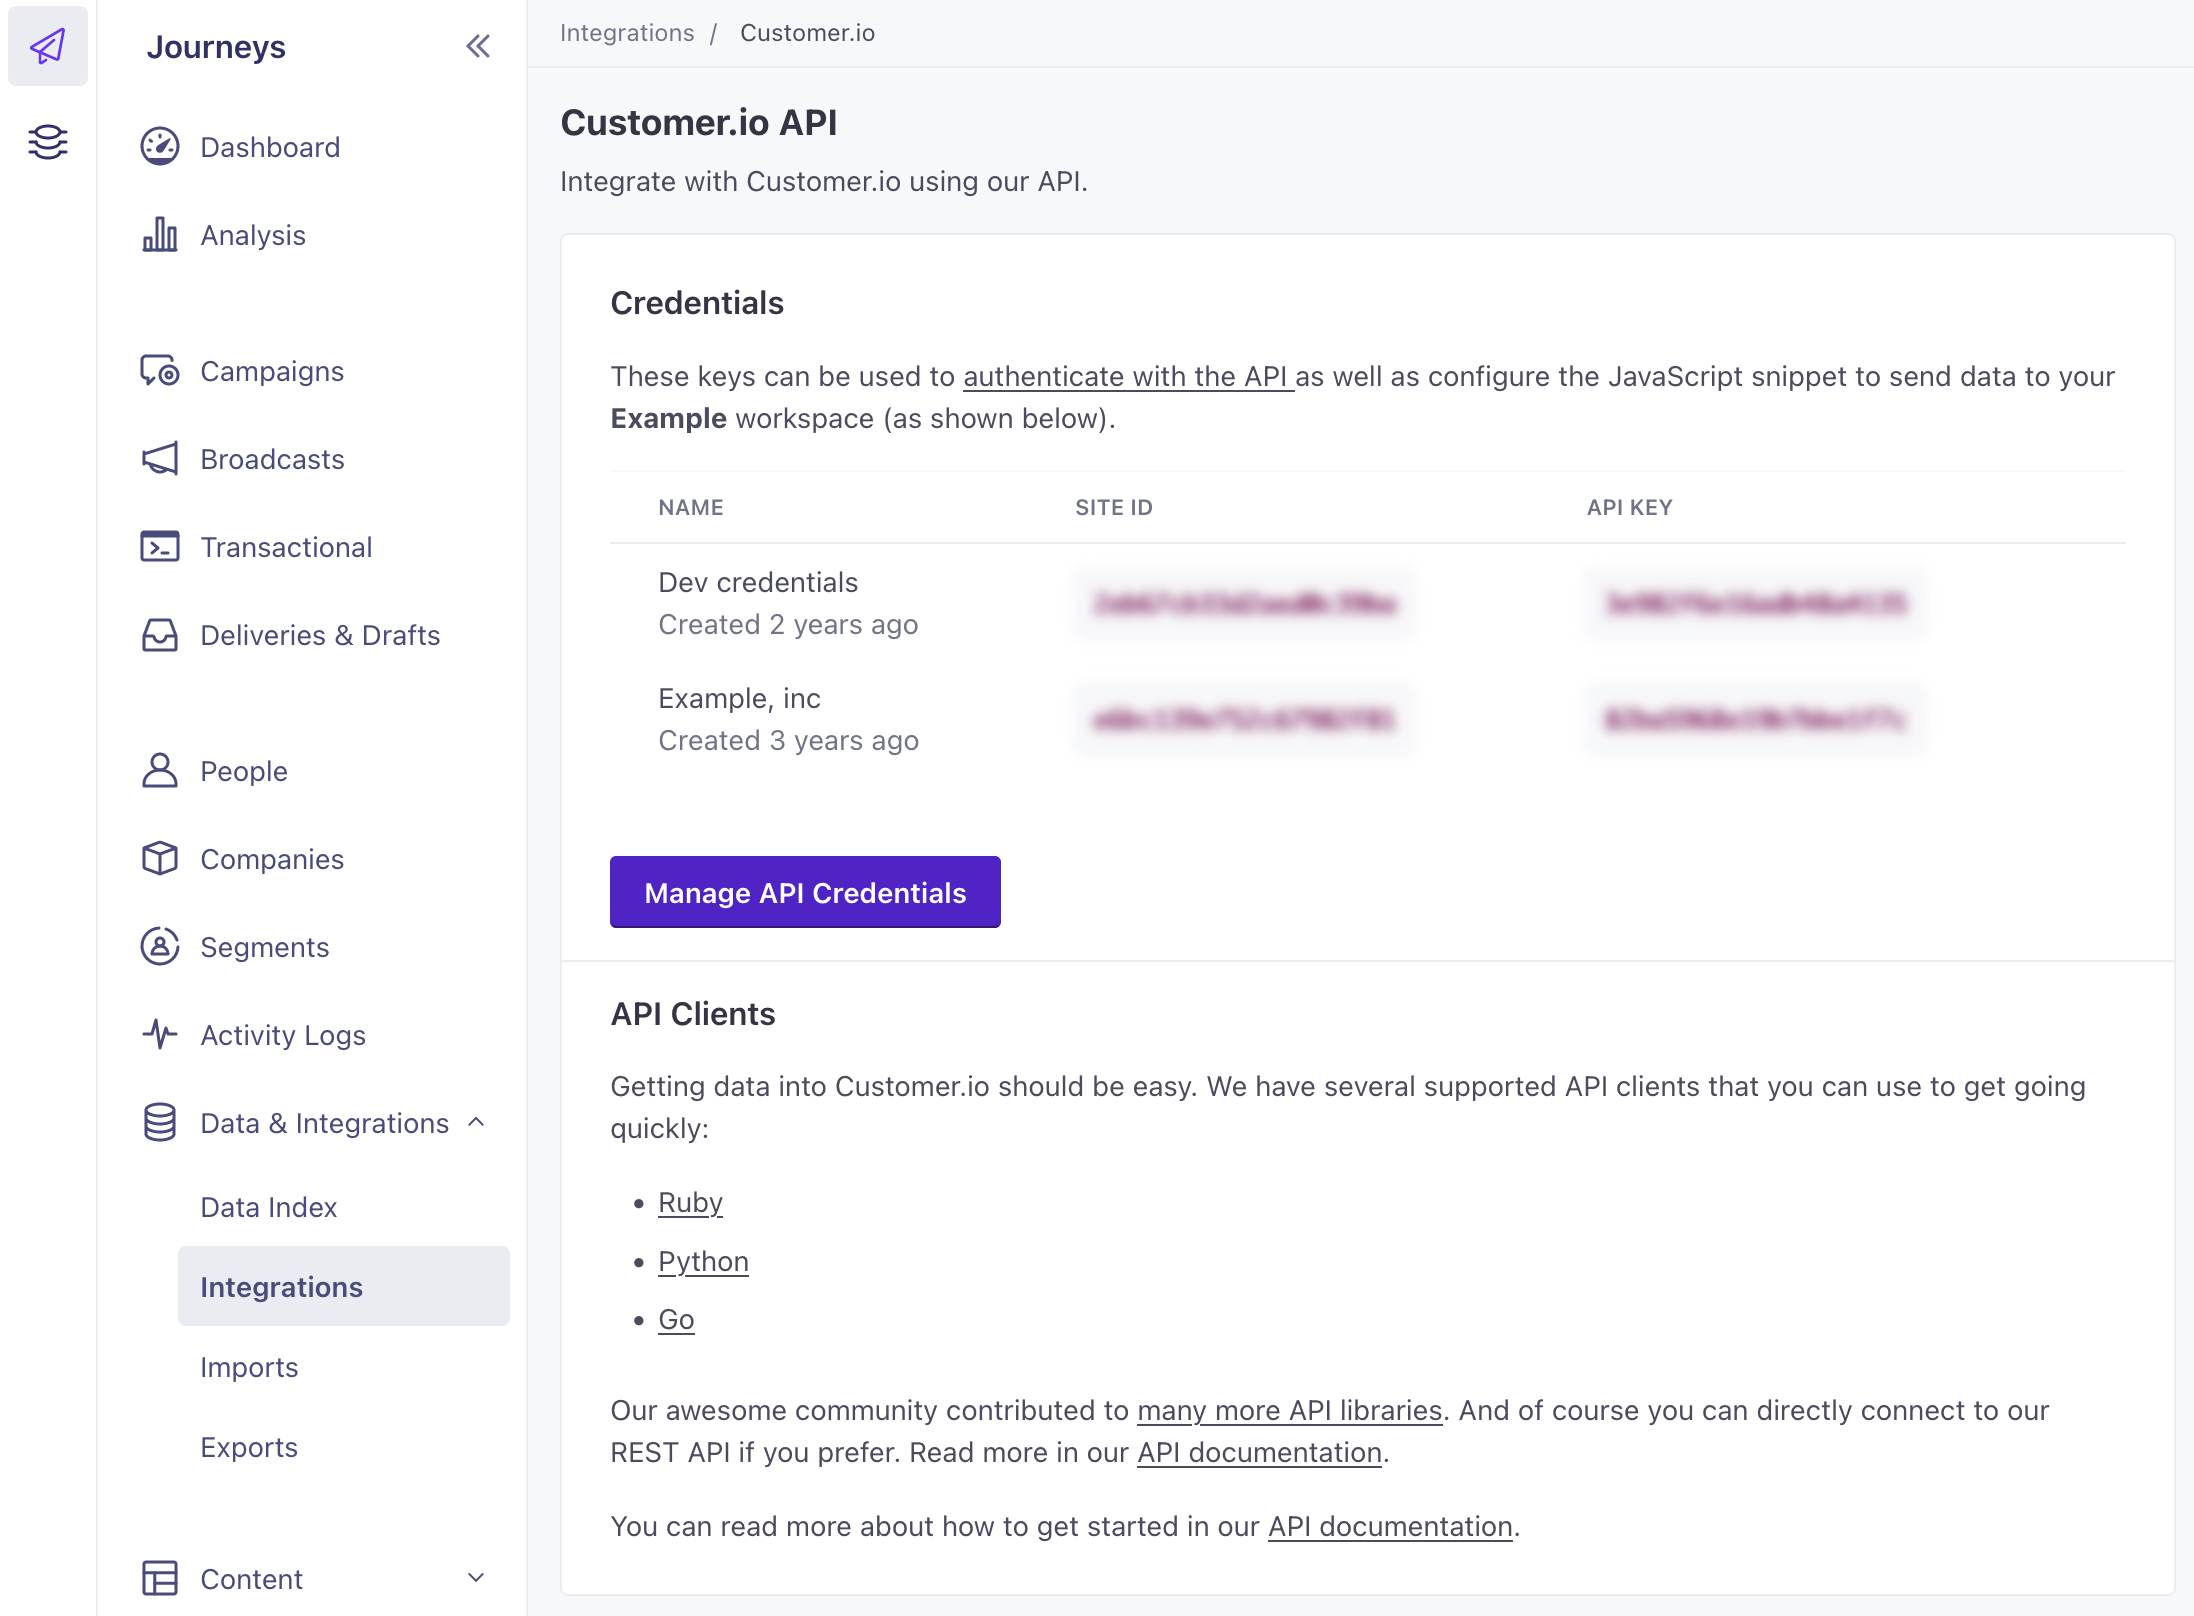
Go to and select Workspace Settings in the upper-right corner of the Customer.io app and go to API and Webhook Credentials.
Copy the Site ID for the set of credentials that you want to send your in-app messages from. If you don’t have a set of credentials, click Create Tracking API Key.
You’ll use this key to initialize the
CioMessagingInApppackage.func application(_ application: UIApplication, didFinishLaunchingWithOptions launchOptions: [UIApplication.LaunchOptionsKey: Any]? = nil) -> Bool { ... let siteId = "YOUR_SITE_ID" let config = SDKConfigBuilder(cdpApiKey: "YOUR_CDP_API_KEY") .migrationSiteId(siteId) .autoTrackDeviceAttributes(true) CustomerIO.initialize(withConfig: config.build()) MessagingInApp .initialize(withConfig: MessagingInAppConfigBuilder(siteId: siteId, region: .US).build()) .setEventListener(self) }

