Slack notification for support tickets
Set up a webhook-triggered campaign to notify your Support team about high priority tickets.
As a part of this guide, you’ll set up a webhook in Zendesk to your Customer.io workspace when someone opens a high-priority ticket. You’ll use the webhook to trigger Slack notifications that alert your Support. Zendesk doesn’t support native Slack notifications when tickets are created, and this provides a handy way to help your Support team stay on top of tickets!
Before you begin
Before you get started, you must have set up the message channel(s) that you want to use to notify your Support team. You’ll also need:
- Access to your Zendesk account.
- Your Customer.io Site ID and API Key credentials. You can find your Customer.io Site ID and API Key credentials under Data & Integrations > Integrations > Customer.io API.
We’re basing this tutorial on Zendesk’s Ticket Created event. Our aim is to notify people when a ticket is created, and use @here to alert people when a ticket has high priority. Zendesk offers a robust system of triggers, so you can trigger webhooks under other conditions.
While you determine the conditions that trigger your webhook in Zendesk, you can use liquidA syntax that supports variables, letting you personalize messages for your audience. For example, if you want to reference a person’s first name, you might use the variable {{customer.first_name}}. to make sure that your incoming data contains the values you’re looking for; your Zendesk data does not need to conform to a specific shape before you can send it to Customer.io.
{
    "version": "0",
    "id": "31187aa5-67d2-4eea-a921-38535bf6ec3b",
    "detail-type": "Support Ticket: Ticket Created",
    "source": "aws.partner/zendesk.com/9242270/default",
    "account": "123456789012",
    "time": "2019-05-20T22:55:31Z",
    "region": "us-east-1",
    "resources": [
        "Support Ticket"
    ],
    "detail": {
        "ticket_event": {
            "meta": {
                "version": "1.0",
                "occurred_at": "2019-05-20T22:55:29.721021468Z",
                "ref": "1-1234567890",
                "sequence": {
                    "id": "35D52F7D44640033CCCE4A5F1ADDB2AA",
                    "position": 1,
                    "total": 9
                },
                "actor_id": 20978392
            },
            "type": "Ticket Created",
            "ticket": {
                "id": 35436,
                "created_at": "2019-05-20T22:55:29.721021468Z",
                "updated_at": "2019-05-20T22:55:29.789534301Z",
                "type": "question",
                "priority": "low",
                "status": "new",
                "requester_id": 20978392,
                "submitter_id": 76872,
                "assignee_id": 235323,
                "organization_id": 10002,
                "group_id": 98738,
                "brand_id": 123,
                "form_id": 6876543,
                "external_id": "TEST1234",
                "tags": [
                    "enterprise"
                ],
                "via": {
                    "channel": "web"
                }
            }
        }
    }
}
Set up your webhook-triggered campaign
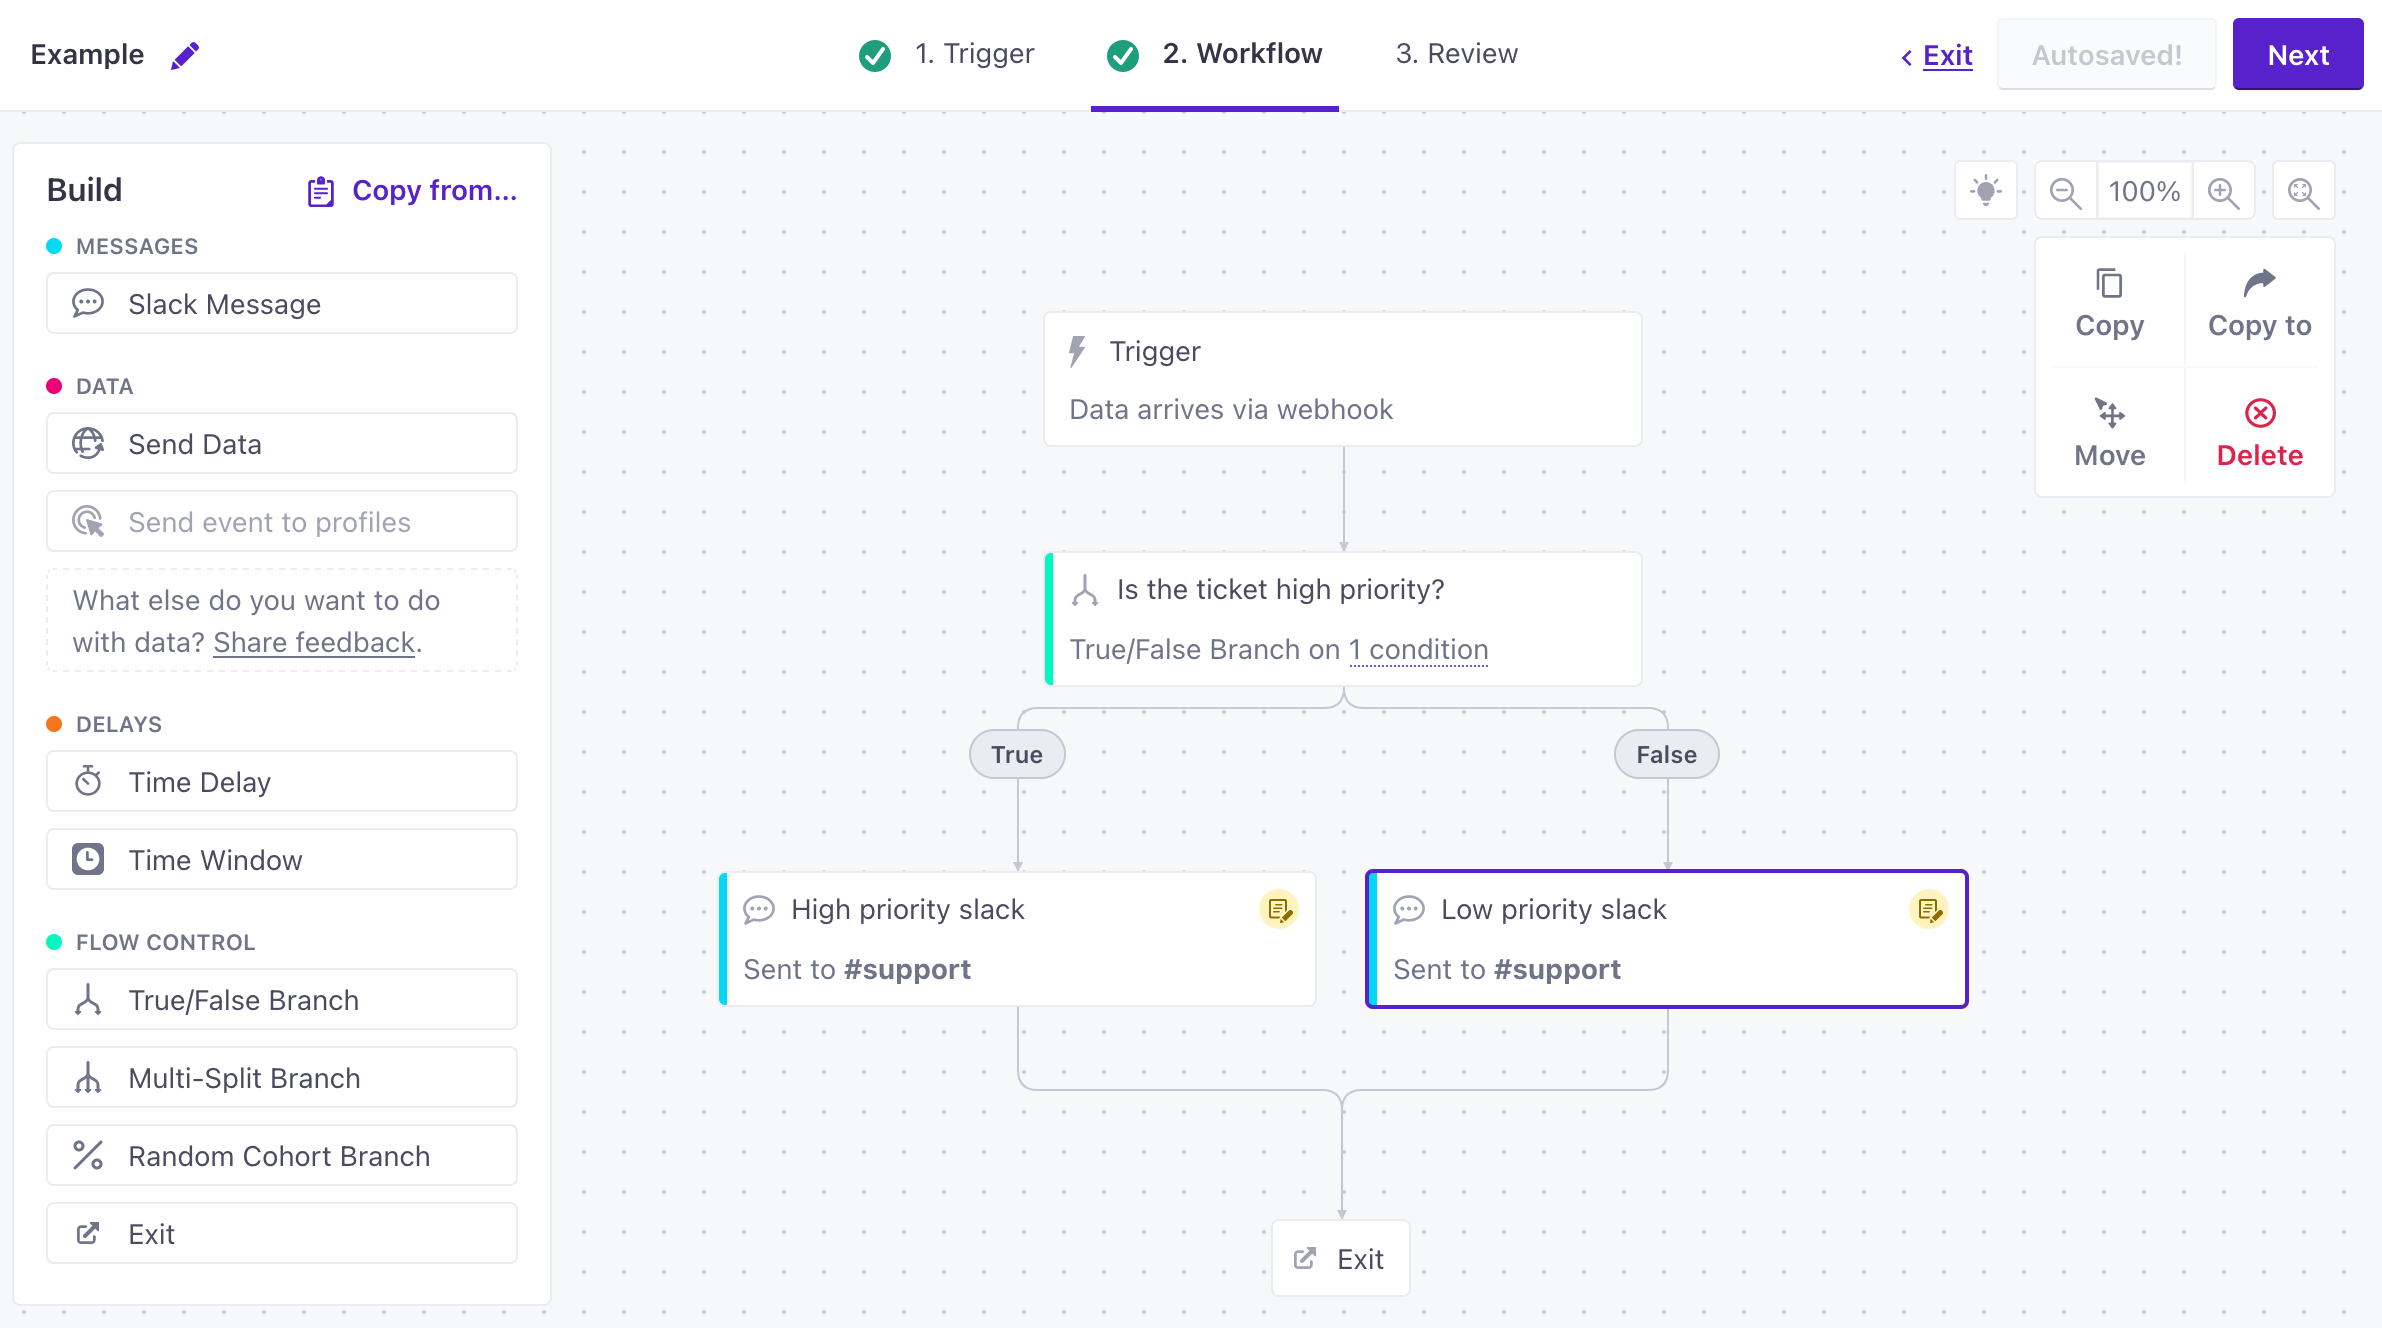
In this example, we’ll create a campaign to notify your Support Team when someone logs a ticket. We’ll use a True/False Branch to send a different notification with an @here alert if the ticket has high priority.
While we’re basing our example on Ticket Created events, you can perform this process with almost any event from Zendesk!
Go to Campaigns and click Create Campaign.
Select Data arrives via webhook and copy the Webhook URL.

In Zendesk, create your webhook:
- Go to
 > Webhooks > Webhooks, click Actions, and select Create Webhook.
 - Paste the Webhook URL that you copied from Customer.io in the Webhook URL field.
- Click Test webhook to populate sample data in Customer.io.
- Click Next, click Add Trigger and determine the conditions that trigger your webhook. In our case, we’re going to trigger the webhook when we receive a high-priority ticket (noted by
detail.ticket_event.ticket.priority). - Click Test webhook to send a test event to Customer.io. This will provide you with some sample data you can reference.
- Go to
Return to Customer.io and click Save & Next to move on to the Workflow step.
Drag a True/False Branch into your workflow. Click it and set the condition to
detail.ticket.priorityis equal to the valuehigh. This lets us set up separate slack notifications for high priority tickets.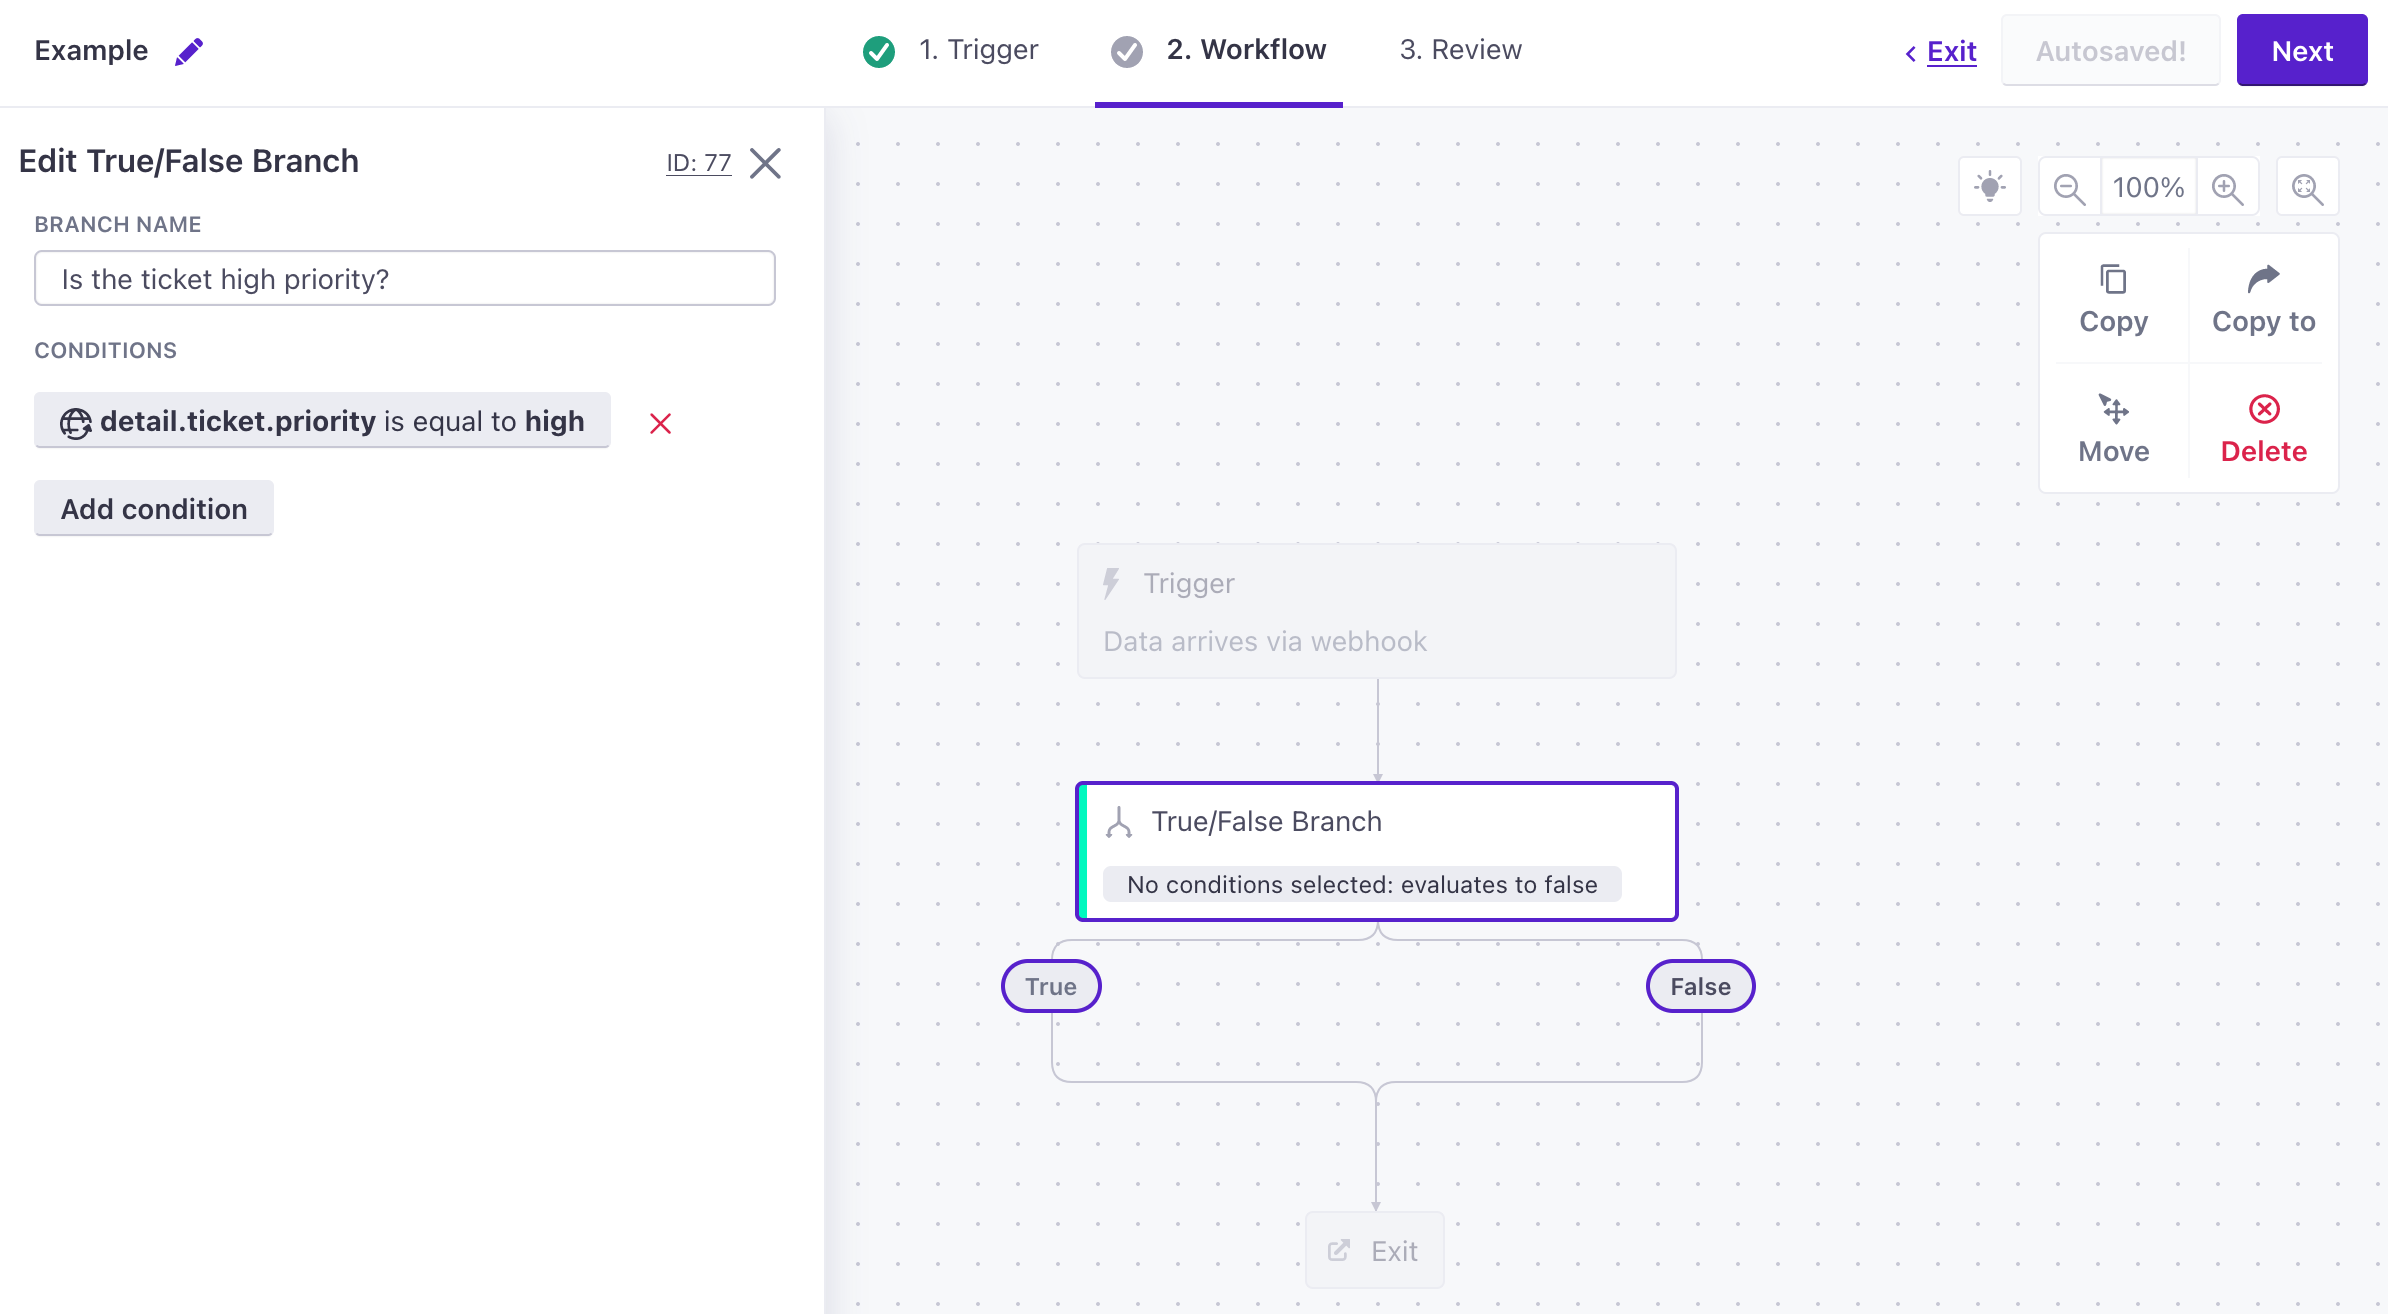
Drag a Slack Notification into your workflow for each branch—one for True and one for False.
Select the Slack action in your workflow and click Add Content.
In the To field, enter the channel or person you want to send a direct message to. In general, the To field expects a variable, but your Support team probably has a static channel (like
#Support)!Enter your message. You can access variables from the ticket using liquidA syntax that supports variables, letting you personalize messages for your audience. For example, if you want to reference a person’s first name, you might use the variable
{{customer.first_name}}. in thetriggerobject. Following our example data above, you can link to the incoming ticket using{{trigger.detail.ticket_event.ticket.id}}. The example below also sends an@herealert to notify people when the ticket priority is high!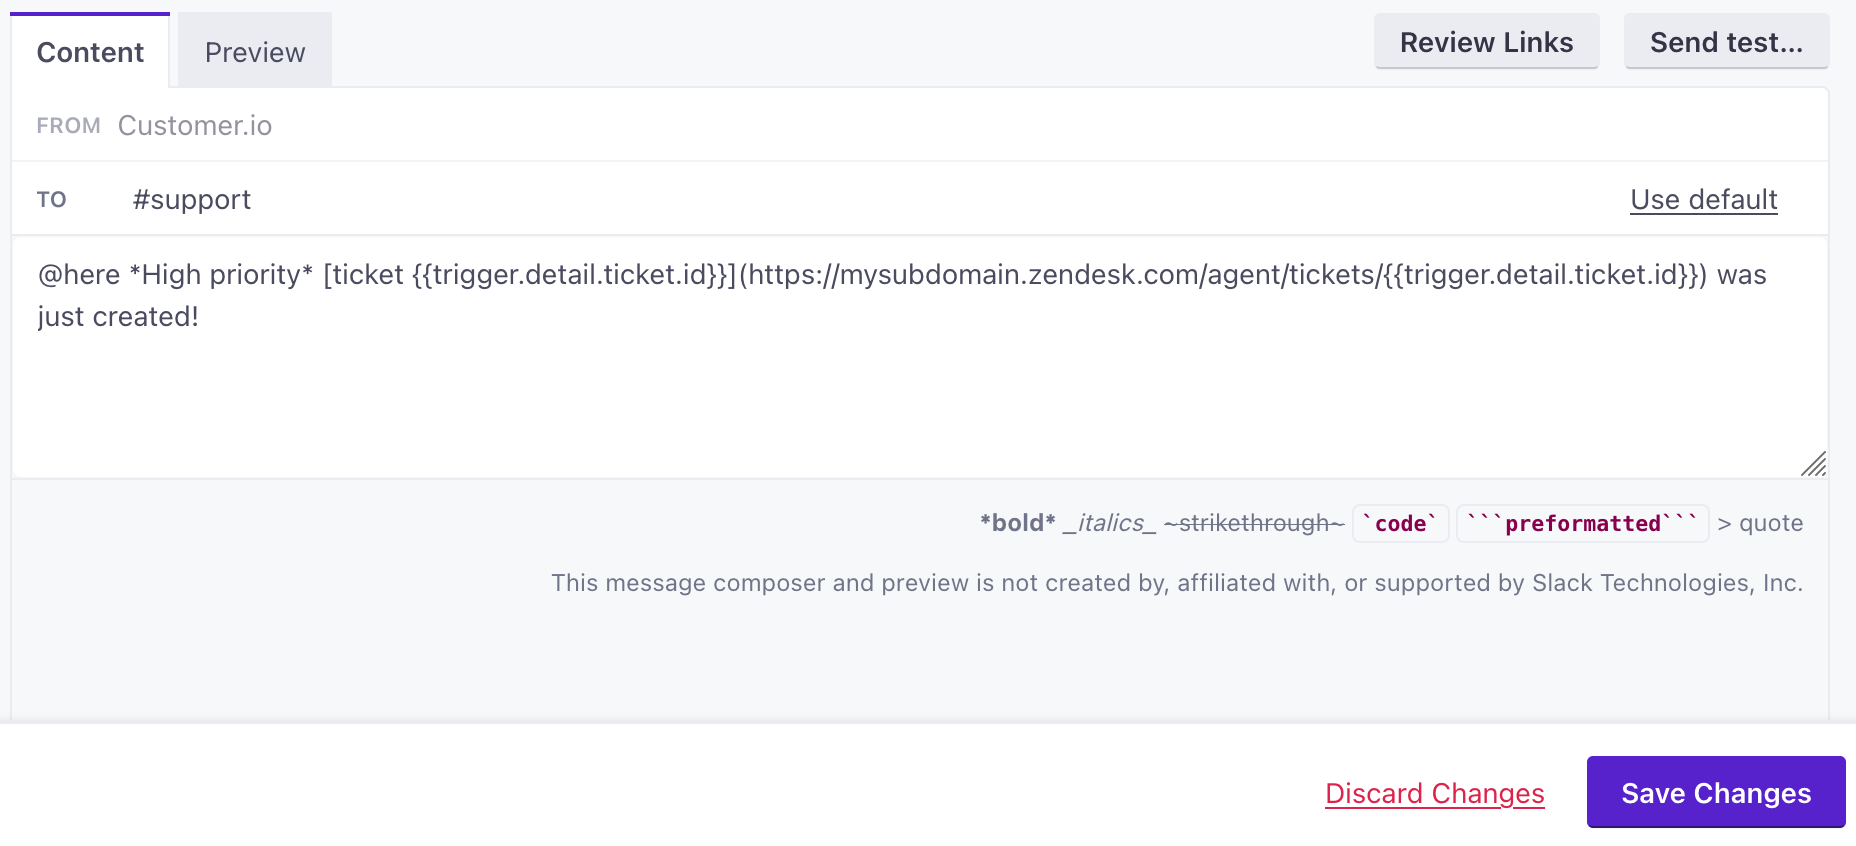
Click Save and Done for this Slack message, and repeat the steps above for your other Slack message. When you’re finished, your campaign will look like this:
When you’re finished, click Done. On the workflow page, click Next and finish configuring your campaign. When you’re done, you’ll begin notifying your Support Team when a ticket matches your trigger(s)!

