Visual Workflow Builder
Our visual workflow builder helps you construct message sequences on an open canvas. For Campaigns, you’ll get to the workflow builder after choosing your Campaign type. For API triggered Broadcasts, you’ll get to the workflow builder after you select your Broadcast recipients.
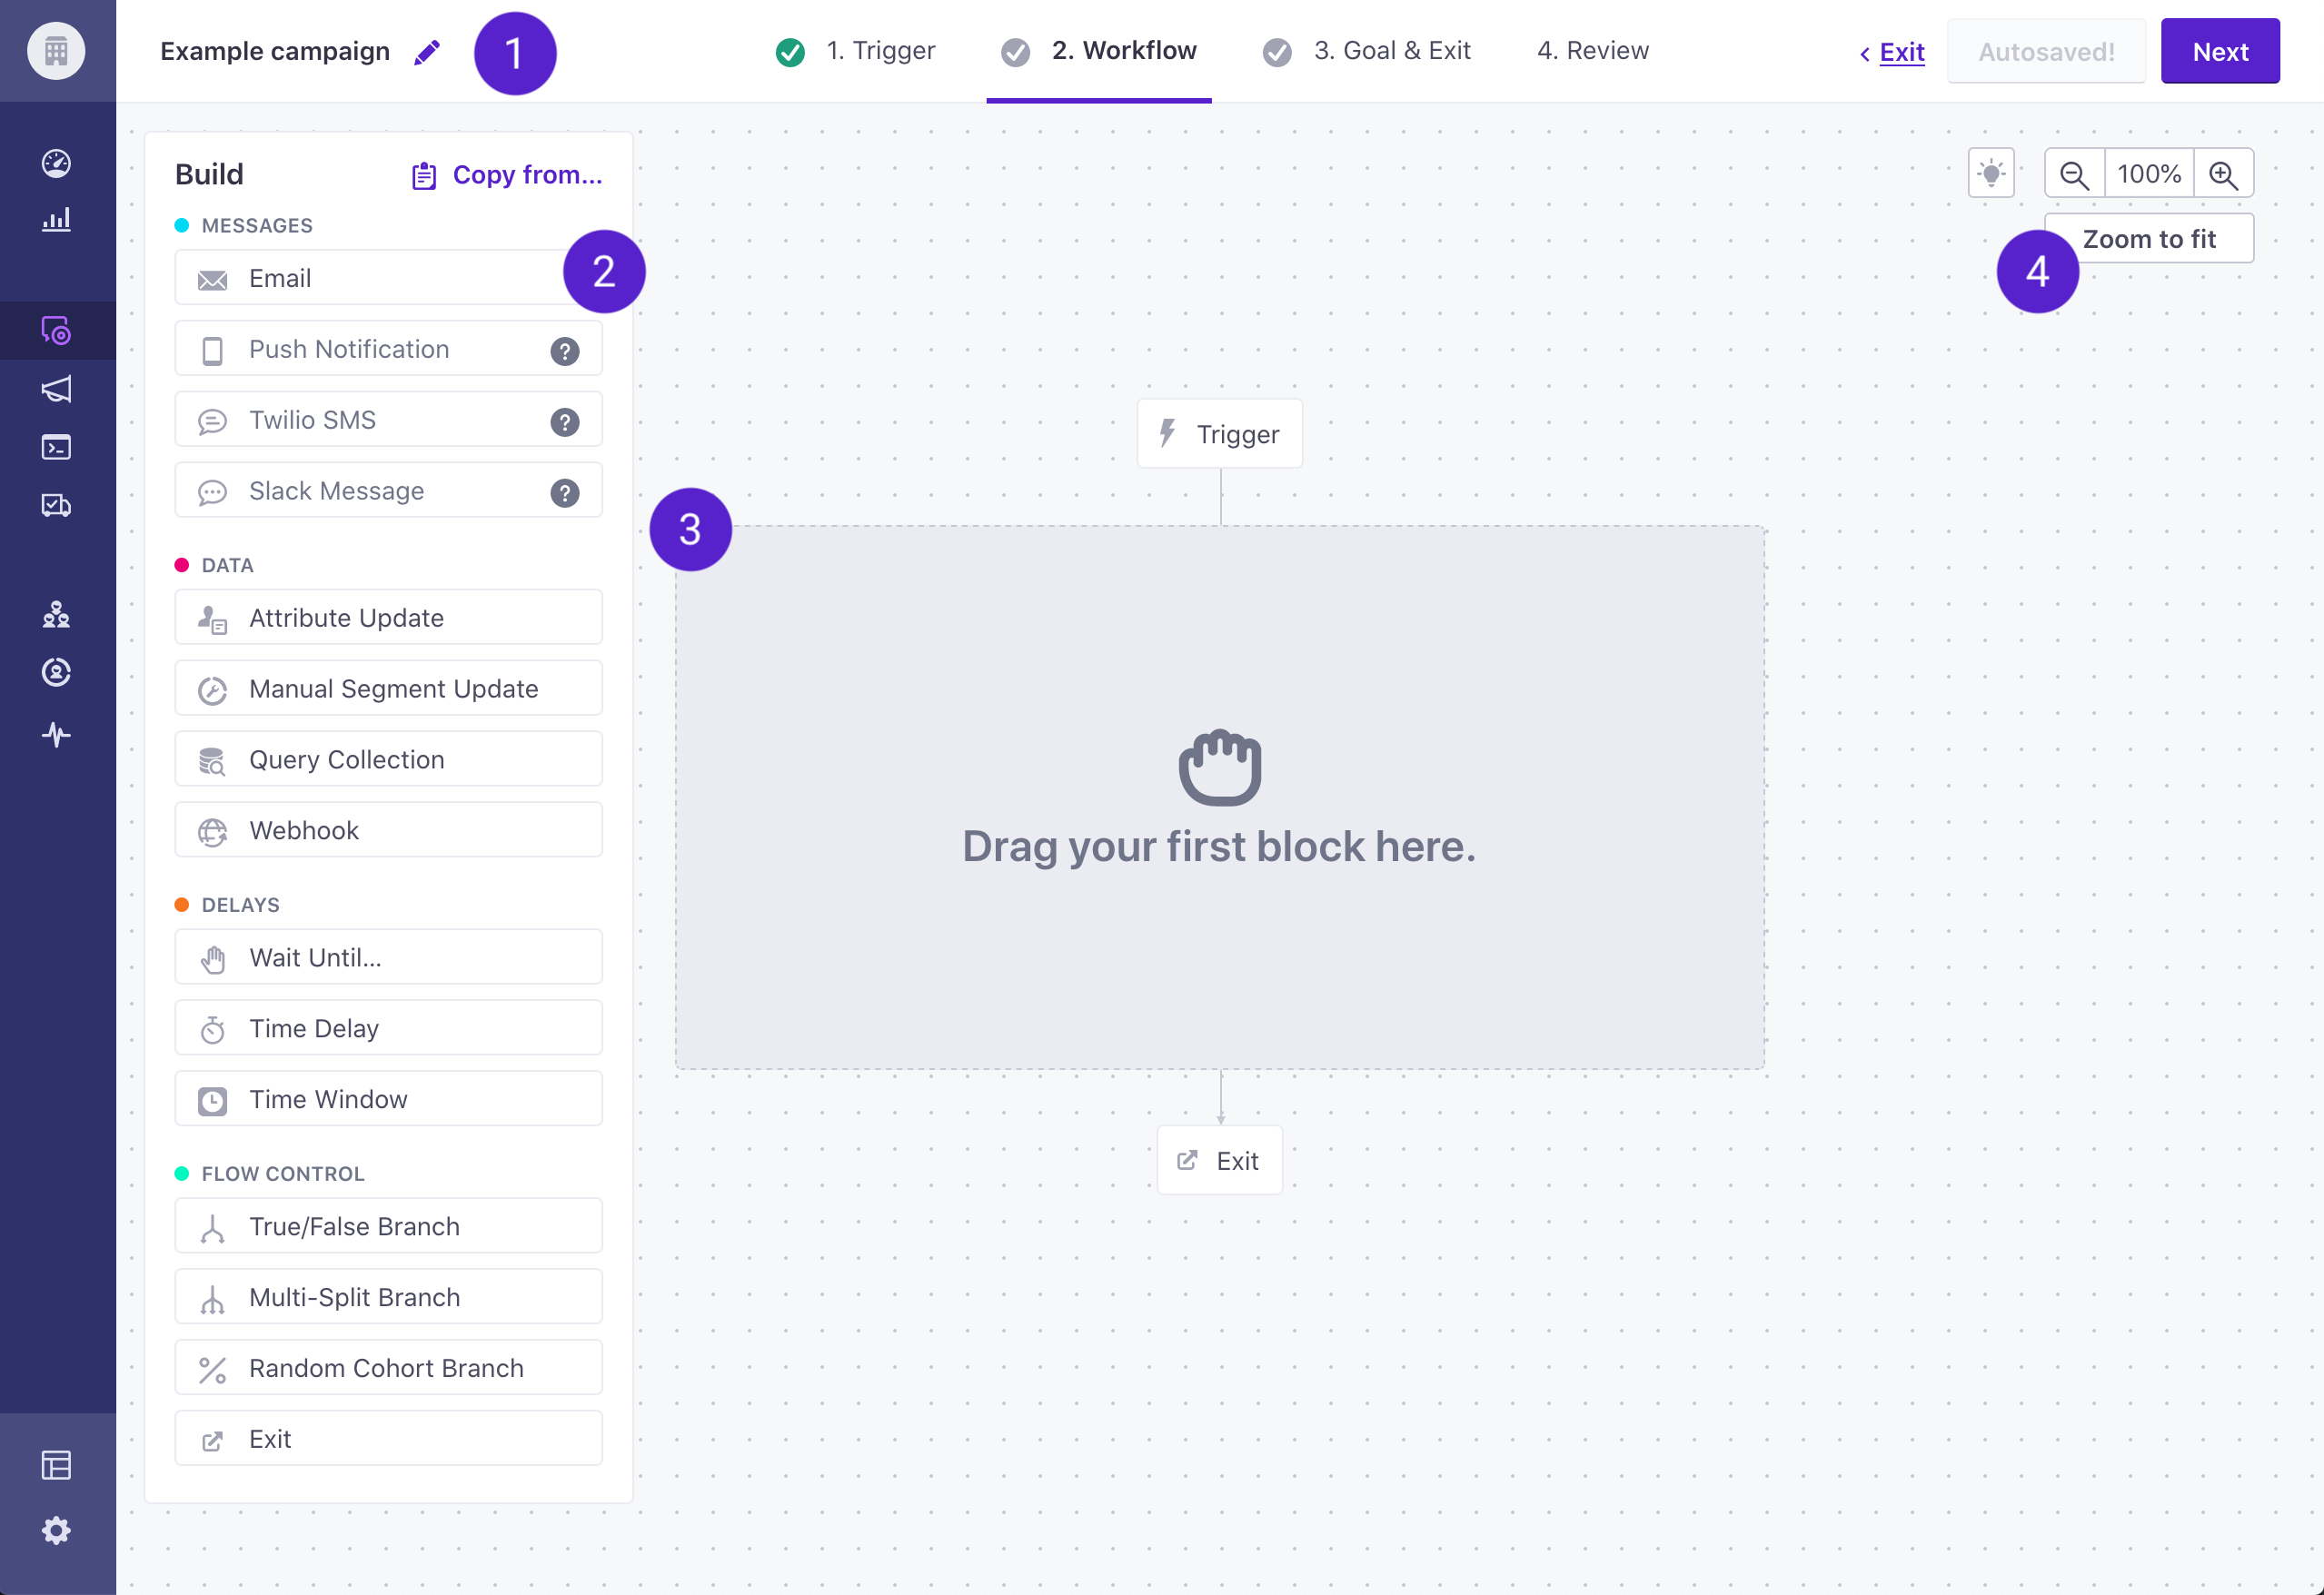
Campaign or broadcast name: you can edit the name here.
Build menu: contains blocks that you can use in your workflow.
Broadcasts don’t support delays
Delays aren’t available for API triggered broadcasts because broadcast messages are sent all at once rather than in a sequence.
Canvas: drag things here to add them to your workflow. The canvas flows top to bottom.
Zoom: zoom in or out to focus on areas of your workflow.
How to use the builder
To add a block to your workflow, drag an item from the sidebar onto the canvas. The canvas shows you where you can drop a workflow block with the (+) indicator.
Moving the canvas
If your workflow stretches beyond the margins of your browser, you can scroll around the canvas.
You can hold spacebar and move your mouse to scroll around the canvas as well.
Select items on the canvas
Click a workflow item to configure it.
Hold shift and click workflow blocks to select them for Move, Delete or Copy operations. You can also click and drag to select multiple workflow blocks. Selecting a branch this way also selects all of the items in the branch.
Moving items
To move a block in your workflow, simply drag it anywhere you see a (+) indicator.

Click and drag to select multiple items. You can either drag items to a new spot in the workflow or click Move and select where you want to drop them.
If you want to move items to a spot in your workflow that doesn’t fit on your screen, just drag the item to the edge of the canvas, and the workflow will scroll.
Keyboard shortcuts
The workflow builder supports a few keyboard shortcuts to help you complete some repetative actions quickly and easily.
| Function | Key | Description |
|---|---|---|
| Scroll | spacebar | Hold to scroll the workspace by moving your mouse. |
| Zoom | command + + / - | Zoom in or out. |
| Select | shift | Hold and click to select items. This can help you select items that might not all be covered by clicking and dragging in the workflow builder. |
| Copy | option / alt | Hold while selecting items to automatically copy them. |
| Delete | del / backspace | Delete workflow items. |
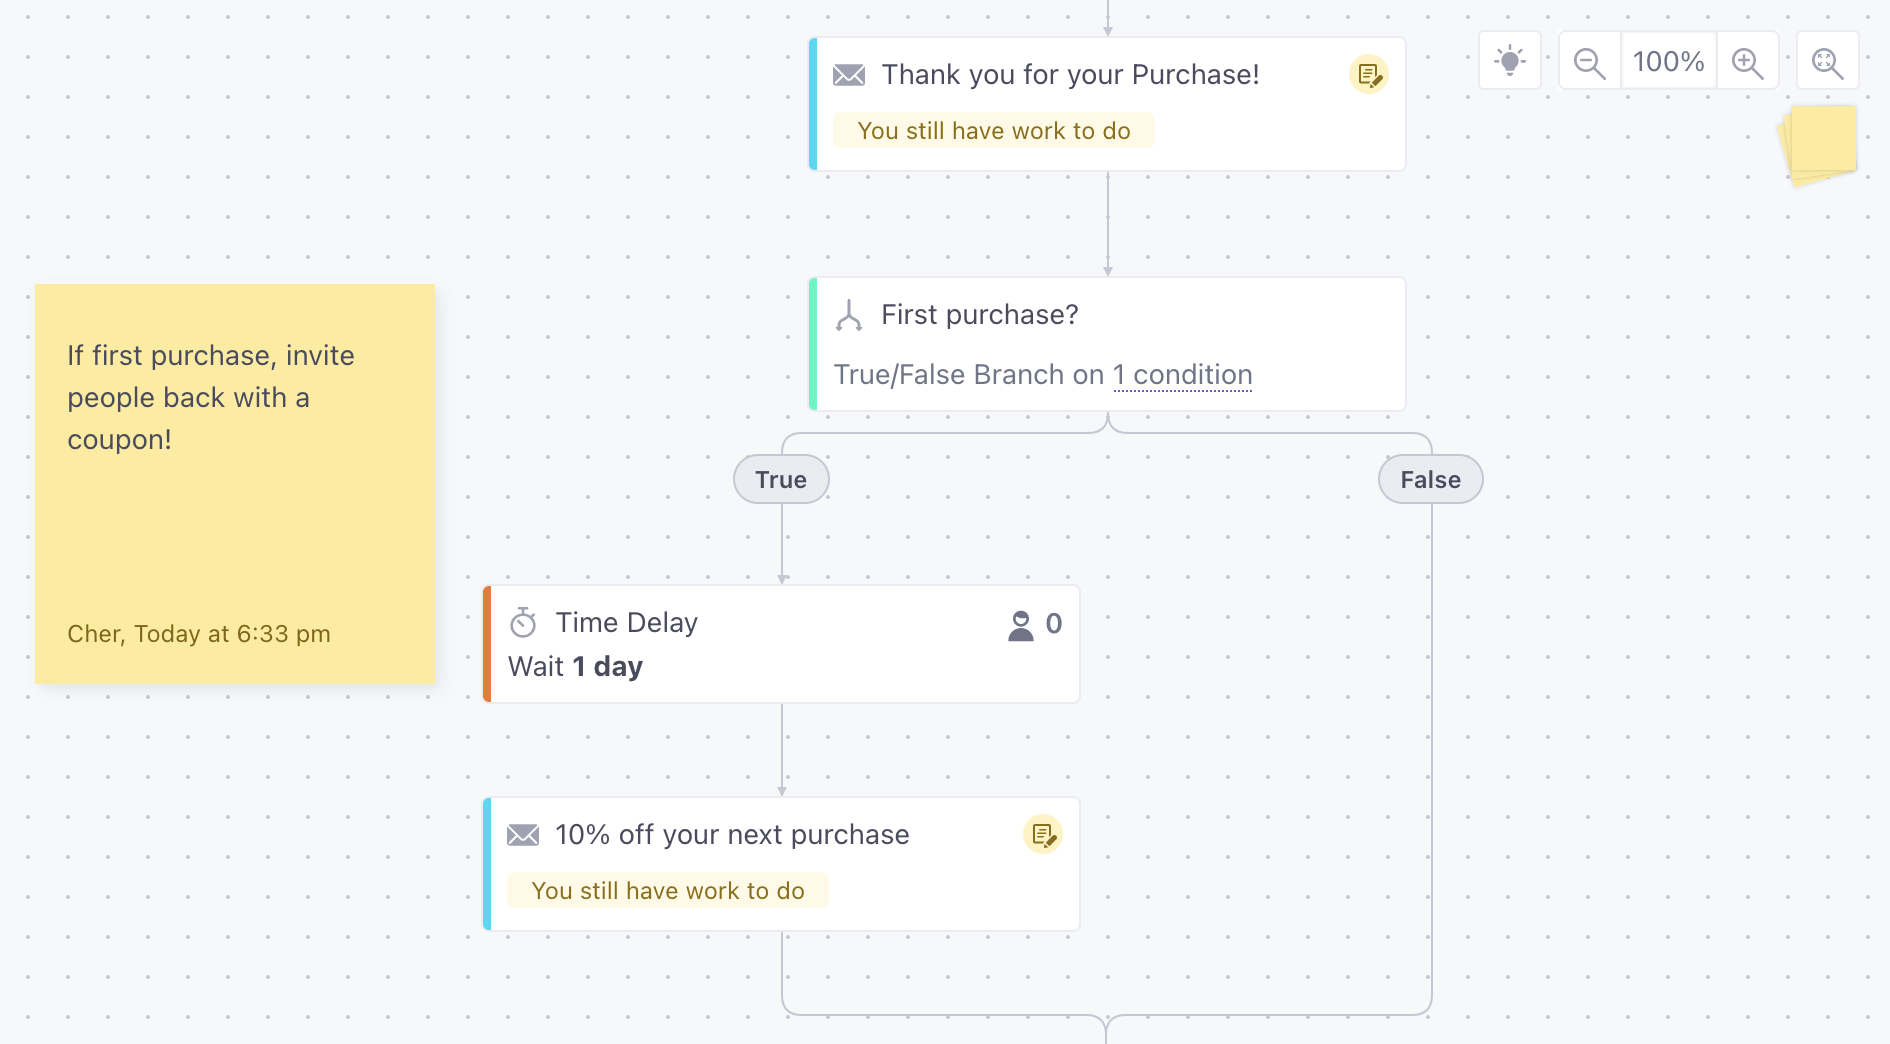
Sticky notes
As workflows become increasingly complex, you may want to leave notes for yourself and others to help explain workflow logic, actions, delays, etc.
To leave notes for yourself and others, drag sticky notes from the top right into your workflow. Click a note to add or edit the text of the sticky note. You can also drag existing notes around the workflow, to place them exactly where you want them.
Each note indicates who created it and when. Click to remove a note from your workflow.
You can click on a note to change its color. You might color coordinate notes written by different members of your team, or differentiate between informational notes and warnings.
Configuring workflow items
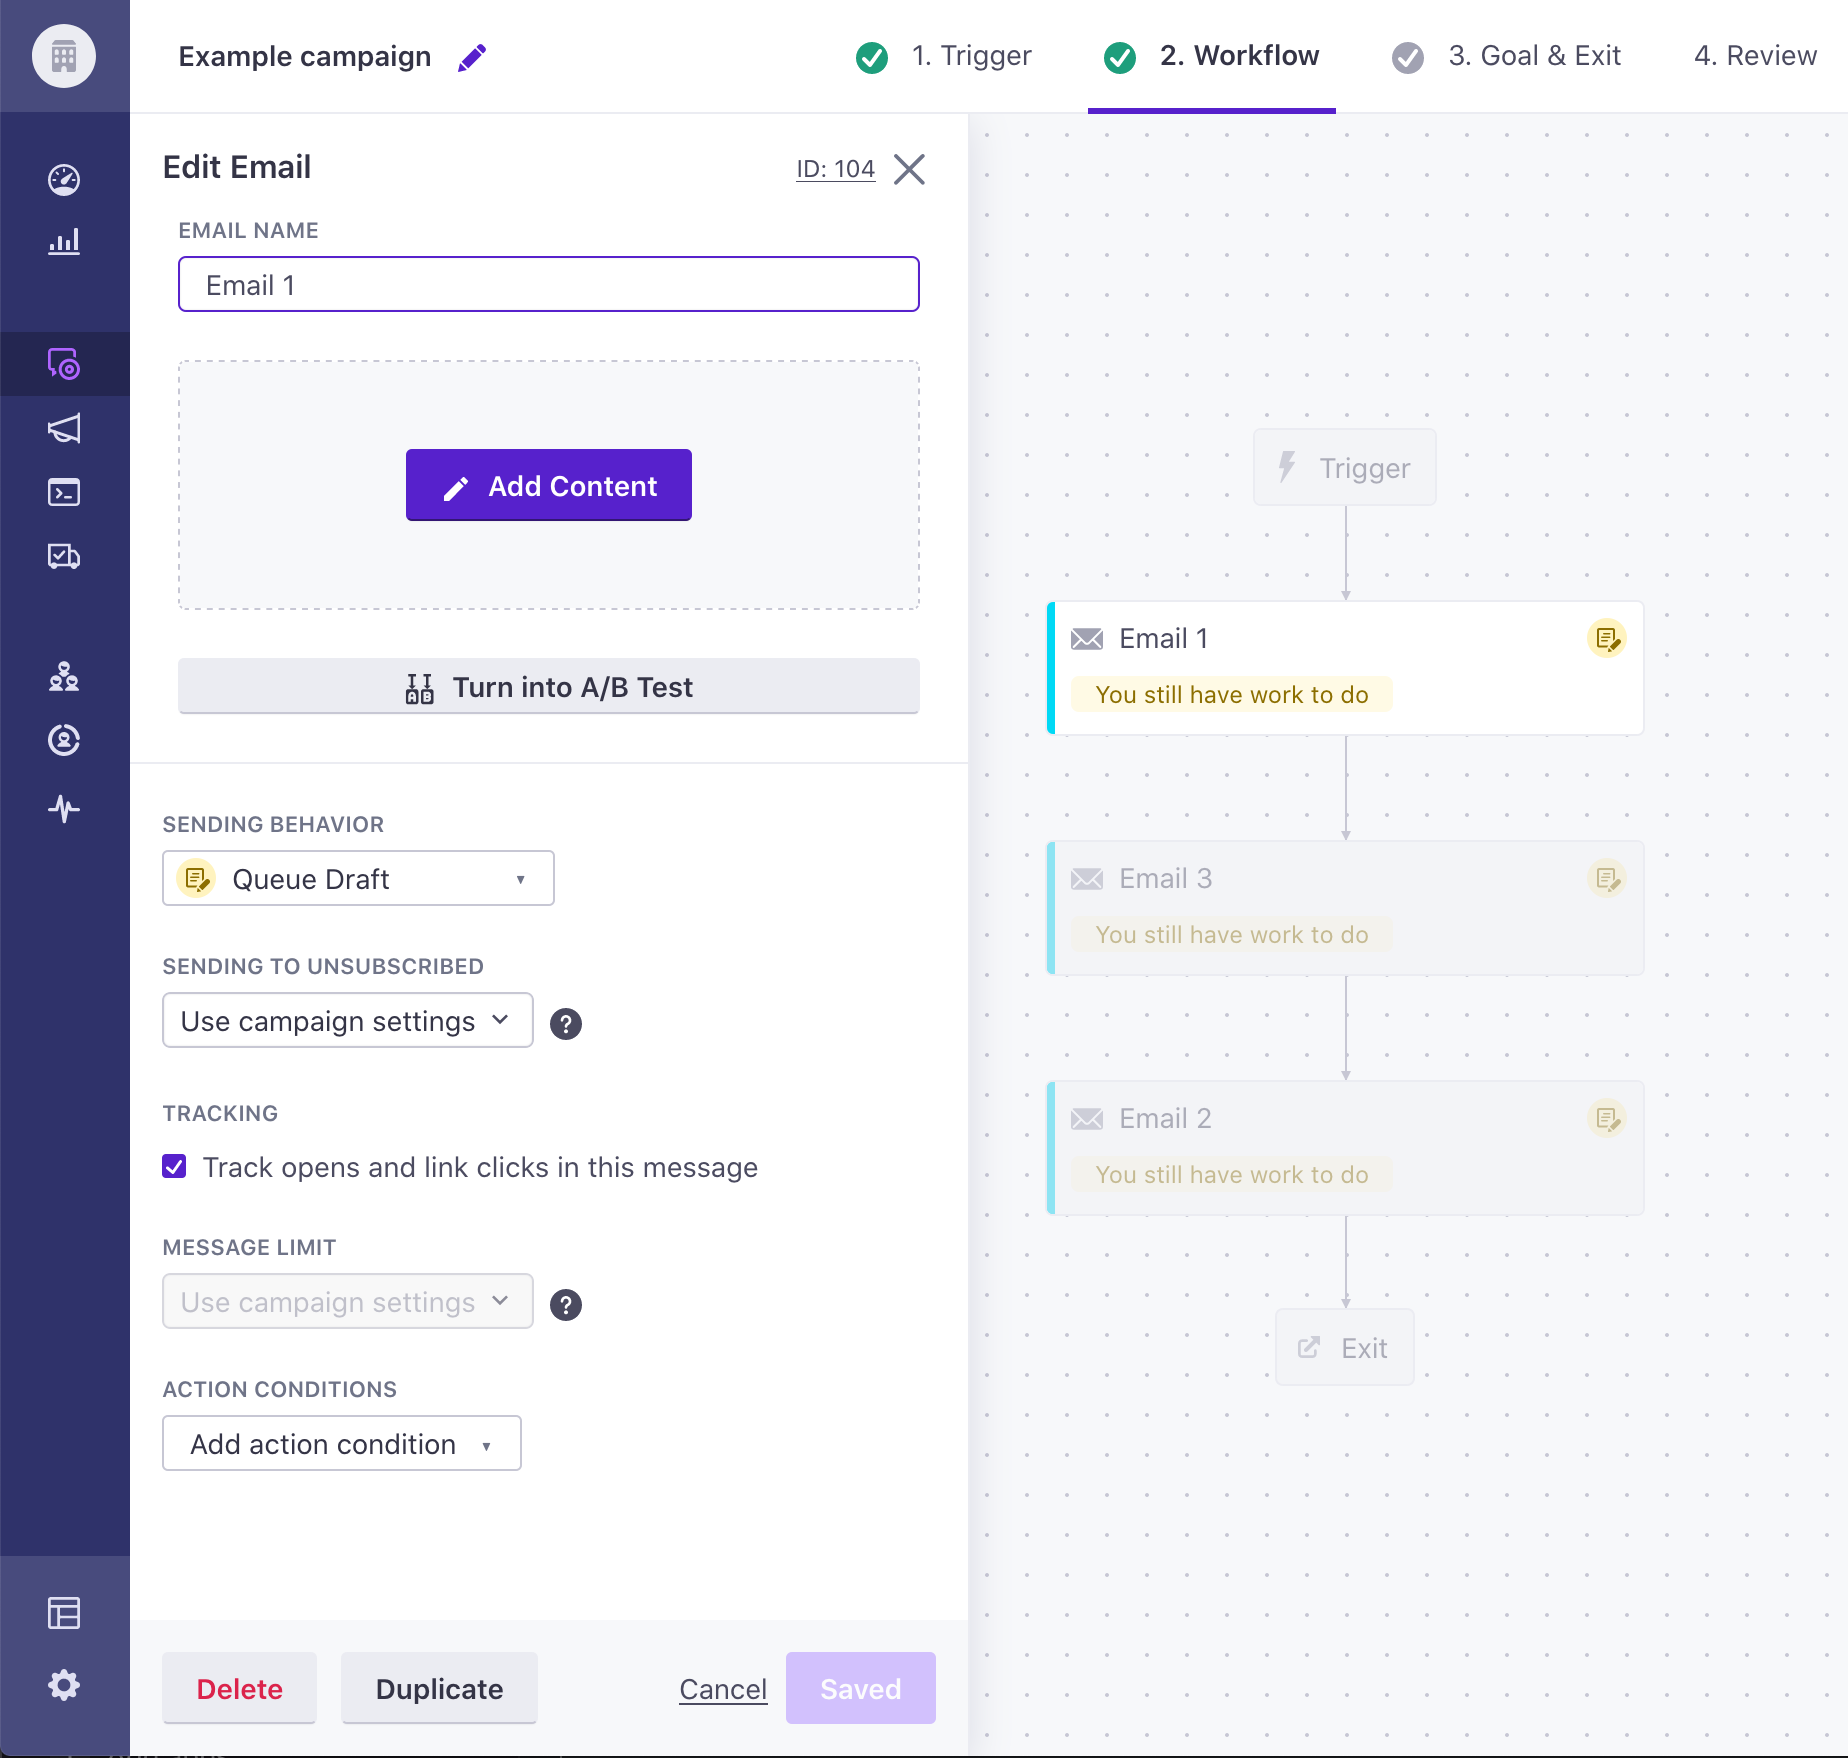
After you drag a block into the workflow, click it to configure it—set a delay timer or add content to a message.
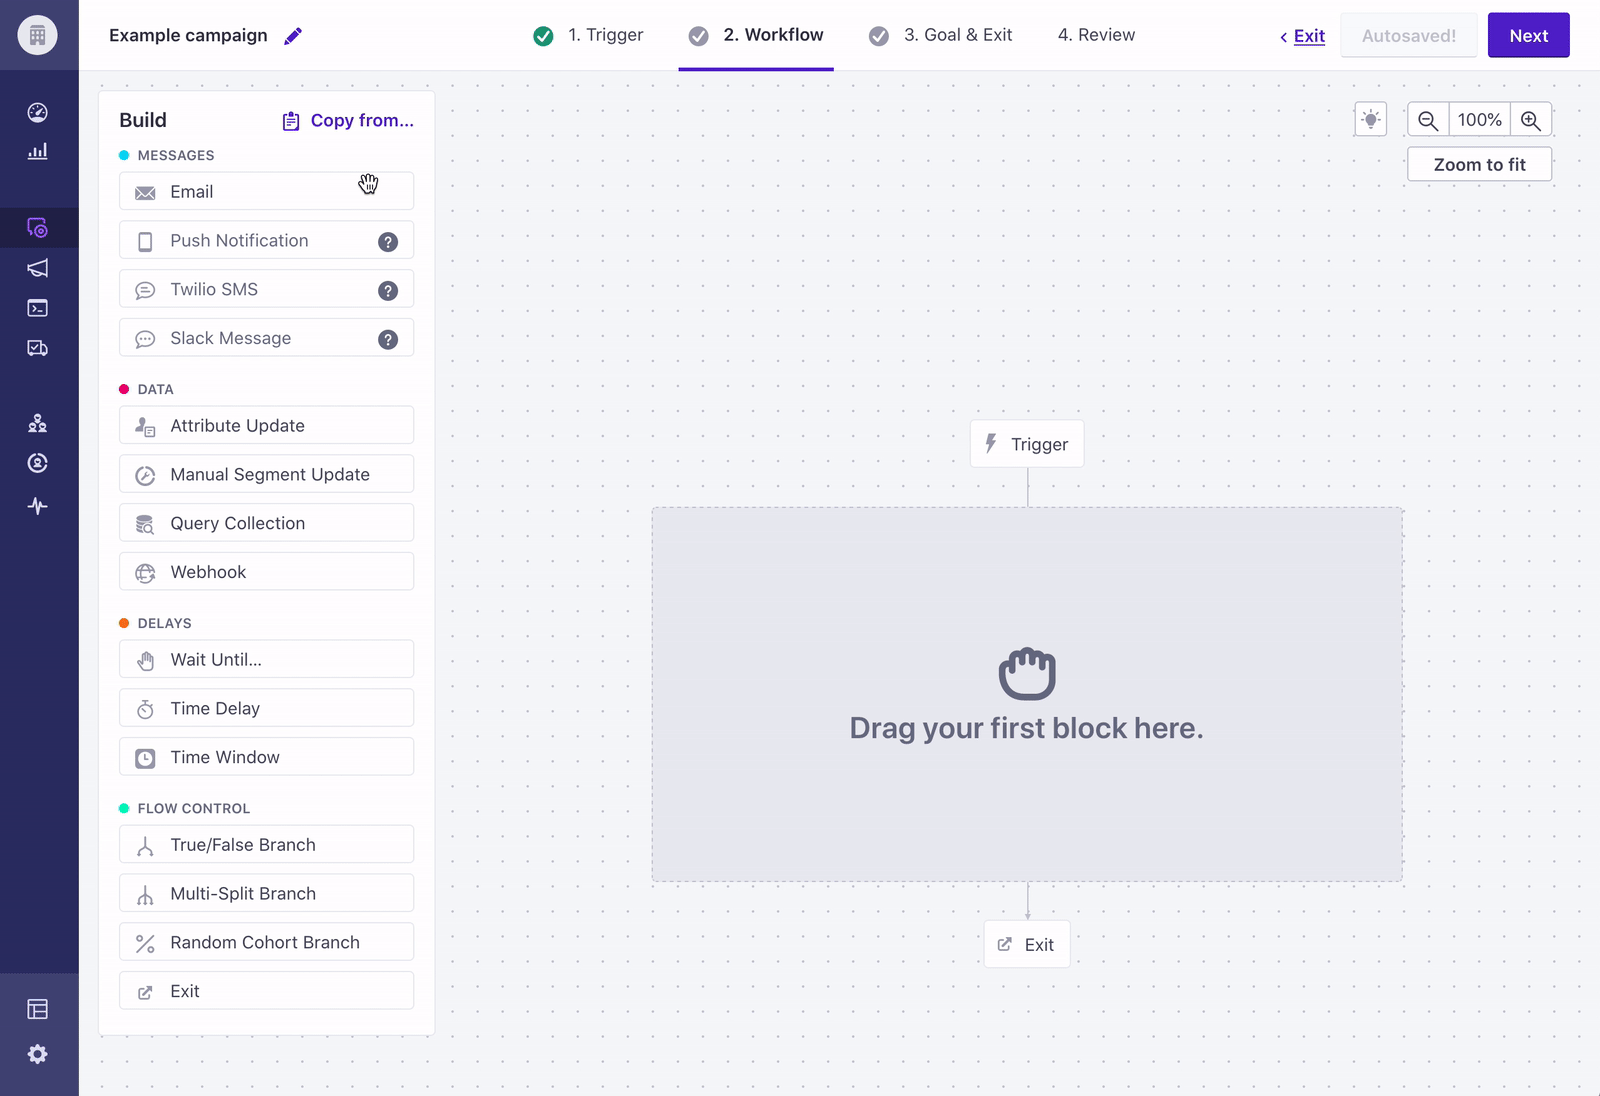
Messages, Attribute Updates, or Webhooks that you haven’t configured are marked: 'You still have work to do'.

Messages
For each message block—Email, Push, Slack, Twilio SMS—you can:
- Edit the item’s name: this is not a subject line, just a shorthand name for the workflow item that will appear in the workflow builder.
- Click to add content.
- Turn it into an A/B test.
- Edit sending behaviour: whether it queues as a draft, sends automatically, or doesn’t send at all.
- Edit unsubscribe behaviour: by default, these will not send to unsubscribed. Please be careful with this setting!
- Add action conditions, in case you’d like the item to be skipped.
- Track links. (Email messages only.)
- Choose a specific platform. (Push messages only.)
If you’ve added content to a message, you’ll be able to get a preview of it. Here’s a screenshot:
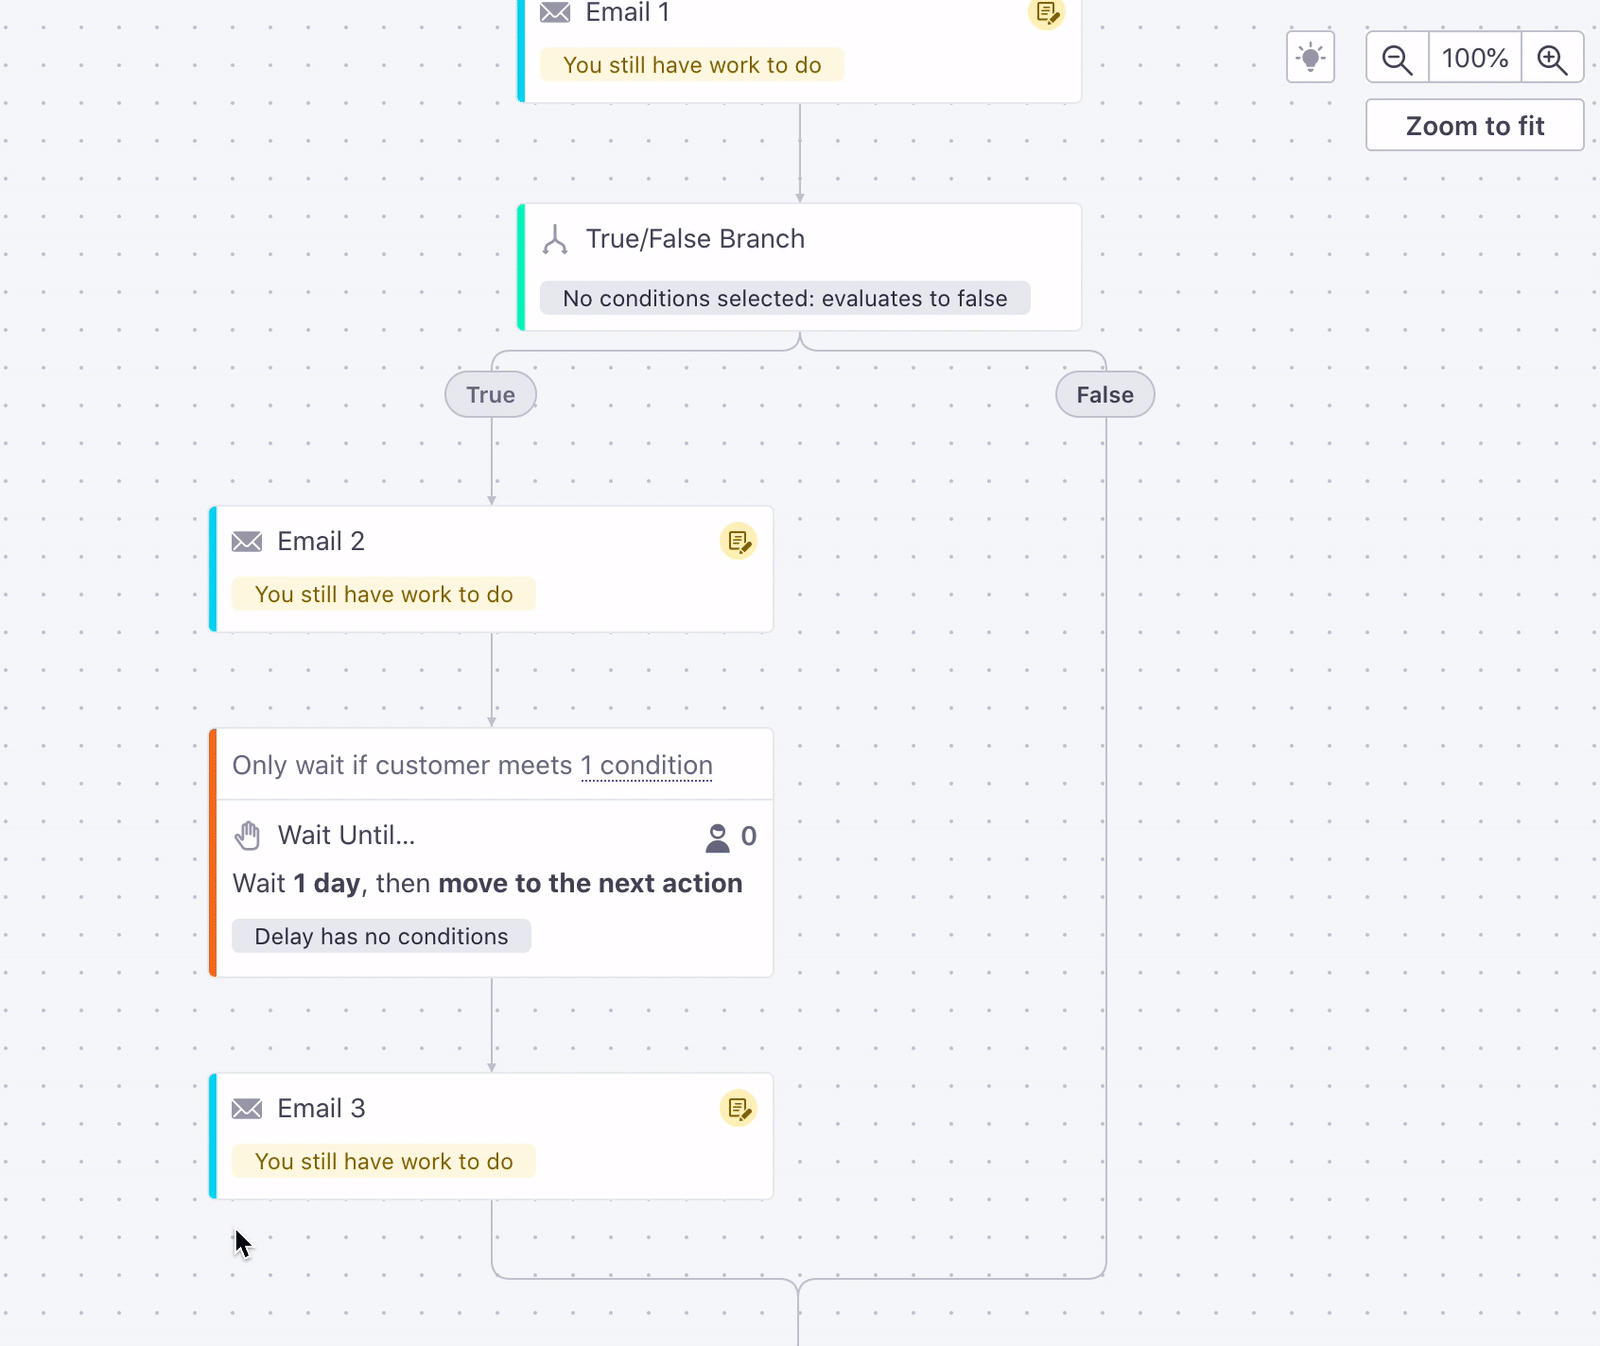
Delays
There are three types of delays you can add to your campaign workflows: Time Delays, Time Windows, and Wait Until…. After you add a delay to the workflow, you can click it to edit the following:
- Time Delay: edit how long the delay is and add an action condition.
- Time Window: configure the window’s day and specific time.
- Wait Until…: add the condition that needs to be met, a maximum wait time.
You can add an action condition to any delay.
Broadcasts don’t support delays
Messages in a broadcast workflow are sent all at once.
Webhooks and attribute updates
Editing a webhook block is similar to editing a message block. For each webhook, you can set:
- The item’s name.
- Add details or add a request.
- Sending behaviour for webhooks (queue drafts, send automatically, don’t send).
- Action conditions.
In each case, you’ll have to save any changes made before continuing.
Branches
Branches let you send people down different paths in your workflow depending on various conditions. You can split people into true/false branch, multi-split branch, or random cohort branch, depending on the types of conditions you want to apply.
After you add a branch to your workflow, click it to define conditions for the branch.
- True/False branch: edit the name of the branch and the conditions determining whether people go down the true or false path.
- Multi-split branch: edit the name of the branch, choose the data type you want to split paths on, and then pick the values of that data type for each path.
- Random cohort branch: you won’t add conditions. Rather, specify the number of paths and what percentage of people should move down each.
- Exit: Reconnect the branch’s exit block to another path in the branch.
Export your workflow as an image
Click in the upper right of the workflow to export your workflow as an image. This makes it easy to export your workflow as a PNG so you can share your automations with people outside of Customer.io.
This makes it easy to share your workflow with people who don’t have access to your workspace or who don’t regularly work with Customer.io, so you can help folks understand how you interact with your audience.
Copying workflow items
To copy within your workflow, select items in the workflow and click Copy. Then click the destination in your workflow.
You can also copy blocks in your current workflow to another workflow or copy from another workflow to your current one.
Copy items from another workflow
When you copy items from another workflow, not all of the copied items’ settings carry over to the destination workflow. This is especially true when you’re copying items from a different workspace. Make sure that copied workflow item settings apply to your current workspace and campaign or broadcast before you save changes in your workflow.
To copy items from another workflow to your current one:
- Click Copy workflow items from….
- Select the Workspace you want to copy items from.
- Select the Campaign or Broadcast that you want to copy items from.
- Click and drag to select the workflow items you want to copy. Or check Select entire workflow to copy everything.
- Click Continue to place items.
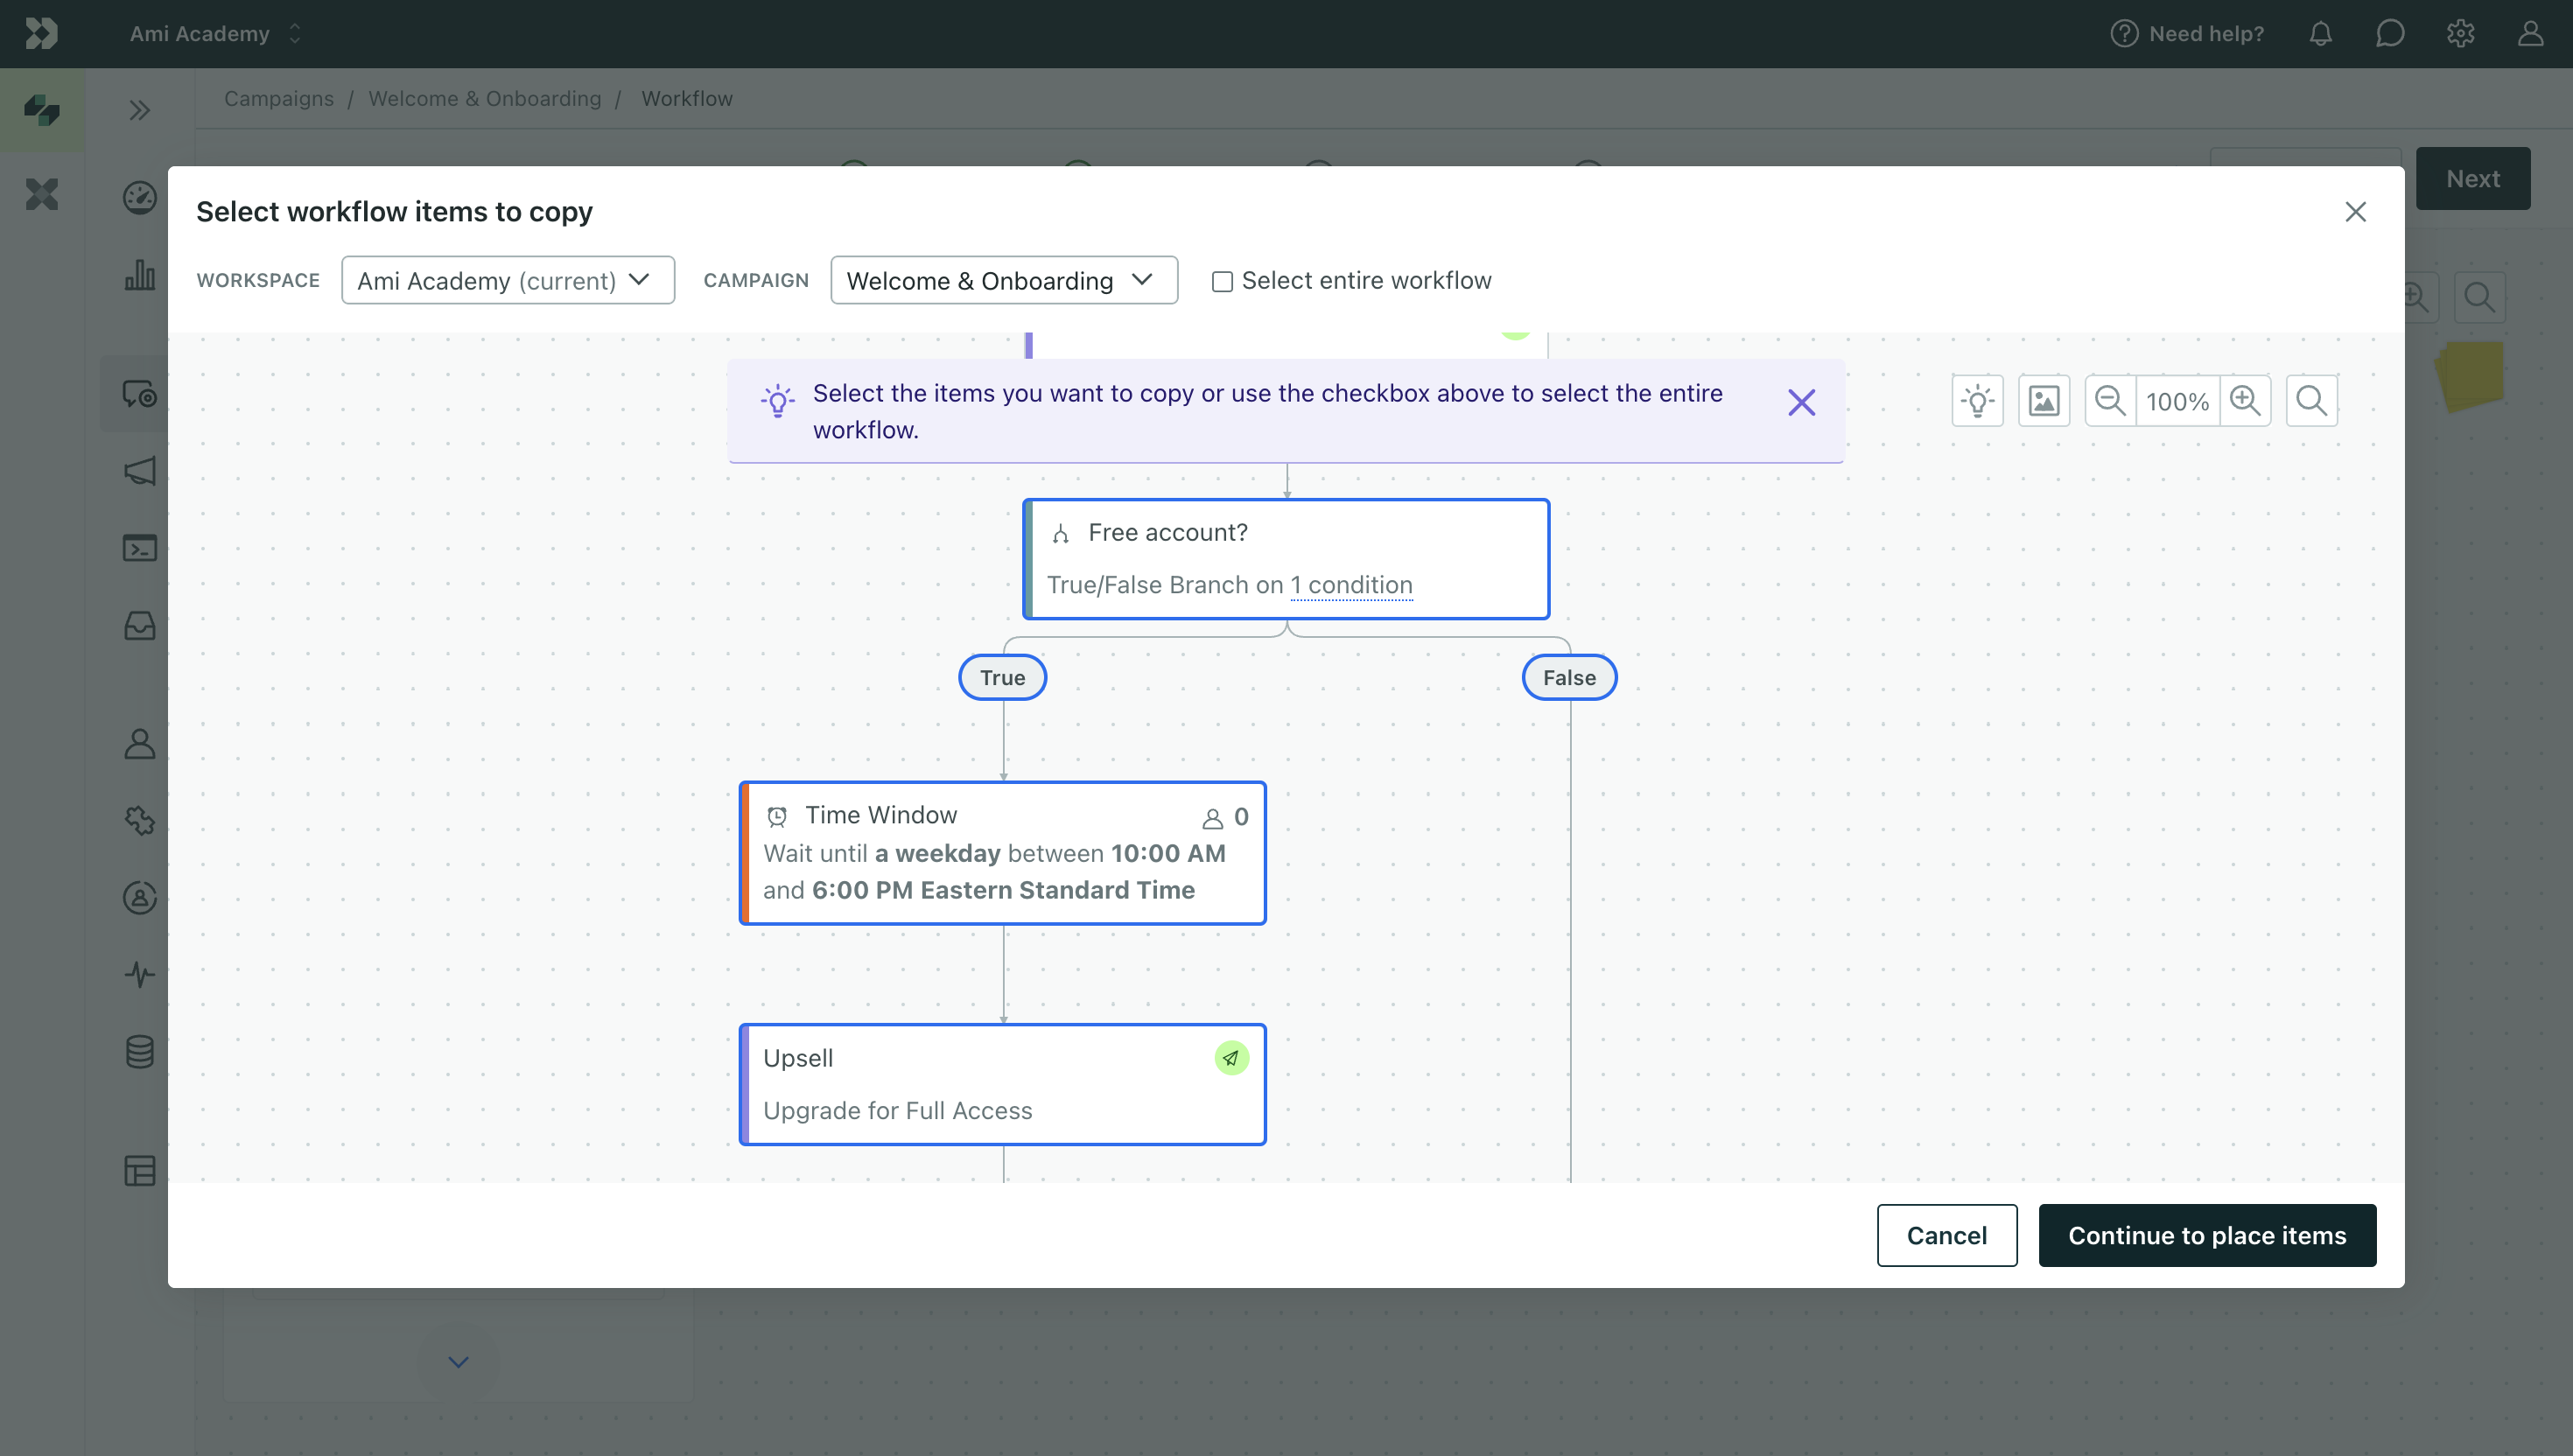
- Click
(+)to place your copied items in your current workflow.
Copy items to another workflow
When you copy items to another workflow, not all of the copied items’ settings carry over to destination workflow. This is especially true when you’re copying items to a different workspace. Make sure that copied workflow item settings apply to your current workspace and campaign or broadcast before you save changes in your workflow.
To copy items from your current workflow to another one:
Select the items you want to copy to another workflow.
Click Copy to….
Select the Workspace you want to copy items to.
Select the campaign or broadcast that you want to copy items to.
Click to place your copied items in your new workflow.
Save your changes.
When you save your changes, use the Save & go to workflow option to go to the workflow you just copied items to. Use Save & close to return to the workflow you copied items from.

