Verify deliverable email addresses with Kickbox
Introduction
You don’t just want to know that email addresses are valid (i.e. they comply with RFC 5322); you want to know that addresses are deliverable. Sending messages to undeliverable email addresses can increase your bounce rate and impact your deliverability.
If you’re not able to verify the deliverability of an email address before you add it to Customer.io, you can always leverage Webhook actions and a third-party verification service like Kickbox.
This allows you to evaluate the deliverability of the email addresses in your workspace and identify the ones you shouldn’t email.
This method is provider-agnostic
While we’ll use Kickbox in our example below, you could use any email verification service that has an API.
Ingredients
- A Data-Driven Segment
- A Segment-triggered Campaign
- Basic API and Webhooks knowledge
- A Kickbox account
Method
We’ll create a Segment-triggered campaign for people who haven’t been verified yet, send an API request to Kickbox to verify their email, and save the result as attributes to leverage that information later.
- Get your Kickbox API key.
- Create a Segment of unverified emails (to use as a campaign trigger).
- Create a Segment of verified emails (to use as a campaign goal).
- Create a Campaign with a webhook action to verify people.
Get a Kickbox API key
We’ll start by getting a Kickbox API key. You can go to kickbox.com to create an account. Your account will be provisioned with 100 credits (i.e. 100 email addresses to verify) and you can purchase extra credits.
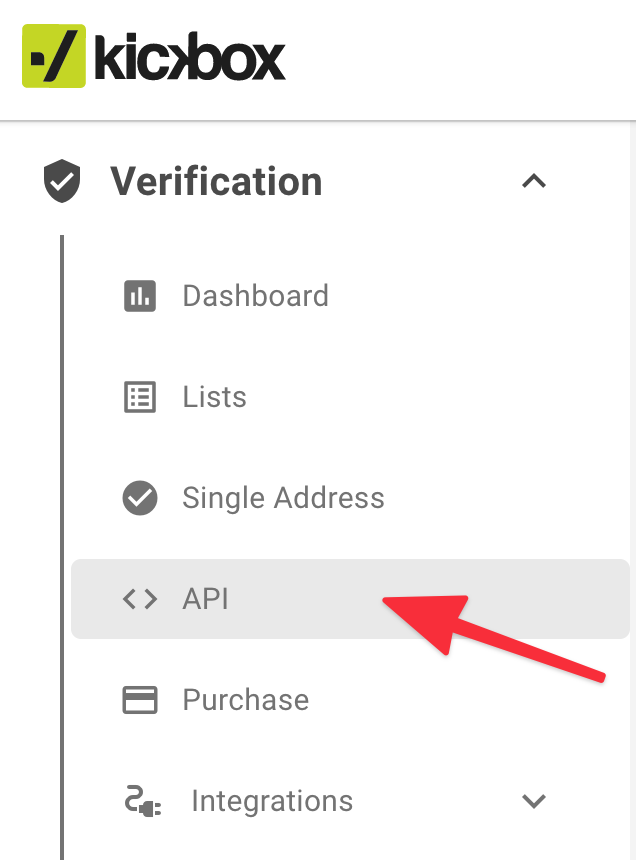
Go to the Verification section of the left sidebar and click API.
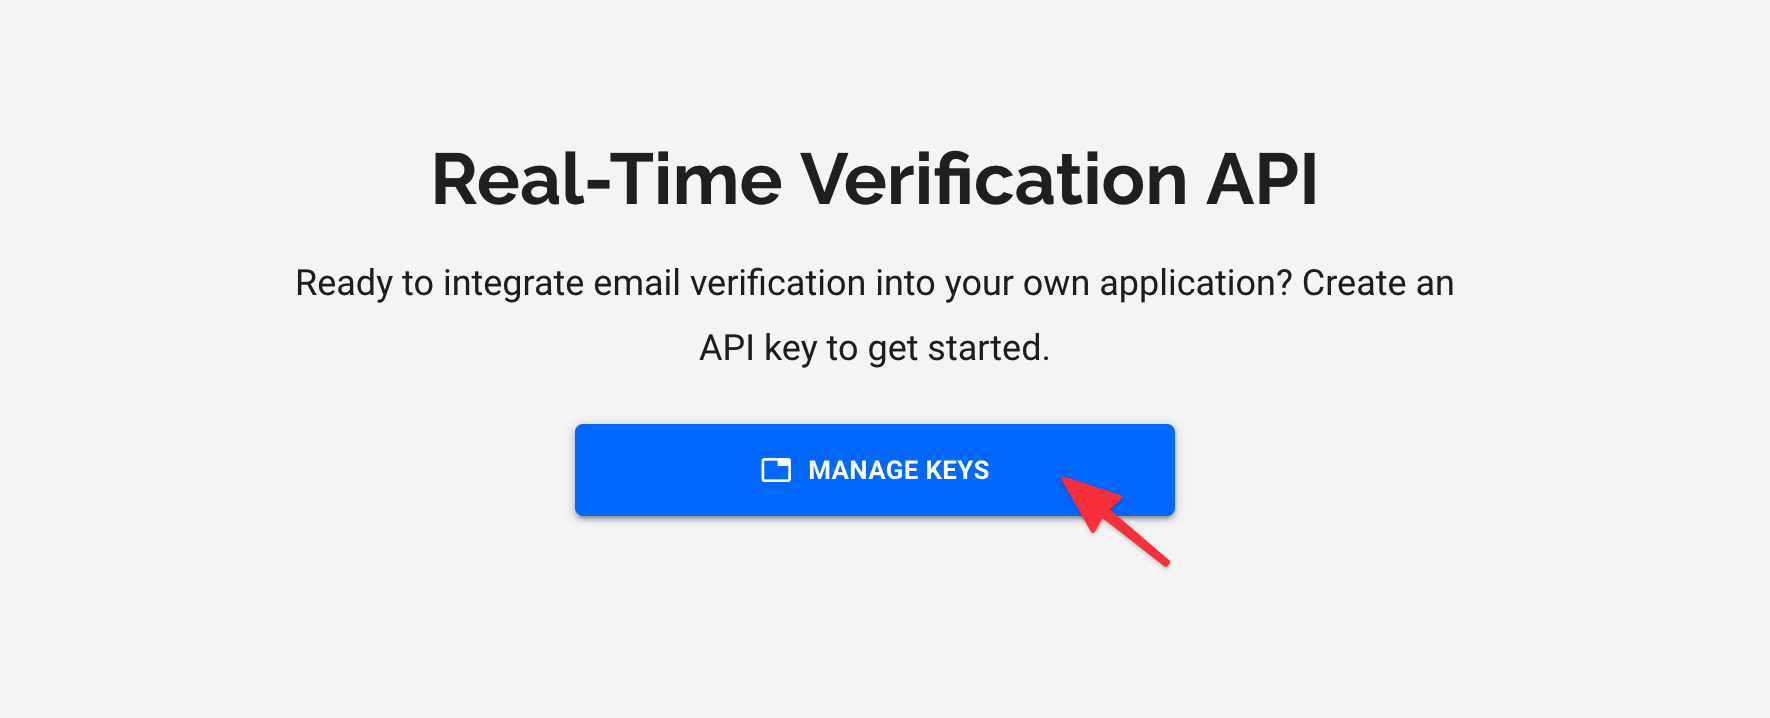
Click Manage Keys.
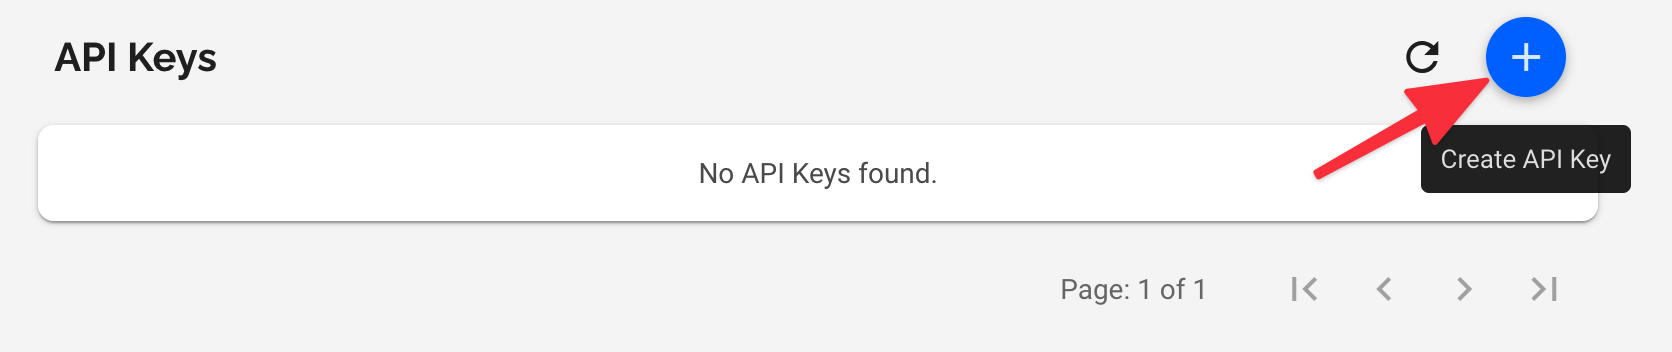
Click to create a new key.
In the modal window, specify a key name (1), activate it for
Production Mode(2), select the scope of permissions (3) before finally creating it (4).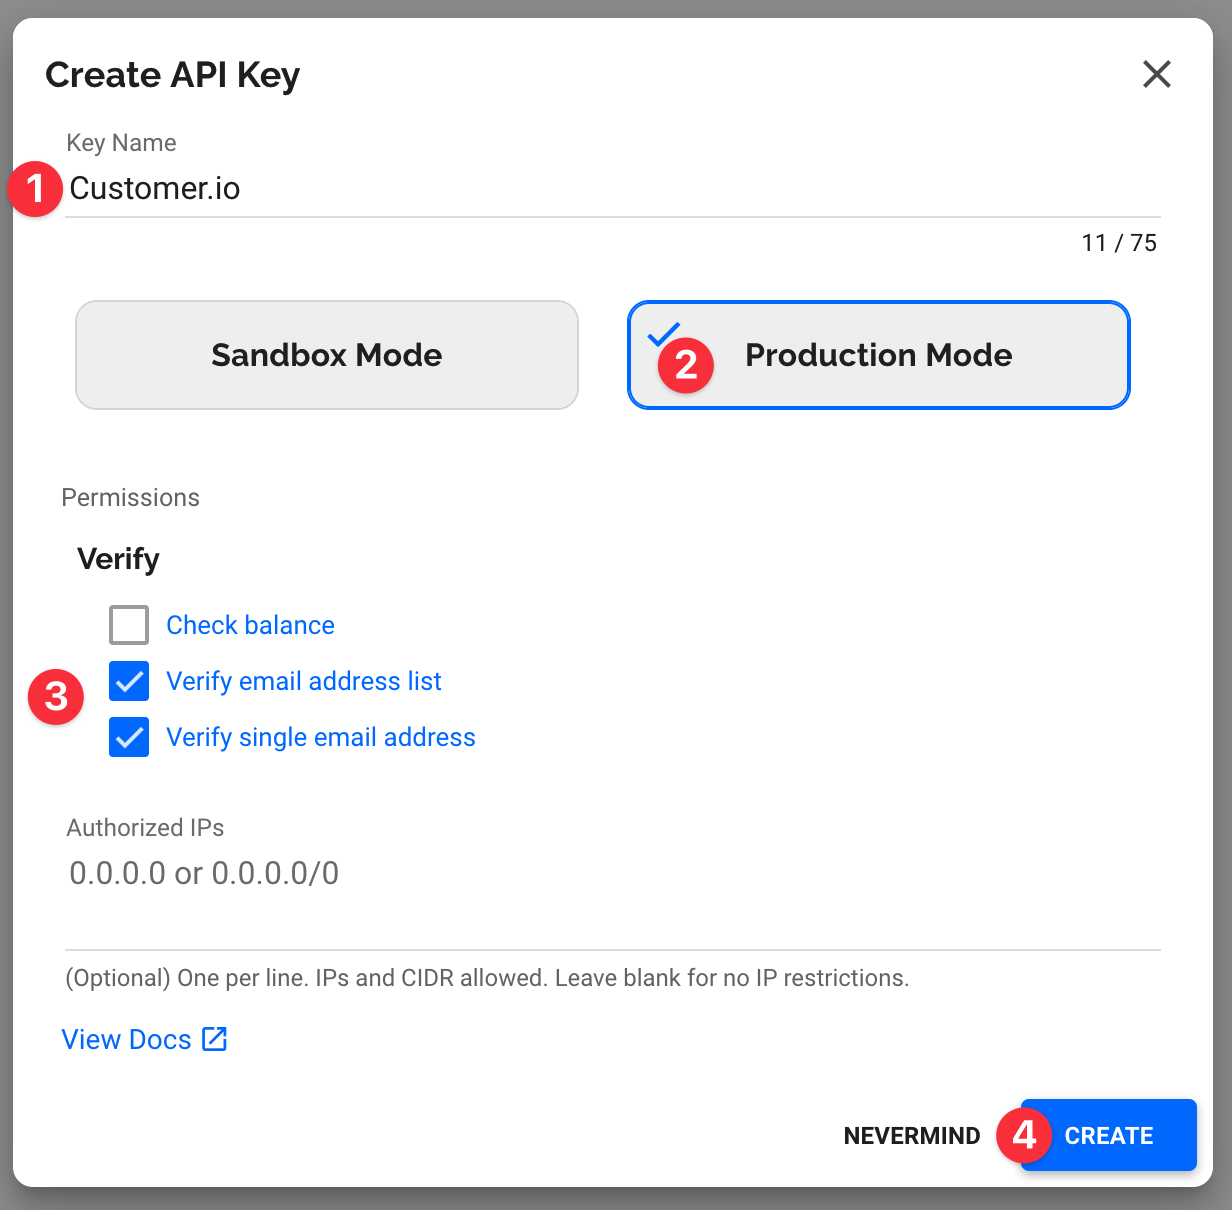
When this is done, you’ll see your API key in the list and you can click the eye icon to unmask it.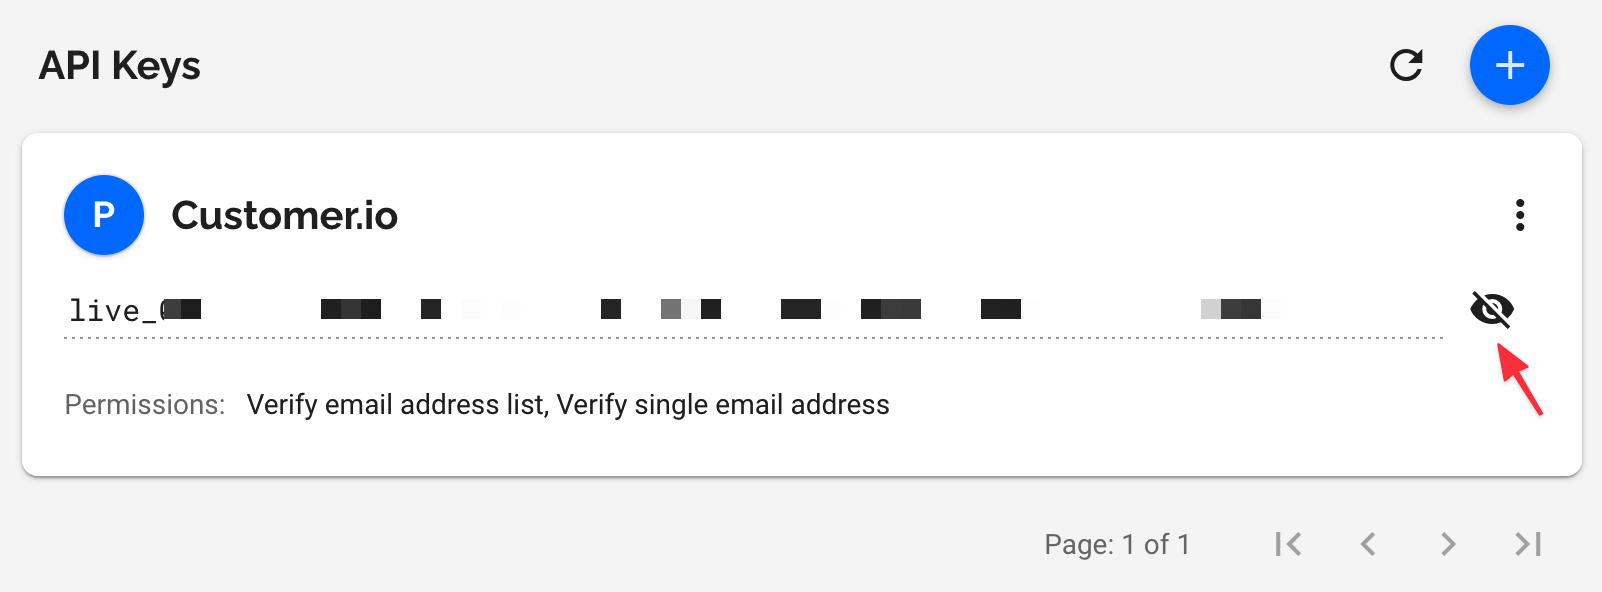
Create a Segment to use as a campaign trigger
In Customer.io, go to Segments and click on Create Segment.
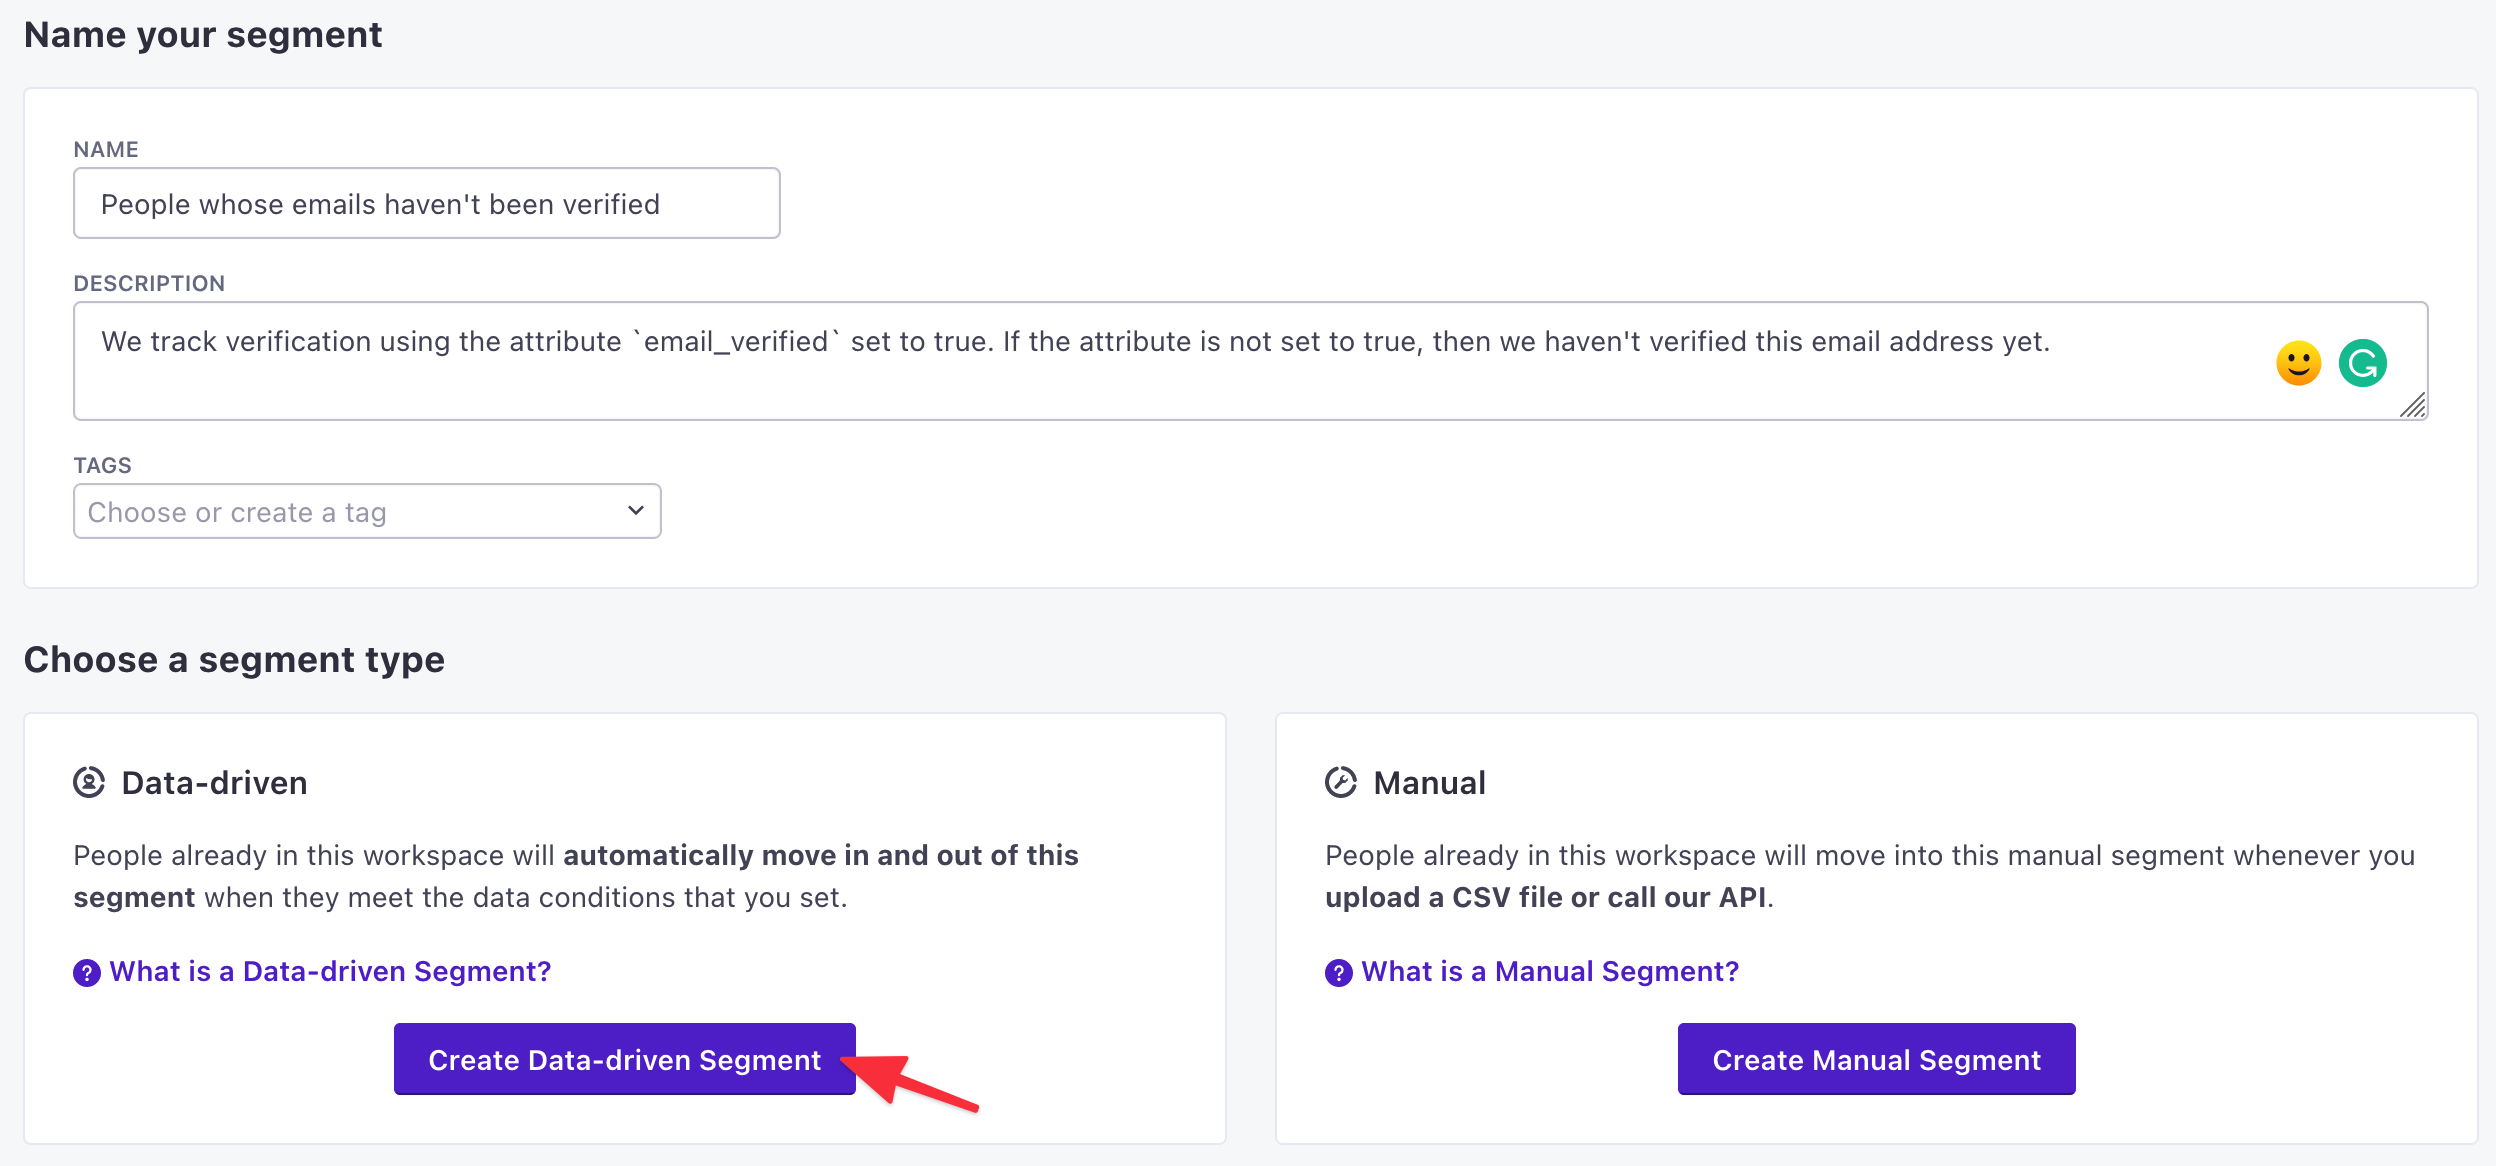
Give your new segment a Name and Description then click Create Data-Driven Segment.
Add a single condition for this segment: Attribute
email_verifiedis not equal totrue. Save the conditions.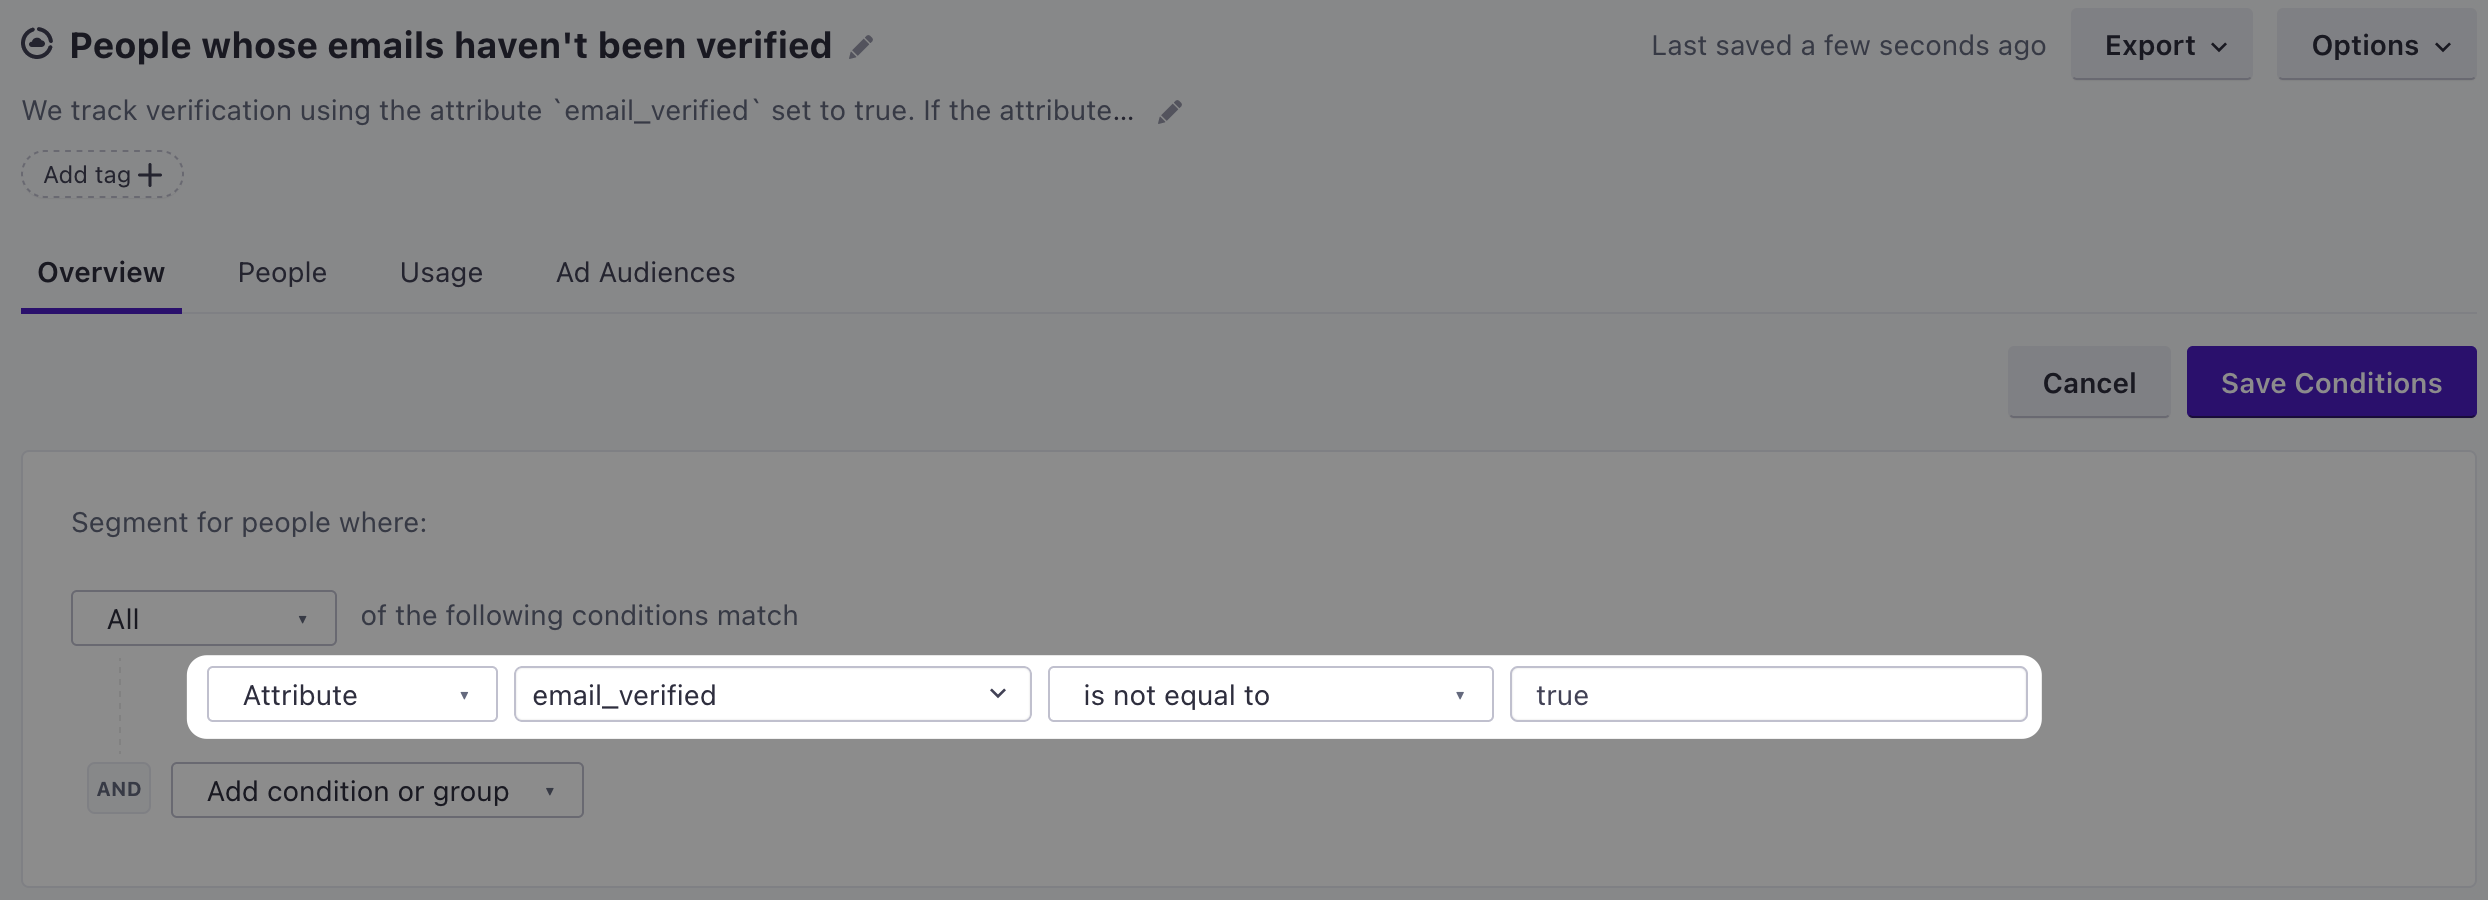
Create a Segment to use as a Campaign goal
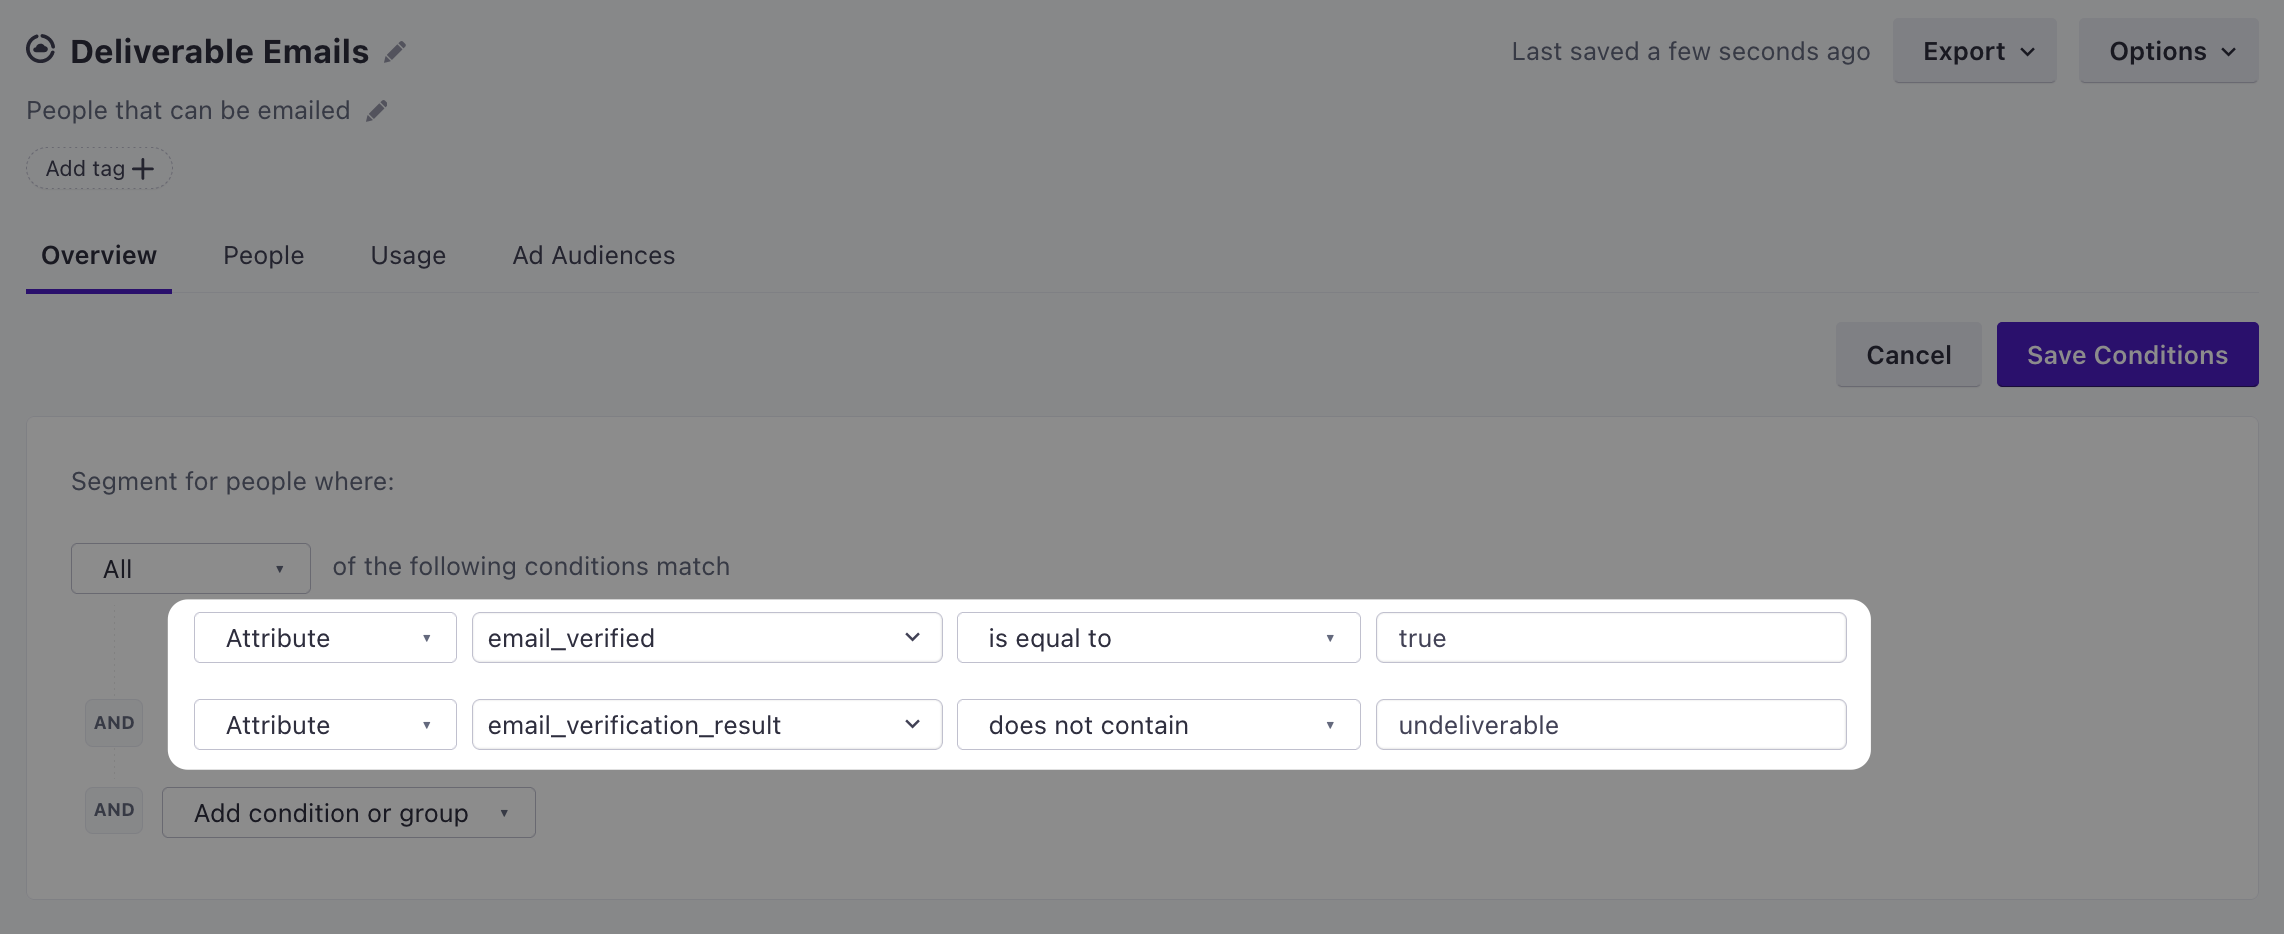
Follow the same steps that you used to create a campaign trigger create a second segment. Make sure it’s set as “Segment for people where All of the following conditions match” and add the following two conditions:
- Attribute
email_verifiedis equal totrue - Attribute
email_verification_resultdoes not containundeliverable
Create a Campaign in Customer.io
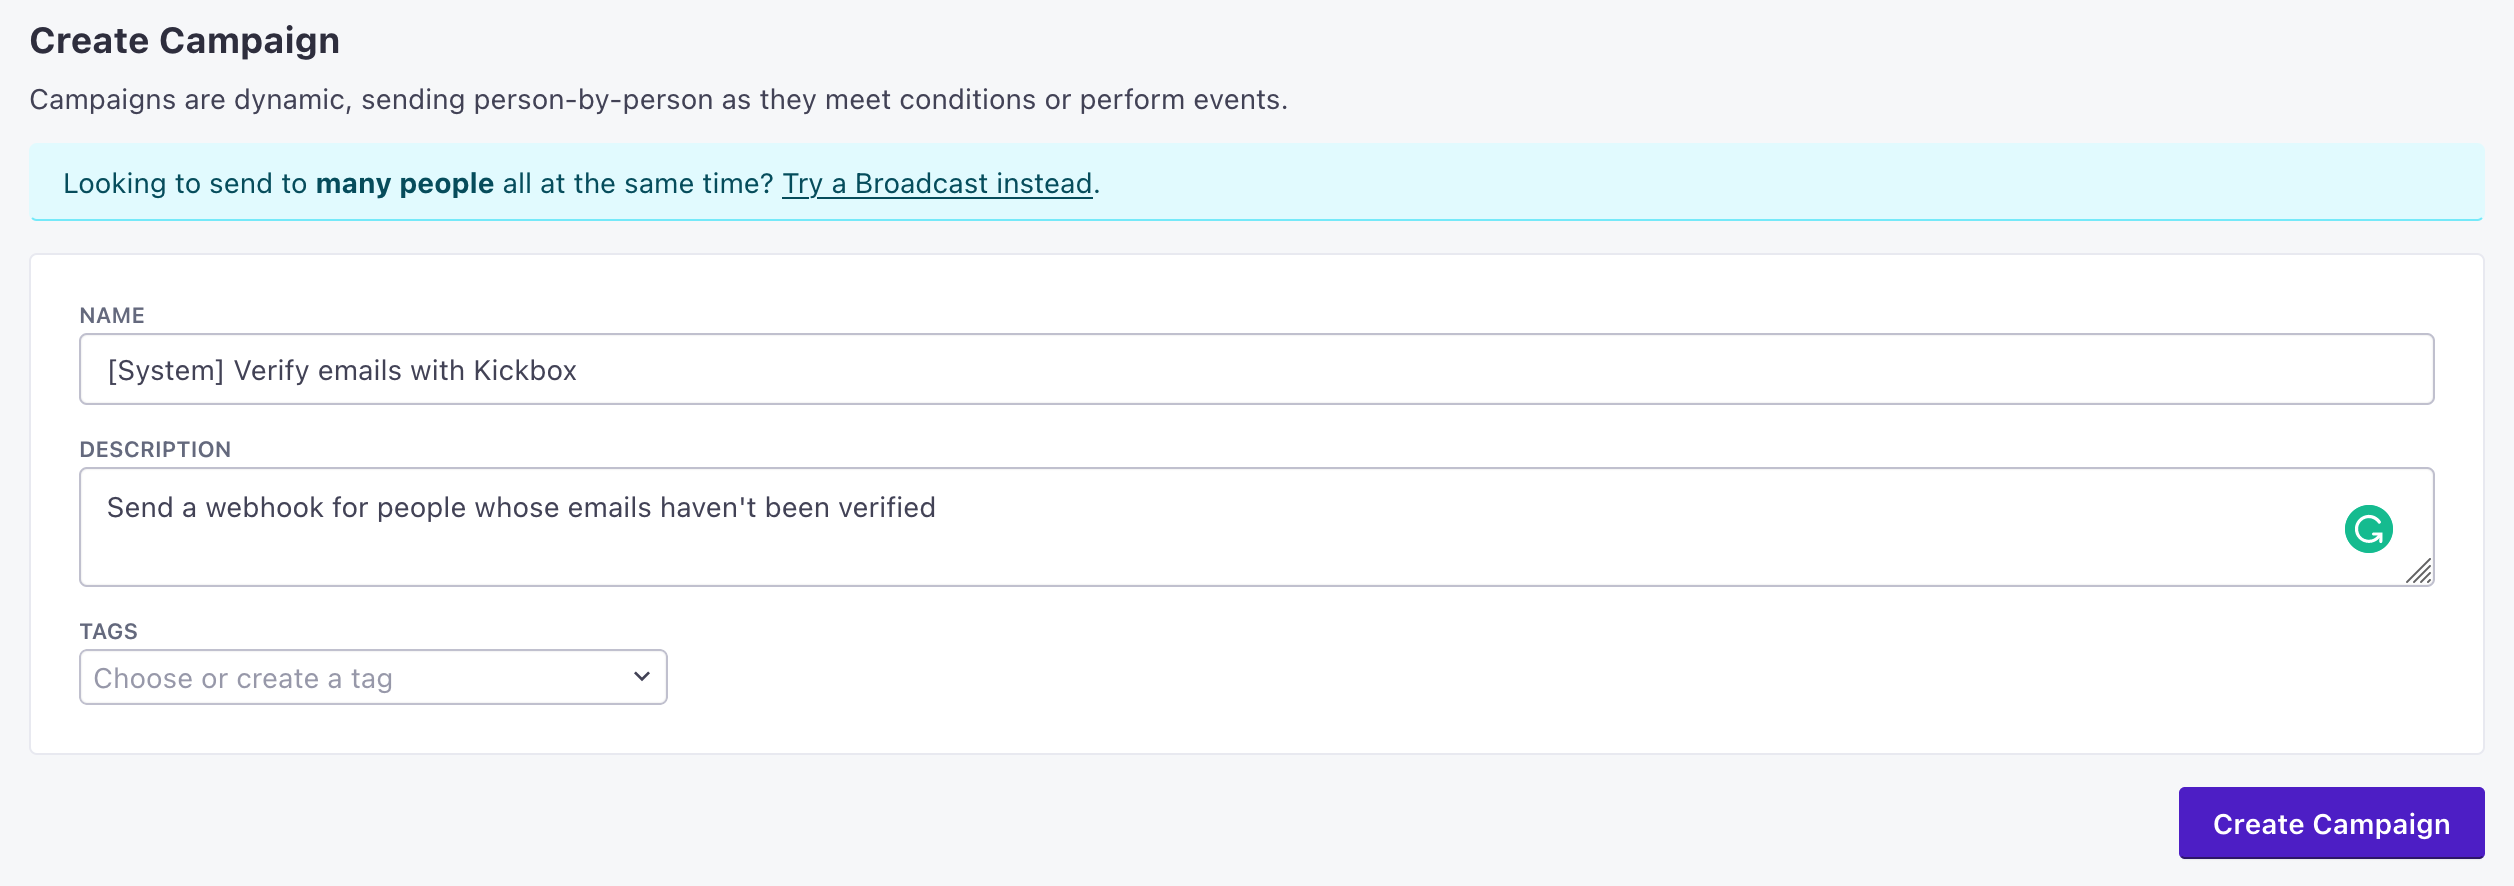
Now that we have our API key and our Segments, we can proceed with our Campaign creation. Head over to Campaigns and click on Create Campaign. Give it a discernible name and description then click Create Campaign.
1. Set up a trigger
This answers the question, What triggers this campaign? In this case, select They meet conditions (1) and define the trigger condition as people in the campaign trigger segment (2) that you created in previous steps.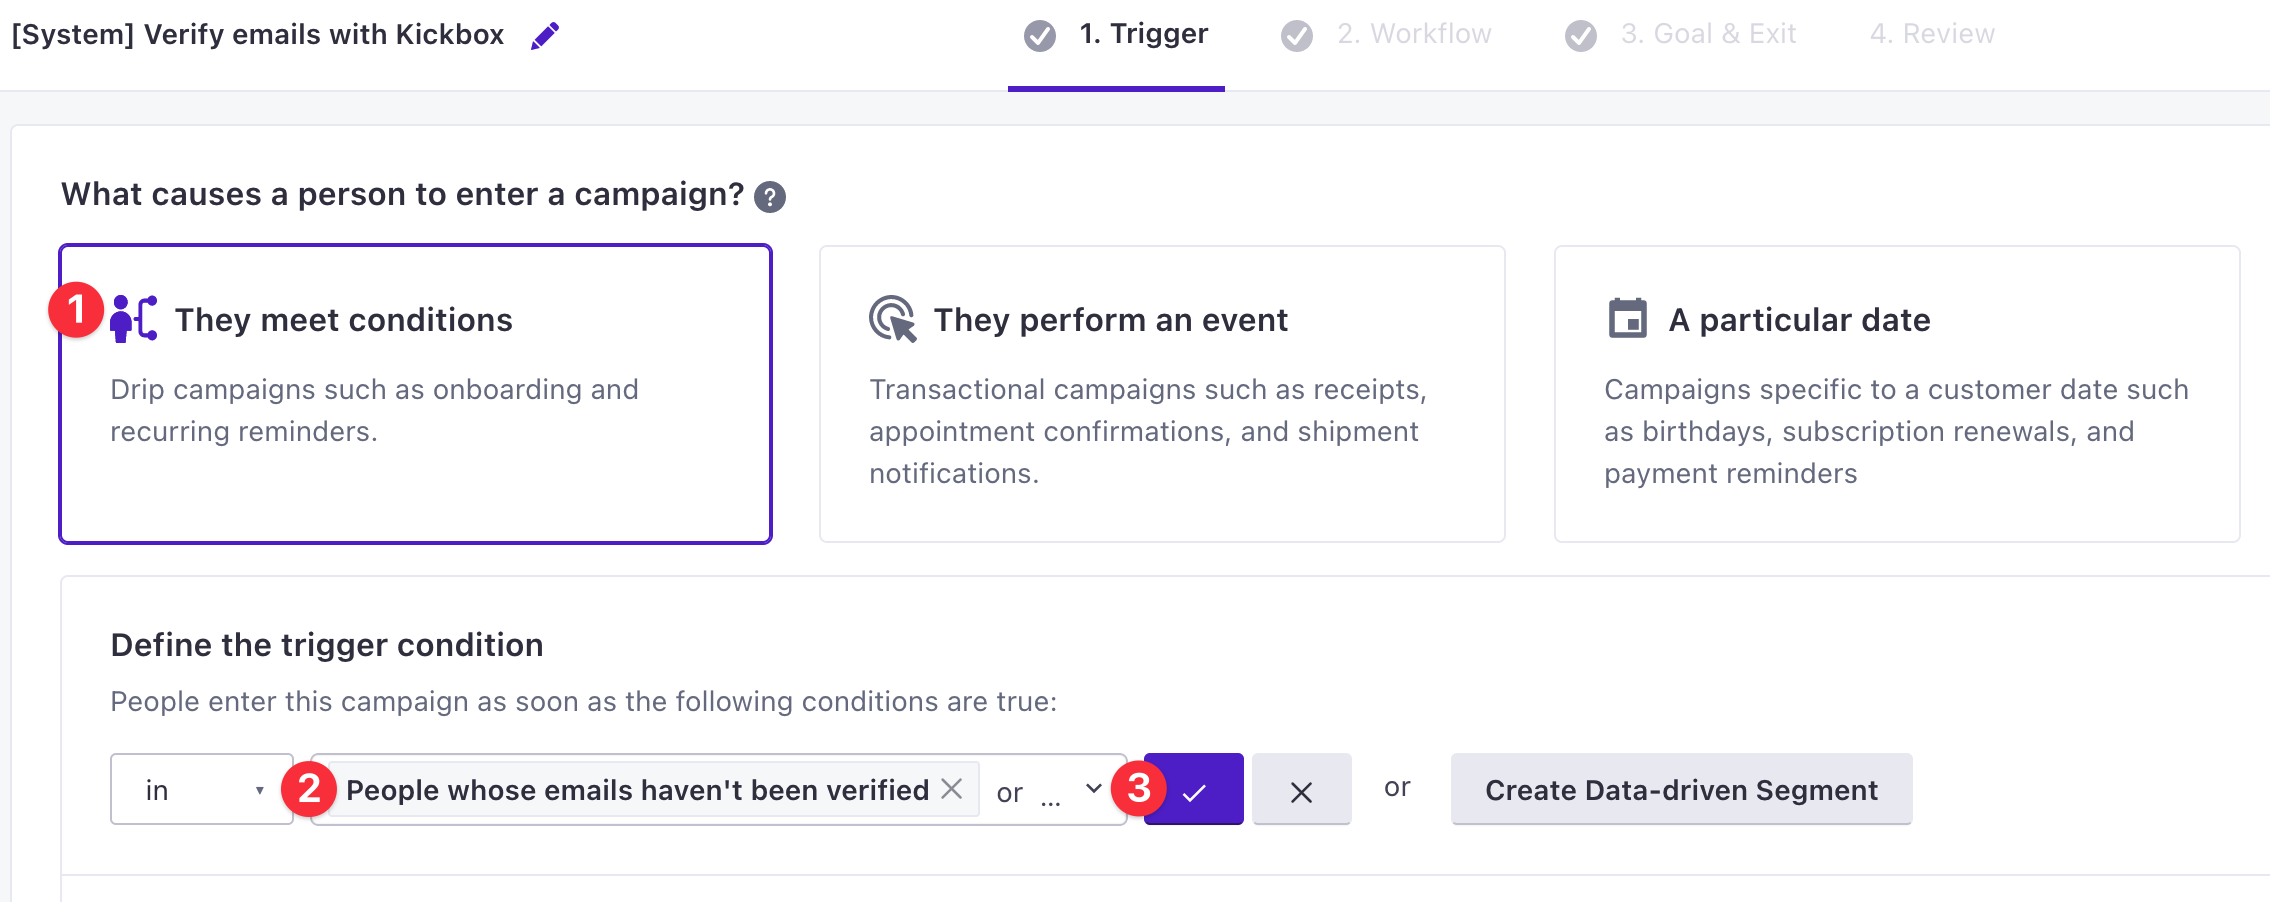
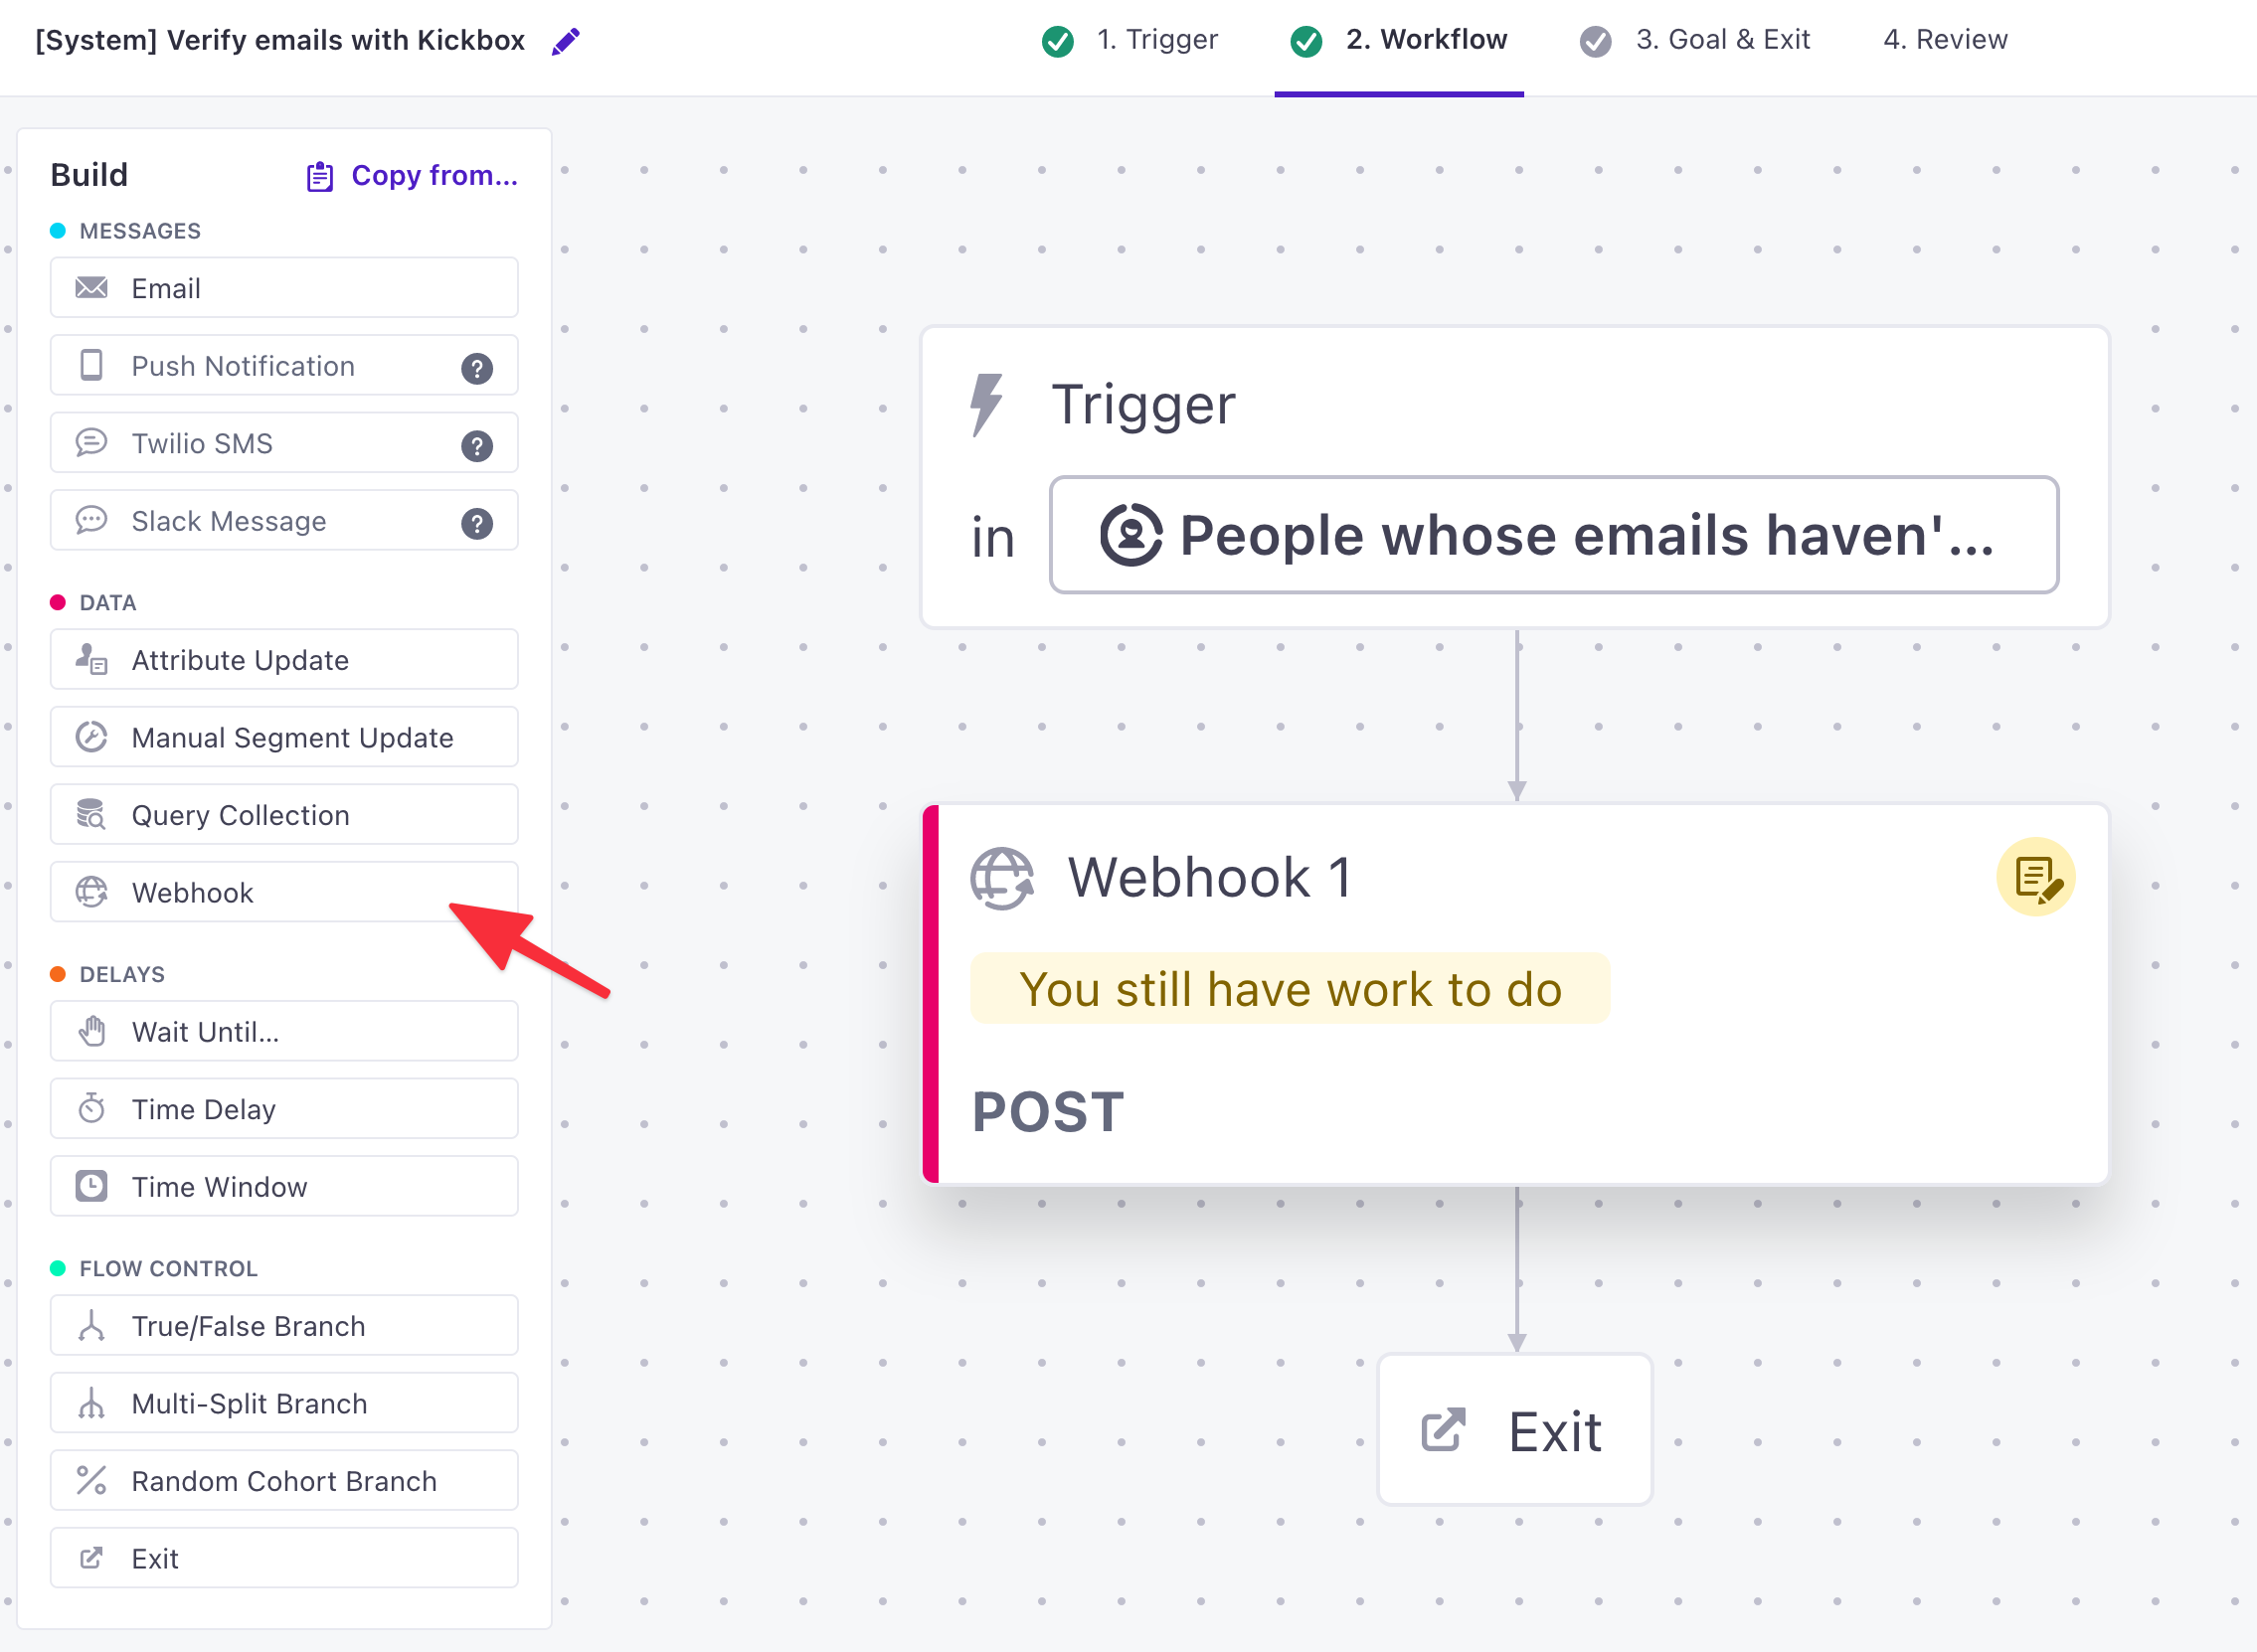
2. Set up a webhook
In the workflow, drag a Webhook action from the Build menu on the left to the Workflow canvas.
Configure a request to Kickbox’s API. You can learn more about their API here.
- Select the
GETmethod (1) - Add the API URL:
https://api.kickbox.com/v2/verify?email={{customer.email | url_encode}}&apikey=[your_api_key](2)Use the
url_encodefilterWe use this Liquid filter (3) to convert URL-unsafe characters in a string into percent-encoded characters.
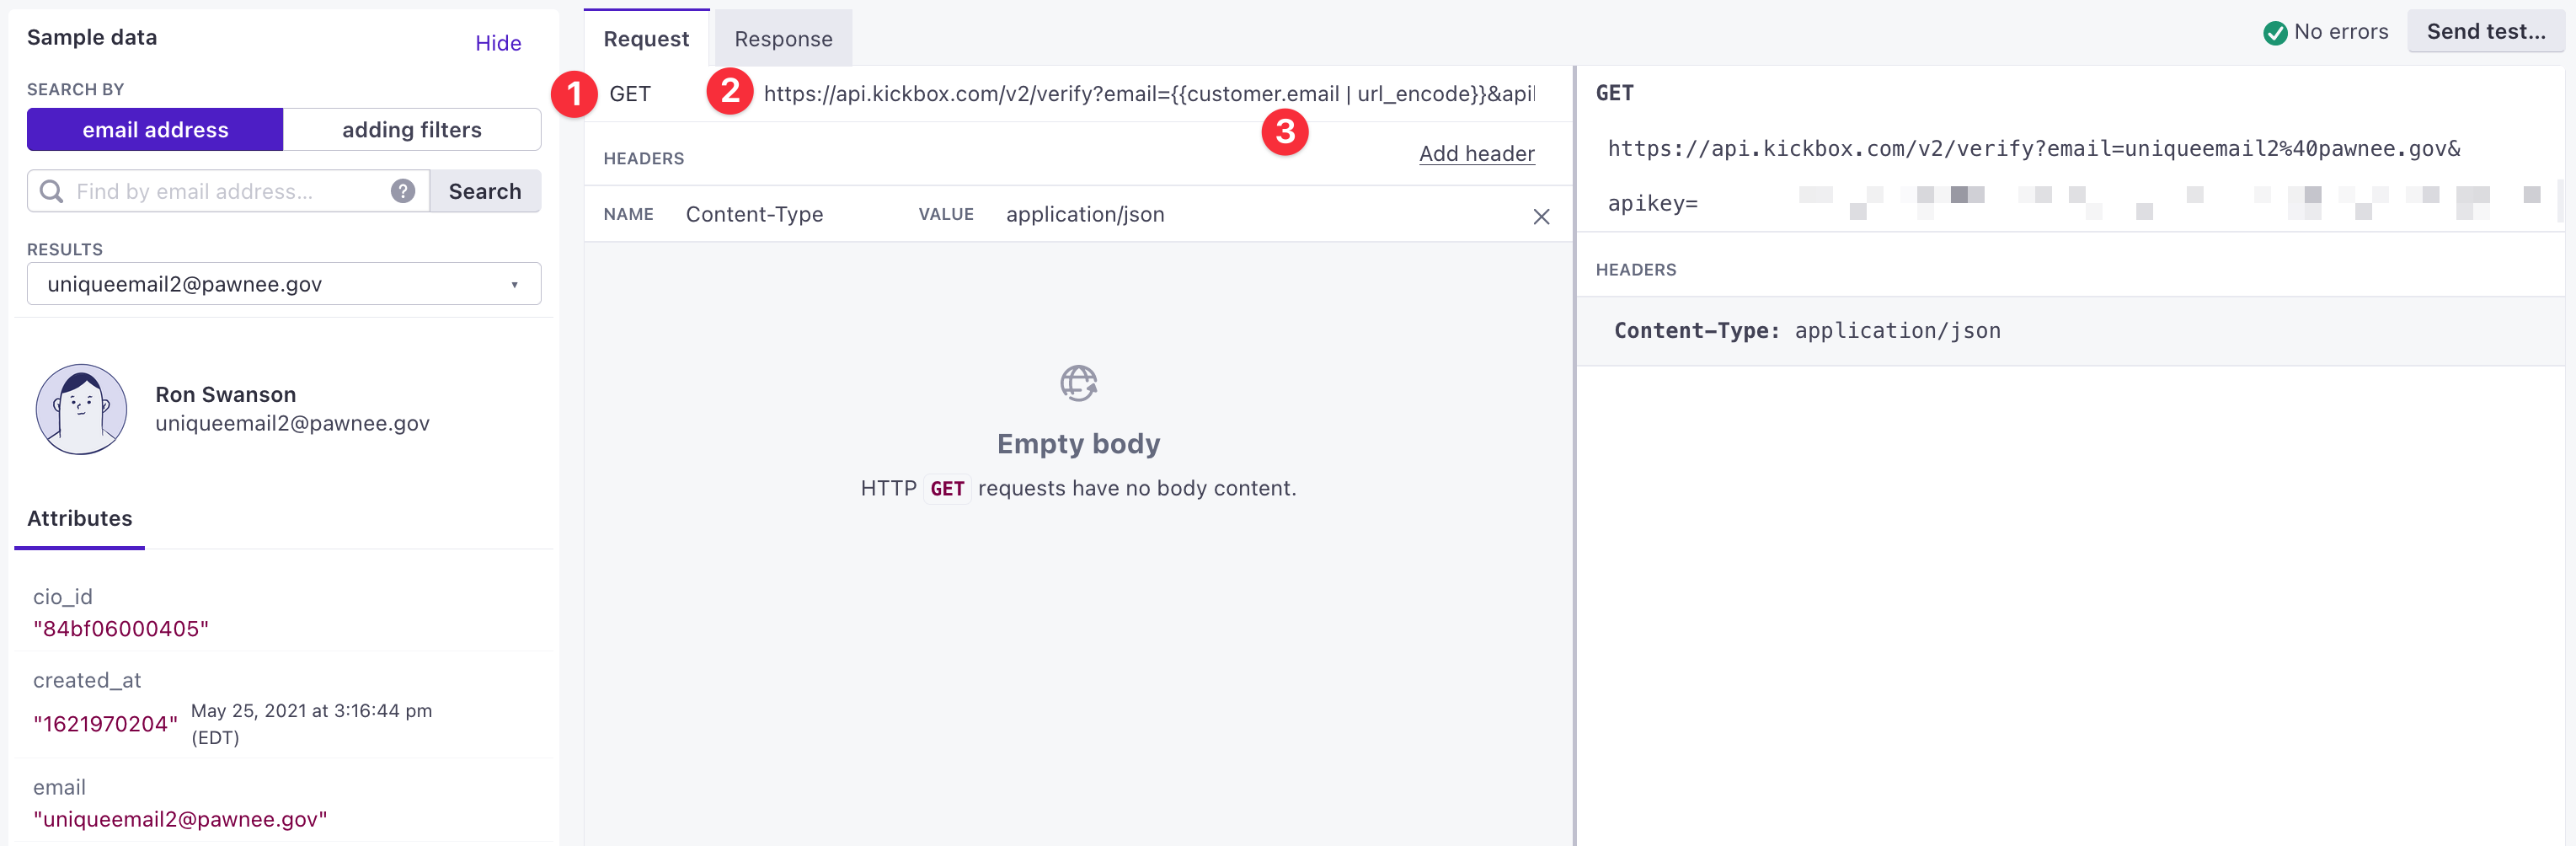
- Select the
Click Send test… (1) to send a test request to the API. If it’s successful, you’ll see a
200 OKstatus and the response will have a JSON object.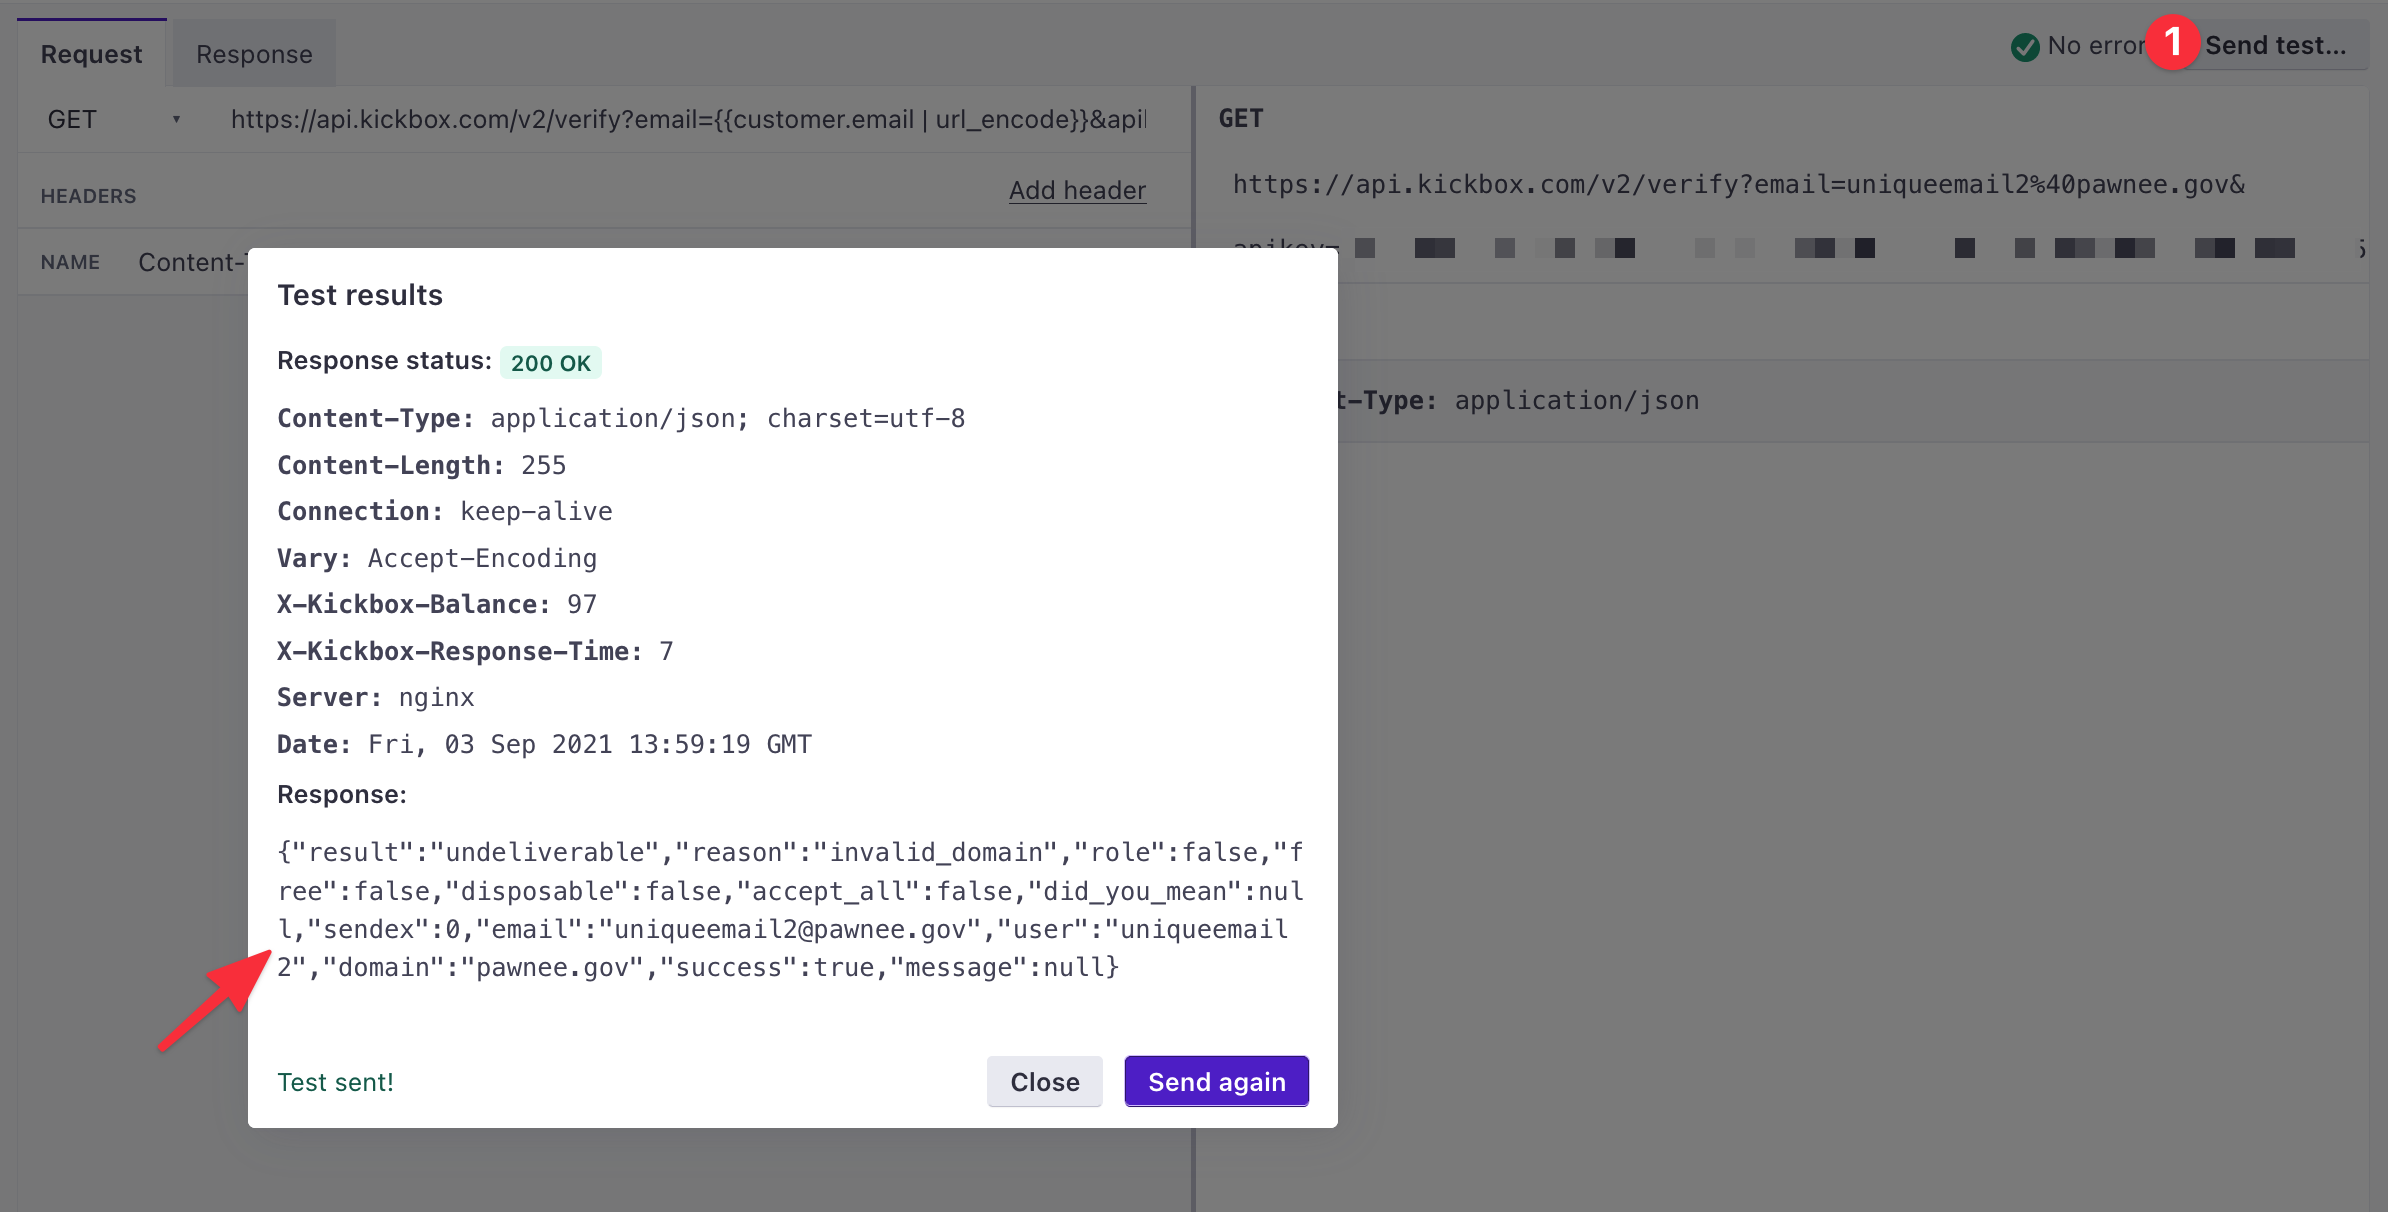
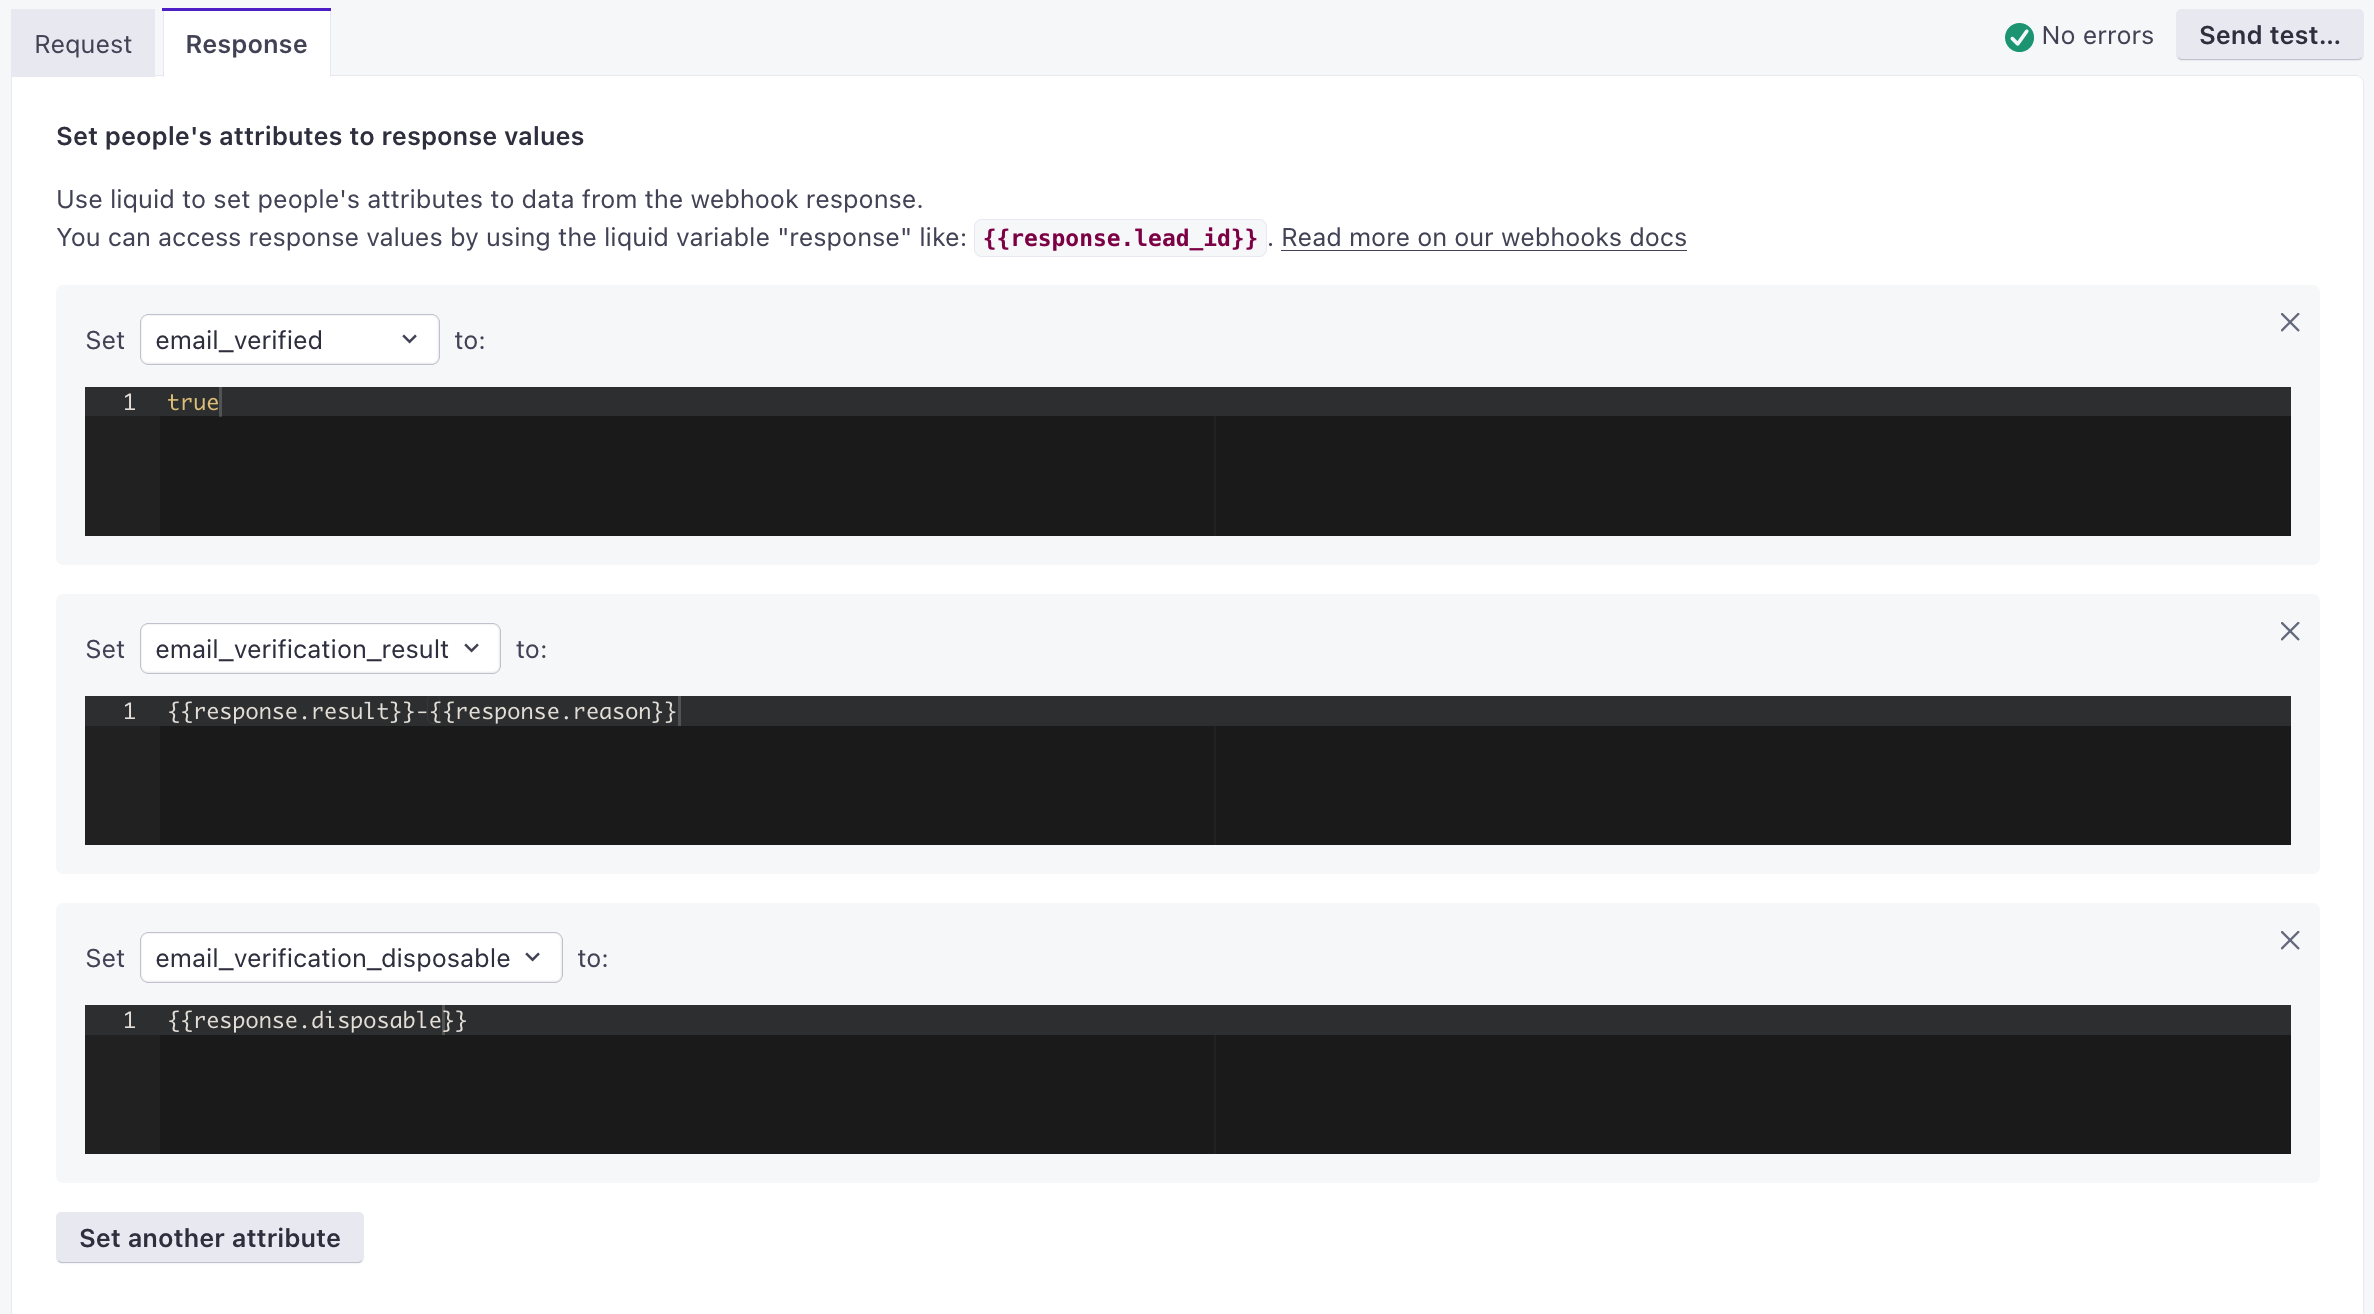
Now that we have a functional Webhook, we can easily save elements from the Response object as attributes for the person. Start by clicking on the Response tab (1) and then on Set up an attribute (2).

Add one or more attributes. In our example, we’ll add 3 attributes:
email_verifiedthat we’ll set totrue. This lets us know which people had their email verifiedemail_verification_resultthat we’ll set to{{response.result}}-{{response.reason}}. This combines the result of the verification request (which can bedeliverable,risky,undeliverable, orunknown) and the reason behind this result. Learn more about these values.email_verification_disposablethat we’ll set to{{response.disposable}}. This can either betrueorfalse. If true, the email address is disposable and shouldn’t be emailed.
You can leverage additional data from the request’s response
We’re limiting to these 3 attributes in our example but you could leverage additional data from the request’s response such as if the email address is from a free service, associated with a role, or if it accepts all incoming messages among other things.
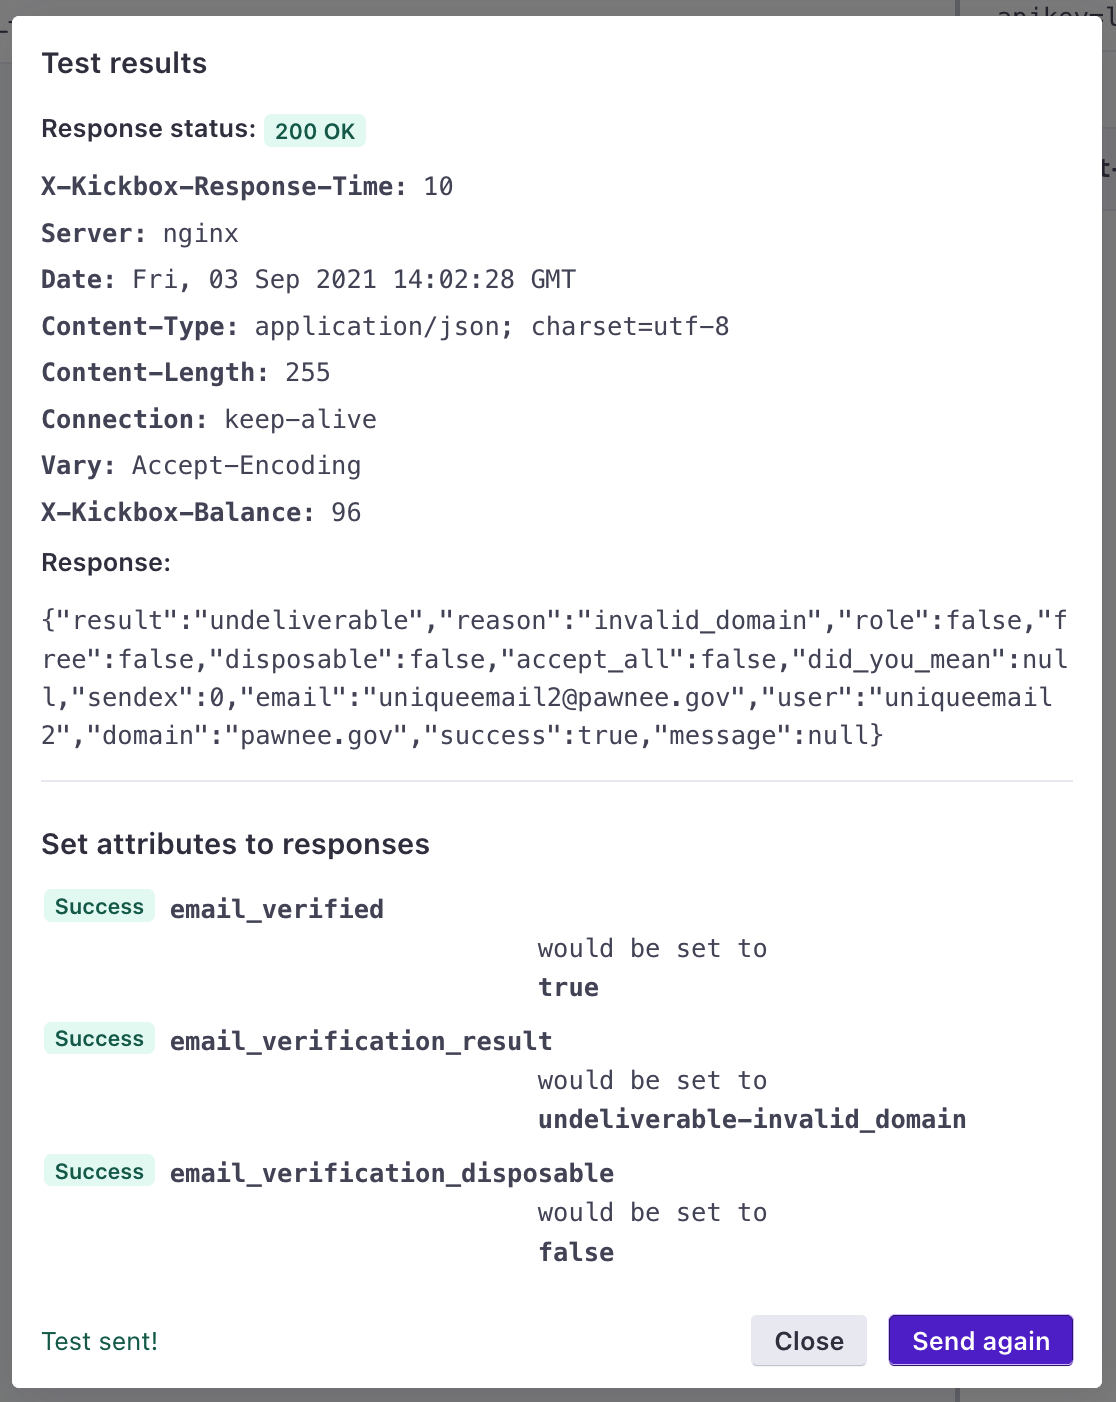
Now, we can test again and we’ll have a preview of the attributes that will be created.
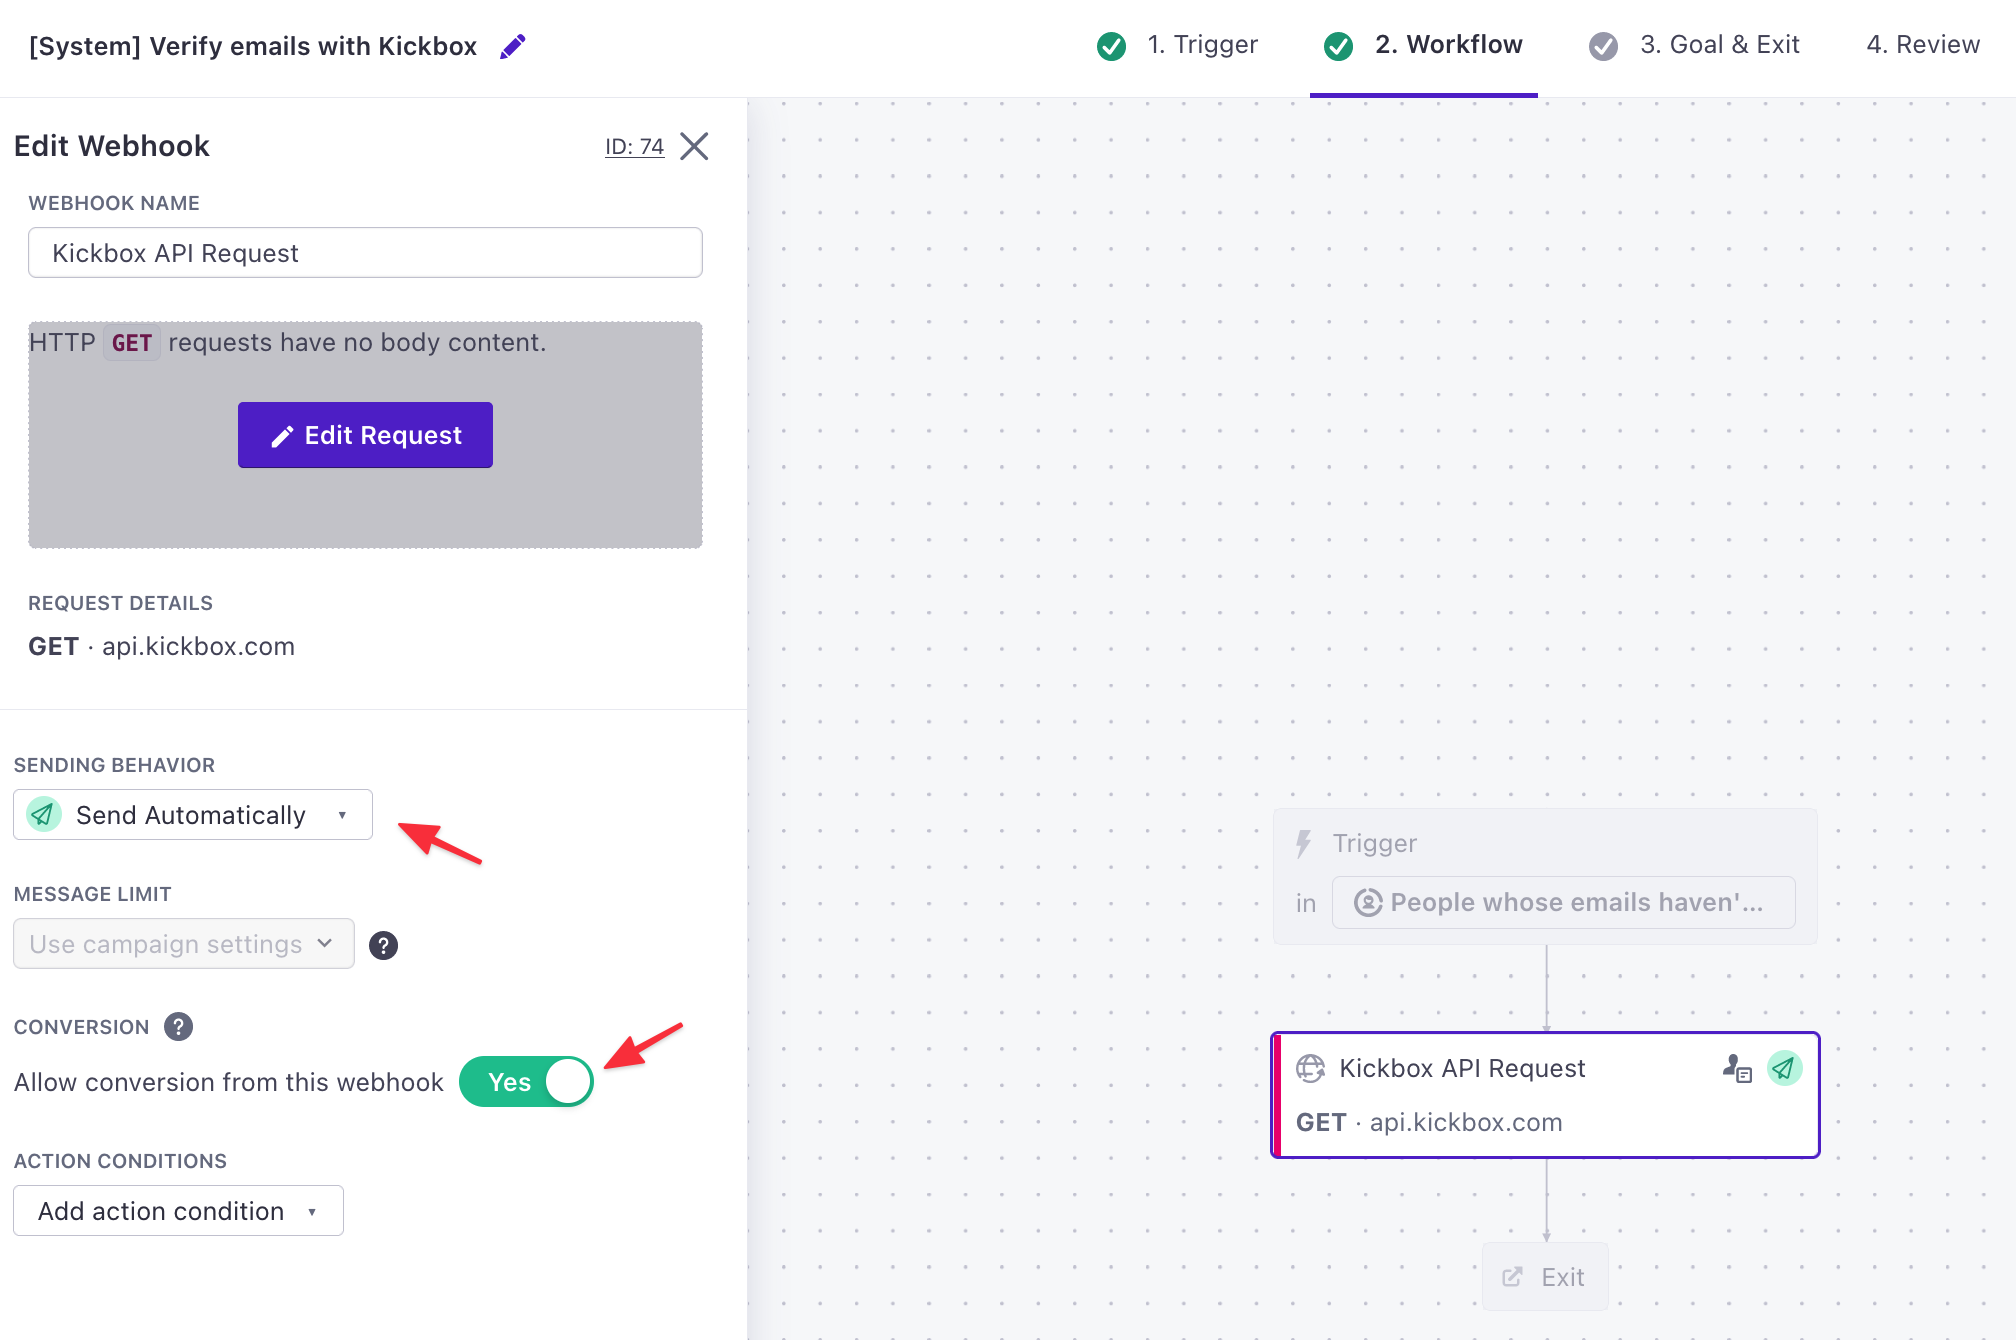
3. Save and update actions settings
Getting back to the Workflow tab, don’t forget to change the sending behavior to “Send Automatically” and toggle the “Allow conversion from this webhook” option.
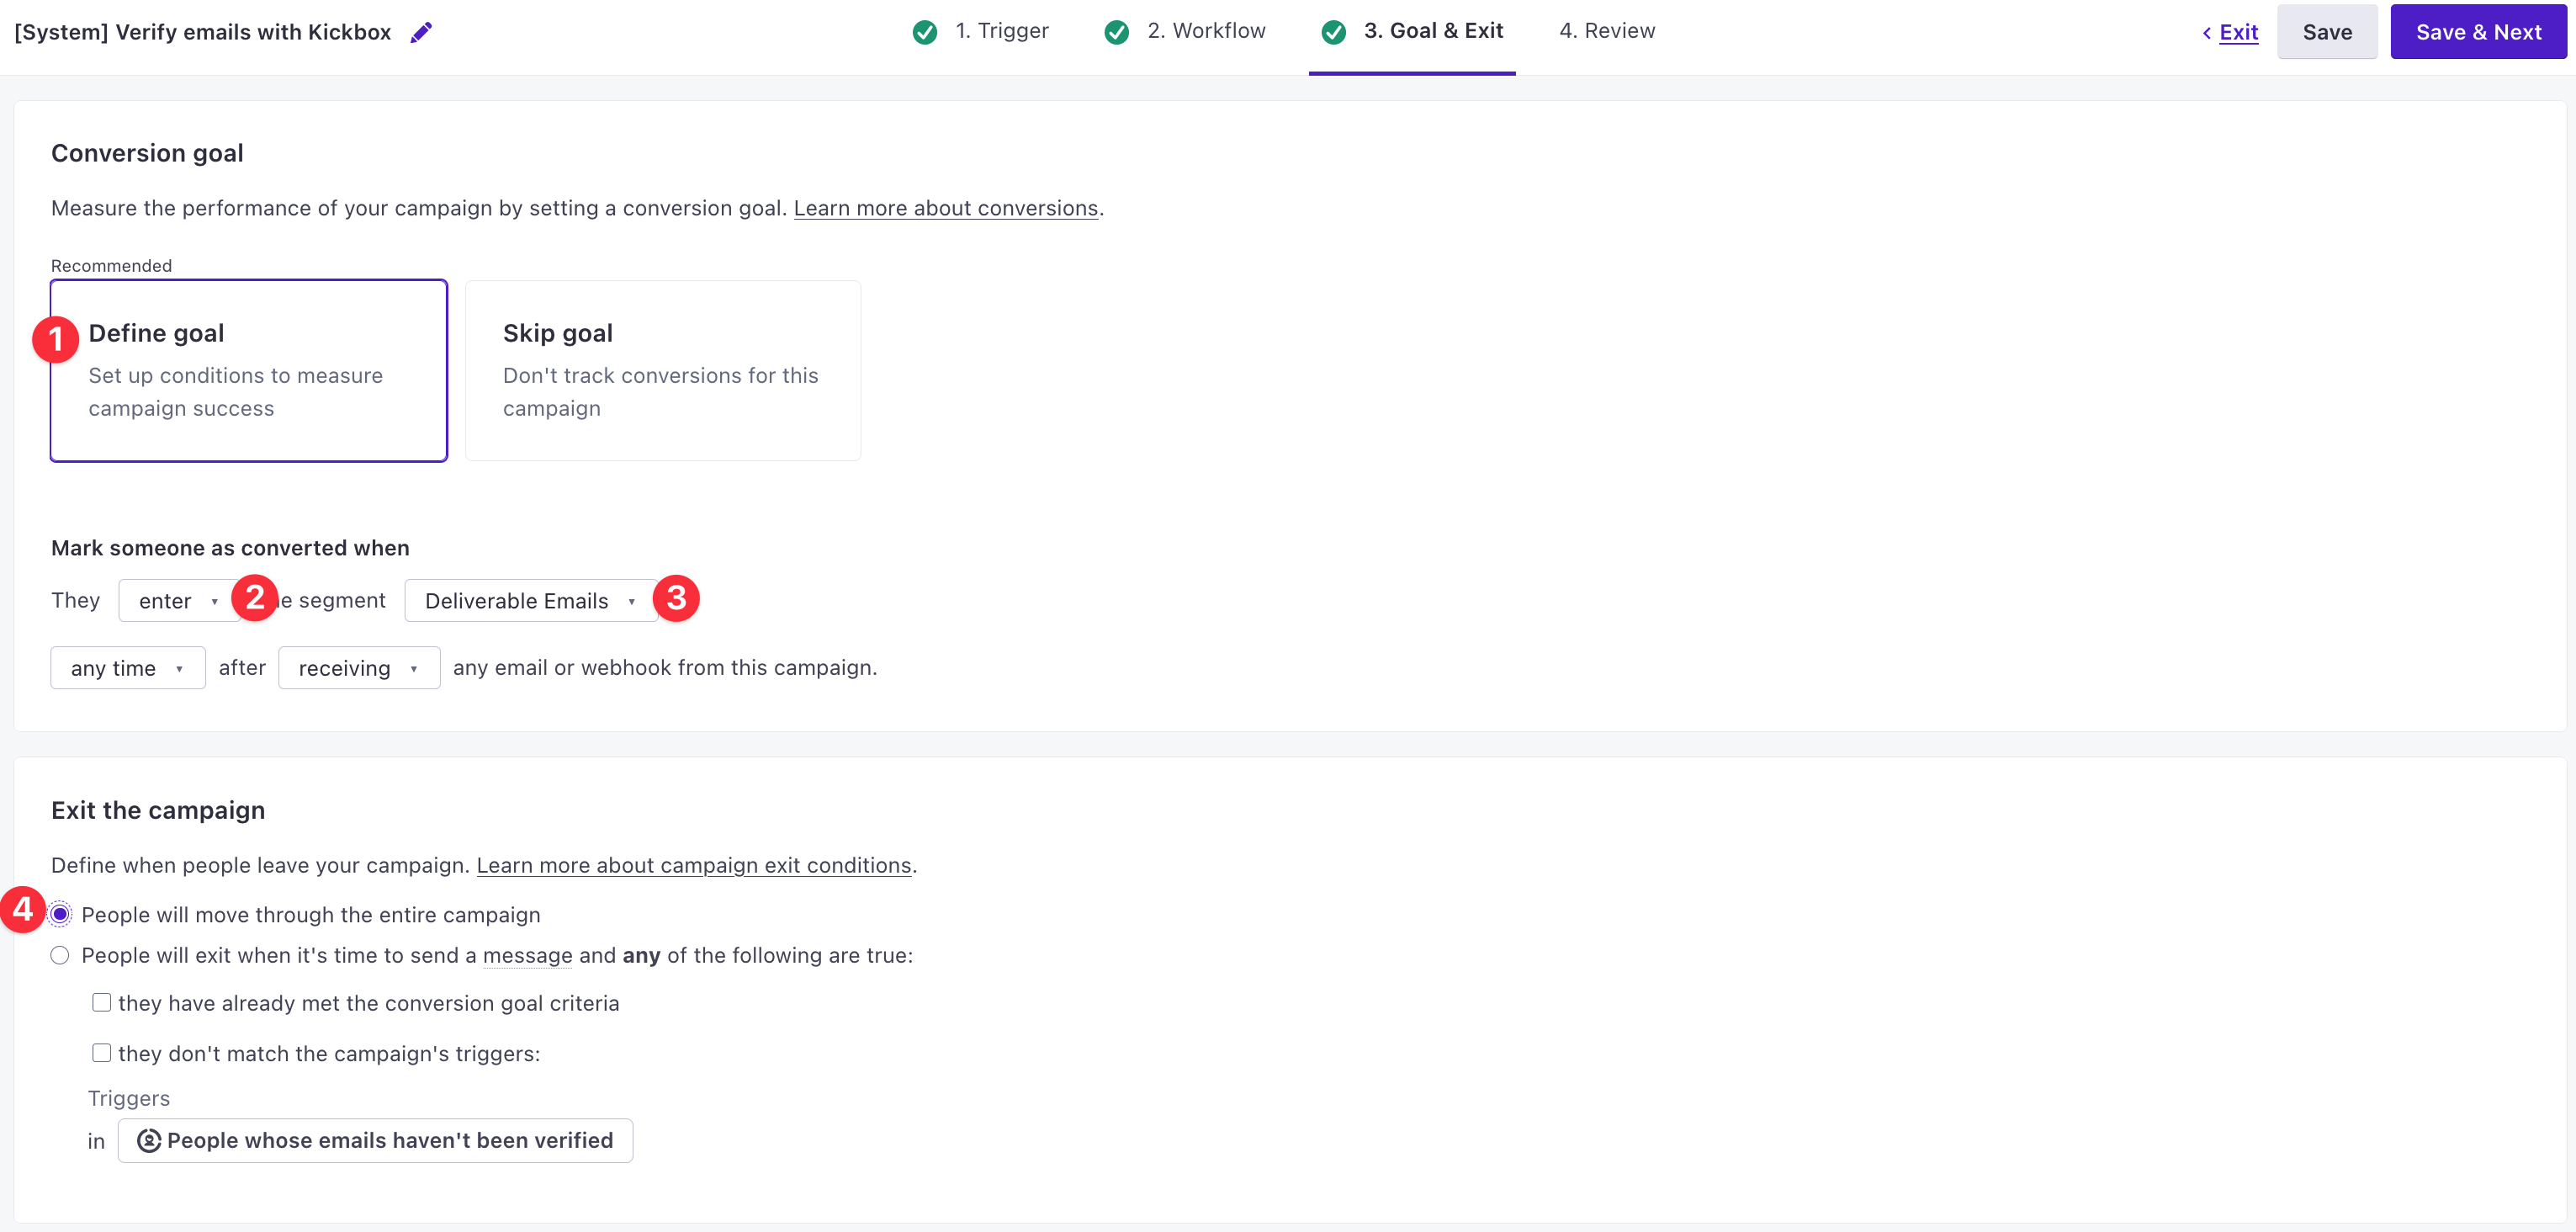
4. Define the Goal
Last but not least, we can now define a Conversion goal (1) if people enter (2) the second Segment we created earlier (3). And we’ll also set the Exit condition as “People will move through the entire campaign” (4).
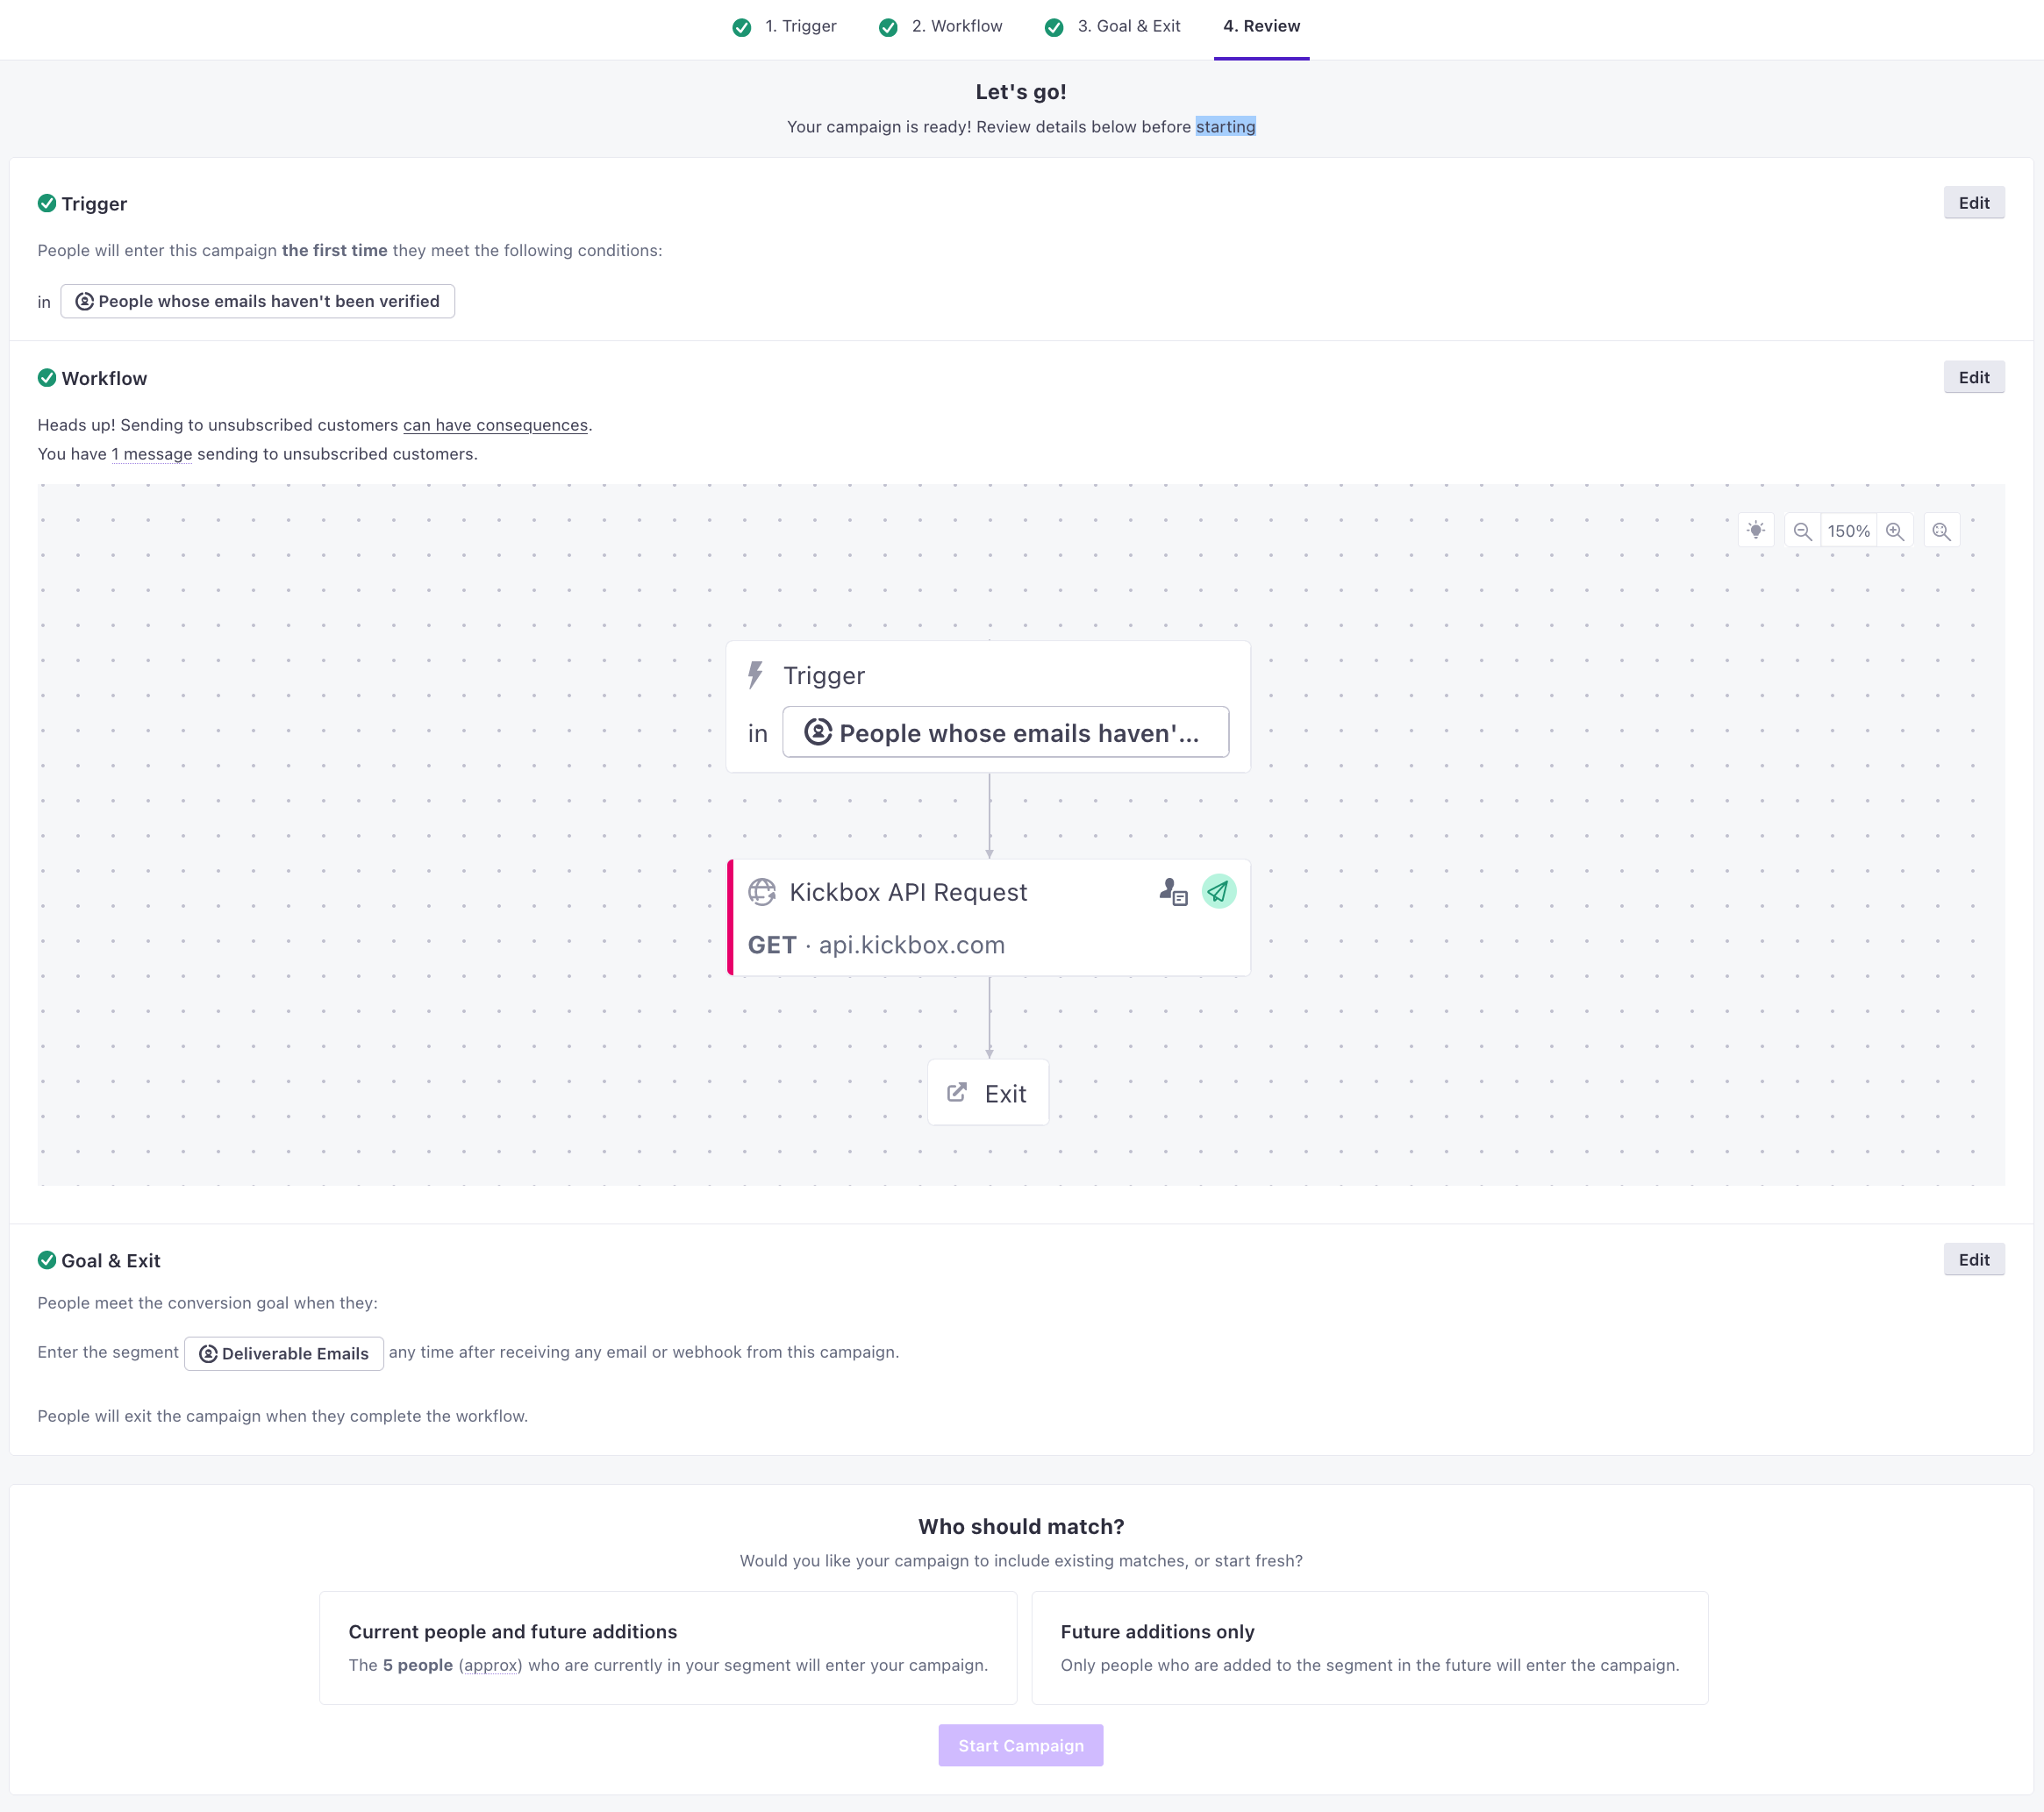
5. Review and start your campaign
You can do a final review of the campaign before you start it.
- If you’d like to only verify new people, select the Future additions only option.
- If you’d like to verify everyone, select the Current people and future addtions option.
Wrap Up
Now you can prevent your workspace from sending emails to undeliverable email addresses by proactively and automatically verifying them.

