Use your SendGrid Account
You can use your SendGrid account to send email through Customer.io with no loss in functionality. To take advantage of SendGrid, you need to do two things:
Point SendGrid’s event API at Customer.io
Now you’ll need to adjust some settings to make sure your SendGrid account (or subuser) sends Customer.io the right data.
Go to Sendgrid.
If you have a subuser for sends through Customer.io, click your account name at the top left, click Switch User, and select the subuser you created for Customer.io. If you want to create a subuser specifically for Customer.io sends, see the section below.
Go to Settings > Mail Settings and turn on Event Notification.
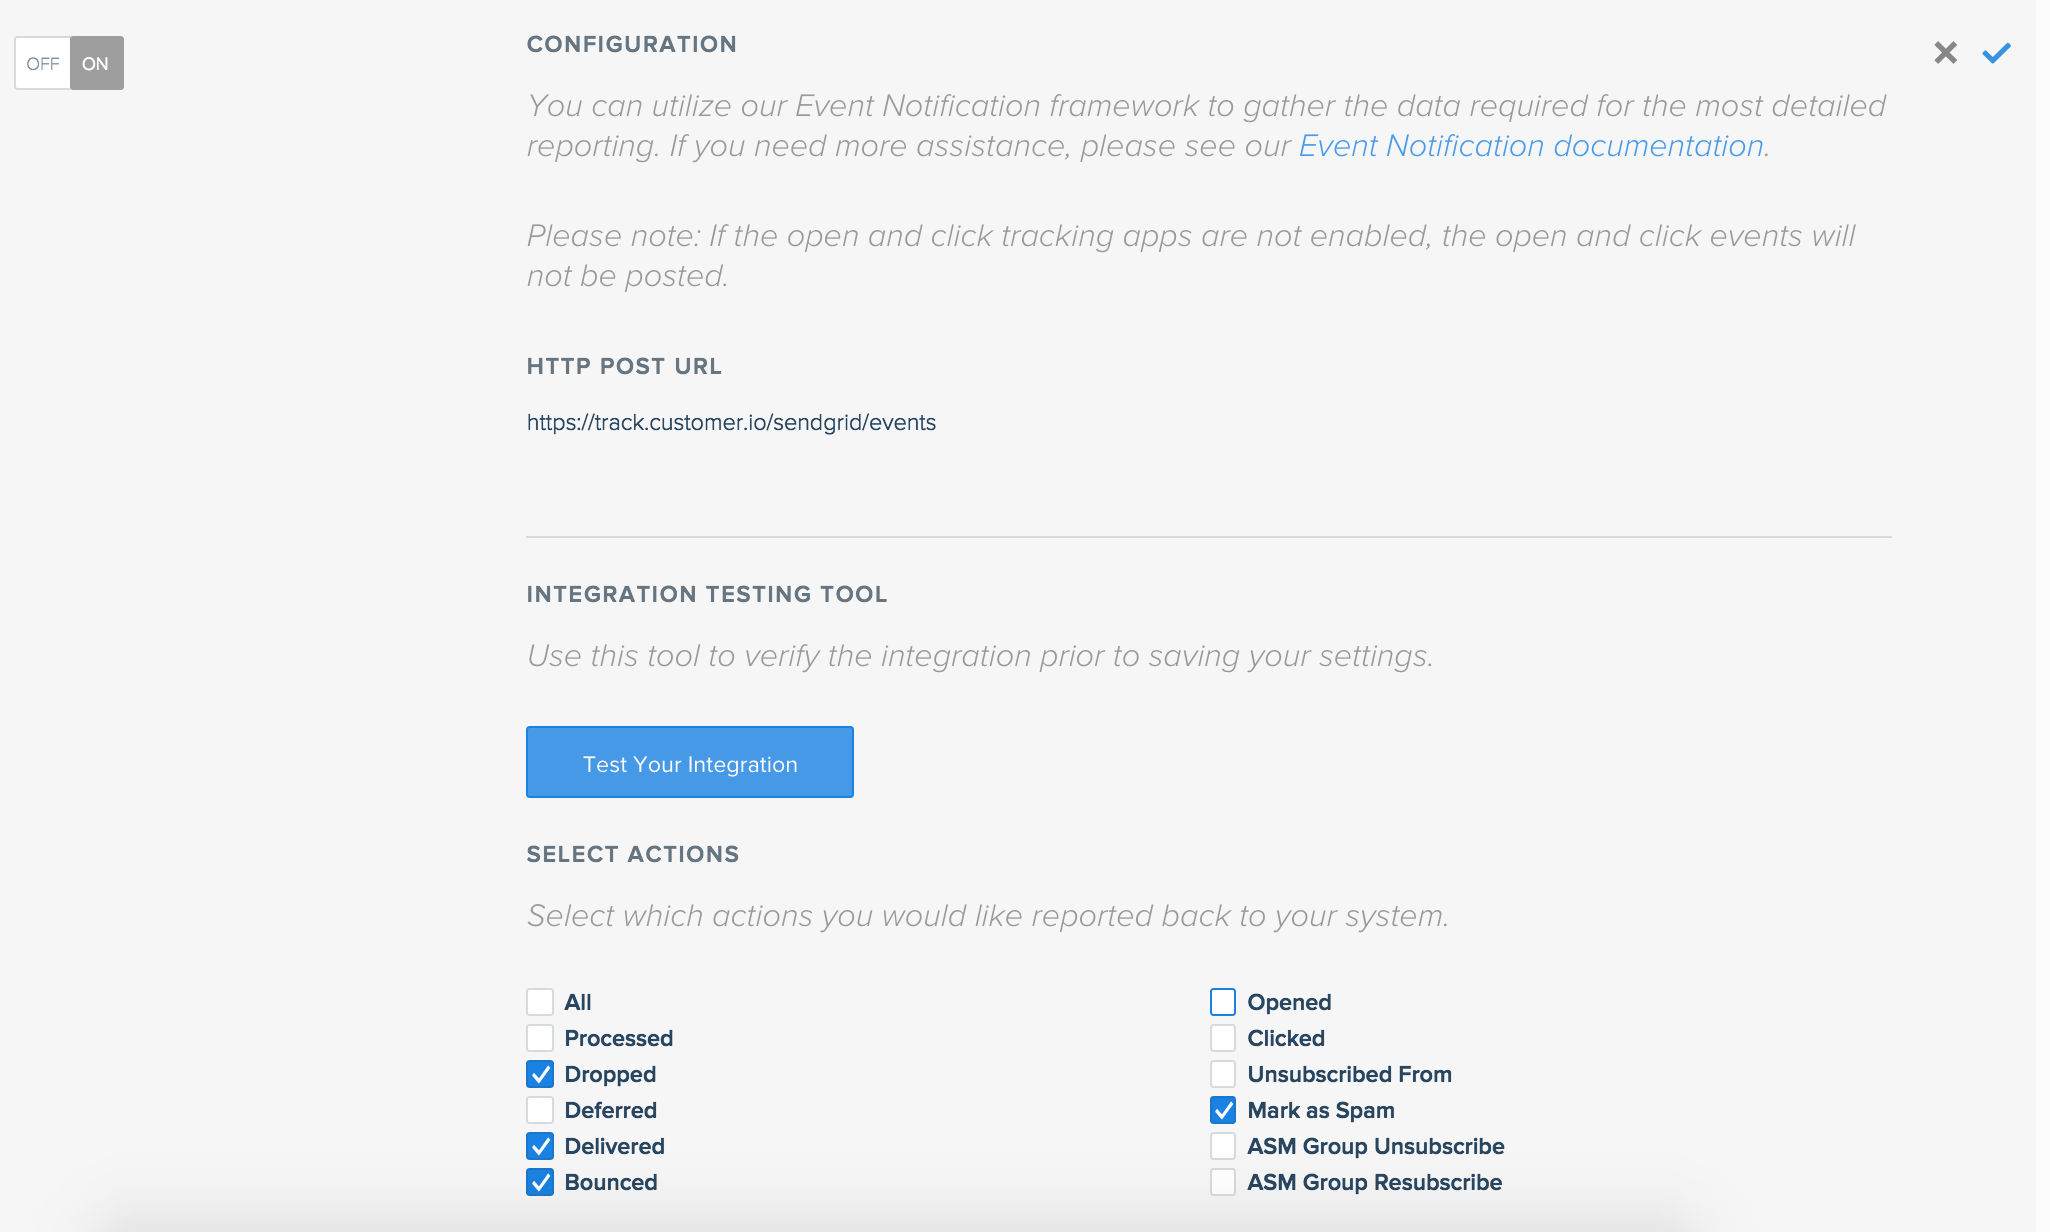
Enter Customer.io URL corresponding to your account region in the HTTP Post URL field.
- US:
https://track.customer.io/sendgrid/events - EU:
https://track-eu.customer.io/sendgrid/events
- US:
Select the Dropped, Delivered, Bounced, and Mark as Spam events. Do not select Opened and Clicked; they are tracked on the Customer.io side.
(Optional) Go to Settings > Sender Authentication and clicking Authenticate Your Domain to set up Domain Keys (DKIM).
(Optional) Create a subuser
If you send some (but not all) of the mail in your SendGrid account through Customer.io, you’ll want to create a subuser first. With a subuser, you can track all your Customer.io email activity without blending in data from your other SendGrid activity and use separate IPs for separates services.
Not all SendGrid plans support the ability to create subusers, so check your plan before you try to create one.
If your plan offers subusers, you can find the option to create new subusers on the Settings > Subuser Management page. A SendGrid subuser has a username, email address and password, letting you (or someone on your team) log in to SendGrid as that subuser. You also need an API key associated with this subuser to add SendGrid to Customer.io in later steps.
If you don’t set up a subuser and use your primary SendGrid account for Customer.io, all your email sent via SendGrid will show up under one account.
Configure custom SMTP settings
Before you begin, you need your SendGrid SMTP credentials. You’ll find them under Settings; if you have a subuser, you’ll find them under Settings > Subuser Management. This integration uses port 587. If you need to use a different port, you should use a custom SMTP integration.
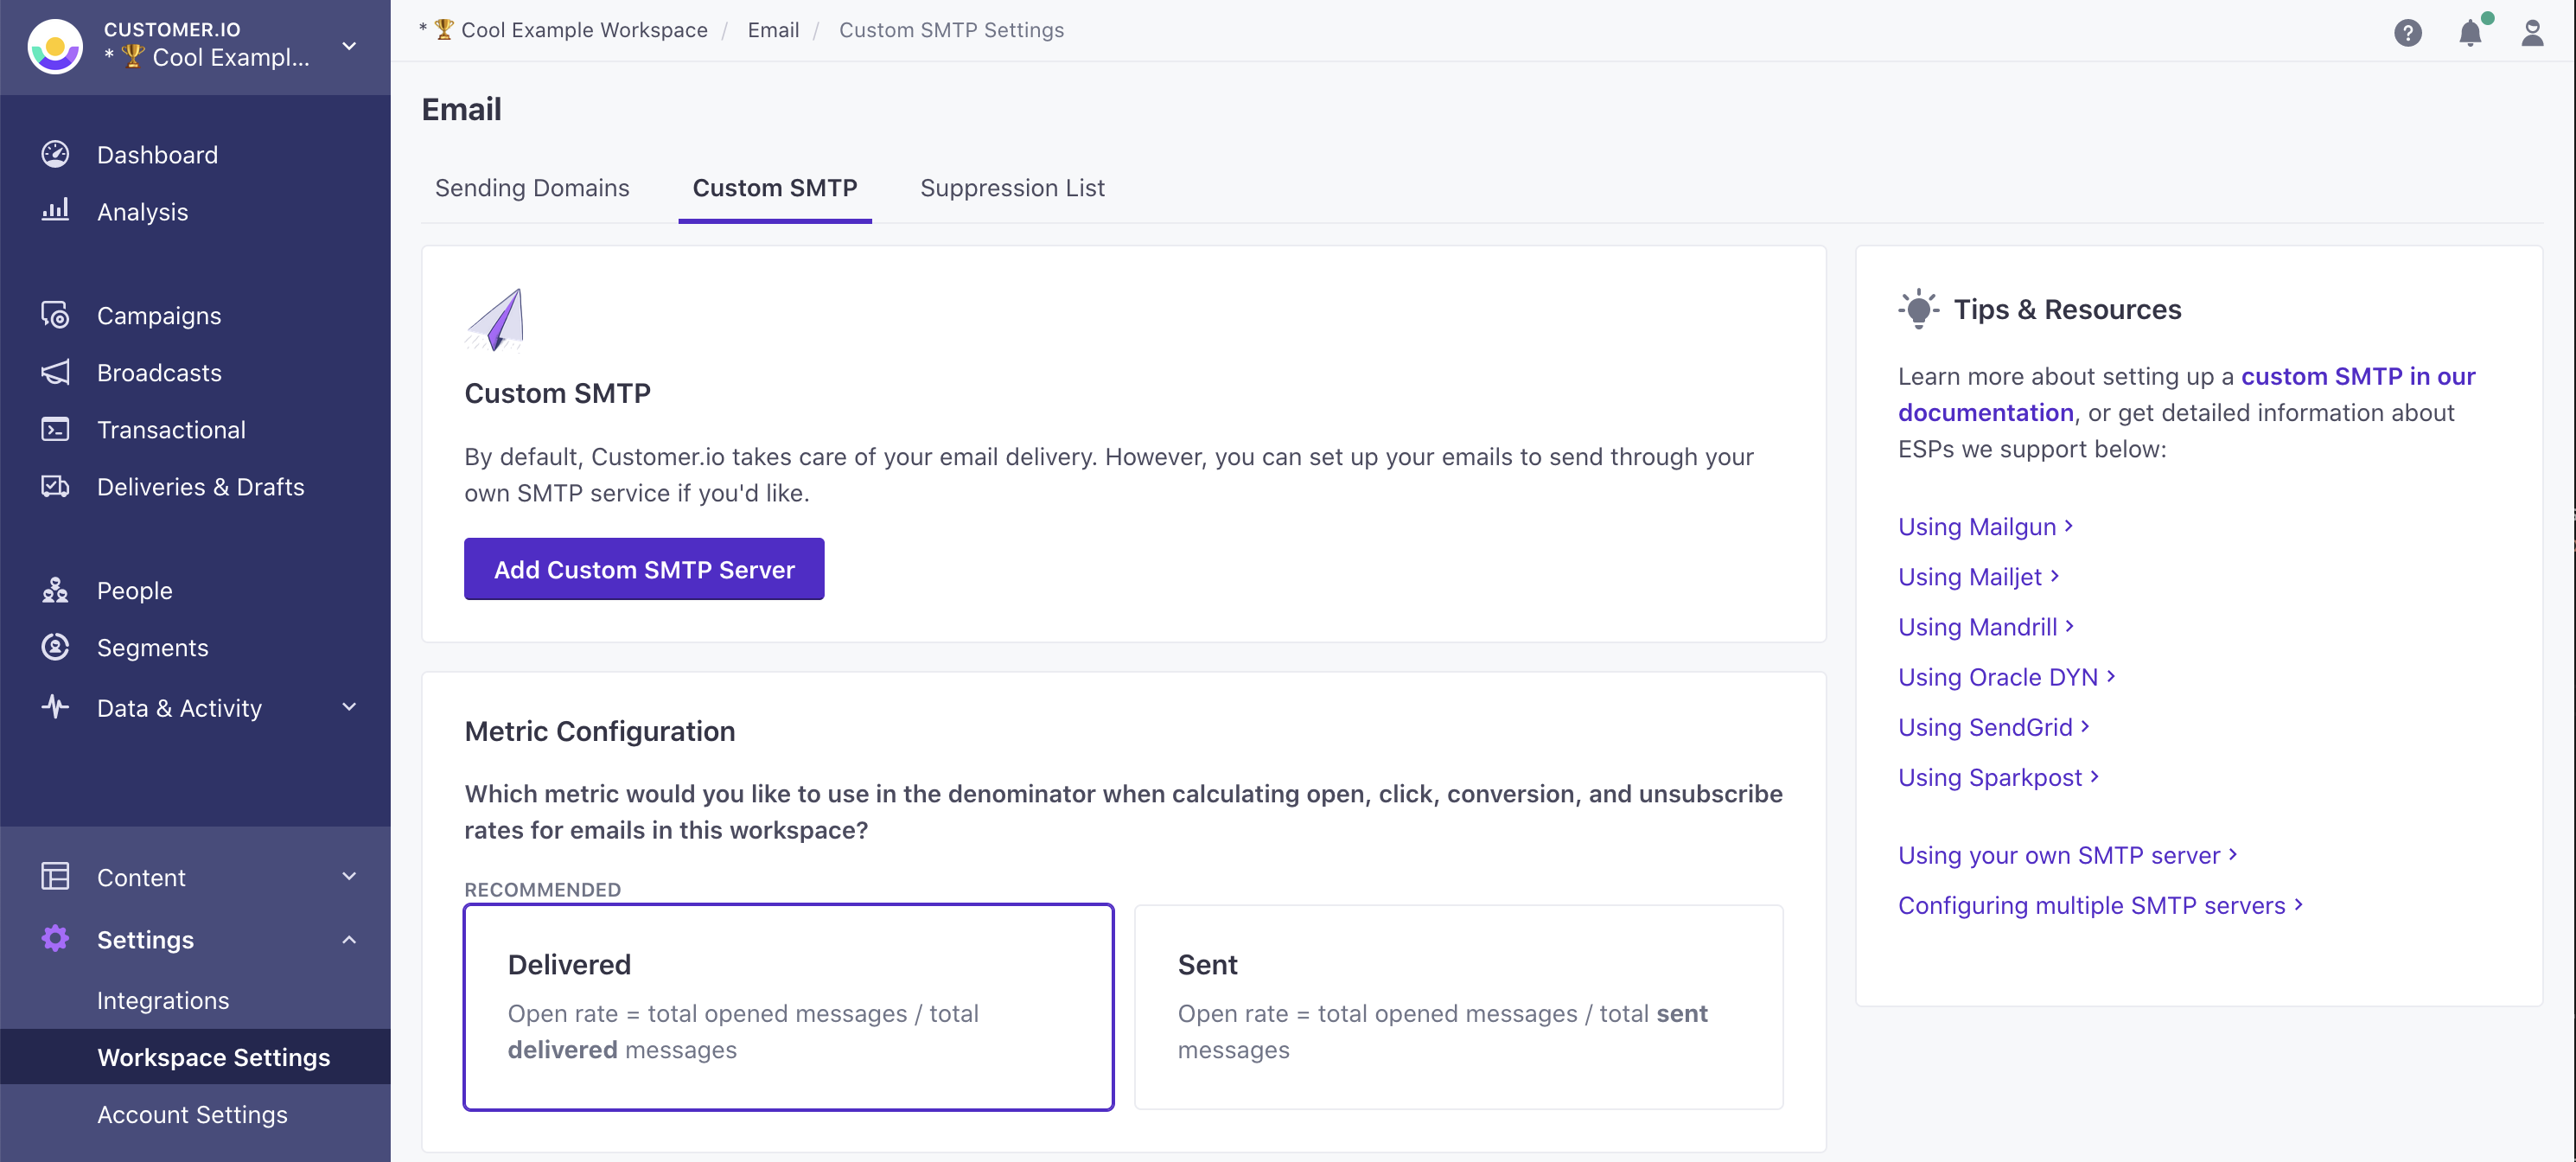
Go to Settings > Workspace Settings.
Click Email, click Custom SMTP Settings, and then click Add Custom SMTP Server.
Select SendGrid and click Continue to set up.
If you haven’t set up webhooks yet, copy the URL on the Set up webhooks tab and then set up webhooks to report message metrics in Customer.io.
Click Add Credentials and enter your SendGrid credentials.
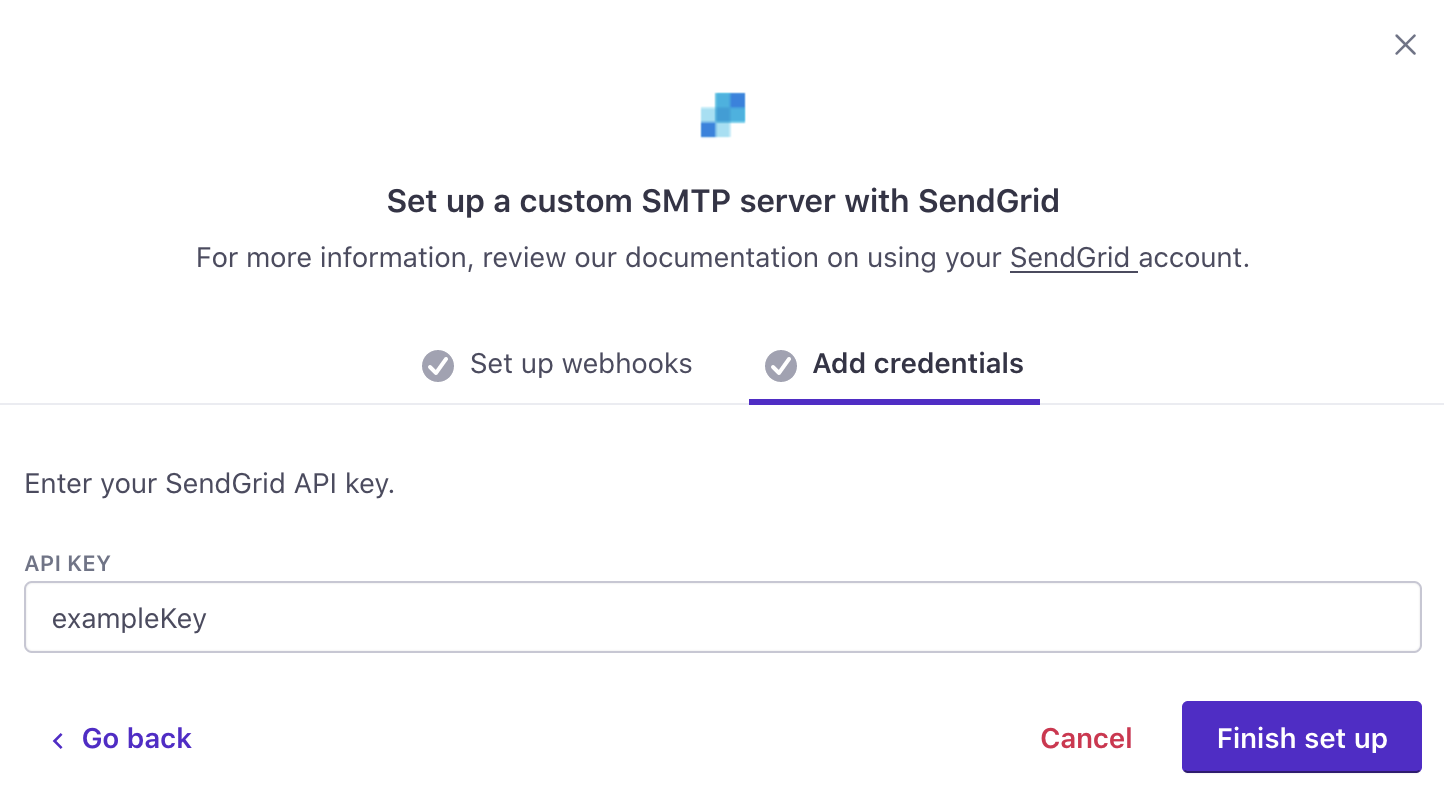
Click Finish set up. Your account is now set up to send email through SendGrid. If you have any questions or feedback, contact us and we’ll be happy to help!
Configure multiple servers to use both transactional and broadcast streams
If you have a Premium Customer.io plan, you can configure multiple custom SMTP servers and assign one to each of your SendGrid server types.

