Use your Postmark Account
You can use your Postmark account to send email through Customer.io with no loss in functionality. To take advantage of Postmark, you need to do two things:
Point Postmark’s webhooks at Customer.io
Log into Postmark.
Select your server, the Message Stream you’ll be sending emails from, and then the Webhooks tab.
Click Add webhook and enter the webhook URL that corresponds to your region in the Webhook URL field.
- US:
https://track.customer.io/postmark/events - EU:
https://track-eu.customer.io/postmark/events
- US:
Select the Delivery, Bounce, Spam, and Subscription Change checkboxes.
Do not send Link Click or Open webhooks to Customer.io!
Customer.io already tracks this information. If you send these webhooks, we’ll record each event twice (once natively in Customer.io and again via Postmark webhook).
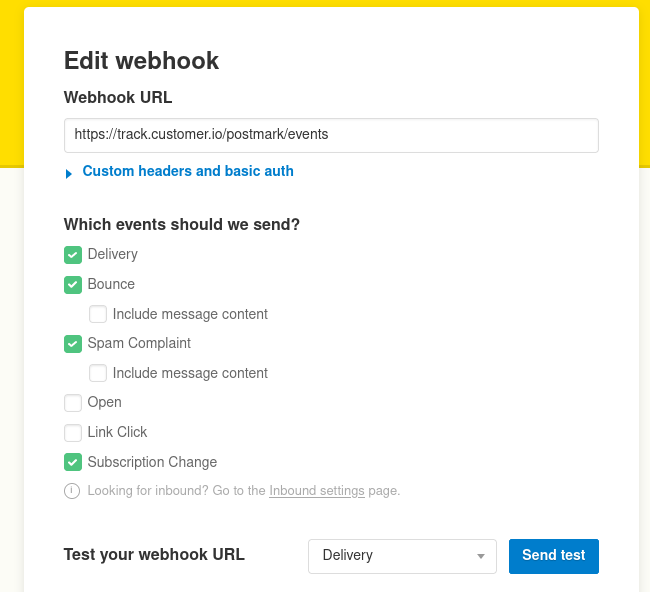
If you want to track opens and clicks via Postmark and not Customer.io, you can change tracking settings on an email by email basis.
Configure Customer.io custom SMTP settings
Obtaining SMTP credentials from Postmark
Before you begin, you’ll need to generate a Postmark SMTP Token. You’ll find it on the Settings tab of the Postmark Message Stream that you want to send from.
- Go to the Settings tab of your Postmark Message Stream (the same stream that you setup webhooks for in the previous step).
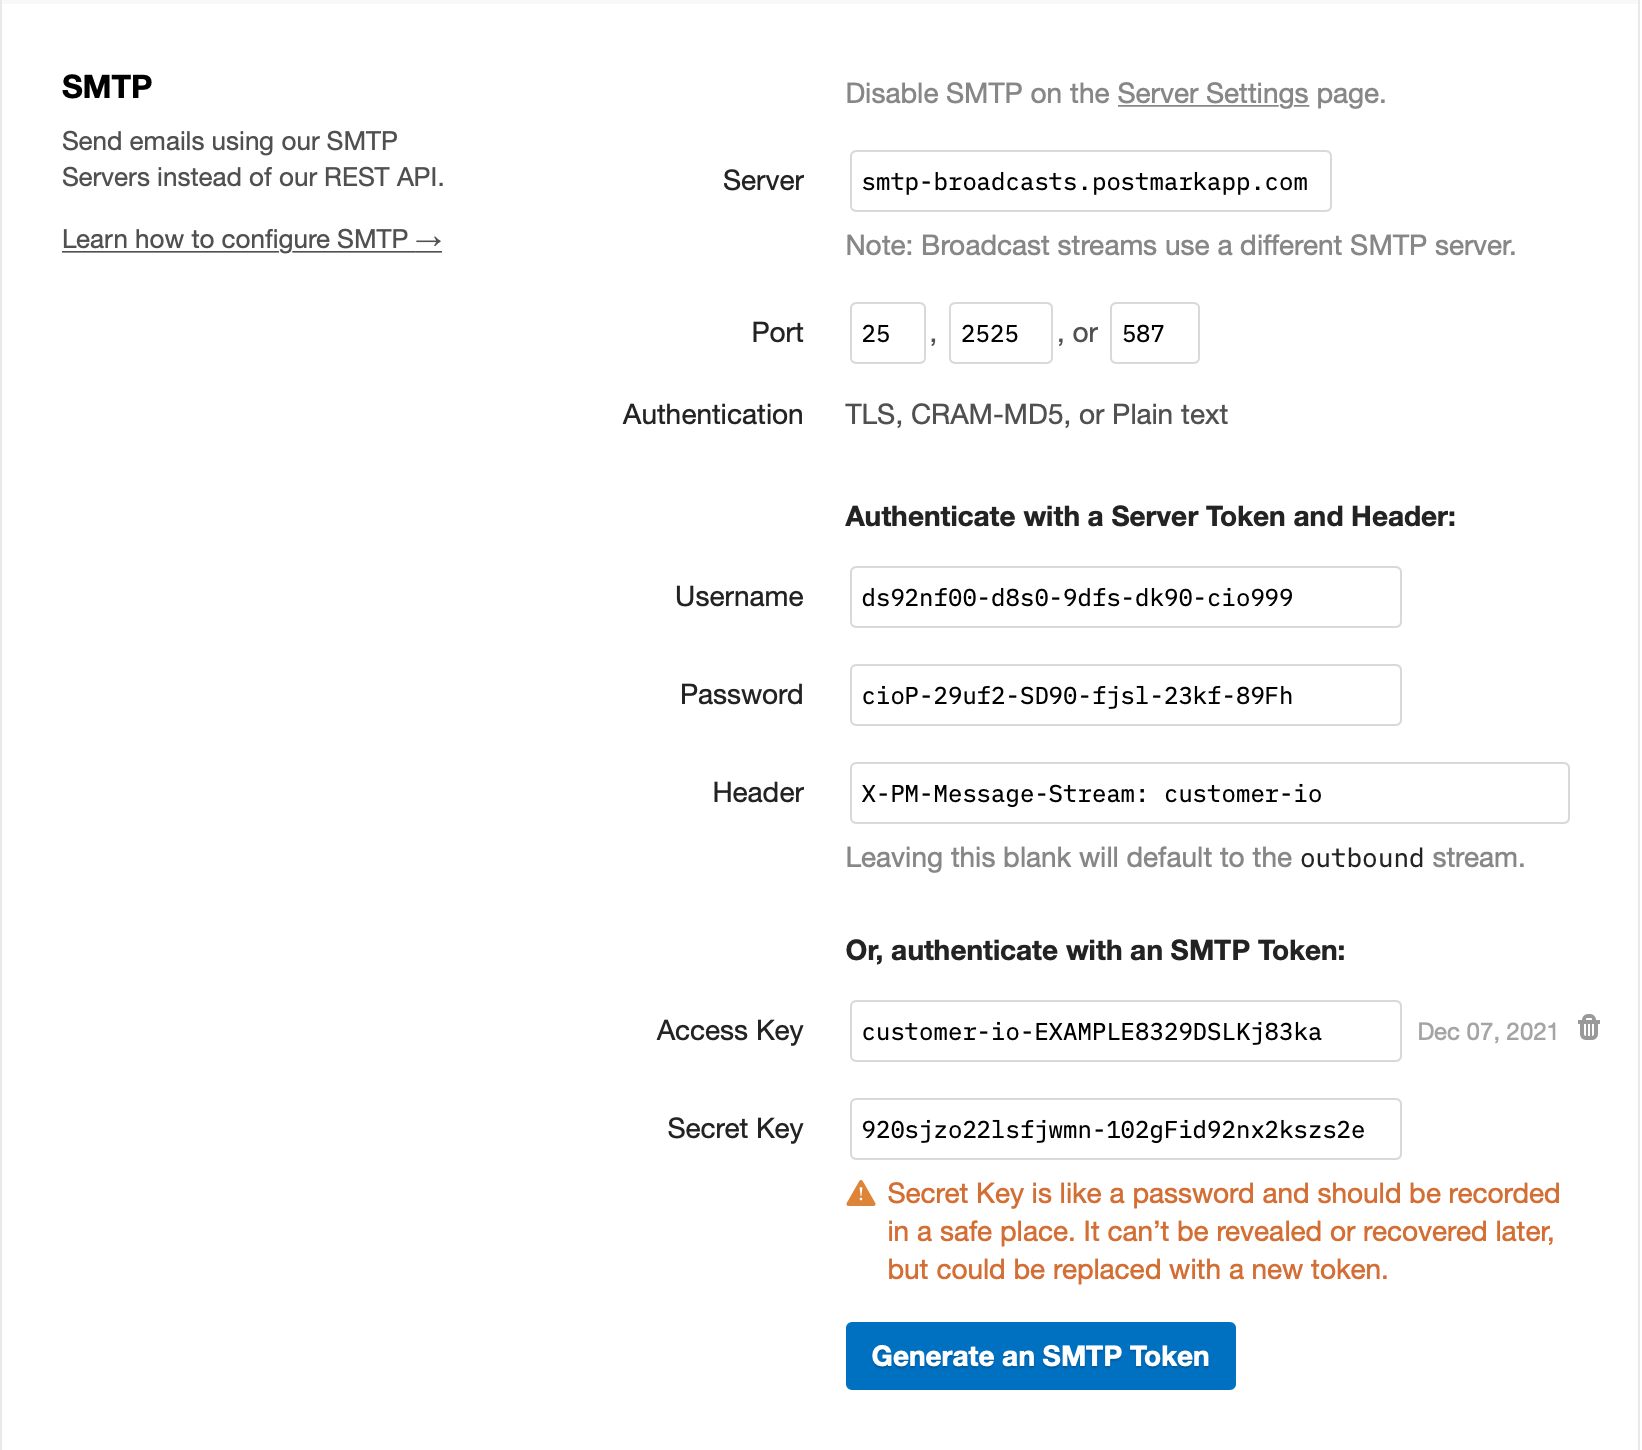
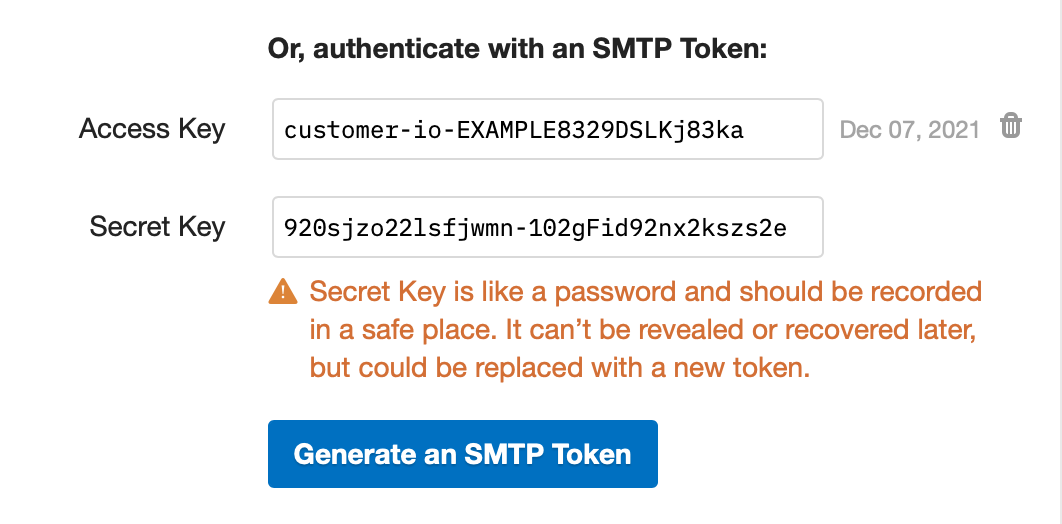
- Click on Generate an SMTP Token
- Note the Access Key as you’ll use it as your username and the Secret Key as your password in Customer.io
Learn more about Postmark SMTP settings.
Configuring Customer.io to use the credentials obtained
- Go to Settings > Workspace Settings.
- Click Email, click Custom SMTP Settings, and then click Add Custom SMTP Server.
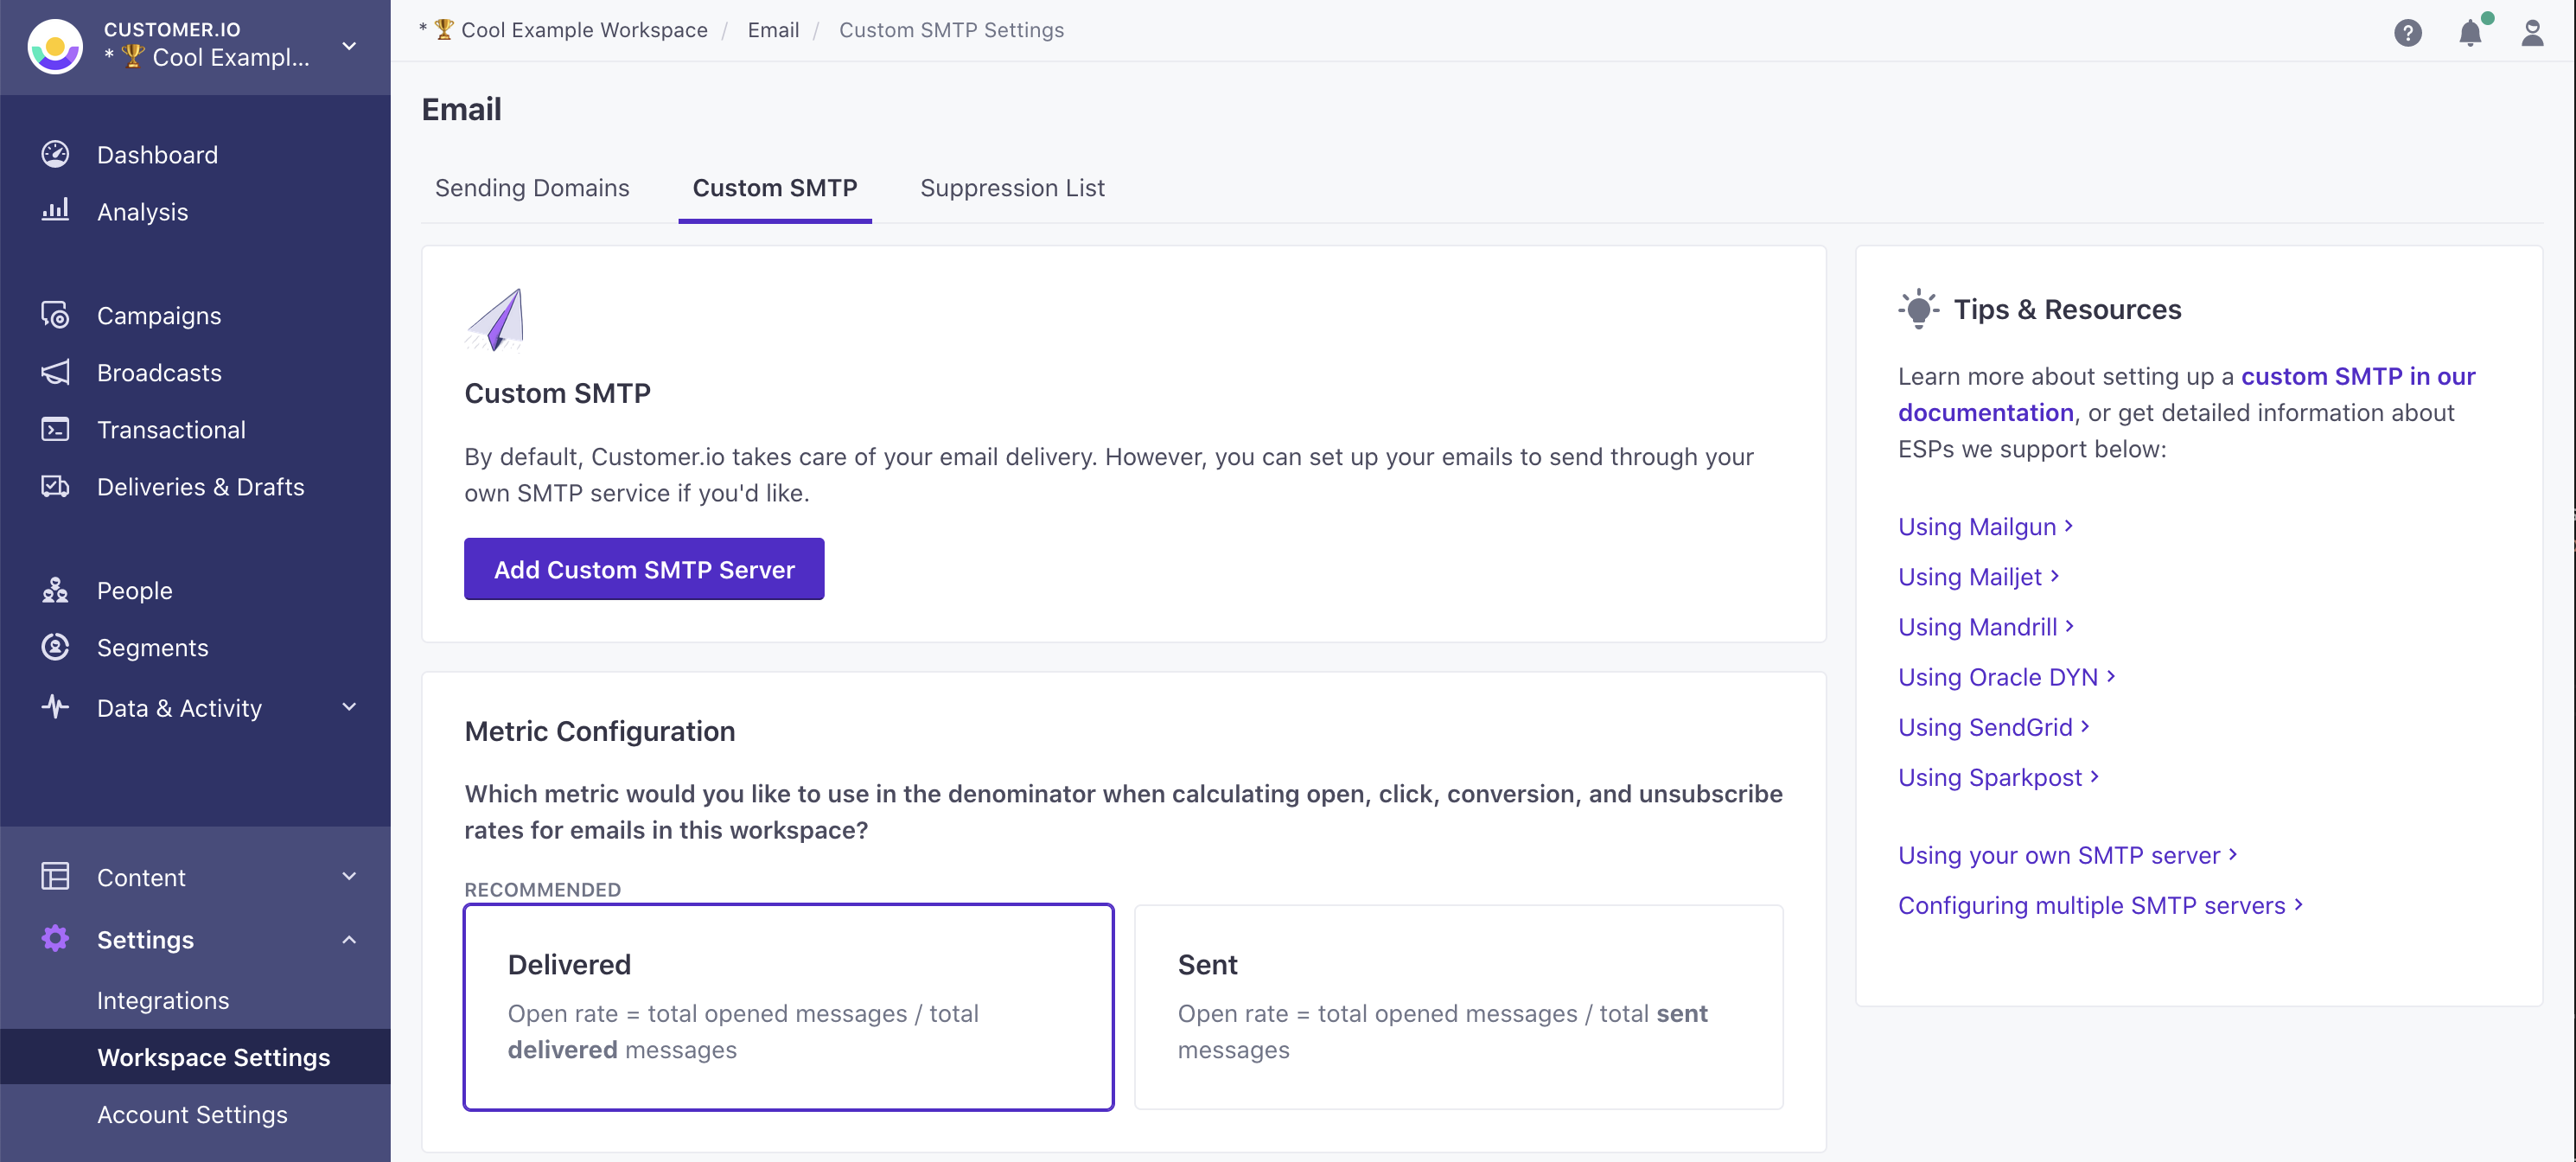
- Select Postmark and click Continue to set up.
- If you haven’t set up webhooks yet, copy the URL on the Set up webhooks tab and then set up webhooks to report message metrics in Customer.io.
- Click Add Credentials and enter the Access Key and Secret Key created in the previous step as your Postmark credentials.
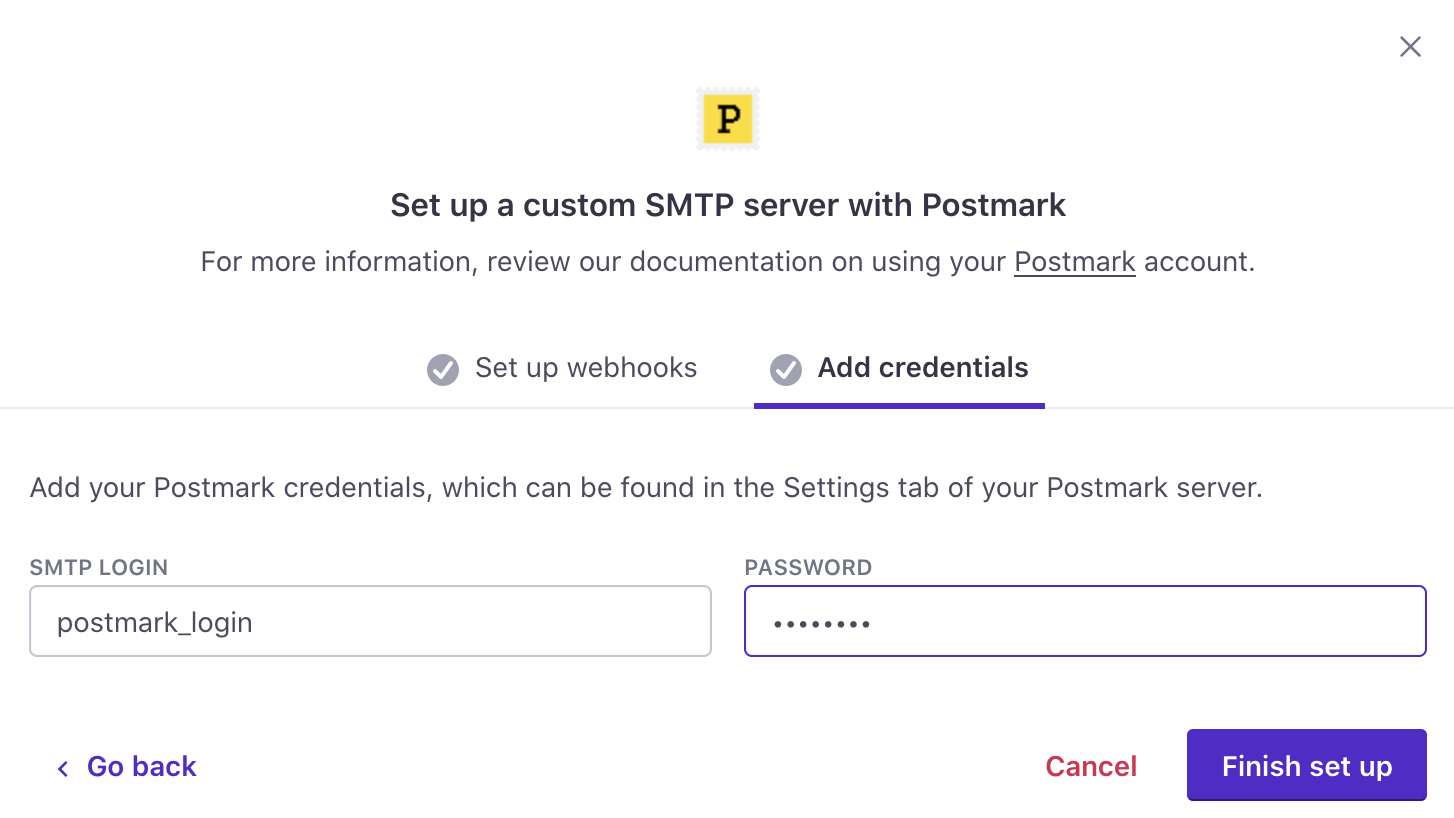
- Click Finish set up. Your account is now set up to send email through Postmark. If you have any questions or feedback, contact us and we’ll be happy to help!
Configure multiple servers to use both transactional and broadcast streams
You can configure multiple custom SMTP servers and assign one to each of your Postmark server types accordingly.
Postmark’s Broadcast Stream will include their Unsubscribe link by default
If you do configure your Customer.io workspace to send bulk emails through Postmark’s Broadcast Stream, an Unsubscribe link is required. Postmark inserts their own link into your messages by default, however you can opt-out of this by contacting Postmark Support. You can request removal of their link by informing them that you’re using Customer.io’s built-in Unsubscribe link and management, and they’ll be happy to assist from there.

