Use your Mandrill Account
Mandrill is designed for transactional messages only
Mailchimp’s acceptable use policy prohibits the sending of bulk emails—emails directed to multiple individuals with the same content—through Mandrill.
You can use your Mandrill account to send email through Customer.io with no loss in functionality. To take advantage of Mandrill, you need to do two things:
Point Mandrill’s webhooks at Customer.io
Go to the Mandrill webhooks page and click Add a Webhook.
Check the following events:
- Message Is Sent
- Message Is Bounced
- Message Is Marked As Spam
- Message Is Rejected
- Message Is Delayed
- Message Is Soft-Bounced
In the Post To URL field, enter the webhook URL corresponding to your region.
- US:
https://track.customer.io/mandrill/events - EU:
https://track-eu.customer.io/mandrill/events
- US:
Click Create Webhook.
If you want to track opens and clicks via Mandrill and not Customer.io, you can change tracking settings on an email by email basis.
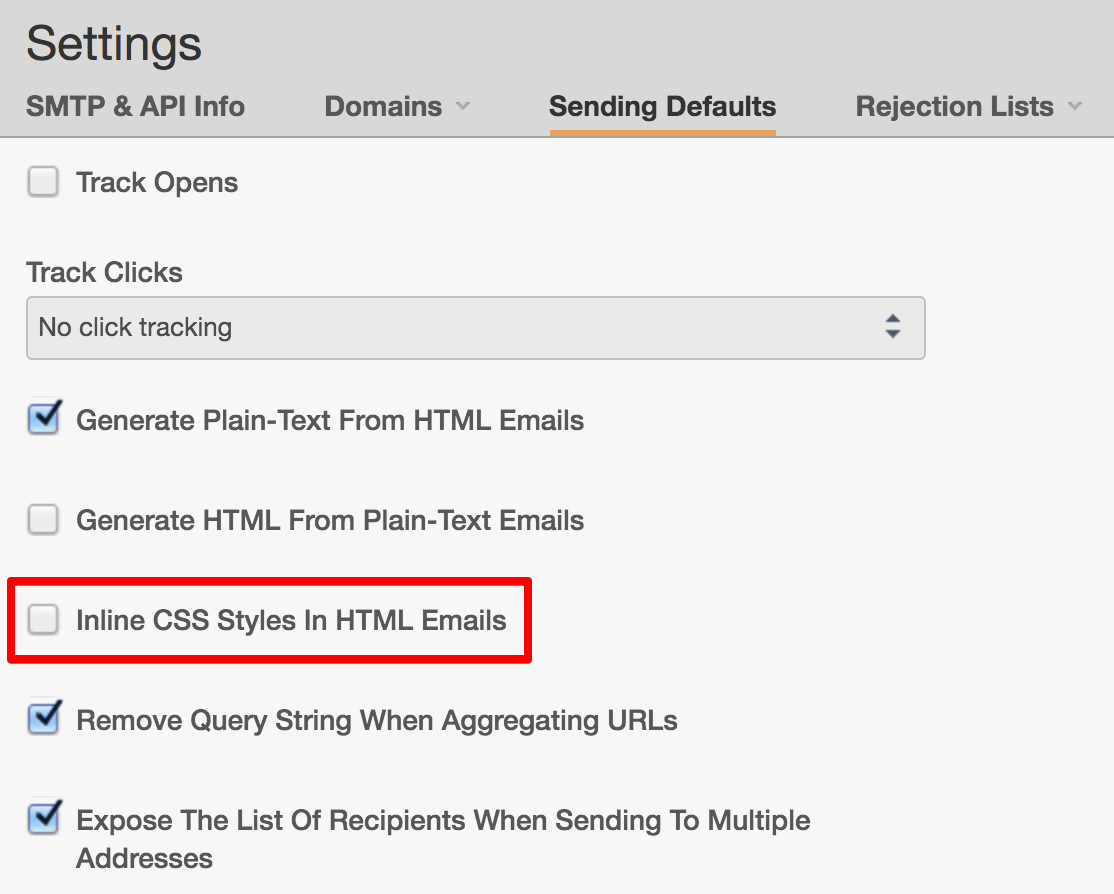
Disable CSS inlining
If you’re using the drag-and-drop email editor or our own CSS pre-processing, we recommend disabling Mandrill’s CSS inlining feature so it doesn’t interfere with ours. Visit the Mandrill Sending Defaults page and make sure the Inline CSS Styles In HTML Emails option is disabled.
You can also disable Mandrill CSS inlining on a per-message basis by adding a custom X-MC-InlineCSS header to your email.
Configure custom SMTP settings
Before you begin, you need your Mandrill (Mailchimp Transactional) SMTP credentials. This integration uses port 587. If you need to use a different port, you should use a custom SMTP integration.
Go to Settings > Workspace Settings.
Click Email, click Custom SMTP Settings, and then click Add Custom SMTP Server.
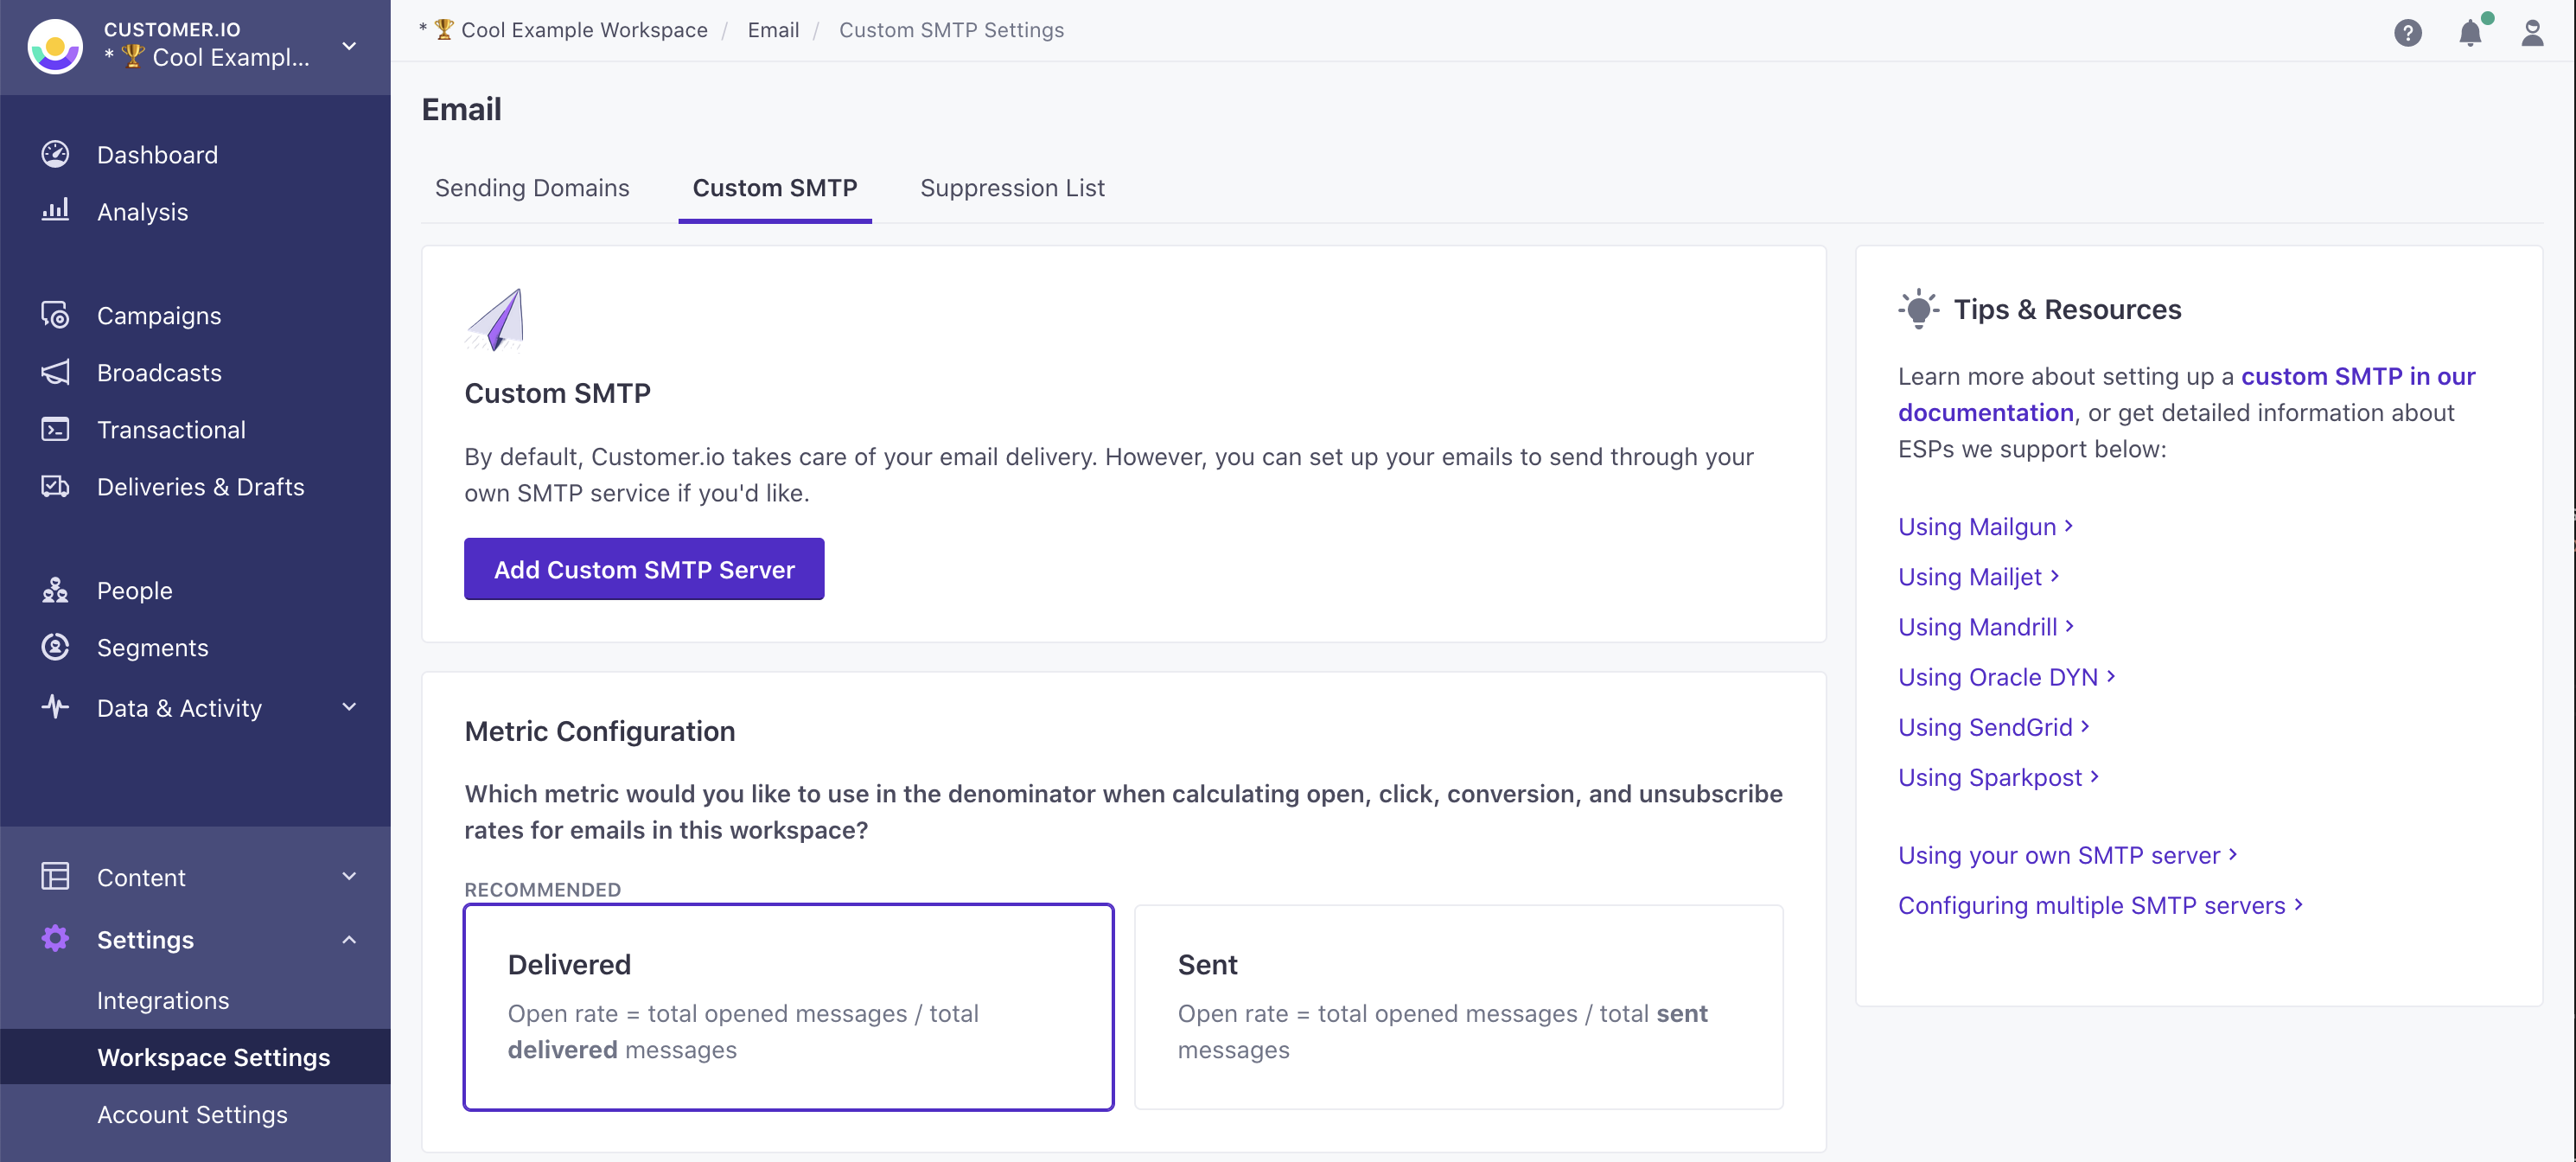
Select Mandrill and click Continue to set up.
If you haven’t set up webhooks yet, copy the URL on the Set up webhooks tab and then set up webhooks to report message metrics in Customer.io.
Click Add Credentials and enter your Mandrill credentials.
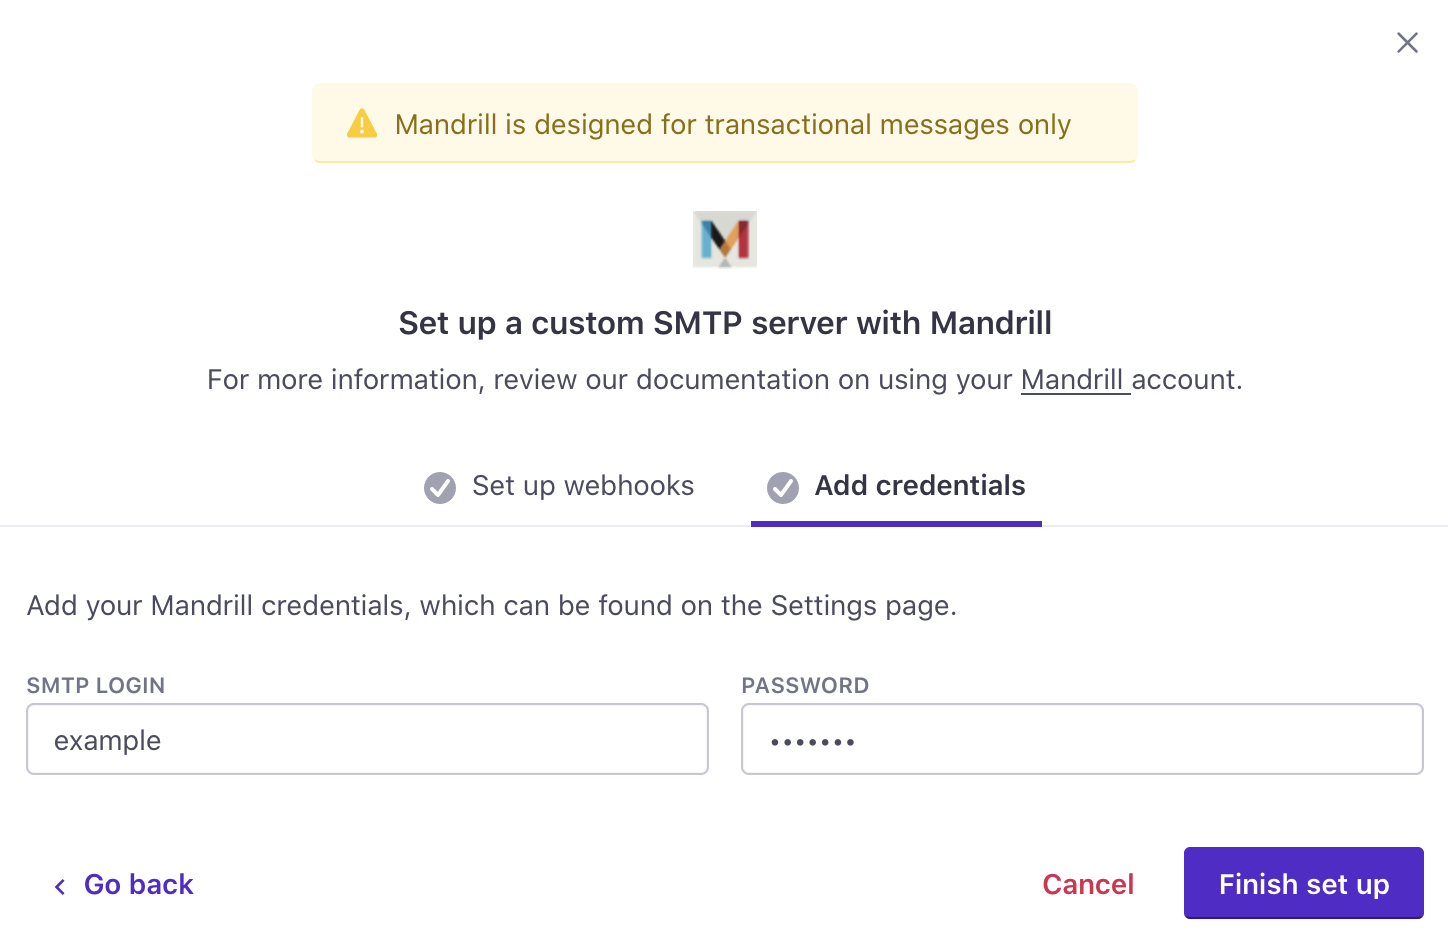
Click Finish set up. Your account is now set up to send email through Mandrill. If you have any questions or feedback, contact us and we’ll be happy to help!
Configure multiple servers to use both transactional and broadcast streams
If you have a Premium Customer.io plan, you can configure multiple custom SMTP servers and assign one to each of your Mandrill server types.
Ensure that your unsubscribe link works
If you use Customer.io unsubscribe links, then everything will continue to work. If you want to use another provider’s unsubscribes, you need to add their unsubscribe link to your emails or layouts. To make sure that it processes, you need to add class="untracked" to the link, like this:
<a href="*|UNSUB:http://mywebsite.com/unsub|*" class="untracked">Unsubscribe.</a>
If you use Mandrill unsubscribe links, unsubscribes will not be tracked in Customer.io. They will only be tracked in Mandrill.

