Key transactional concepts
Transactional messages are different from your average marketing messages and adhere to a few special concepts.
Transactional IP Pool for Email
By default, we add email domains to Customer.io’s shared IP address pool to send emails. We manage and monitor multiple IP pools and remove domains that perform poorly to maintain high deliverability.


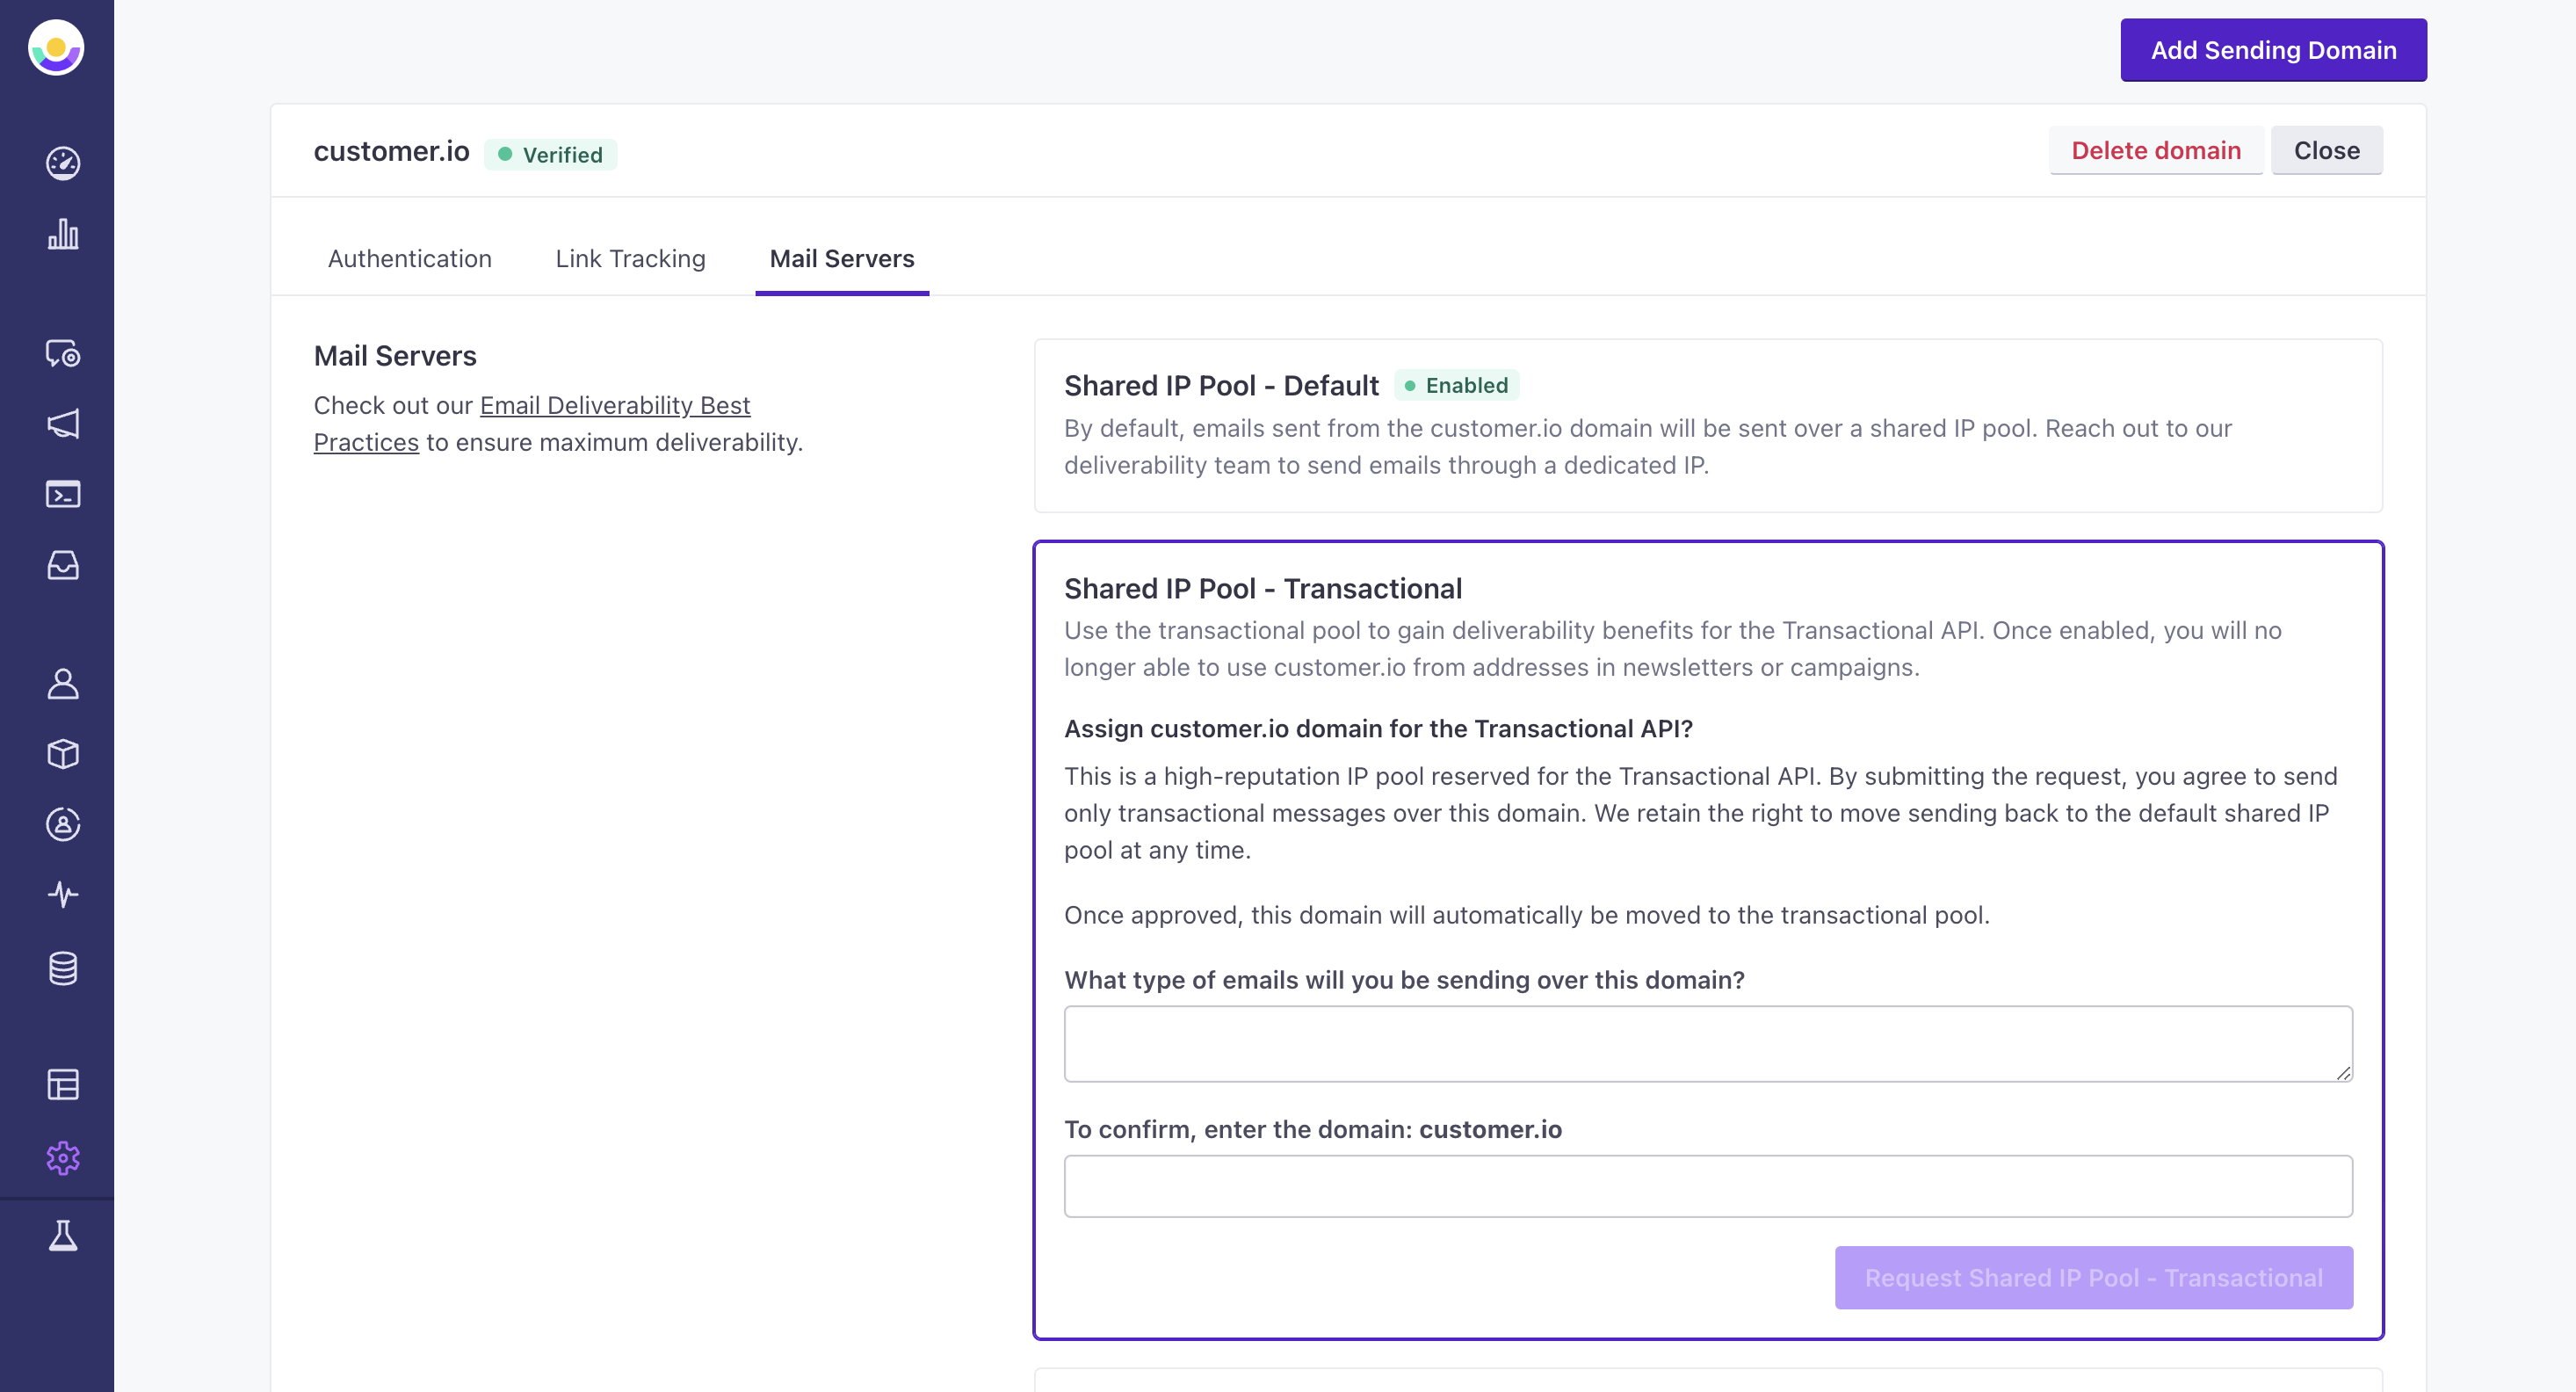
We also maintain a separate, transactional IP address pool. This pool has even higher standards—stricter bounce and spam thresholds—than our default, shared IP pool. This ensures that your transactional messages achieve the highest deliverability. Only domains used with the transactional service can send emails over this IP pool.
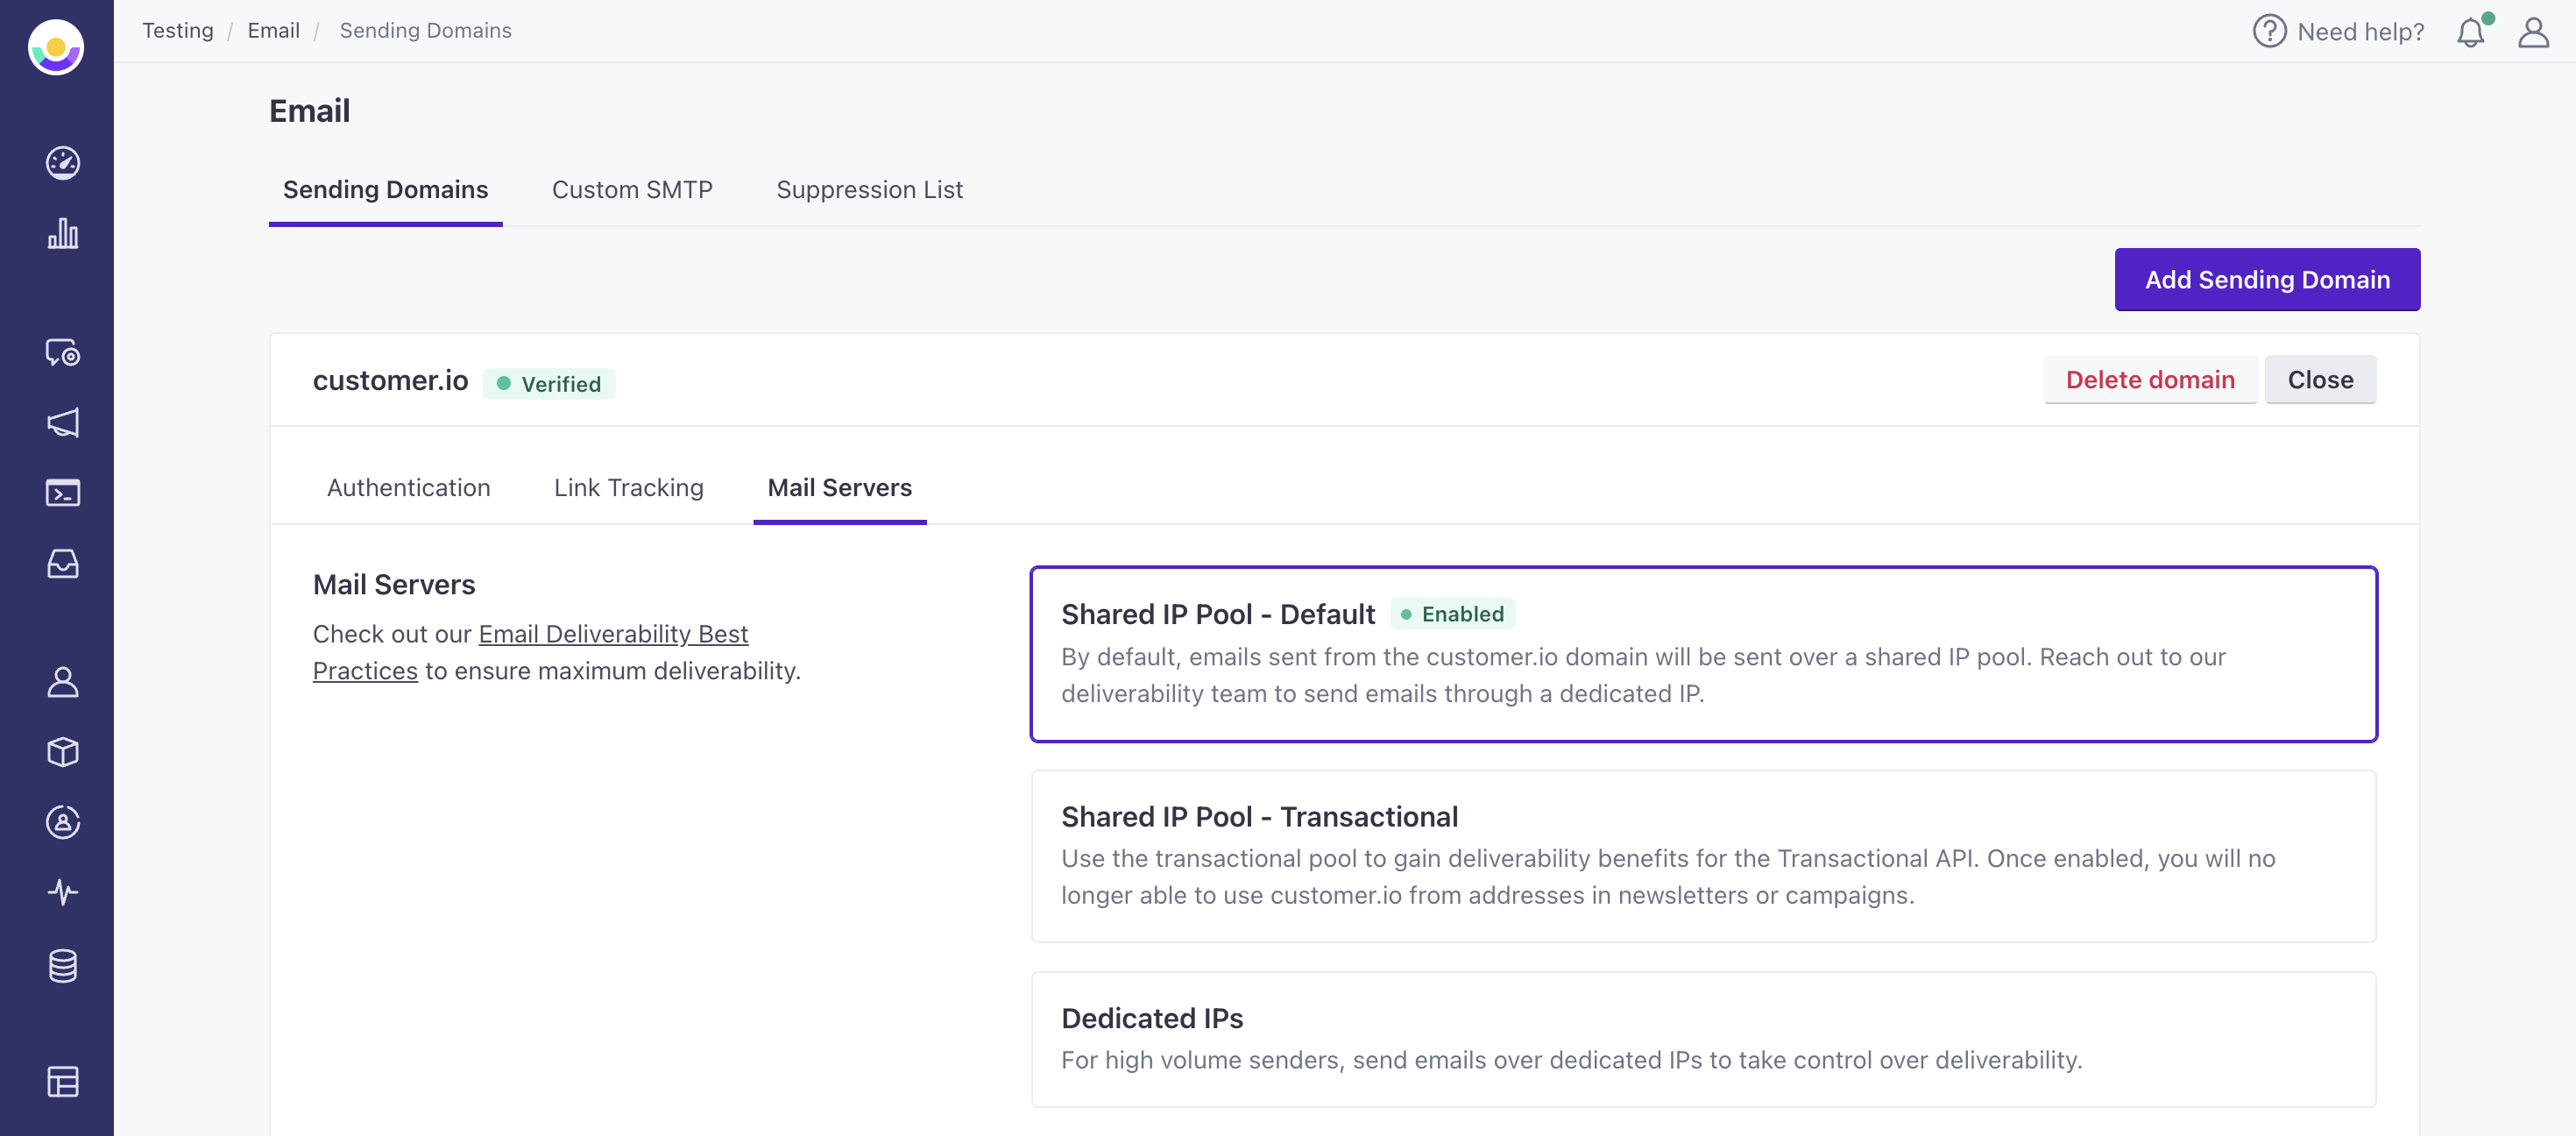
If you have a separate sending domain for your transactional messages, you can request that we add your domain to the transactional IP pool from your email settings. Select Manage Domain and click the Mail Servers tab.


When we add a domain to the transactional pool, you can no longer use it to send campaigns or broadcasts.
You can also request dedicated IP addresses or set up a custom SMTP mail server from your email settings.
Transactional Message Template transactional_message_id
When you create a transactional message with the Add Content option, it generates a transactional_message_id. You’ll use this value to indicate which of your transactional messages you want to populate and send.
You can use your message’s Trigger Name rather than the ID
When you create your transactional message in Customer.io, you can assign it a Trigger Name. When you send a transactional message, you can pass the Trigger Name as the transactional_message_id, which can make it easier to know what kinds of transactional messages you’re sending and when!
While you can omit the transactional_message_id and populate your own message body, subject, and from values at send time, we recommend that you create a transactional message template for every type of message you plan to send (“Receipt”, “Password Reset”, etc), even if you want to populate a custom message at send time.
Customer.io attributes metrics for your transactional message to a transactional_message_id; if you don’t provide a transactional_message_id when you send your message, we attribute metrics to "transactional_message_id": 1. Using a transactional_message_id lets you gather and organize metrics for the different types of transactional messages that you send while still providing the flexibility to populate custom messages.
You can find the transactional_message_id in a few places:
- In the code sample in the Send Message step when you set up your message.
- In the code sample in the Overview tab after you set up your message.
- In the URL when you select a transactional message in the user interface. The number immediately following
/transactional/is thetransactional_message_id. - You can return a list of your transactional messages, each containing the
id(short fortransactional_message_id) from the Transactional API.
Uncategorized Messages
Messages sent without a transactional_message_id are grouped as “Uncategorized Messages” and aggregated at the bottom of the Transactional List.


Trigger Data and Content Variables
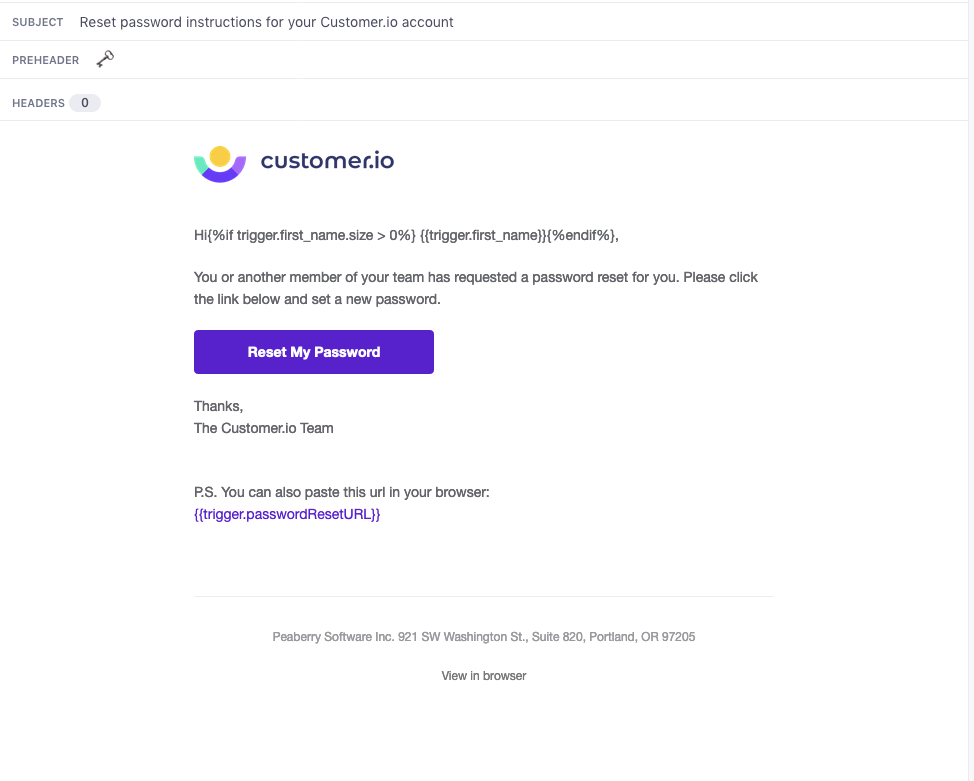
When using a transactional message template, you can customize your message using Liquid. To reference customer attributes in your content, use {{customer.<attribute>}} just as you would in any other message in Customer.io.
To reference data that you pass in the API, use {{trigger.<message_data.property>}}. Then, in your API request, include a message_data object that defines the values for trigger placeholders.
Below is an example showing a password reset message and the API request to trigger it.


message='
{
  "to": "sarah@example.io",
  "transactional_message_id": 3,
  "message_data": {
    "first_name": "Sarah",
    "passwordResetURL": "https://www.example.io/password?token=12345"
  },
  "identifiers": {
    "id":"1234"
  }
}
'

echo $message | curl -v https://api.customer.io/v1/send/email \
-H 'Content-Type: application/json' \
-H 'Authorization: Bearer APP-API-TOKEN' \
-d @-
Schedule your message
You can use the send_at parameter in your transactional API request to schedule your message for up to 90 days in the future. This helps if customers sign up for time-sensitive transactional messages, so you don’t have to manually schedule your transactional API requests in your backend system.
You might use send_at to send booking reminders as a person’s vacation rental or event approaches. Or you might let customers who expressed interest in a product before it’s released know exactly when it becomes available.
Message retention and link tracking
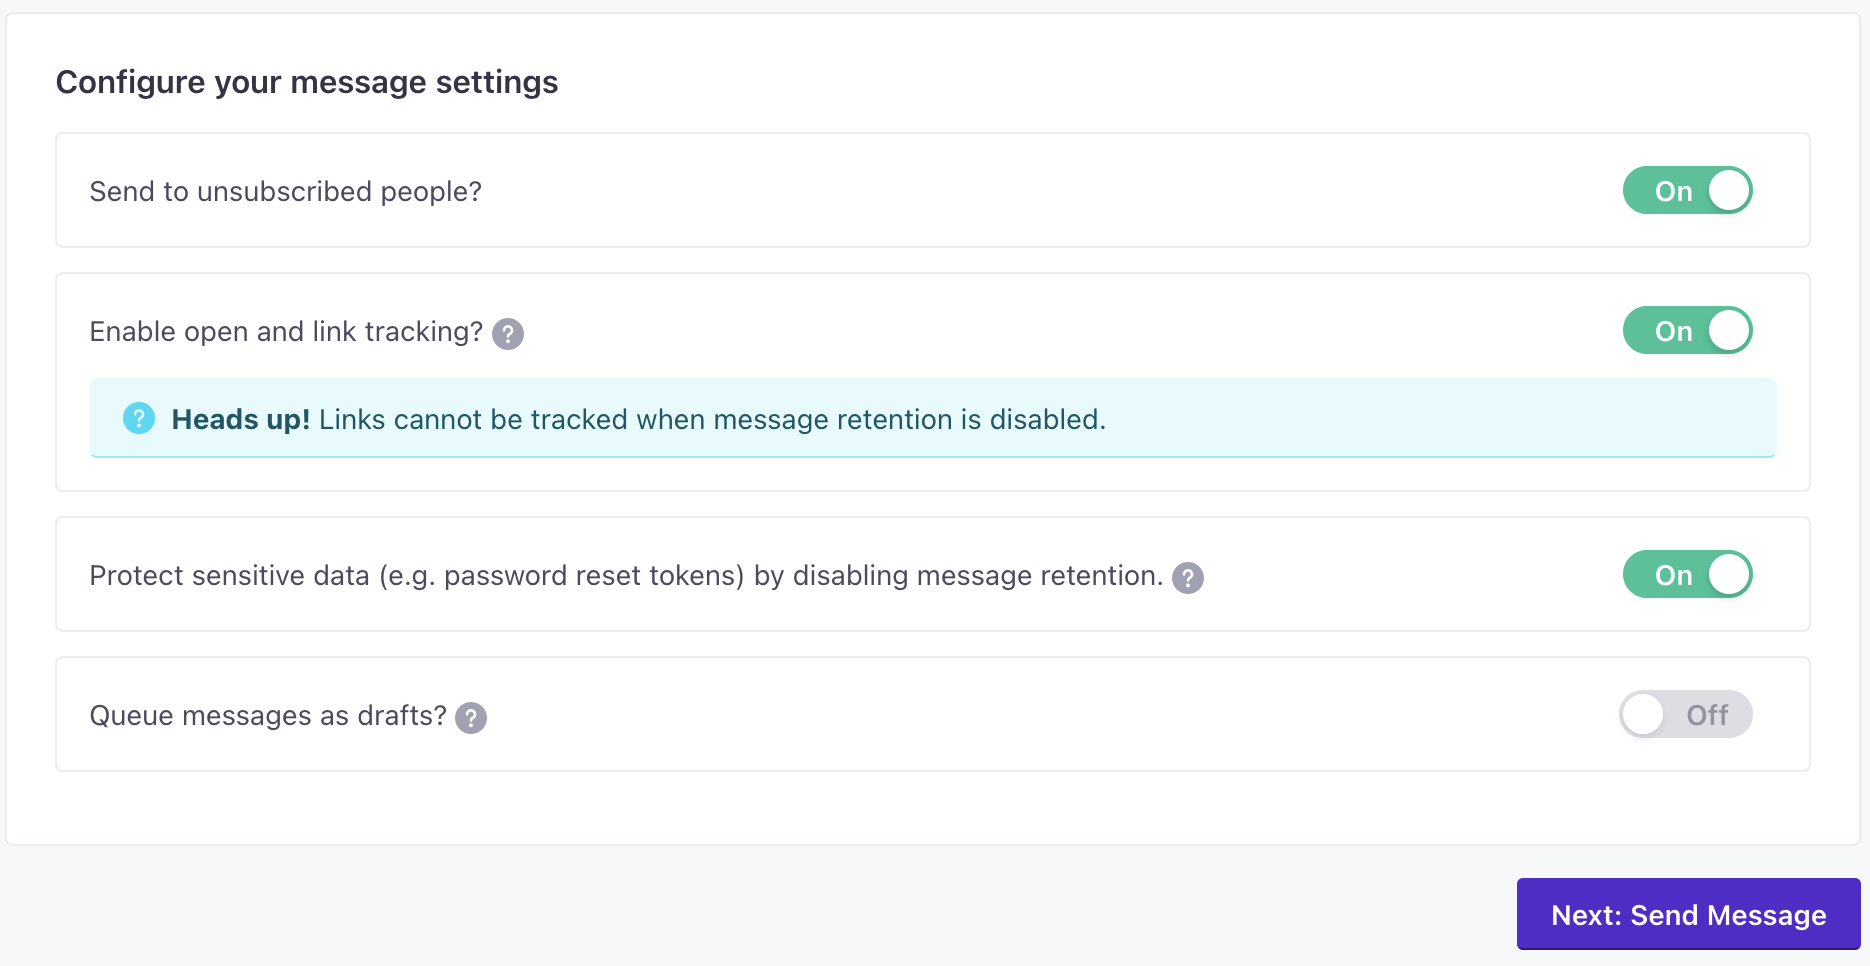
By default, we retain the content of the messages you send and track links in transactional messages. However, you might not want to do this for transactional emails with sensitive information—personal customer information, password reset tokens, etc. For sensitive messages, you can enable the Protect sensitive data setting. This setting prevents Customer.io from storing the body of transactional messages.
However, when you enable the Protect sensitive data setting, you also necessarily disable link tracking in your message because we don’t retain the message.


