Test in-app messages
UpdatedYou can send test messages to prove your integration and make sure your in-app messages behave the way you want them too.
Create a test user
Before you test messages in your workspace, you should to create a person to send test messages to. You don’t want to send tests to your real users!
Two different kinds of in-app test messages
For in-app messages, you can test your integration as a whole, and you can test individual messages.
Testing your integration helps you prove that you’ve set up in-app messaging properly. Testing individual messages gives you confidence that your messages show up in the right places, respond correctly to actions, and so on—before you send them to a live audience.
Test your integration
Before you send a message, the in-app settings page shows you the platforms you can support and provides access to a test message to prove that your integration with Customer.io is set up properly and you can receive messages on the right platform.
Before you send a test message, you should have the ID or email address of the user you want to send a test to! If you don’t have a test user, you’ll want to add one to your workspace first—maybe even yourself!
- Go to Workspace Settings > In-App Settings and click Send Test.

- Enter the ID or email address of your test user and click Send Test.
- Open the app or website you want to test. If you see the test message, everything’s working properly! If you don’t see a message, check out our troubleshooting tips below.
Remember, we send an in-app message to all the platforms you’re integrated with, and a person gets the message on the first platform they open. So, if you’re testing in-app messages, you’ll want to make sure that you open the app or website you’re testing against first. If you already have the app or website open when you send your test, you’ll need to refresh the page or app to get your in-app message.
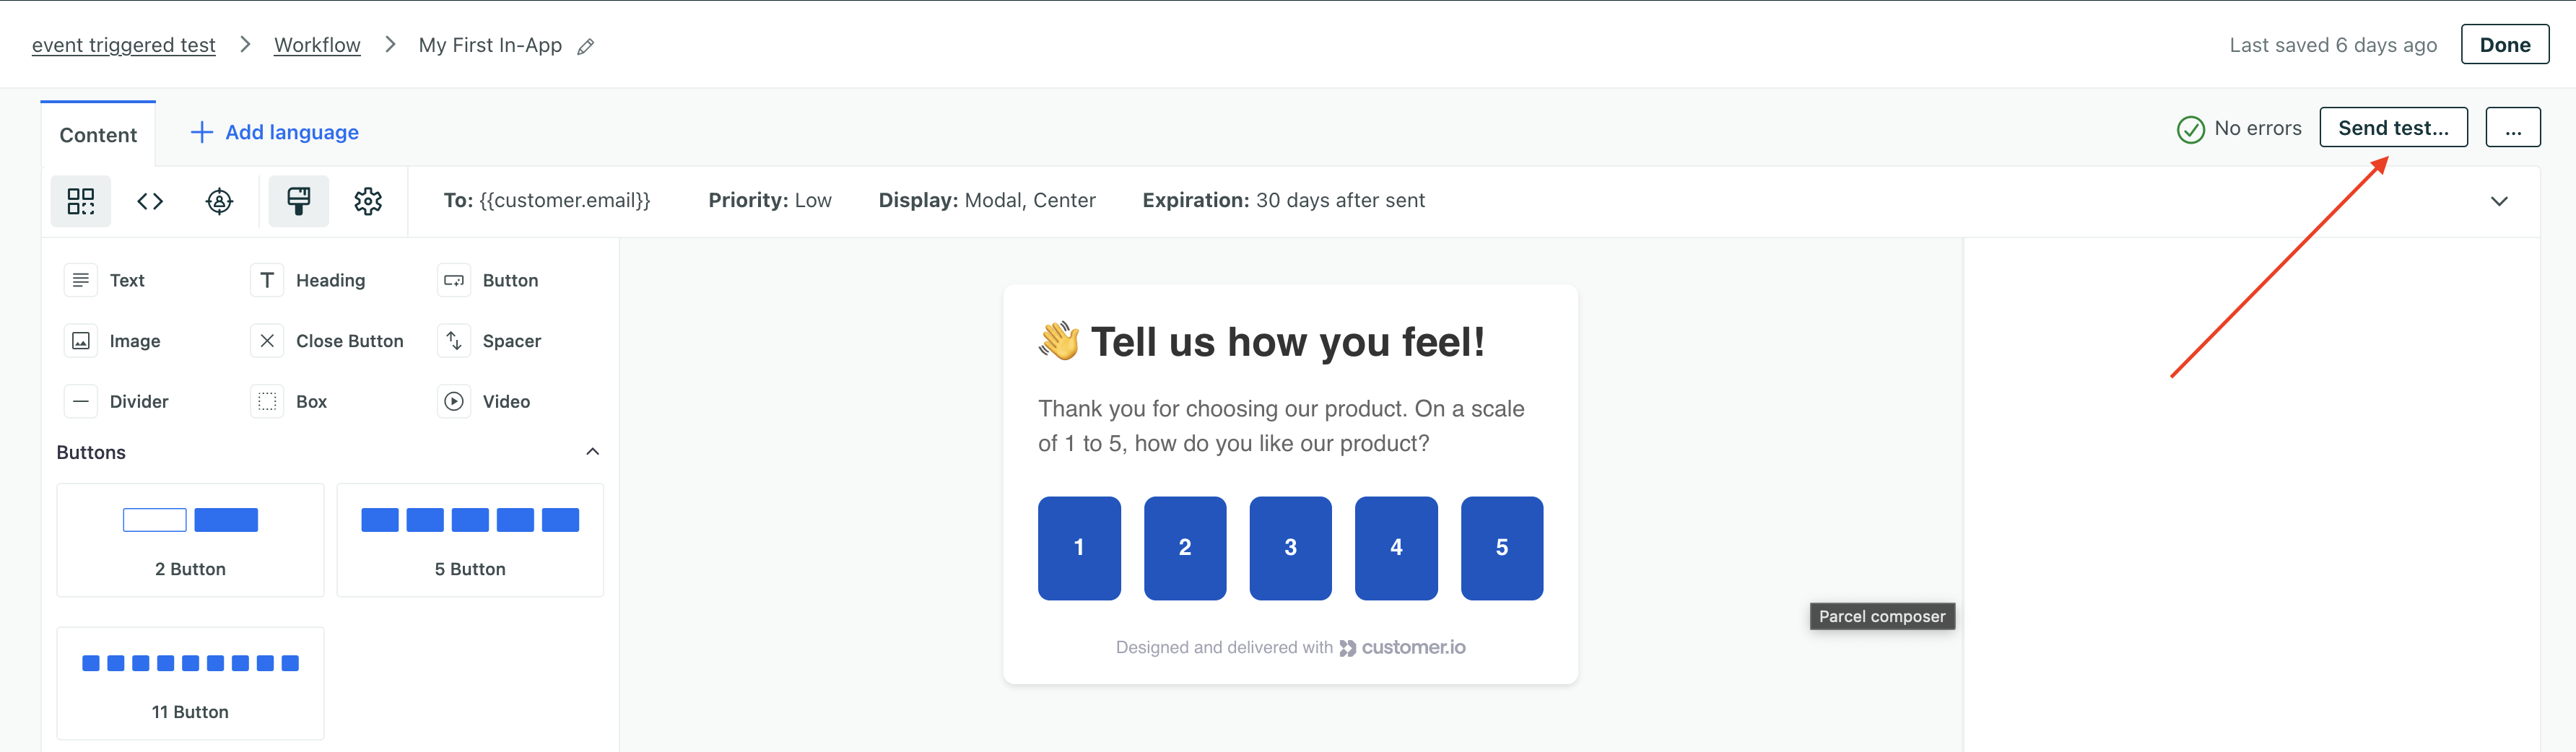
Send a test message from a campaign or broadcast
In a campaign or a broadcast workflow, you can click Send Test to test a real message. This lets you make sure that your message behaves the way you expect: it shows up on the right page or screen; it appears in the right place on a page or screen; and the content all renders as you expect it to.
In an in-app message:
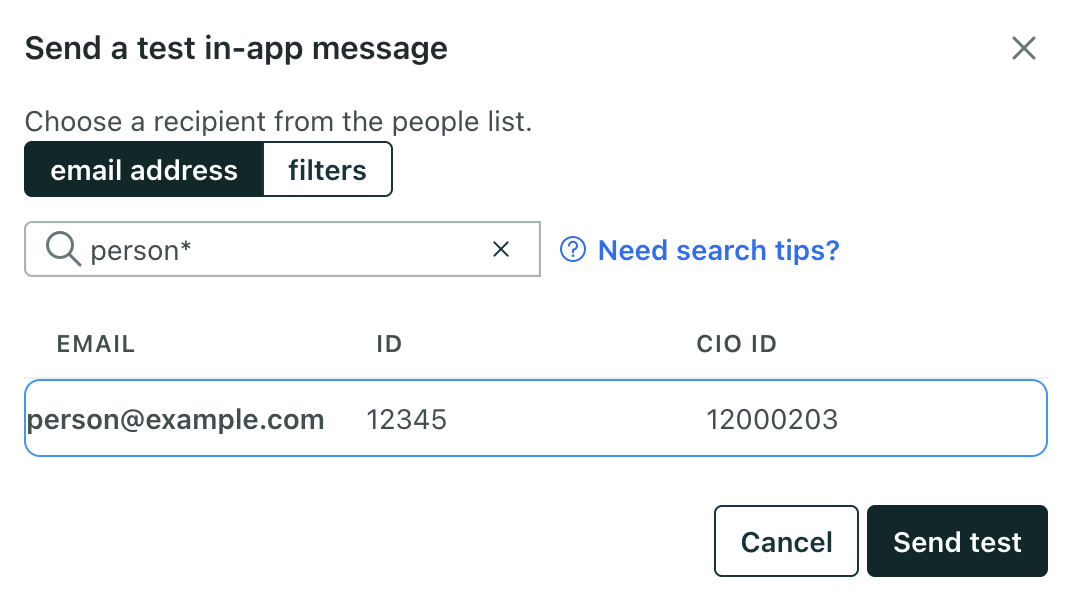
Click Send Test.
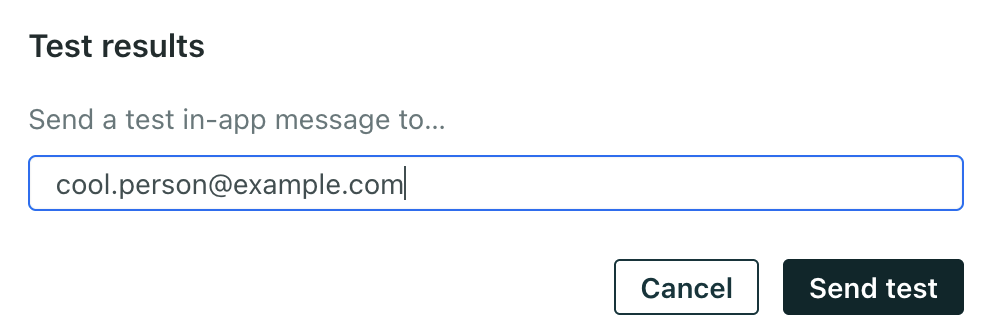
Enter the email or ID of the person you want to send your test to and click Send Test one more time.
Open the app or website where you expect the test to appear and verify that your message works the way you expect it to.
If you’re sending your very first message or test, you should start with your app or browser closed. If your app or browser are open when you send your very first test message, you may need to close and reopen your app or clear your browser cache to get your message right away!
Tips for testing messages
You probably want to have some debugging tools available when you open your message. Nothing fancy but:
- For your website: open the inspect view in your browser so you can verify the styles in your message. You may even want to inspect the network calls to make sure that your buttons perform the correct actions.
- For your mobile app: you may want to set the Customer.io SDK log level to
debugso you can trace every aspect of your in-app message, from receipt to dismissal. - Close your browser or app before you send your first test! Before you send your very first message, we poll for messages at a slow rate. We update this rate when you send your first message—but only if your browser or app is closed. If you have your app or website open when you send your first message, it may take up to 3 minutes to see your message. This delay only occurs for the very first message you send from Customer.io.
- If you send your first test before you close your app or browser, you can clear your cache or restart your app to actively poll for messages.
Troubleshooting tips for your in-app integration
If you send a test message and don’t receive it:
Check that you sent your test to the correct user.
Make sure that you’ve identified the person you want to send your test to.
If testing your website, you might try sending a manual identify call in the console to get your message. If you get the message after you send an identify call manually, then your problem might be in how you send identify calls from your code!
analytics.identify(<id or email>)Check your browser console or debug messages for errors on your website. You can trace traffic to and from Customer.io to find the error. On your website, you should see calls for
i(identify) andp(page) before you get your message.If you have a single page app, make sure that you’ve set up page calls correctly. We only send page calls automatically when a page loads. If you have a single page app, that won’t happen, so you’ll need to send page calls manually when the route changes.

