Enable Time Zone Match in 10 Minutes with Clearbit
Introduction
Time Zone Match can be very handy, especially for onboarding campaigns to help reach and teach people who are trying out your app for the first time. Being able to define a delivery time window that’s specific to individual users will help you reach them at the right time.
If you use Clearbit and Customer.io, you can enable Time Zone match in about 10 minutes.
Ingredients
This recipe works for teams who use Clearbit enrichment via Segment.com. Clearbit will send two attributes to Customer.io:
clearbit_person_time_zoneclearbit_company_time_zone
Method
Step 1. Add a timezone attribute to your profile data
To enable Time Zone Match in Customer.io, there must be an attribute named timezone in your users’ profiles. So we’ll be using an Create or update person action to transform your Clearbit fields into the required timezone field for Time Zone Match.
Haven't enabled *Create or update person* actions yet? Just head to the **Email & Actions** section of your workspace.
Create a new Condition Triggered Campaign
This campaign will modify existing profiles in your Customer.io Workspace — as well as add the required timezone attribute for new profiles as they get added and enriched in your Workspace.
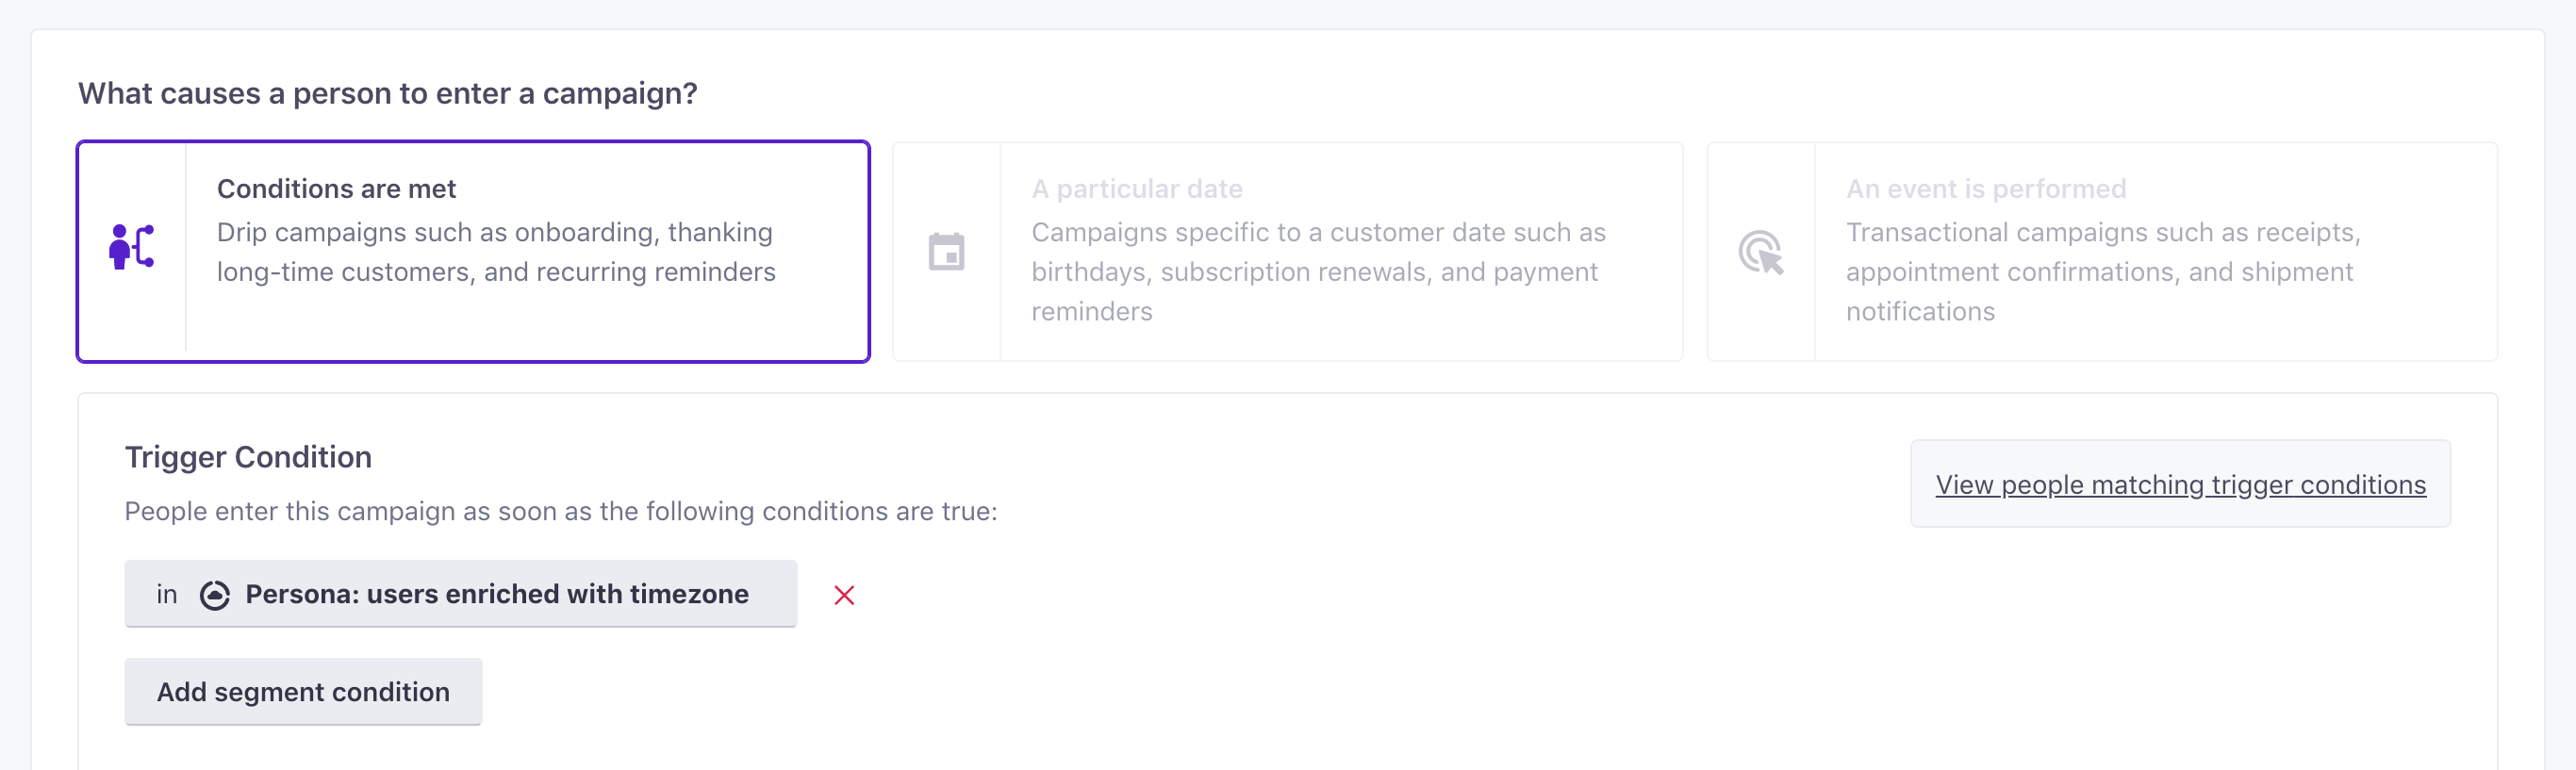
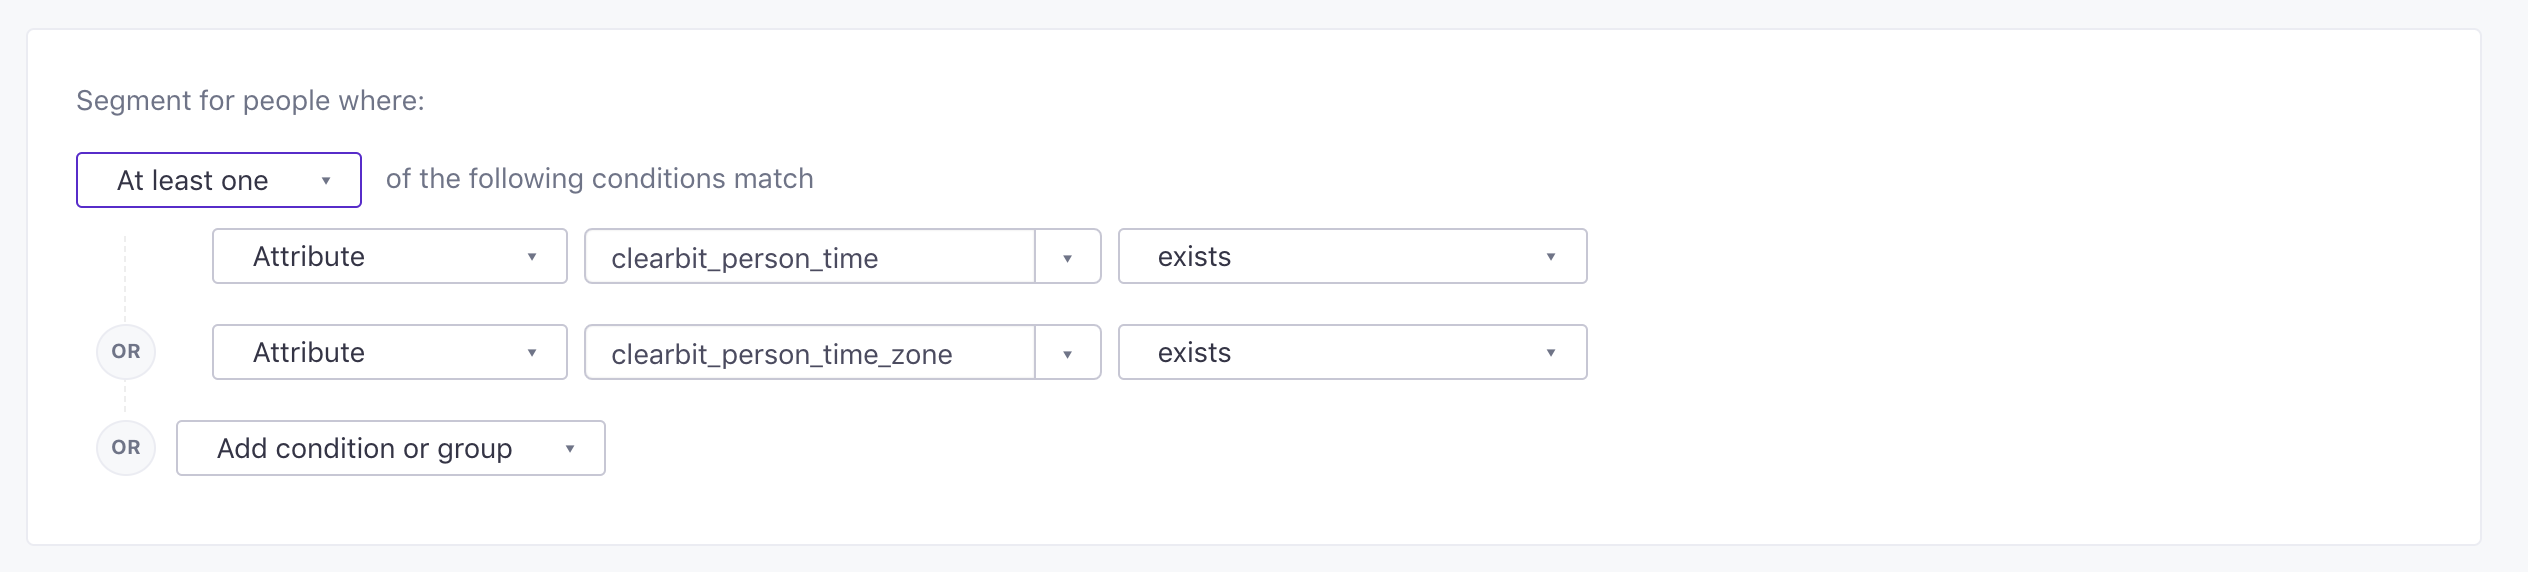
For your trigger, you’ll use a segment looking for profiles that have been successfully enriched with either the person’s time zone OR the company time zone. (You can, of course, just look for matches on one of these, but here, we’re going for the largest number of users.)
Add a Create or update person action
Next step is the workflow! You only have to add one action - a Create or update person action. Once a user’s profile is enriched with Clearbit’s timezone data, this action will update their profile with a new timezone attribute.
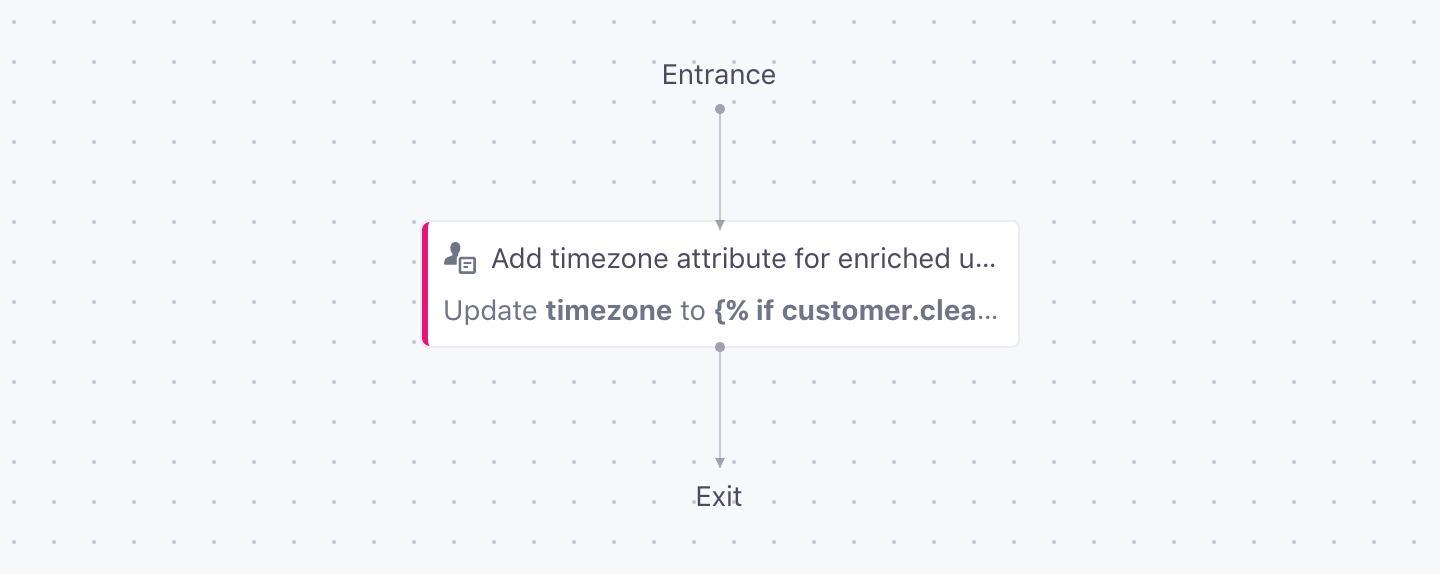
Set up the Attribute Update Content
Here, we’ll simply use a Liquid if/else statement:
{% if customer.clearbit_person_time_zone.size > 0 %}
{{ customer.clearbit_person_time_zone }}
{% elsif customer.clearbit_company_time_zone.size > 0 %}
{{ customer.clearbit_company_time_zone }}
{%endif%}
This creates an attribute called timezone and sets it to the same value as either clearbit_person_timezone OR clearbit_company_timezone. (We prioritized the person’s timezone since companies may have geographically distributed employees.)
Test your Liquid
After saving, use some sample data and preview to verify that the current selected profile computes to the expected timezone value.
Step 2. Test Time Zone Match
You’re almost done! Head to Workspace Settings > Time Zone Match section and click Settings. Here, you can check that your timezone attribute is working by entering a customer’s email and checking the output. This is what you want to see:

You can now add Time Zone based Time Windows to your campaigns in Customer.io! To begin to use that time zone data, edit any Time Window in a triggered campaign (or add a new one) to set the window to the user’s timezone.
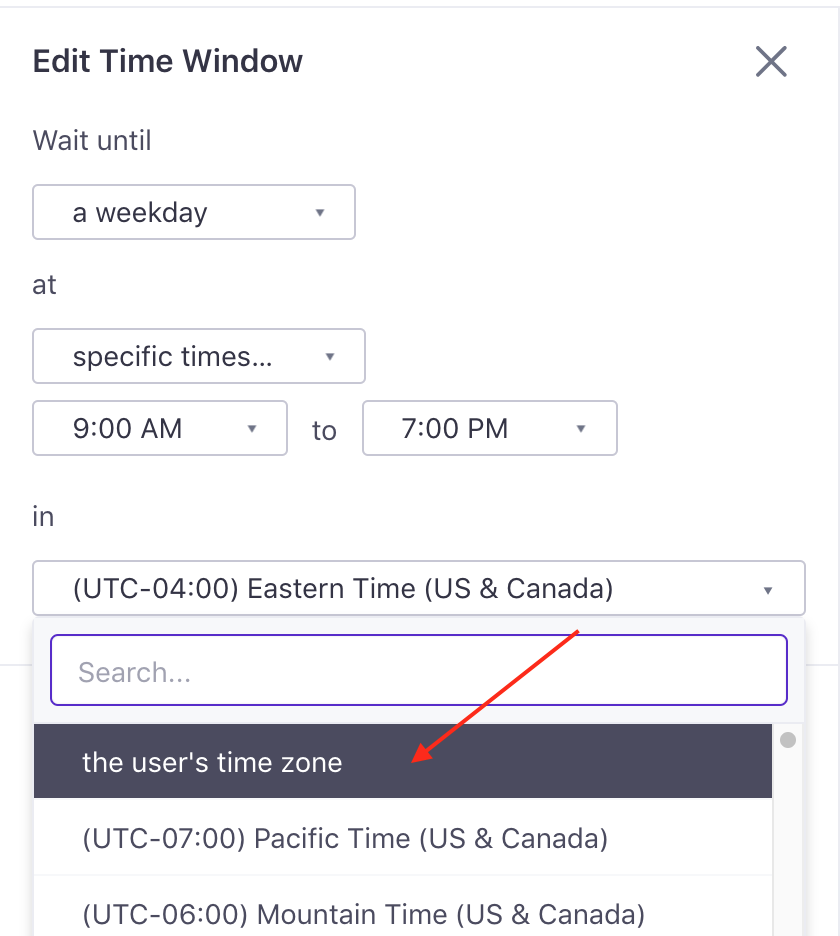
Now, as users enter the time window, they’ll wait until its 9AM to 5PM in their own timezone before progressing through the remainder of your campaign.
Have questions about Time Zone Match, Create or update person actions, or connecting to Clearbit? we’re here to answer!

