Shortcuts to external services
You can add shortcuts from people in Customer.io to external services, making it easy to go from a person in Customer.io to that person’s account in your CRM tool, analytics platform, or any other service. You can even set up shortcut webhooks to call an external API from a person’s page.
You’ll find the Shortcuts button on the upper-right corner of any person’s page in your workspace. Go to People and select a person to add or use shortcuts.

Add a shortcut
Customize links with liquid
Though you add a shortcut from an individual person’s page in Customer.io, your shortcut will appear on every person’s page in your workspace. You should use liquidA syntax that supports variables, letting you personalize messages for your audience. For example, if you want to reference a person’s first name, you might use the variable {{customer.first_name}}. in your link to personalize the shortcut for everybody in your workspace.
- Go to People and select a person in your workspace.
- Click Shortcuts and select Add a shortcut.

- Select whether to add a Link or a Webhook. If you’re not familiar with webhooks, you probably want to add a link.
- Set a Name for your shortcut. This is how you’ll recognize your shortcut in Customer.io.
- Provide the Value for your shortcut. This is the URL you want to link to. Remember, you can include liquidA syntax that supports variables, letting you personalize messages for your audience. For example, if you want to reference a person’s first name, you might use the variable
{{customer.first_name}}. in your URL. - (Optional) If you selected Webhook in earlier steps, set your HTTP verb, request headers, and body (where applicable). For more information, see Webhook shortcuts below.
- Click Add shortcut.
If you don’t want to perform the action defined by your shortcut, you can click Shortcuts > > Copy link to copy the link for your shortcut. Paste it into a text editor to make sure that it works as expected.
Personalize shortcuts with liquid
You add a shortcut on an individual person’s page, but shortcuts apply to all of your people. The shortcut that you add on one person’s page will also appear on everybody else’s page in Customer.io. You can template shortcuts using liquidA syntax that supports variables, letting you personalize messages for your audience. For example, if you want to reference a person’s first name, you might use the variable {{customer.first_name}}., to produce URLs that apply to everybody in your workspace.
While you can use conditionals and other complex liquid in your shortcut URLs, variables are limited to attributesA key-value pair that you associate with a person or an object—like a person’s name, the date they were created in your workspace, or a company’s billing date etc. Use attributes to target people and personalize messages. Attributes are analogous to traits in Data Pipelines. and Customer.io “user” variables.
Attributes are items you reference in liquid using customer—like customer.id to reference an ID or customer.email to get a person’s email address. This means that you should set the variables that you want to reference outside Customer.io as attributes on people in your workspace.
User properties are the user.email, user.id, and user.role of the team member who uses the shortcut. These properties help you reference and capture information about the person using the shortcut, so you can audit who used the shortcut or assign the shortcut user as a support representative. You can find a person’s email address, ID, and role under Settings > Account Settings > Team Members.
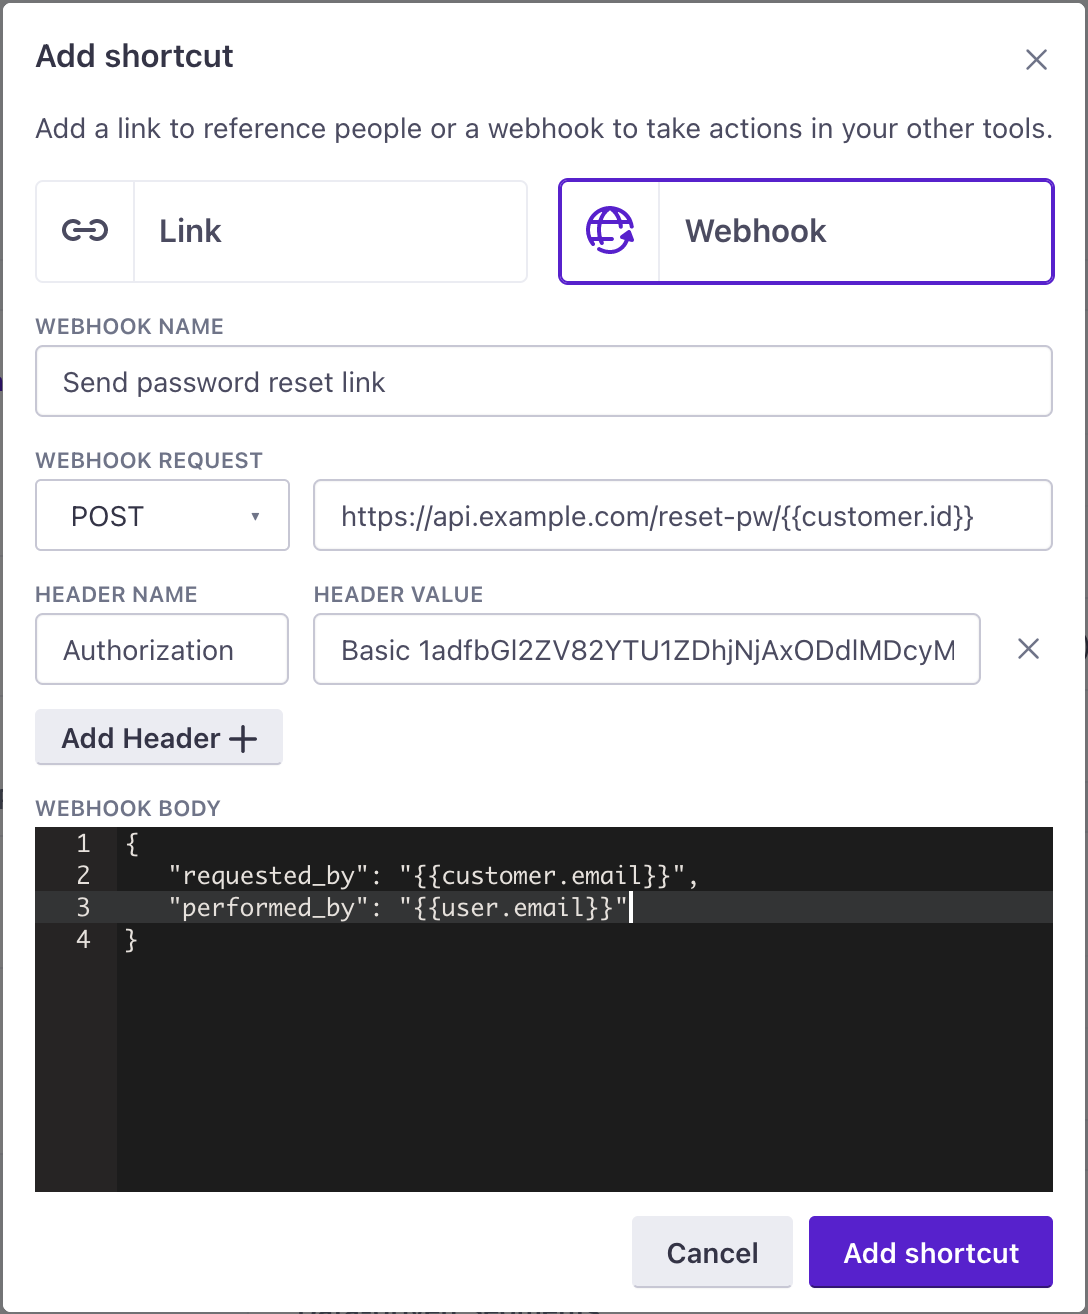
For example, imagine that you want to set up a webhook shortcut that assigns the person who clicks the shortcut as a support representative for a person. Your payload could reference both the “person” (customer) and Customer.io team member (user).
{
  "needs_support": {
    "id": "{{customer.id}}",
    "email": "{{customer.email}}"
  },
  "support_rep": "{{user.email}}"
}
Webhook shortcuts
You can add a webhook as a shortcut. This provides a quick, low-code solution to call an external API. You could use shortcut webhooks to suspend or reactivate accounts, pull information about people, and trigger other actions in third-party services.
When you set up a webhook shortcut, you’ll pick an HTTP verb, set request headers, and populate a request body where applicable. Like your request URL, request headers and bodies support liquidA syntax that supports variables, letting you personalize messages for your audience. For example, if you want to reference a person’s first name, you might use the variable {{customer.first_name}}., letting you populate your webhook request with information for each individual person.
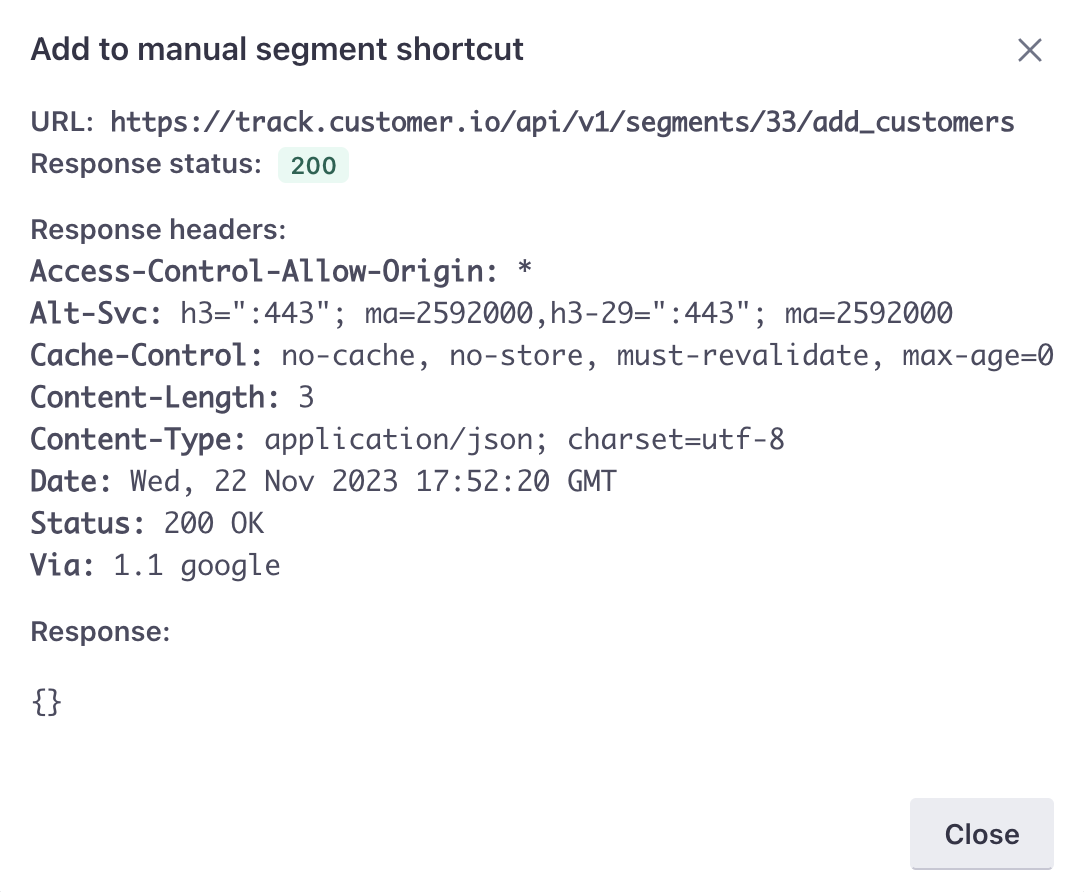
When you use a webhook shortcut, we’ll show you the response. While you can perform GET requests with a webhook, you cannot save or manipulate data from a response. If you want to save data from an external service and associate it with a person, you should create a campaign with a webhook action.
Webhook shortcuts do not retry
Webhook shortcuts expect a response within 25 seconds and will not retry. If we don’t receive a response within 25 seconds, we’ll consider the request timed-out.
Add/remove person in a manual segment
Instead of uploading a CSV to adjust the people in a manual segment, you can add people to or remove them from a manual segment using a shortcut!
- Go to People and select a person in your workspace.
- Click Shortcuts and select Add a shortcut.
- Select Webhook.
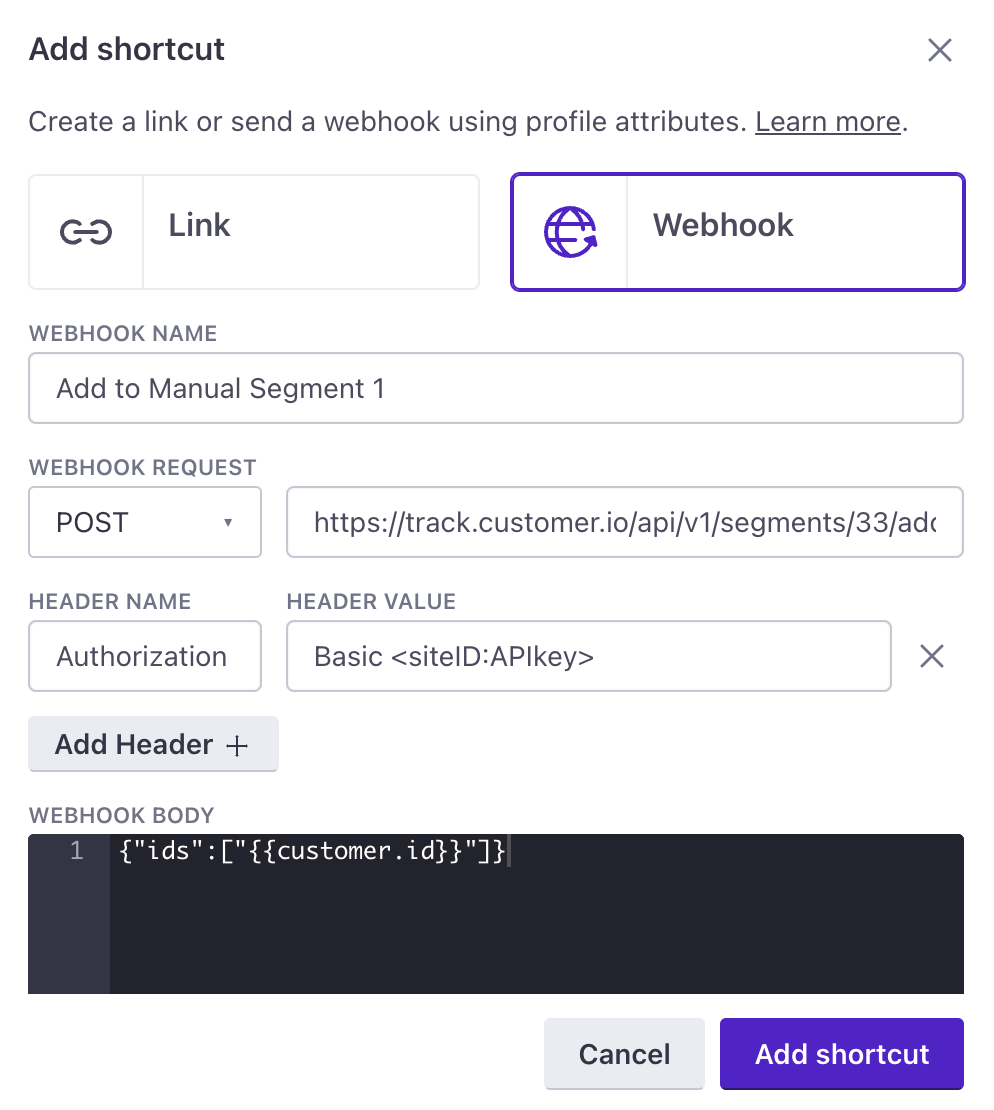
- Add a Name to the shortcut like “Add to Segment_Name.”
- Select
POSTas the method. - Add one of our Track API endpoints:
- To add a person, add this URL and replace the segment ID: https://track.customer.io/api/v1/segments/{segment_id}/add_customers.
- To remove a person, add this URL and replace the segment ID: https://track.customer.io/api/v1/segments/{segment_id}/remove_customers.
- Add a Header for Authorization. The value should be:
Basic <siteID:APIkey>, where your credentials and the colon are base64 encoded. - Add this body:
{"ids":["{{customer.id}}"]}. - Save changes.
- Click Shortcuts then select the shortcut you just made. You’ll receive a 200 if it’s successful:
- Go to your manual segment, and you’ll see the audience now includes or excludes the person!
Test your shortcut
After you set up your shortcut, you should test it to make sure that your liquid variables and logic render correctly. If there’s a liquid error in your shortcut—a property doesn’t exist, or the logic in your shortcut doesn’t render, you won’t be able to use the shortcut. You can hover over the shortcut to see more information about the error.
You can copy a link URL and paste it into a text editor to test that your logic and variables render the way you expect. On a person’s page, click Shortcuts > > Copy link to copy any of your shortcuts.
If there’s an error in your liquid, we’ll render the liquid in the URL itself. For example, if you added an extra angle bracket on customer.id, your shortcut URL will show {{customer.id}}} when you copy the link.
Edit a shortcut
- Go to People and select a person in your workspace.
- Click Shortcuts, select for the shortcut you want to modify, and then click Edit.
- When you’re done with your edits, click Save changes.
Delete a shortcut
- Go to People and select a person in your workspace.
- Click Shortcuts, select for the shortcut you want to modify, and then click Delete.

