Onboarding Campaign
Introduction
After someone signs up for your app, the task of onboarding them begins! Show how they can get value from your app and improve your user activation and retention rates. Thoughtful onboarding email campaigns are a win for everyone.
This recipe will show you how to set up targeted drip series using segment triggered campaigns in Customer.io to keep people interested, learning, and making progress.
Ingredients
- Choose a specific behavioral goal that is key to your onboarding process
- Optional: basic knowledge of Liquid
Method
While you can have several onboarding campaigns for your customers, each campaign should be focused on nudging them towards a particular goal.
For this example, we’ll use a fictional subscription service based on the Acme Corporation from Looney Tunes. Each month, subscribers get a box of roadrunner-catching products. The specific goal we have for Acme customers, like Wile E. Coyote, is to get them to fill out their profile so they can get tailored product selections.
Let’s get started!
Prep for the campaign
Before getting started on creating this campaign, let’s do some prep work. You’ll want to decide on a specific behavioral goal and think about how many messages you’d like to create to nudge people towards that goal.
Create a new condition triggered campaign
In the navigation, click Campaigns, followed by Create Campaign. Give your campaign a name that makes its purpose clear so you can track it later (in this case, I’ve used Onboarding Series #1: Profile Set-up).
Choose the conditional trigger type for your campaign.
Define your trigger
Your trigger defines who will receive this campaign. In our case, that’s members of Acme’s Hunters Club service who haven’t yet filled out their profile. Click Add segment condition, and find your segment:
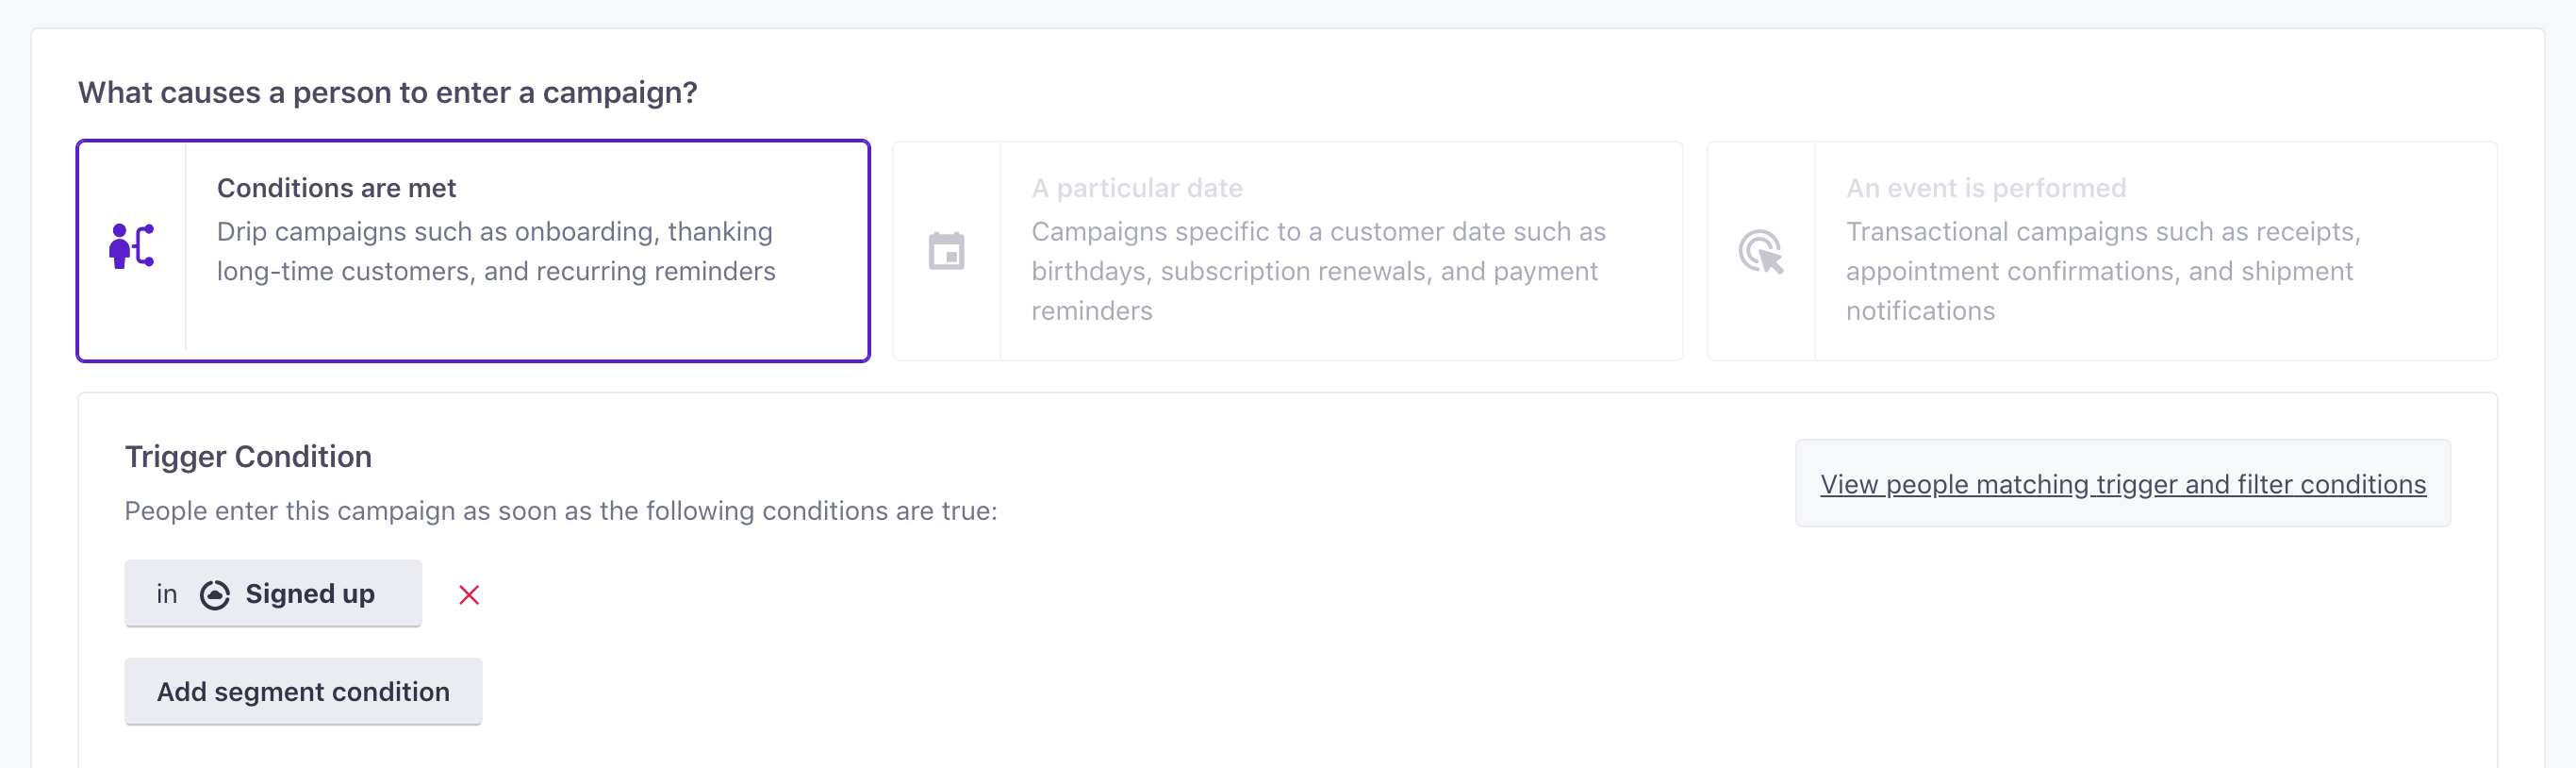
When you first got into Customer.io, you may have noticed a default segment called “Signed up” which is composed of anyone whose created_at attribute is a timestamp. Here, we’re using that “Signed up” segment because we want to send our onboarding campaign to anyone who signs up for Acme.
Need a segment?
You might need a segment that doesn’t exist yet. For example, you may have deleted the “Signed up” segment or want to reach a more specific audience for your particular onboarding series. In that case, head to Segments and create your segment.
An example ‘Signed up’ segment looks like this:

Once you save your segment, you can then use it in your triggered campaigns.
Optional: Add a filter to prevent people from receiving more messages once they take action
A trigger is evaluated at the start of a campaign— if a user enters the segment, they’re added to the campaign. Filters, on the other hand, are evaluated just before a message is sent. They’re helpful when you want to stop messages from going out to users after they perform a certain action. In our case, we want to stop telling them to fill out their profile once they’ve filled it out.
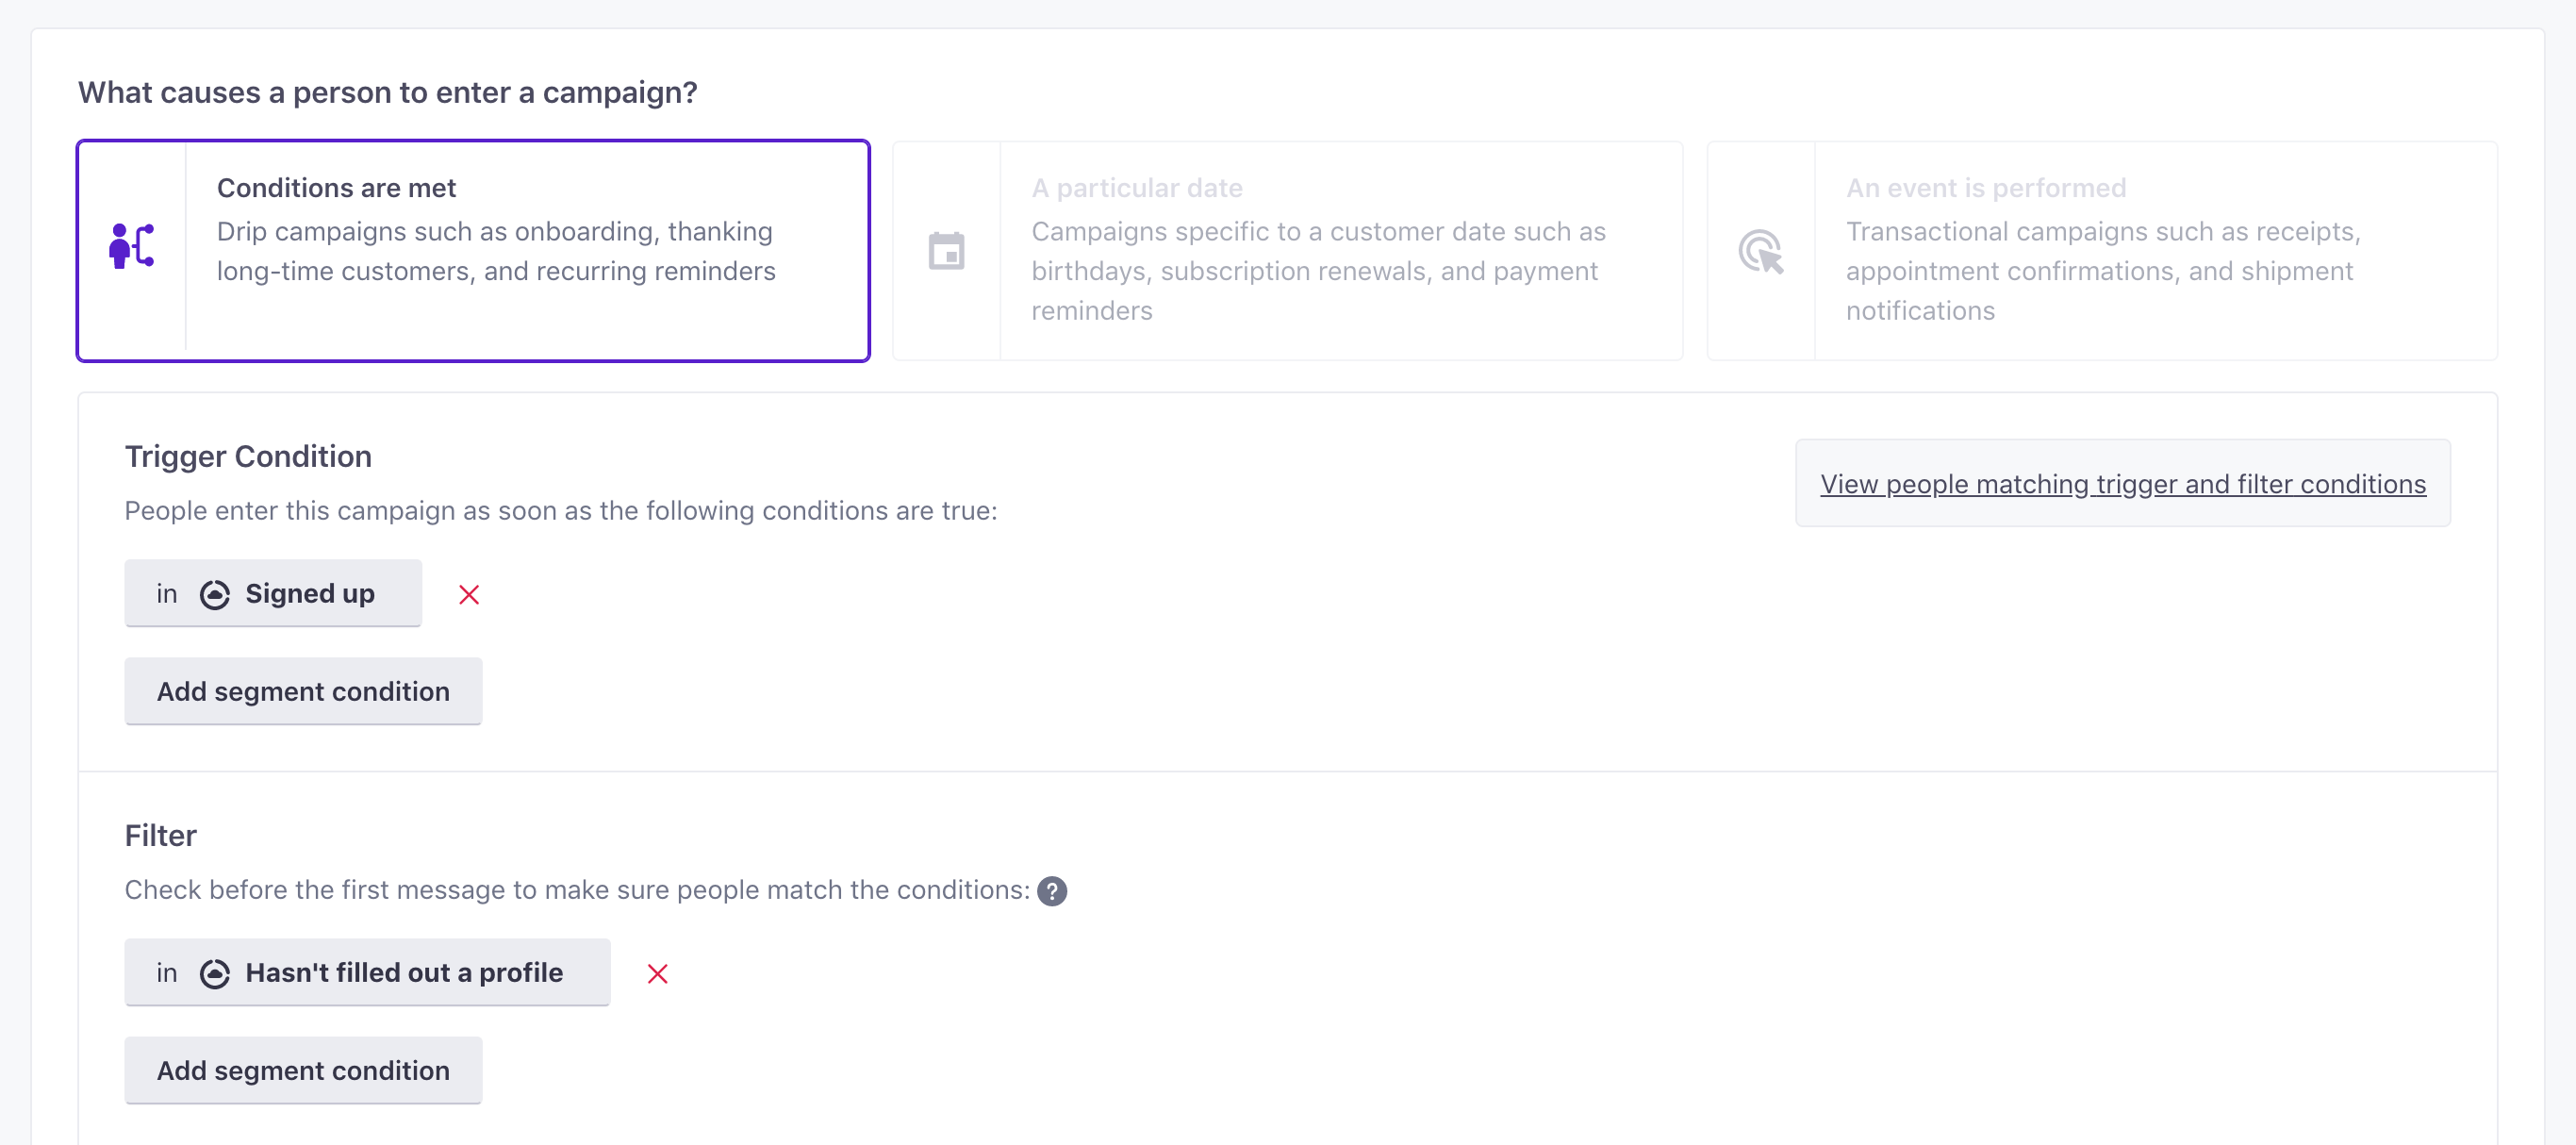
In this example, if Wile E. Coyote fills out his profile, the filters ensure he’ll stop getting the emails.
Set up message timing and content in the workflow
Add your first email
Once you’re in the Customer.io workflow, drag and drop an email into the builder. Then, click it to customize it:
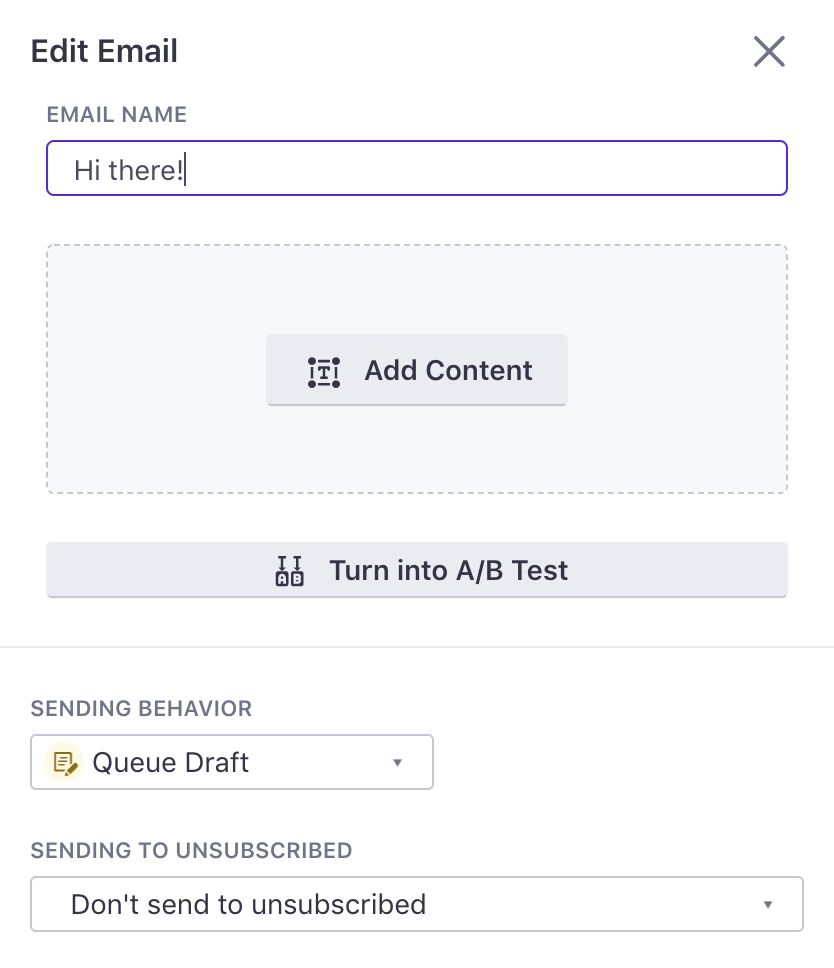
Give that email a name that makes its purpose clear. This can be your email’s subject line, or something totally different. Click Add Content in the side panel to start writing your content!
Write your email’s content
Our composer has powerful tools you can use to personalize each email, and make the onboarding experience that much better. Here’s our example:
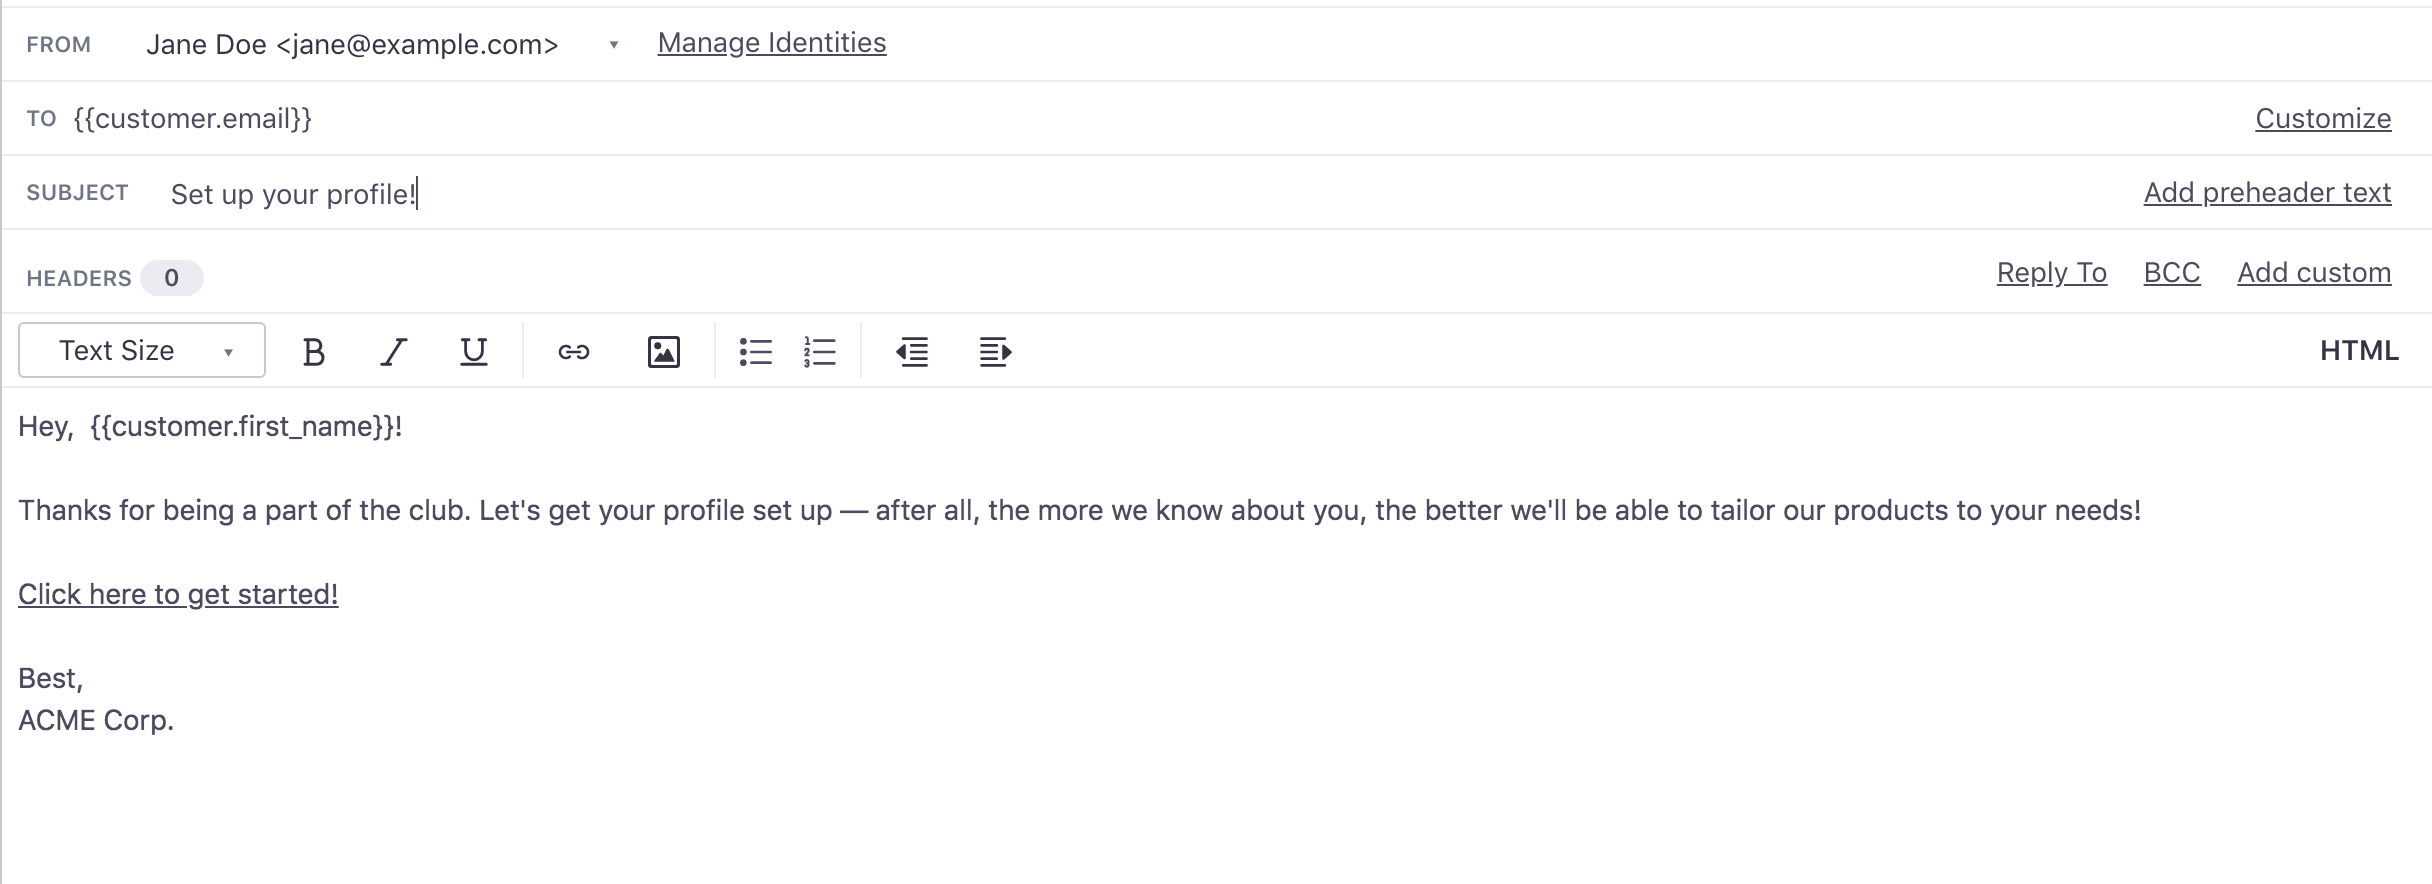
You can use Liquid tags to add a customer’s name (as I’ve done with {{customer.first_name}}) and tailor the content depending on which attributes you use.
Use the Layout & Preview toggle in the top left to see what your email will look like in inboxes everywhere. (If you’re working on a larger screen, you’ll see that view as a 3rd panel on the right.)
Once you’re happy, save your email, and click Done. You’ll be taken back to your workflow.
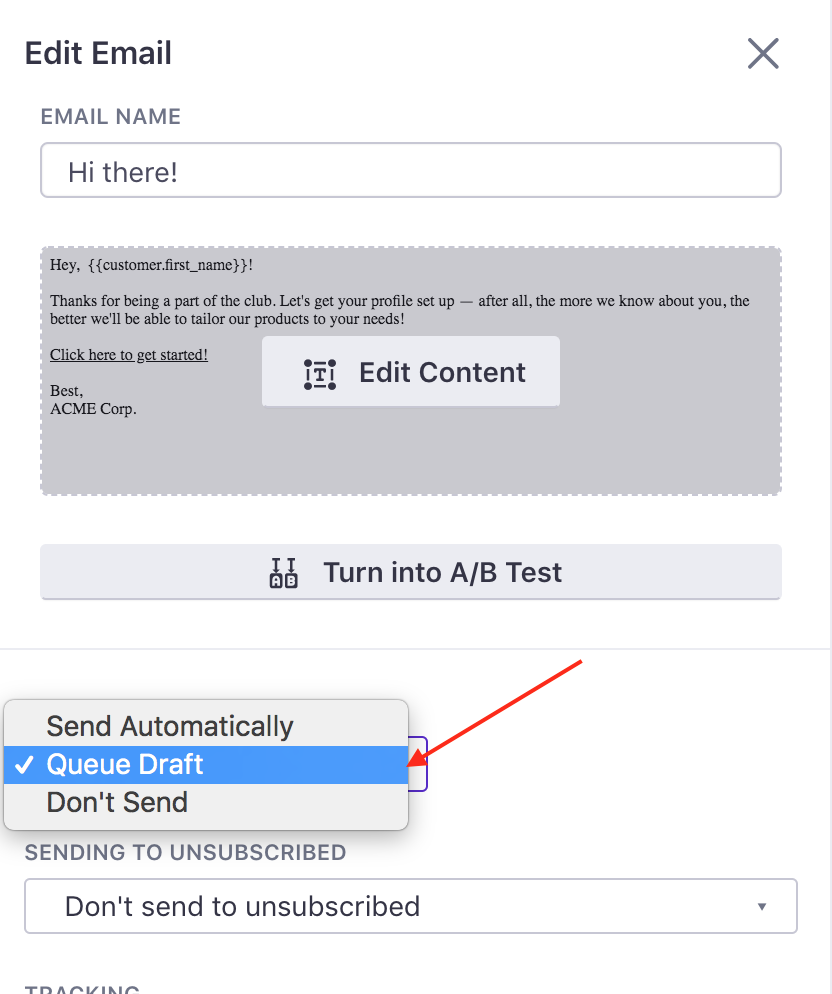
Edit your email’s behavior
I want this message to draft first (so I can approve it before sending), so I’m going to leave the default email behavior as ‘Queue Draft.’ If I wanted it to send right away, I would select ‘Send Automatically.’
Add a delay
Timing is key in onboarding. We want people to have a chance to explore the app before prompting them to fill out a profile. So from the workflow builder sidebar, I can click and drag a Delay before they receive my next message:
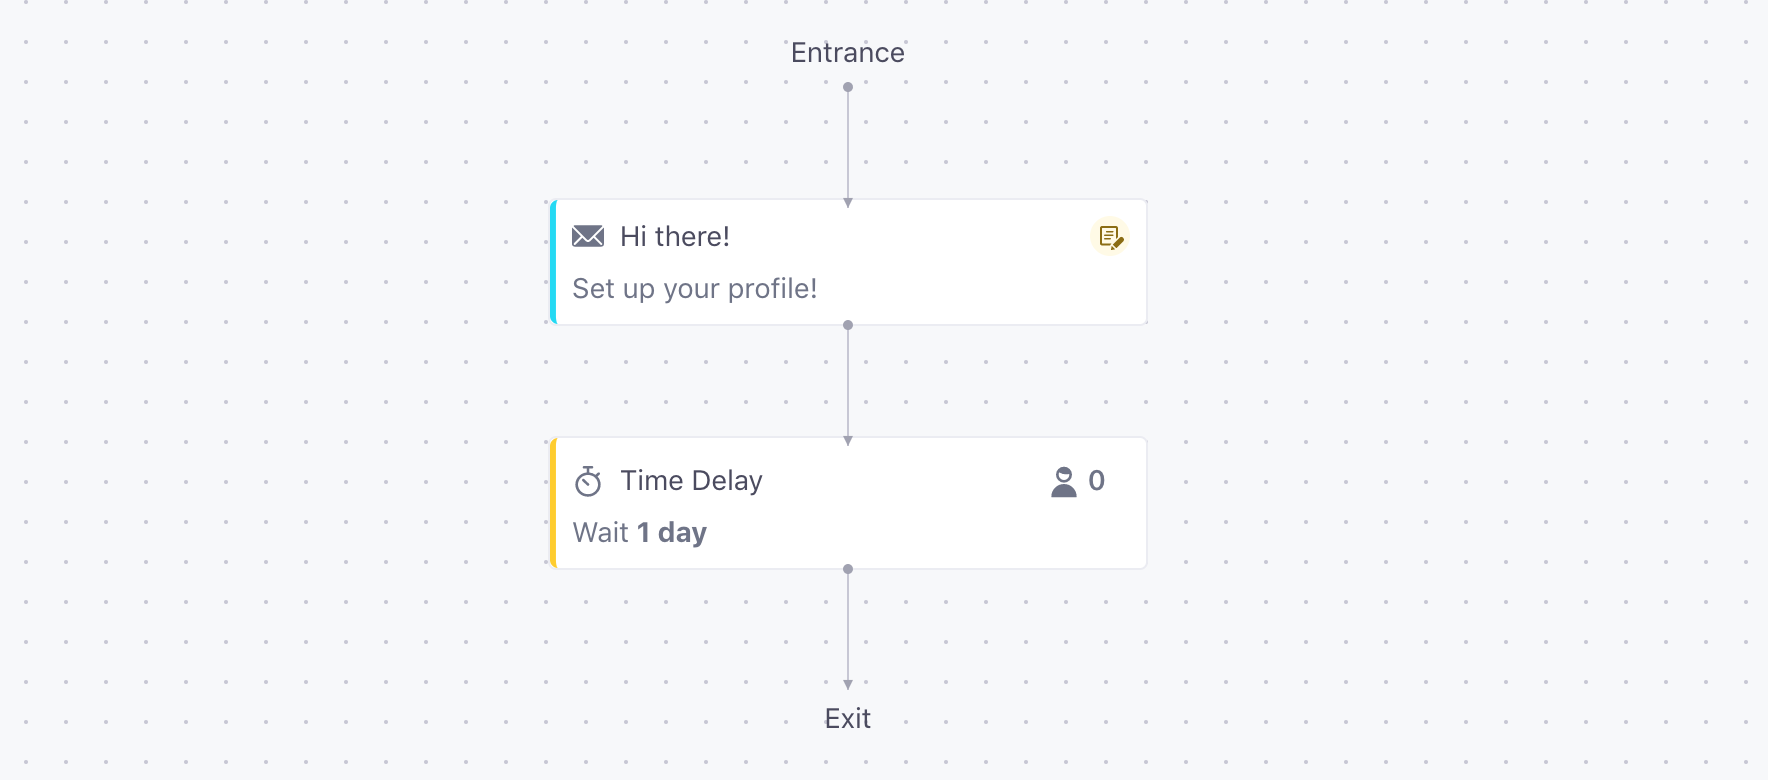
I’ve set mine to one day, but you can set yours to whatever you like (days, minutes, or hours).
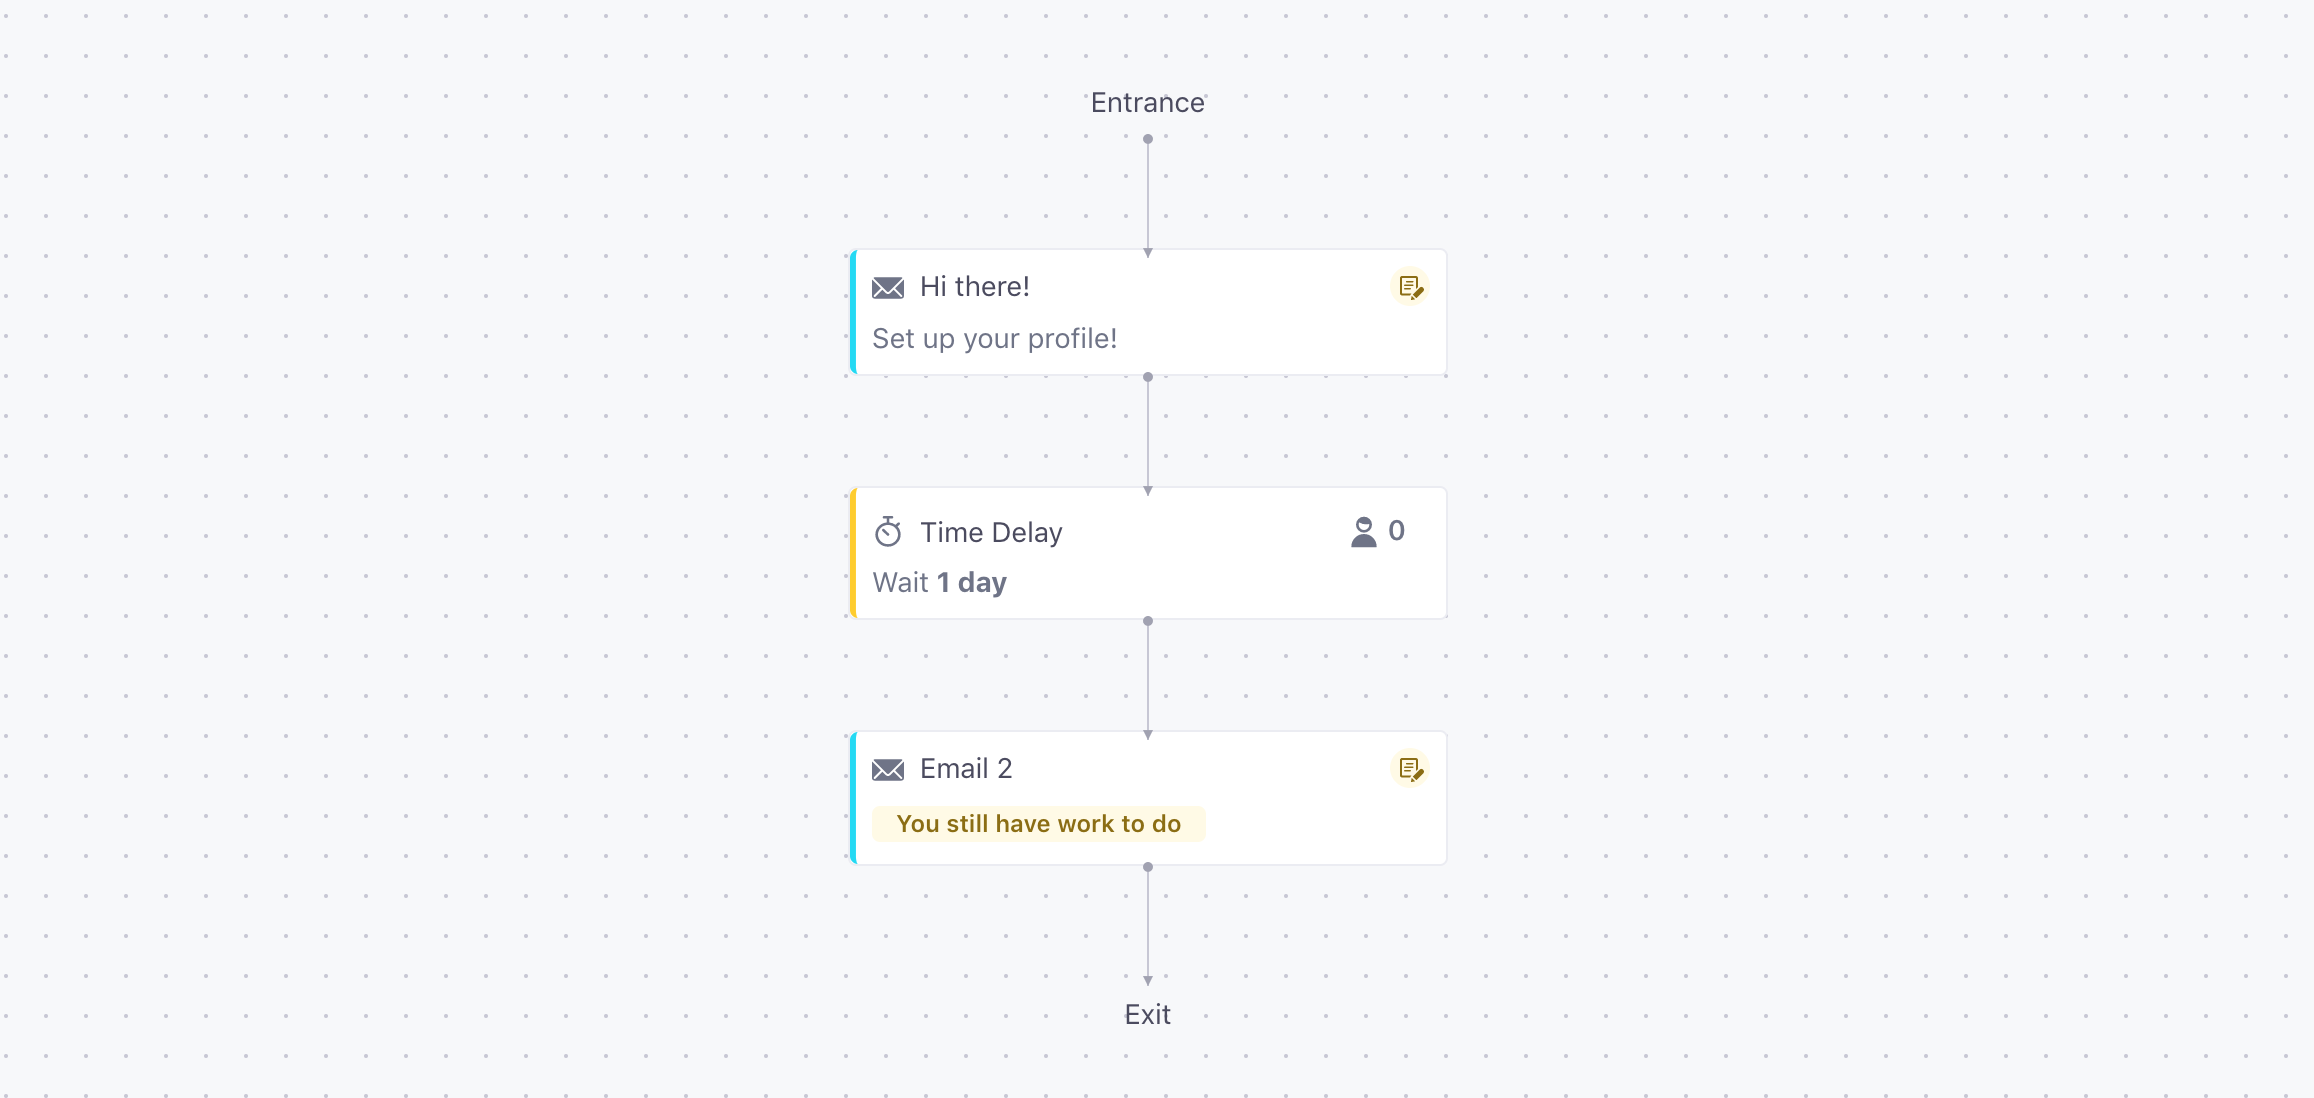
Add another email
Now it’s time to really start building out our campaign. I want to add another email, one which prompts the customer (if they still haven’t’t filled out their profile) to do so. Once again, I drag an email into the workflow after the delay.
Optional: Set up a time window
Say I know that my users often have some downtime on weekend mornings— that’s when they browse products most often. So maybe that’s when I want to ping them. Customer.io lets you do that, by adding a Time Window in the workflow. Drag and drop it in, and click to set it up:

This way, I can be sure that they’ll get the message when it’s most appropriate for them, and most helpful!
And so on…
With this in mind, keep setting up your workflow. Add emails, delays, and time windows as appropriate. You can see my Acme example here:
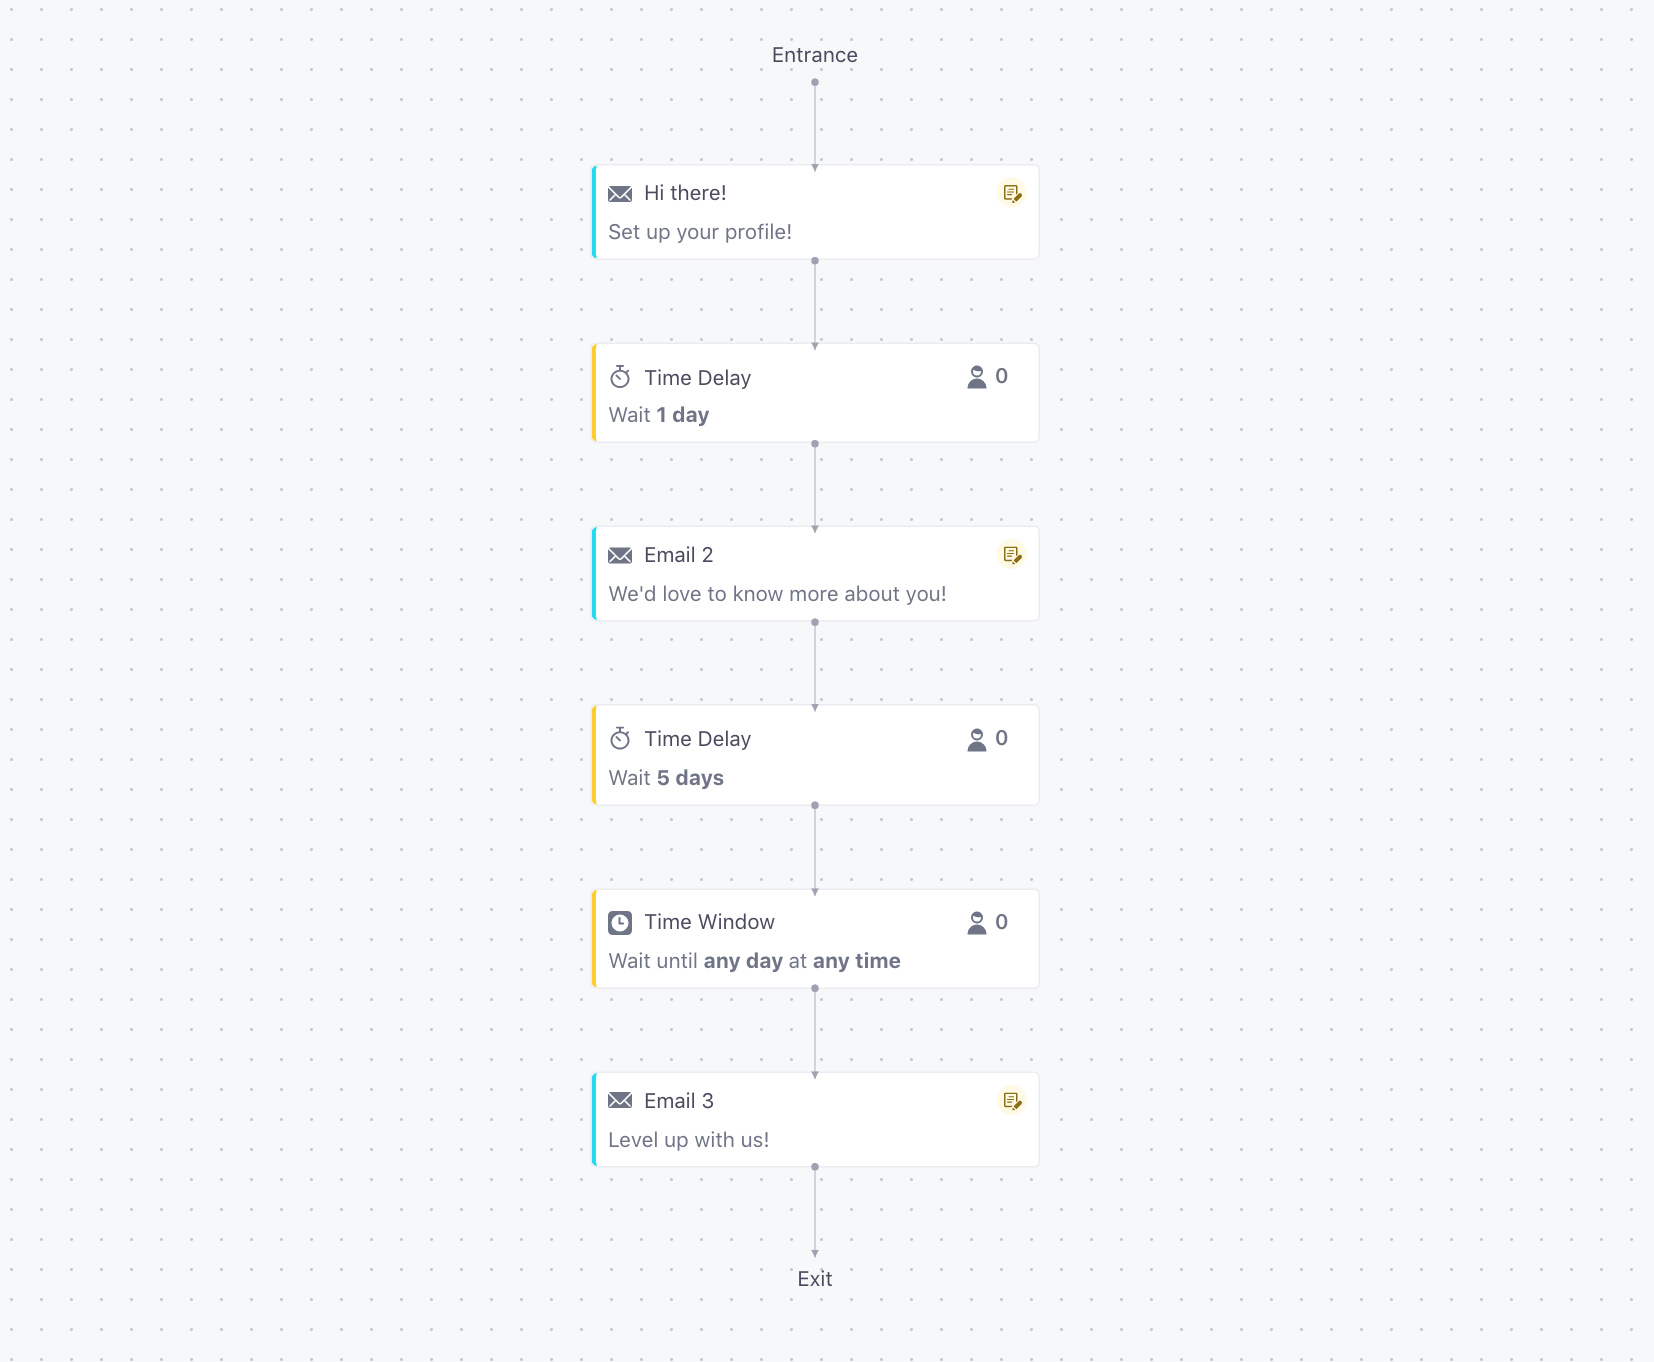
Good onboarding emails are well-timed, focus on a behavioural goal, and offer different techniques and framings to give value to the customers (and the company). My first email is ‘Why you should set up your profile,’ with a view to giving Wile E. Coyote better product recommendations if I know more about him. The final one is ‘How to level up your roadrunner-catching skills,’ appealing to customers’ desire to catch more roadrunners— and prompting them to fill out their profile in the process.
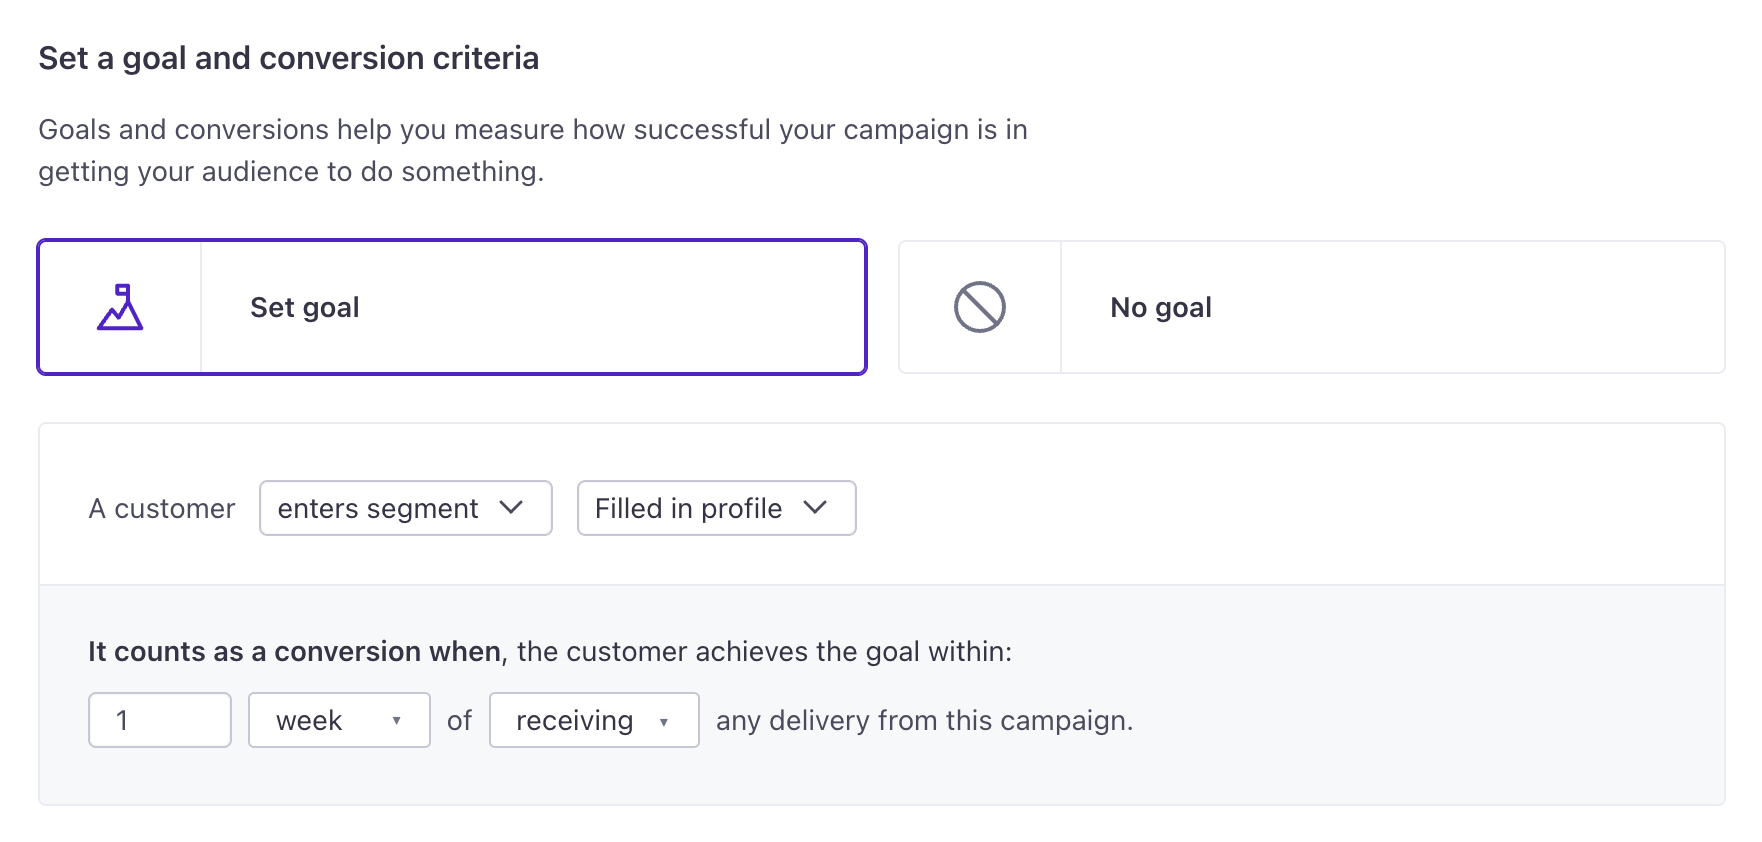
Set up your conversion goal
Once you’re done with your campaign setup, you can set a goal to help you understand whether or not your messagesThe instance of a message sent to a person. When you set up a message, you determine an audience for your message. Each individual “send”—the version of a message sent to a single member of your audience—is a delivery. and journeysA person or data object’s path through your campaign. have their desired effect. Conversions can be a more reliable way to track success than opens and clicks.
In this case, a conversion is the behavioral goal we decided at the beginning: whenever a customer fills out a profile. I have a segment that identifies those customers:

Which I then use to define my conversion goal:
Review!
It’s time to review your onboarding campaign; check it out at a glance and see if there are any errors or anything missing. Check timing, email names, and sending behaviours until they’re exactly what you need. And finally, choose who to send to!
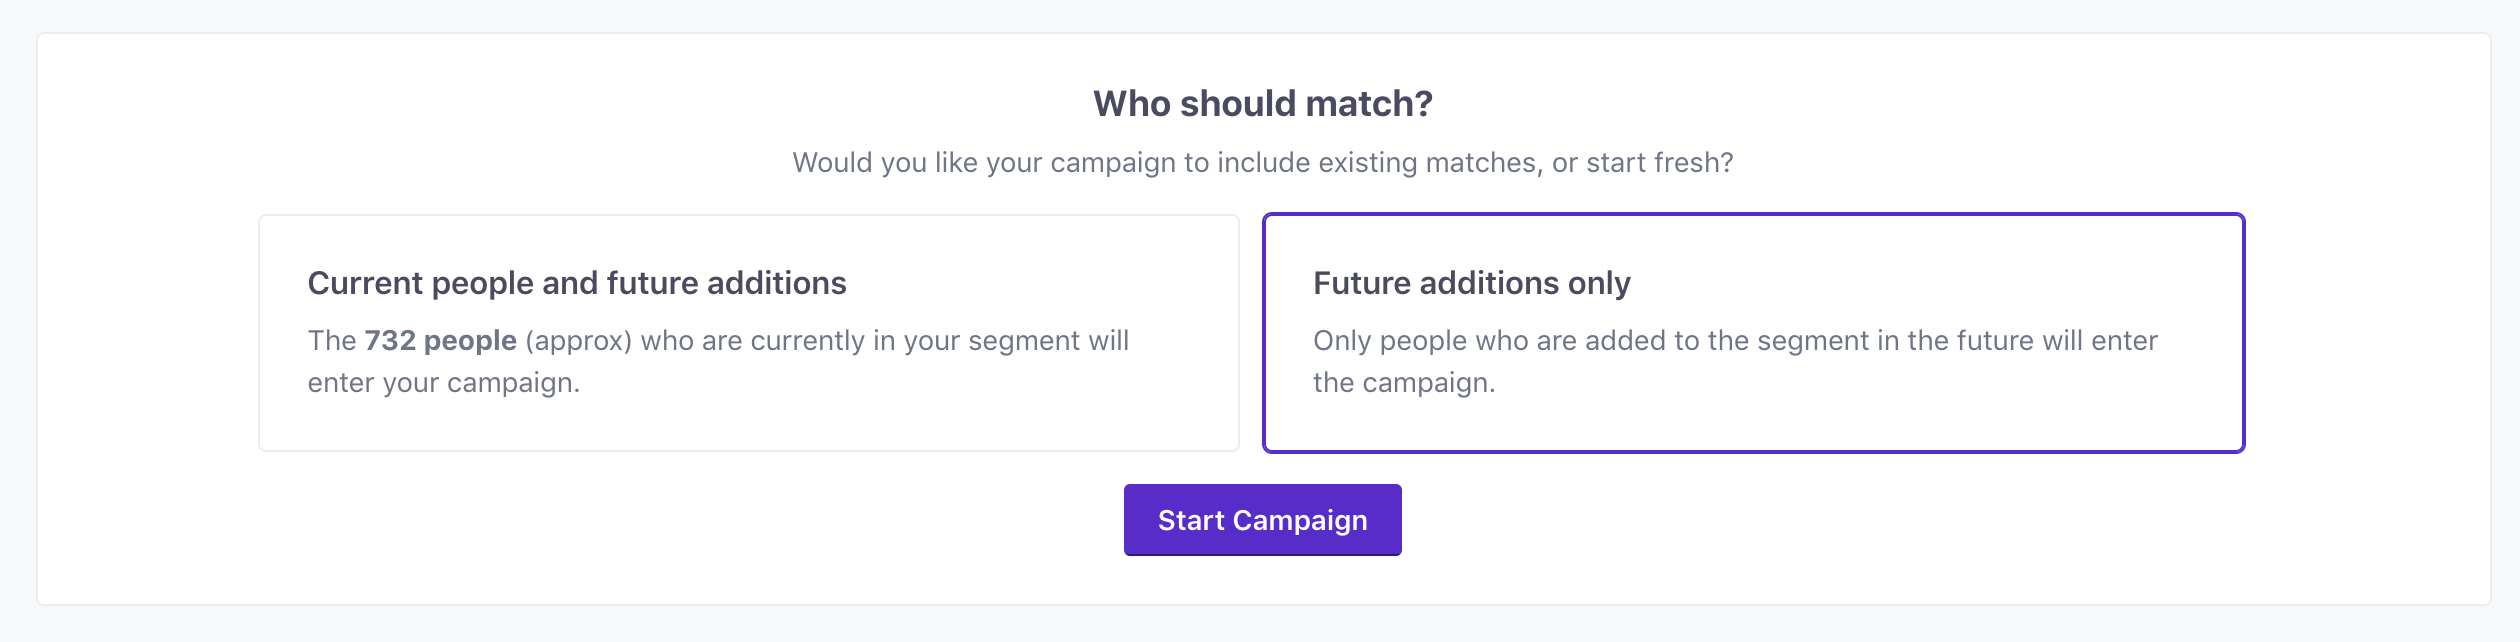
Current or future matches?
By default, campaigns are forward-looking. Anyone who matches your trigger in the future will receive the onboarding campaign. However, you can choose to include existing matches, too—it’s up to you!
For my example, I only want future matches to receive my new onboarding campaign:
Get sending!
Click start, and that’s it! You can head over to the campaign’s overview page after the emails start sending, to get an insight into its performance.
If you’ve set your emails’ sending behavior to draft to check how your campaign will run, remember you’ll have to set to “Send Automatically” to reach your customers.
Wrap Up
Getting started in any app and making that app stick in a user’s day-to-day can be a struggle, and that’s why thoughtful onboarding campaigns are so critical.
If you have any questions about the process or are wondering how to apply it to your service (assuming you don’t offer a roadrunner-catching product subscription box), please send us a message!

