How do I create multiple subscription types?
Before the subscription center existed, we recommended the following options to those who wanted to track preferences at a more granular level than our global unsubscribe and to segment people based on these preferences. We recommend using our subscription center moving forward.
Customer.io now has a subscription center!
Our subscription center lets you manage multiple subscription topics and set subscription-based audiences for campaigns and broadcasts. If, however, the options in this article better serve your use case, please let us know so we can continue to improve our product.
Here are three tracking subscription preferences:
- Use our subscription center!
- Custom unsubscribe links: This method lets you segment based on people who have clicked a link that represents unsubscribing.
- Form-based, custom subscription center: This method lets you map a custom form to profile attributes to capture your customers’ subscription preferences.
Custom unsubscribe links
Let’s say you have multiple webinars that you run. You want to send updates to people about a particular webinar but also give them a way to opt out. This method works great for discrete events that you don’t really want to keep around forever as a preference on people’s profiles.
Custom unsubscribe links must adhere to new Google and Yahoo standards
If you use custom unsubscribe links, you’ll also need to do a bit of development work to support the new RFC 8058 before June 1, 2024. See custom unsubscribe links (RFC 8058) for more information.
1. Create landing pages
Set up different links/landing pages, three in this example, and make sure link tracking is enabled. The content on the pages can be anything you want, but make sure the person landing there knows they’ve been unsubscribed.
e.g.
example.com/unsub/webinarupdates#02-20-2017example.com/unsub/webinarupdates#02-27-2017example.com/unsub/webinarupdates#03-05-2017
Note: This custom implementation does not give your customers a way to resubscribe to this information.
2. Change the unsubscribe link in the layout
In your layout, replace Customer.io’s global unsubscribe link {% unsubscribe_url %} with the link to one of your landing pages. In our webinar example, you would either need to have a different layout for each webinar preference or move the link into the body of your message.
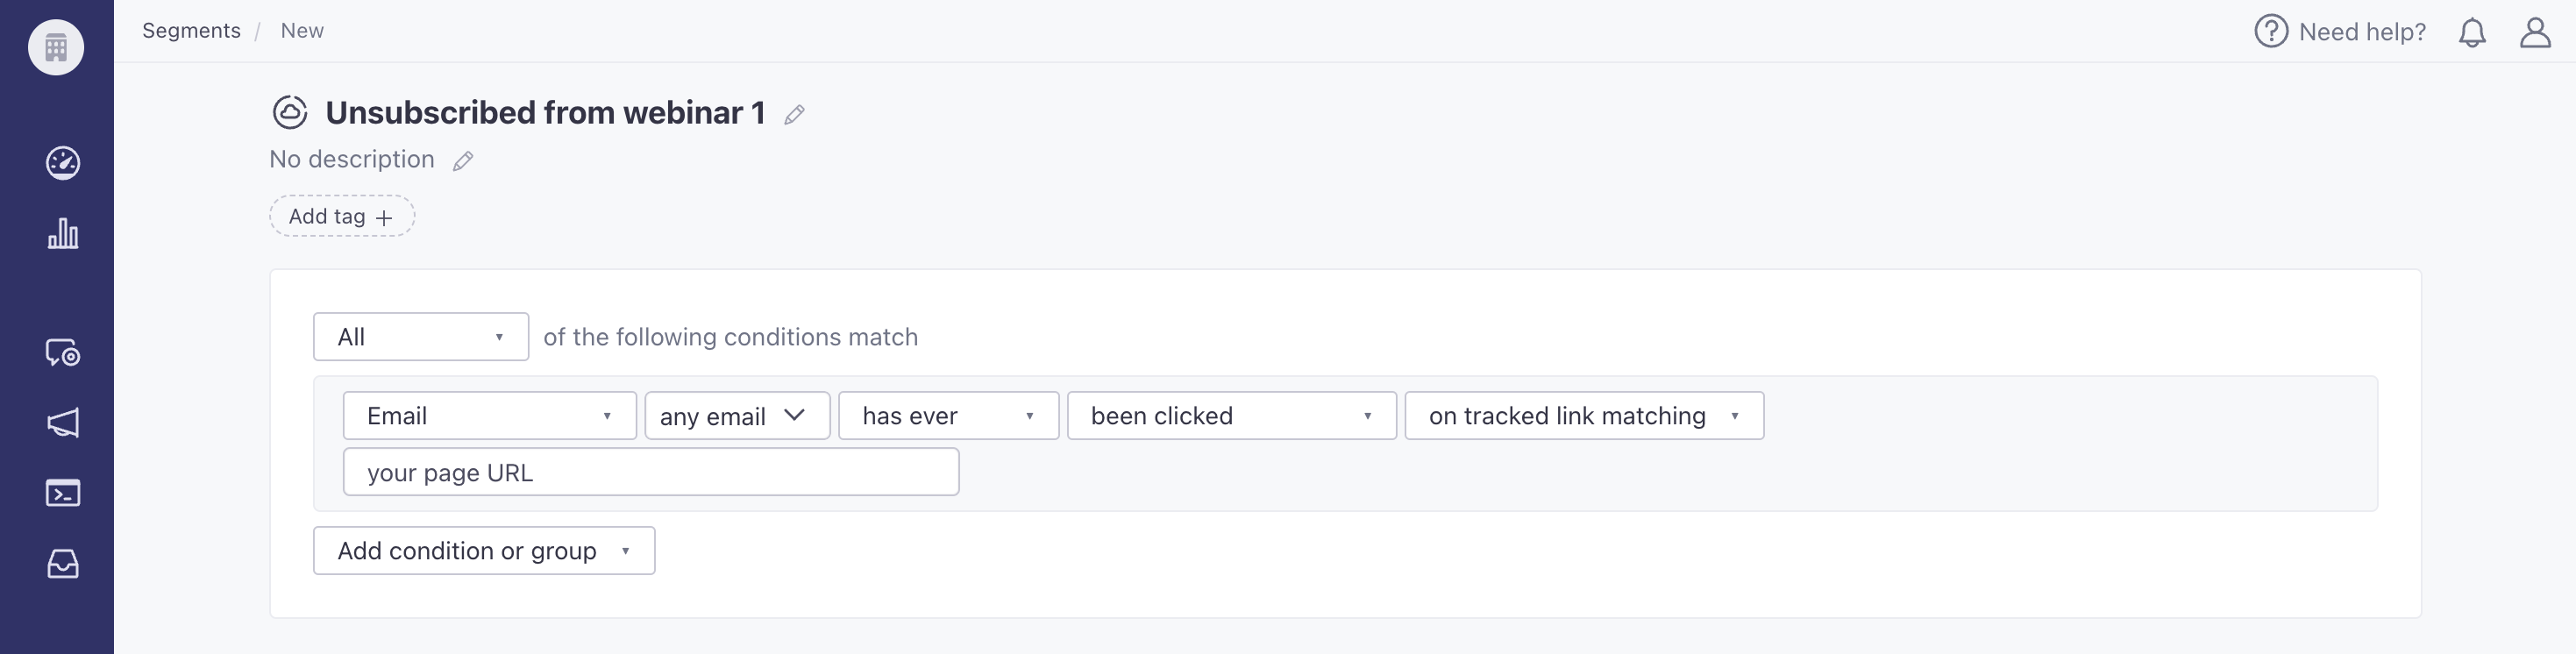
3. Create data-driven segments to avoid sending to unsubscribed people
Give your new segment the following rule: “Email [any email] has ever been clicked on tracked link matching [your page URL]”, like this:
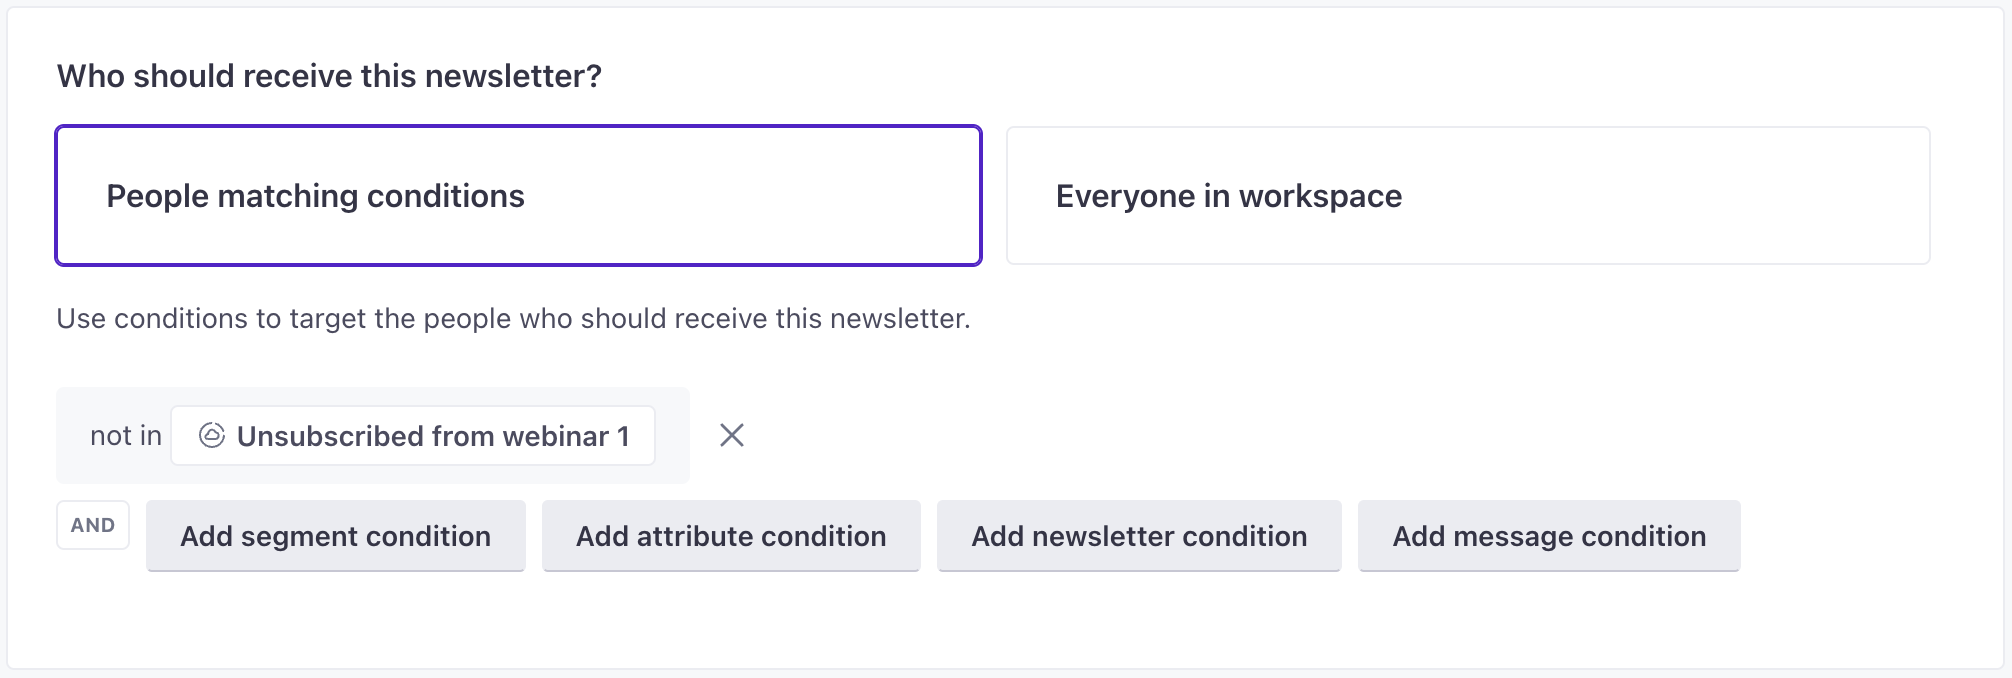
4. Target these segments to message the right people
You can then use these segments to ensure you don’t send messages to people who are unsubscribed.
You can also use these segments to trigger campaigns to update people’s attributes using the Create or update person action.
Creating your own subscription center
For this method, you will need to build a subscription center form and use Customer.io’s forms integration to connect your custom form to your workspace.
Overall, you’ll need to:
- Create your form with the various subscription options you need.
- Map your form to their respective profile attributes in your workspace.
- When you set up your form in Customer.io, you will map your form’s subscription options to the profile attributes that you want to use to capture users’ subscription preferences.
Always include a global unsubscribe option
Be sure to include a global unsubscribe option on your form and map it to the reserved unsubscribed attribute. If a person wants to unsubscribe from all of your messages, your form will set this attribute to true, making sure that you respect their unsubscribe request.
When someone submits your form, their subscription attributes will update according to the mapping you set. Then you can set up segments to include or exclude people who have various subscription attributes for future messages.
Report unsubscribe metrics for custom subscription centers
When you use our default unsubscribe link and page, we attribute unsubscribe requests to a particular message, helping you understand how your audience receives your messages.
If you use a custom subscription center, you need to attribute unsubscribes to a particular message if you want to capture unsubscribe metrics for your messages. You can do this using our custom unsubscribe API.
This endpoint attributes each unsubscription to a specific message and sets the person’s unsubscribed attribute to true. If you use a custom subscription center and manage subscriptions with other attributes, the unsubscribed attribute may not represent your audience’s subscription preferences.
The unsubscribed attribute represents a global unsubscription in Customer.io. A person whose unsubscribed attribute is equal to true won’t receive any of your messages unless you specify this in settings for campaigns and broadcast and settings for your messages in your workflows.

So, if you use a custom attribute to represent your audience’s subscription preferences, and you report unsubscription metrics using the unsubscribe reporting API, you may need to set your campaigns and broadcasts to All subscribed and unsubscribed so that your audience continues receiving messages in accordance with their custom subscription preferences.
Your audience can still unsubscribe if you use a custom subscription center and do not report unsubscribe metrics back to Customer.io. You just won’t be able to attribute your audience’s unsubscribe requests to a particular message.

