Campaign for syncing Mixpanel cohorts
Send cohort data from Mixpanel to Customer.io Journeys so you can add people, index events, and more.
In Mixpanel, you can organize users into cohorts, which are akin to segments in Customer.io. Mixpanel cohorts compile users based on criteria like what events they’ve performed. You can send cohort data from Mixpanel to Customer.io through webhooks, and you can trigger campaigns to update people, index events, and more. Visit Mixpanel’s documentation on webhooks for more info.
Before you begin
Mixpanel
You must have a paid Mixpanel plan to create custom webhooks. View other prerequisites here.
Customer.io
In your Customer.io workspace, create a webhook-triggered campaign. To begin, name your campaign then select the trigger type “Create your own trigger from a webhook.” Next, set up a custom webhook in Mixpanel.
Set up Mixpanel
- Log into Mixpanel.
- Go to Data Management > Integrations in the top navigation.
- Select Custom Webhooks from the list of integration options.
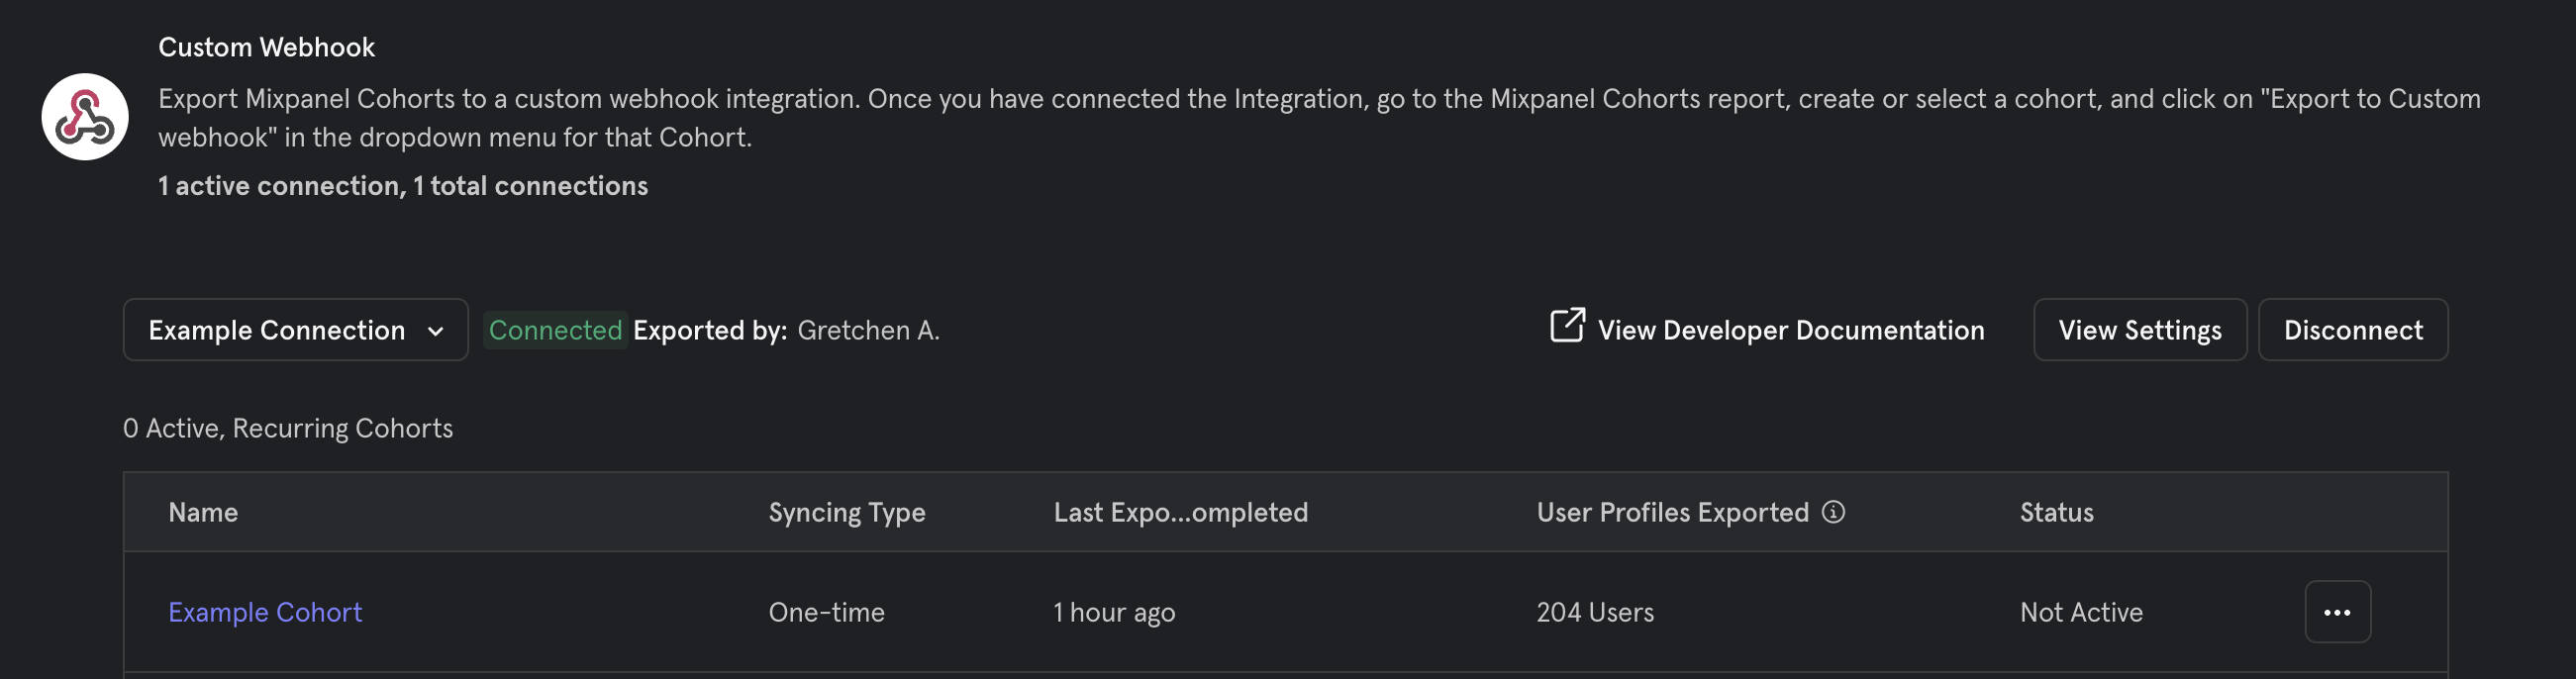
- Create a Connection. If you already have connections, select the connection dropdown then click Add Connection at the bottom.
- Provide a name. Then copy/paste the URL under Trigger Conditions from your campaign in Customer.io.
- Enter your Track API credentials under Username and Password. Make sure you use credentials for the correct workspace.
- Go to Data Management > Cohorts. Create a cohort you want to send to your workspace or select an existing cohort.
- Click the three dots followed by Export to…. Choose the name of your custom webhook then the sync frequency: one time or recurring. Click Begin Sync when you’re done. This will populate test data in your workspace to help you set up your workflow.
Mixpanel will not send more than 1,000 users per call. For info on retries, custom properties, and more, visit Mixpanel’s documentation.
Finish setting up your webhook-triggered campaign
Go to your webhook-triggered campaign.
Drag a Send Data block onto the canvas. We refer to this as a Webhook Action.
Click Add Request in the left hand pane.
Create a POST request targeting our track v2 endpoint for multiple requests. If you’re in the EU, make sure you use our endpoint with
track-euin the URL.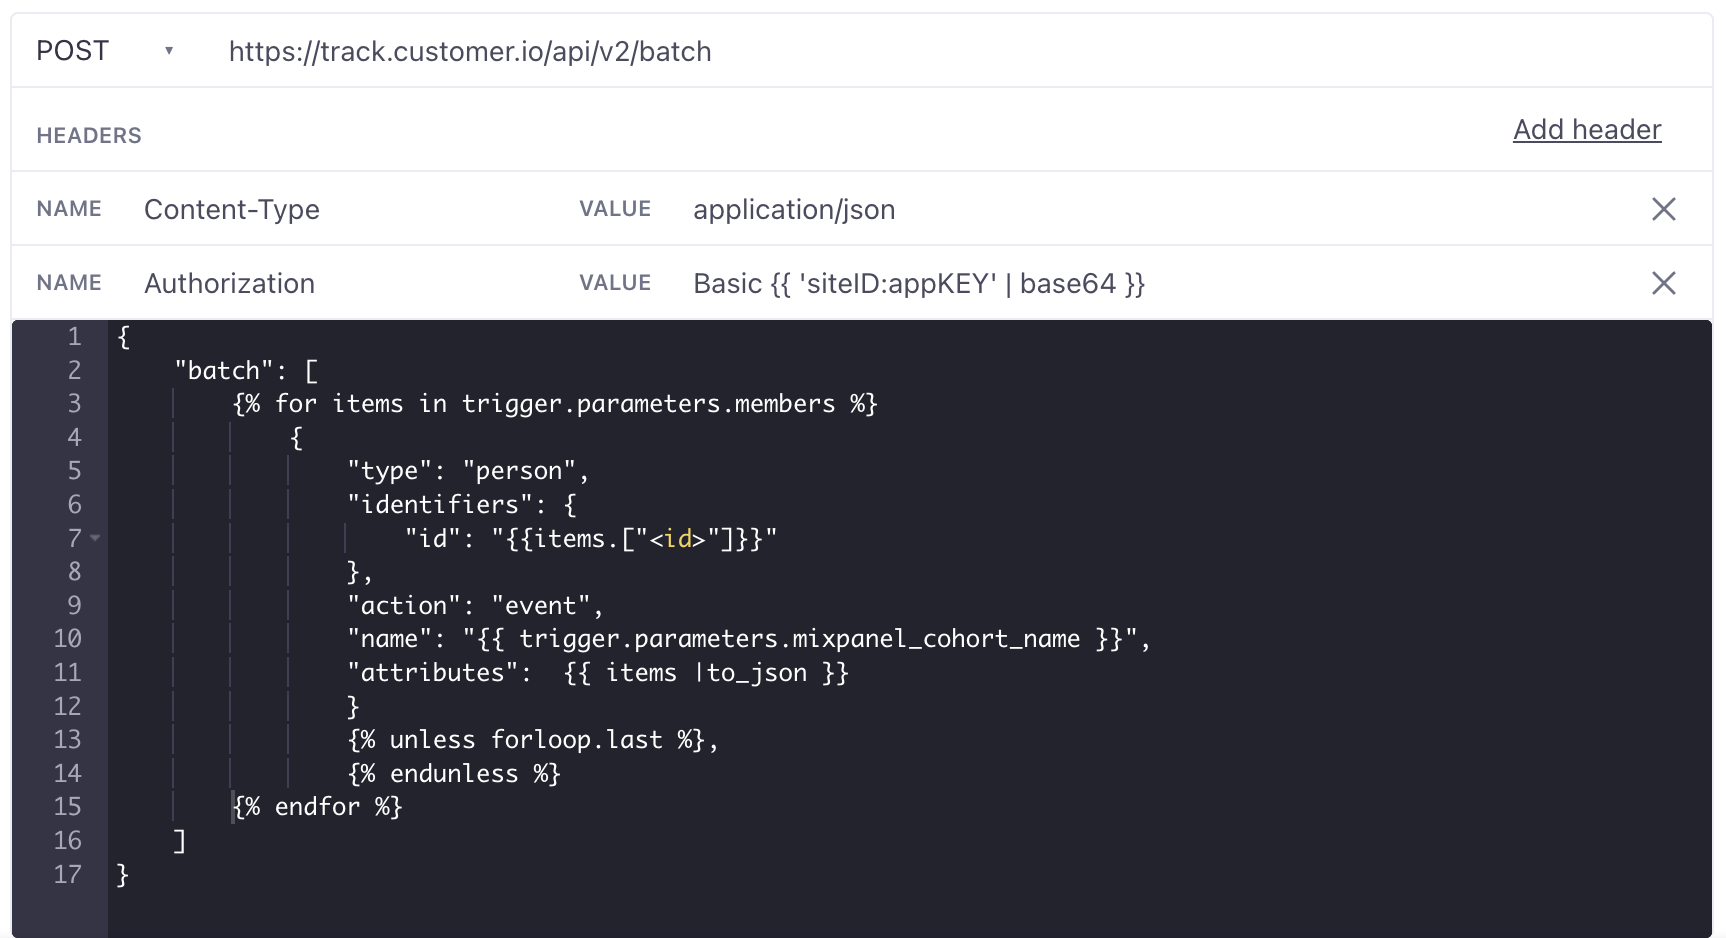
Add your Track API credentials to the
Authorizationheader: Basic {{ ‘siteID:appKEY’ | base64 }}. Make sure you use credentials for the correct workspace; these need to match those you added to Mixpanel.Add the following JSON to the body:
    {
        "batch": [
            {% for items in trigger.parameters.members %}
                {
                    "type": "person",
                    "identifiers": {
                        "id": "{{items.["<id>"]}}"
                    },
                    "action": "event",
                    "name": "{{ trigger.parameters.mixpanel_cohort_name }}",
                    "attributes":  {{ items |to_json }}
                }
                {% unless forloop.last %},
                {% endunless %}
            {% endfor %}
        ]
    }
Make sure your identifiers match your General workspace settings. For instance, if you identify by
email, you’ll want to update the payload. Within{{items.["<id>"]}}, replace<id>with the Mixpanel field you want to use to identify people.On the left, you’ll see the test data sent from setting up your cohort in Mixpanel.
Click Save.
Go to the Review tab, and if you are ready, start the campaign.
If you set up your cohort to send once, go back to Mixpanel and export the cohort again.
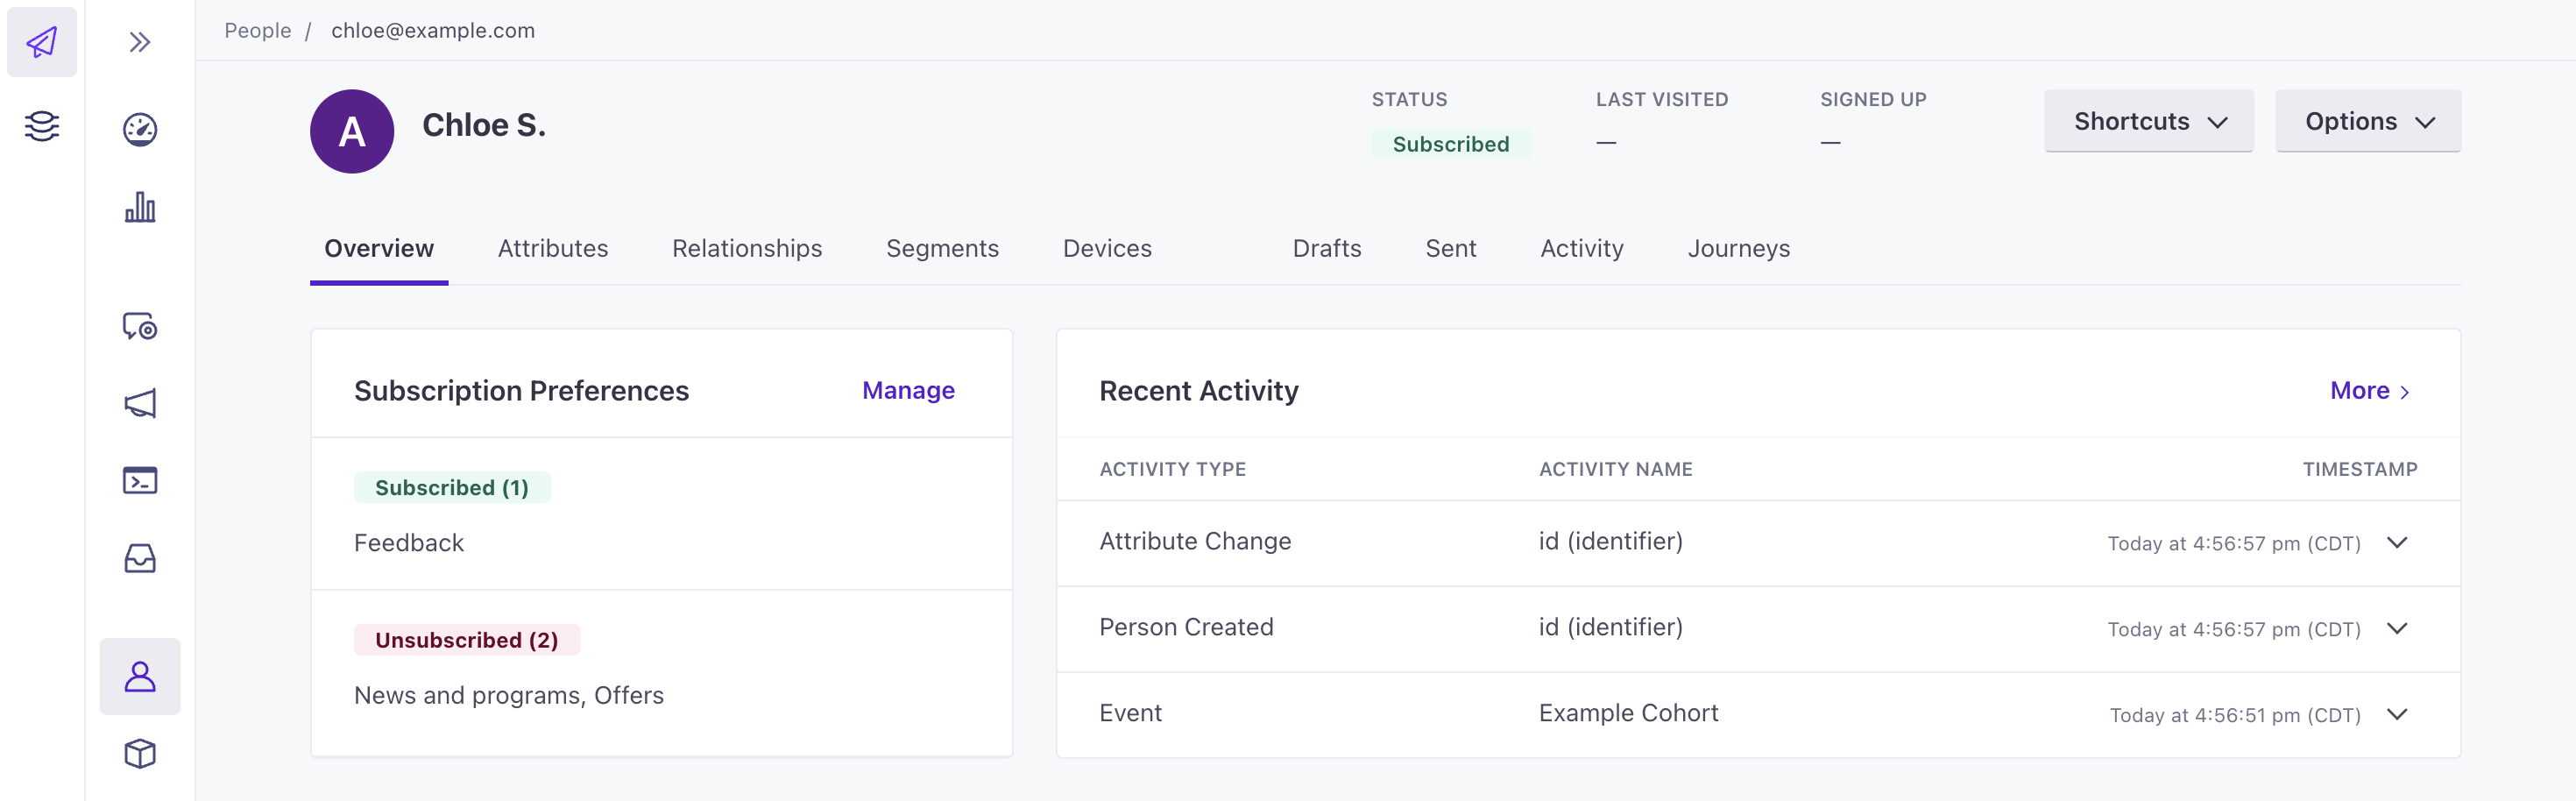
After the webhook triggers the campaign, you’ll see new people and events created in your workspace. New people are identified based on the id provided in the payload. An event with the cohort name and attributes will be added to your Data Index and associated with all people in this payload.
Add event attributes to people’s profiles
You add event data to people in a couple of ways:
- You can add a Create/update person action after the webhook action in this campaign.
- You can create a campaign triggered by an event (the cohort in this case) to craft a new workflow that could also include updating profiles based on event data.
Create a segment from a Mixpanel cohort
After you send cohort data from Mixpanel to Customer.io through a webhook-triggered campaign, you can create segments that correspond to these cohorts to track the population over time.
To create a segment that targets a Mixpanel cohort:
- Go to Segments.
- Click Create Segment.
- Give your segment a name and description so you know which cohort it relates to.
- Choose Data-driven segment so that your segment audience stays in sync with your cohort data from Mixpanel.
- Recall that cohort data comes over as an event. Select Add condition or group then choose Event from the dropdown.
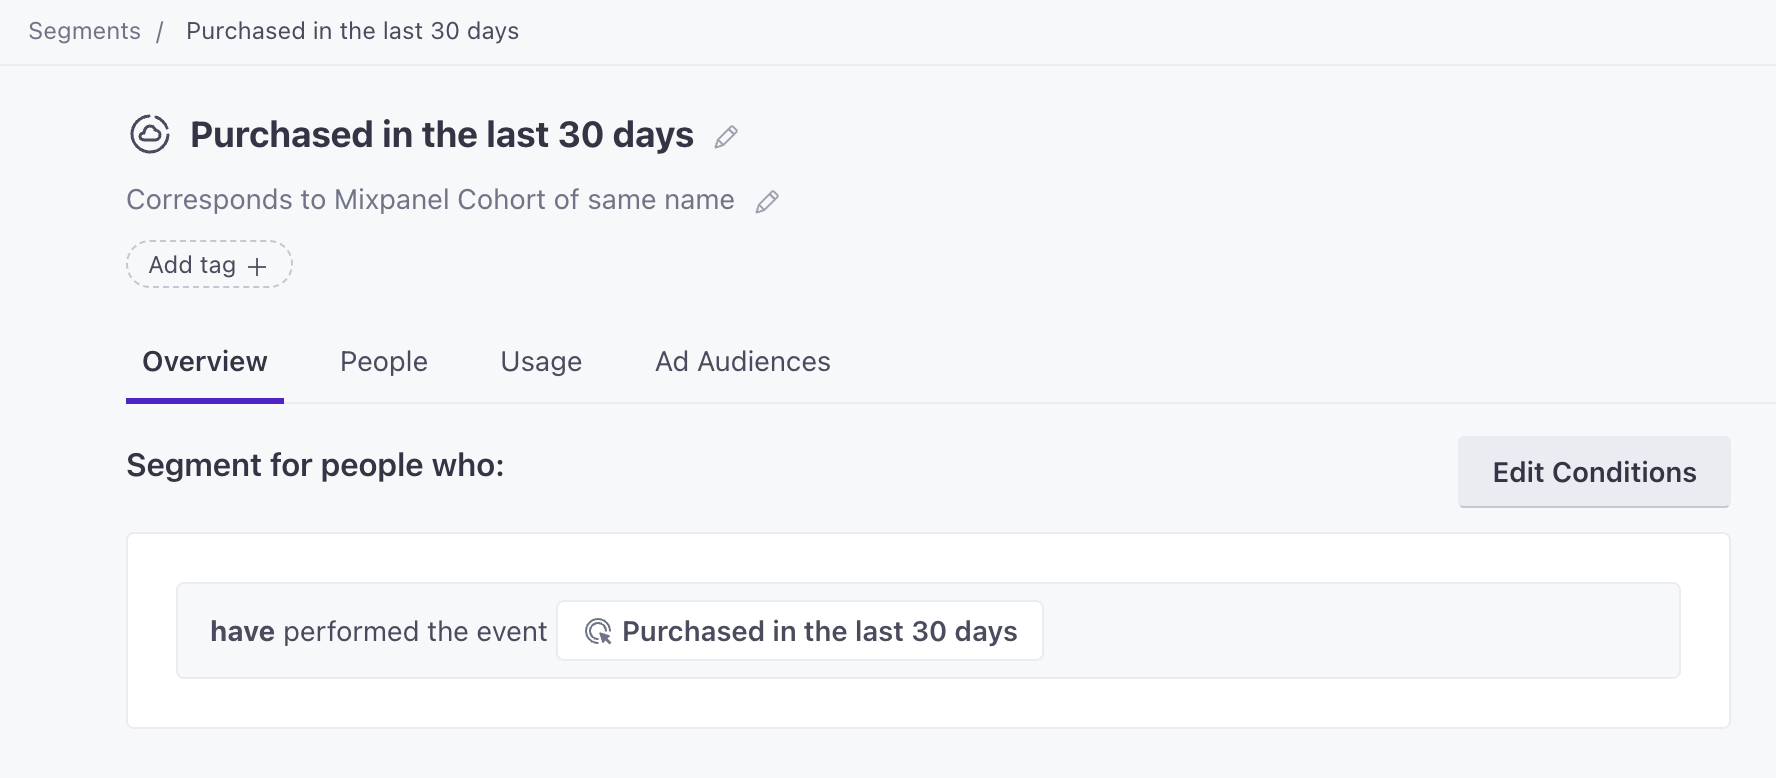
- In the event_name field, select your cohort name.
- Then choose whether you want to target people who have or have not performed this event. Hover over the condition and click Refine to filter the audience further.
- Save your changes.
You can use this to trigger a campaign, but to reference any event attributes (attributes of the cohort in this case) in messages, you’ll need to create an event-triggered campaign or store event data on people’s profiles.

