Send direct mail with Lob
Using webhooks, you can trigger personalized direct mail right from your campaigns, so you can reach people physically in addition to other message channels.
How it works
Lob specializes in intelligent direct mail, so you can send personalized postcards, letters, and more to your customers. Using webhooks, you can send personalization data and trigger messages from your campaigns.
This lets you send personalized physical mail to customers in response to the things they do on your website or in your app—like if a customer requests more information, or if you want to follow up with a physical coupon to retain customers. You can even trigger campaigns in Customer.io based on events from Lob, helping you keep the conversation going with your customer through both digital and physical channels.
Prerequisites
Before you can trigger Lob messages from Customer.io, you’ll need to set up a few things in Lob:
- Your Lob API keys: you provide these keys when you set up webhooks in your campaigns or broadcasts. You can find your API credentials in Lob.
- Set up your Lob creative file(s): when you send a webhook to trigger messages in Lob, you’ll specify the creative file, or “template”, that you want to send to your audience, so you’ll want to set up your templates before you begin. You can create templates in the Lob dashboard.
Use a test API key first
If you’re just getting started, you may want to use a test API key to make sure that your webhooks in Customer.io trigger the right messages in Lob. When you’re sure everything’s set up correctly, then you can switch to production credentials.
Send a Lob message
Set up a campaign or broadcast in Customer.io. When you get to the Workflow step, you can add a webhook that triggers a message from Lob.
Drag Send and Receive Data into your workflow, then click it and set the Webhook Name. This is the name you’ll see in the workflow and can help you understand what the webhook does.
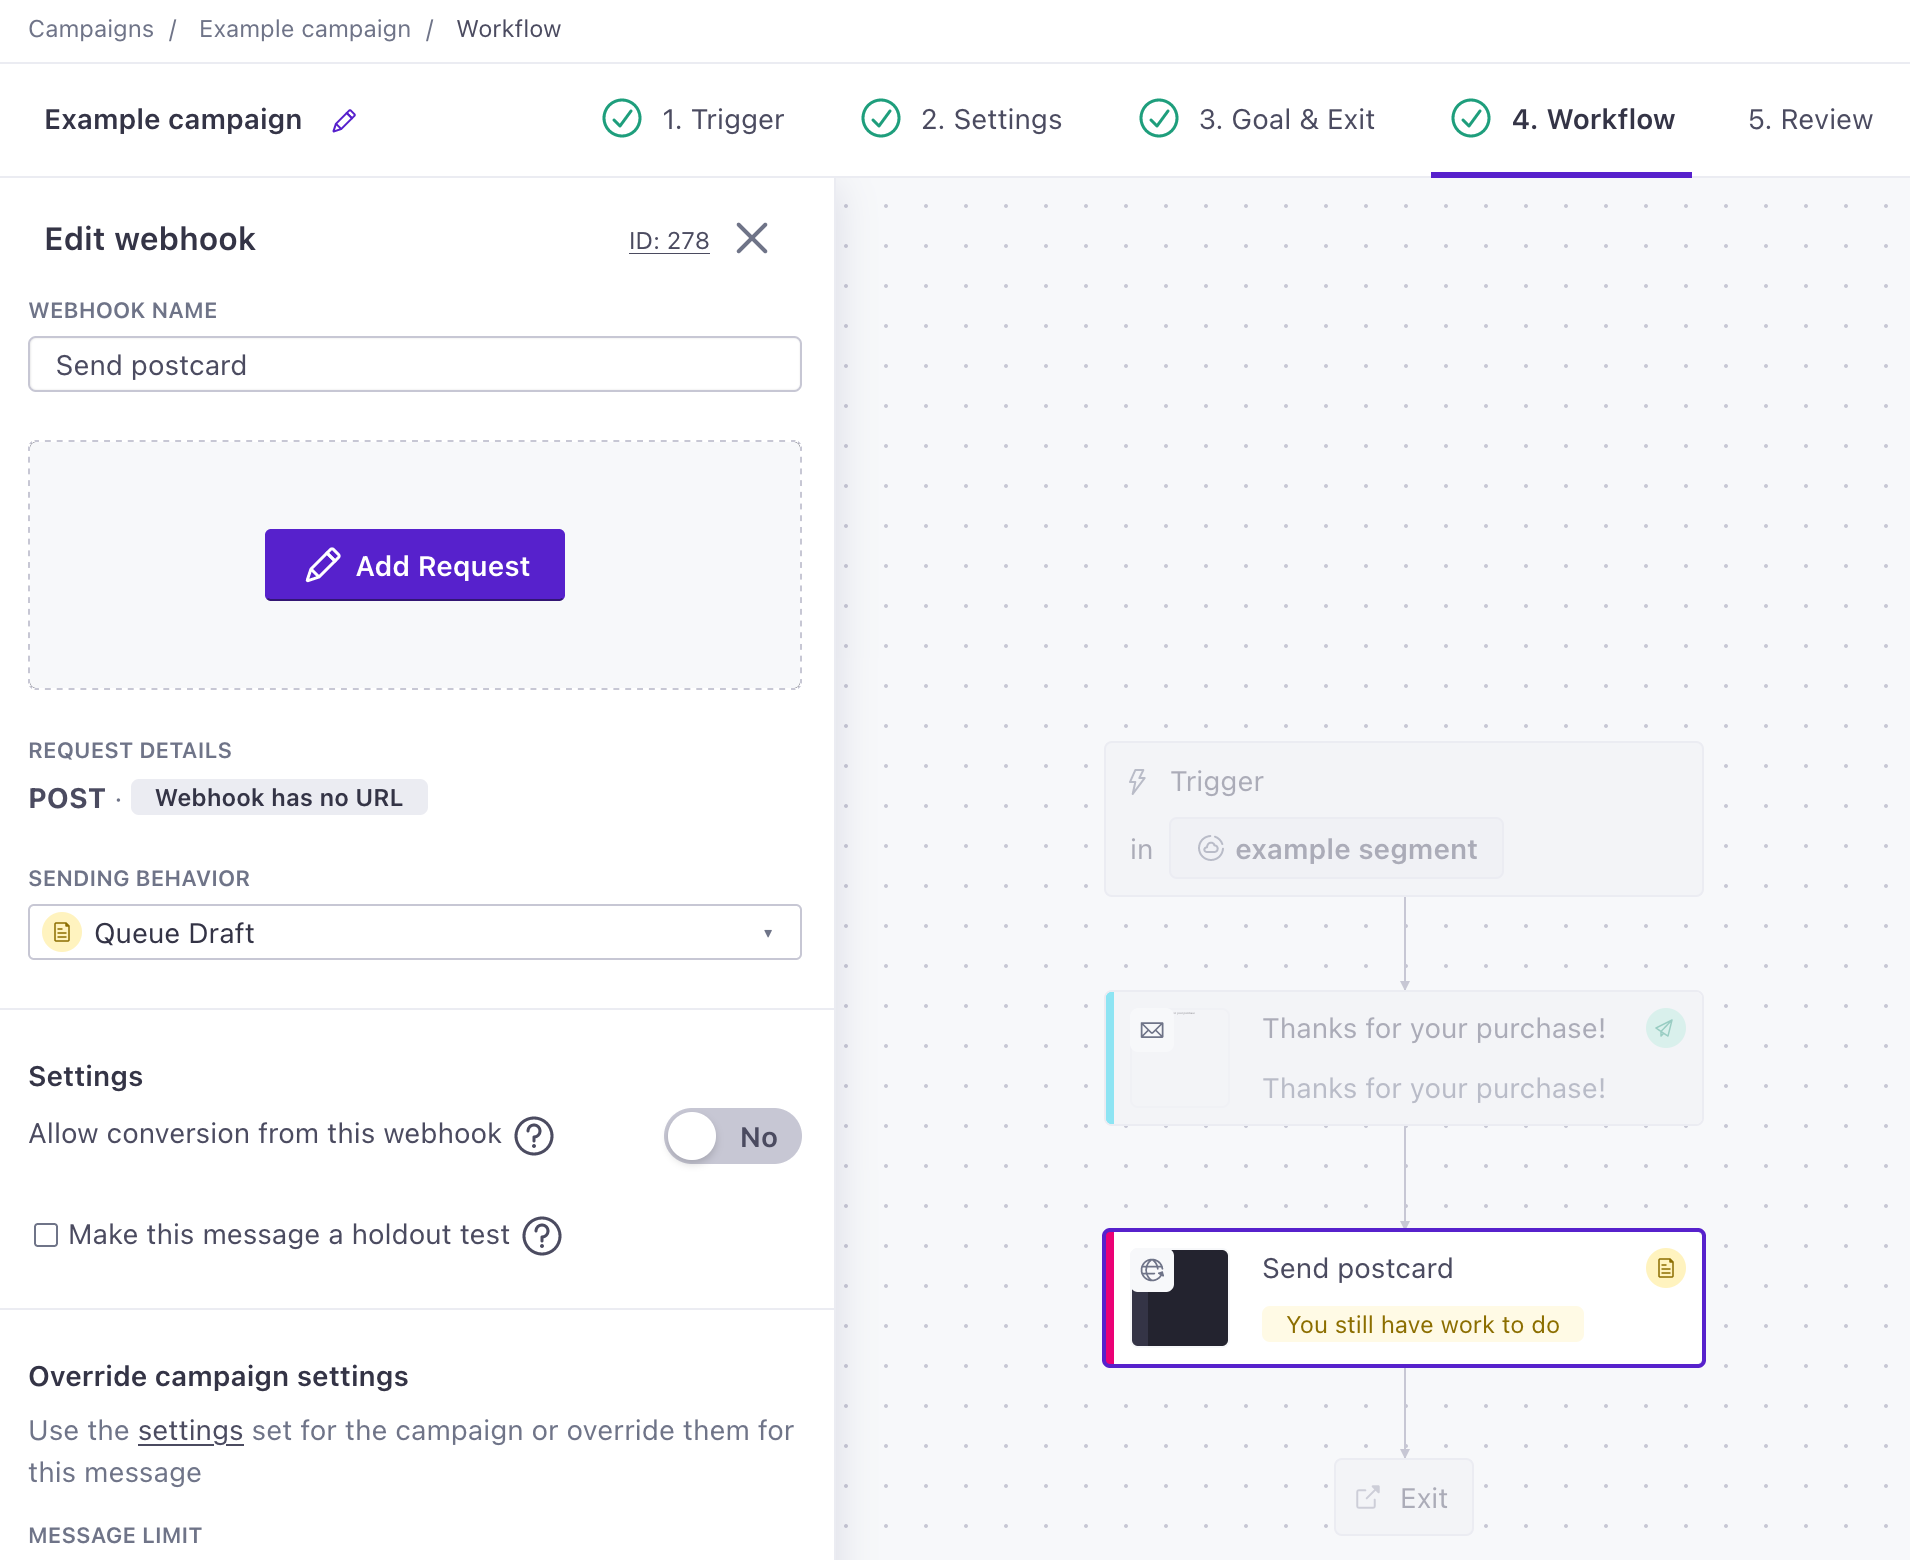
Click Add Request to begin setting up your webhook.
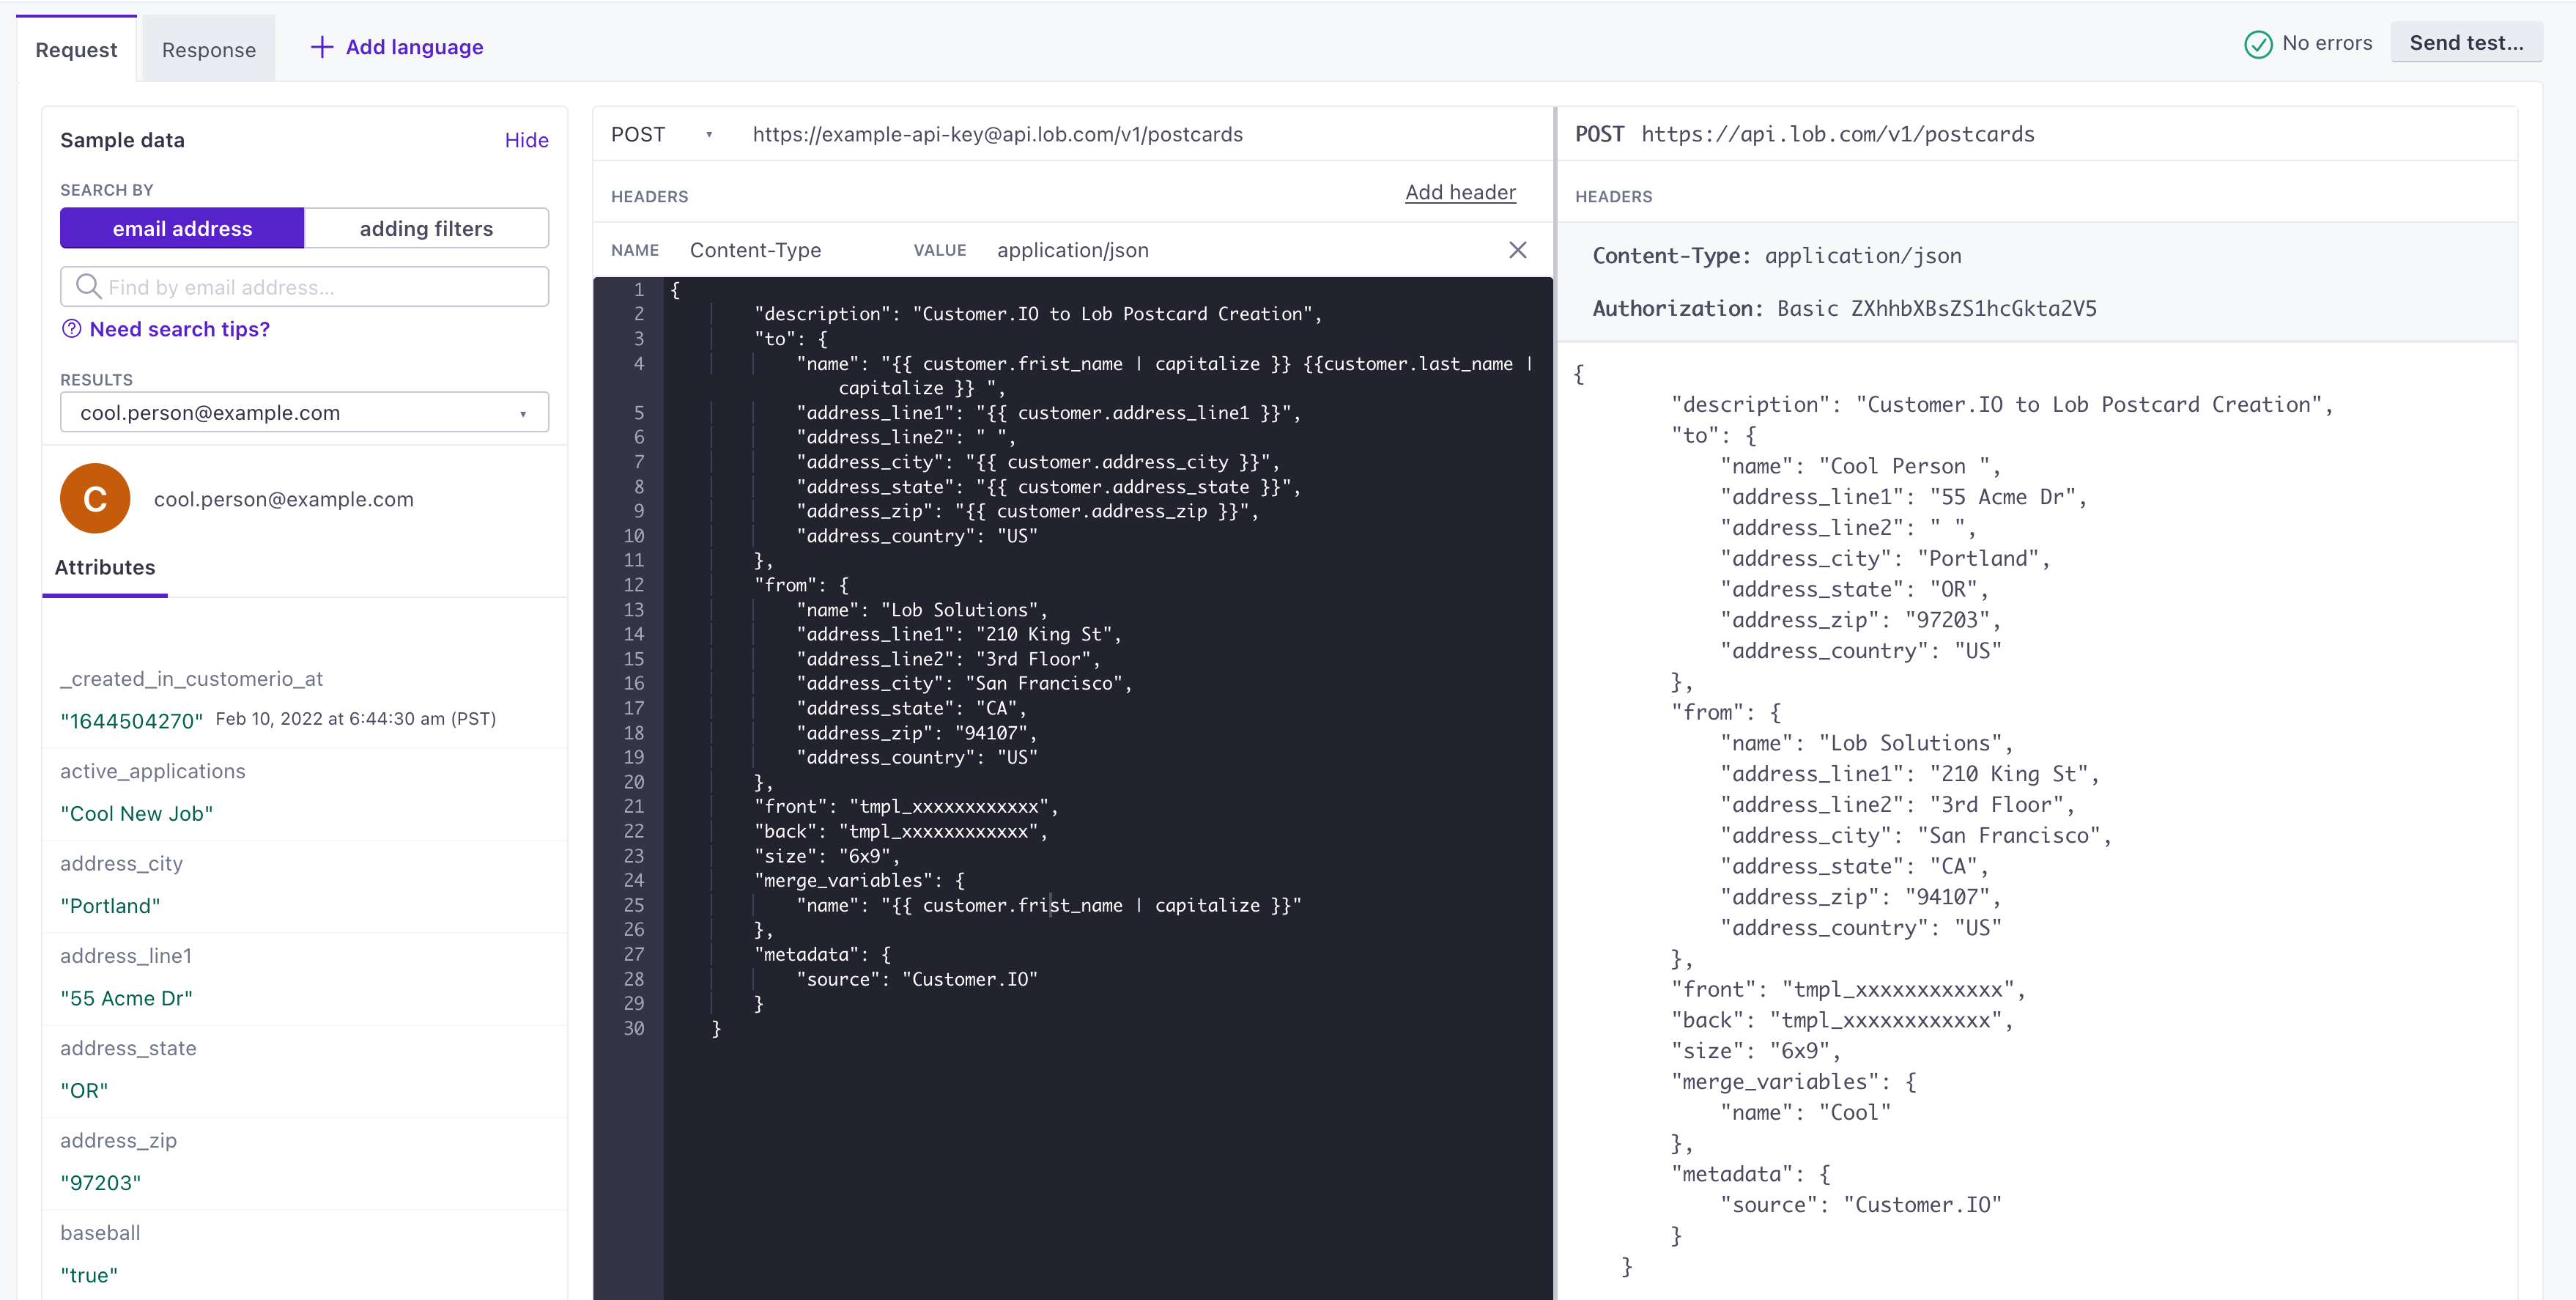
Enter the URL for the request next to POST. Your URL contains your API key and the type of mail you want to send—postcard, letter, etc in the format:
https://<your_api_key>@api.lob.com/v1/<resource>. You can find the URL format in the Lob documentation. For our example, we’ll use a postcard:https://example-api-key@api.lob.com/v1/postcardsConstruct your webhook payload, including the person you want to send
toand themerge_variablesyou want to use to personalize the message. You can use liquidA syntax that supports variables, letting you personalize messages for your audience. For example, if you want to reference a person’s first name, you might use the variable{{customer.first_name}}. to set variables from a person’s profile in Customer.io as properties in your payload.For this example, we’re using the Lob
/postcardsAPI, but you’ll want to replace the payload structure here with whatever type of mail you send to Lob.{ "description": "Customer.IO to Lob Postcard Creation", "to": { "name": "{{ customer.first_name | capitalize }} {{customer.last_name | capitalize }} ", "address_line1": "{{ customer.address_line1 }}", "address_line2": " ", "address_city": "{{ customer.address_city }}", "address_state": "{{ customer.address_state }}", "address_zip": "{{ customer.address_zip }}", "address_country": "US" }, "from": { "name": "Lob Solutions", "address_line1": "210 King St", "address_line2": "3rd Floor", "address_city": "San Francisco", "address_state": "CA", "address_zip": "94107", "address_country": "US" }, "front": "tmpl_xxxxxxxxxxxx", "back": "tmpl_xxxxxxxxxxxx", "size": "6x9", "merge_variables": { "name": "{{ customer.first_name | capitalize }}" }, "metadata": { "source": "Customer.IO" } }Save the webhook.
(Recommended) Test your webhook to make sure that you send the right message with the correct template variables.
Now when you start your campaign, people will automatically trigger direct mail through Lob when they reach the appropriate step in your workflow.
Test your Lob webhook
While setting up your webhook, you can test it to make sure that you send the right message and template variables to Lob—and that your audience gets mail with the right information.
When setting up your webhook:
Select a test user in the left-column. If you’re using a test API key, your test user could be anybody. But, in general, we recommend that you use a dedicated test user—maybe even yourself—to make sure that you don’t accidentally send test messages to your audience.
Click Send Test in the upper-right corner to send a test webhook. Customer.io will report the status code and test results to show the payload you sent. You can check out the payload to make sure that everything looks correct.
Then you can log into Lob and verify that your test message was received correctly.
Now you can swap your test credentials for your real, live credentials and confidently send personalized direct mail from Lob.
Trigger campaigns based on events from Lob
Integrating Lob and Customer.io helps you synchronize your digital and direct mail channels. For example, you might want an email to land in your customers’ inboxes the same day they receive postcards from Lob.
To do this, you’ll set up a webhook-triggered campaign using webhooks from Lob.
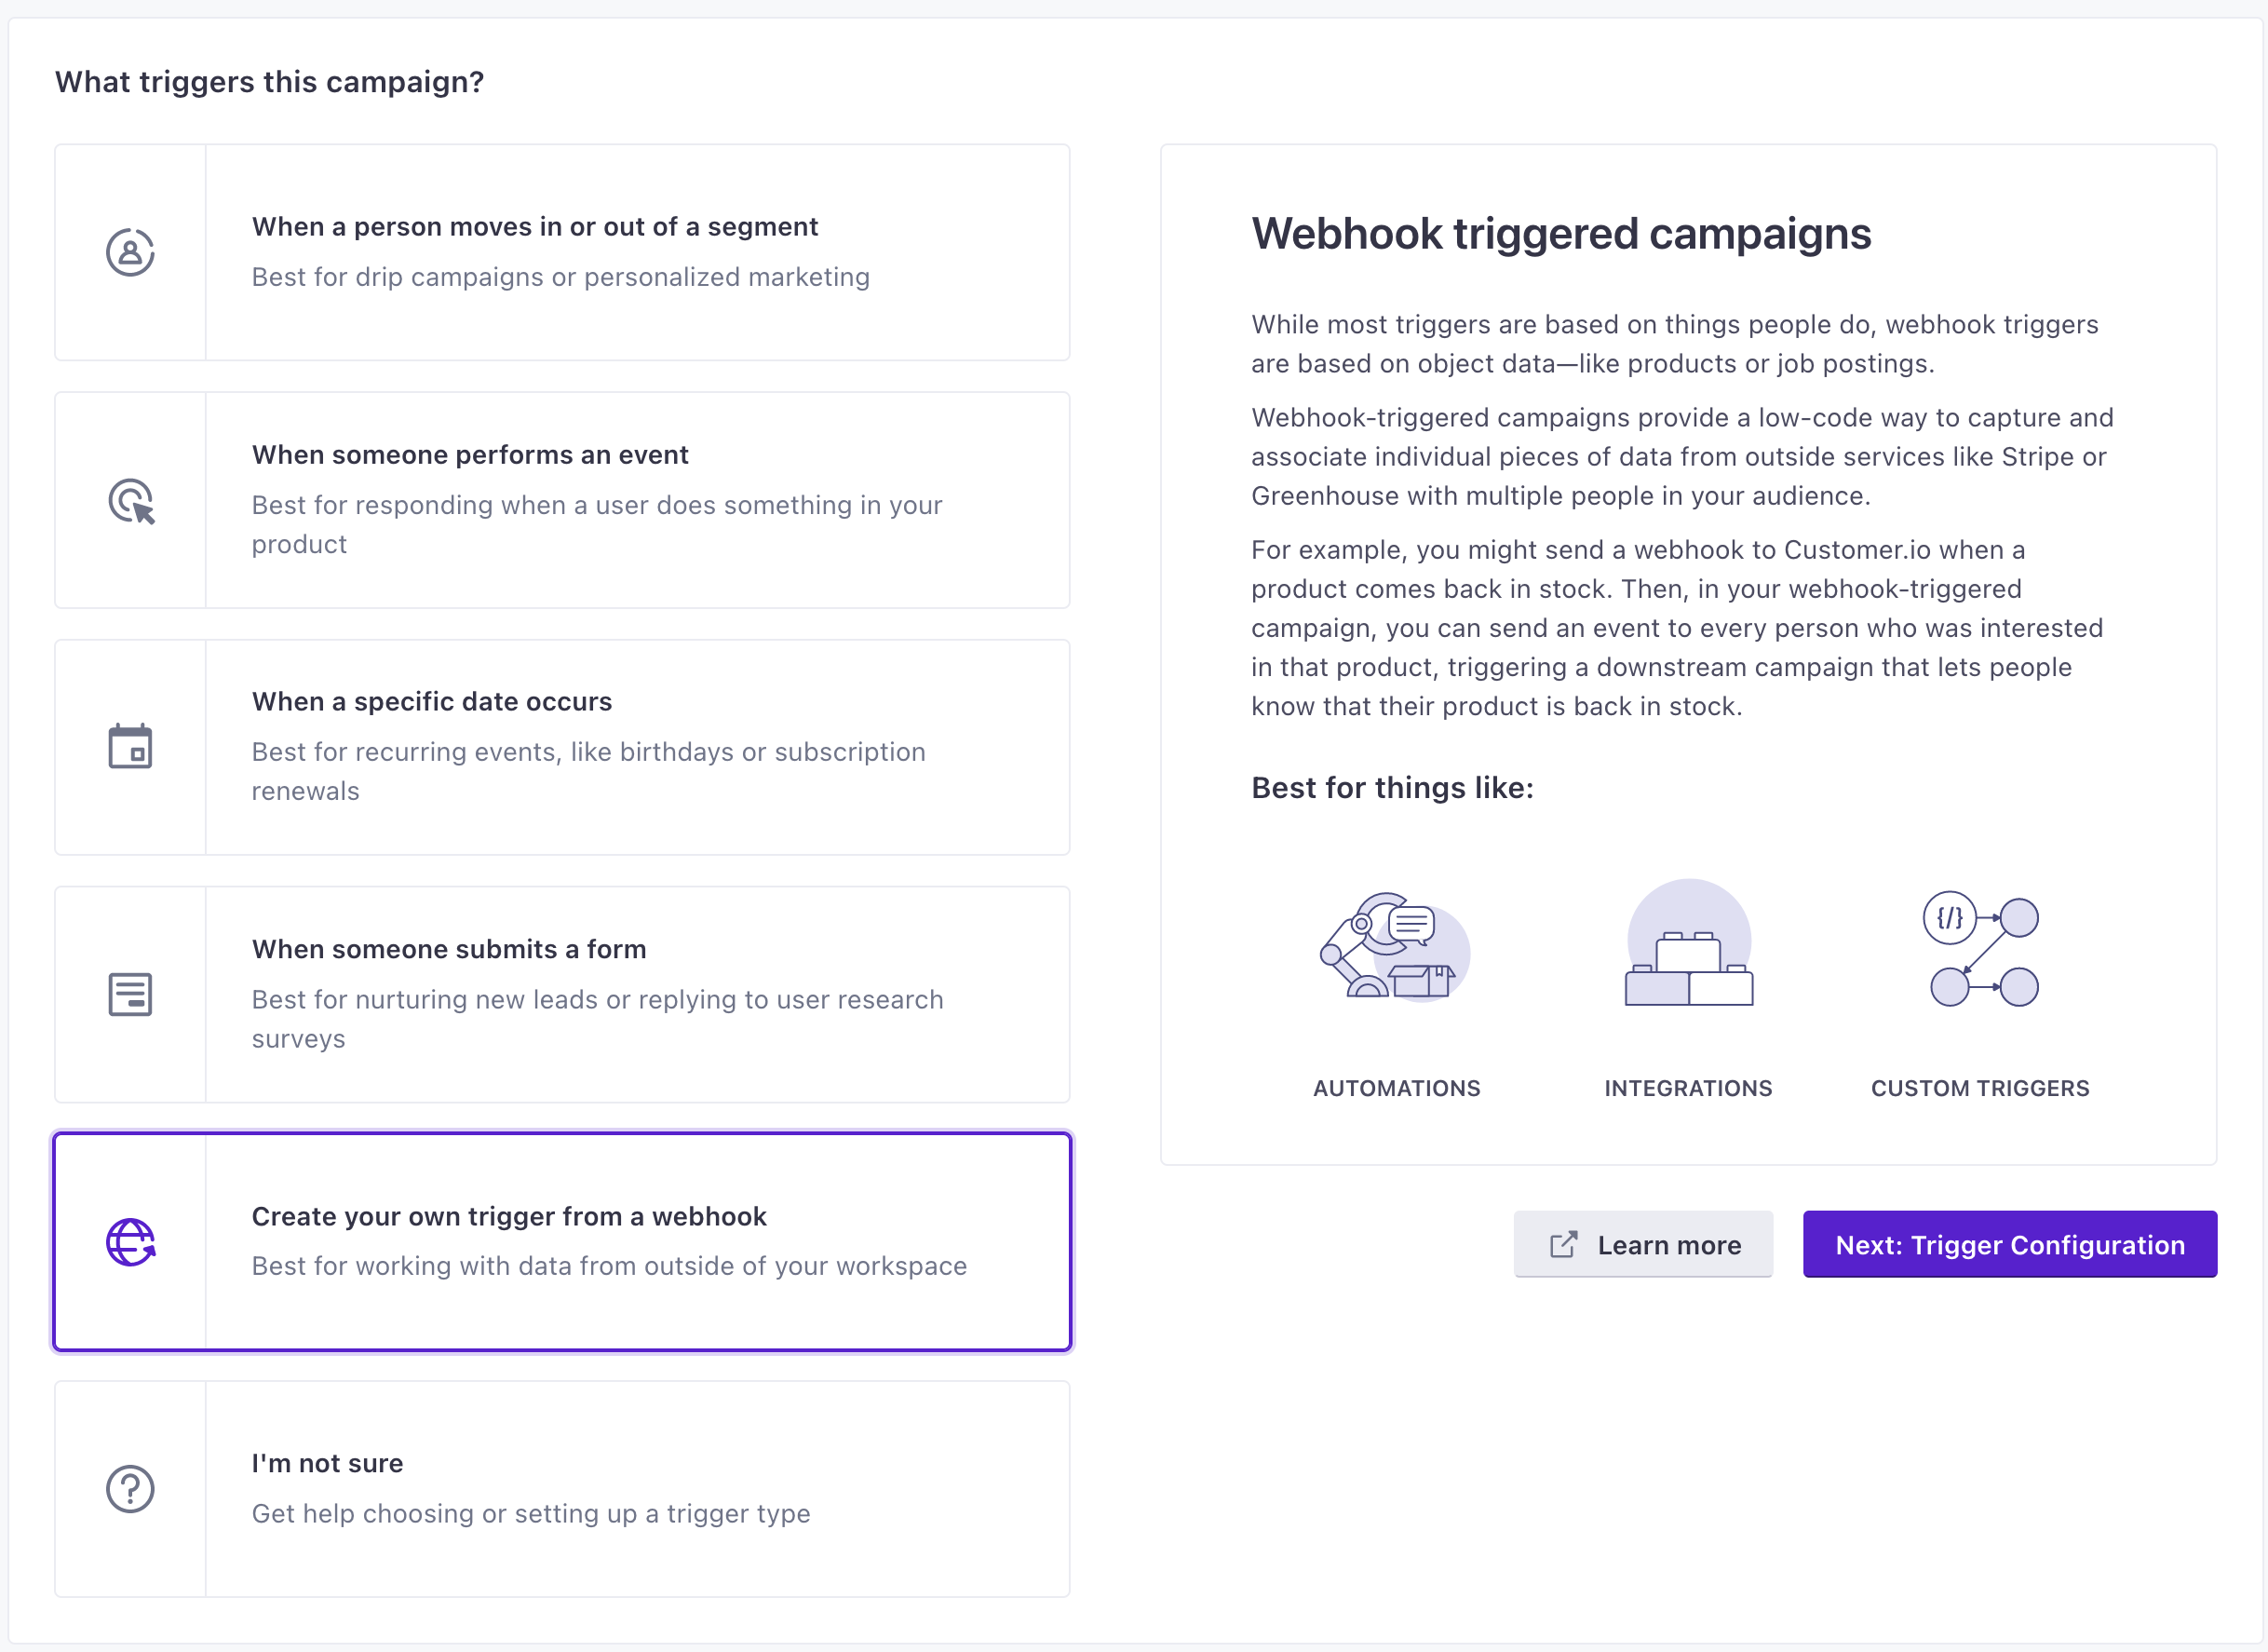
- Go to Campaigns and click Create Campaign.
- In the Trigger step, select Create your own trigger from a webhook and click Next.
- Copy the webhook URL and go to Webhooks in your Lob dashboard.
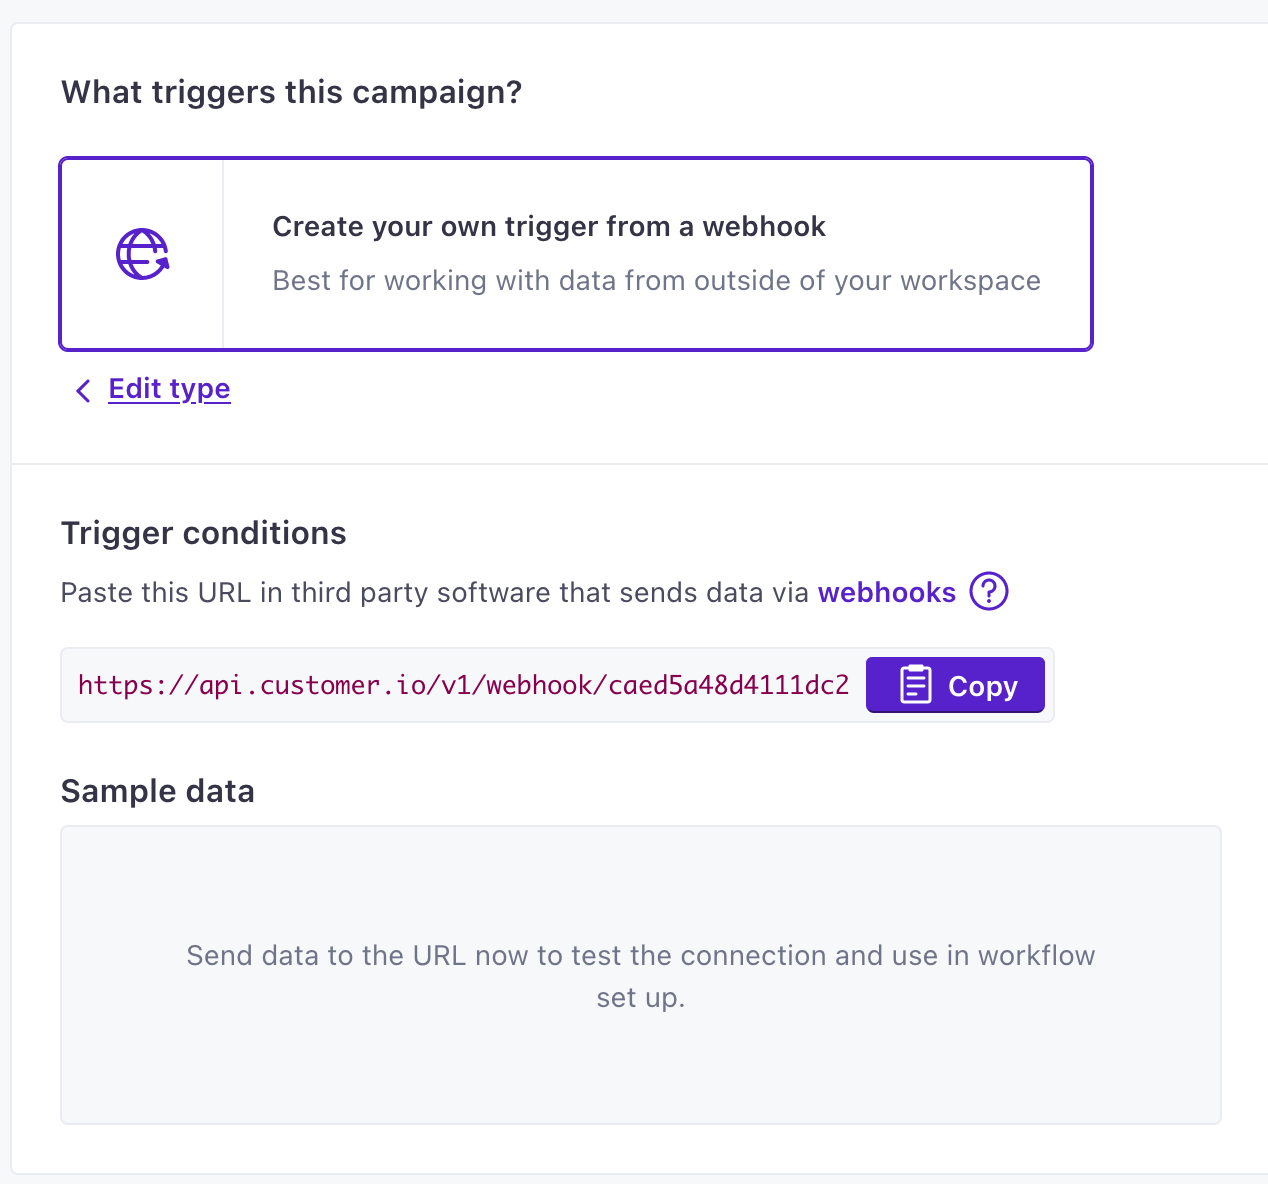
- Paste the URL under Create a New Webhook.
- Select the event(s) you want to trigger your campaign in Customer.io—in many cases, you’ll want to wait for the Delivered event.
Now you can finish setting up your campaign in Customer.io, and Lob will automatically trigger your campaign when the event(s) you selected occur.

