Jotform
Connect Jotforms to your workspace to automatically add people and trigger campaigns when they submit your form. Our Jotform integration relies on a webhook from Jotform.
How it works
When you set up a Jotform integration, we’ll give you a personalized Webhook URL. You’ll provide this webhook URL to Jotform. Whenever someone submits your form, Jotform calls this webhook to send the form submission data to Customer.io.
The form submission creates a person in your workspace if they do not already exist, or updates them if they do. In both cases, we map form fields to attributesA key-value pair that you associate with a person or an object—like a person’s name, the date they were created in your workspace, or a company’s billing date etc. Use attributes to target people and personalize messages. Attributes are analogous to traits in Data Pipelines. for each person who fills out your form.
We capture the first e-mail field on your form as the email attribute in Customer.io. For other fields, we use the internal input ID as the attributeA key-value pair that you associate with a person or an object—like a person’s name, the date they were created in your workspace, or a company’s billing date etc. Use attributes to target people and personalize messages. Attributes are analogous to traits in Data Pipelines. name. Jotform typically prefixes field IDs with q<x>_ where x is the order that the field was added to the form. So, for example, if the first field on your form is an e-mail field, it will appear in Customer.io as a q1_email attribute by default—though you can map form fields to different attributes after your first form submission.
Map form fields to attributes end C->>C: Create or update person C-->>A: Optional response campaign
("Thanks for your response!")
You can also trigger campaigns when people submit your form. This provides a handy way to automate personalized responses. You can personalize responses with liquidA syntax that supports variables, letting you personalize messages for your audience. For example, if you want to reference a person’s first name, you might use the variable {{customer.first_name}}. using either customer attributes that you assign from form submissions ({{customer.<attribute>}}) or form fields from the form_submit event (in the format {{event.<form_field_id>}})!
Connect Jotform to your workspace
As a part of this process, you’ll add a webhook to your Jotform. Then, you’ll can preview and fill out your form to test your webhook-enabled form. When your test data appears in Customer.io, you’ll map form fields to attributesA key-value pair that you associate with a person or an object—like a person’s name, the date they were created in your workspace, or a company’s billing date etc. Use attributes to target people and personalize messages. Attributes are analogous to traits in Data Pipelines..
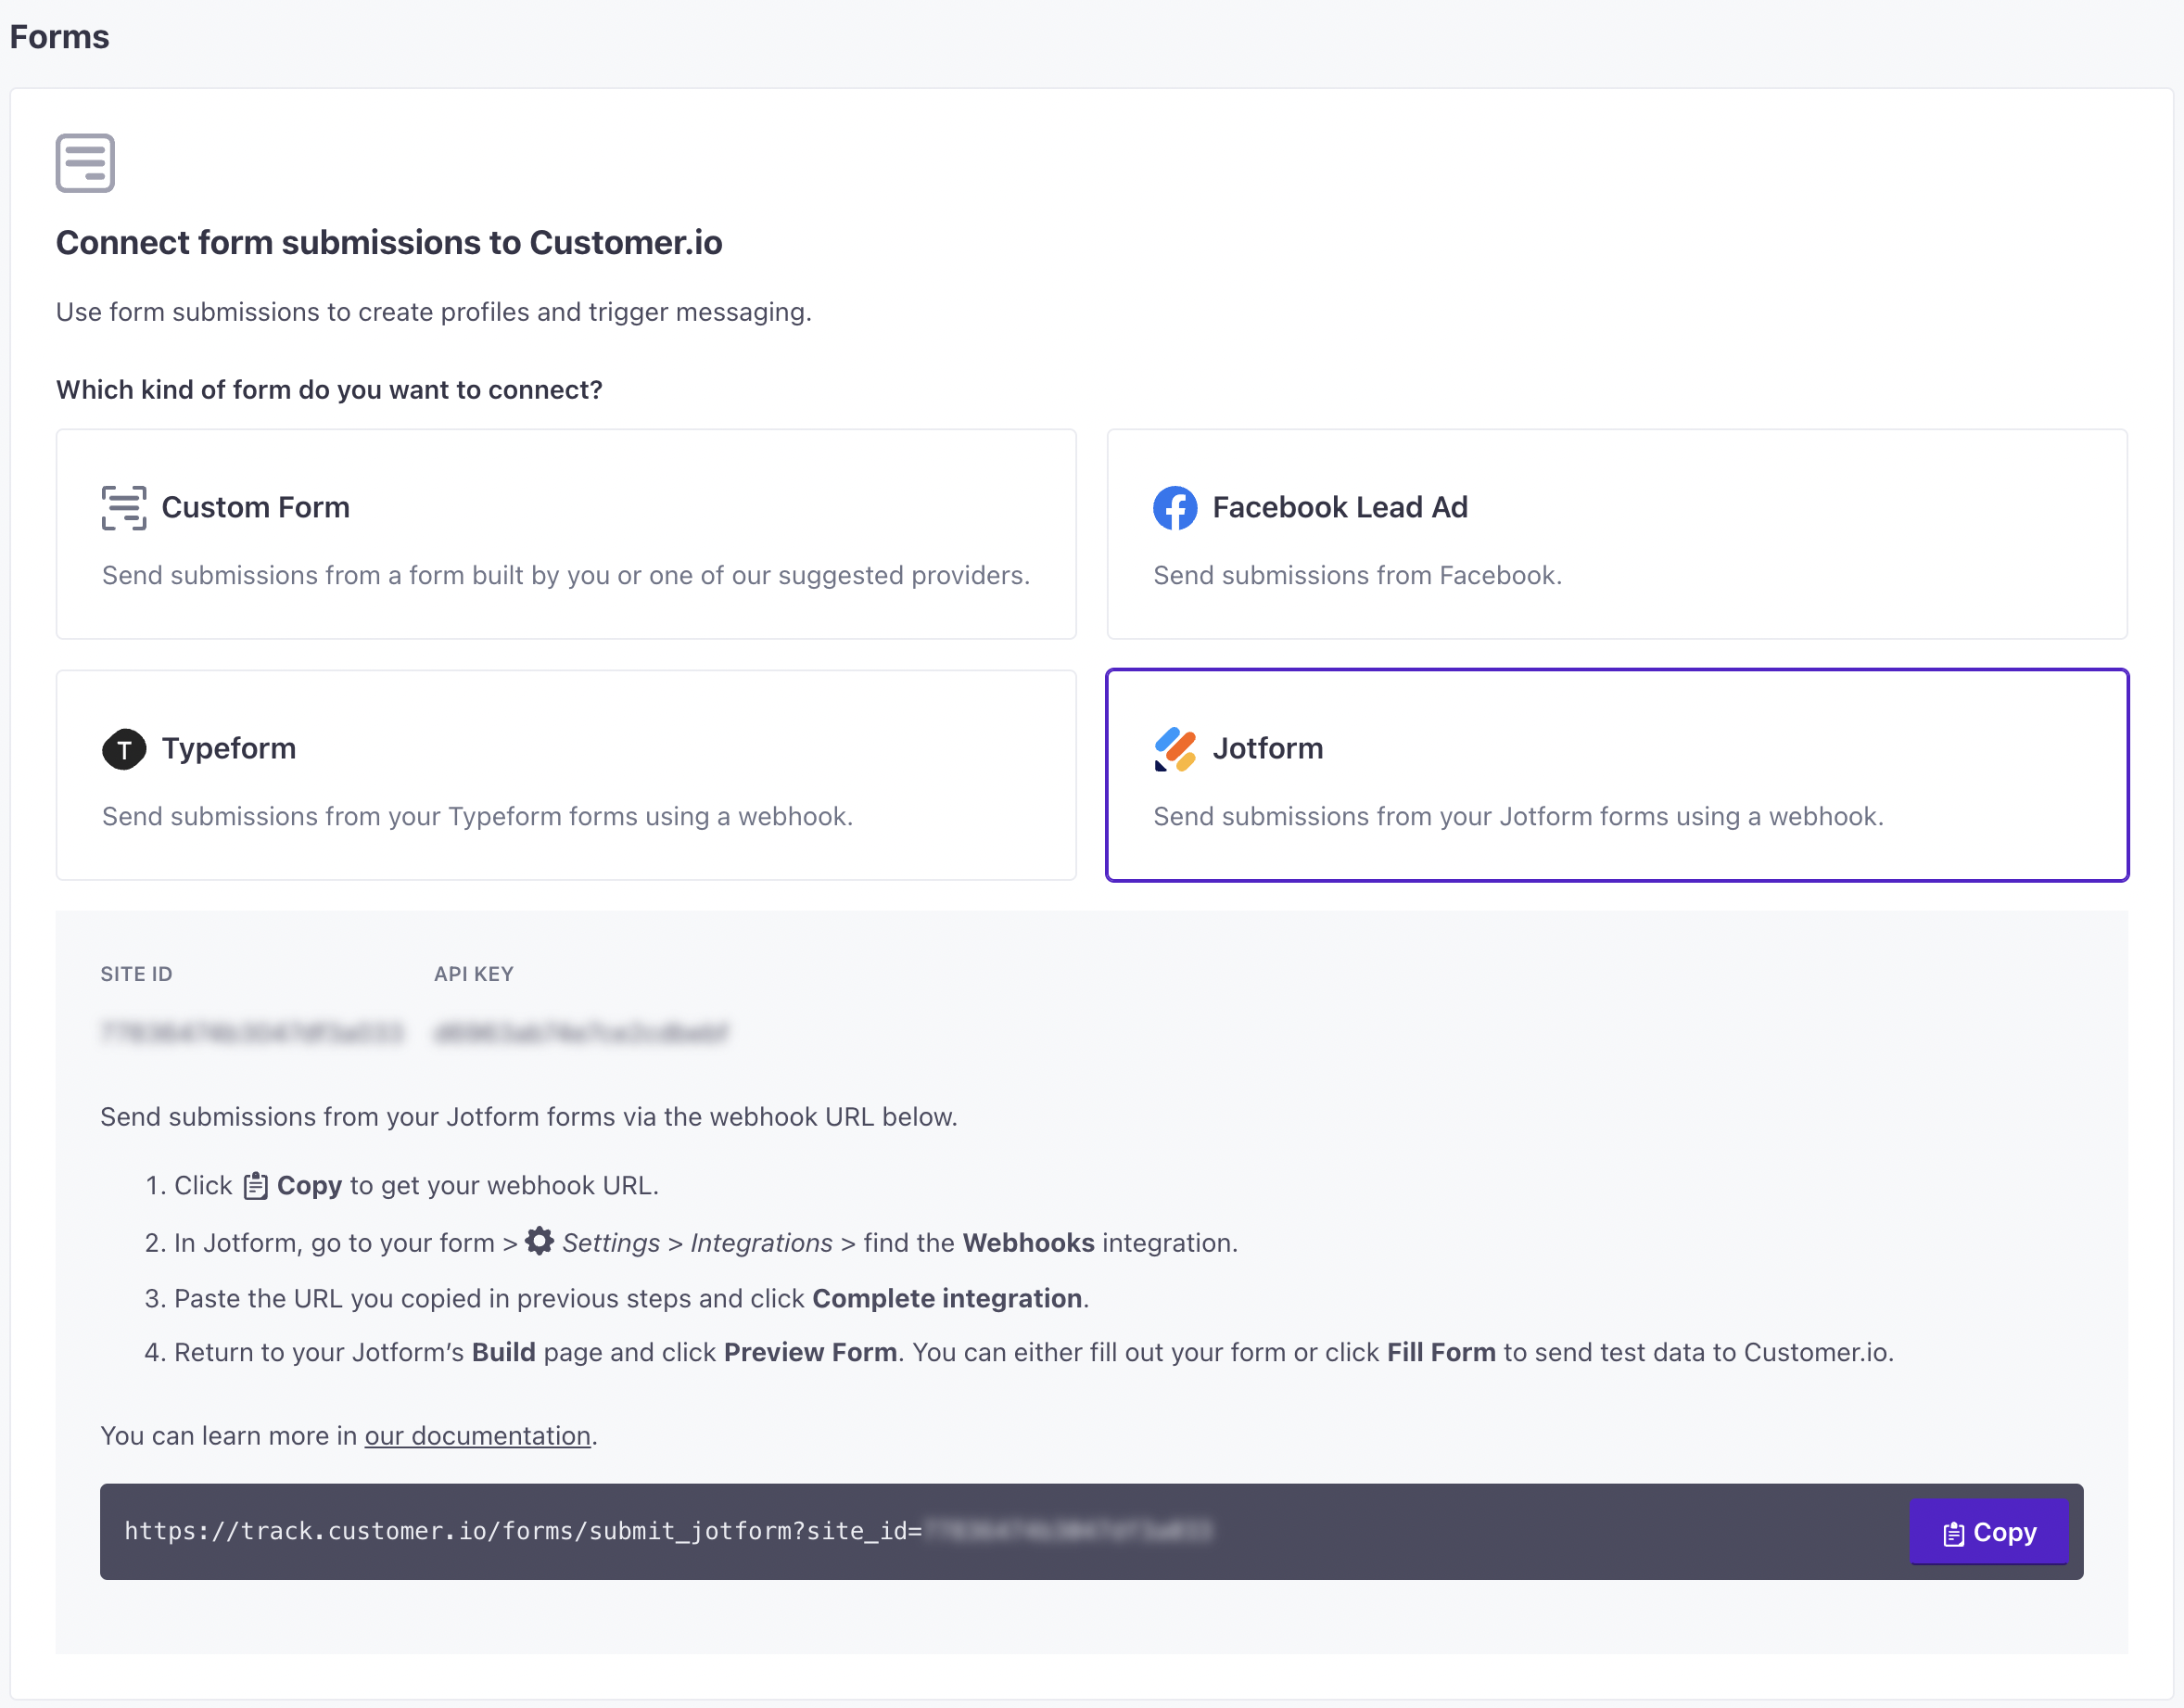
- Go to Data & Integrations > Integrations and select Jotform.
Click Copy to get your webhook URL.
In Jotform, go to your form’s Settings, click Integrations and find the Webhooks integration.
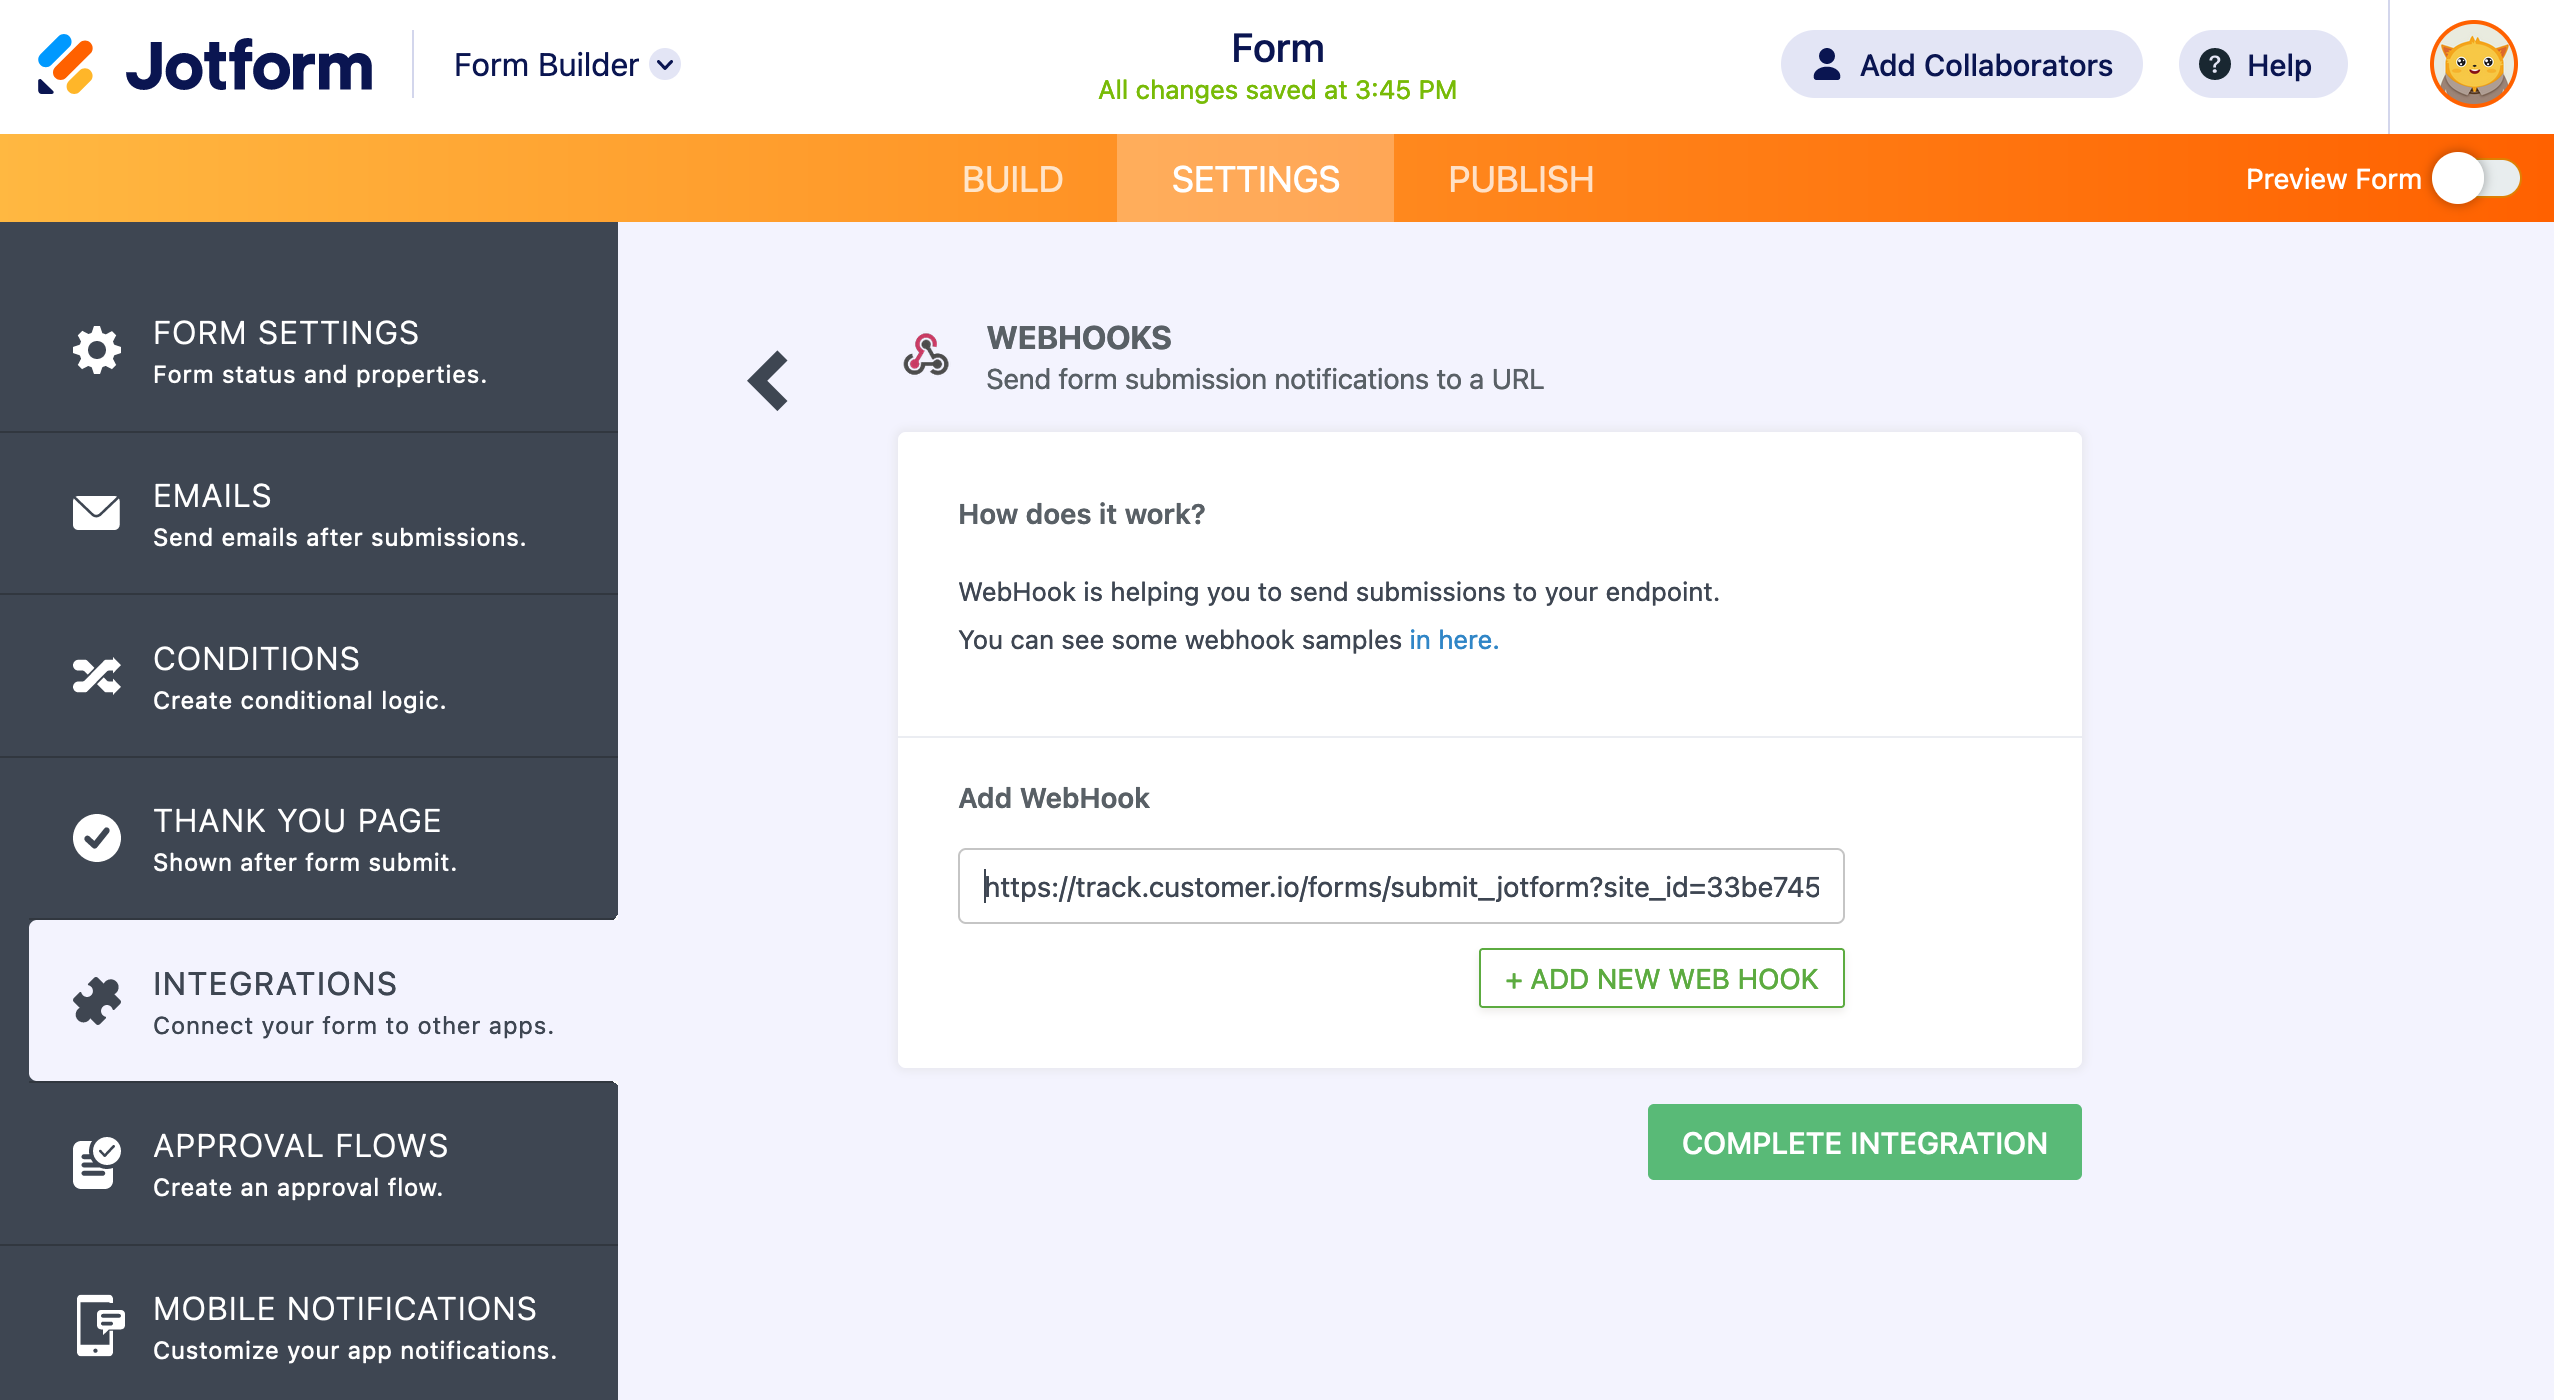
Paste the URL you copied in previous steps and click Complete Integration.
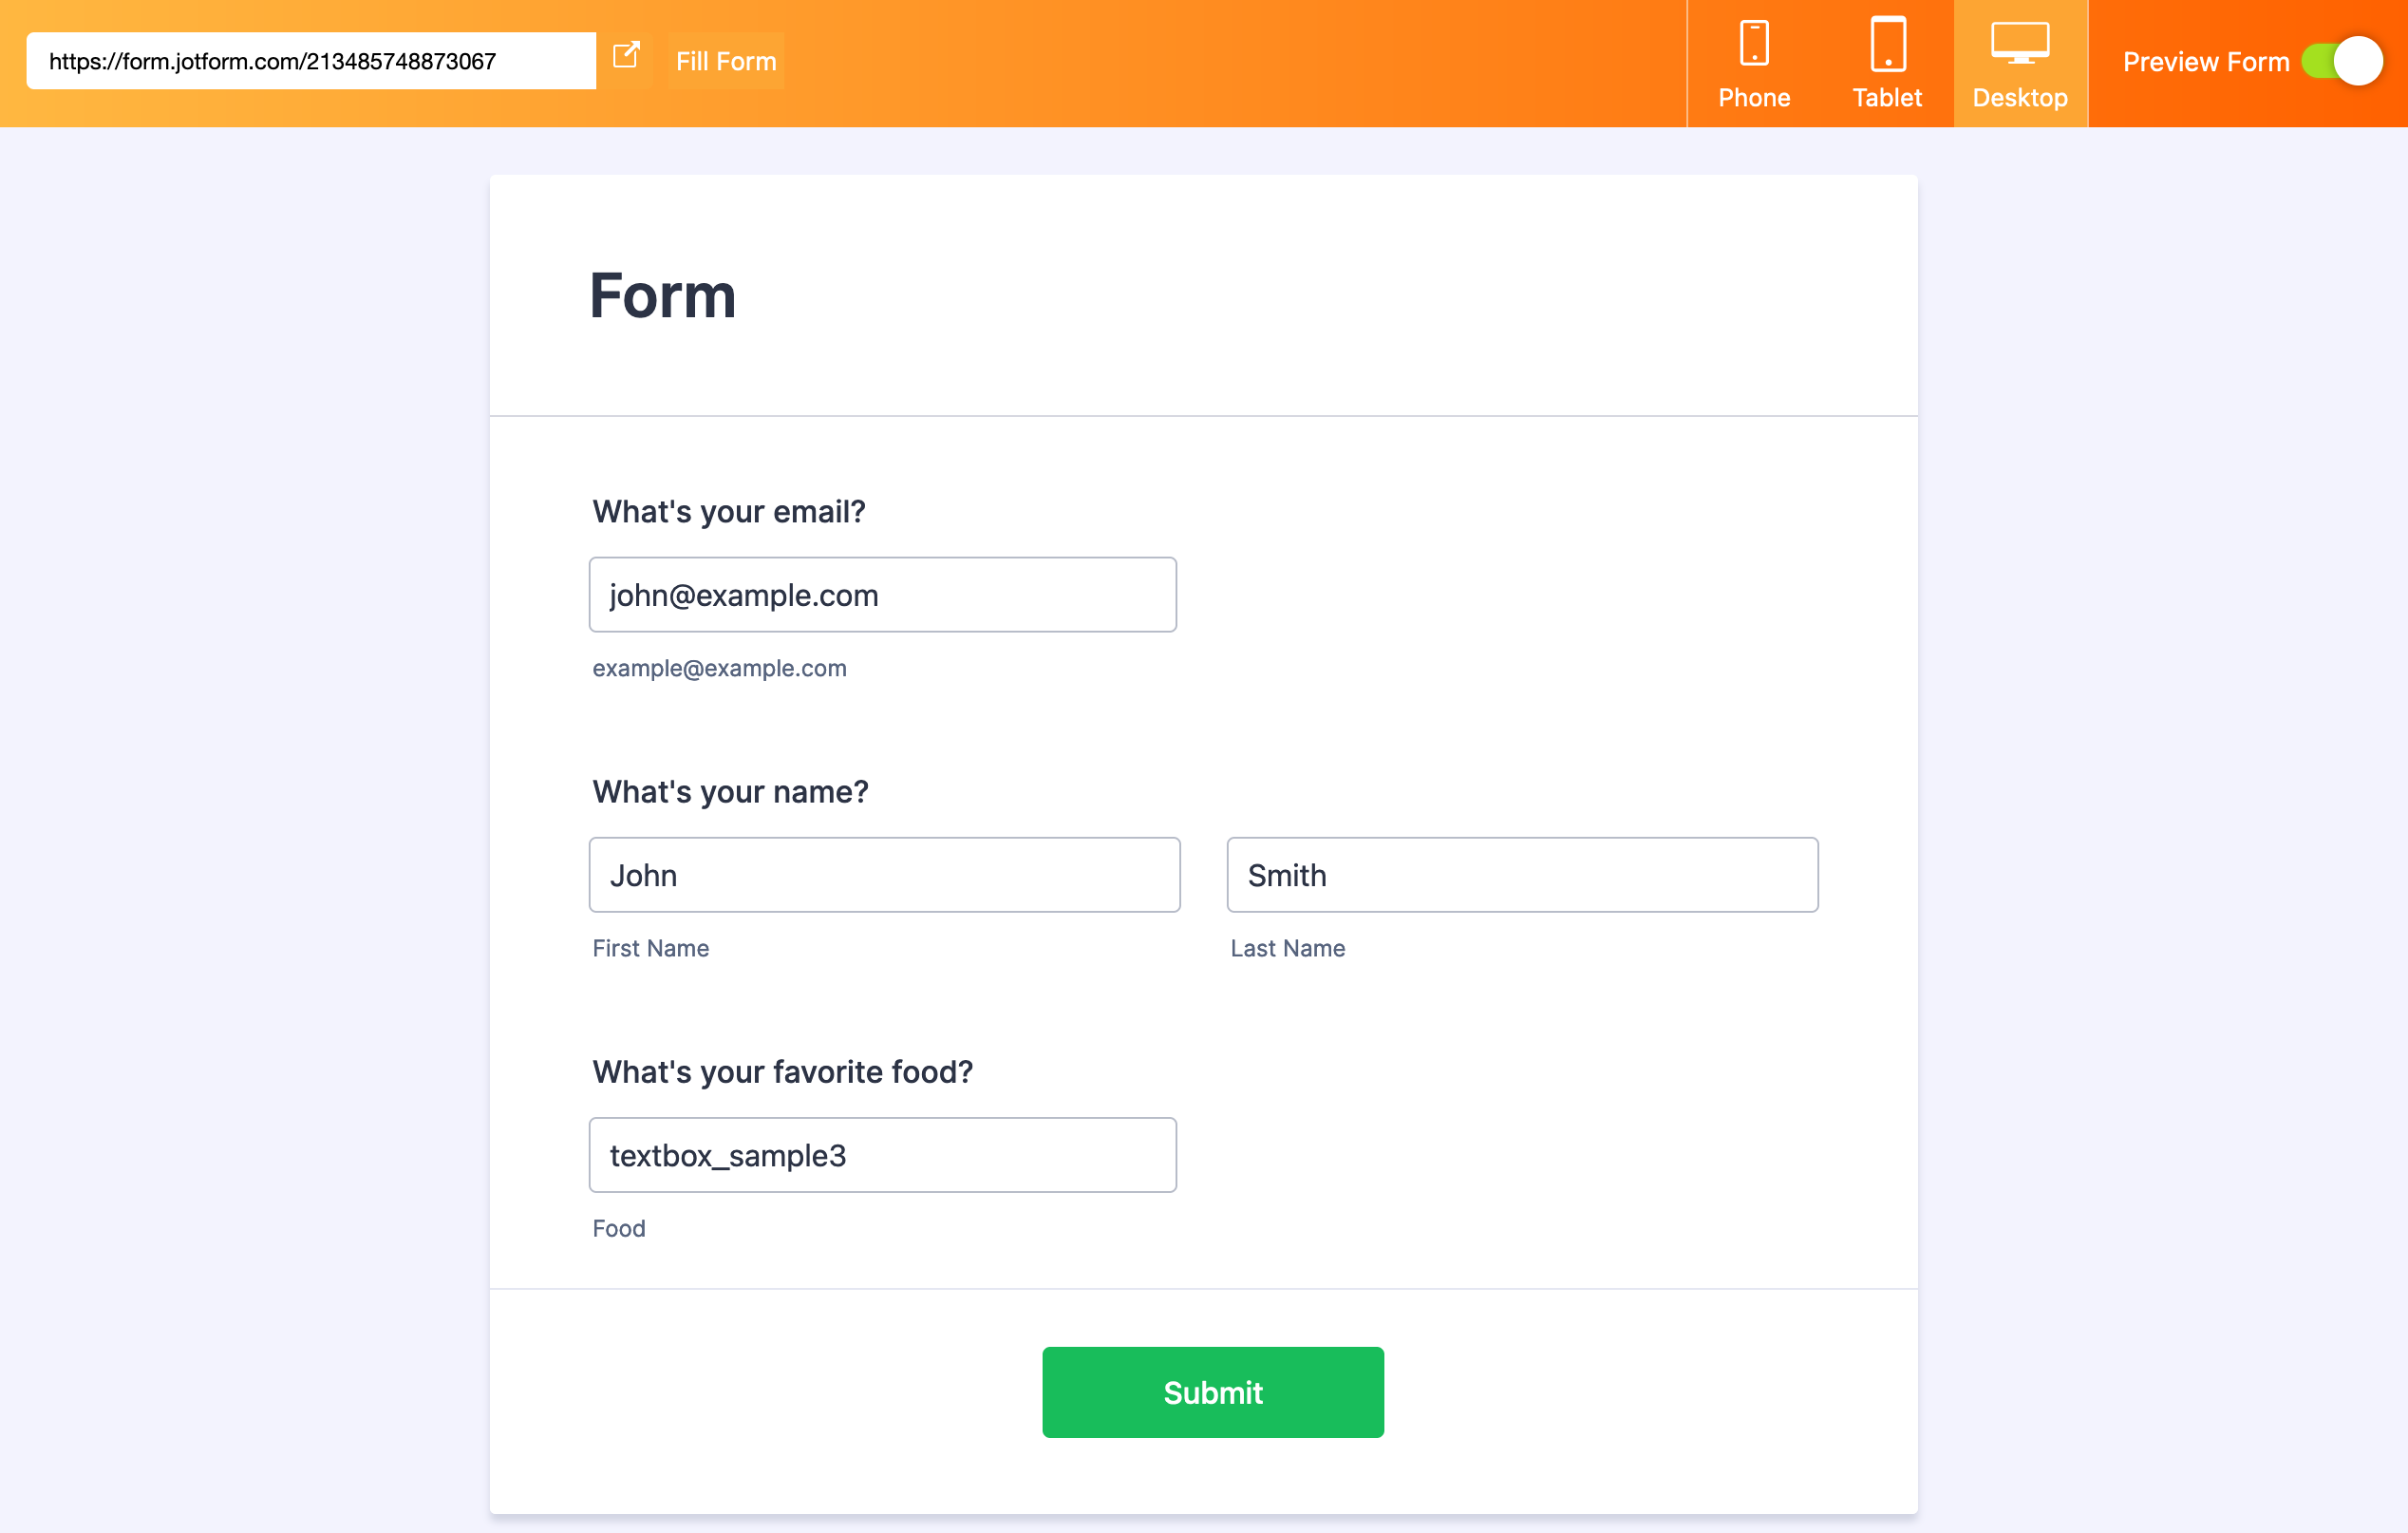
Return to your Jotform’s Build page and click Preview Form. You can either fill out your form or click Fill Form to send test data to Customer.io.
Return to Customer.io and see how your form mapped to your workspace. From here, you can re-map fields to attributes before you deploy your form to a wider audience.
Map form fields to attributes
The first time you submit a form, we map Jotform fields to attributesA key-value pair that you associate with a person or an object—like a person’s name, the date they were created in your workspace, or a company’s billing date etc. Use attributes to target people and personalize messages. Attributes are analogous to traits in Data Pipelines. in Customer.io using each form field’s internal ID. You’ll almost certainly want to re-map form fields to more apt attribute names.
On your first submission, we use the internal input ID as the attributeA key-value pair that you associate with a person or an object—like a person’s name, the date they were created in your workspace, or a company’s billing date etc. Use attributes to target people and personalize messages. Attributes are analogous to traits in Data Pipelines. name. Jotform typically prefixes field IDs with q<x>_ where x is the order that the field was added to the form. So, for example, if the first field on your form is an e-mail field, it will appear in Customer.io as a q1_email attribute by default—though you can map form fields to different attributes after your first form submission.
If you haven’t already made a test submission for your form, go to your Jotform’s Build page and click Preview Form. You can either fill out your form or click Fill Form to send test data to Customer.io. When you go to map fields in Customer.io, you’ll see a Preview attribute. You can ignore this; it only appears when you fill out your form in the Preview mode.
In Customer.io, go to Data & Integrations > Integrations > Forms and click your form. If your form doesn’t appear on this page, try refreshing the page or clearing your browser cache.
Click Edit under Mapped Fields* to set the attributes for each form field. In each field, you can select an existing attribute or type in a new one.
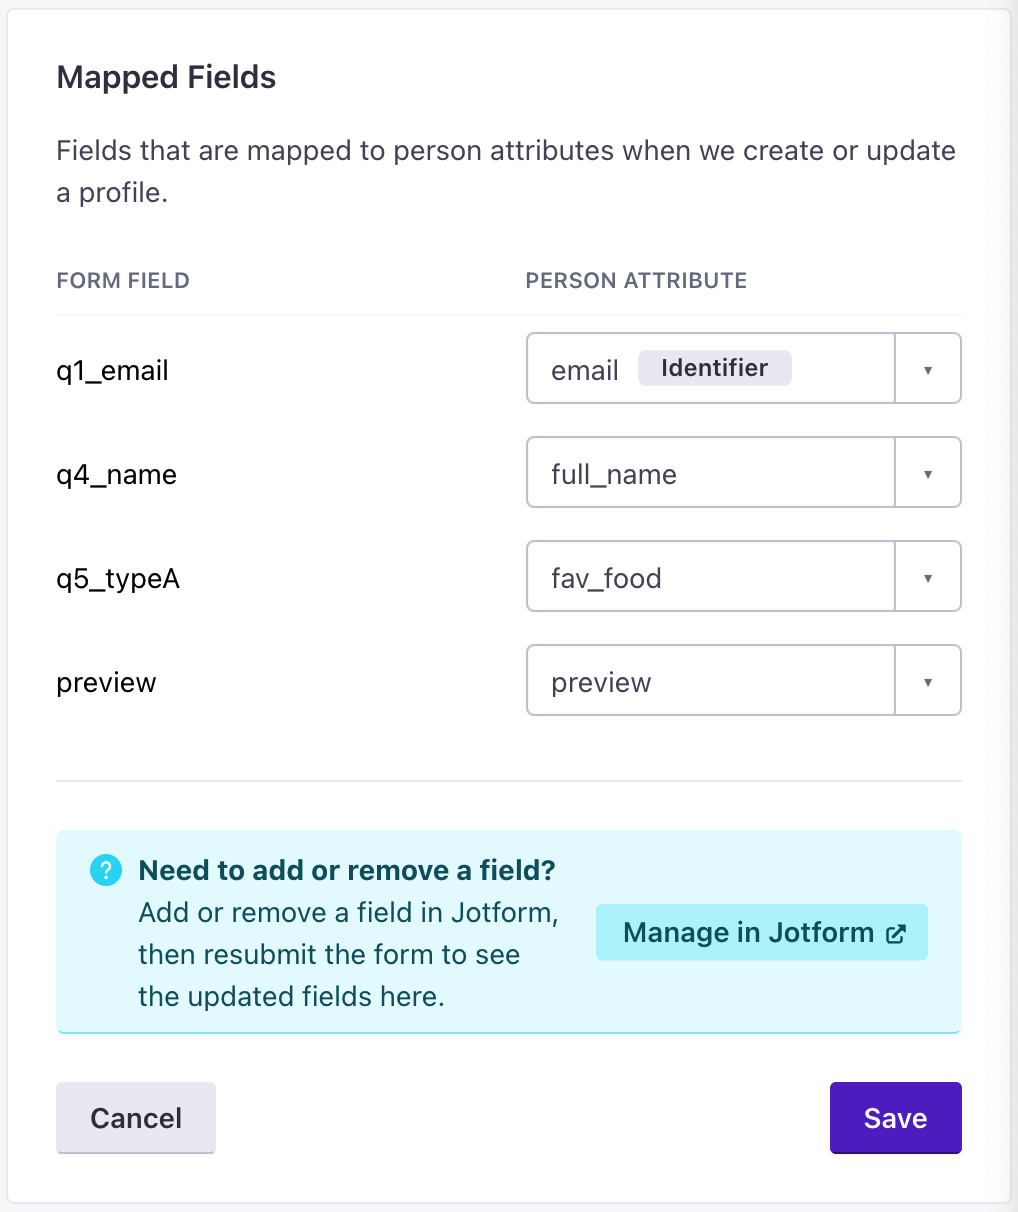
Click Save when you’re done.
Tests can create or update people in Customer.io
Whenever you fill out your Jotform, even in Preview mode, it will create or update a person with test data in your workspace using the ID or email in the test request. You can use this person as a reference as you set up your form, but you may want to delete this person when you’re done.
Removing attributes from your form
When you remove a field from your Jotform, we’ll stop capturing it in Customer.io automatically. You can’t remove a field from your form, or otherwise disable it, in Customer.io.
Complex field types and unsupported fields
Some Jotform fields return JSON objects. For example, the Name field produces an object with two values: first and last. When we encounter a field like this, we convert it to a string.
So, if you used the Name field on your form and someone named Cool Person filled in your form, the result in Customer.io is an attribute called q<x>_name with a value of Cool Person.
If you want to split complex values, like names, into different attributes—like, first_name and last_name—you can enter your form respondents into a campaign and use Create or update person actions to split your Jotform name into first_name and last_name.
We do not support the following Jotform field types: File Upload, Product List, Signature or Captcha.
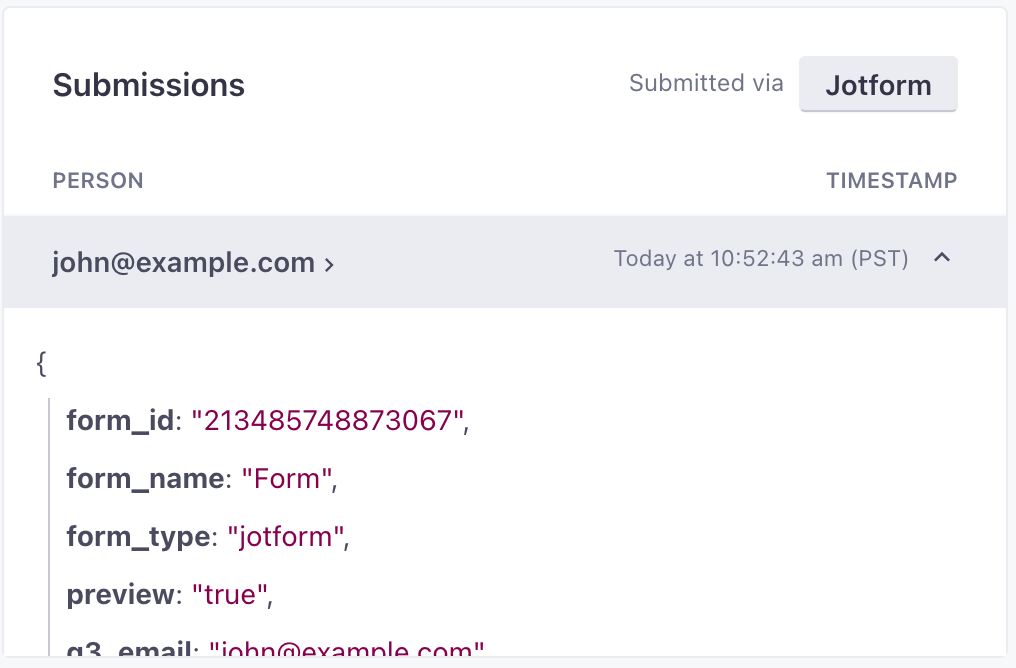
Find recent Jotform submissions
Go to Data & Integrations > Integrations > Forms.
Click and select Manage Form for your Jotform.
The Submissions card shows recent submissions. Click a submission to see details for that form.