Send in-app messages using webhooks
You can use webhooks to send in-app messages through other platforms. Webhooks provide a way to access public APIs and services outside of Customer.io. We treat webhooks like messages: when someone reaches a webhook in your campaign, we’ll execute the webhook, accessing an external API. In this case, we’ll show you how to use webhooks to send in-app messages.
An in-app message is a message that targets a person currently using your app or website. In-app messages reach people after they open your app, helping you communicate with engaged members of your audience without bombarding them with notifications outside your app.
We have our own in-app solution!
Check out our in-app documentation to learn more about sending in-app messages from Customer.io without a third party service. If you already use another service, you might use webhooks as a transitional solution while you migrate to Customer.io.
Use a webhook to launch Appcues Flows
Appcues Flows are product tours or another series of in-app messages. If you set up your Appcues Flow to target an audience of Specific Users—a group of users bearing one or more properties—you can use a Customer.io webhook in your campaign to apply properties to people in Appcues, making them eligible to experience your Appcues Flow when they return to your site or app.
Before you get started, you’ll need your Appcues API credentials. People in your Customer.io workspace must have an attributeA key-value pair that you associate with a person or an object—like a person’s name, the date they were created in your workspace, or a company’s billing date etc. Use attributes to target people and personalize messages. Attributes are analogous to traits in Data Pipelines. or IdentifierThe attributes you use to add, modify, and target people. Each unique identifier value represents an individual person in your workspace. (id or email) that maps to a person in your Appcues account so that you can associate people in Customer.io with the right Appcues users.
To set up a webhook that triggers an Appcues Flow in your campaign:
Add a Webhook to your workflow and click Add Request.
Set the URL to
https://api.appcues.com/v1/accounts/{account id}/users/{{customer.<attribute>}}/activitywhere:{account id}is your account ID in Appcues.<attribute>is the attribute that maps to your users’ identifiers in Appcues.
Make sure the method is set to
POST.Click Add Header and enter
Authorizationfor the name andbearer <your_appcues_api_key>for the value. Click here to find your Appcues API keyEnter your payload. The
property_nameandproperty_valuein the example payload below represent the name of the attribute and the value of the attribute that trigger your flow.{ "profile_update": { "property_name": "property_value" } }(Optional) Test your webhook request! Under Results, select the person you want to send a test to, and then click Send test…. If your webhook is configured correctly, your request will expose your Appcues Flow to your test person.
Click Save Changes. When you activate your campaign, your webhook will expose tours to people who progress to the webhook in your campaign.
Use a webhook to start Chameleon tours
Chameleon tours work like in-app messages, but, unlike other in-app messages, you don’t send a tour or experience: you trigger it. Your tour should be set up to trigger based on a the presence of one or more attributes. Our webhook will set an attribute on a person in a campaign, causing the tour to appear for that person.
To set an attribute on a person in Chameleon, you need to know their uid or id. You can store this value on an attribute in a person in Customer.io; or, if people in Customer.io have an id value that matches the id or uid values in Chameleon, you can use {{customer.id}} in your payload.
Before you begin, you must have:
- mapped people from Customer.io to users in Chameleon.
- a tour or experience that is triggered by a custom user property.
- your Chameleon API token.
In the workflow for your campaign:
Add a Webhook to your workflow and click Add Request.
Set the URL to
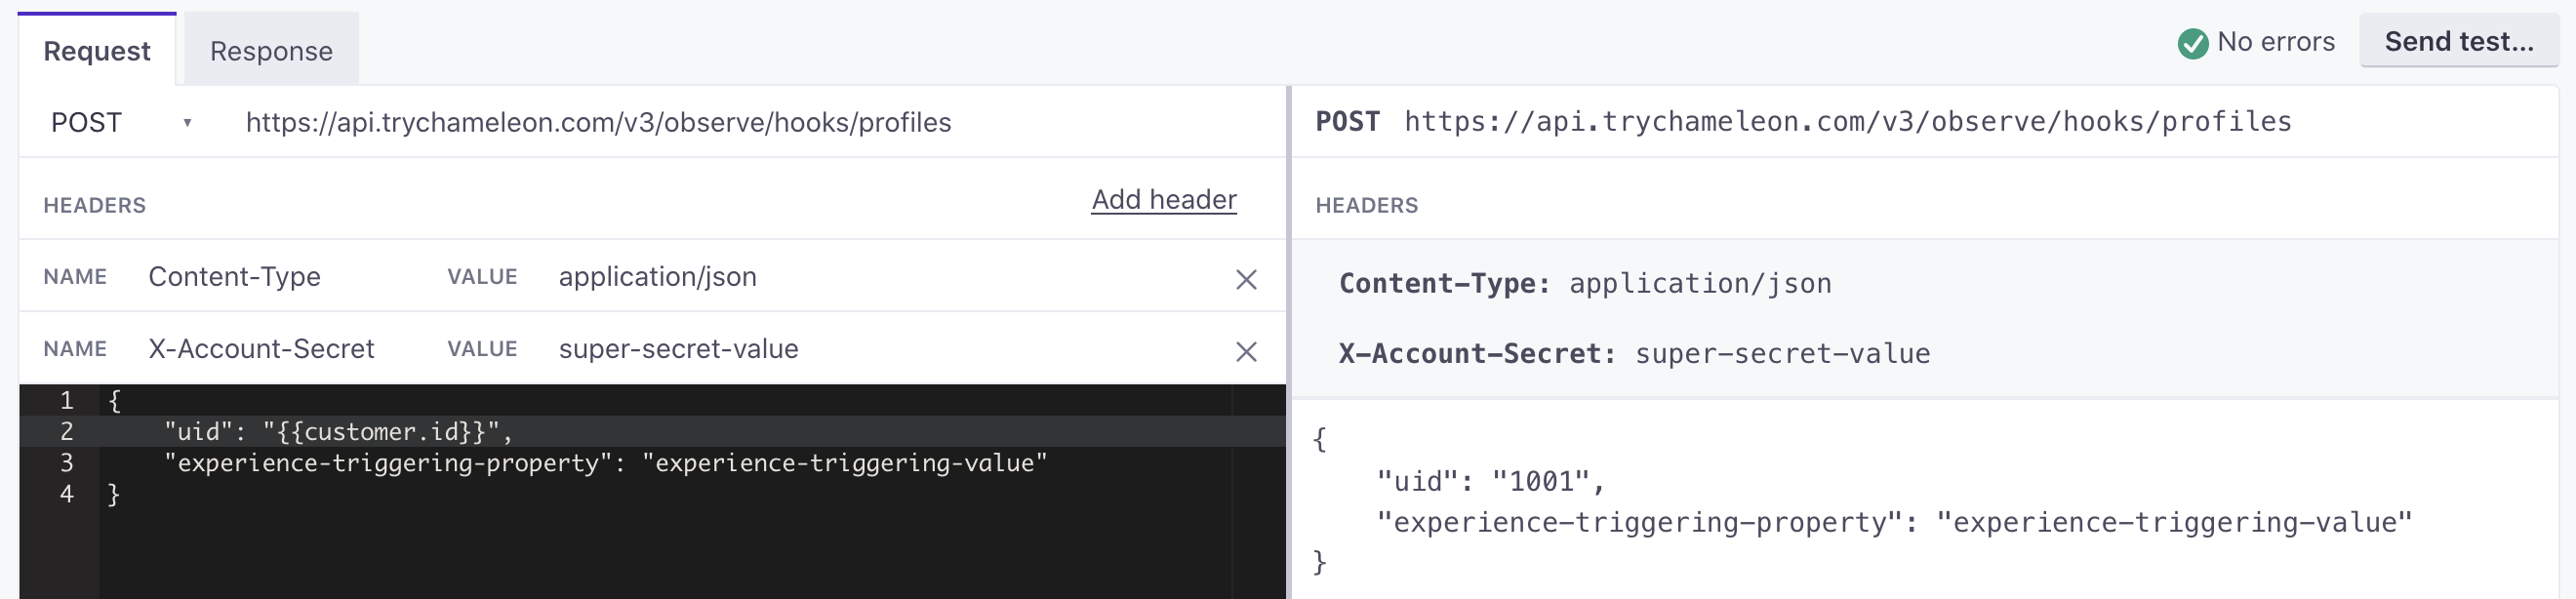
https://api.trychameleon.com/v3/observe/hooks/profiles.Make sure the method is set to
POST.Click Add Header and enter
X-Account-Secretfor the name and enter your Chameleon API token for the value. Click here to find or generate your Chameleon API token.Enter your payload. In this case, because you’re setting a custom property on a user to trigger a tour or experience, the payload is relatively simple.
{
    "uid": "{{customer.chameleon-uid}}", // chameleon-uid is an example
                                         // set the attribute that maps to
                                         // your Chameleon UID
    "experience-triggering-property": "experience-triggering-value"
}
(Optional) Test your request! Under Results, select the person you want to send a test to, and then click Send test…. If your webhook is configured correctly, your request will expose your tour or experience to your test person.
Click Save Changes. When you activate your campaign, your webhook will trigger tours and experiences for people who reach the webhook in your campaign.
Send in-app messages with Airship
To take advantage of Airship’s in-app messaging solution in Customer.io, you must:
- integrate the Airship SDK in your app.
- have your Airship App Key and Master Secret. You can find both in the Airship dashboard.
- use the
named_userfeature in Airship. - create an attribute in Customer.io called
named_userthat matches the Airship named user value. When you set up your webhook, you’ll use{{customer.named_user}}to make sure that your in-app message reaches the right person.
In the Workflow for your campaign:
Add a Webhook to your workflow and click Add Request.
Set the URL to
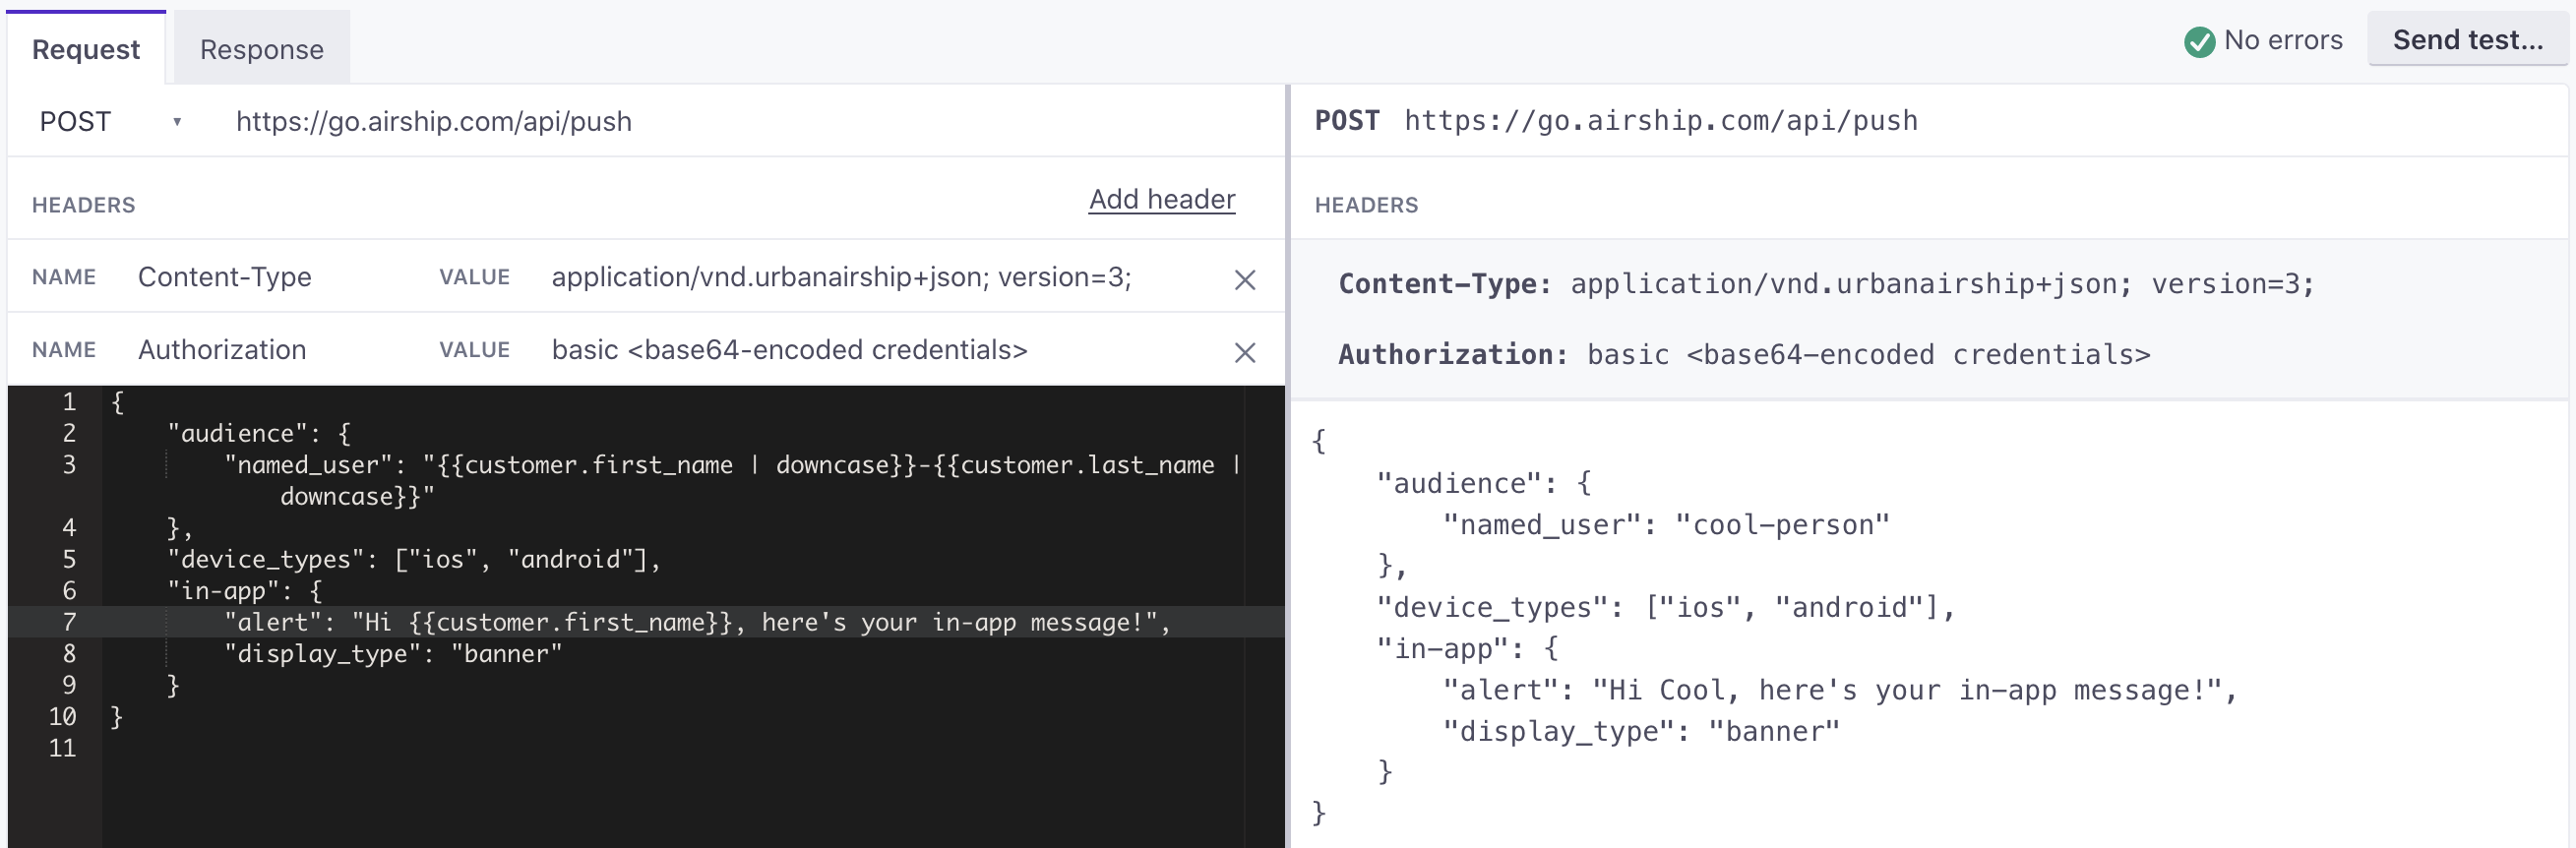
https://go.airship.com/api/push.Click Add header. Enter
Authorizationfor the Name andbasic <base64-encoded credentials>for the Value. You can go here and enter your credentials in the formatappKey:masterSecretto get your Base64-encoded authorization credentials.Click Add Header again and enter
Content-Typefor the Name andapplication/vnd.urbanairship+json; version=3;for the Value.Provide the payload for your in-app message. The example below has the basic information required by Airship’s API, but the
in-appobject can be much more complex. See Airship’s documentation to learn more. In our example, we have a customer attribute mapped directly to anamed_userin Airship.{ "audience": { // push to the specific user you want to message "named_user": "{{ customer.named_user }}" }, // set the device types your audience might have "device_types": ["ios", "android"], "in-app": { "alert": "Your in-app message goes here", "display_type": "banner" } }(Optional) Test your request! Under Results, select the person you want to send a test to, and then click Send test…. If this person has a
named_userattribute and your webhook is configured correctly, your request should send them a message.Click Save Changes. When you activate your campaign, your webhook will send in-app messages through Airship.