In-App Messages: Getting Started
In-app messages let you incorporate dynamic, personalized content into your app or website with very little development or engineering and help you continue conversations across channels. By personalizing messages based on the activities your audience performs in- or outside your app, you can maintain highly relevant interactions with your audience.
What is an in-app message?
An in-app message is a message sent to a user inside your app or on your website. It’s distinct from a push notification in that a user must be in your app or on your website to receive it. They can’t get your message if they don’t open your app or log in to your site.
While we refer to in-app messages as messages, you can make them persistent and use them as banners or other UI elements. They aren’t necessarily one-time messages!
How it works
When you send an in-app message, the message waits in a queue until your recipient opens your app or website on one of their devices. When a recipient opens your app or website, we poll for new messages and send messages in the queue. When someone gets a message, we log events based on their responses—whether they tap an action in the message, dismiss it, etc.
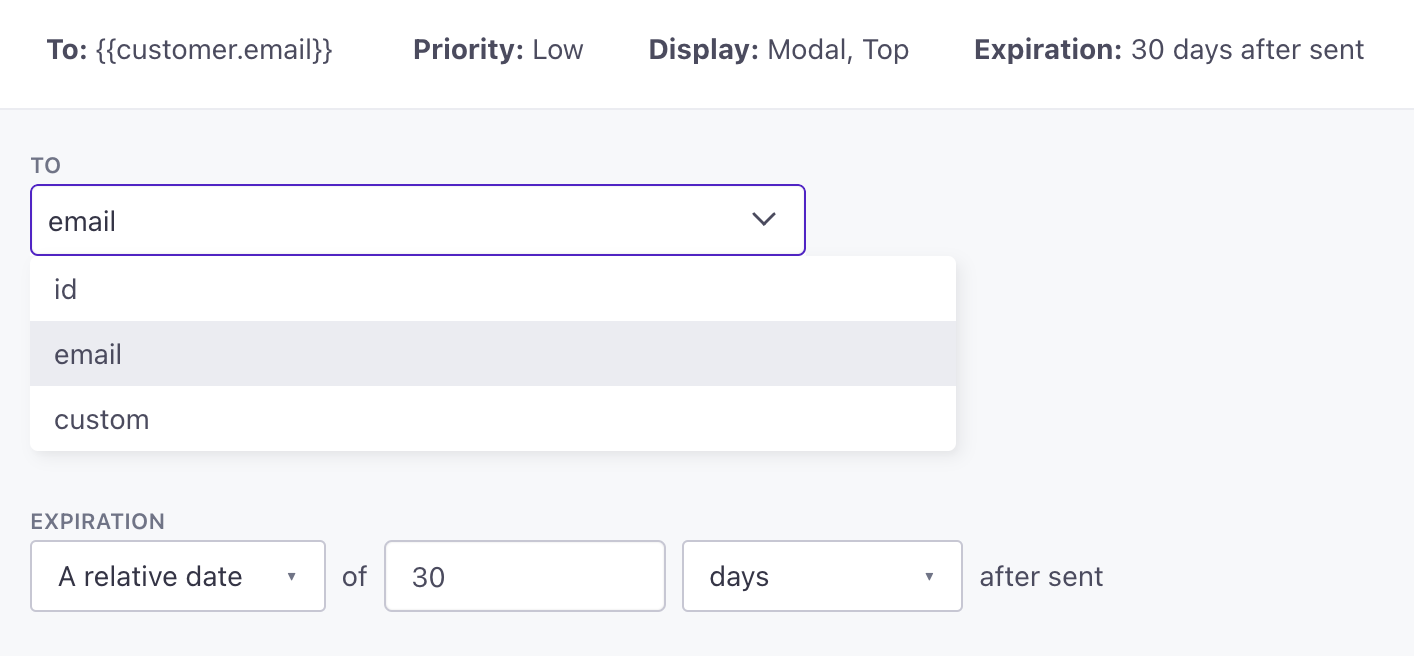
You’ll target your message to your audience by their ID or email rather than by device or browser. In-app messages appear in the first device or browser that the person visits after you send a message. After a person receives your message, they won’t get it on another device or browser session (unless they enter a campaign again or you re-broadcast your message).
until user opens app a->>b: User opens app b->>c: Identify user c->>b: Send in-app message b->>a: User sees
in-app message
Before you begin
To send in-app messages, you’ll need to install an SDK (software development kit) in your website or mobile app. If you’re not a developer, this can sound intimidating, but don’t worry! All you need to do is copy a block of code to your website.
For your mobile apps, this process probably requires a mobile developer, but you can still start drafting messages in Customer.io without setting up your app.
I start?} a-->|I'm a marketer|f{Are SDKs already
integrated?} f-->|yes|g[Create in-app messages] a-->|I'm a developer|h[Integrate mobile SDK] f-.->|no, contact a developer|h{Integrating app
or website?} h-->|Website|i(Add JS snippet
to your website) h-->|App|b(Install mobile SDK) i-->g b-->g
Set up your website
You’ll need to add a JavaScript snippet to your website. If you’re not a developer, don’t worry! This is a simple copy-and-paste operation, and we’ll walk you through what you need to do.
If you are a developer, check out our JavaScript SDK documentation to learn more about what you can do with our JavaScript library. You’ll need to identify people you want to send messages to, but you can also track events, listen for interactions with in-app messages, and more.
This process uses our newer Data Pipelines JavaScript snippet. See our Journeys JavaScript library instructions if you’re integrated with our classic JavaScript library and don’t want to switch. But keep in mind that our Data Pipelines JavaScript snippet supports more features and is where we’re focusing our development efforts!
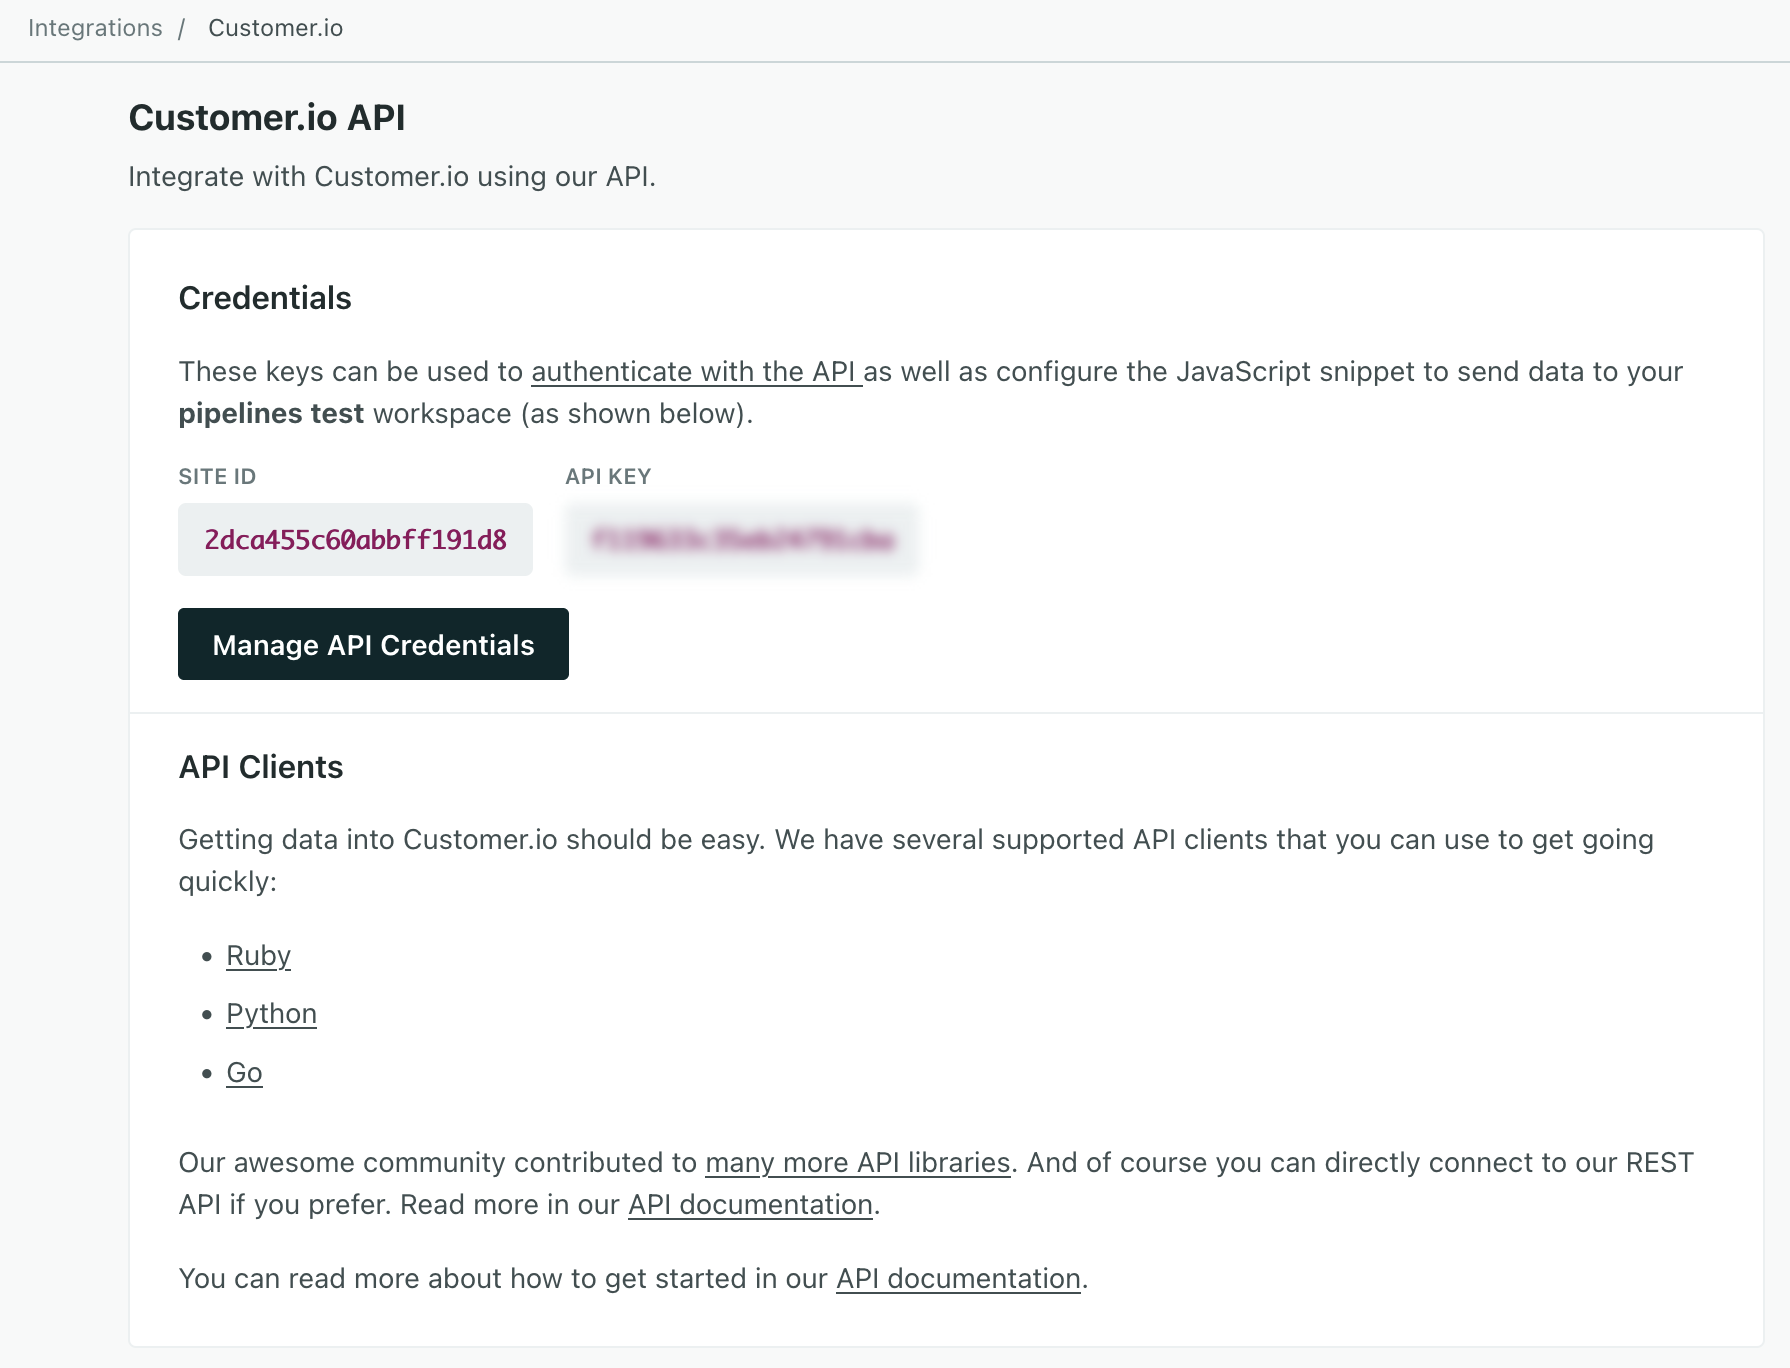
Go to Data & Integrations > Integrations > Customer.io API and copy your Site ID. You’ll need it in later steps.
Go to the Data Pipelines tab and click Sources.
Click Add Source, pick JavaScript, and click Next.
Give the source a Name. This is simply a friendly name to help you find and recognize your integration in Customer.io.
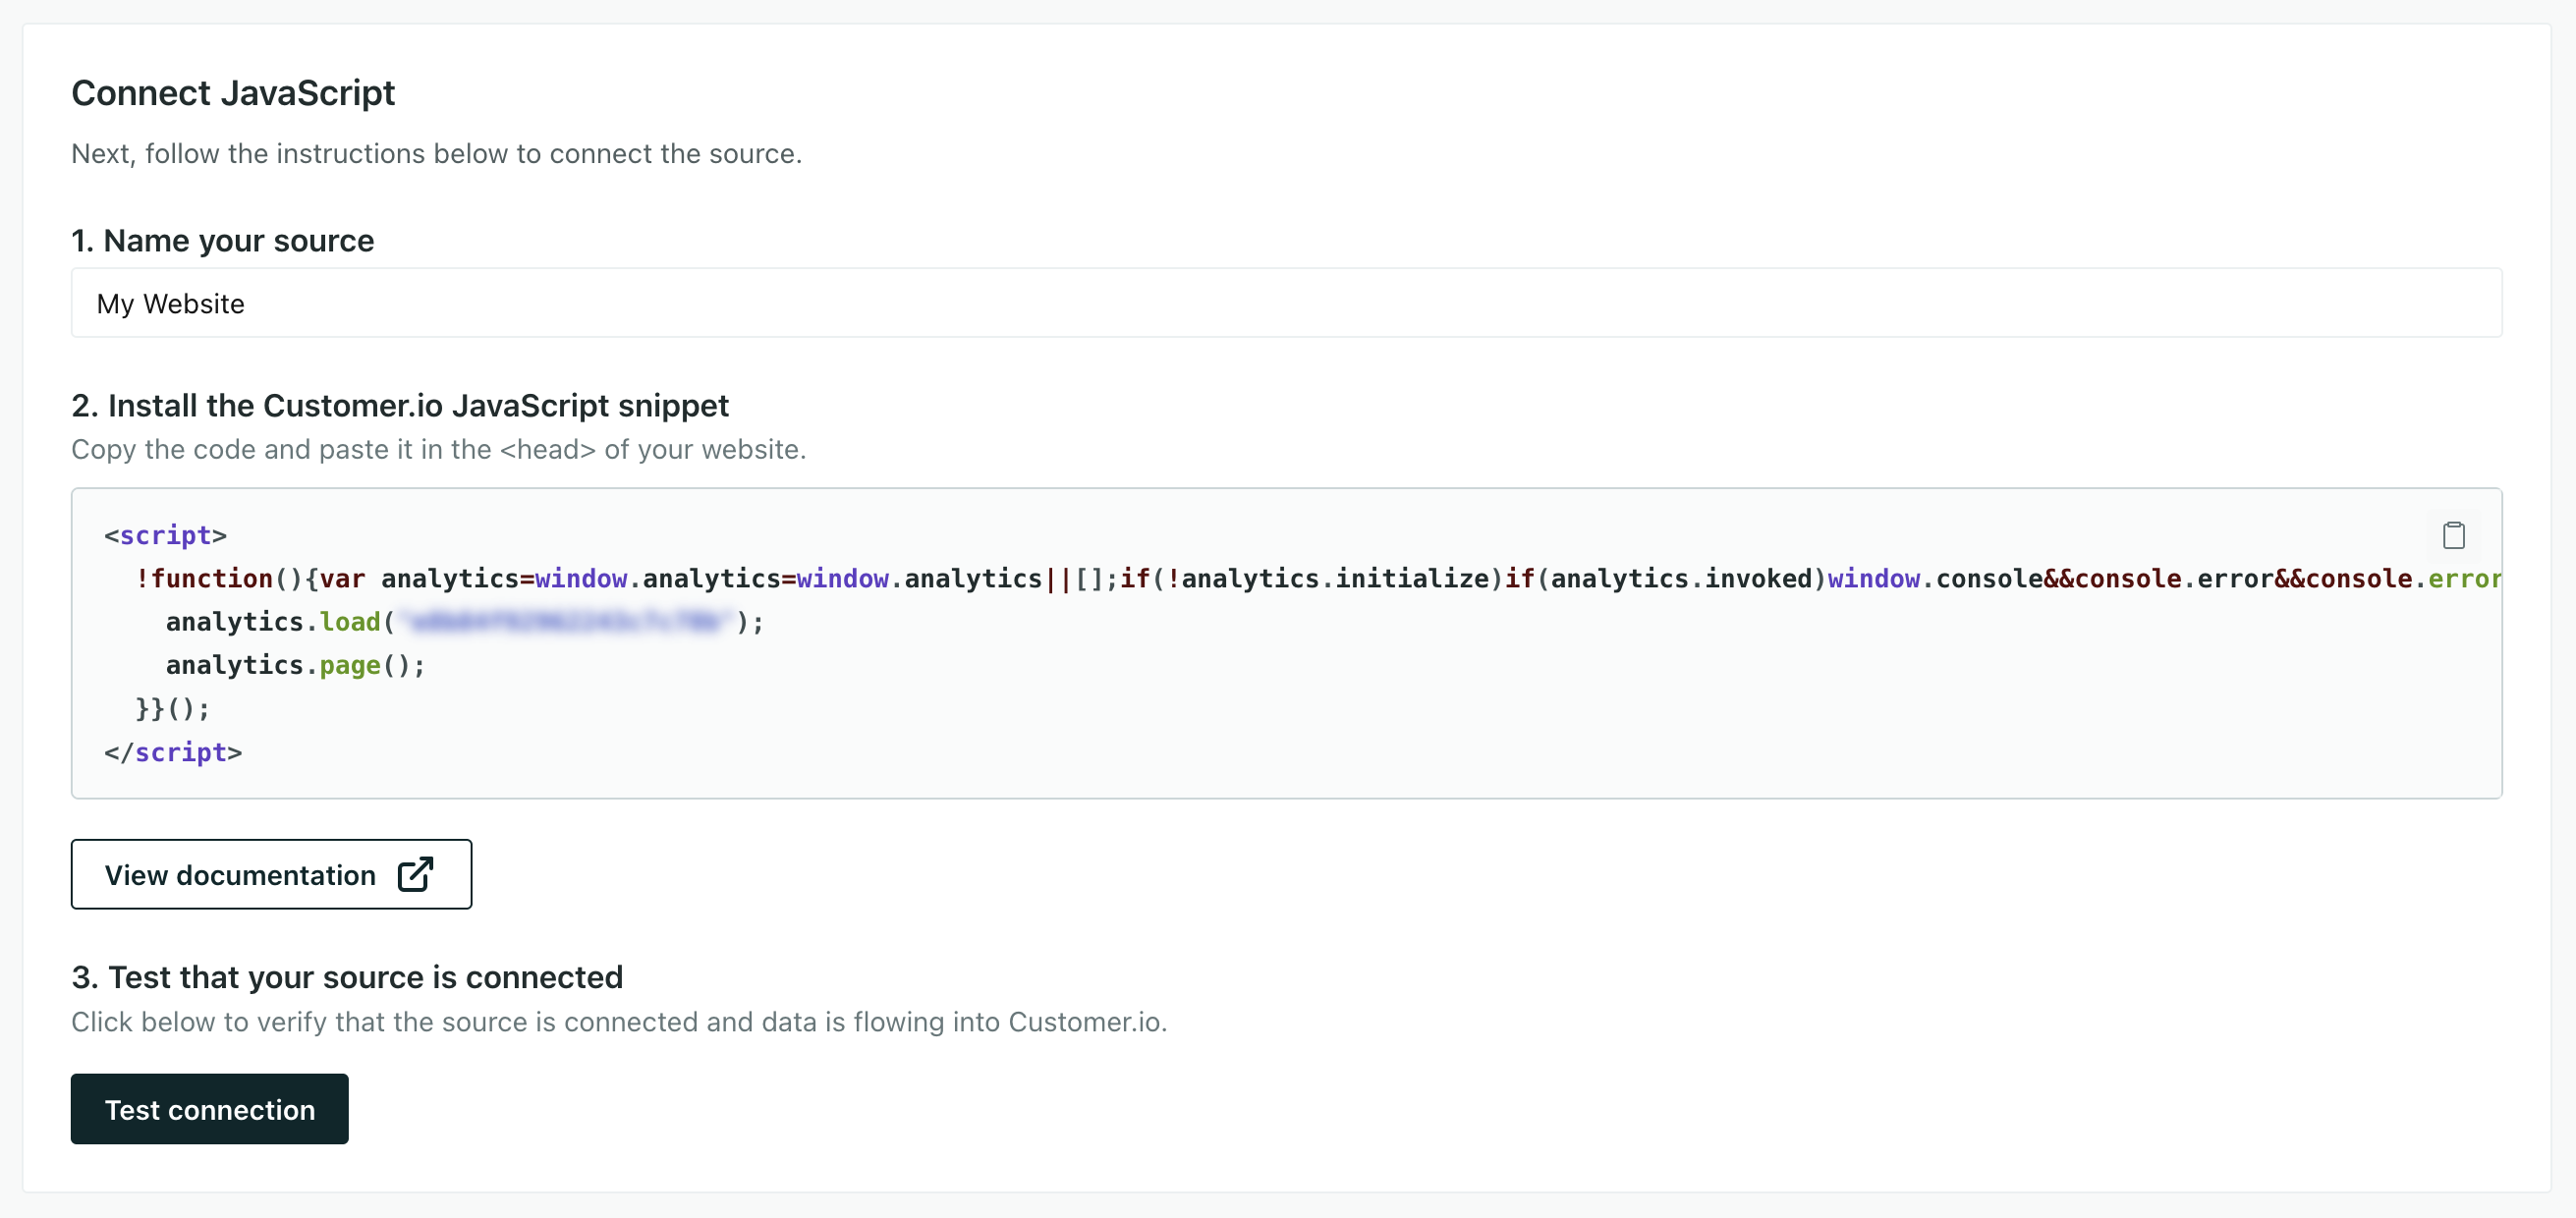
Copy the Sample Code and paste it into your website, directly below the closing
</head>tag.If you’re in our EU region, make sure that
t.srccontains our EU url (https://eu-api.customer.io/v1/analytics-js/snippet/). Your code looks like this, though yours will have a real Write Key in theanalytics.loadstatement.<script> !function(){var analytics=window.analytics=window.analytics||[];if(!analytics.initialize)if(analytics.invoked)window.console&&console.error&&console.error("Snippet included twice.");else{analytics.invoked=!0;analytics.methods=["trackSubmit","trackClick","trackLink","trackForm","pageview","identify","reset","group","track","ready","alias","debug","page","once","off","on","addSourceMiddleware","addIntegrationMiddleware","setAnonymousId","addDestinationMiddleware"];analytics.factory=function(e){return function(){var t=Array.prototype.slice.call(arguments);t.unshift(e);analytics.push(t);return analytics}};for(var e=0;e<analytics.methods.length;e++){var key=analytics.methods[e];analytics[key]=analytics.factory(key)}analytics.load=function(key,e){var t=document.createElement("script");t.type="text/javascript";t.async=!0;t.src="https://cdp.customer.io/v1/analytics-js/snippet/" + key + "/analytics.min.js";var n=document.getElementsByTagName("script")[0];n.parentNode.insertBefore(t,n);analytics._writeKey=key;analytics._loadOptions=e};analytics.SNIPPET_VERSION="4.15.3"; analytics.load("YOUR_WRITE_KEY"); analytics.page(); }}(); </script>Add the following lines inside the
analytics.loadstatement and paste the Site ID that you copied in the first step in thesiteIDline (where you seeYOUR_JOURNEYS_SITE_IDbelow).<script> !function(){var analytics=window.analytics=window.analytics||[];if(!analytics.initialize)if(analytics.invoked)window.console&&console.error&&console.error("Snippet included twice.");else{analytics.invoked=!0;analytics.methods=["trackSubmit","trackClick","trackLink","trackForm","pageview","identify","reset","group","track","ready","alias","debug","page","once","off","on","addSourceMiddleware","addIntegrationMiddleware","setAnonymousId","addDestinationMiddleware"];analytics.factory=function(e){return function(){var t=Array.prototype.slice.call(arguments);t.unshift(e);analytics.push(t);return analytics}};for(var e=0;e<analytics.methods.length;e++){var key=analytics.methods[e];analytics[key]=analytics.factory(key)}analytics.load=function(key,e){var t=document.createElement("script");t.type="text/javascript";t.async=!0;t.src="https://cdp.customer.io/v1/analytics-js/snippet/" + key + "/analytics.min.js";var n=document.getElementsByTagName("script")[0];n.parentNode.insertBefore(t,n);analytics._writeKey=key;analytics._loadOptions=e};analytics.SNIPPET_VERSION="4.15.3"; analytics.load( "YOUR_WRITE_KEY", // Support in-app messaging { "integrations": { "Customer.io In-App Plugin": { siteId: "YOUR_JOURNEYS_SITE_ID" } } } ); analytics.page(); }}(); </script>Click Test Connection to make sure that everything works and click Complete Setup.
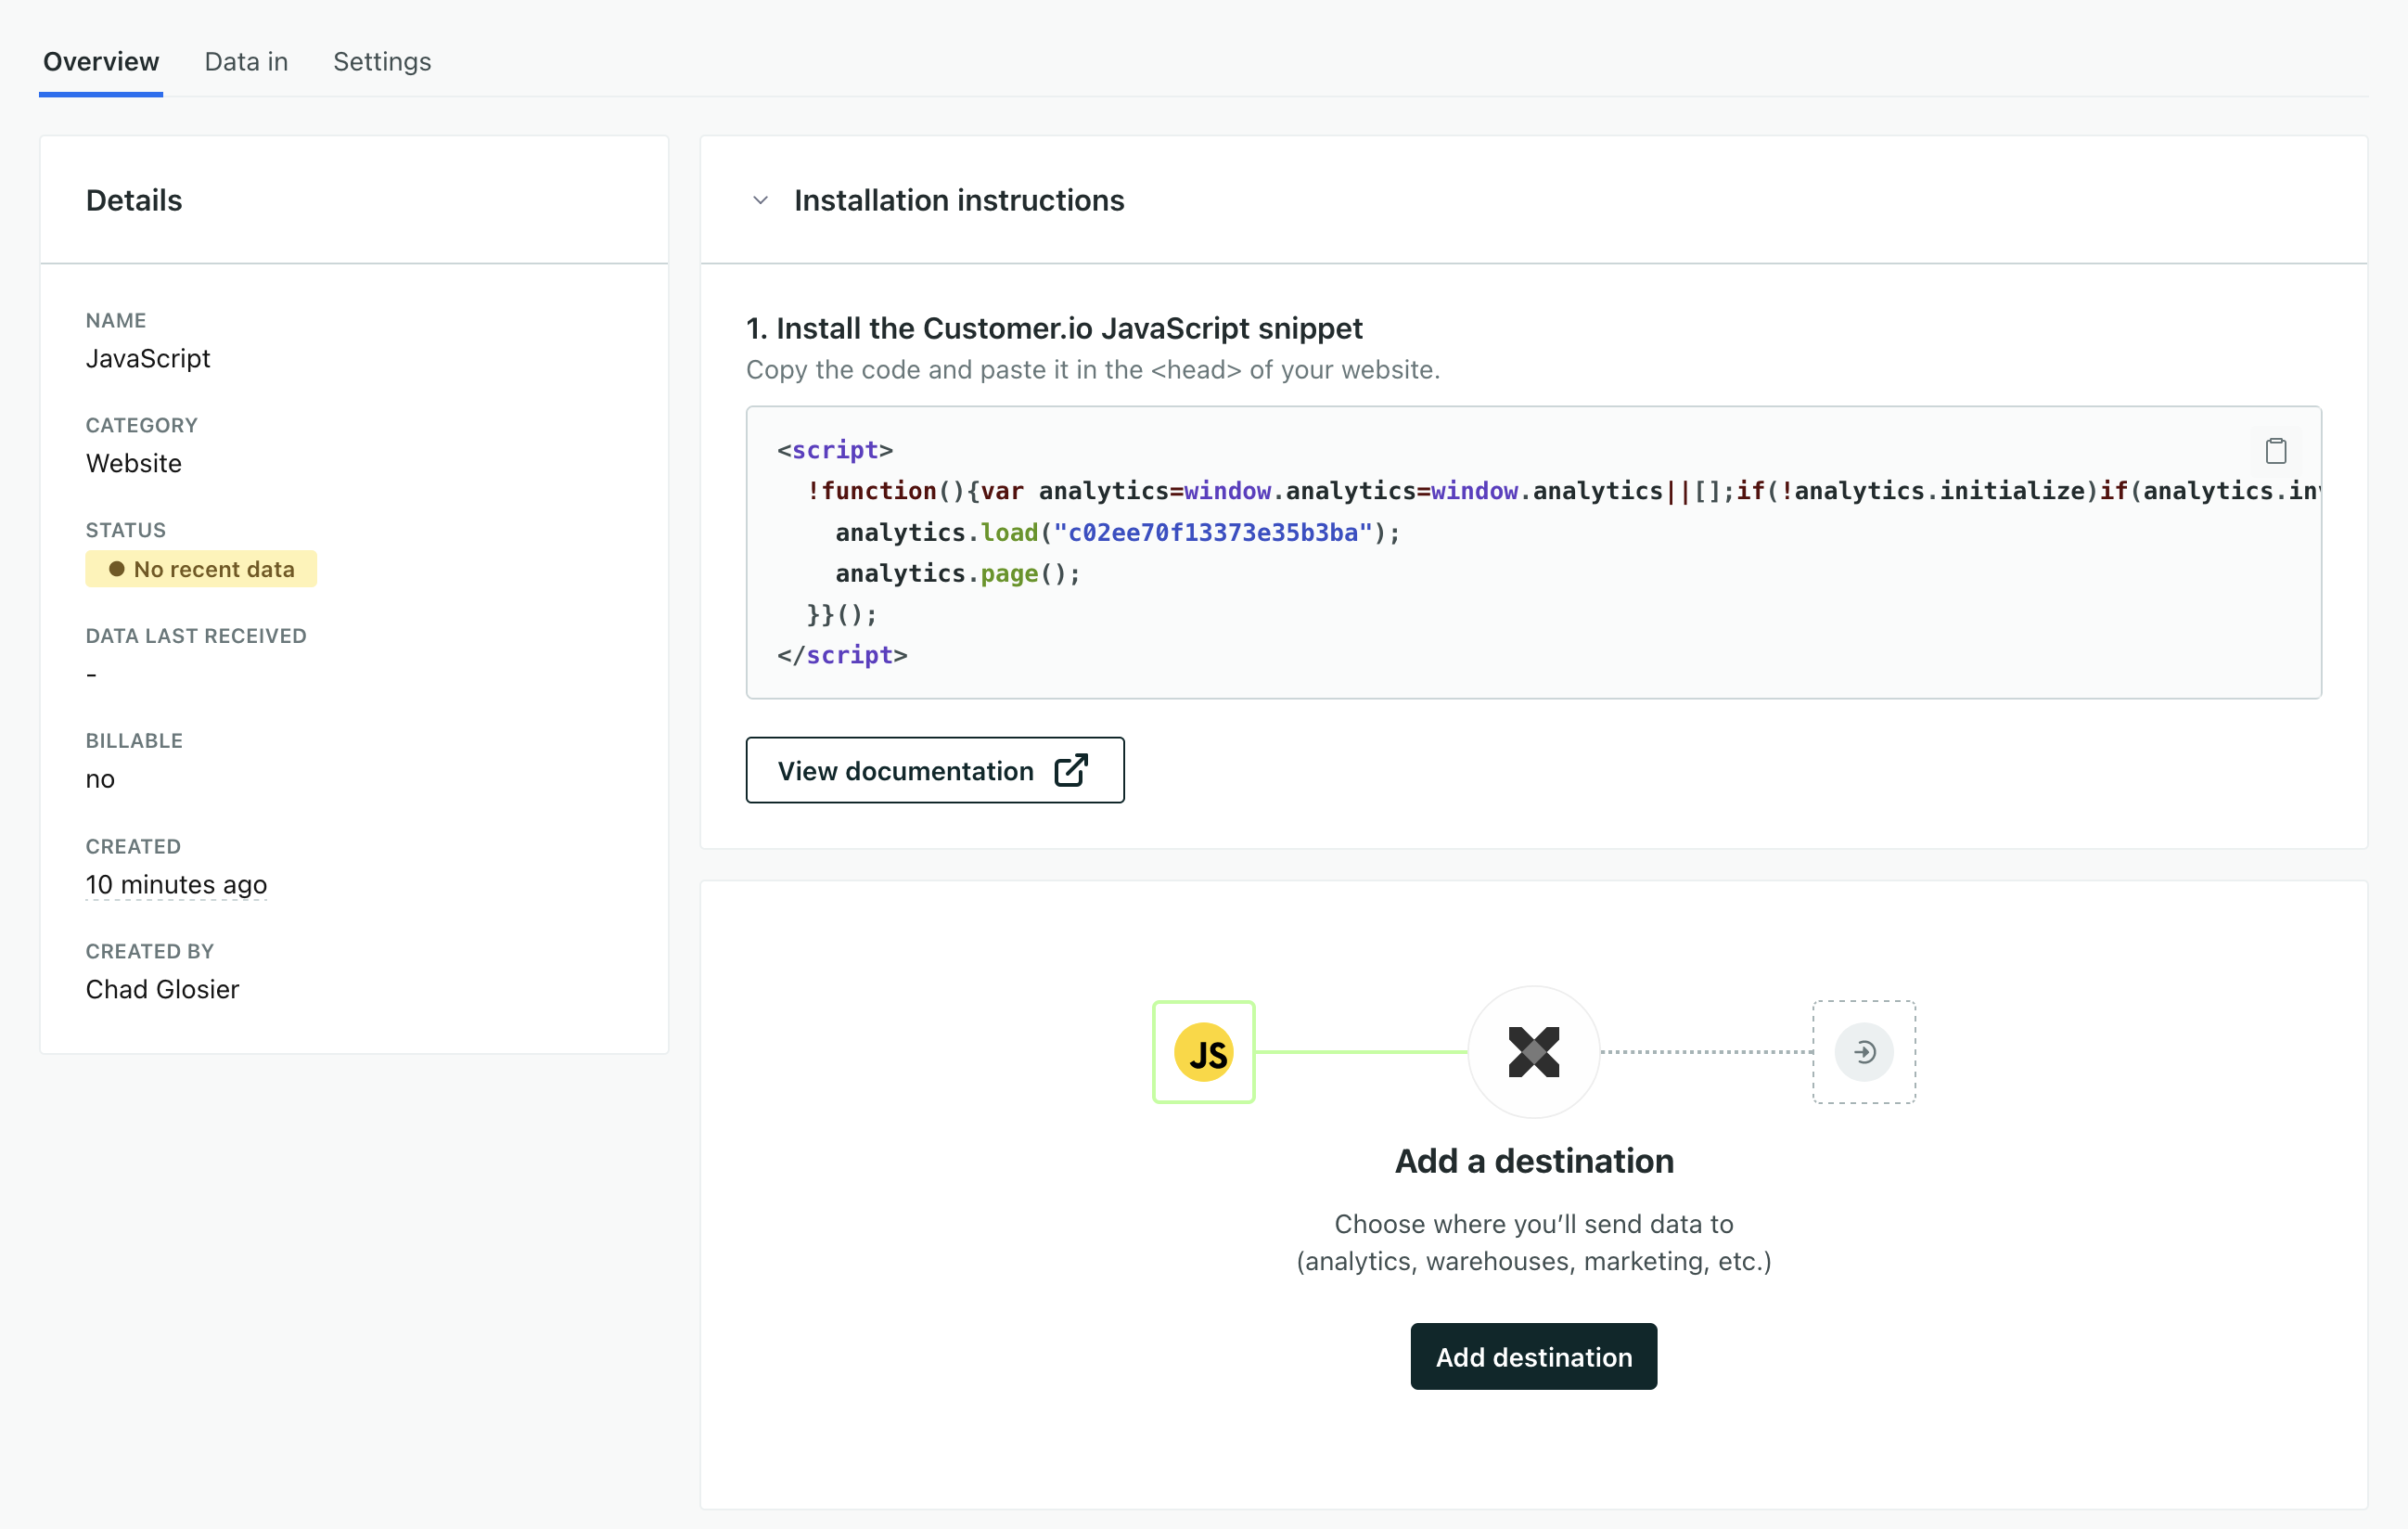
You’re not done yet! Click Add a destination.
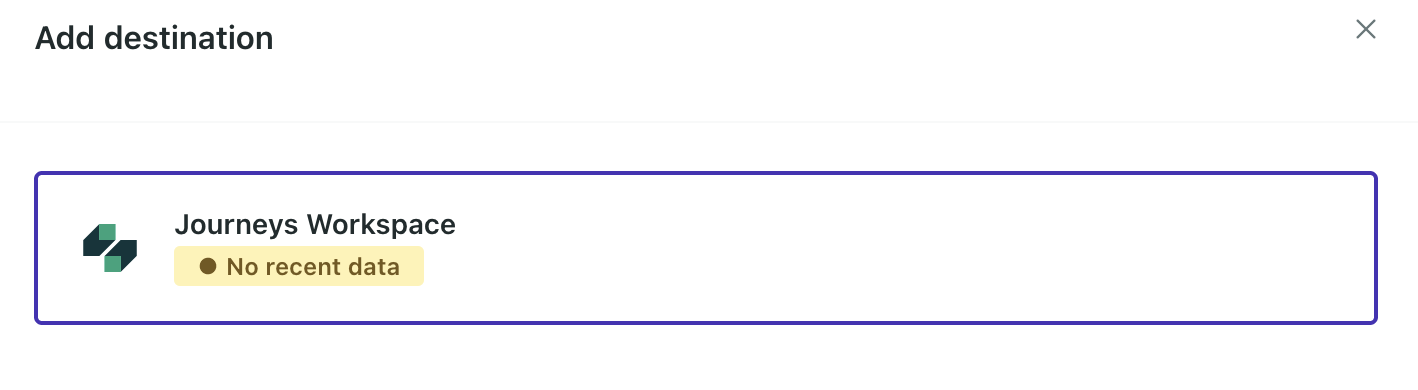
Select your workspace, and then click Connect.
Now you’re almost ready to send in-app messages. You might want to send yourself a test message to prove your integration. Otherwise, you’ll need to identify people and send events to Customer.io to trigger your messages!
Identify your website visitors
You must identify people before you can send them messages. You can do this with the identify method.
You’ll send an identify call whenever someone logs into your website, provides their email address, or otherwise agrees to use your service. The identifierThe attributes you use to add, modify, and target people. Each unique identifier value represents an individual person in your workspace. you use in your call must match the To field in your in-app message configuration. For example, if you send messages based on your audience’s email address, then your identify call must use your audience’s email address when identifying people.
//analytics.identify(id, attributes)
analytics.identify('f4ca124298', {
  email: 'person@example.com',
  first_name: 'Cool',
  last_name: 'Person',
  plan_name: 'premium'
  // Strongly recommended when you first identify someone
  created_at: 1339438758,   // This is the timestamp when the user
                            // first appears, in Unix format.
});
Set up your mobile app
Check out our mobile SDK documentation to incorporate the in-app notifications SDK. You might need a mobile developer to help you add our SDK to your app.
Polling for messages
We normally check for new in-app messages every 10 seconds. But we adjust this rate when people don’t have active messages in queue to minimize unnecessary network traffic.
When you first start sending in-app messages, it may take a few minutes to ramp up in-app polling frequency to the normal rate. This won’t affect your users. But, if you have your website or app open when you send your very first test message, you’ll want to clear your cache or restart your app to see messages at the normal polling rate.
| Polling Frequency | Active Messages in Queue? | Description |
|---|---|---|
| Low (180 seconds) | No | This is the polling rate before you send your first message. We also revert to this rate if you don't send a message within 30 days after your last in-app message expires. |
| Inactive (60 seconds) | No | This is the rate for people who've received a message in the last 30 days but do not have an active message in the queue. |
| Active (10 seconds) | Yes | This is the rate for people who have an active message in the queue. |
Add in-app support to the classic JavaScript snippet
We typically recommend that you use the Data Pipelines JavaScript Source to take advantage of our latest features.
But if you’re already integrated with our Journeys JavaScript snippet, you can enable in-app by adding the data-use-in-app property to your code, highlighted in the sample below. See our Journeys JavaScript documentation to learn more about what you can do with this JavaScript snippet, including listening for interactions with in-app messages.
<script type="text/javascript">
    var _cio = _cio || [];
    (function() {
        var a,b,c;a=function(f){return function(){_cio.push([f].
        concat(Array.prototype.slice.call(arguments,0)))}};b=["load","identify",
        "sidentify","track","page","on","off"];for(c=0;c<b.length;c++){_cio[b[c]]=a(b[c])};
        var t = document.createElement('script'),
            s = document.getElementsByTagName('script')[0];
        t.async = true;
        t.id    = 'cio-tracker';
        t.setAttribute('data-site-id', 'YOUR_SITE_ID');
        t.setAttribute('data-use-array-params', 'true');
        t.setAttribute('data-use-in-app', 'true');
        t.src = 'https://assets.customer.io/assets/track.js';
        //If your account is in the EU, use:
        //t.src = 'https://assets.customer.io/assets/track-eu.js'
        s.parentNode.insertBefore(t, s);
    })();
</script>
Identify people with the Journeys JavaScript snippet
You must identify people before you can send them messages. You can do this with the identify method.
You’ll send an identify call whenever someone logs into your website, provides their email address, or otherwise agrees to use your service. The identifierThe attributes you use to add, modify, and target people. Each unique identifier value represents an individual person in your workspace. you use in your call must match the To field in your in-app message configuration. For example, if you send messages based on your audience’s email address, then your identify call must use your audience’s email address when identifying people.
// Send this when a user logs in or you otherwise identify them.

_cio.identify({
    // Required attributes — you must include your customer's identifier (this can be either an email address or a unique ID value) in a property named "id". See below for more details.
    id: 'example-person',

    // Strongly recommended when you first identify someone
    created_at: 1339438758,   // Timestamp in representing when the user
                              // first signed up in Unix format.

    // Other attributes (properties you'll reference with liquid)
    email: 'person@example.com',
    first_name: 'Cool',
    last_name: 'Person',
    plan_name: 'premium'
});
Enable in-app messaging
When you add an in-app message to your workflow, you can enable in-app messaging right there.
But, on the settings page, we’ll show you the platforms we support with links to documentation. Until you send and receive your first message, the Connect your app step will show Required—because we assume that you have more setup to do.
You can even send a test message to prove your integration on this page! When you send, and successfully display, your first in-app message, we’ll show that setup is complete and you’re ready to send messages to your audience!
Close your browser or app before you send a test!
Before you send your first message, we poll slowly for messages. We update this rate when you send your first message—but only if your browser or app is closed. If you have your app or website open when you send your first message, it may take up to 3 minutes to see your first message!

Disable in-app messaging
Disabling in-app messaging cancels all in-app messages and prevents your campaigns from sending in-app messages in the future. If you have campaigns with in-app messages in them, you may want to remove those messages first to make sure that your campaign and broadcast workflows still make sense.
- Go to Settings > Workspace Settings > In-App.
- Click Enable or Disable.

