Import objects or relationships via CSV
Add or update objects and relationships via CSV to add or update data in Customer.io. This is a good option if you’re just getting started and want to quickly add objects or relationships to your workspace. You can also import if your data isn’t available through an integration.
How it works
You can upload CSVs or Google Sheets to add or update objects and relationships outside your normal integration path.
- When you upload a CSV of objects, each row in your CSV represents an object, and each column represents an object attribute.
- When you upload a CSV of relationships, each row is a relationship between an object and person, and each column (besides
object_type_id,object_id, and the identifier of the person) is an attribute on the relationship.
You can upload a CSV or Google Sheet of objects or relationships through Data & Integrations, People, or an Object Type page.
Import a CSV of objects
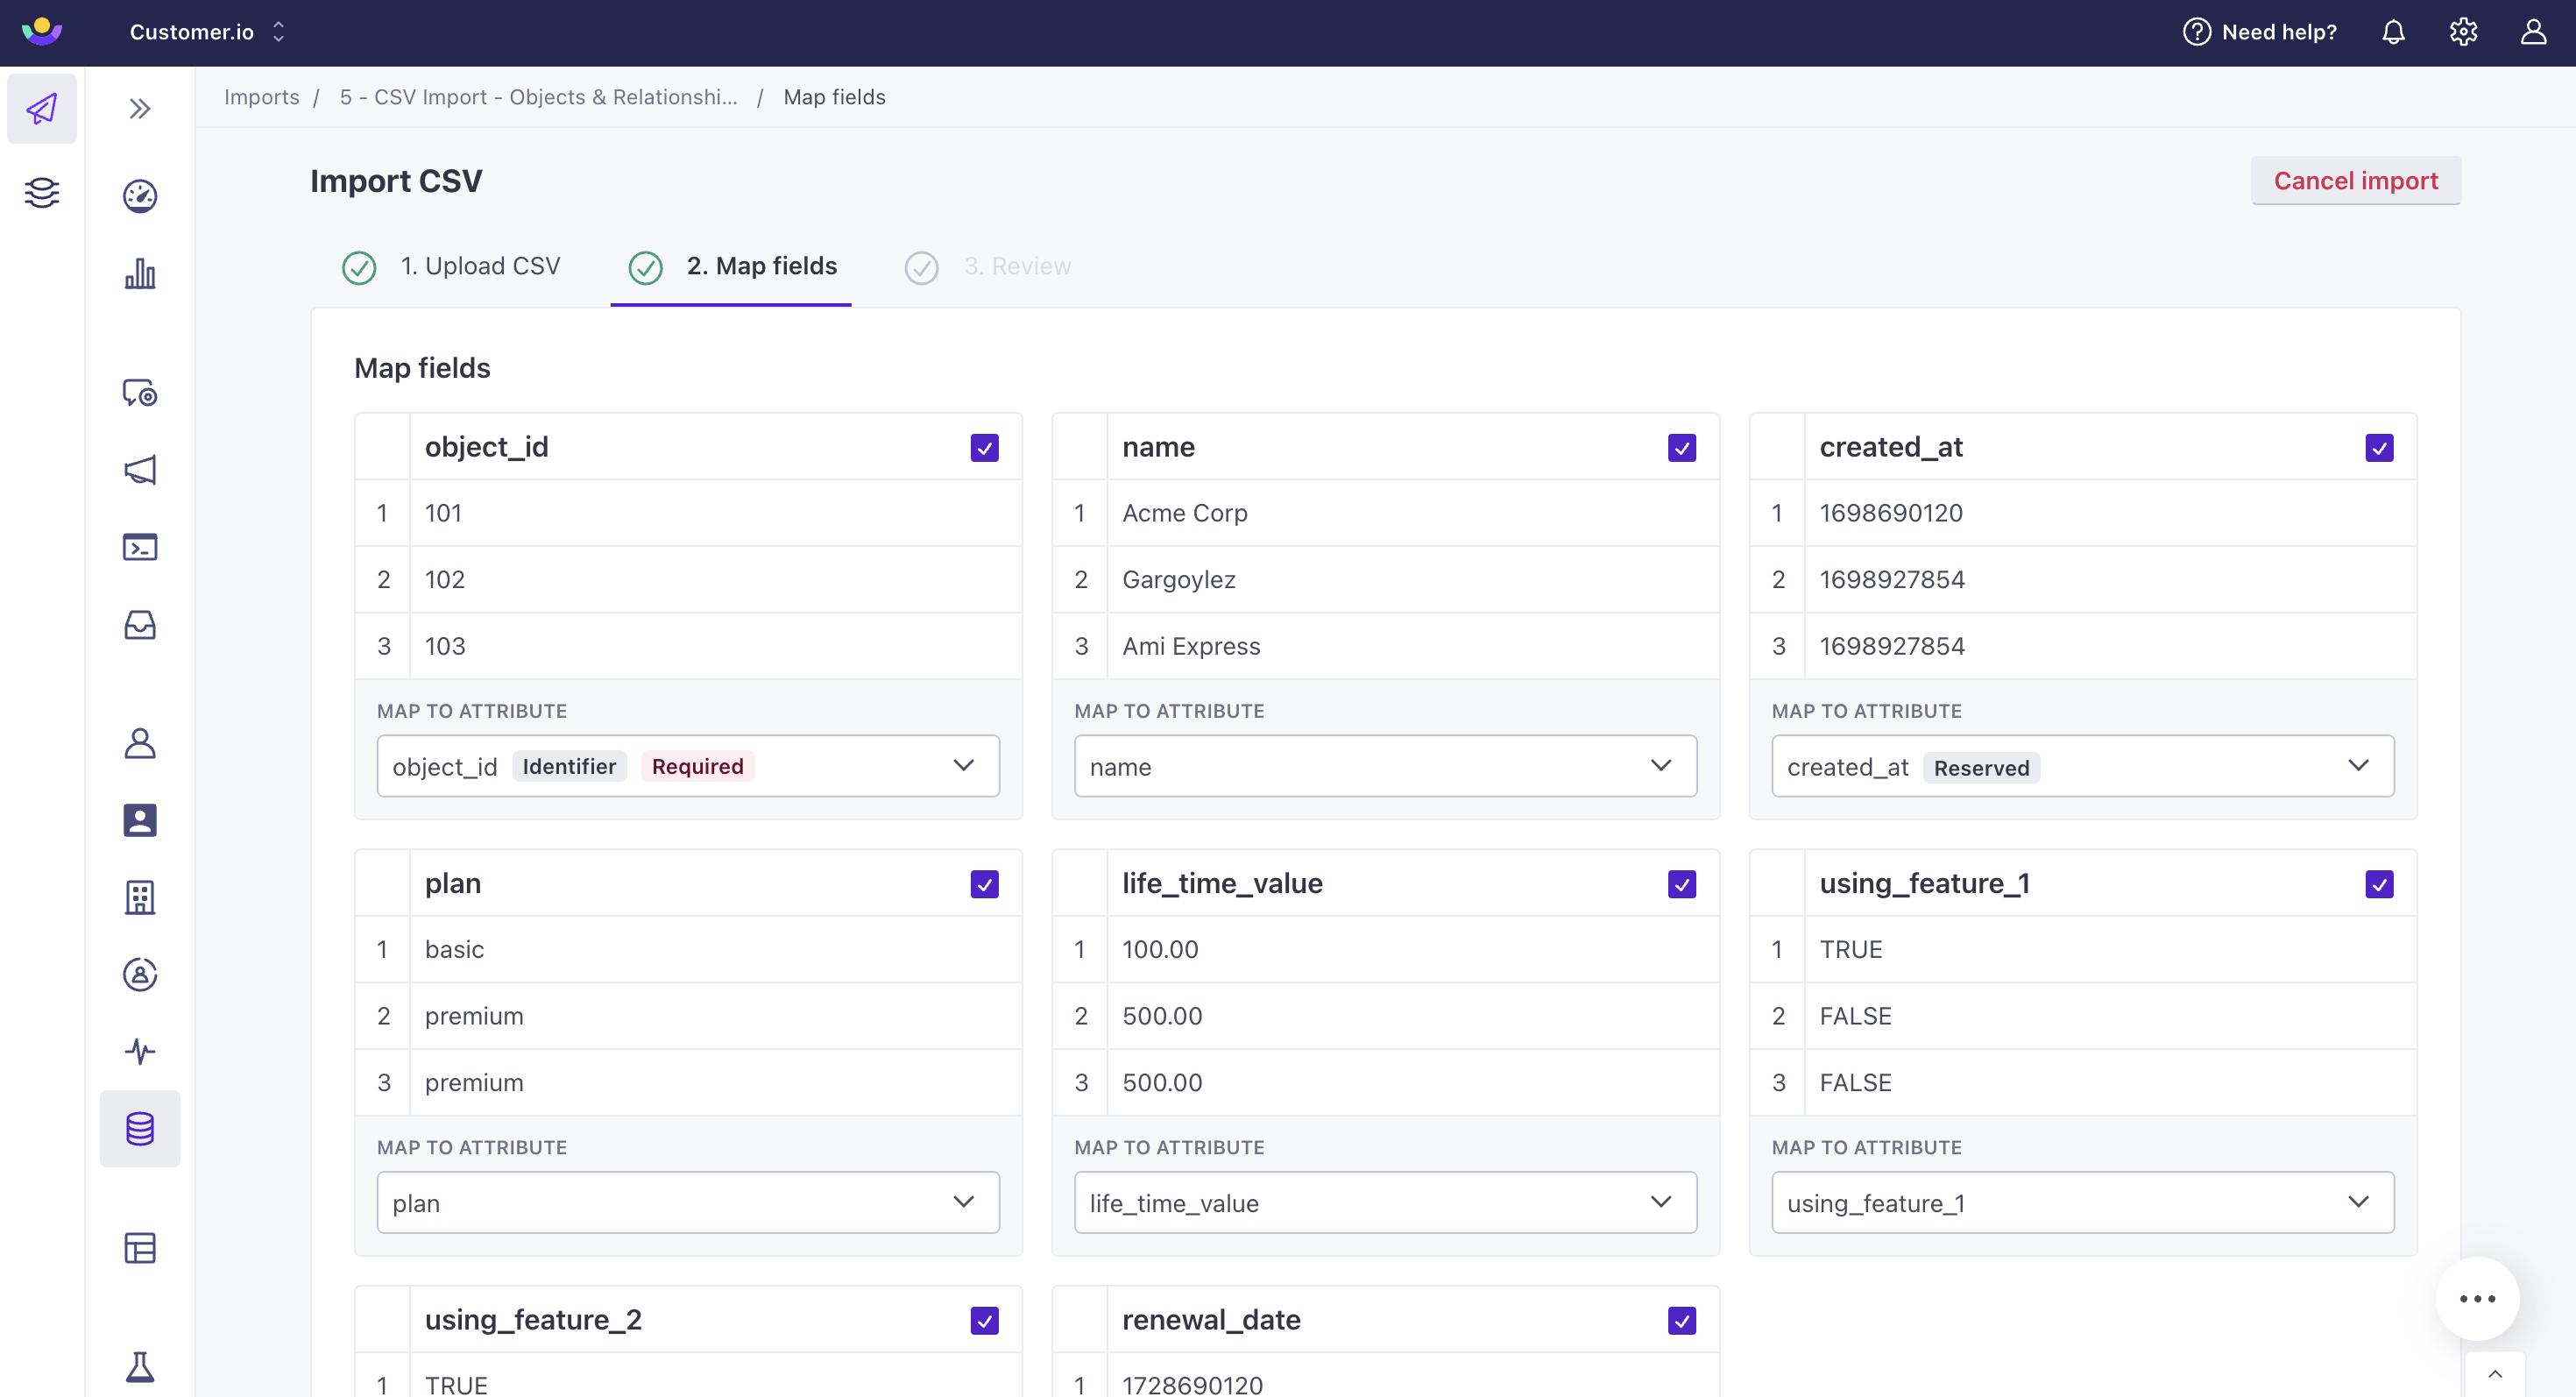
Before you import objects, create your CSV. An object CSV only requires an object_id, but you can also specify object attributes like name, created_at, and anything else relevant to your objects. You can import objects for a single object type via CSV or Google Sheets.
To import objects via CSV:
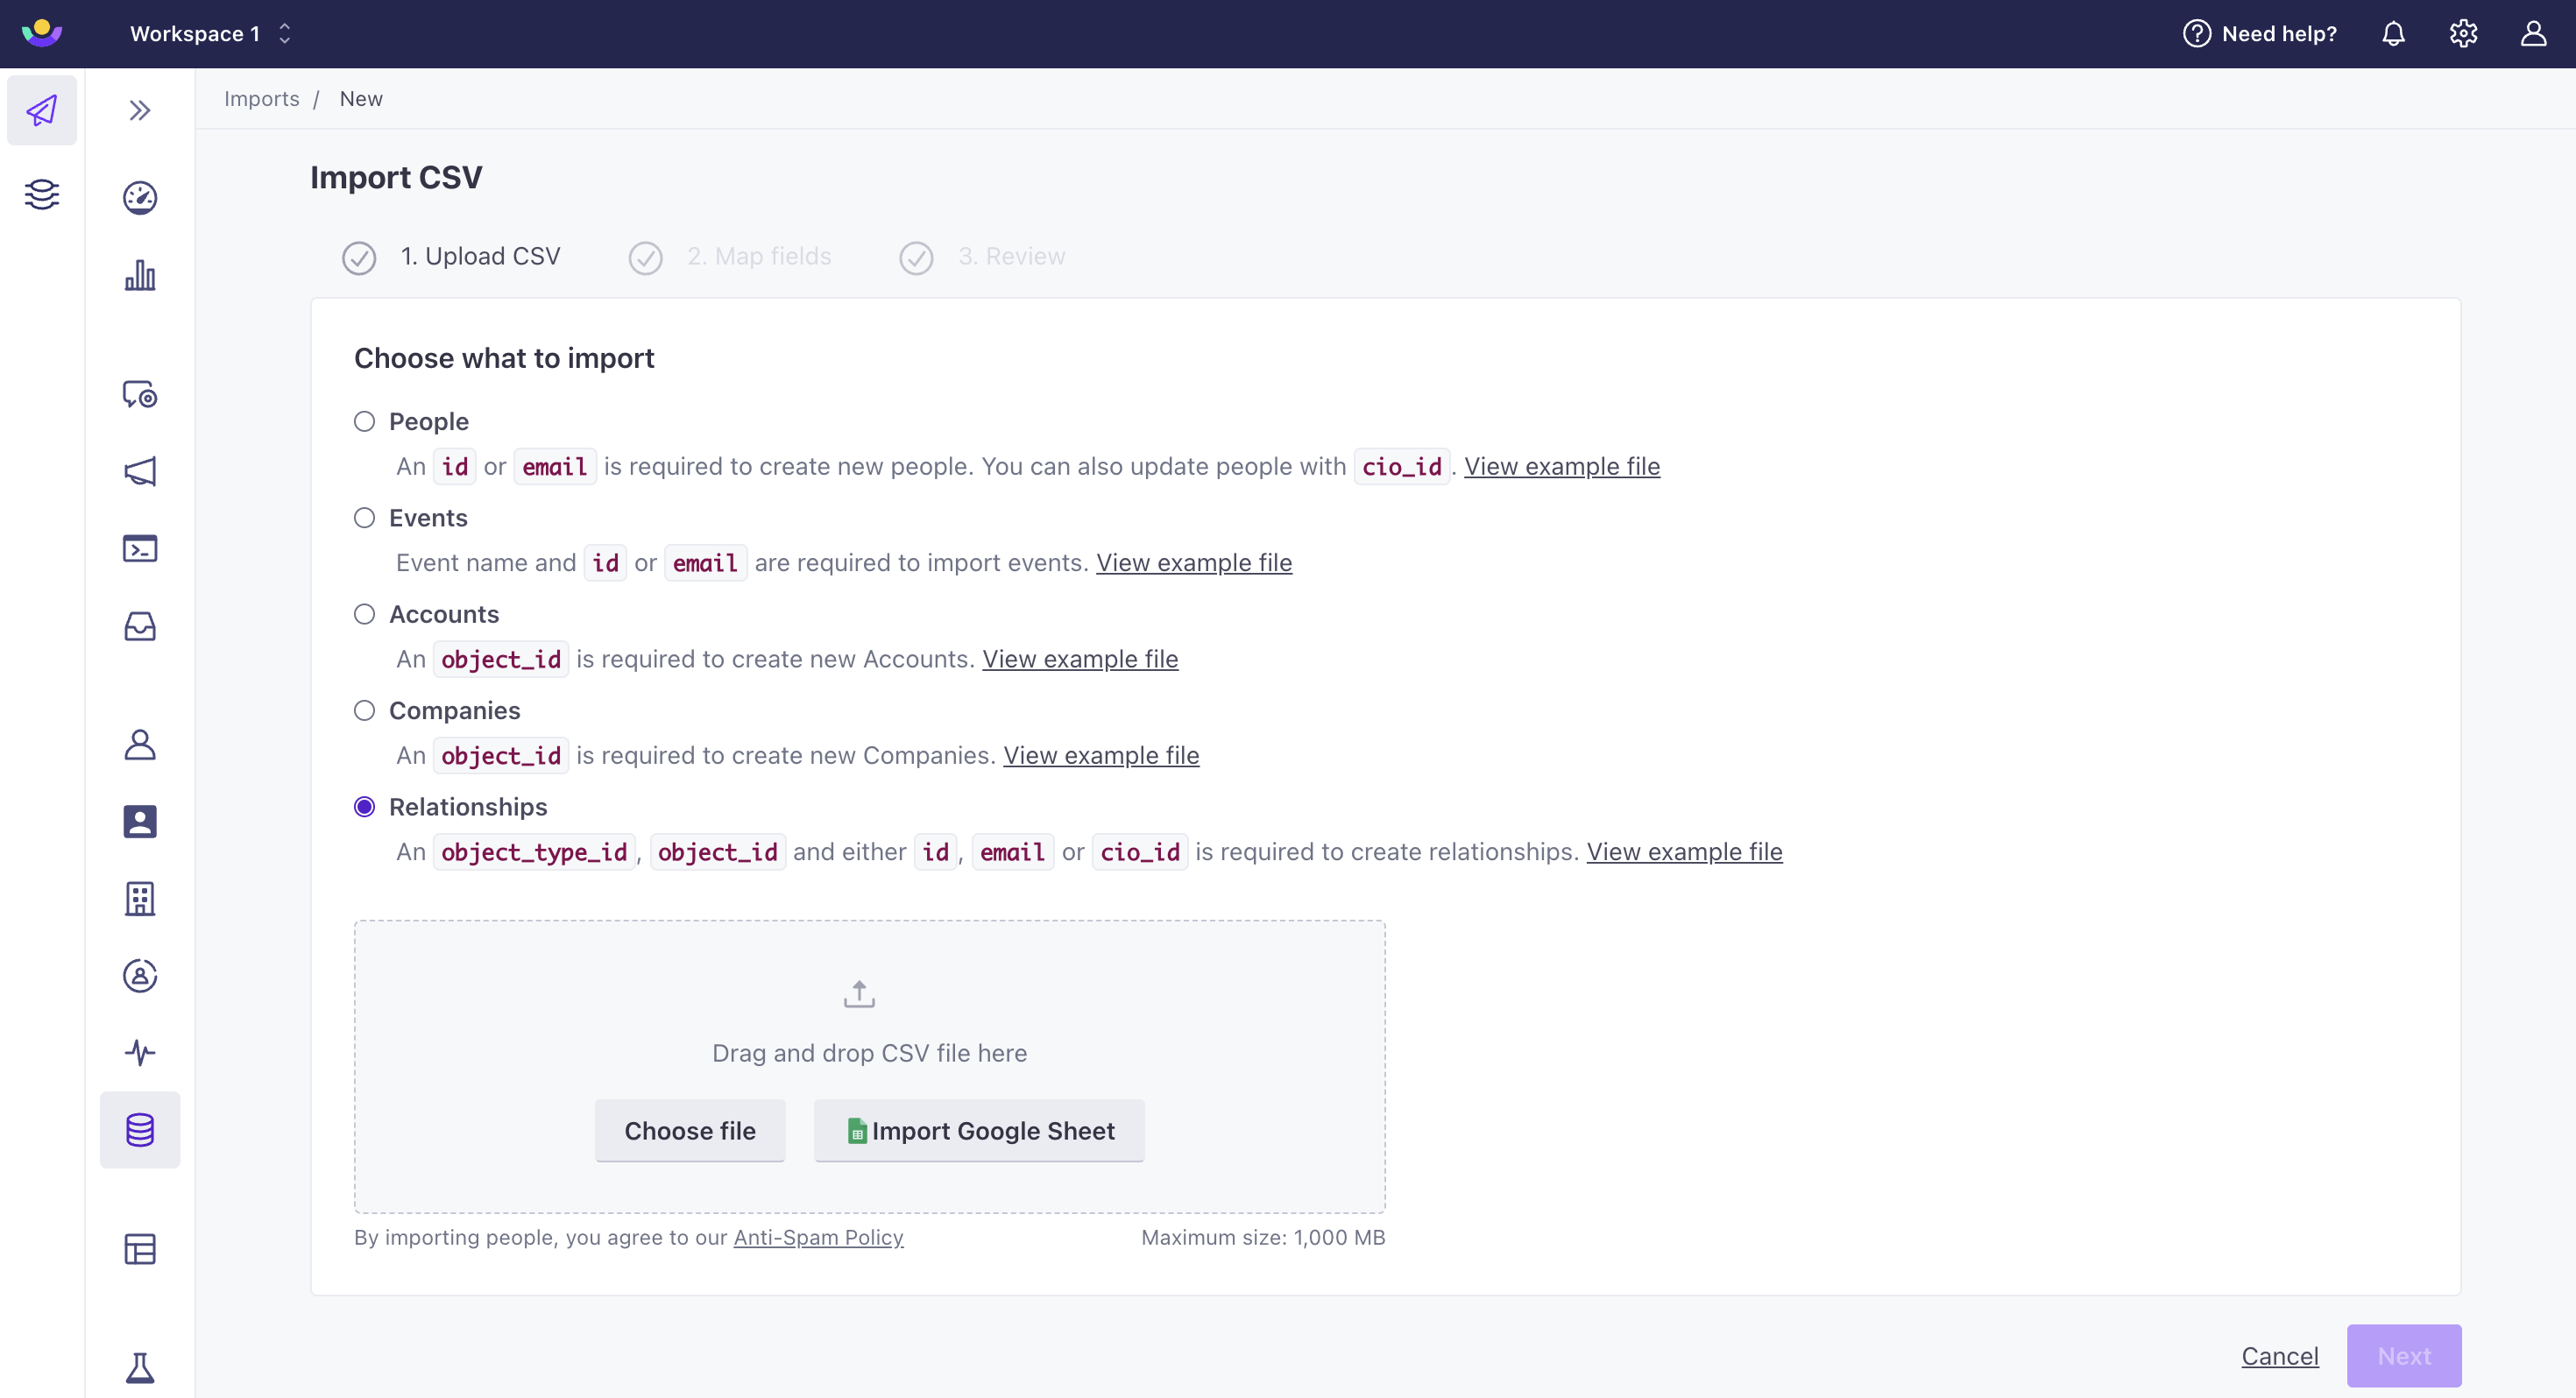
Go to Data & Integrations > Import then click Import in the top right. Select the radial next to the object type you want to import.

You can also import through People > Add People > Import a CSV in the top right. Or click the object type in the left hand menu > Add an object > then Import a CSV.
Click Choose File at the bottom of the import list. Make sure your file meets our CSV requirements.
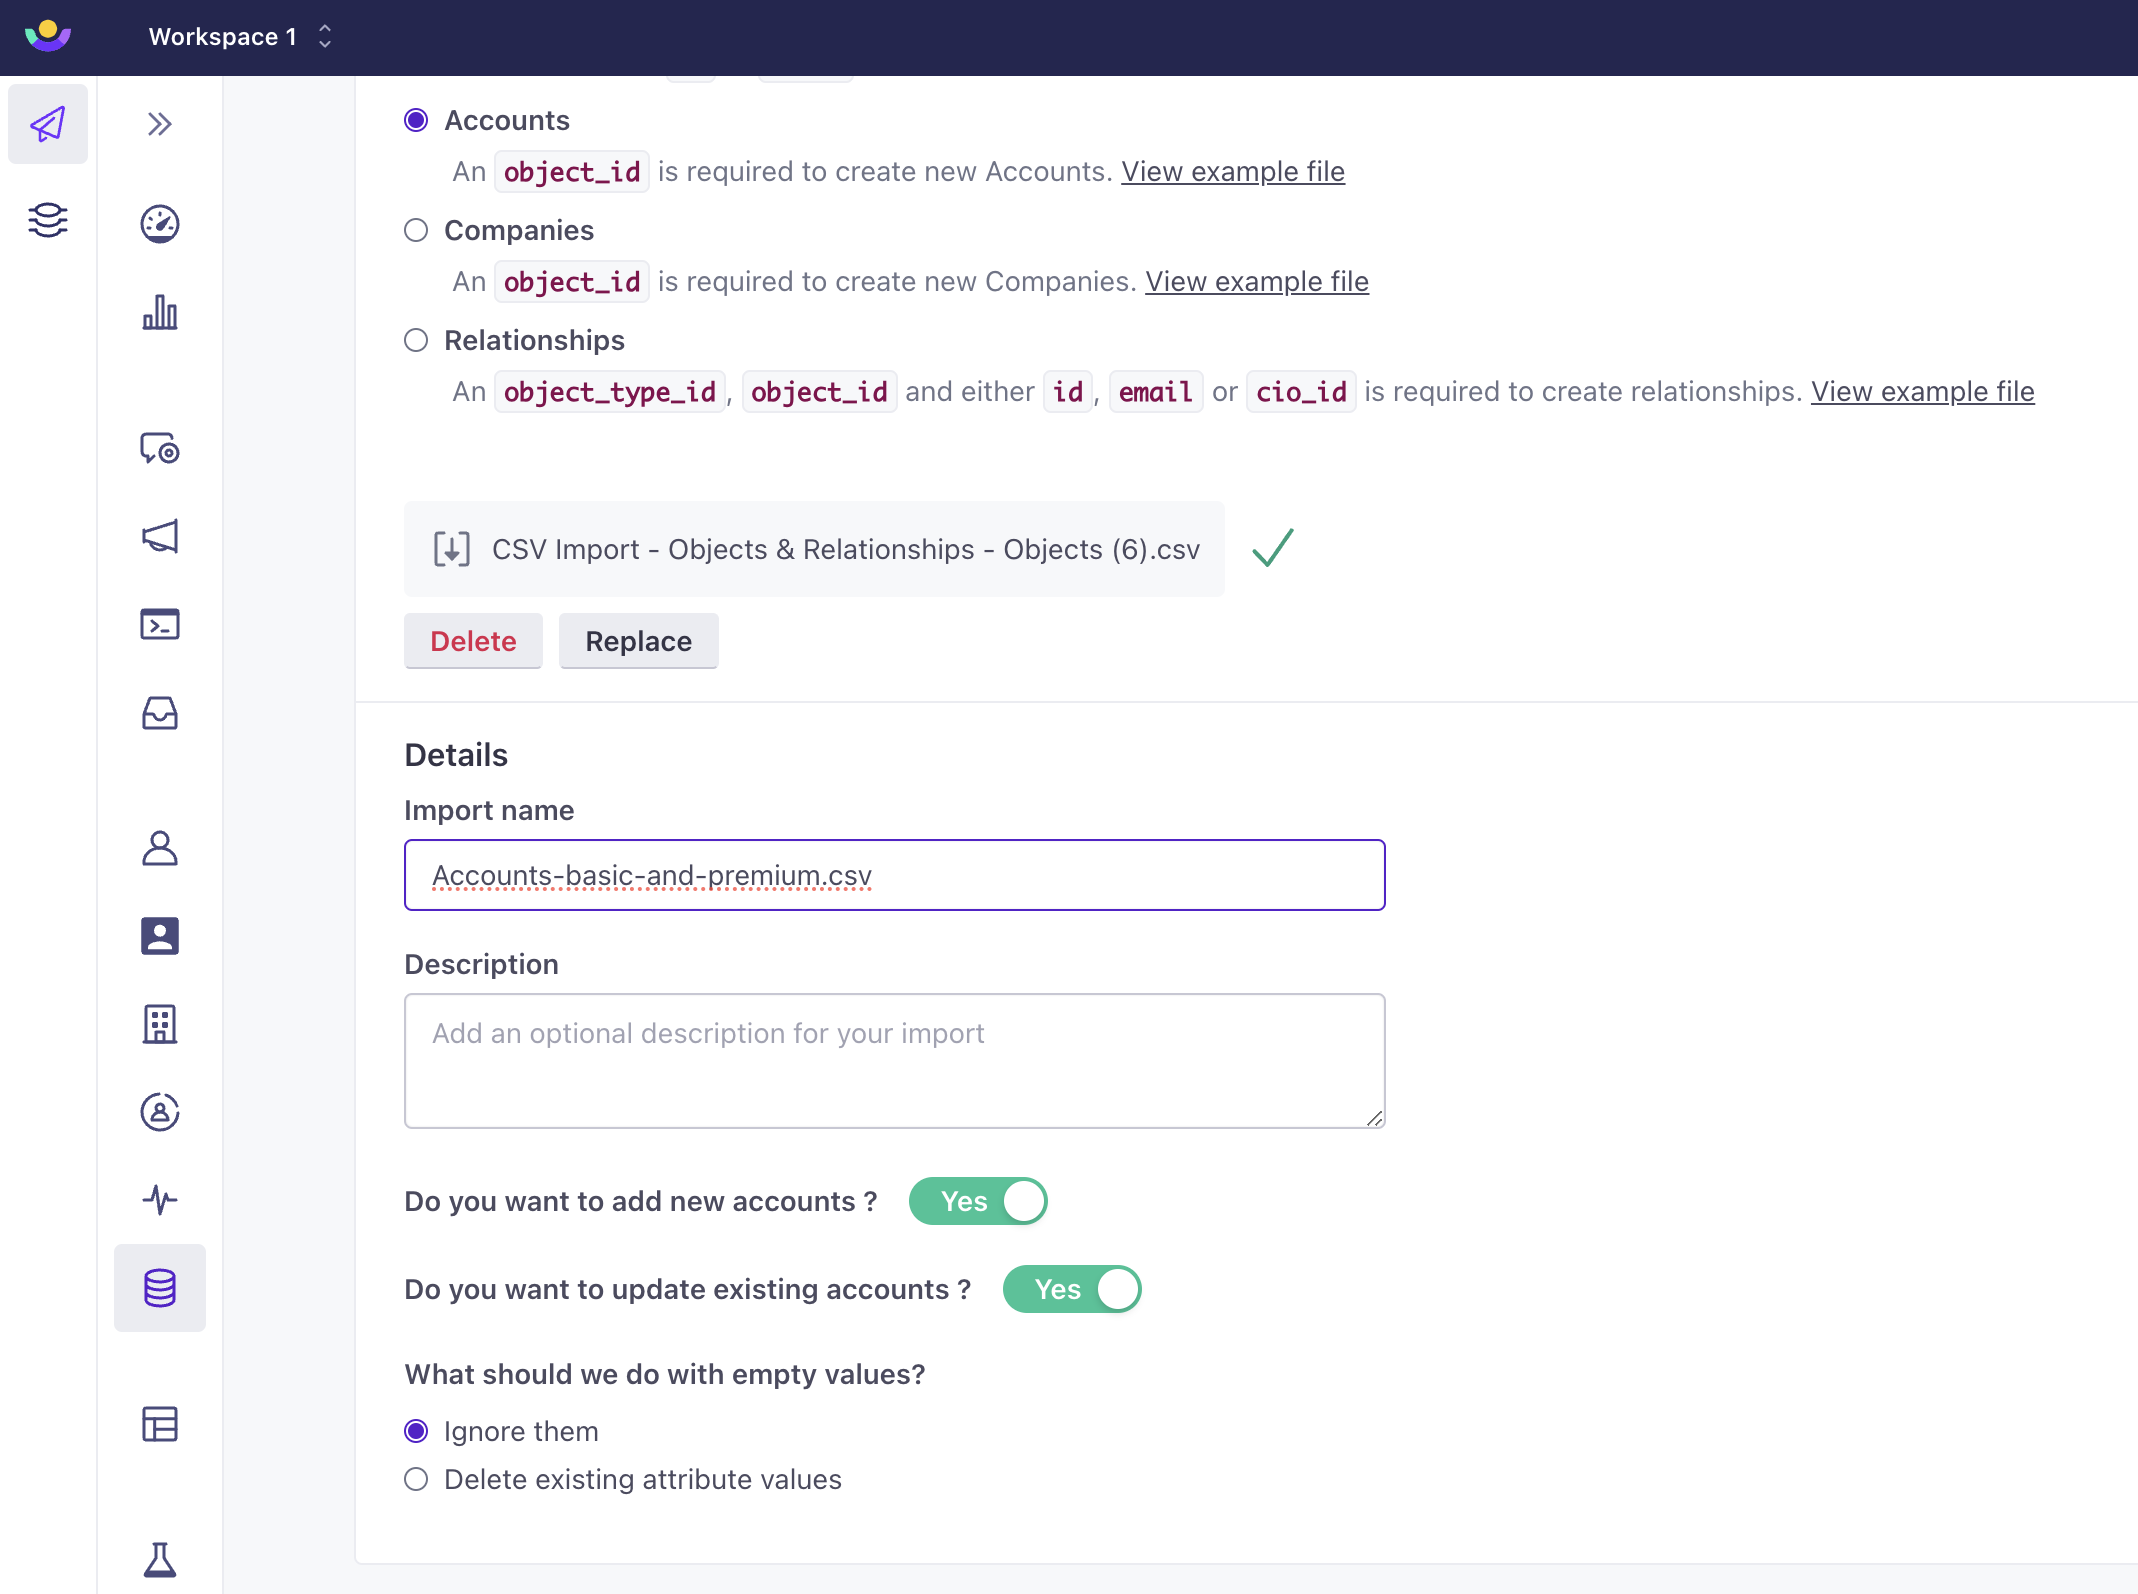
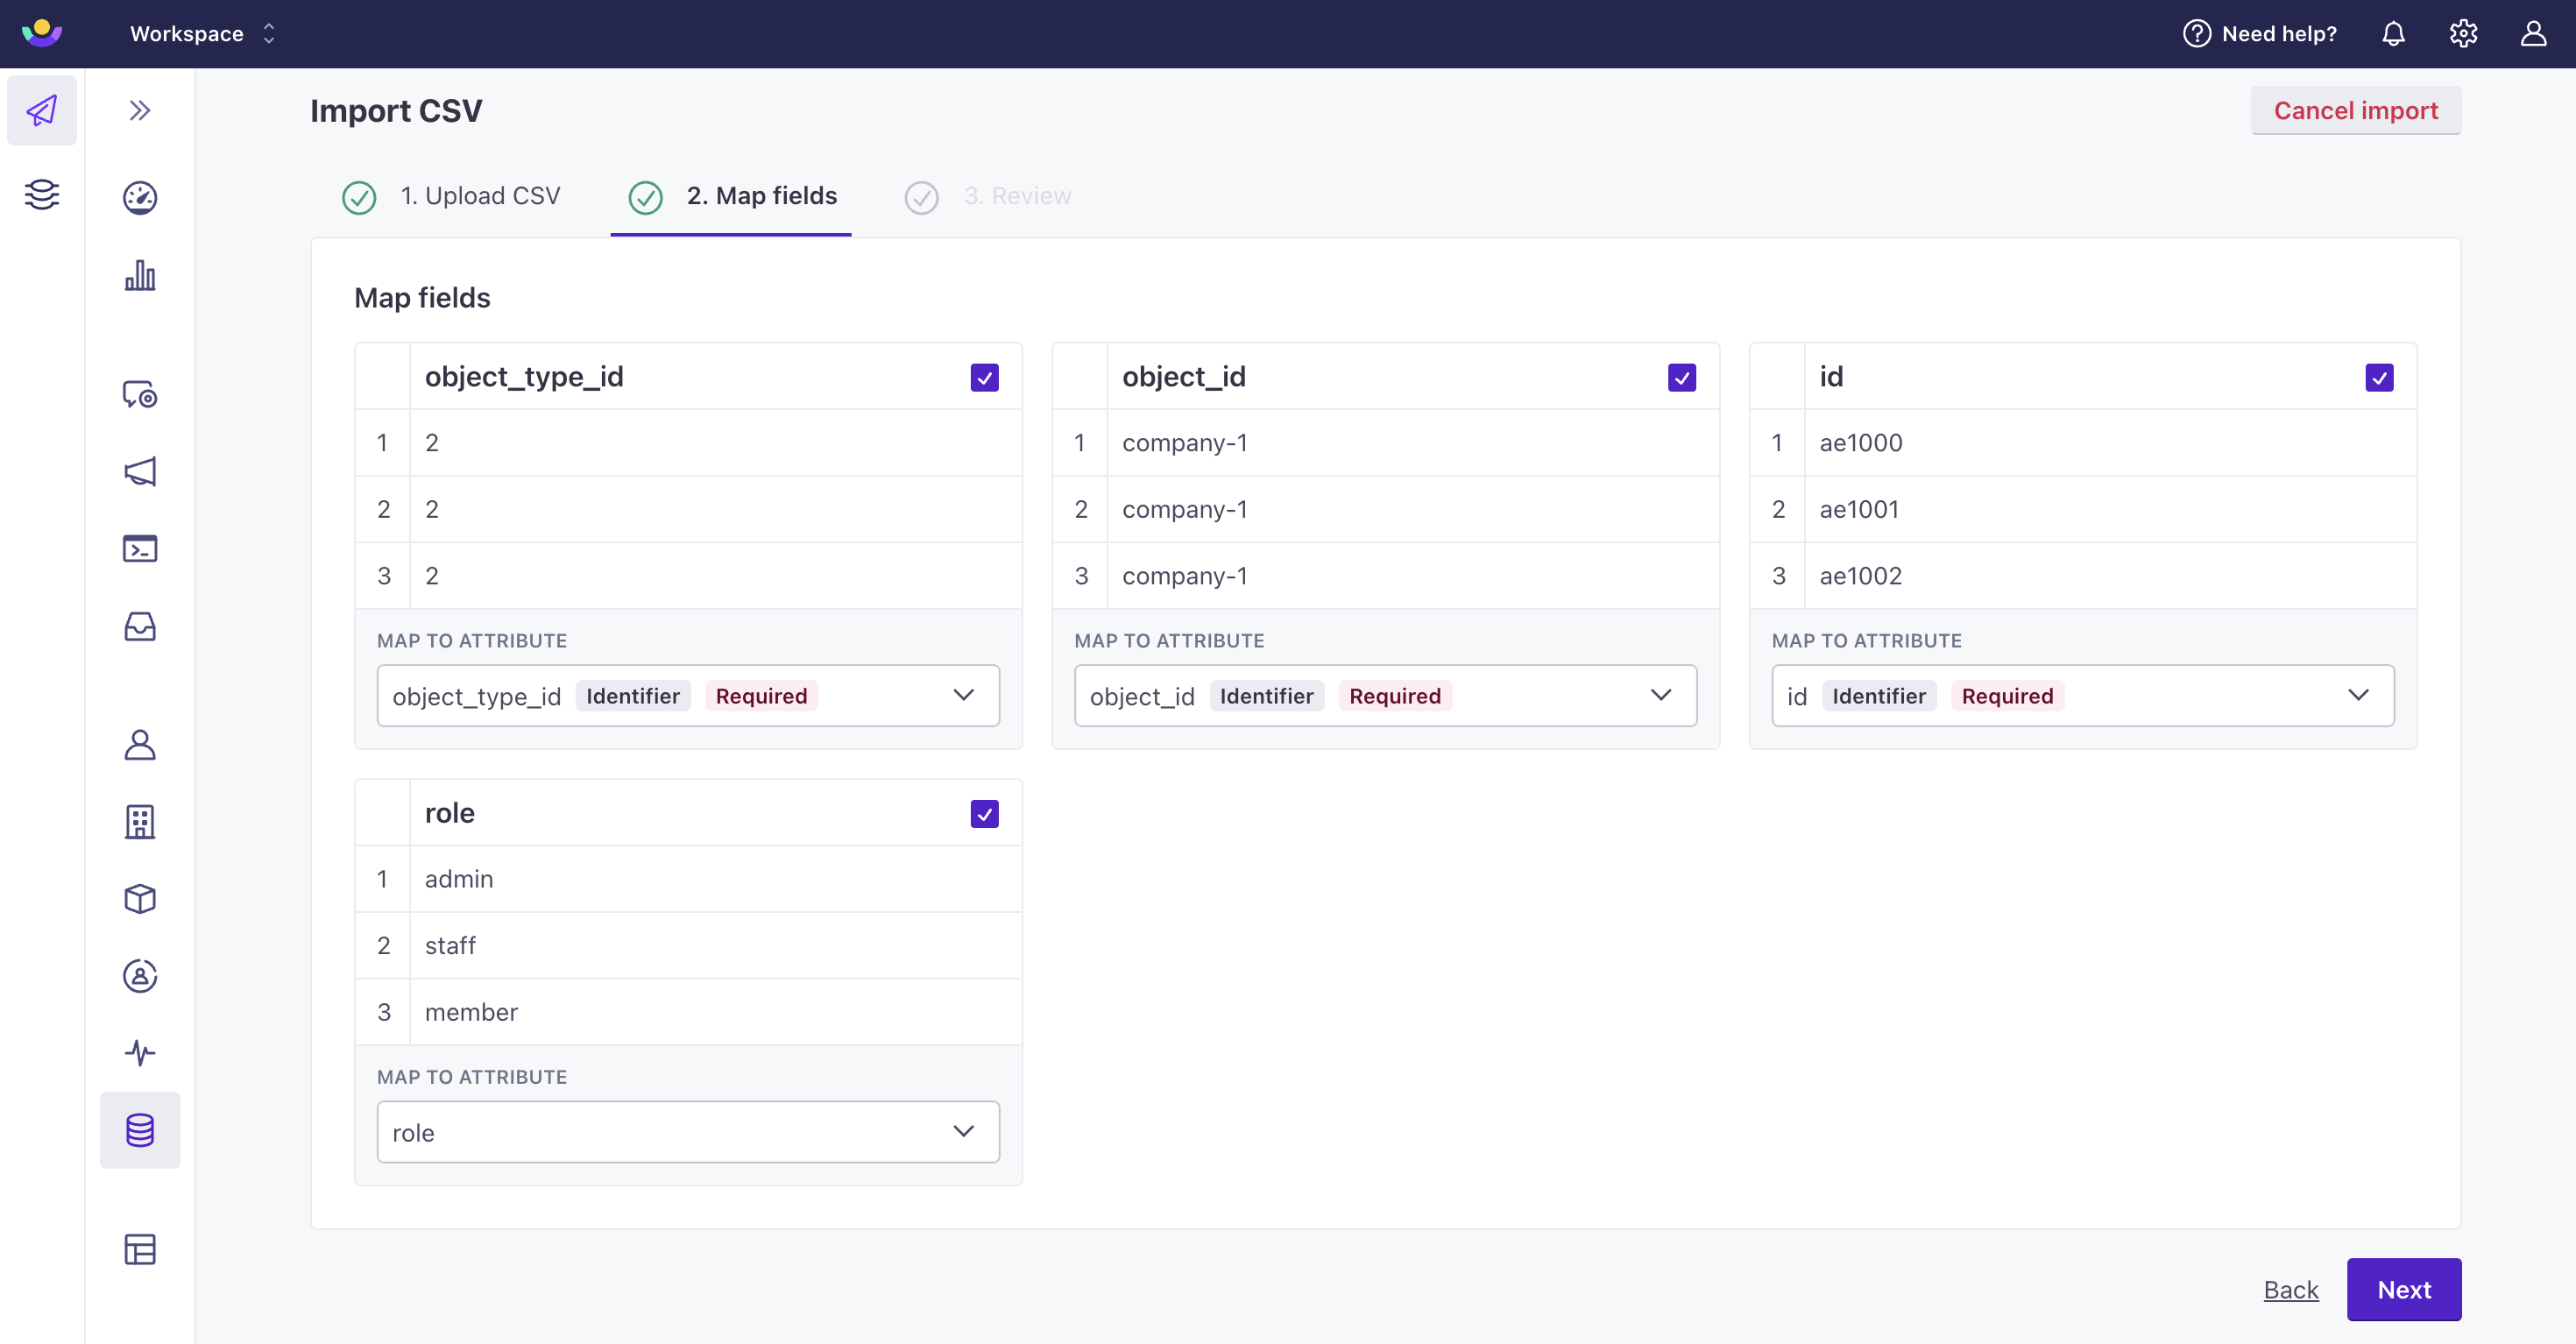
Creating new attributes
If you import a column, but you don’t map it to an existing attribute, we create a new attribute using the column title.
Each row in your CSV can trigger a campaign
Customer.io processes imports row-by-row. Object-triggered campaigns may fire as we create new objects, so review your import carefully!
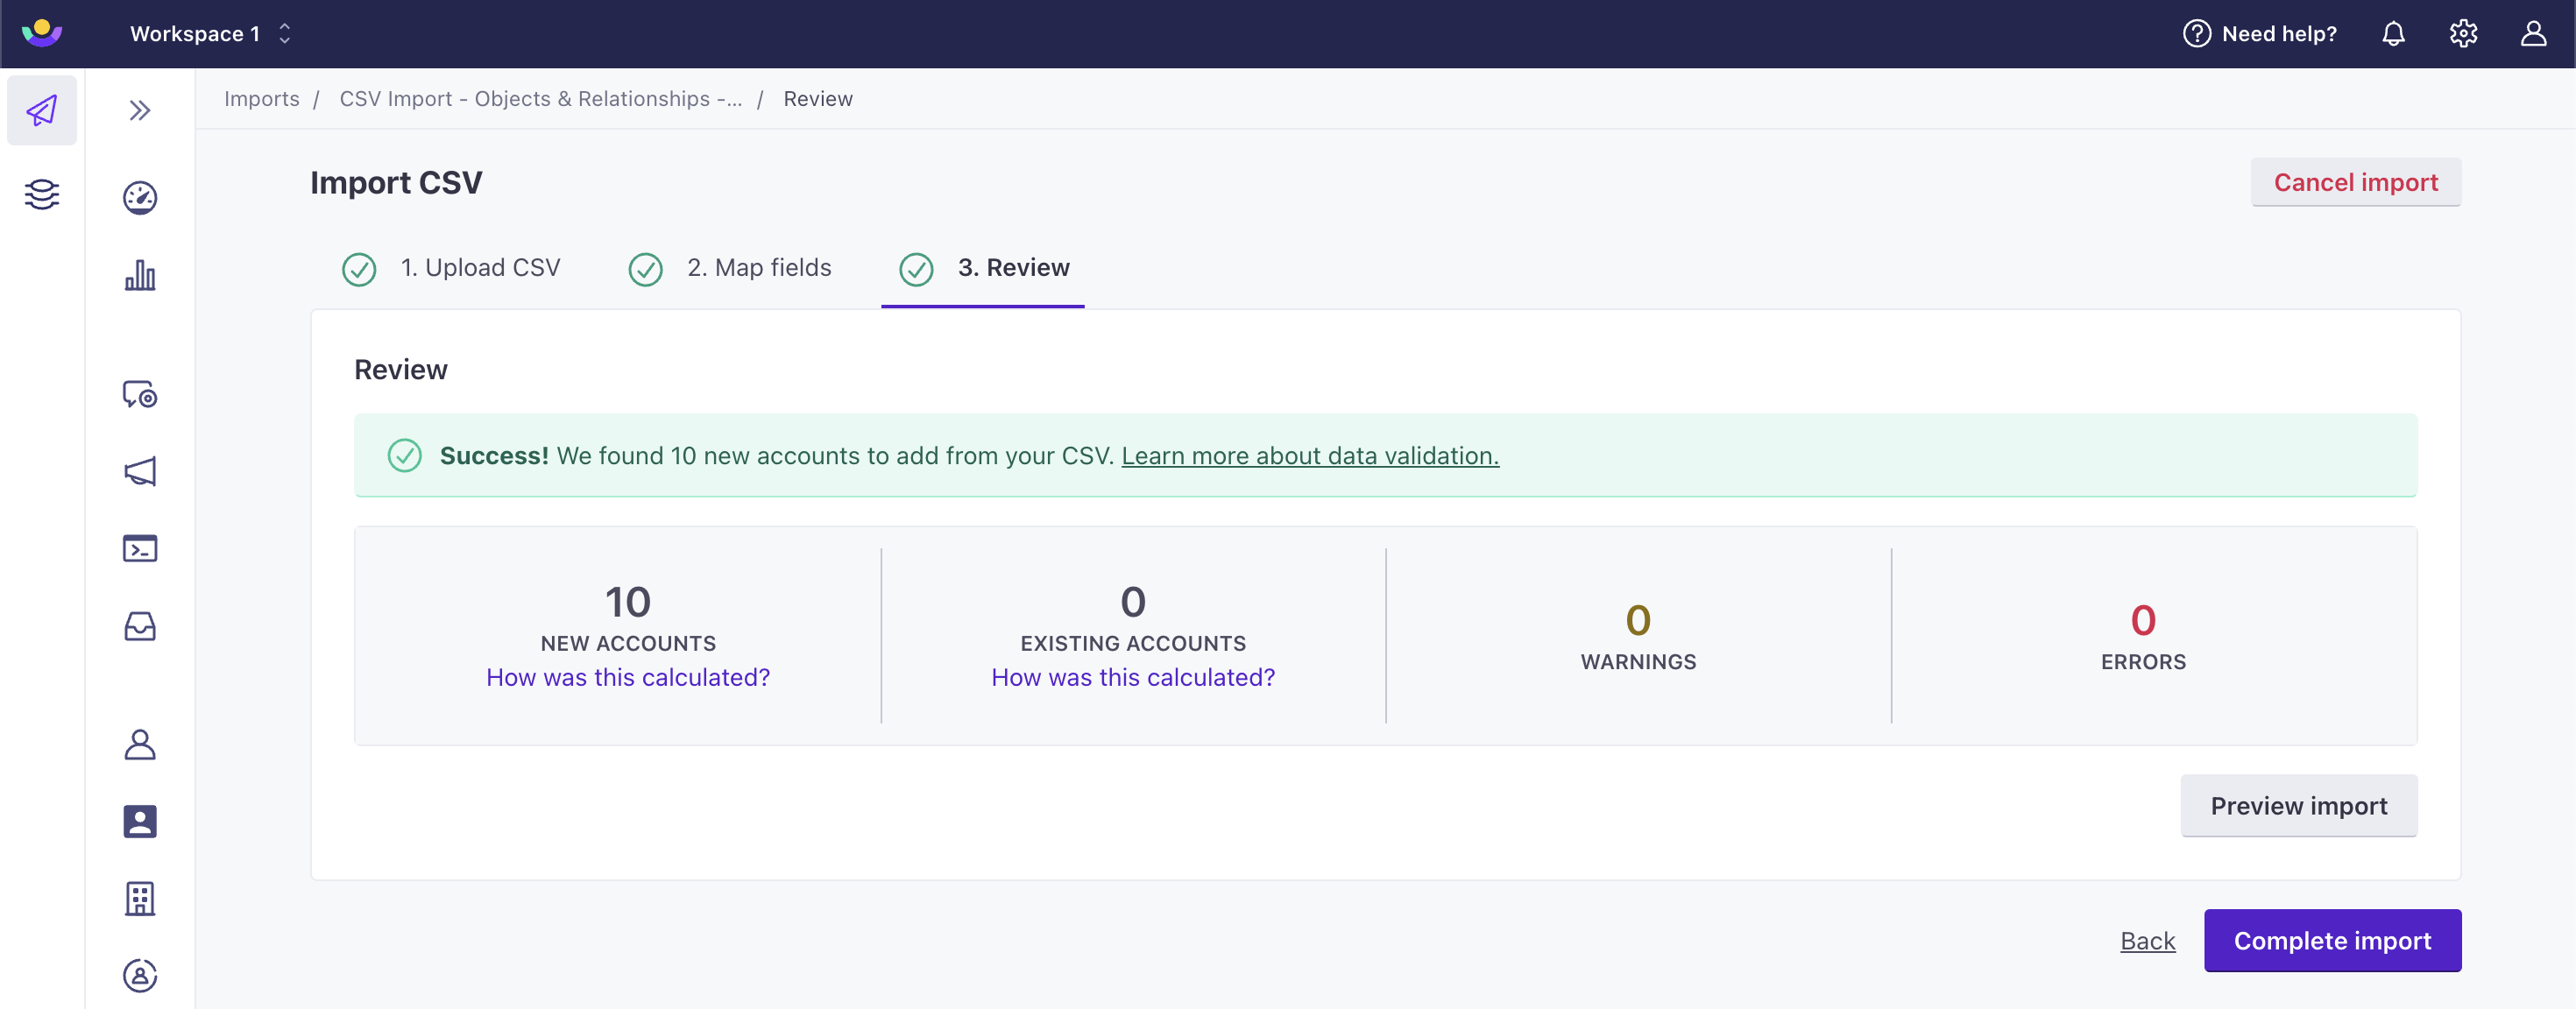
Click Complete Import to begin importing objects.
The import process takes approximately one minute per 20-30 thousand rows. You can leave the page, and we will email you when your import is complete.
Go to Data & Integrations > Imports to revisit this import or see your previous imports. On the table, you’ll see how many rows were imported. Hover over the count to check how many objects were updated or created.
Import a CSV of relationships
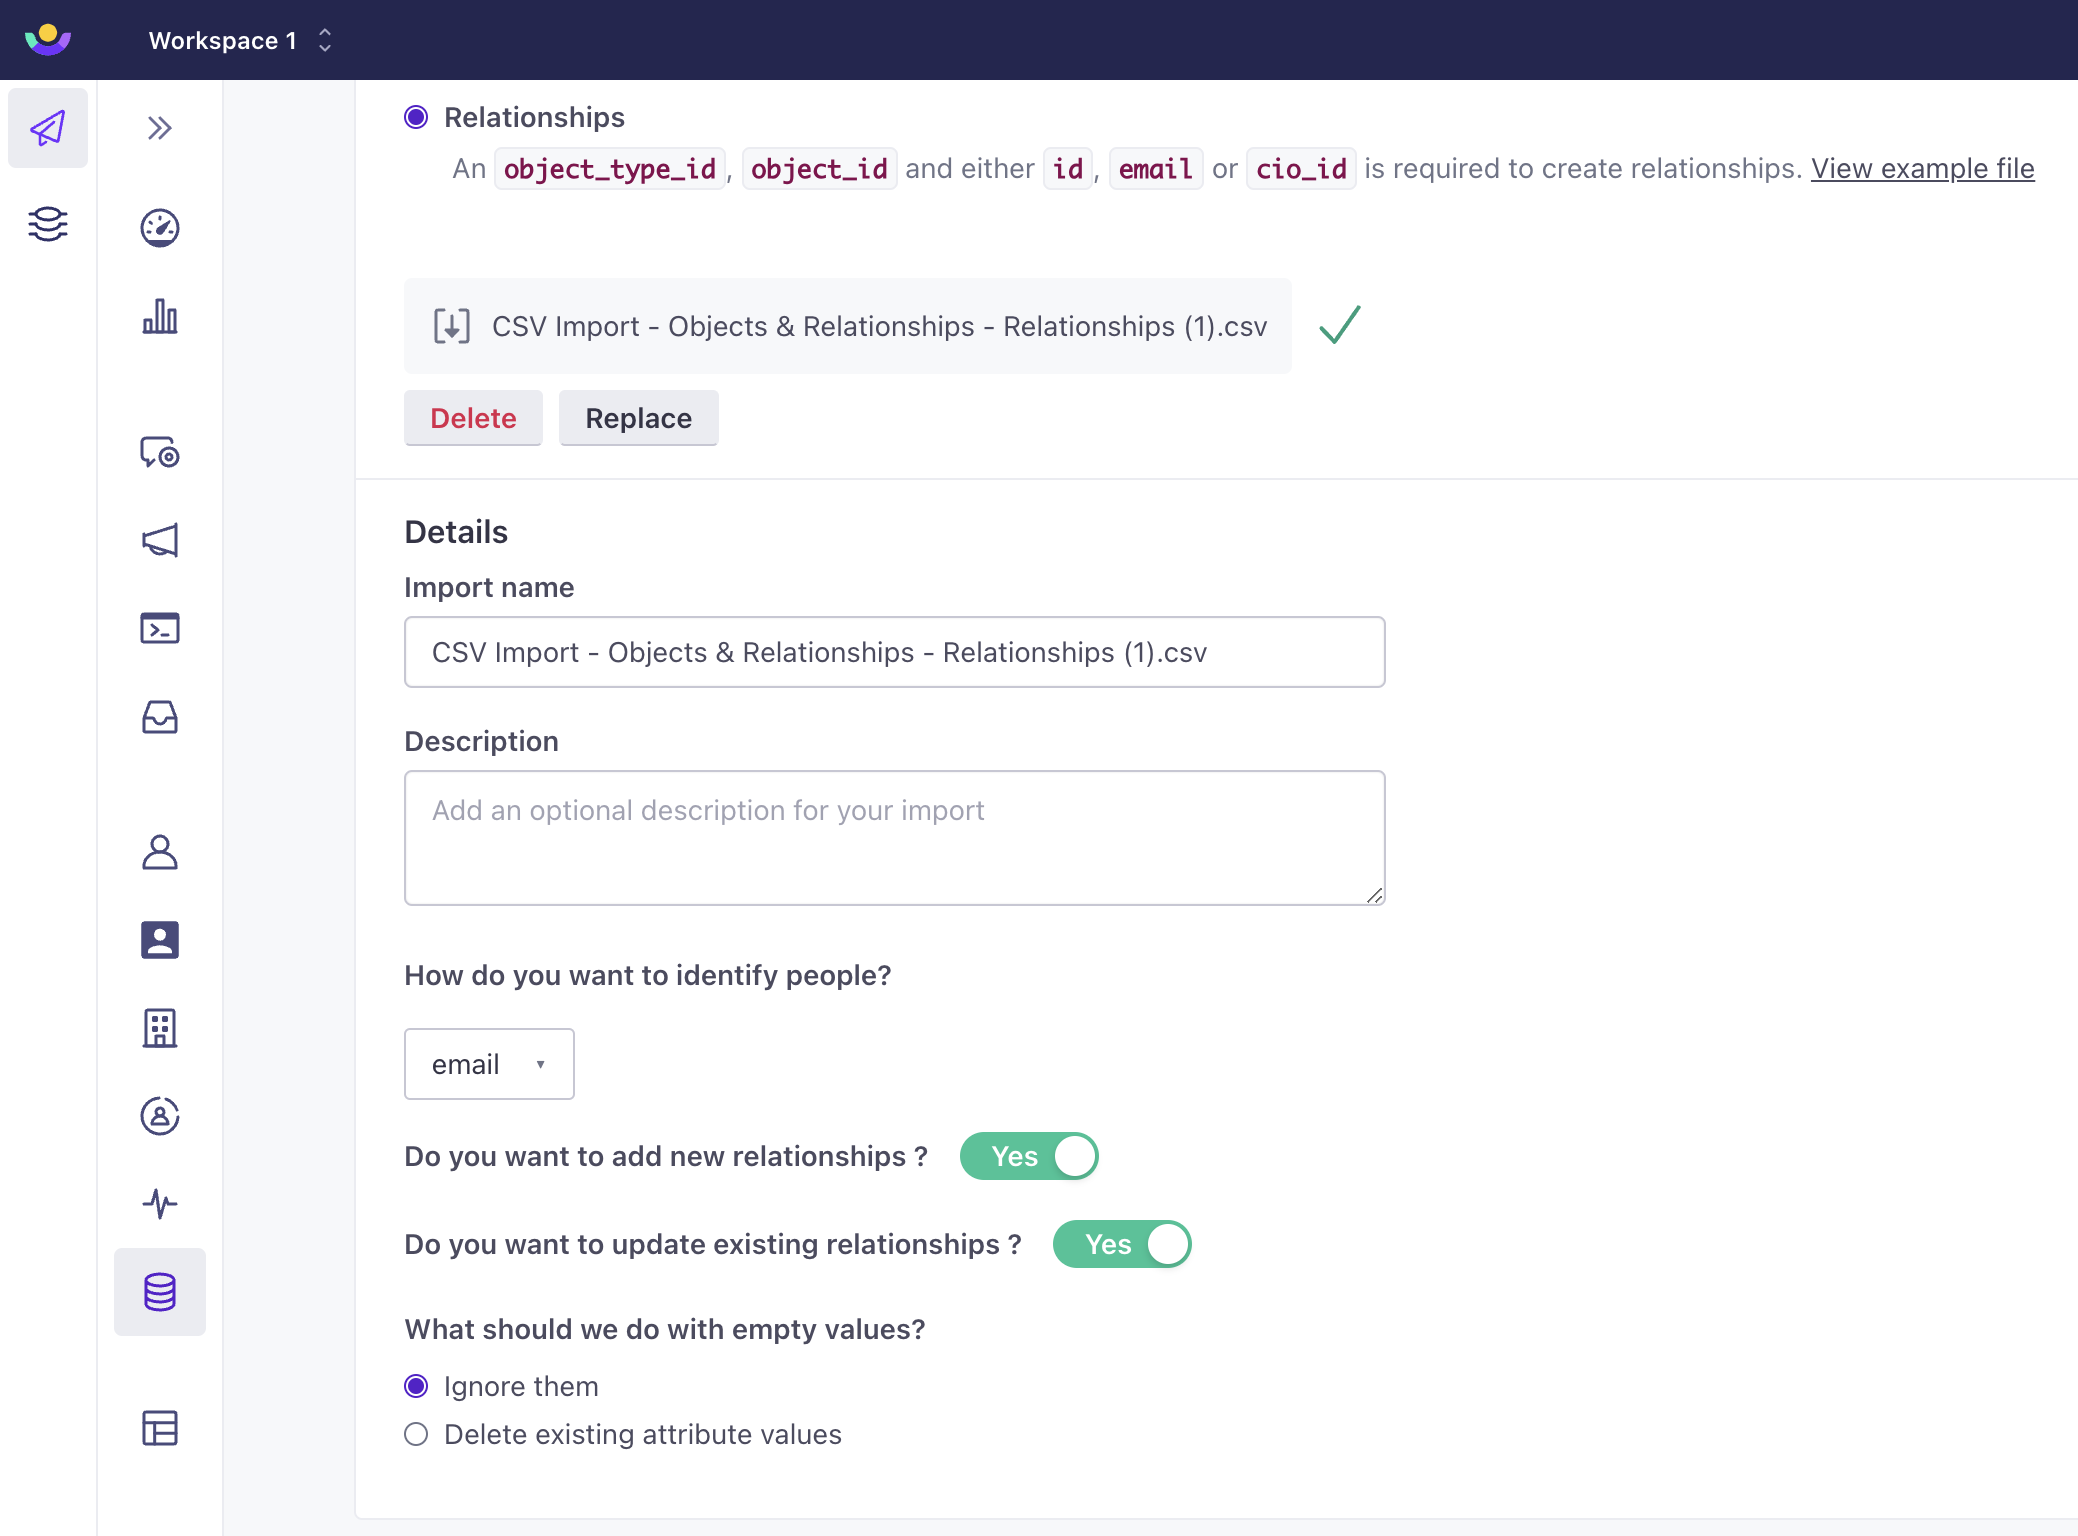
Before you import relationships, create your CSV. You can import relationships for one or more object types via CSV or Google Sheets. A relationship CSV requires both object_type_id and object_id to identify the object as well as an identifier - id, email or cio_id - for the person in the relationship. You can optionally specify relationship attributes like role, created_at, and anything else relevant to these relationships.
Add objects and people before importing relationships
You cannot create people or objects when you import relationships; the objects and people referenced in the CSV must already exist in your workspace. Check out Add/update people and events and Import objects for more info.
To import relationships via CSV:
Go to Data & Integrations > Import then click Import in the top right. Select the radial next to Relationships.
You can also import through People > Add People > Import a CSV in the top right. Or click the object type in the left hand menu > Add an object > then Import a CSV.
Click Choose File at the bottom of the import list. Make sure your file meets our CSV requirements.
Creating new attributes
If you import a column, but you don’t map it to an existing attribute, we create a new attribute using the column title.
Each row in your CSV can trigger a campaign
Customer.io processes imports row-by-row. Relationship-triggered campaigns may fire as we create relationships or update their attributes, so review your import carefully!
Click Complete Import to begin importing relationships.
The import process takes approximately one minute per 20-30 thousand rows. You can leave the page, and we will email you when your import is complete.
Go to Data & Integrations > Imports to revisit this import or see your previous imports. On the table, you’ll see how many rows were imported. Hover over the count to check how many relationships were updated or created.
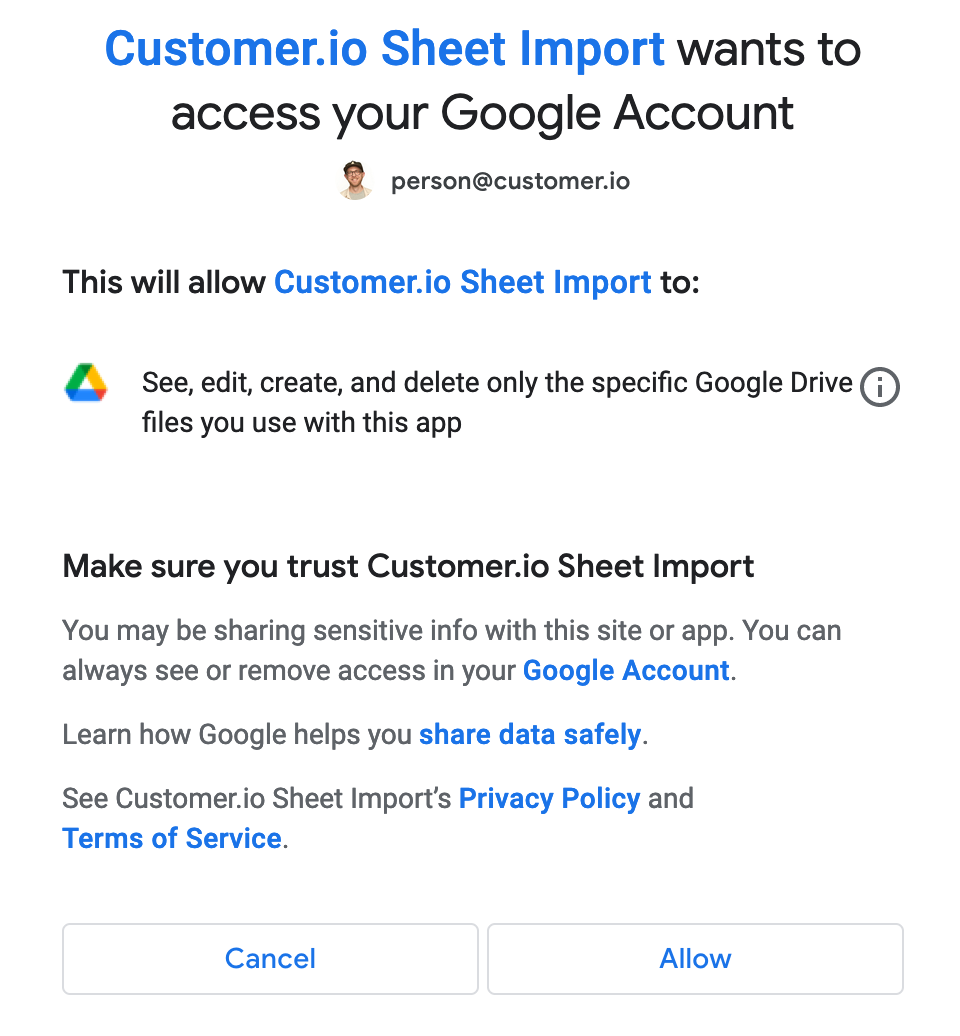
Import a Google Sheet
If you want to import Google Sheets, you must login to your Google account and allow us access to your sheets. You’ll see this includes the ability for us to read, edit, create, and delete the specific files that you share with us. However, we will only ever read files; we don’t write changes to your documents.
After you grant access, you can select the individual sheets that you want to share with Customer.io.
CSV requirements
To upload an object CSV, it must:
- contain a column
object_idthat maps to each object - not exceed 100MB in size
- not contain more than 100 columns
- be in CSV format OR a Google Sheet
- To share Google Sheets, you must log in to your Google account and grant Customer.io access to your sheets.
To upload a relationship CSV, it must:
- contain a column for
object_type_idthat maps to the object type of each object in your relationships - contain a column
object_idthat maps to each object in the relationship - contain a column for the identifier of the person in the relationship -
id,emailorcio_id - not exceed 100MB in size
- not contain more than 100 columns
- be in CSV format OR a Google Sheet
- To share Google Sheets, you must log in to your Google account and grant Customer.io access to your sheets.
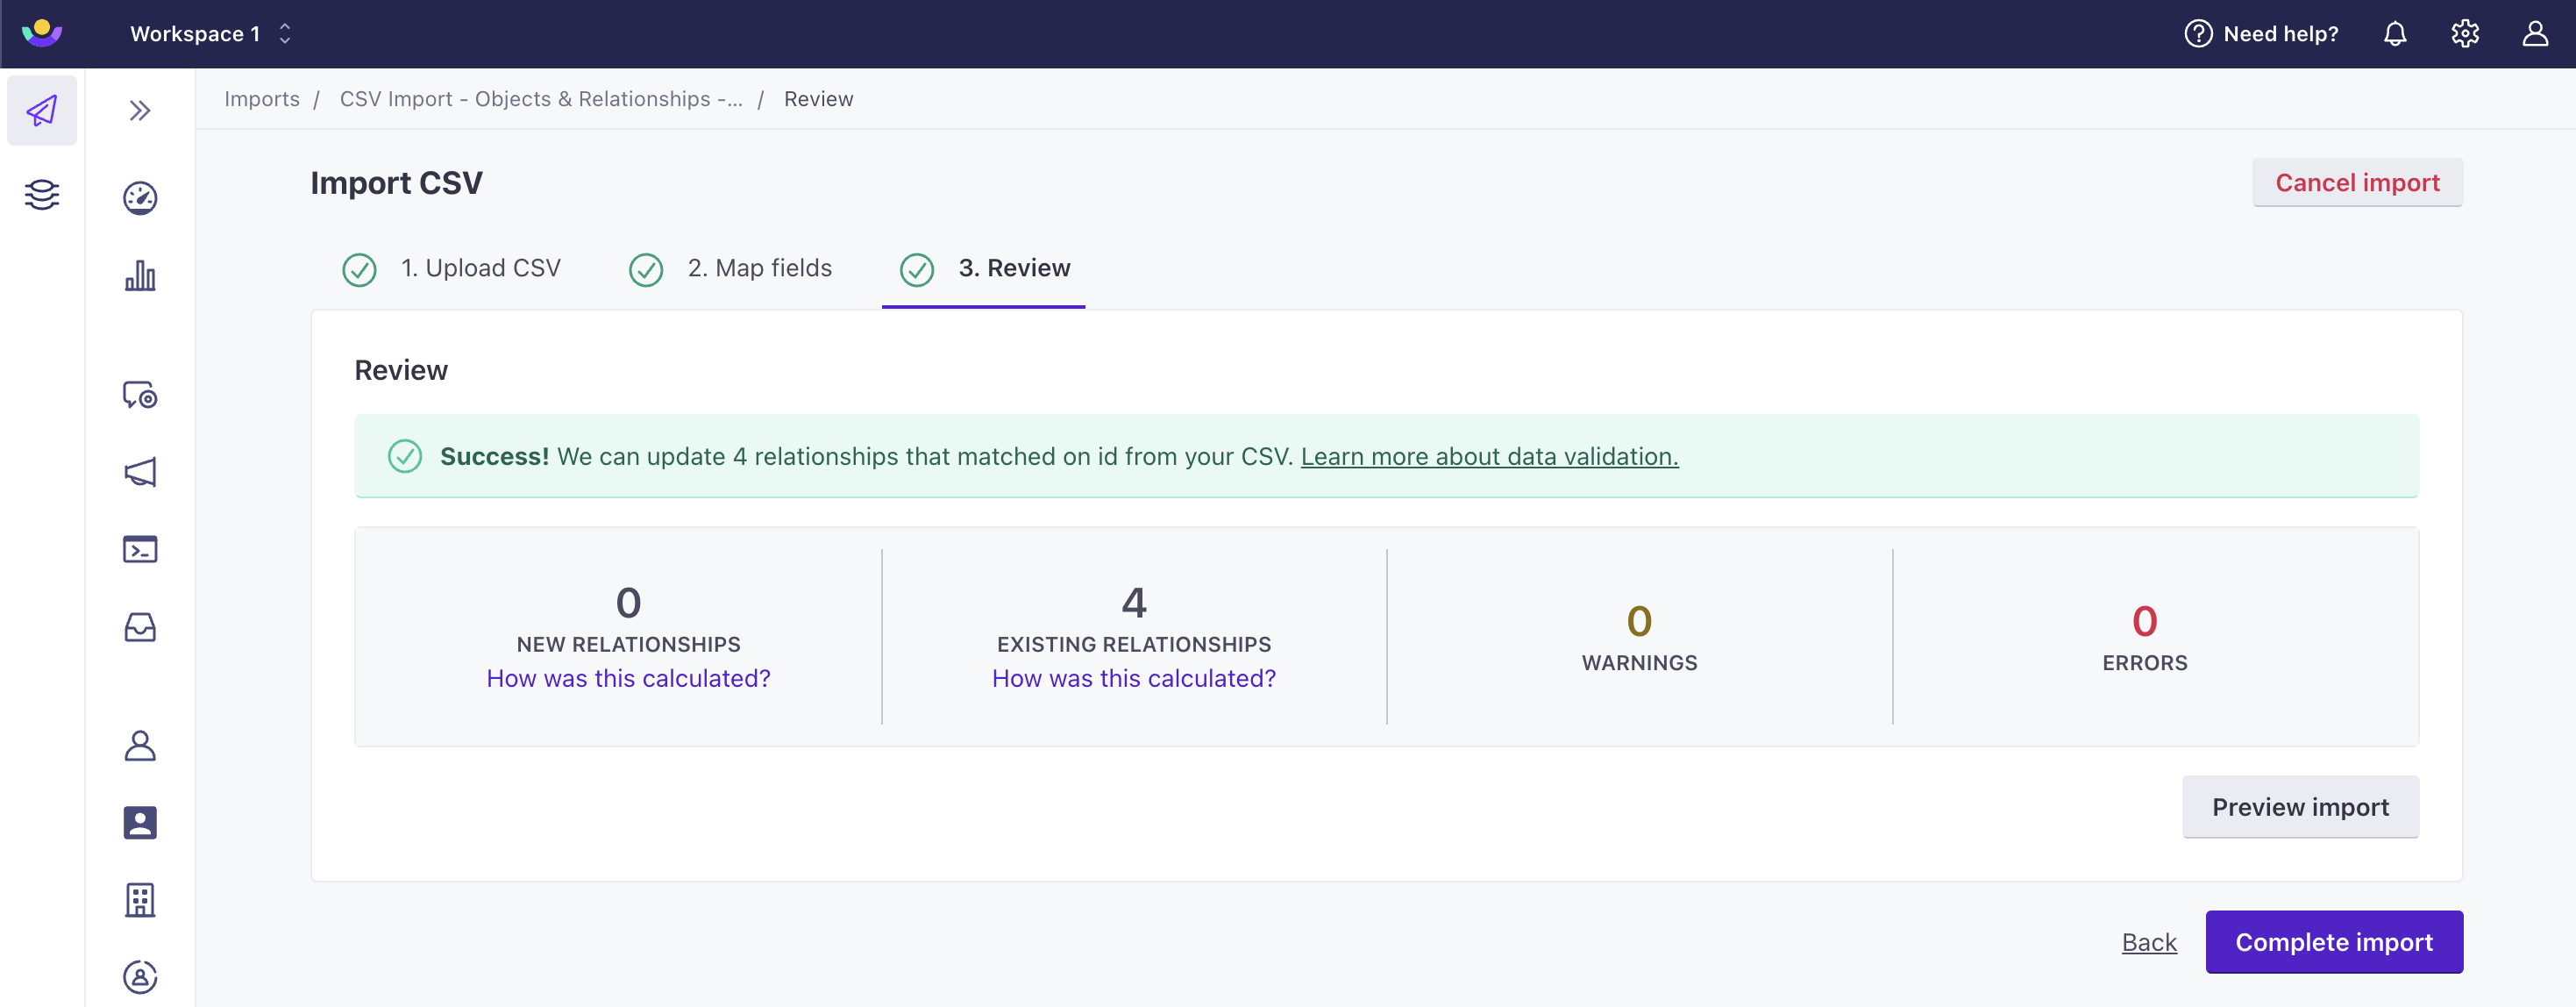
Review errors and warnings
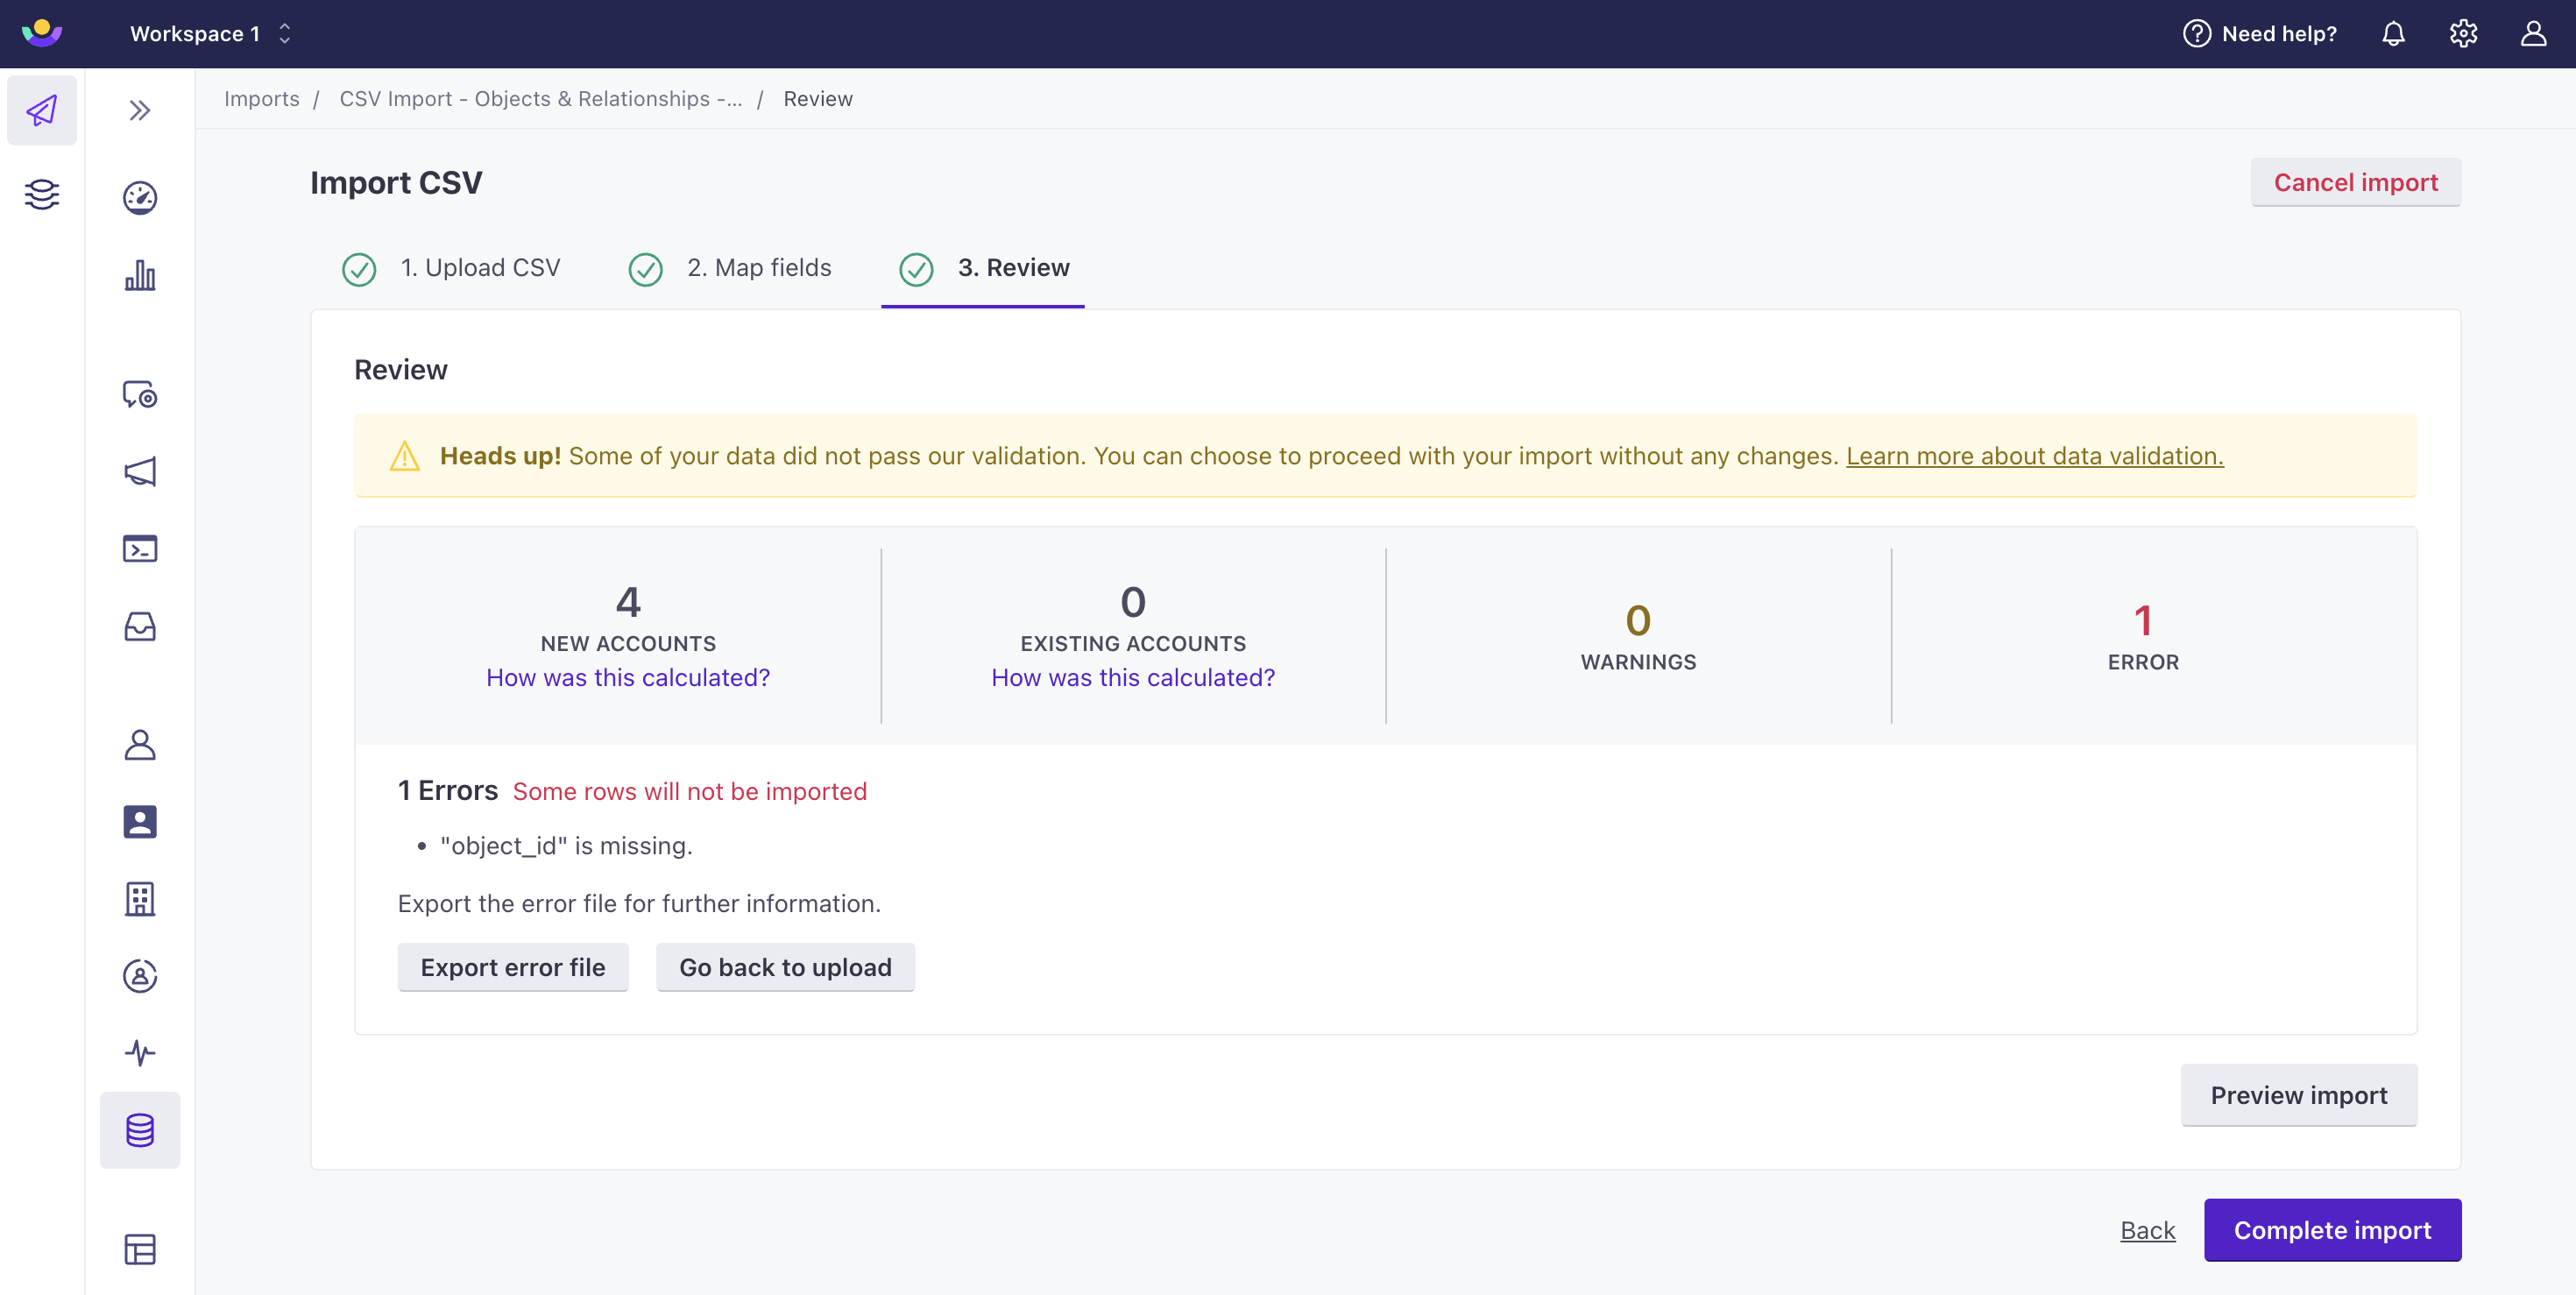
On the final Review step, we validate your import and return errors and warnings for rows in your CSV file. Rows with errors will not be imported, but rows with warnings will. Depending on the size of your CSV file, it may take a moment for us to validate your import.
If there are no errors or warnings, you can continue importing your file as normal. If there are issues, you may want to correct your CSV file so you import all items.
- Errors are issues that prevent us from importing a row:
- The row is missing a value in the “id” column.
- “object_id” is empty.
- The specified Person does not exist.
- The specified Object does not exist.
- Warnings are issues that do not prevent us from importing a row, but that you may want to address to make sure your data is well formed and consistent:
- Same “id” paired with multiple “email” values.
- Multiple rows have the same “email” value.
Click Preview Import to see which rows would successfully import.
You can also click Export errors file or Export warnings file to download a CSV containing the issues found. Each file contains the rows from your original CSV file that resulted in errors or warnings respectively, including 2 new columns:
- _row: contains the row number from your original file that contained an error or warning.
- _errors or _warnings: lists errors/warnings for a row.
Re-import your error CSV
You can import users directly from an error or warning CSV file after you correct the errors. Make sure you remove the “_row”, “_errors” and/or “_warnings” columns.

