Facebook Lead Ads
When you run Facebook ads, you can include forms to capture information about people who are interested in your products and services. This integration lets you add people who fill out your Facebook lead ad form to your Customer.io workspace, then trigger campaigns so you can convert your Facebook leads to customers or users.
Your workspace must identify people by email to use this integration
If your workspace does not identify people by email address, you can
- enable email as an identifier or
- create a new workspace to take advantage of this integration.
Overview
To set up a Facebook Lead Ads integration, you connect your Facebook business account to Customer.io, activate the forms you want to capture leads from, and map fields from your forms to attributes.
When a person fills out your Facebook lead ad, Customer.io receives a form_submit event containing the Facebook lead form ID, the form name, and values representing the form submission.
This form_submit event adds a person to, or updates a person in, your workspace. You can also use it to trigger campaigns, add people to segments, etc.
Prerequisites
To take advantage of this integration:
- Your Facebook lead ad forms must capture email addresses in a field called
email - Your workspace must use email address as a unique key to identify people.
Customer.io maps email addresses from your form to people—each email address represents a unique person in your workspace. You can map additional fields in your form to attributes in Customer.io.
Facebook Permissions and Authentication
When you add a form to Customer.io, you’ll authenticate with Facebook and grant Customer.io access to your Facebook business account. This user must have the following permissions:
- Manage Page
- Leads Access
- Business Management (shown as “Manage your business” in the Meta UI)
We’ll confirm the pages you want to grant Customer.io access to and the permissions we’re requesting.
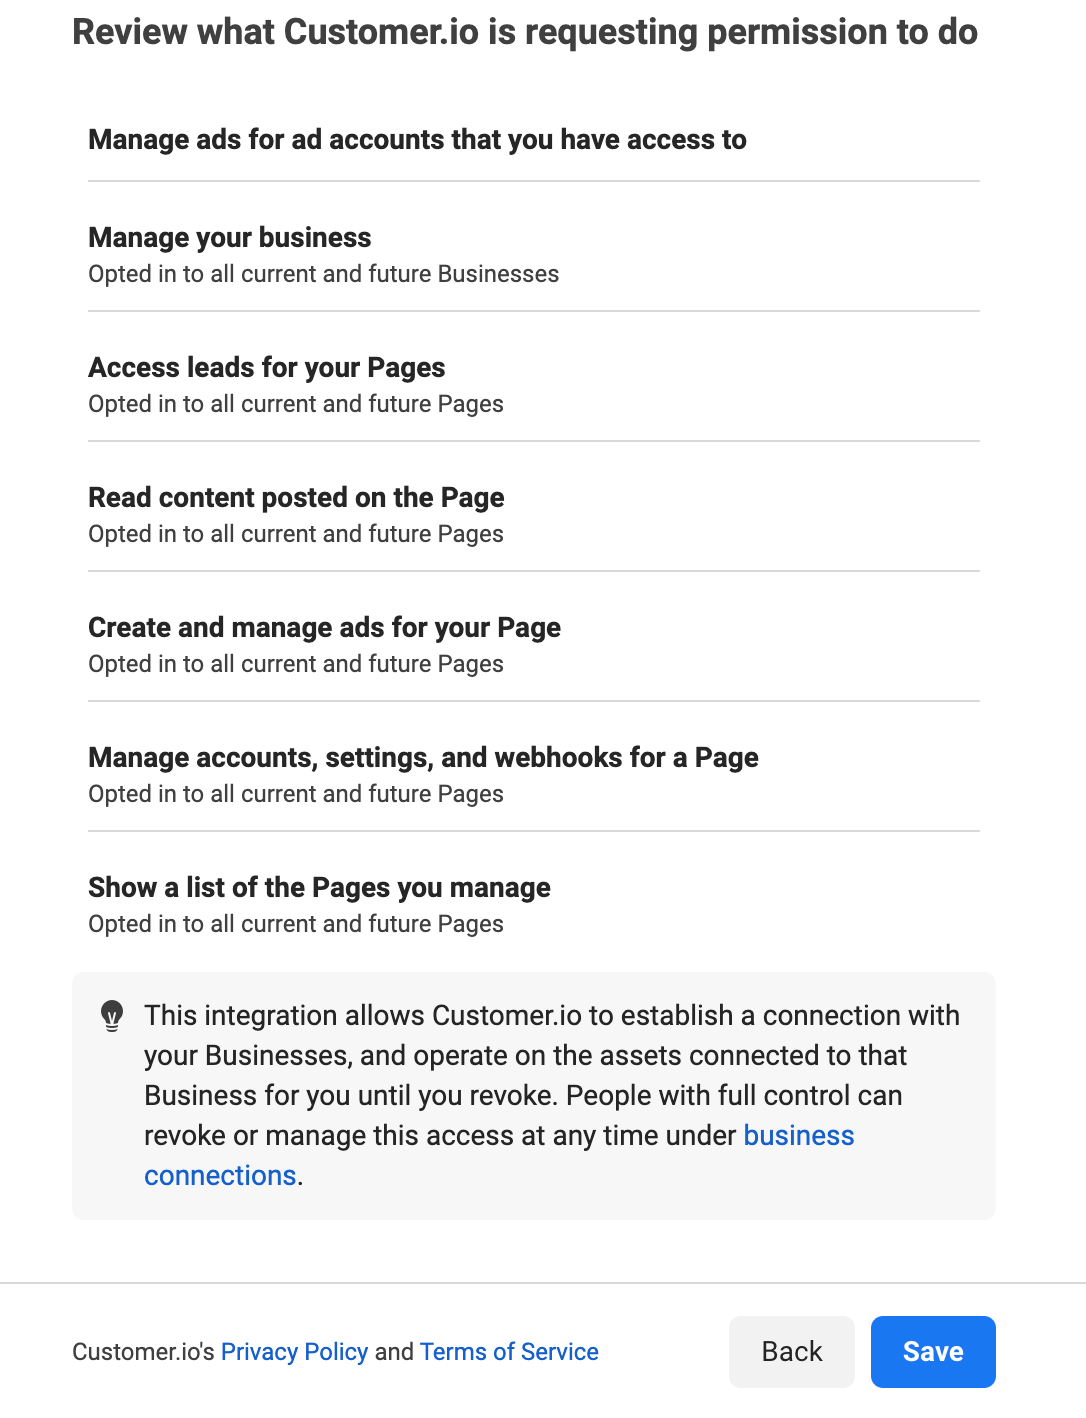
While you grant Customer.io access to your Facebook business and page, we don’t store your credentials. Instead, we request an access token from Facebook, which we use to authenticate with pages and lead ads. This token will not expire unless you revoke access to Customer.io from your Facebook business account.
Set up a Facebook Lead Ads integration
Your workspace must identify people by email address to use the Facebook Lead Ads integration. If your workspace identifies people by ID, you can create a new workspace to use this integration and capture leads.
- Go to Data & Integrations > Integrations > Facebook Lead Ads.
- Click Sign in with Facebook to connect
- Enter your Facebook credentials and click Log In.
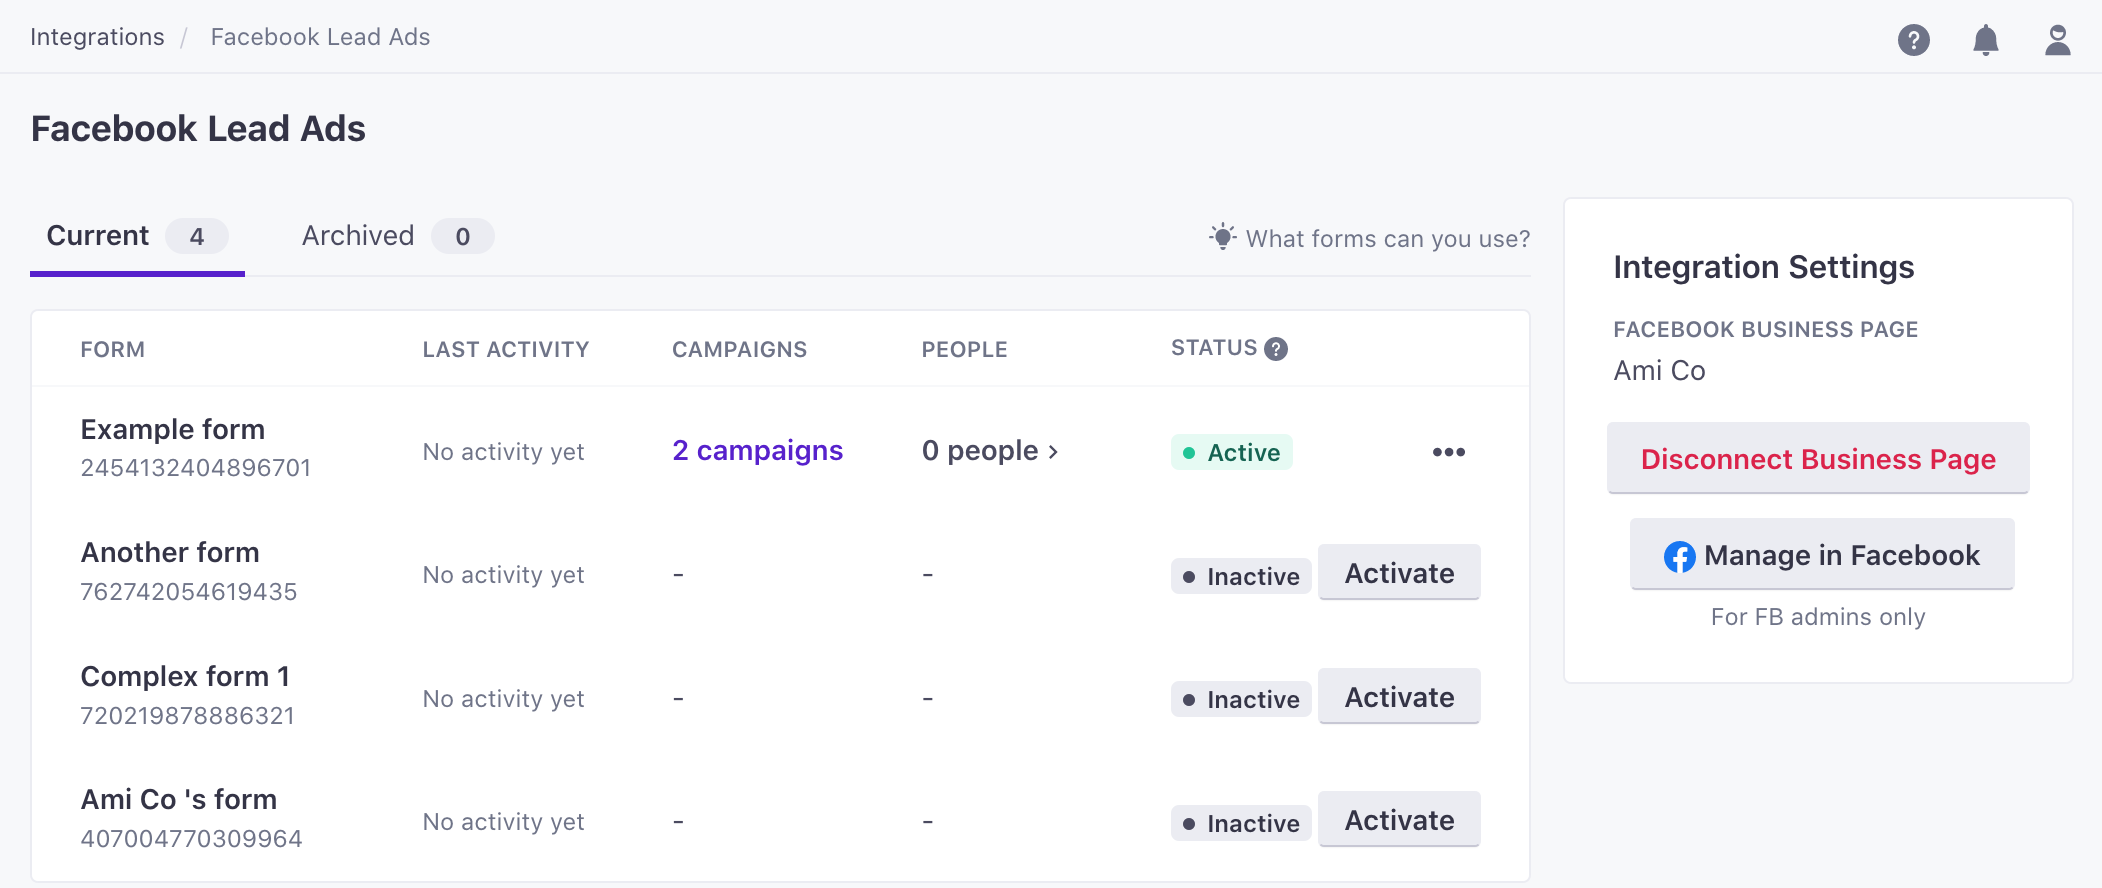
Customer.io now lists your Facebook lead ad forms, but you still need to Activate the forms that you want to use to add people to your workspace and trigger campaigns.
Activate a lead ad form
When you activate a form, Customer.io begins capturing form_submit events whenever someone fills out the form. This event adds people to, or updates people in, your workspace, and can trigger campaigns.
When you activate a form, you map form fields to attributes you want to set on people in Customer.io.
- Go to Data & Integrations > Integrations > Facebook Lead Ads.
- Click Activate for the form you want to activate.
- Map form fields to attributes in Customer.io. Your form must have a field called
emailthat captures email addresses.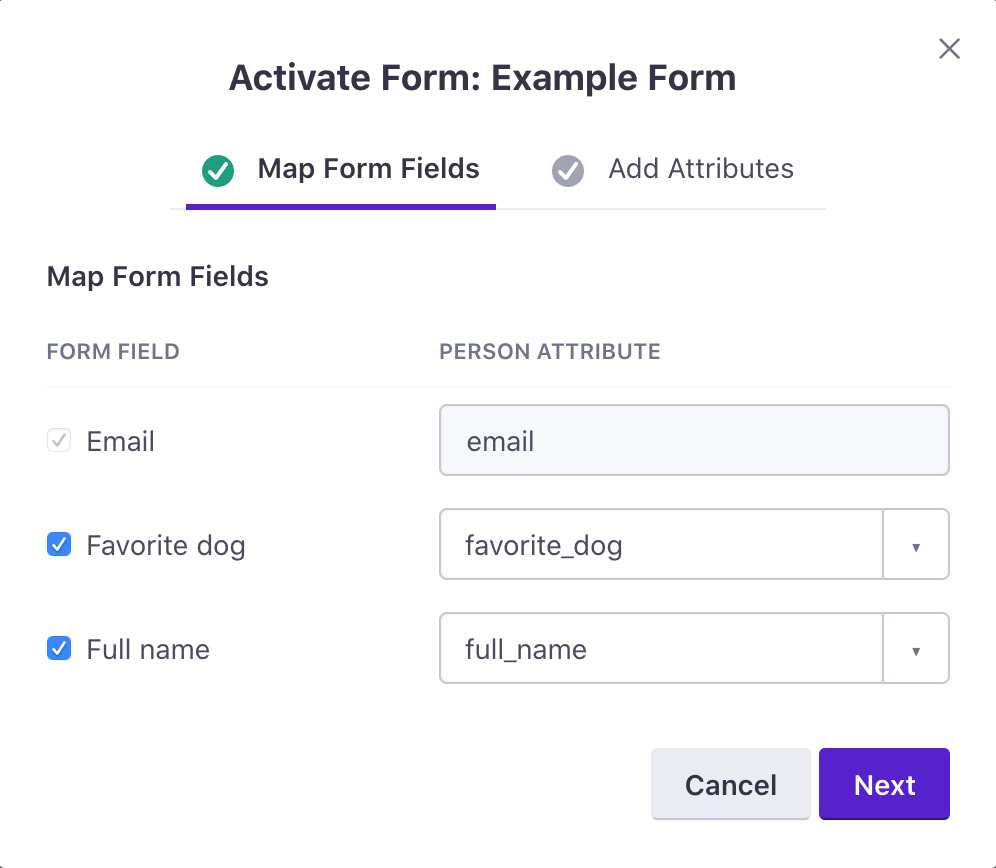
- (Optional) Click Next to assign or update Added Attributes. These are static attribute values that do not come from form fields and apply to everyone who fills out your form. These attributes are not unique to individual respondents.
- Click Activate.
Manage form attributes
You can change the way fields in your active forms map to attributes in Customer.io.
- Go to Data & Integrations > Integrations > Facebook Lead Ads.
- Click the options icon, and select Manage form.
- Change the Mapped Form Fields or Added Attributes. If you disable an attribute, your form will still capture these values, and they’ll appear in
form_submitevents, but they won’t be set as attributes on people in Customer.io.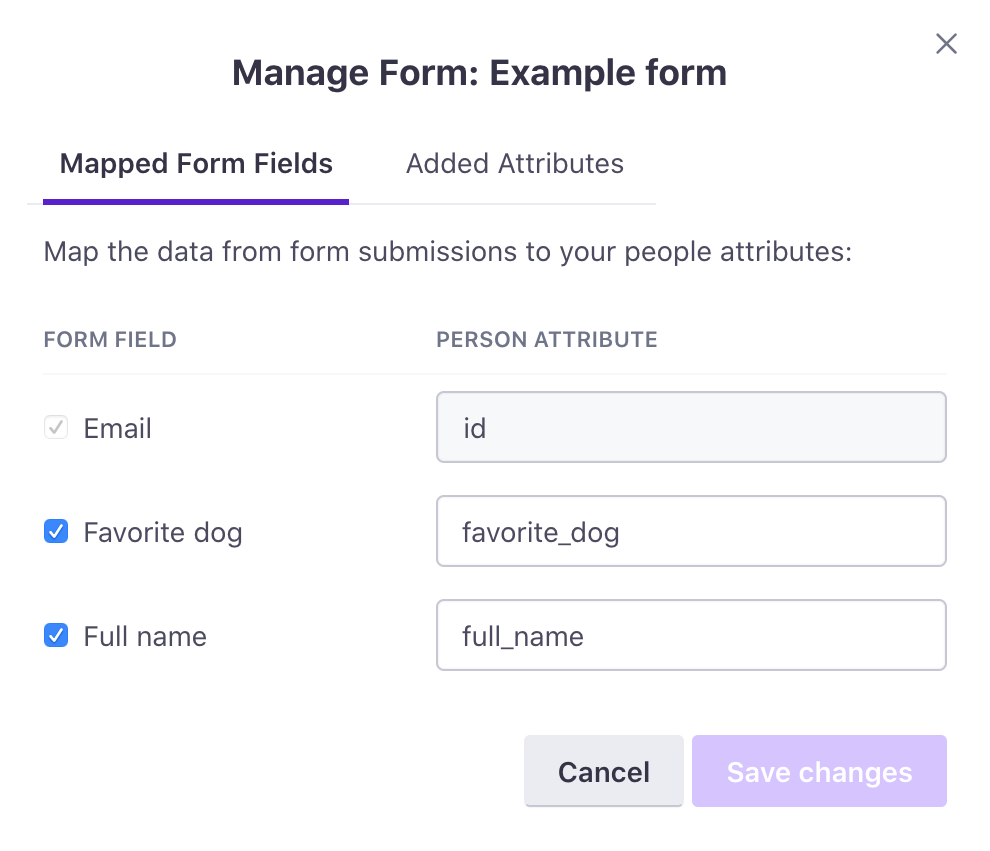
- Click Save changes.
Test form events
You can send test form_submit events representing a person who has already filled out your form to test campaigns or broadcasts triggered from Facebook lead ads.
Test events do not affect attributes
Test events only test campaigns, messages, etc using the values from your form, but they cannot add or update people in your workspace. If you want to perform an end-to-end test, you can send a test event from the Facebook Lead Ads Testing Tool.
- Go to Data & Integrations > Integrations > Facebook Lead Ads.
- Click the options icon, and select Test form event.
- Find the person you want your event to represent. This person must already exist in your workspace.
Use a test person
If you send a test event for a real member of your audience, you may inadvertantly enter that person into a campaign or send them messages. We strongly recommend testing events using your own internal email address or a test address.
- Fill out test values for the form.
- Click Send form_submit event.
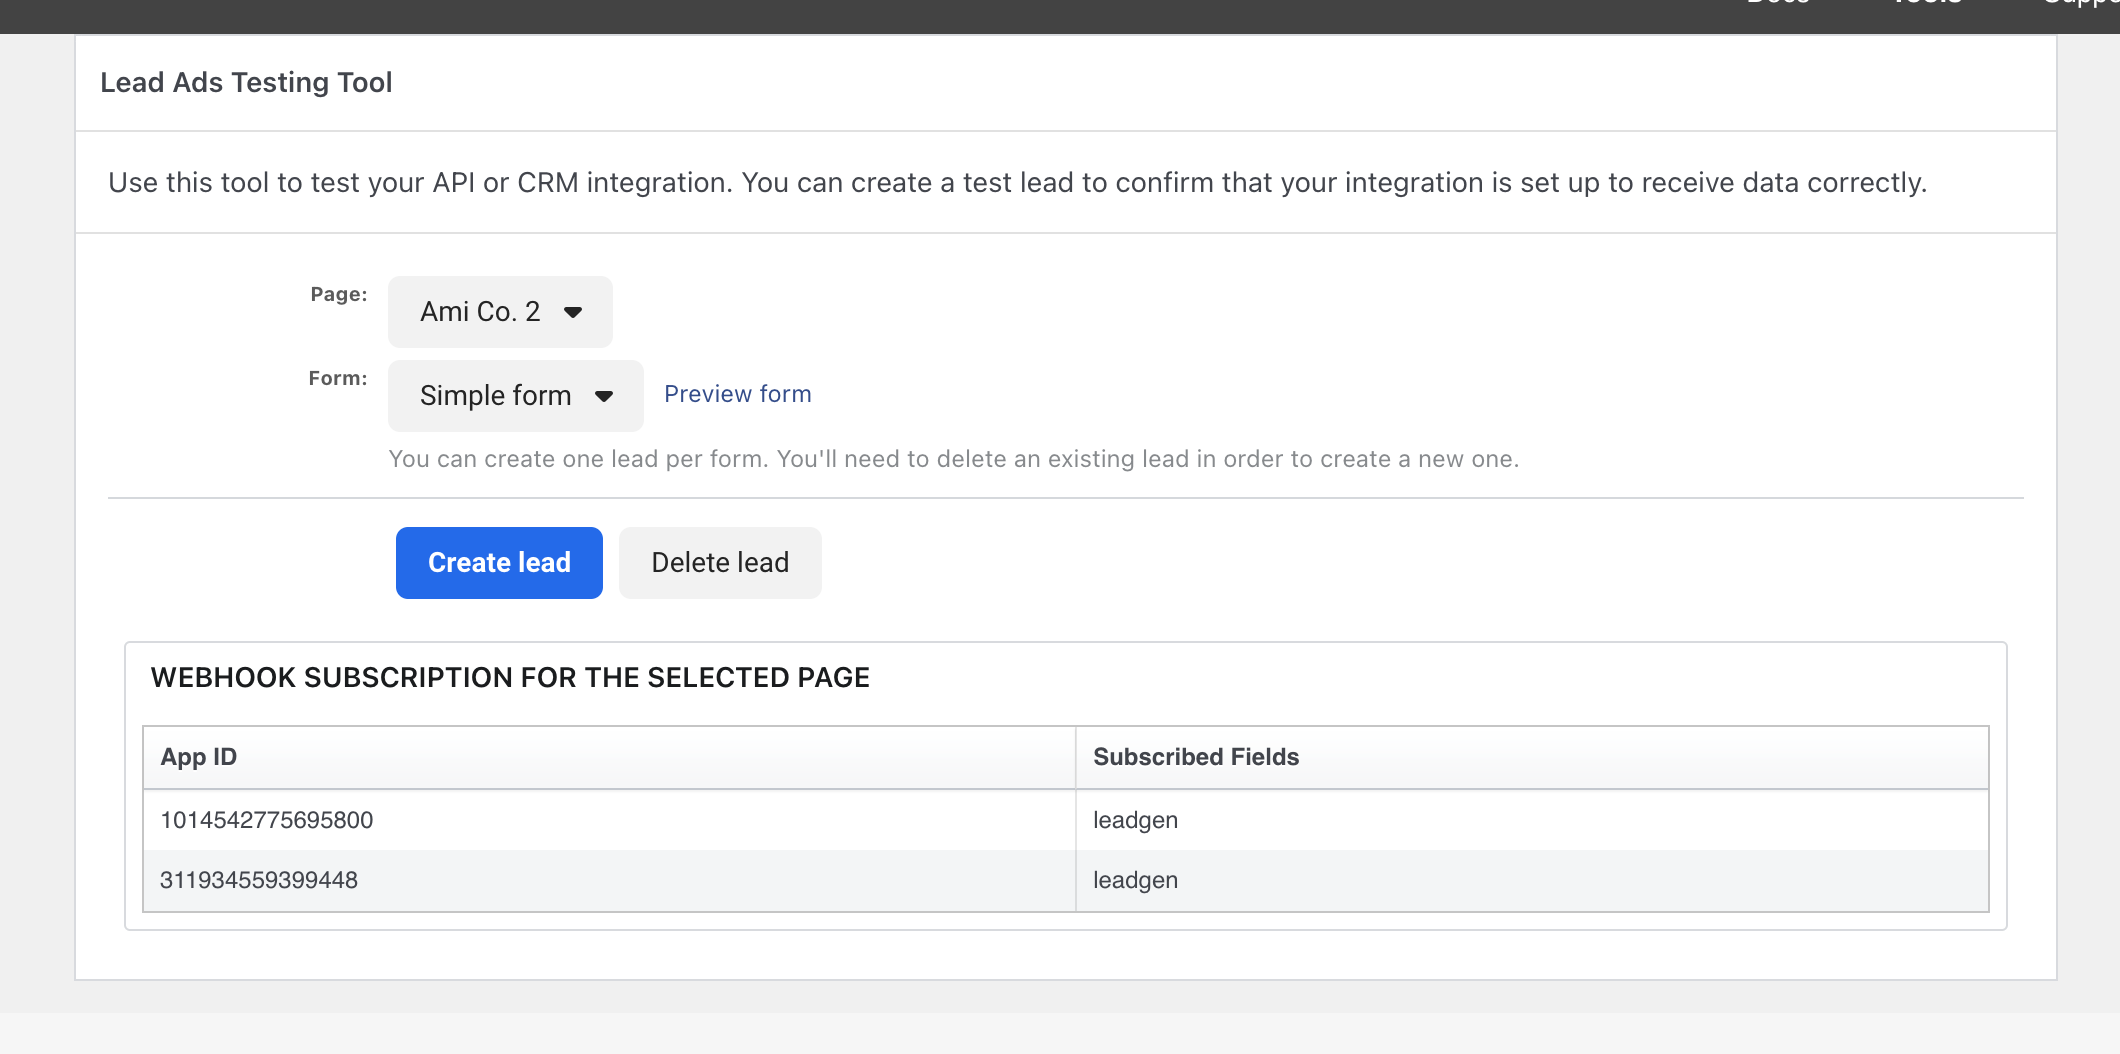
Troubleshooting
If you’re having trouble with your Facebook Lead Ads integration, verify that your app is subscribed.
- Go to https://developers.facebook.com/tools/lead-ads-testing.
- Select the page and form you want to test from the dropdowns.
- Click Preview form to verify your app is subscribed or click Create lead to test form submission.
Deactivate a form
Deactivating a form prevents it from sending events into Customer.io and capturing new respondants. Deactivating a form does not affect leads that already entered your workspace by filling out the form, nor does it archive a form in your Facebook business account.
- Go to Data & Integrations > Integrations > Facebook Lead Ads.
- Click the options icon for the form you want to modify, and select Deactivate.
- Type the form name and click Deactivate.
Trigger a campaign from a form
When you have Active Facebook lead ad forms, you can trigger campaigns whenever someone fills out a form.
Using liquid in form-triggered campaigns
In your campaign, you can use liquid representing attributes you set from your form or properties from the form_submit event itself. You might want to use event properties if you want to reference a form field value that you don’t set as an attribute on people who fill out your form.
To set up a form-triggered campaign:
- Go to Campaigns and click Create Campaign or edit an existing campaign.
- Click They fill out a form and select the Trigger form that causes people to enter the campaign.

- Finish setting up your campaign as normal.
When you review and start your campaign, people who fill out the form on Facebook automatically enter your campaign, helping you automate a conversation with, and hopefully convert, your leads to customers or users!
You can see the campaign(s) triggered from your form on the Facebook Lead Ads integration page.

