Data-driven segments
Data-driven segments are groups of people that you automatically populate when they meet certain conditions. People enter the segment when they match the conditions and leave the segment when they stop matching the conditions. These kinds of segments help you group people according to real-time activities.
Create a data-driven segment
This process explains how to create a segment on the Segments page, but can also create a segmentA group of people who match a series of conditions. People enter and exit the segment automatically when they match or stop matching conditions. when you create a campaign (using the They meet conditions option). The same basic steps apply there as well. If you create a new segment when working on a campaign, you may want to check your segment before you start the campaign just to make sure that your conditions match the right people for your campaign.
- Go to Segments.
- Click Create Segment.
- Enter a Name and Description for the segment. These help you find the segment—both in the list of segments, and when selecting the segment in a campaign, broadcast, etc.
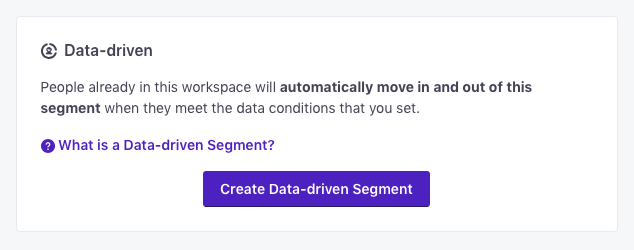
- Click Create Data-driven Segment.
- Add conditions that people must meet to join the segment.
- Click Save Changes.
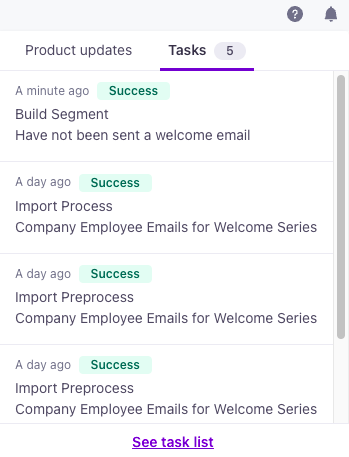
When you save a data-driven segment, it takes a bit of time to build and determine the initial membership in the segment. The more people in your workspace and the more complex your segment conditions, the longer it takes to build the initial segment membership. You can monitor the build process by clicking in the upper-right corner and going to your workspace’s Tasks list.
Segment conditions
When you create Data-driven Segments, you’ll build a set of conditions determining membership in the segment—like whether a person has received a specific message or has a certain attribute. People matching the conditions enter the segment, and they leave the segment when they no longer match those same conditions.
You can segment on the following things:
- AttributesA key-value pair that you associate with a person or an object—like a person’s name, the date they were created in your workspace, or a company’s billing date etc. Use attributes to target people and personalize messages. Attributes are analogous to traits in Data Pipelines.
- Events
- Forms that people have filled out
- Page EventsEvents that track when people view pages on your website. You can track page view events using our JavaScript snippet or by sending requests directly to our API.
- Messages
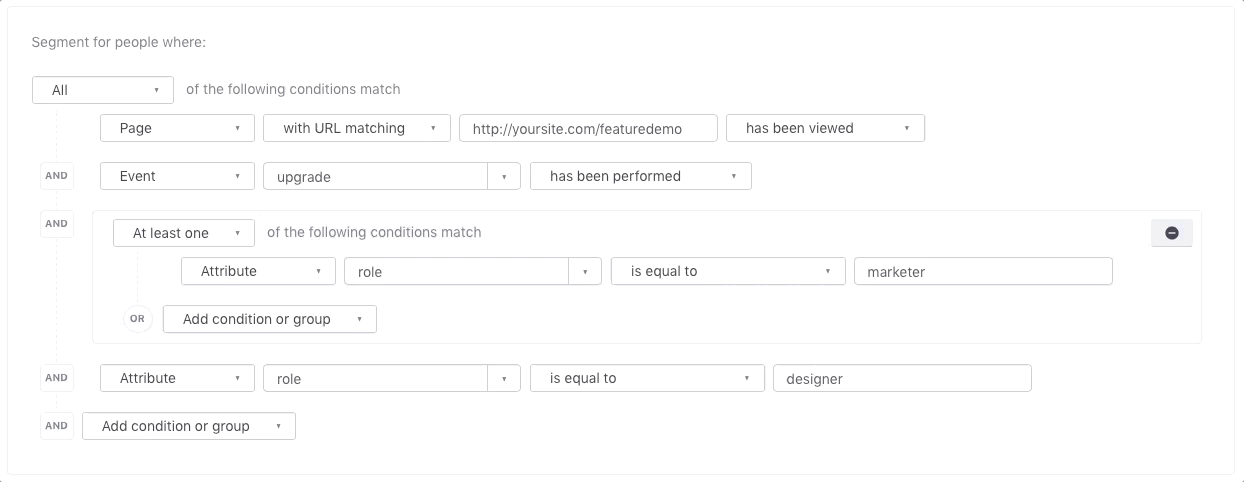
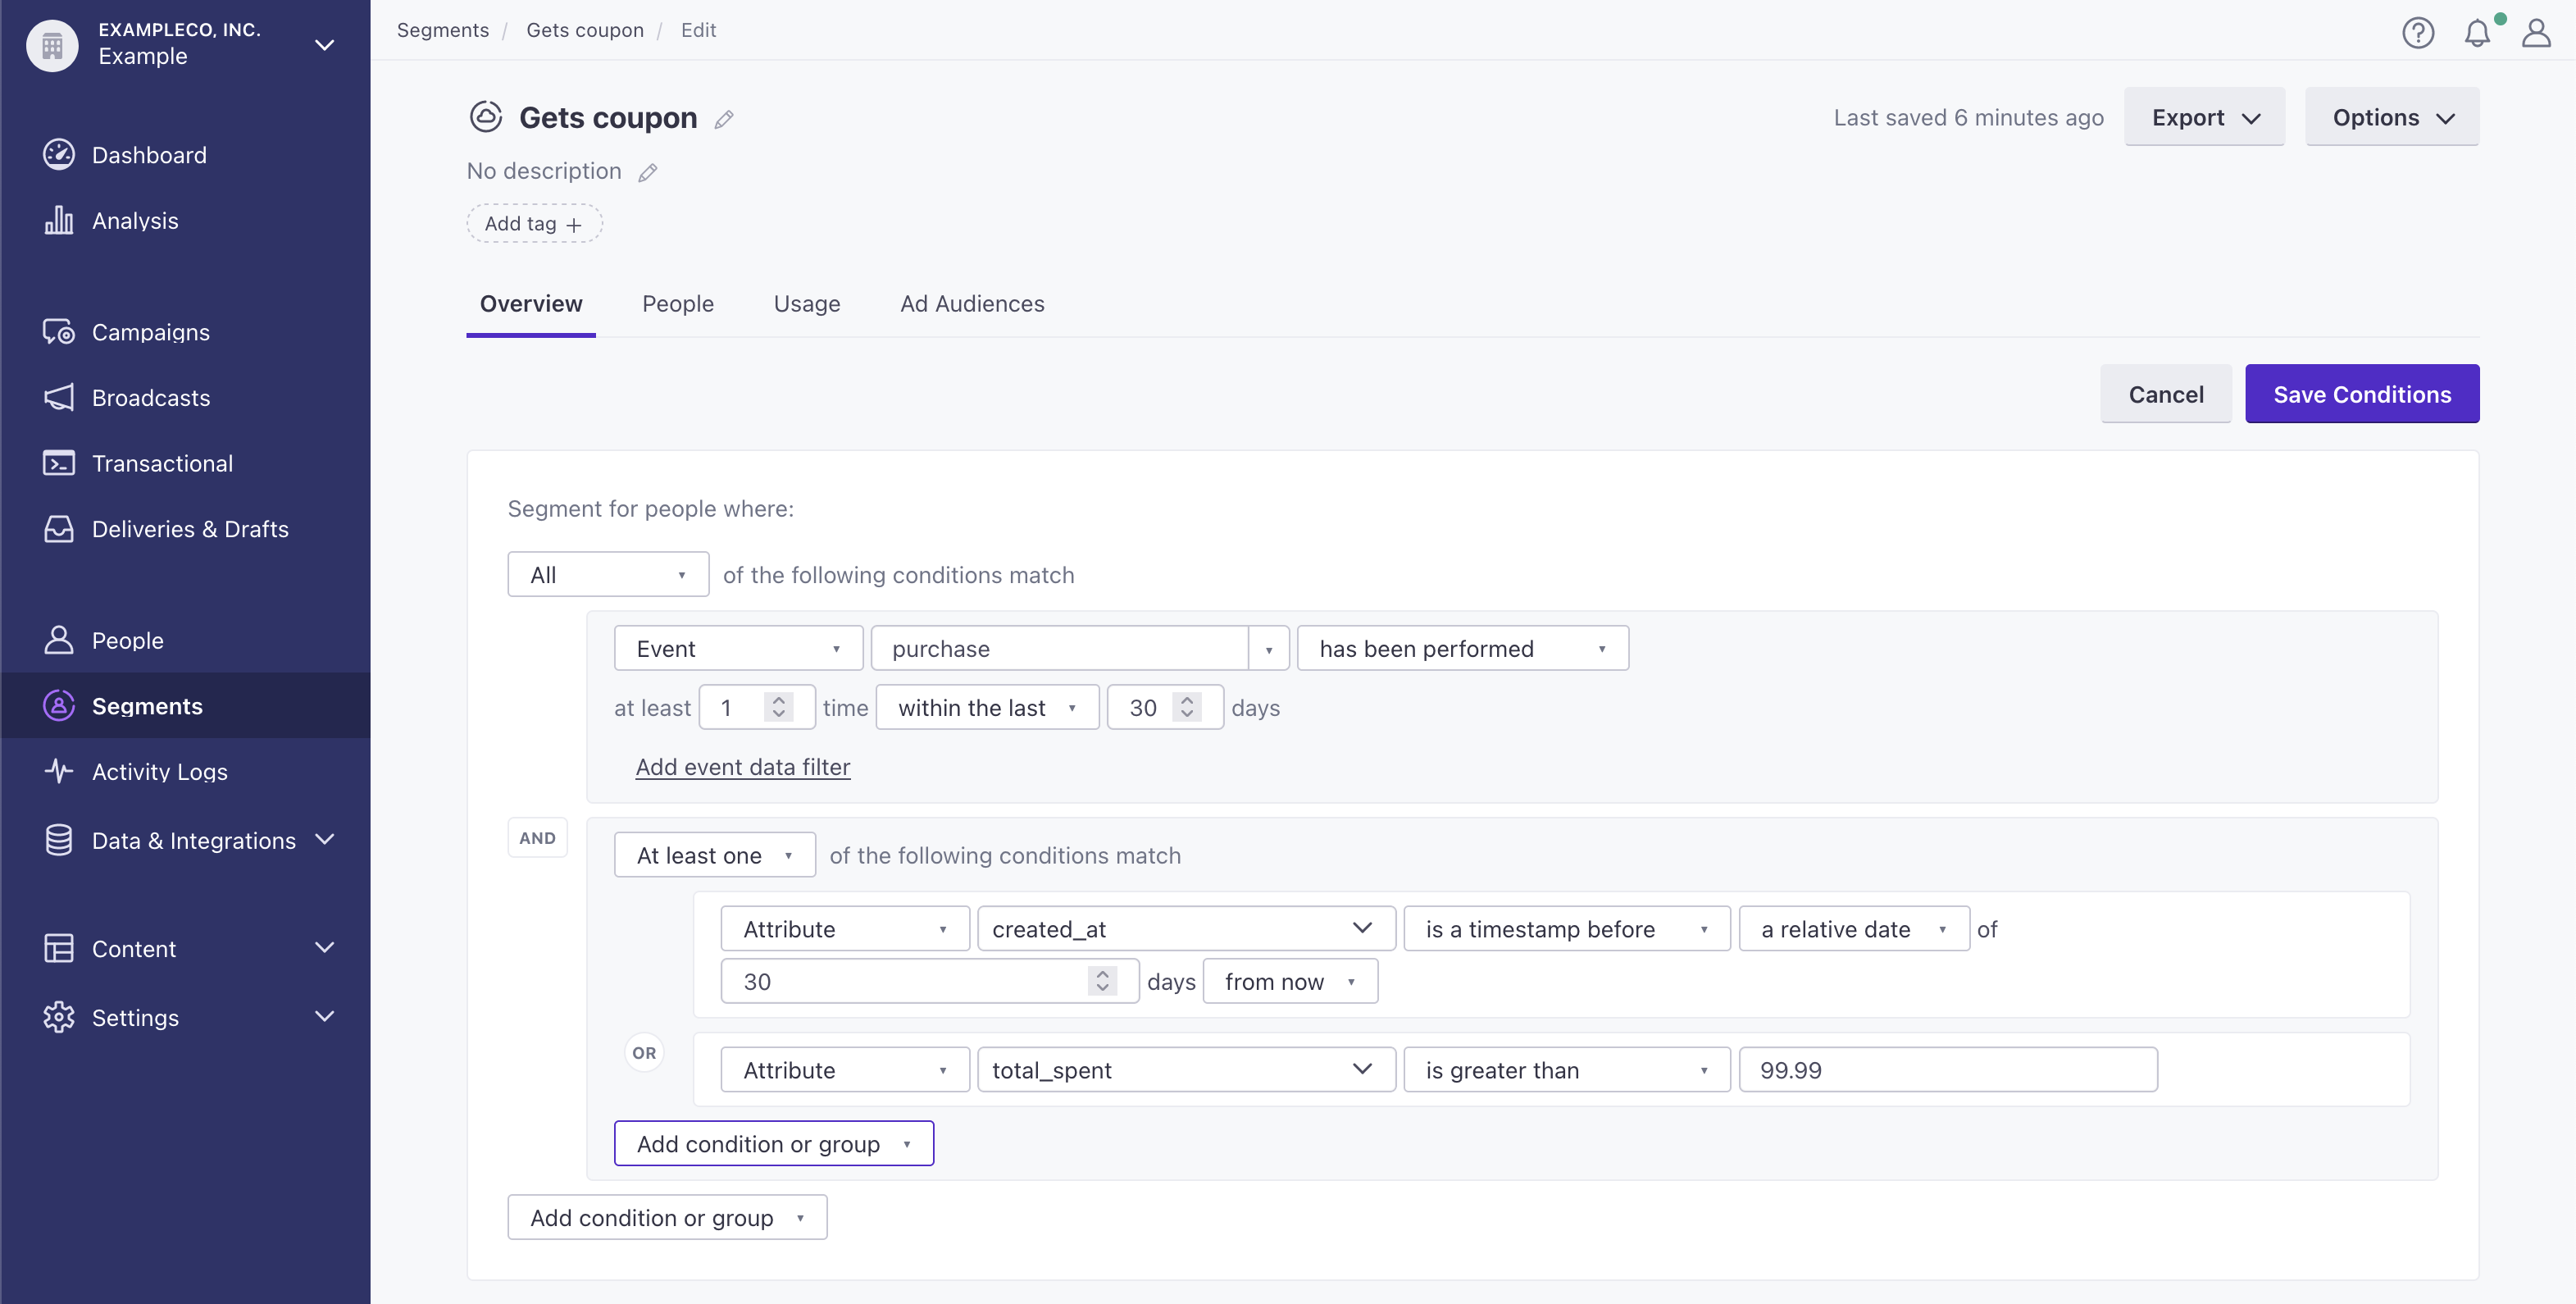
When you create a segment, you start by specifying how to join conditions—All or At least one. All represents a boolean and—where all conditions must be true for a person to enter the segment. At least one is a boolean or, requiring only one of your conditions to be true to enter the segment.
You can also nest conditions using the Group option. This lets you create complex segmentation logic like condition1 AND (condition2 OR condition3). There is a handle on the left side of each condition or group that you can use to drag and rearrange conditions. After you create your segmentation conditions, use the handle to move conditions into nested groups that fit your specific logic.
Using AND and OR conditions in a segment
When you create a segment, you determine whether a person needs to match ALL conditions or At least one condition. These reflect AND and OR logic respectively.
You can use the Group condition to add additional layers of AND and OR logic within your segment: items within the group use the same AND/OR logic.
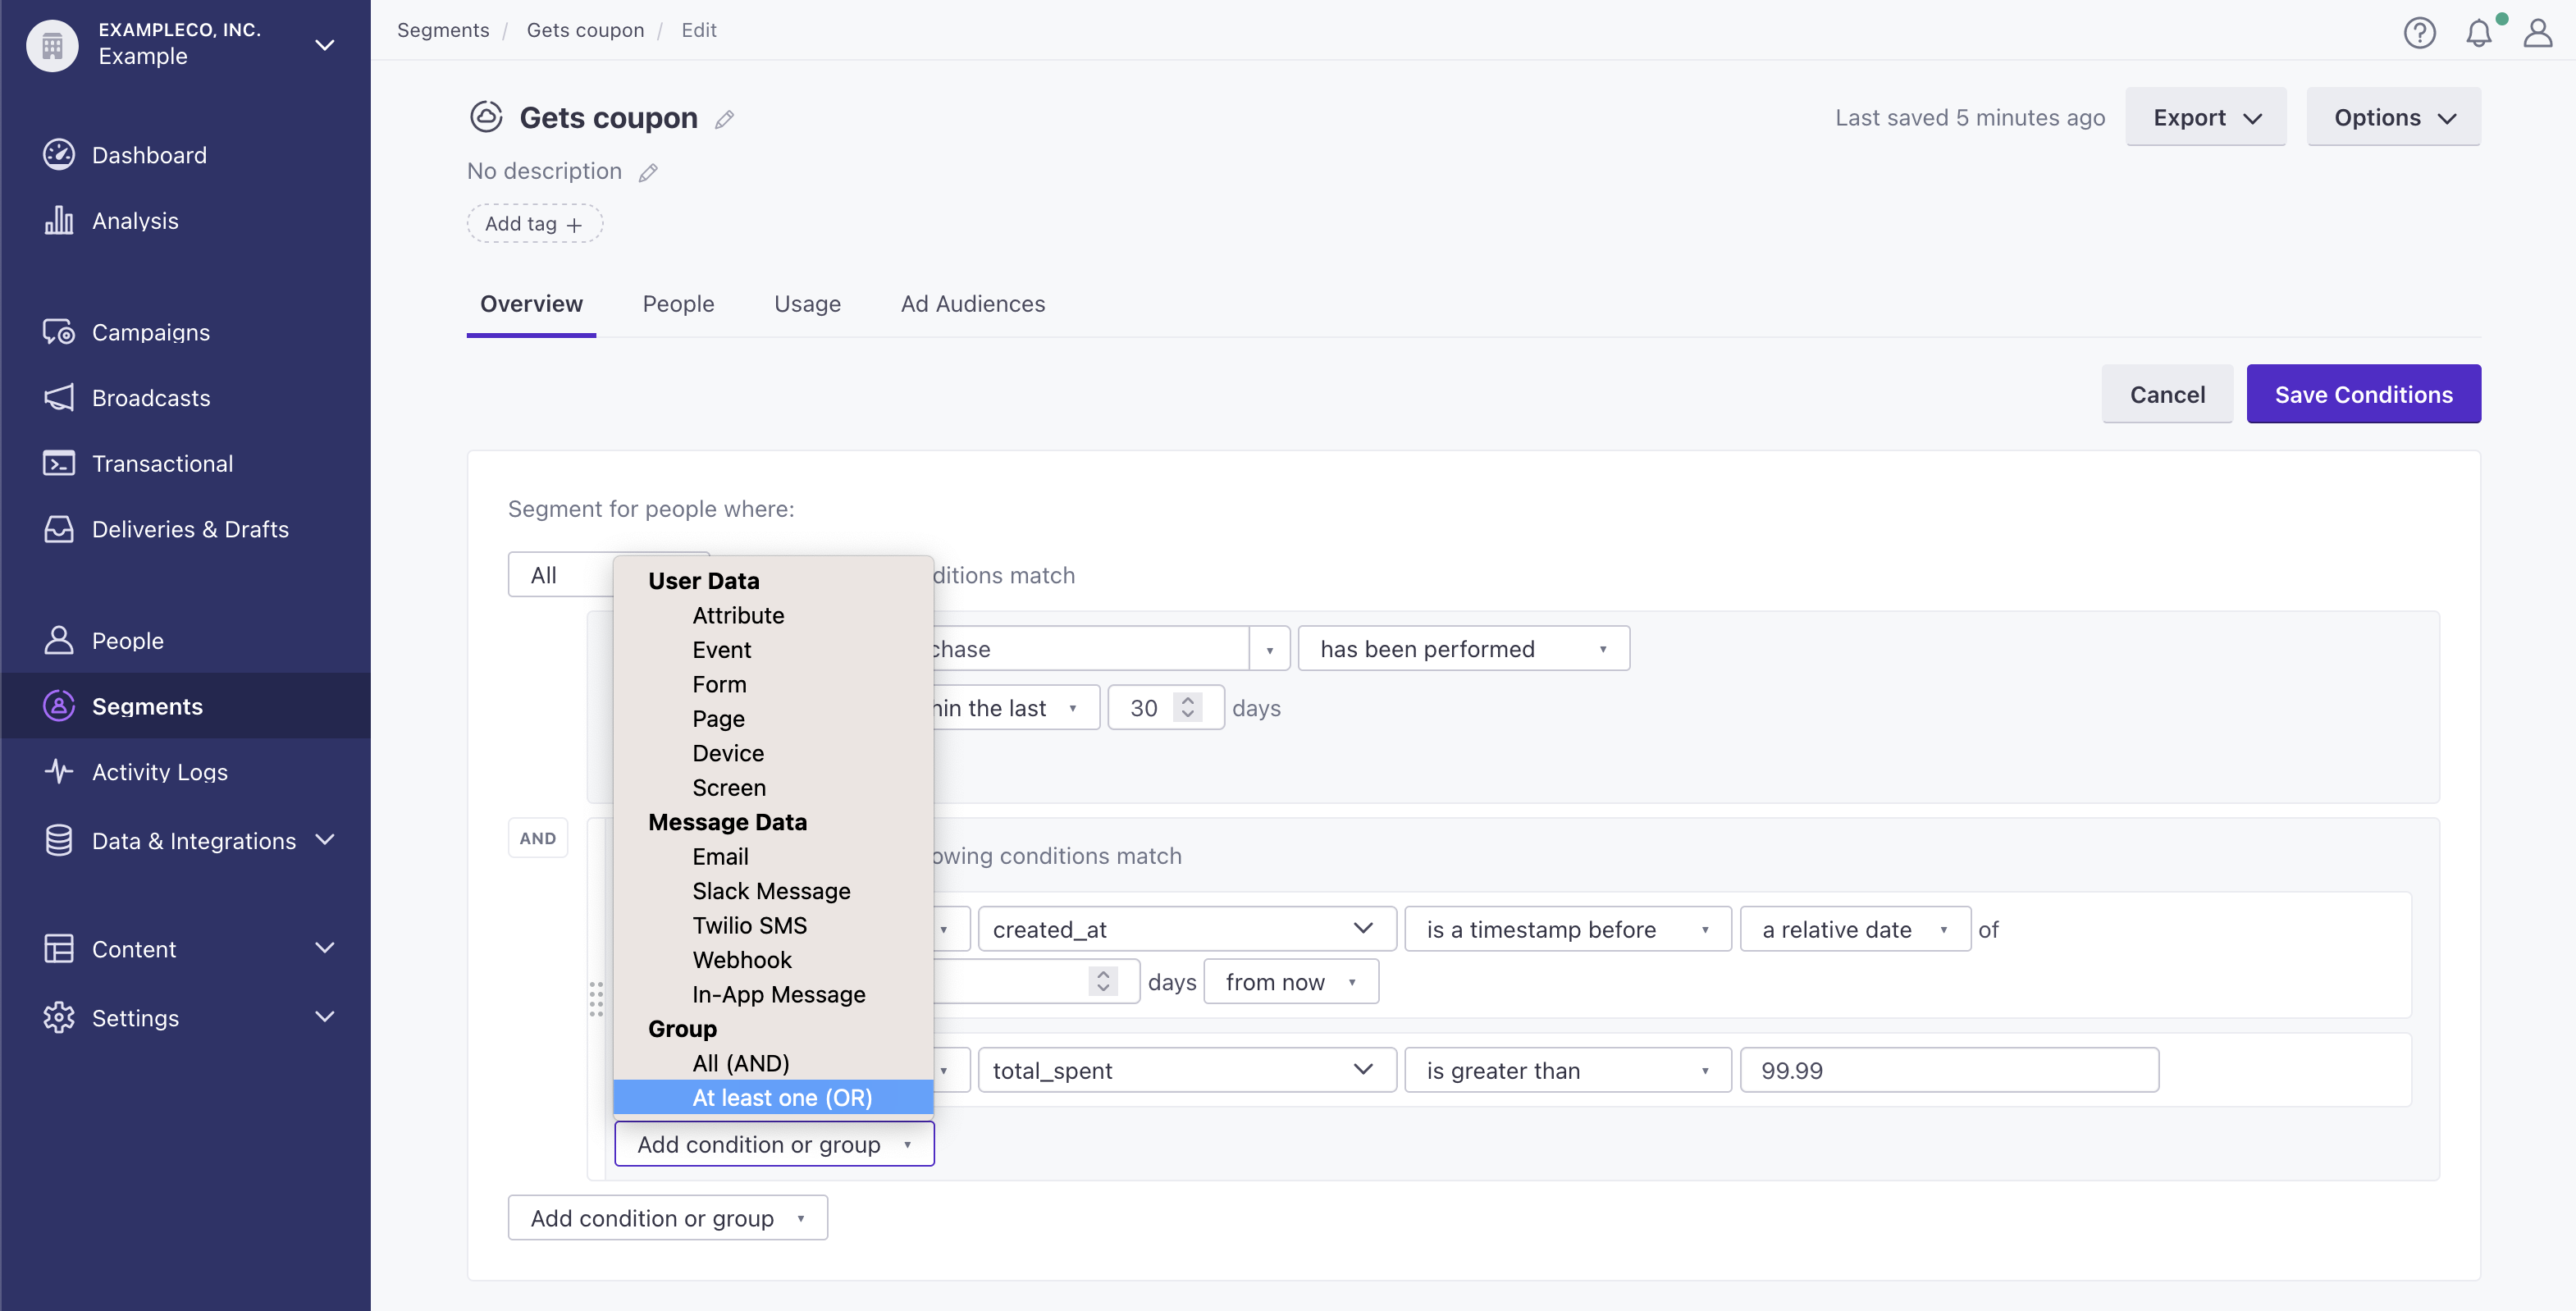
While you select the logic when you add a group, new groups add another drop-down that you can use to change logic within the group. Note that groups only display their logic (the “AND” and “OR” bubbles to the left of the group) after you add at least two conditions, because you’ll need at least two conditions before there’s any logical difference between AND and OR.
For example, the segment below contains people who have performed the purchase event, and are either new customers (created within the last 30 days) or spent a minimum dollar amount.
Using JSON arrays in segments
Attributes and events can contain complex JSON—arrays, objects, and arrays of objects. You can use JSON notation to access JSON in your segment. However, when you access an array, you can provide an index to access a specific item in the array or leave the index blank to match any item in the array.
For example, if you store a person’s shipping addresses in an array of objects call shipping_addresses, you could match the city in the first shipping address using shipping_addresses[0].city. If you want to match a city value against any object in the array, you could use shipping_addresses[].city. If you want to match a value against any property in any value or object in the array, you could simply use shipping_addresses[].
When referencing an array of values—not a property belonging to an object in an array, but the array itself (e.g. array[])—the equals evaluator works like a contains operator. For example, if you have an attribute called favorite_foods containing the values pizza, fries, burgers, trying to create a segment where favorite_foods[] equals pizza would evaluate to true.

Segments with special characters
Event names and other assets that you may want to segment on can include special characters. In most cases, we’ll accept special characters without issue. However, the following special characters perform special, “regular expression (regex)” functions in search. You can escape them (and treat them as literal characters) with \.
*is a wild card: it represents any character. For example,s*nkmatches event names “sink”, “sank”, and “sunk”. If you don’t place any characters after*, it’ll match all previous characters, wherever they appear, in a string.+represents “and”: it matches both values in a statement. You can use it with attribute conditions and event conditions, but not event names. For example, if you wanted to find a person whose email address containedpersonandgmail, you could writeemail contains person+gmail. This statement matches a person whose email address wasperson@gmail.combecause their address contains bothpersonandgmail.|represents “or”: it lets a person who has performed (or not performed) either event to enter the segment. For example, a segment based onhide|seekevents lets a person who has performed either thehideorseekevents to enter the segment.
Use the contains condition when entering regex
To use regular expressions in your segment, you need to use the “contains” or “does not contain” conditions. Using regex with “equals” or “does not equal” will yield no results.
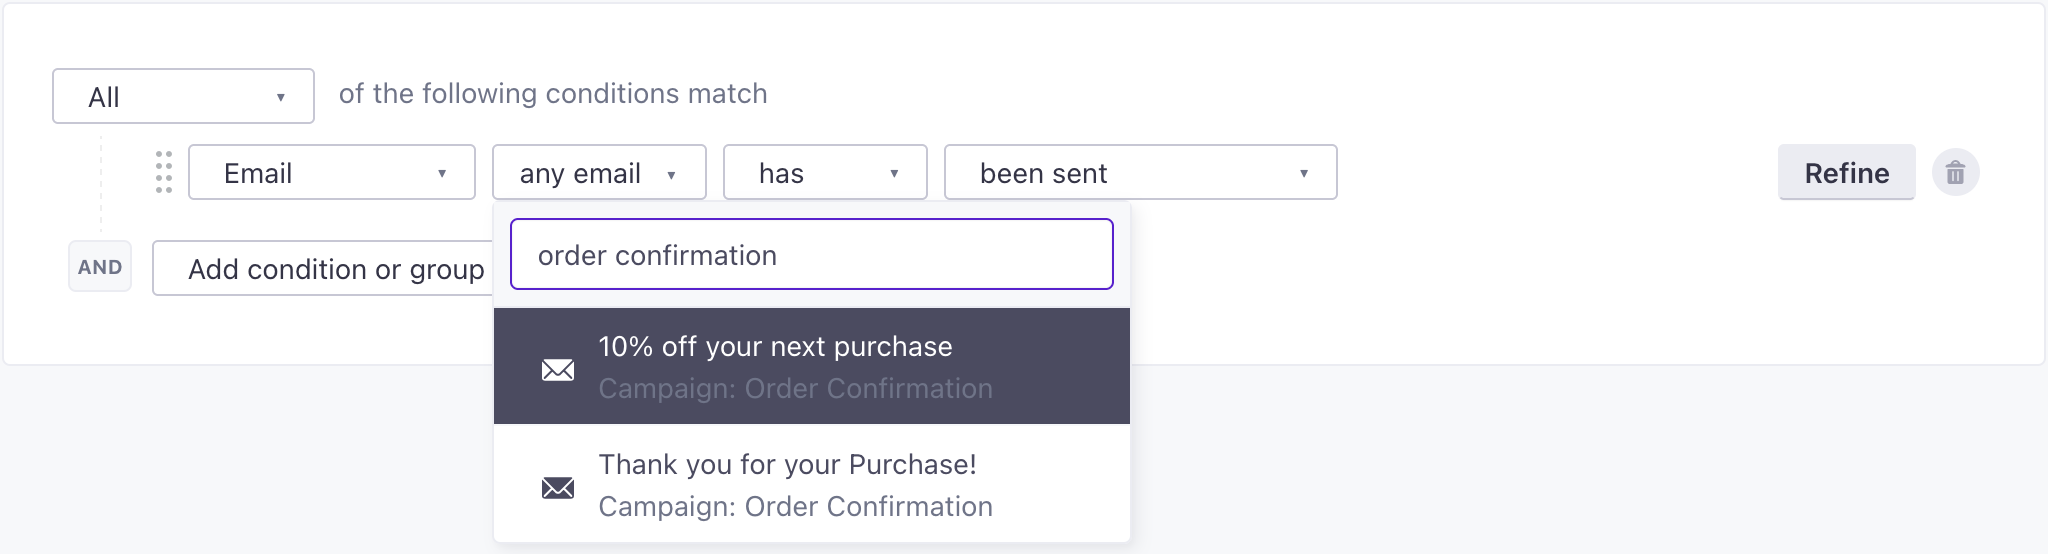
Segment on a message
You can create a segment of people who have received an email or triggered a webhook action in a campaign. When you create your segment, you’ll select the action type—Email or Webhook. Click the Any dropdown to search across your campaigns and messages to find the specific message you want to use for your segment condition.
Using timestamps
You can create data-driven segments based on timestamps, but we evaluate match time for segments with timestamps in a different manner from other segments. A match time is when someone enters a segment. For most segment conditions, this is when someone gains an attribute, loses an attribute, performs an event, and so on. But for segments with timestamp conditions, we can actually calculate the match time based on a date-time, so the match time might not always be, for instance, when someone gains a timestamp attribute.
To help explain this, you could have a segment condition where a profile attribute birthday exists. People would join this segment as soon as you recorded their birthday attribute. But if your segment is birthday is a timestamp 15 days from now, people will only join your segment when they meet that condition.
For more information on implementing timestamp conditions in a segment, go to Timestamp Conditions.
Segment-triggered campaigns with past timestamps
Customer.io typically does not trigger campaigns based on historical data
Customer.io, as a practice, does not trigger campaigns based on backfilled or historical data. (The exception is with backfilled events.) For segment-triggered campaigns, this means you can create a profile with a past timestamp that causes the person to join a segment, but that person will not trigger a campaign based on that same segment.
For example, assume you created a data-driven segment with the following condition: last_online is a timestamp before 30 days ago. You use this segment to trigger a new campaign.
On March 30th 2023, you add a new person with the attribute last_online: 1669965166 (Dec 2, 2022 at 12:12:46 am). This profile would enter the segment, but the match time would be Jan 1, 2023 at 12:12:46 am, 30 days after the person’s timestamp, which is the first day the segment condition is true. While this person would enter the segment, they would not trigger a campaign on March 30th, 2023, since the match time is in the past.
For more information on implementing past timestamp conditions in a segment, go to Timestamp Conditions.
Segment-triggered campaigns with future timestamps
Try out date-triggered campaigns instead
If you trigger campaigns using a timestamp-based segment, you may want to try date-triggered campaigns instead. With date-triggered campaigns, people won’t trigger a campaign until the time(s) specified in the trigger conditions. This makes it easier to predict when people will start and finish journeys.
Remember that, for segments with a condition that starts with a timestamp, the match time is the time when the condition is true, not necessarily when the person joined the segment. This creates some caveats for segment-triggered campaigns based on future timestamps. In this scenario, a person will trigger the campaign, but not start a journey, until the timestamp. This ensures that people don’t inadvertently experience the journey before it’s relevant to them.
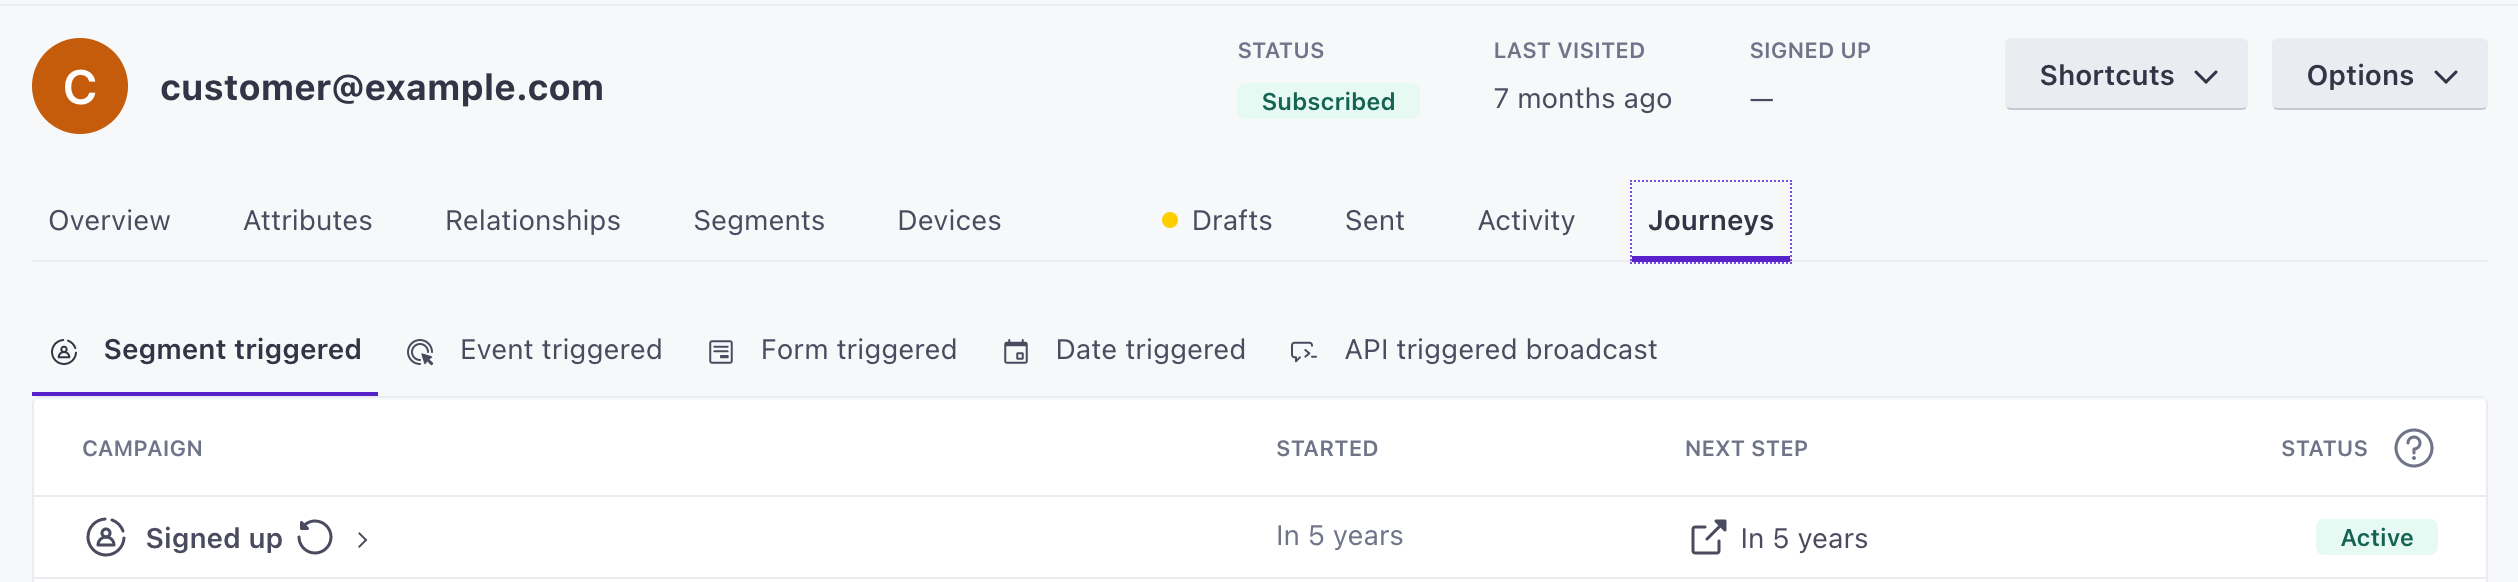
For example, imagine that you have a segment called “Signed up” with a single condition: joined_club is a timestamp. On January 1st, 2023, you add a person whose joined_club value is a timestamp for March 17, 2028. This person joins the “Signed up” segment because their joined_club attribute is a timestamp. If you use the “Signed up” segment as a campaign trigger, this person will generate a campaign journey, but they won’t start the journey until March 17, 2028 — the date and time value for their joined_club attribute - because that’s when the person officially joins the club.
You can find journeys with future start-times on the Campaign’s Journeys tab or under an individual person’s Journeys tab with a Started time in the future.
If you want people to start their journey based on future timestamp values, you may want to try out date-triggered campaigns instead. But, if you need to use a segment-triggered campaign based on a future date, you can set the campaign’s trigger conditions to include dates and times within a range of the present (the is a timestamp between or after conditions). This lets people with a timestamp (like our joined_club example) start their journey even when they have a future value.

Segment based on object relationships
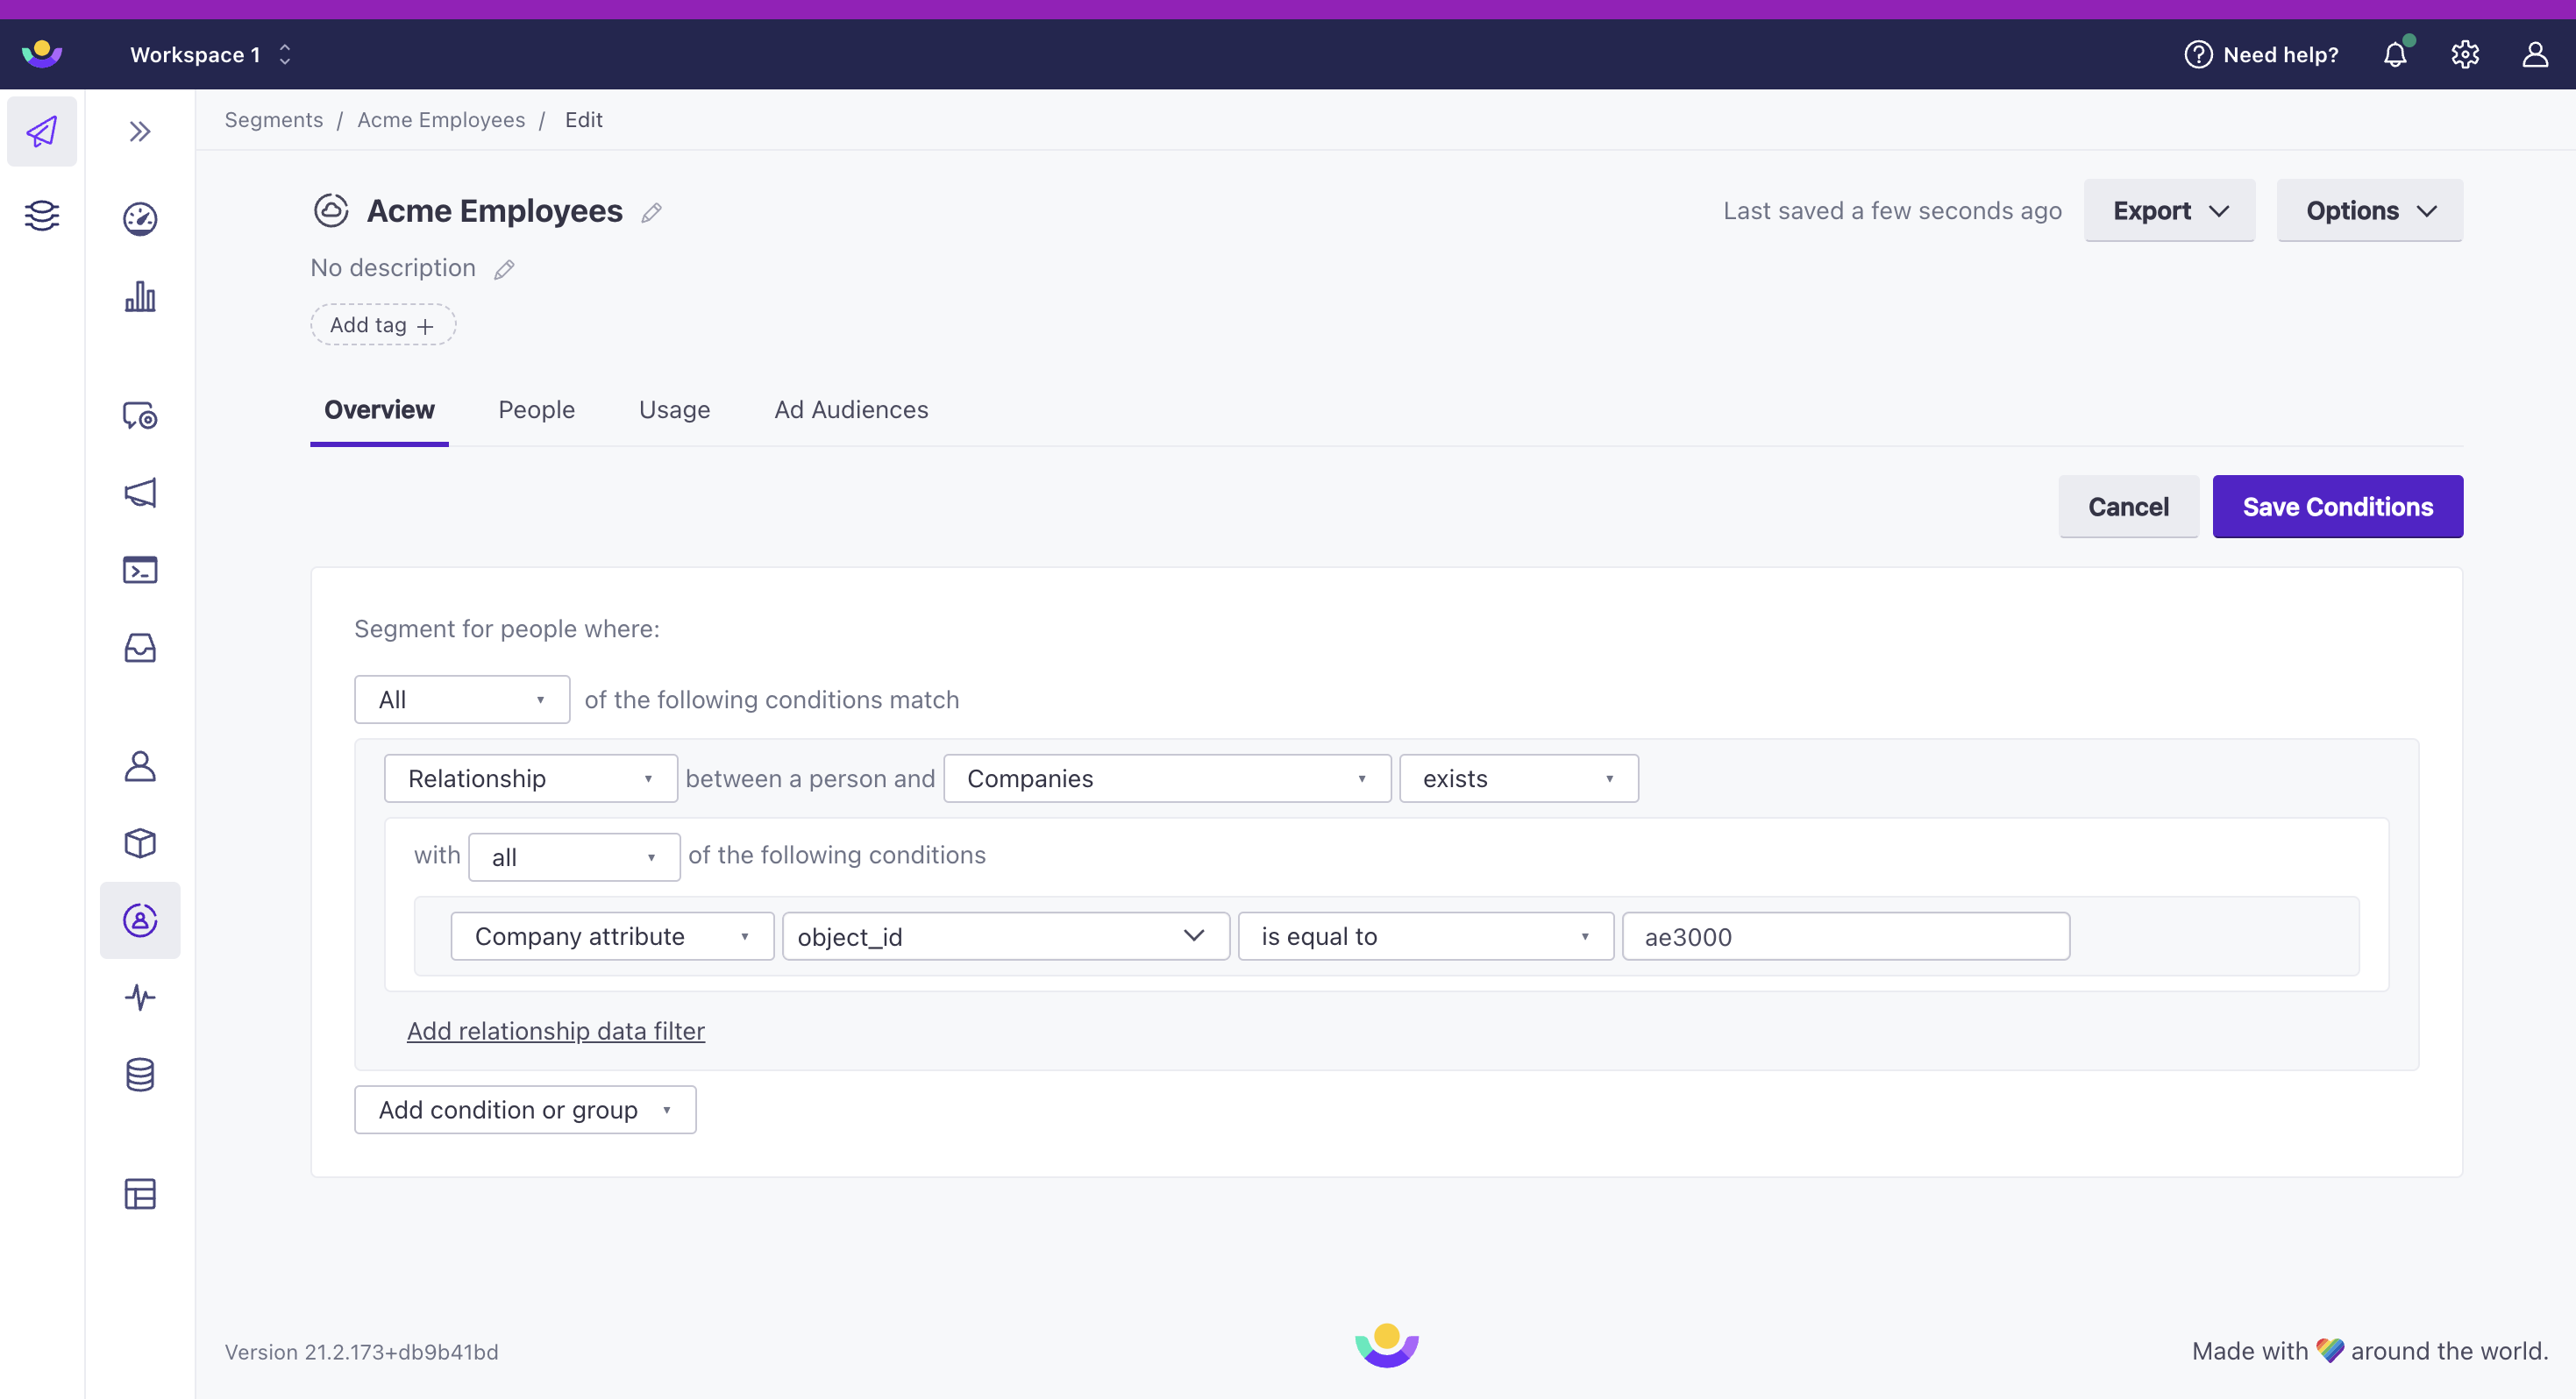
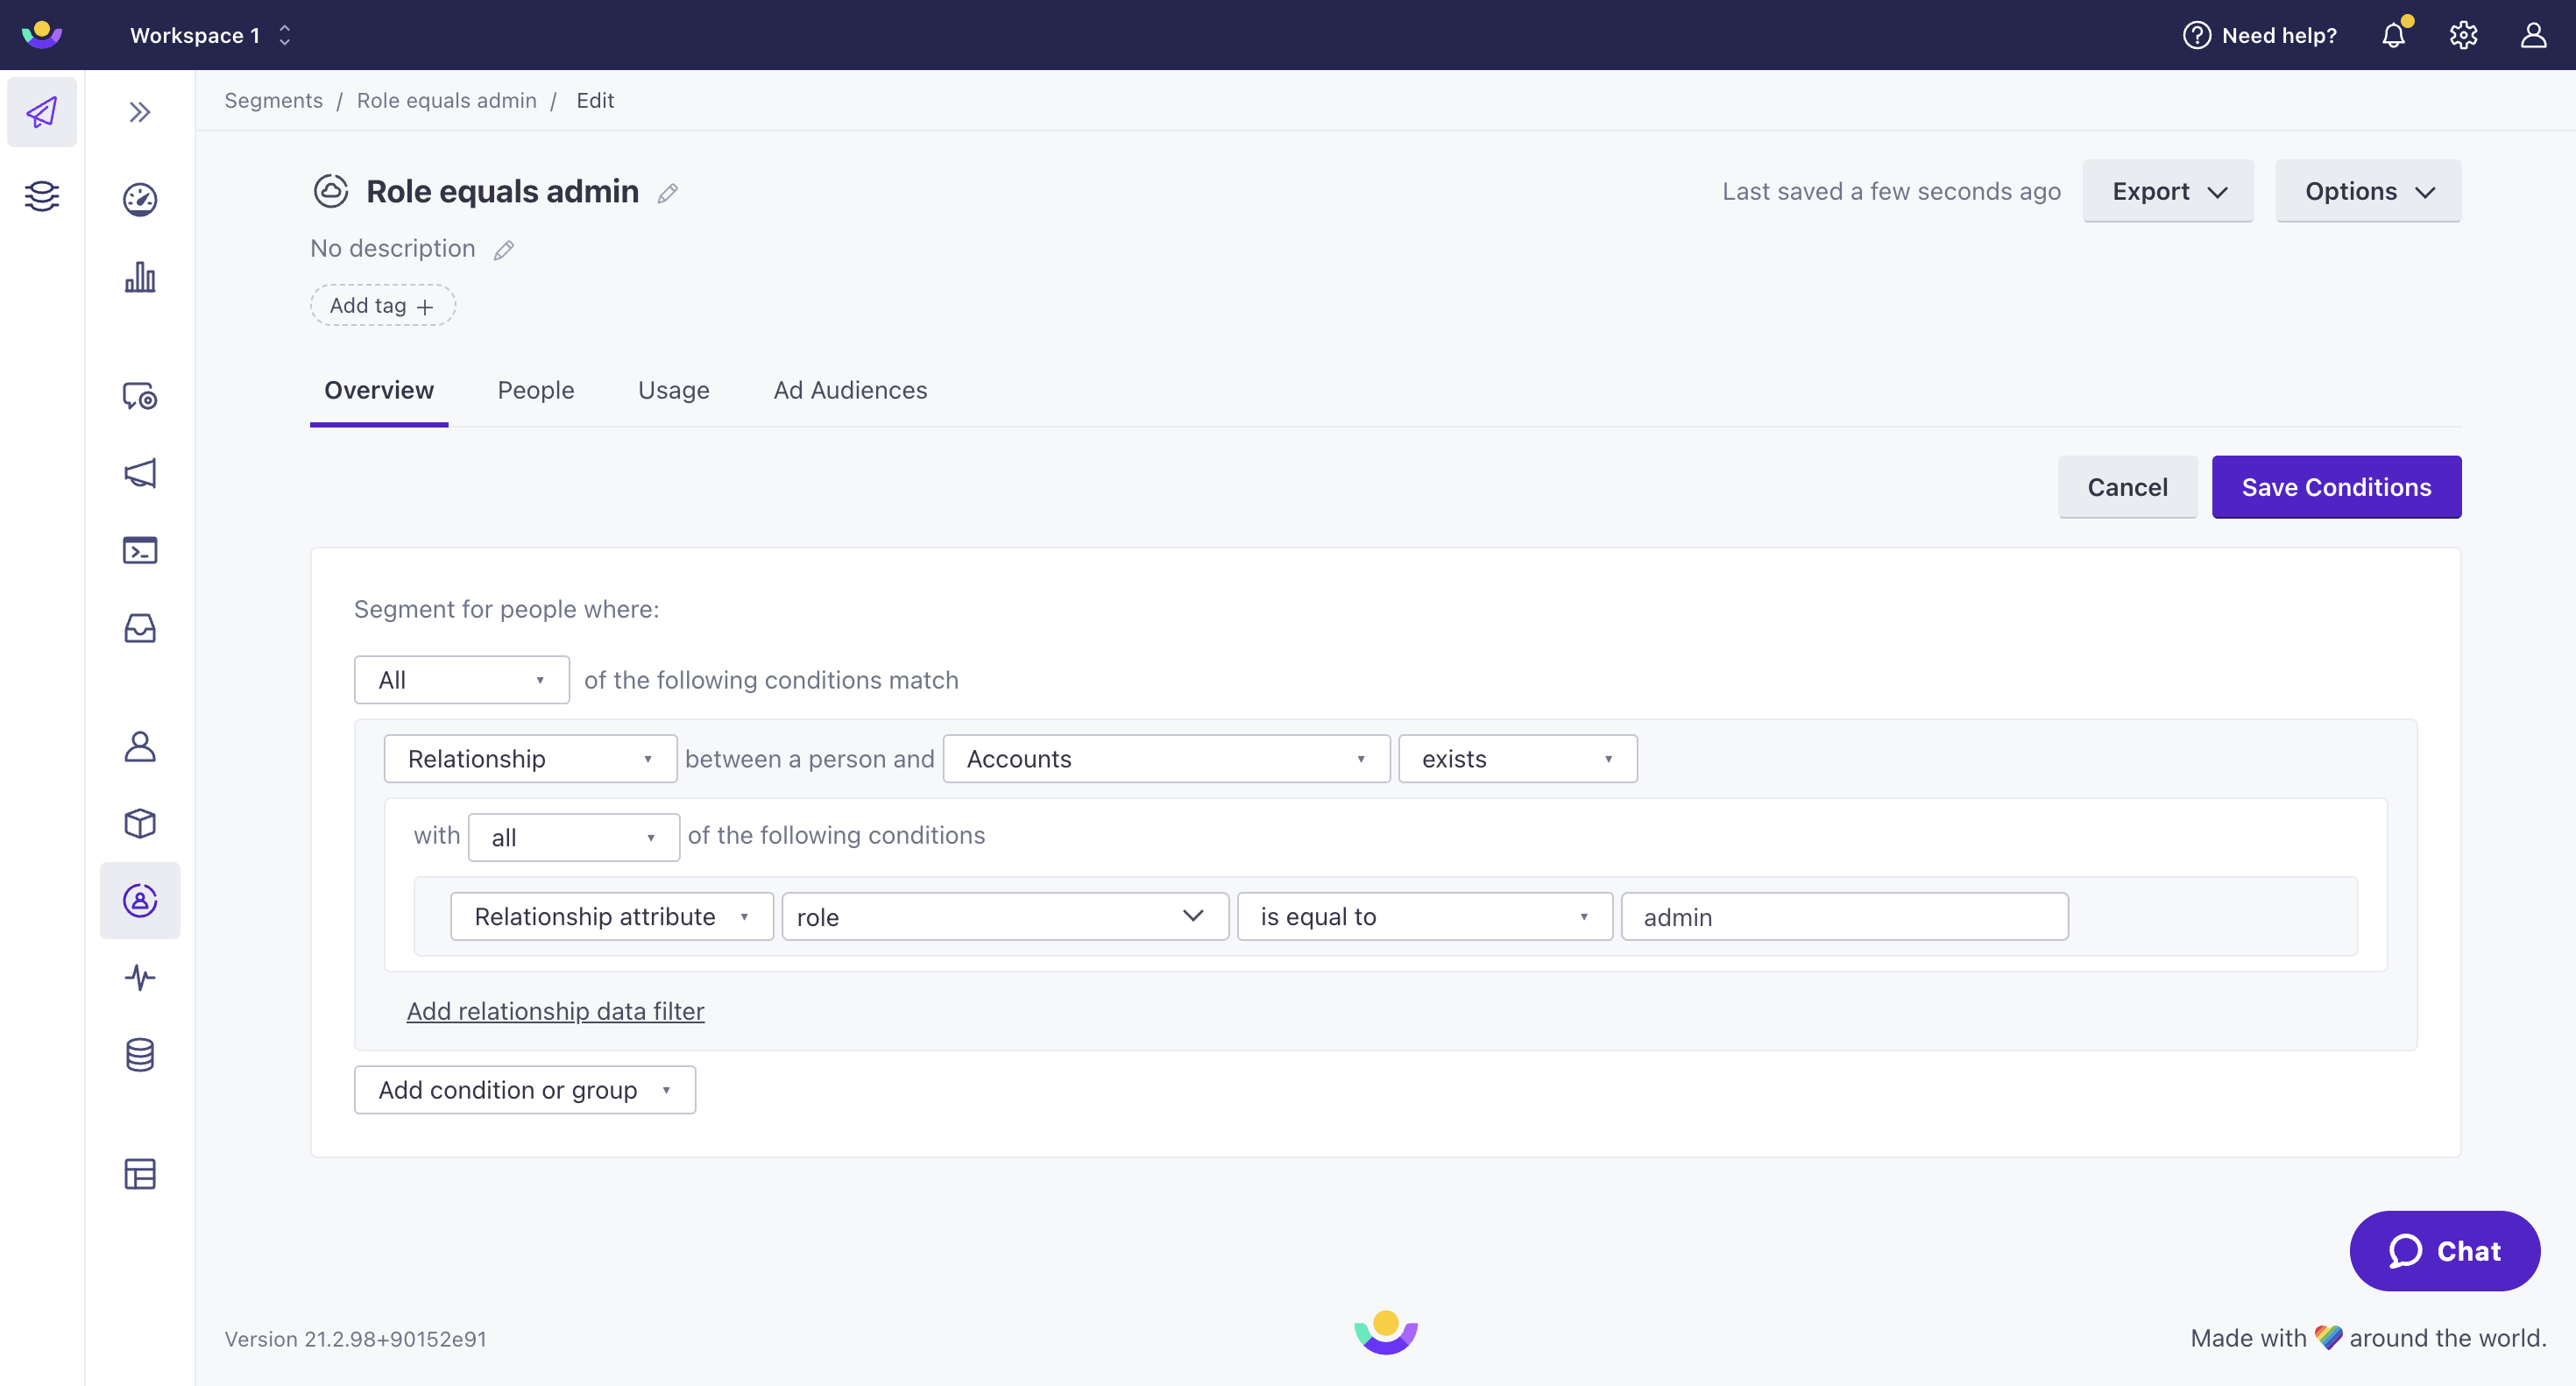
You can relate people to objectsNot to be confused with a JSON object, an object in Customer.io is a non-person entity that you can associate with one or more people—like a company, account, or online course. You can use objects to message people based on changes to their company, account, or course itinerary.—things like companies, accounts, or online courses. Then you can base segments on these relationships. This provides a way to trigger a campaign for everybody at a company, or everybody taking a course.
When you create a segment, use the Relationship option to target people based on their relationship to one or more objects.
Using object-based segments as campaign triggers
In general, you’ll set up segments based on a relationship to a type of object. If you use this kind of segment to trigger a campaign, a person will only trigger the campaign for the first relationship and not subsequent relationships. To trigger a campaign based on every relationship change, create relationship-triggered campaigns.
You can also create segments based on relationship attributes. This allows you to target how someone relates to an object, not just the existence of a relationship. For instance, you could segment users who all have an attribute of role = admin as a relationship attribute on an account.
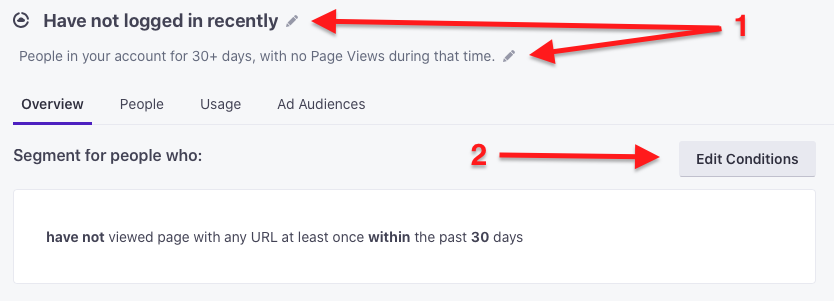
Edit a segment
You can edit the name, description, and conditions for your segment. Changing a data-driven segment’s conditions will cause the segment to rebuild and may affect active campaigns.
Go to Segments.
Click the segment you want to update.
- Click to edit the name and/or description for the segment.
- Click Edit conditions to edit the conditions driving membership in the segment.
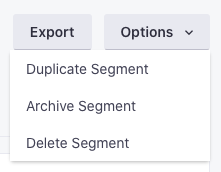
Delete a segment
You cannot delete a segment that is currently in use. Check the Usage tab when looking at your segment to see if it’s still in use somewhere in your workspace.
- Go to Segments.
- Click the segment that you want to delete.
- Click Options > Delete Segment and confirm your choice.
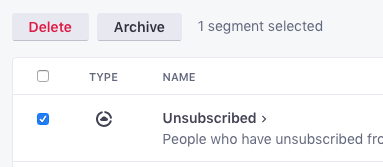
You can also delete multiple unused segments from the Segments page by checking the box next to each segment that you want to delete and then clicking Delete.
Duplicate a data-driven segment
You might want to copy a data-driven segment as a starting place for the conditions in a new segment.
- Go to Segments.
- Click the segment you want to duplicate.
- Click Options and select Duplicate Segment.

