Assign a personal support rep
Introduction
Onboarding is hard to get right. You want to show off the benefits of your app at a large scale while creating a personal touchpoint.
Many of our customers introduce a dedicated customer support person to their end user as soon as they sign up. The new user can then reach out directly with any concerns or questions. This way, end users know that they’re getting one-to-one attention from the start, and that someone will be there to help them as they discover the app.
Customer.io lets you set this up easily, resulting in personalized onboarding emails that look like this:
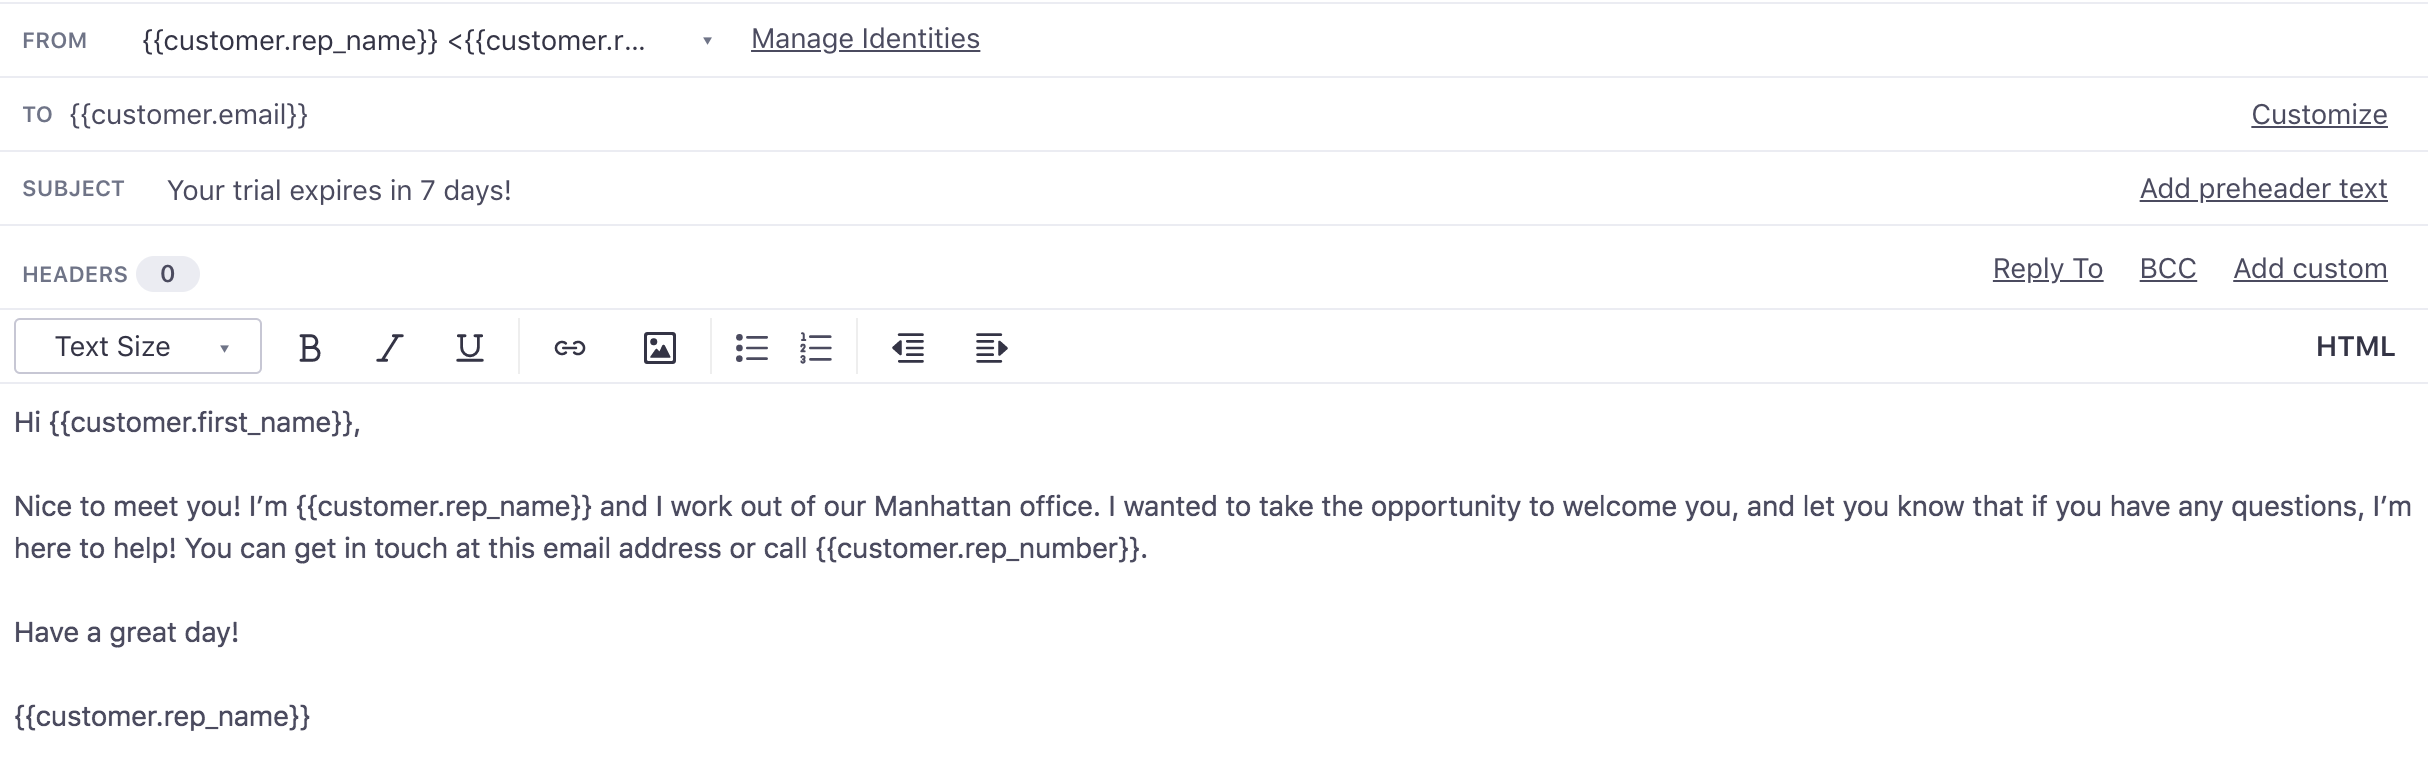
Hi Jane,
Nice to meet you! I’m John and I work out of our Manhattan office. I wanted to take the opportunity to welcome you, and let you know that if you have any questions, I’m here to help! You can get in touch at this address or call 123-456-7890.
Have a great day!
John S.
In this recipe, you’ll learn how to assign a personal support or account representative.
Ingredients
- Basic knowledge of Liquid tags
- Ability to send attributes to Customer.io
Method
Store the attribute
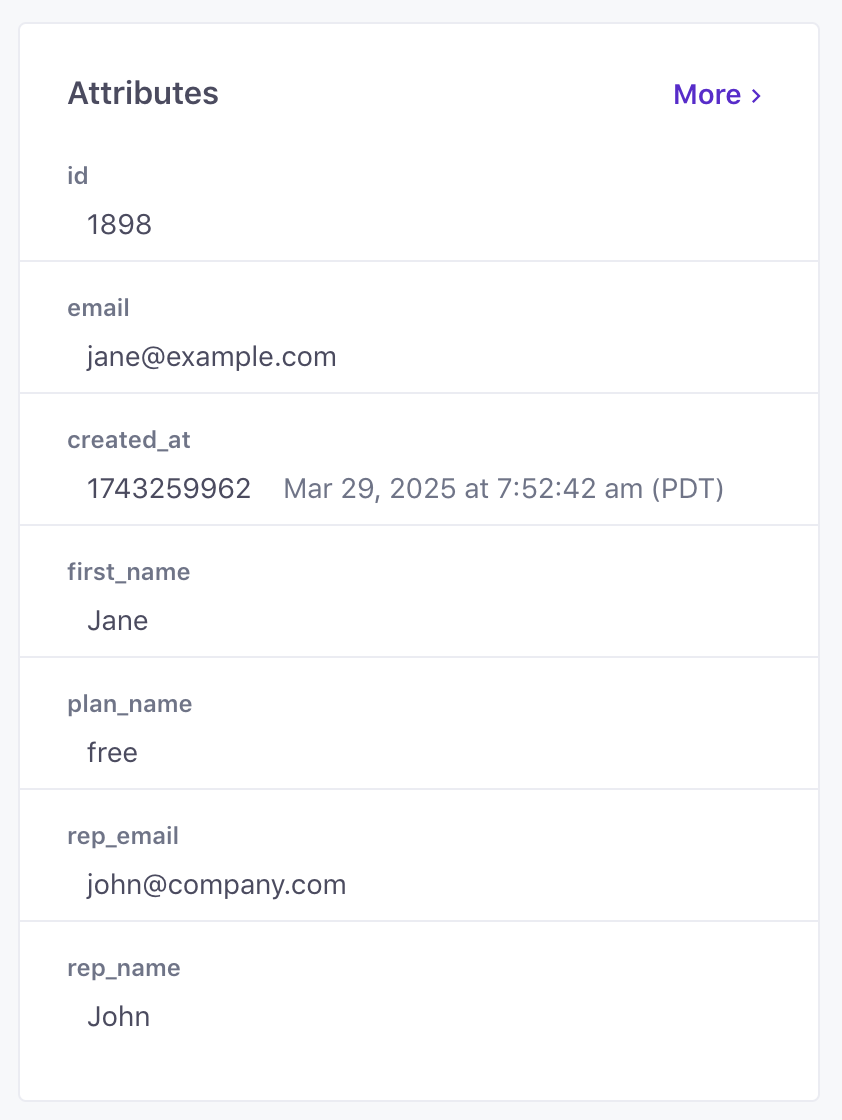
When you create a new end user in Customer.io, we recommend that you store their personal support rep’s information as part of their attributes.
This is an example of how you might do that with the _cio.identify() function in the JavaScript snippet:
<script type="text/javascript">
    _cio.identify({
        id:         '1898', // must be unique per customer
        email:      'jane@example.com',
        created_at: 1743259962,
        // Custom user attributes
        first_name:  'Jane',
        plan_name:  'free',
        rep_name:  'John',
        rep_email: 'john@company.com'
    });
</script>
Here, I’ve used rep_name and rep_email, but you can define them however you like.
Then, when you check out this person in Customer.io, their attributes look like this:
Create a “From” address using Liquid tags.
Head to Workspace Settings in the left-hand menu, select Email and then define a new From Address using Liquid.
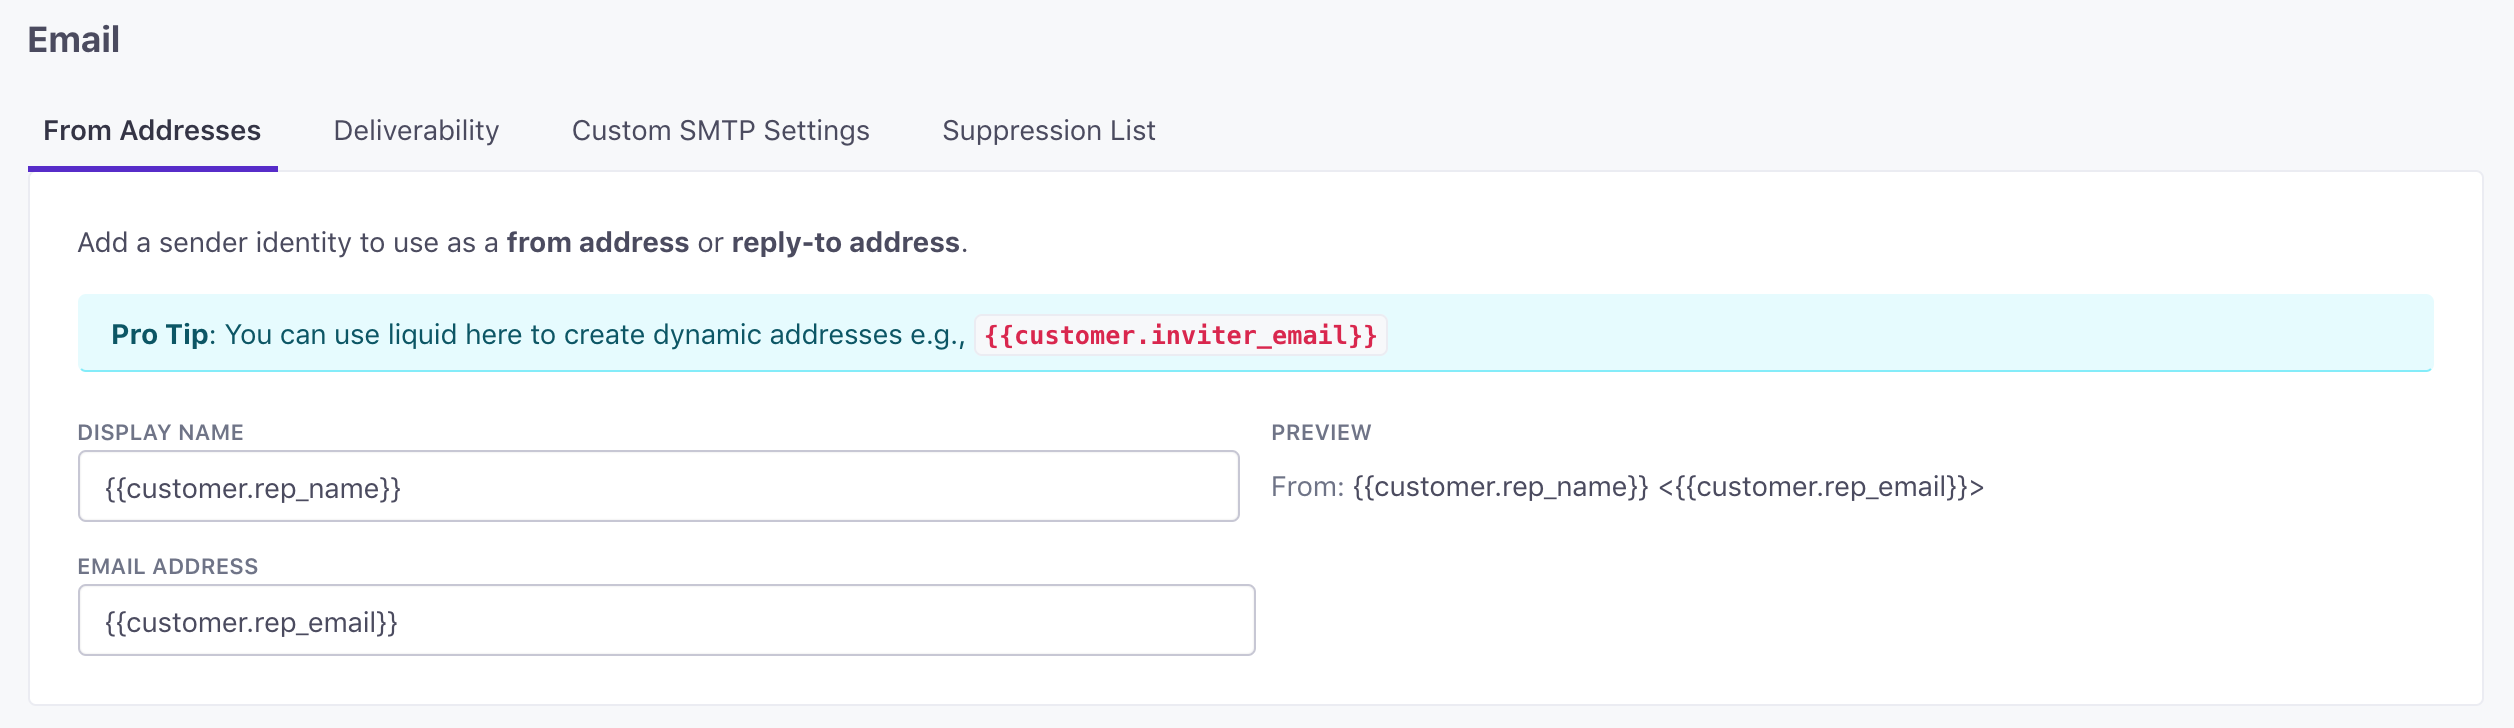
Make sure that you input the same terms that you used on the customer attribute. We used rep_name and rep_email earlier, so we made sure to reuse them here. If you used something else (support_rep, for example), your From Address might use the Liquid tags {{customer.support_rep_name}} and {{customer.support_rep_email}}.
Select that “From” address in composer
When you’re creating your onboarding campaign, select your new From Address:

And use the same Liquid tags when composing your message:
Tip! You can add all sorts of attributes for a personal support rep that can help you customise your message: city, phone number, and photo are a few examples.
That’s it! We’ll merge in the from address when we generate the email for that user.
Wrap Up
Assigning end users a personal support rep is a great way of approaching onboarding. This way, whenever people reply to onboarding emails, it goes straight to their rep, someone who is already familiar with them and their journey through the app. As a result, your customers get the tailored, empathetic support they deserve.
If you have questions about this recipe or how to apply it to your business, get in touch!

