Set up message channels
If you’re new here, you’ll need to set up message channels before you can send messages. The setup process, and your involvement, varies depending on whether you want to set up email, in-app messages, push notifications, or SMS/MMS, and so on.
Before you begin
Before you can send messages, you need to configure the types of messages you want to send. If your workspace is new, you can follow the onscreen setup guide, but you can always add channels later under Settings > Workspace settings.
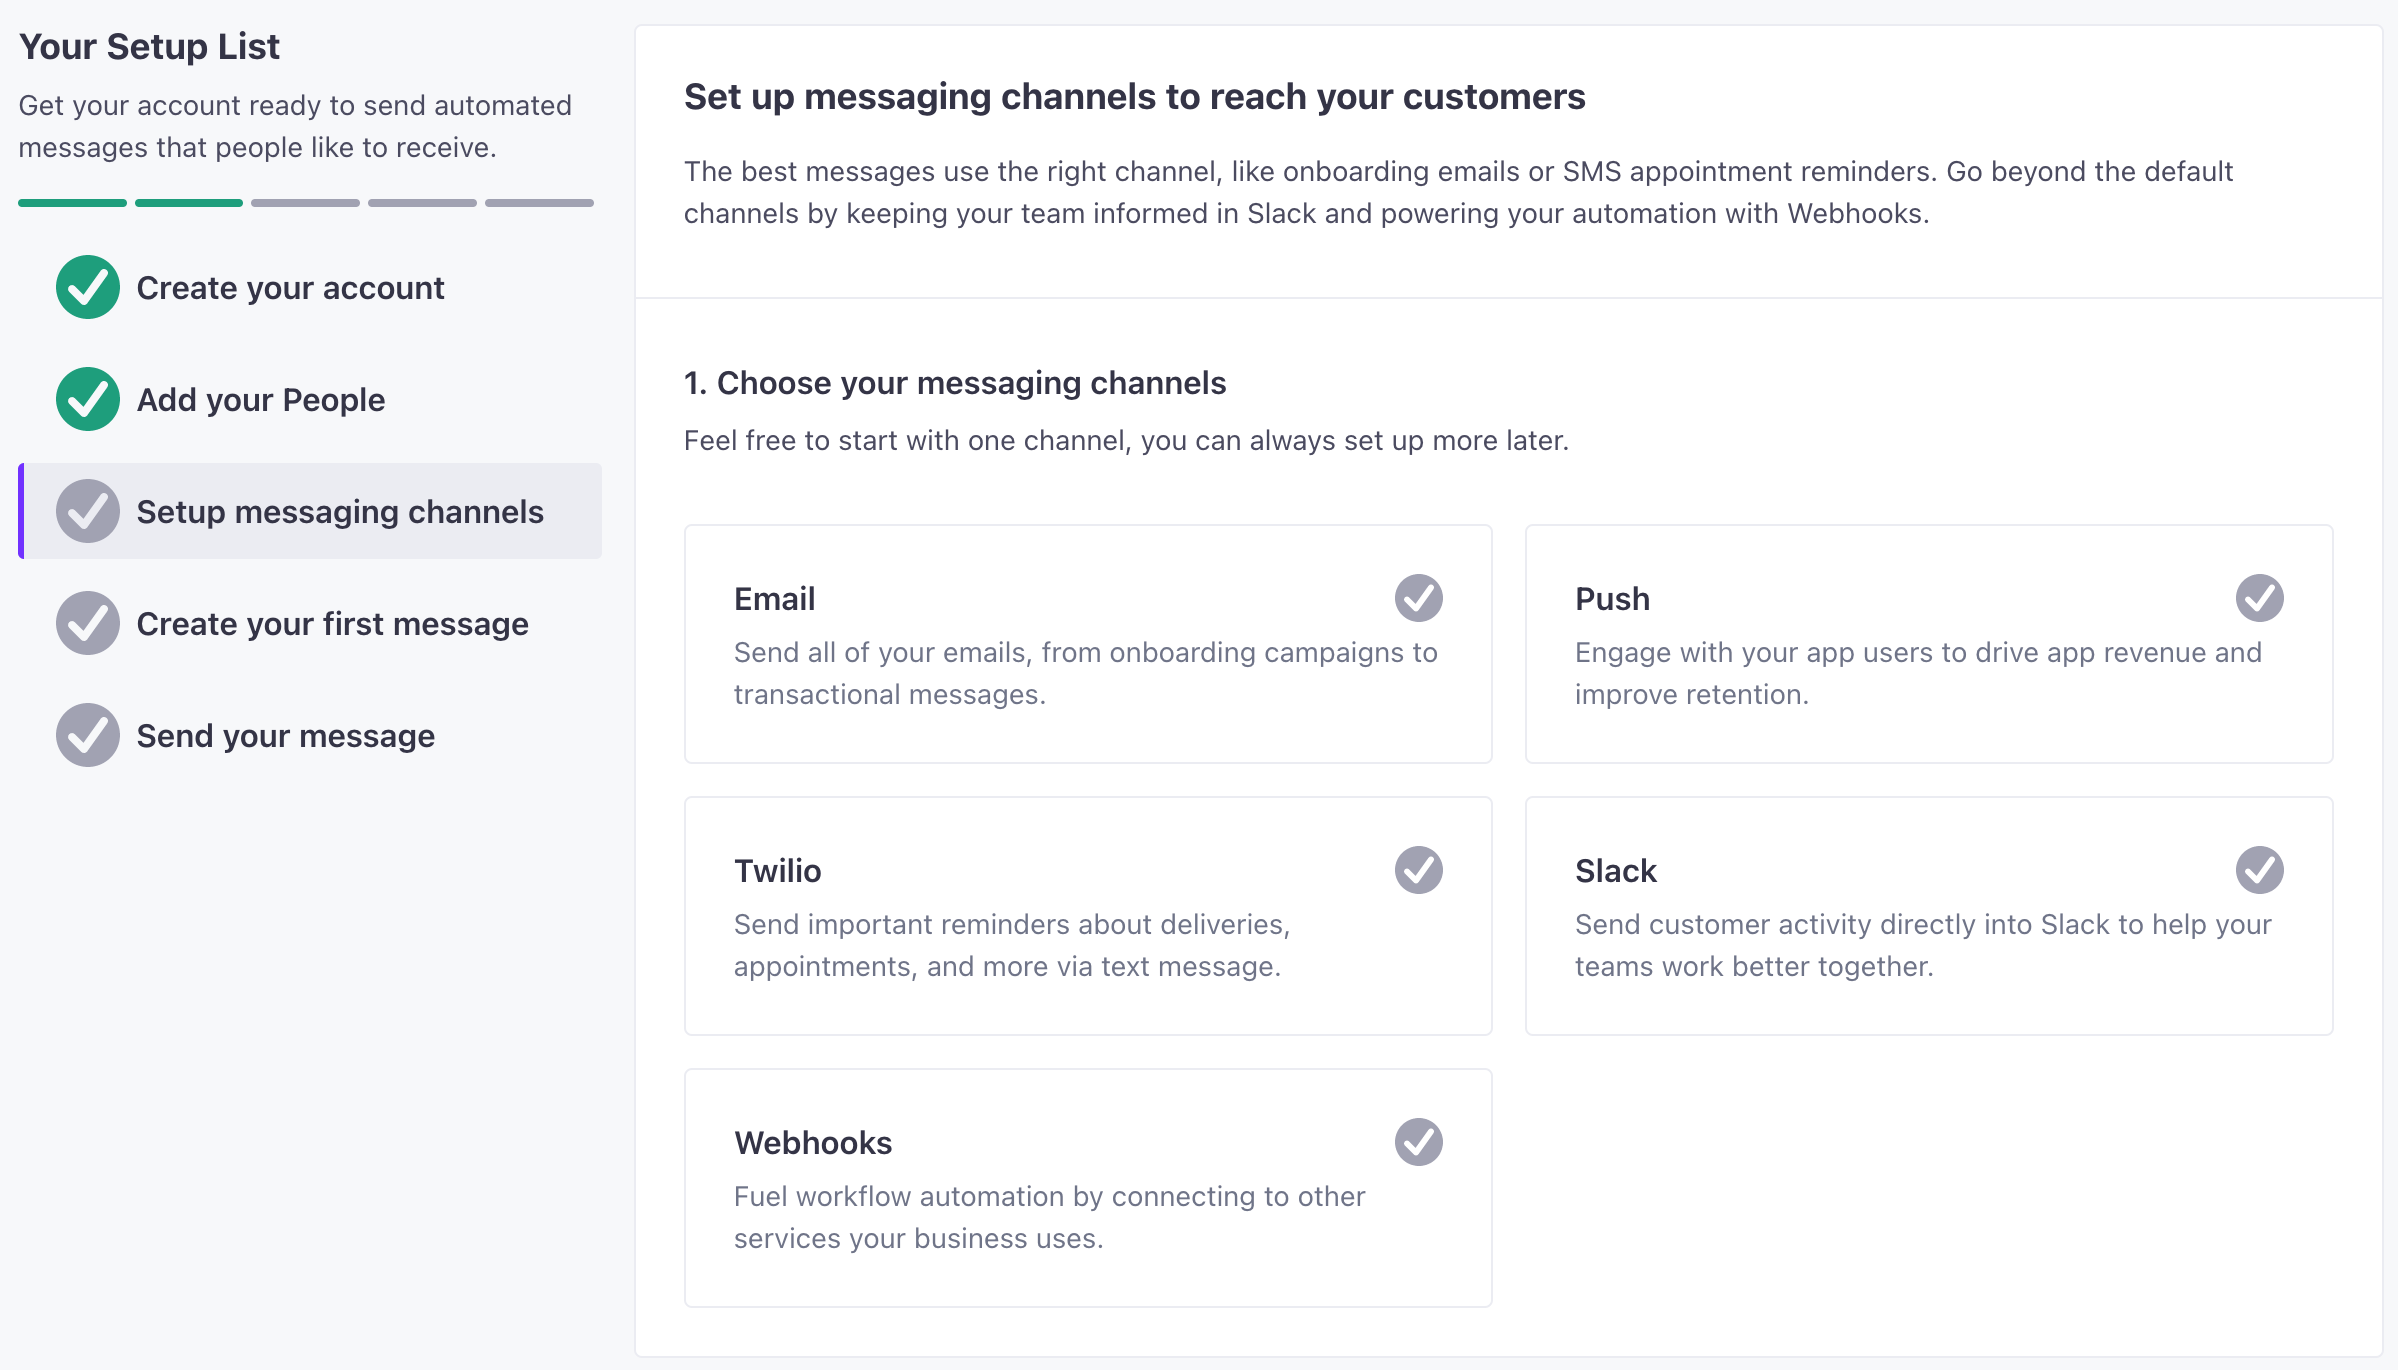
Some message channels take more time and effort to setup than others. Most require access to resources outside of Customer.io. You might need to work with your development team or other teams in your organization to set up your message channels.
For example, email setup often requires access to your domain provider and/or your email service provider. Push and in-app messages to mobile devices require some development effort.
Set up email
You can deliver email through us or use your own provider. If you’re new to email marketing, it’s easiest to send email through us and use our default settings! But if you already have an email provider, you can skip this section and use them instead.
We ensure that all email sent from us is authenticated and meets industry technical standards. We have a no-tolerance policy towards spammers and diligently monitor our network for denylistings, problematic senders, and other factors that could negatively impact your messages’ deliverability.
- Enter your domain—like
example.com.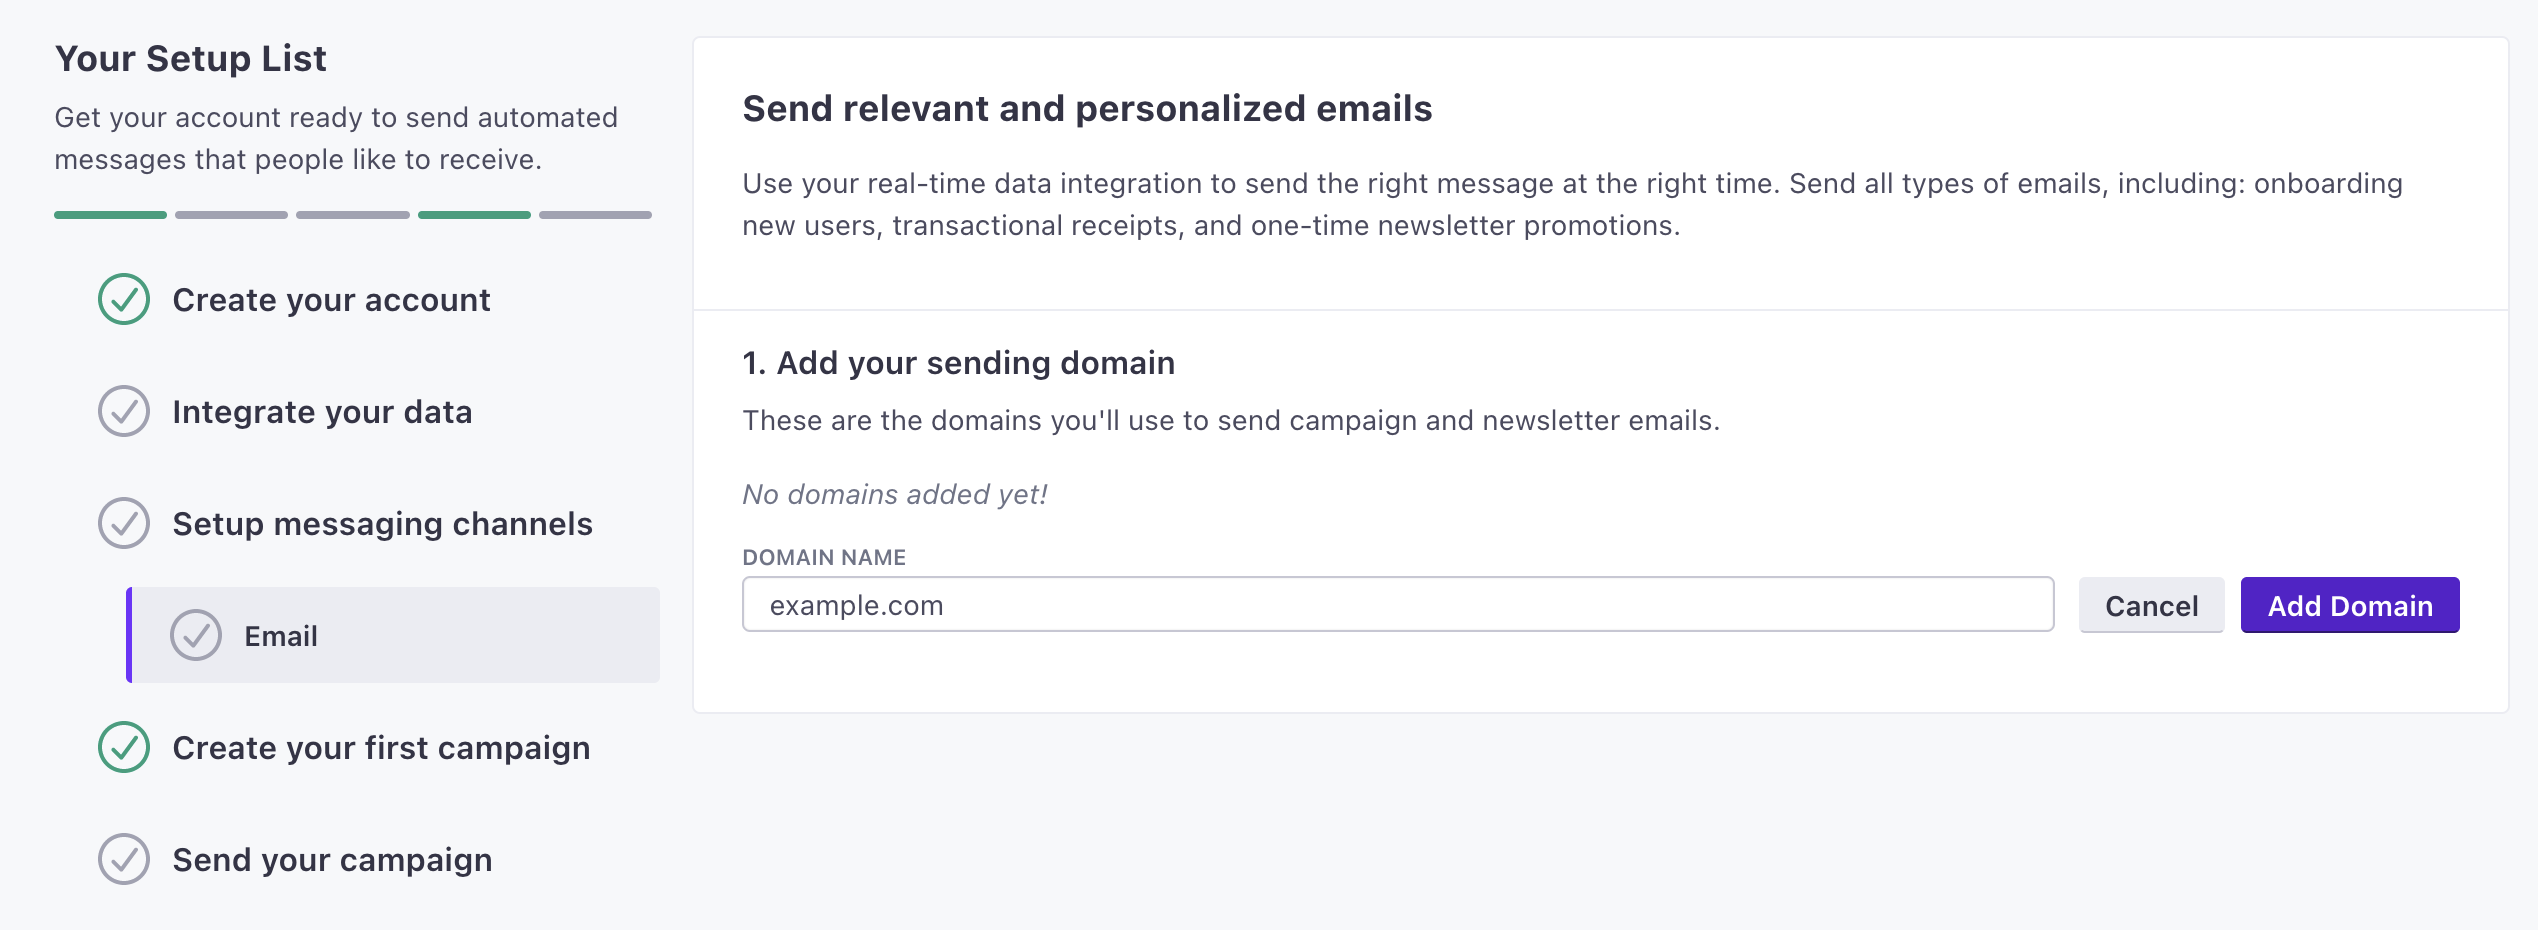
- Enter your From address(es). These are the addresses that your messages will come from.

- Verify and authenticate your domain(s). This involves adding some records to your domain host.
- (Recommended) Set up link tracking so you can record the links that people click in your messages. This involves adding a CNAME record to your domain host(s).
Start sending emails slowly!
If you’re just getting started with Customer.io, you’ll need to start slowly. Sending a large number of emails right away can hurt your domain reputation and deliverability. See our guide to sending slowly for more information.
Use your own email provider
You can also use your own account with any of the following fully-supported platforms:
Start sending emails slowly!
If you’re just getting started with Customer.io, you’ll need to start slowly. Sending a large number of emails right away can hurt your domain reputation and deliverability. See our guide to sending slowly for more information.
Set up in-app messages
You can enable in-app messaging and start setting up your messages right away, but you’ll need to integrate your website or mobile app with Customer.io before you can send messages. If you haven’t already, it’s easy to add our Journeys Web SDK to your site and start sending messages right away.
To send messages to your website visitors, you need to add the JavaScript client to your site.
To send messages to your mobile audience, you’ll need to integrate with our mobile SDKs.
- Go to Settings > Workspace Settings and click Get Started next to In-App.
- Click Enable in-app.
- Go to Content > In-App Messages and set up your Branding and Messages. Here’s how you’ll set up and use in-app messages in Customer.io.
Set up push notifications
We support push notifications for mobile applications; we don’t support web push.
If you’re starting fresh, you should integrate with our mobile SDKs. But, if your app is already set up to receive push notifications and you don’t want to integrate our SDKs, you should check out our integration guide.
You’ll also need to add your Apple Push Notification Service (APNS) and Firebase Cloud Messaging (FCM) credentials to your workspace.
| APNS | FCM |
|---|---|
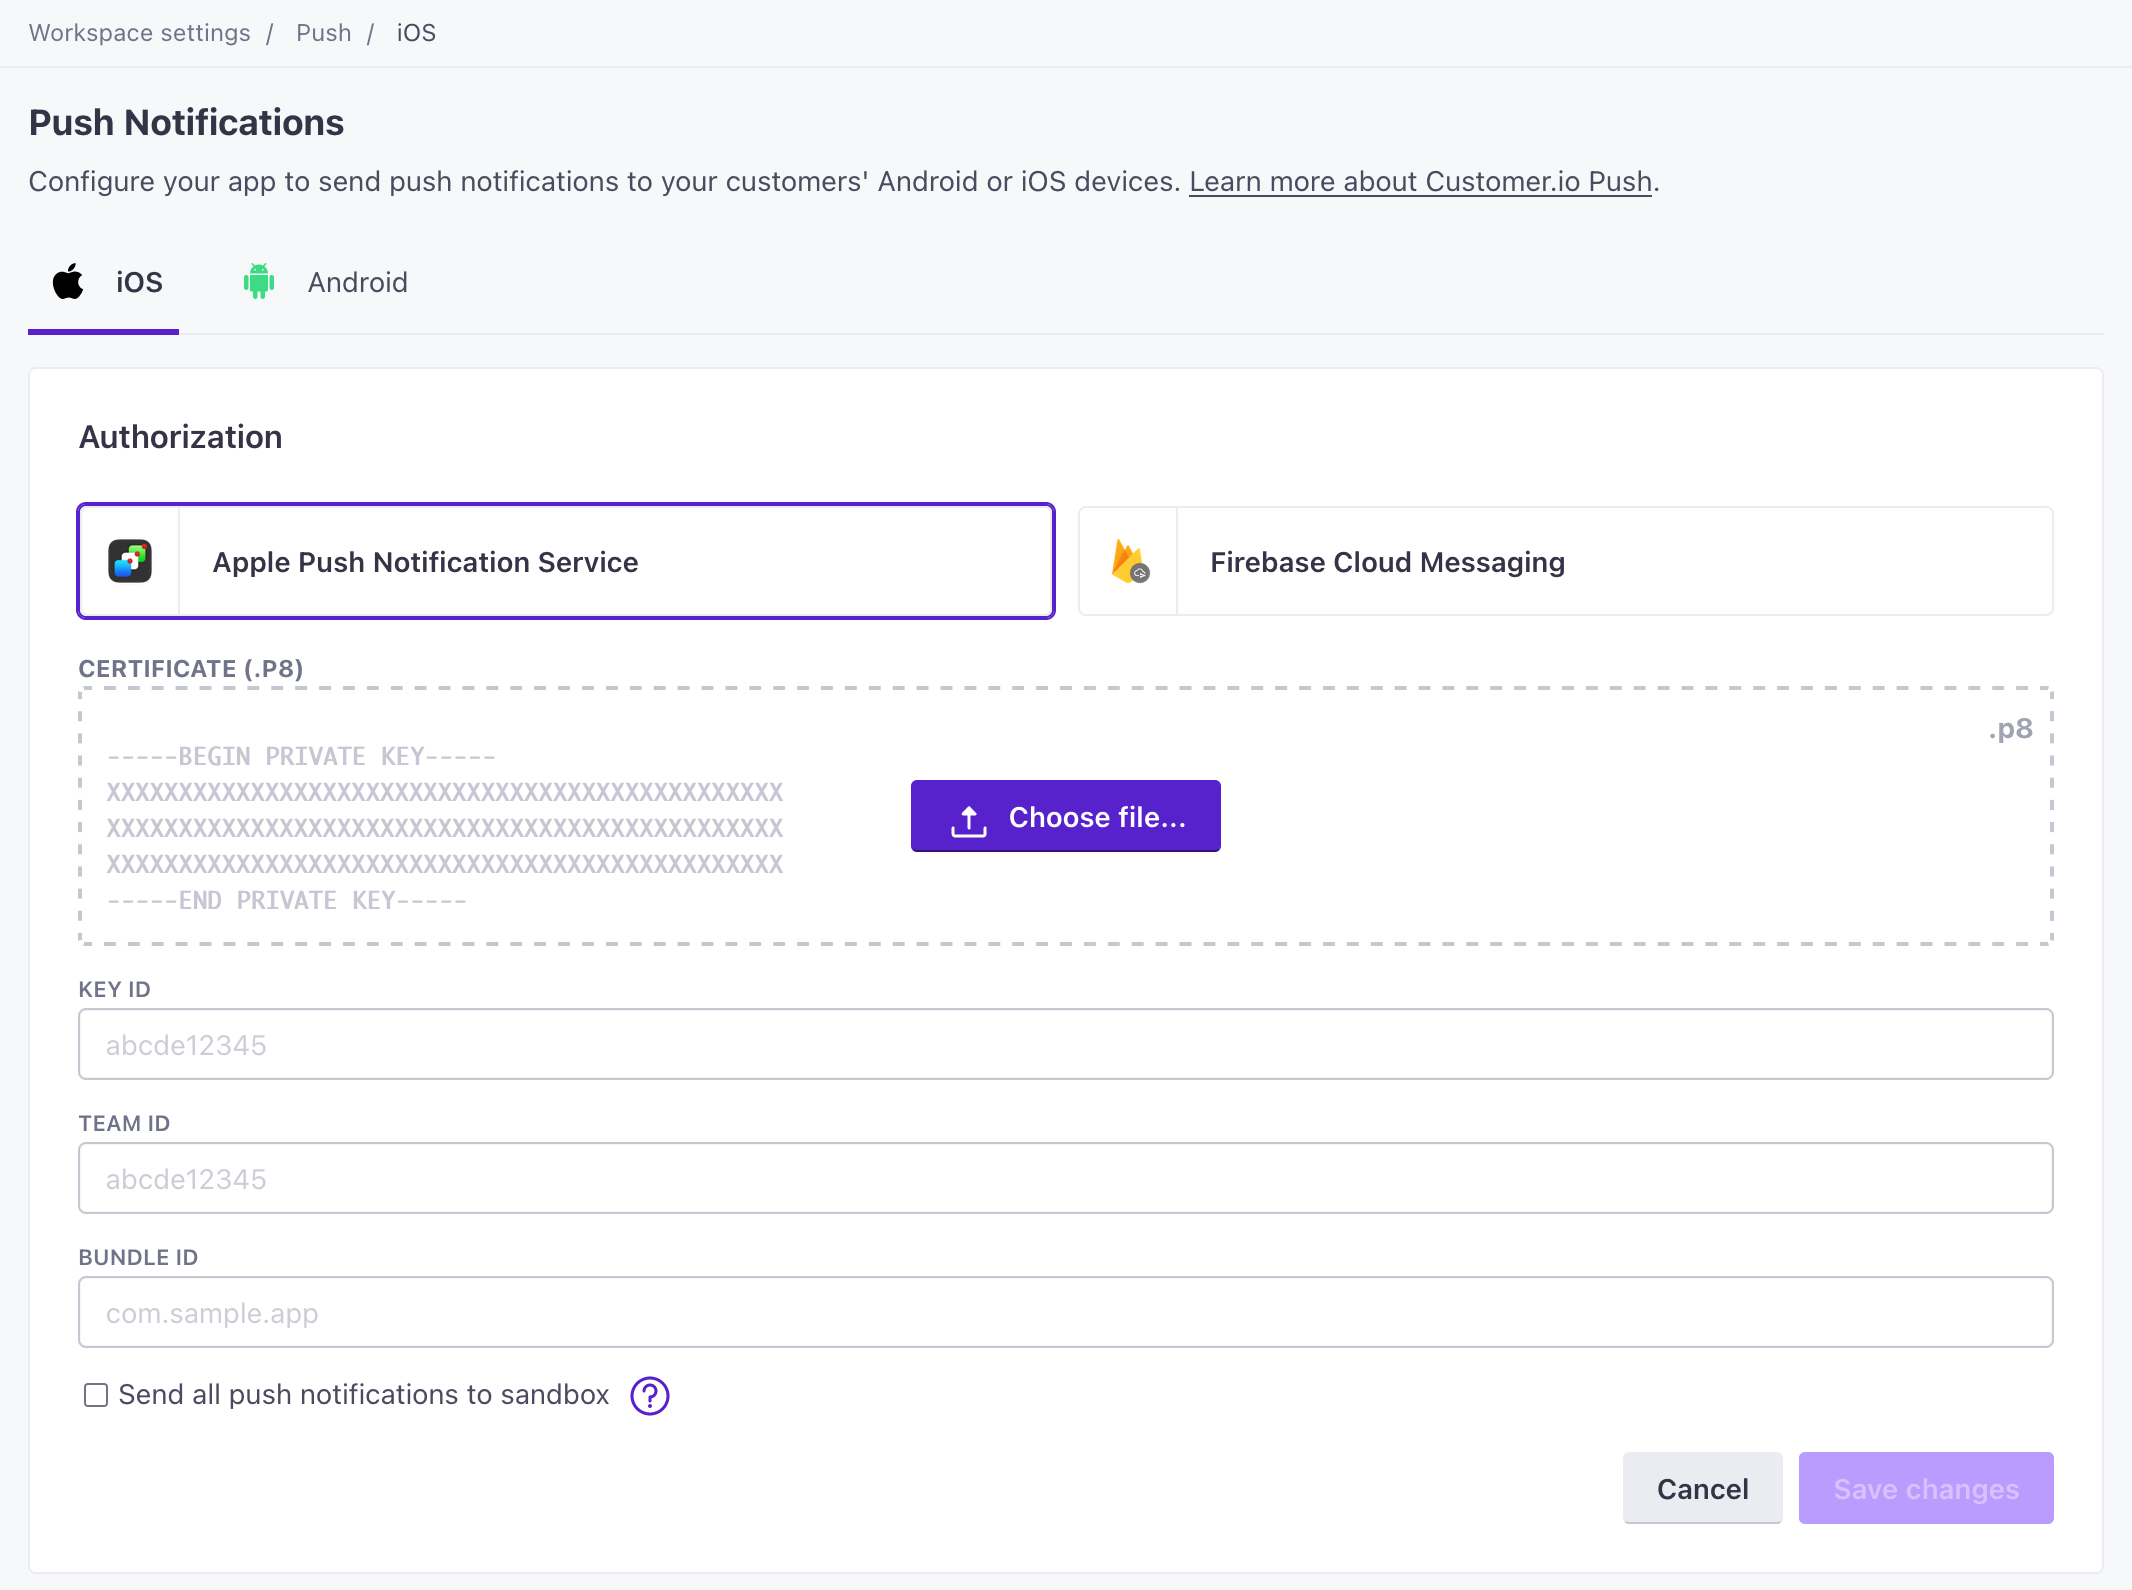 | 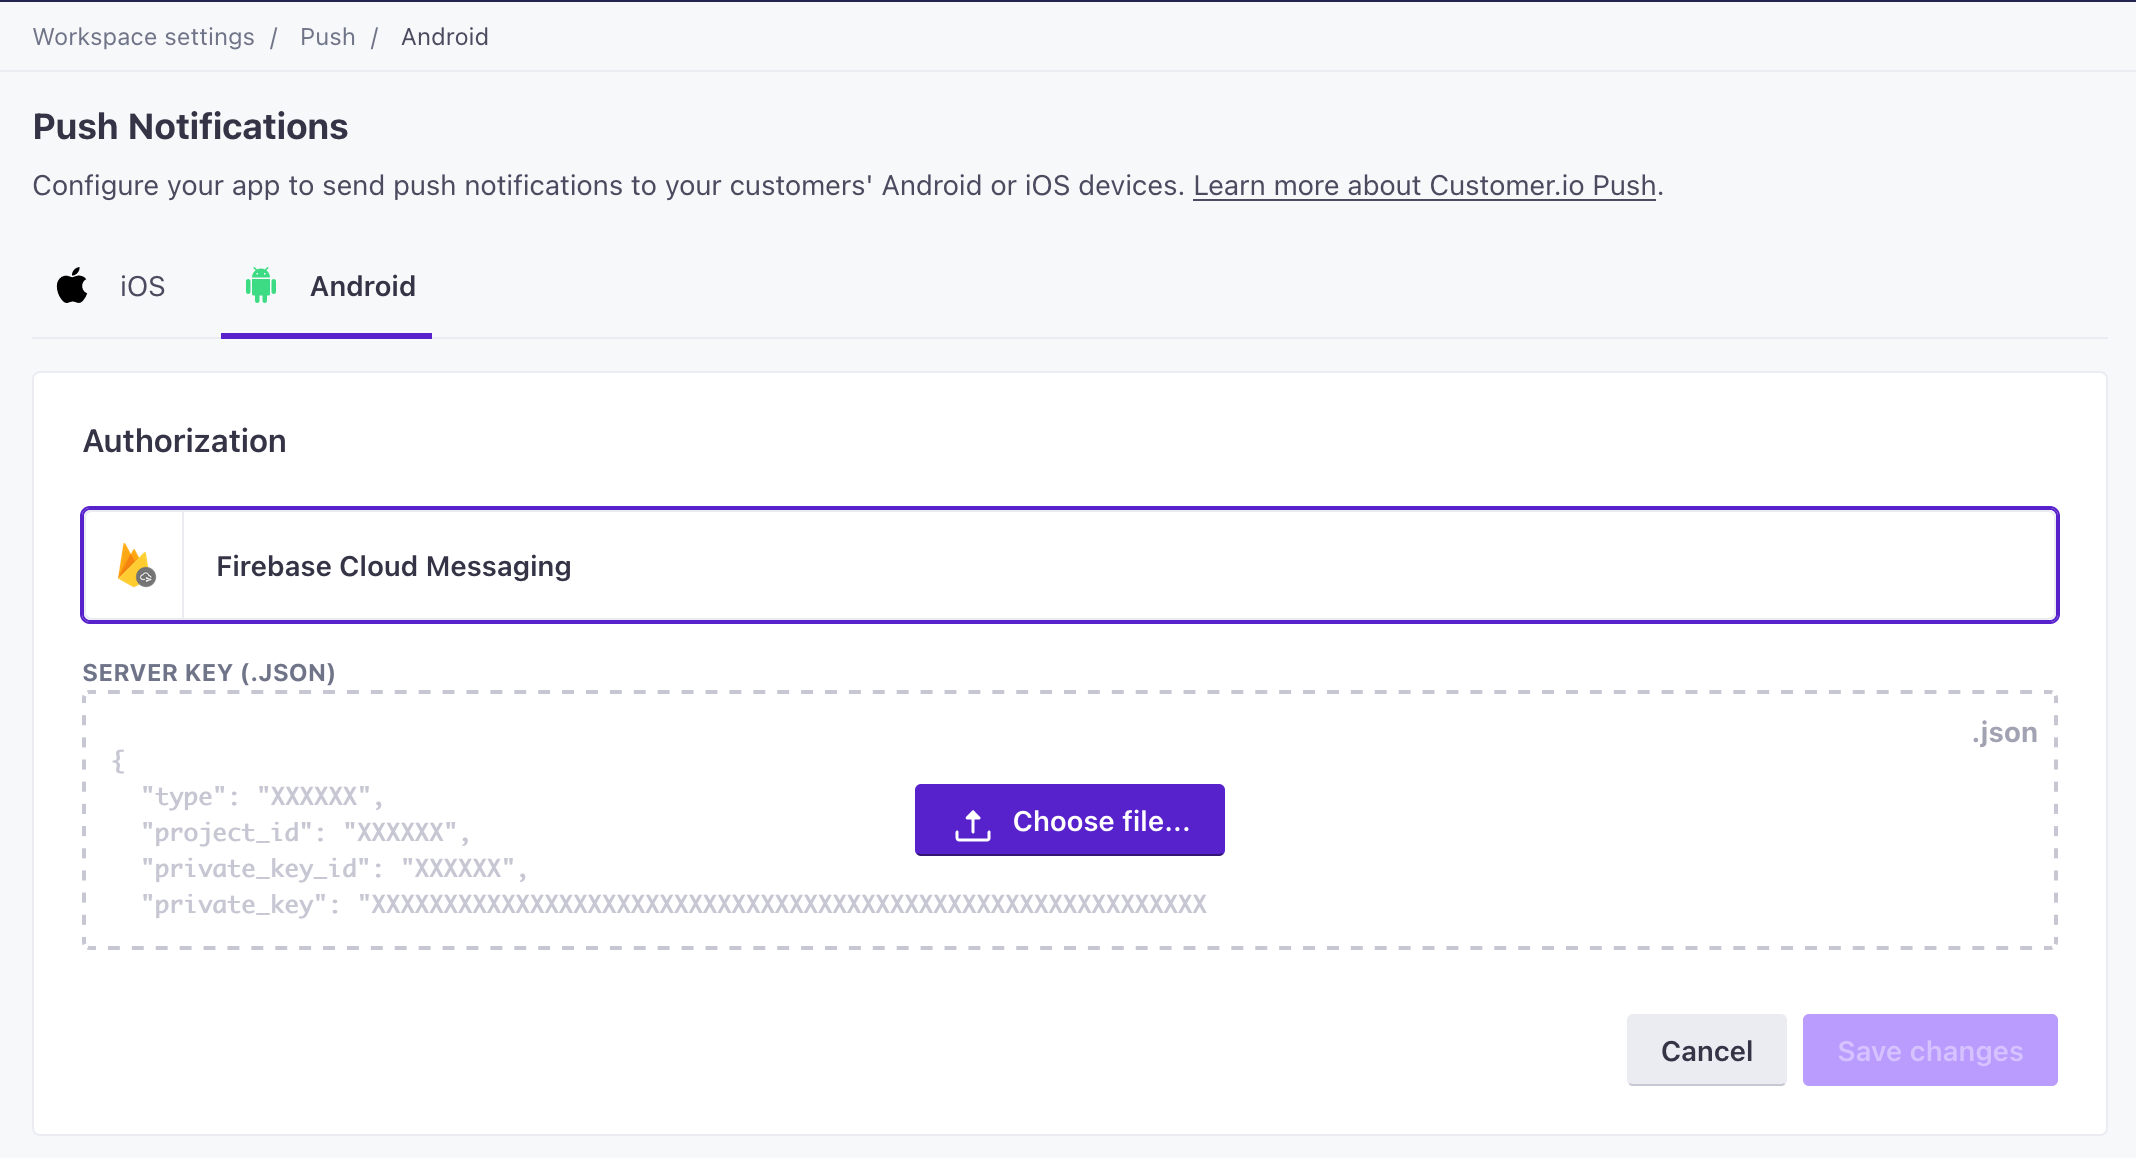 |
When you’re ready, you can send a simple push notification or use a custom push payload to send a push notification that includes a deep link or an image.
Set up SMS/MMS
We support SMS and MMS messages through Twilio. You’ll need to set up a Twilio account and add your credentials to Customer.io before you can send SMS messages. If you want to send messages through another provider, or to a region outside of North America, you can use other providers via webhooks.
To send Twilio SMS and MMS messages in Customer.io, you’ll need to have a Twilio account and the Sender phone number. This might be a regular phone number, short code, or an alphanumeric ID.
Twilio can lease these numbers to you. Or, if you have a paid Twilio account with Alphanumeric Sending enabled, you can send messages from an Alphanumeric ID instead of a Twilio phone number.
Set up a Twilio account if you don’t already have one. We recommend using a trial account to get started.
Set up a Twilio-specific Sender if you don’t already have one. You can’t use your own phone number to send SMS; you need to purchase a number from Twilio. If you already set up your sender number, you’ll select it when you compose messages.
In your Customer.io workspace, Go to Data & Integrations > Integrations > Twilio SMS and add your Account SID and Auth Token. You’ll find these values in your Twilio dashboard. We only support credentials associated with the US Twilio region.


Other message channels
- Slack: Enable Slack and authorize Customer.io to send messages to your Slack workspace.
- Webhooks: You can use webhooks to create quick, if-this-then-that style integrations that send data to, or trigger actions in, systems outside of Customer.io.

