Integrate with Customer.io
How it works
While you can add people to Customer.io manually or upload CSVs, you’ll get the most out of our platform when you integrate data sources and send data to Customer.io programmatically.
You can integrate with either Data Pipelines and Journeys; both provide ways to get people, events, and other data into Customer.io. But we generally suggest that you integrate with Data Pipelines rather than integrating directly with Journeys.
Data Pipelines represents the most flexible integration path: it’s the best way to get data into, and out of, Customer.io. While Journeys offers some integration options, it’s primarily a messaging platform. It’s where you’ll spend most of your time after you’ve integrated with Customer.io.
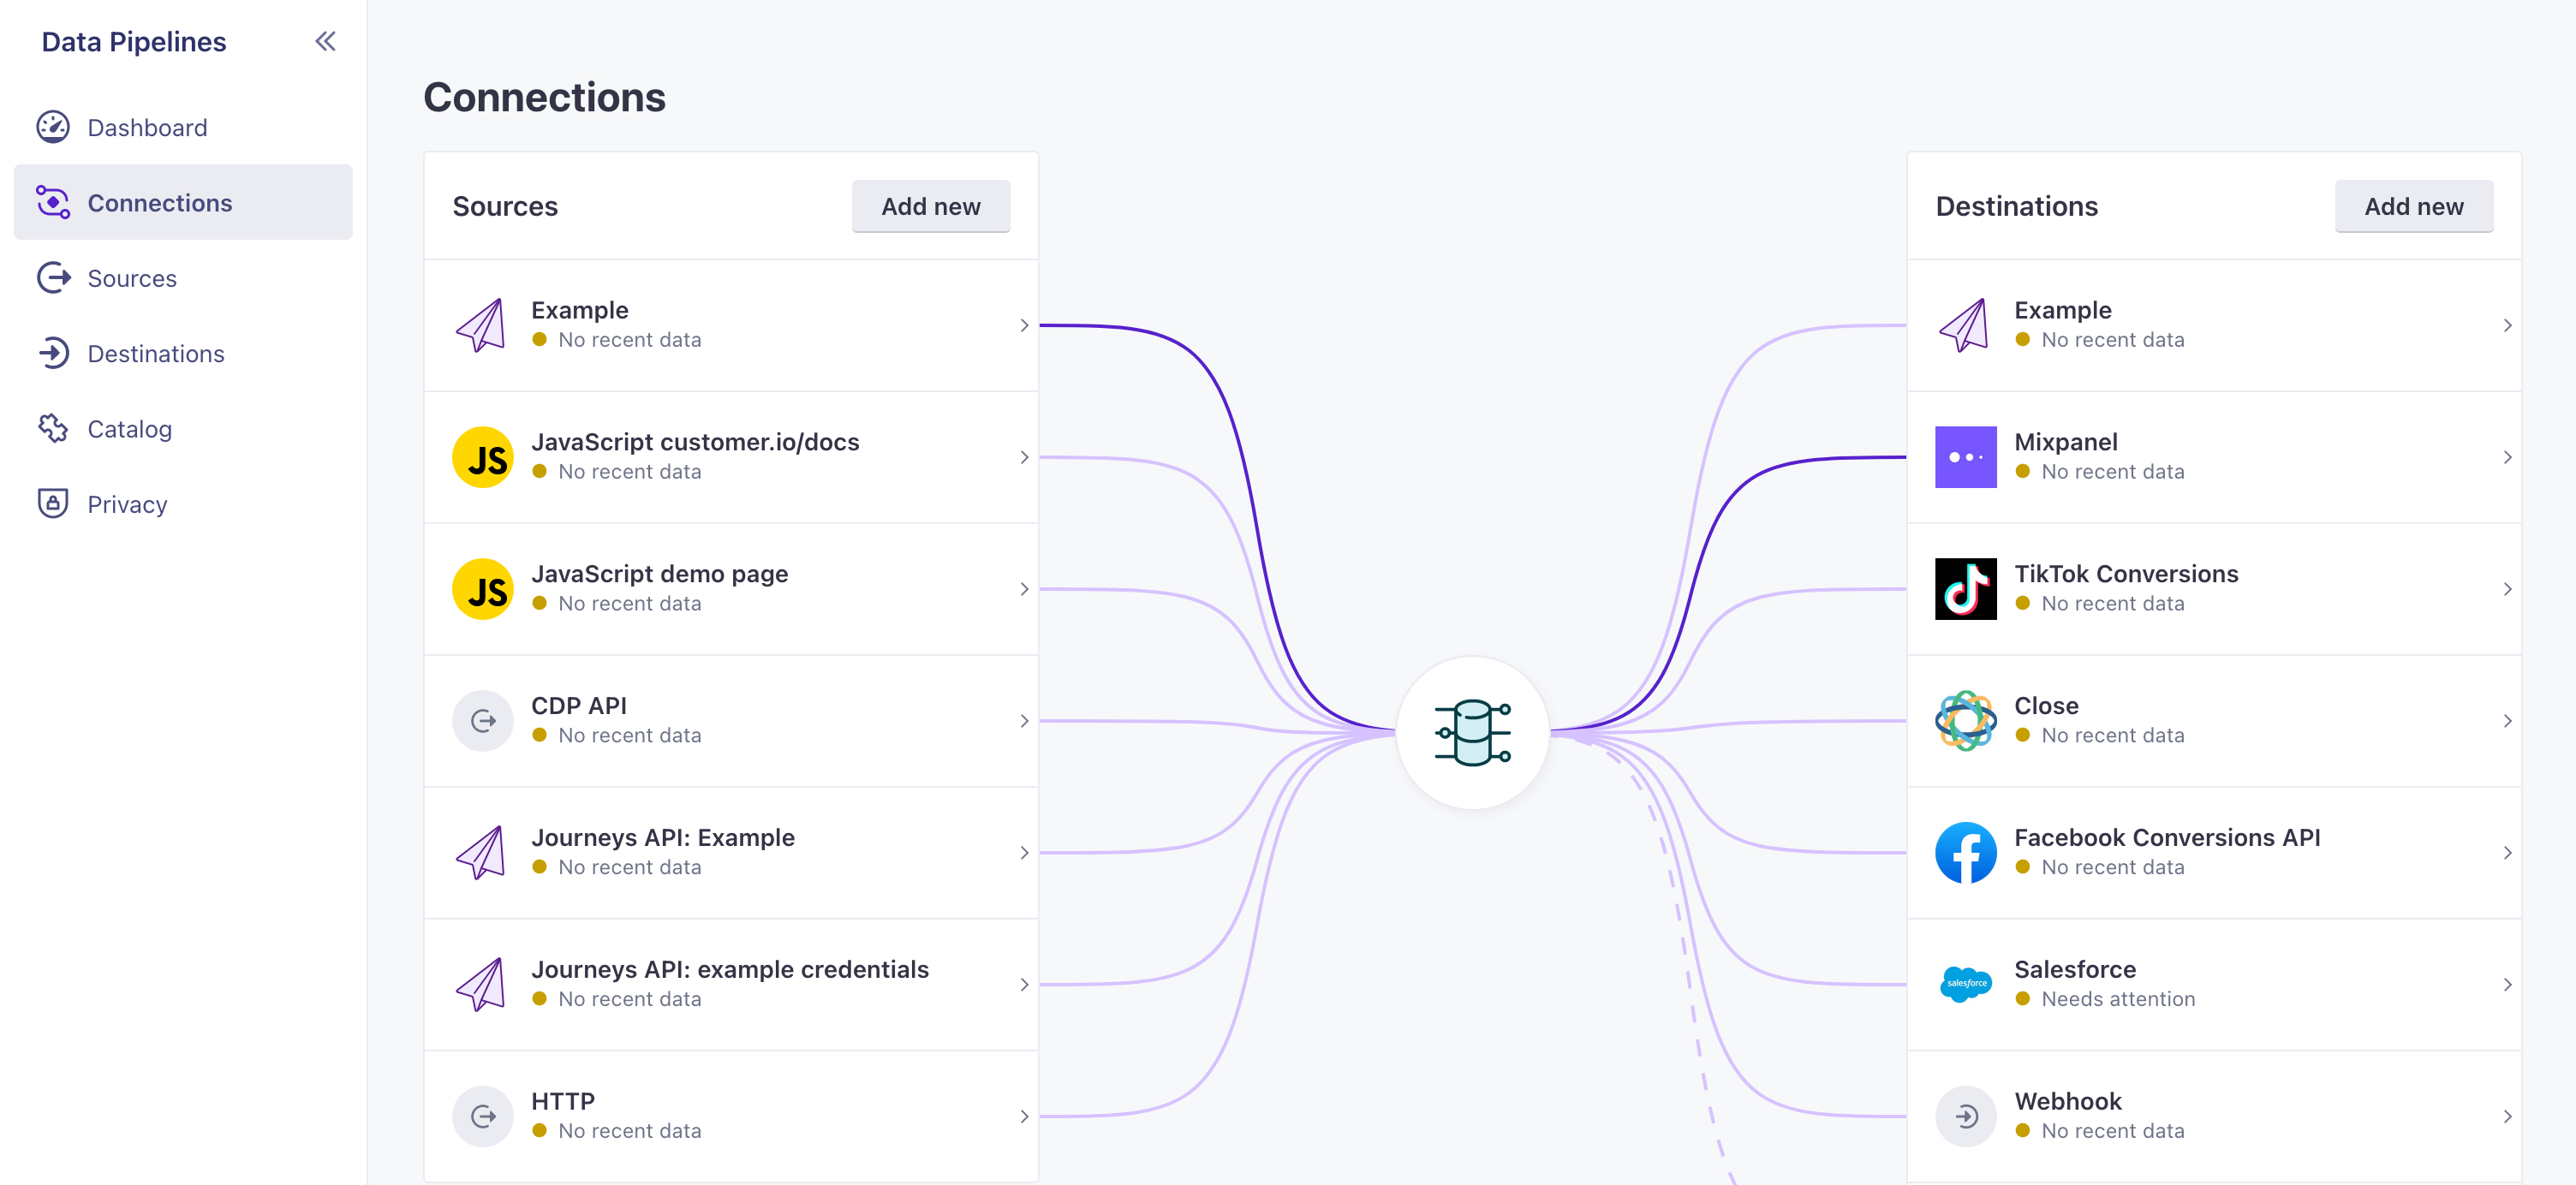
You can integrate all your data sourcesA source is a website or server that you want to capture data from—it’s a source of data! with Customer.io—your website, mobile apps, and databases.
data come from?} d-->|Website|a d--->|Mobile App|f(Integrate with a mobile SDK) d--->|Database or Data Warehouse|g(Integrate with a Data Pipelines
Reverse ETL source) a{Will you send
in-app messages?} a-->|Yes|c(Integrate with the
Data Pipelines JS Source) a-->|No|e(Integrate with a Data Pipelines
Server Source library) style c fill: #FFEDF0 style e fill: #FFFAE5 style f fill: #E6FAF3 style g fill: #E5FBFE
| Integrations (Sources) | Description |
|---|---|
| RecommendedJavaScript SDK | Provides a simple path to support Customer.io on your website, including support for in-app messages. |
| Server-side libraries | Support Customer.io in your Node.JS, GoLang, or Python server. If you’re running a web server and want to send in-app messages, you should use our JavaScript library instead. |
| Mobile SDKs | Support push notifications and in-app messages in your mobile app. We support iOS, Android, React Native (including Expo), and Flutter. |
| Reverse ETL | Add and update people, events, objects, and relationships from your backend database. |
| Incoming webhooks | Trigger campaigns from any external service that can send data to Customer.io. |
| Outgoing webhooks | Send data to a URL as a part of campaigns. Provides a low/no-code way to integrate Customer.io with external services. |
| Direct API Integration | If you want to integrate with a database or language we don’t yet support, you can integrate directly with our APIs. |
Data sources and destinations
When you integrate with Customer.io, you’ll send data in from sourcesA source is a website or server that you want to capture data from—it’s a source of data! like your website or mobile app. You can also send data out to destinationsA destination is a place that you want to send data from one or more sources to. You can use your own workspace as a destination; send data to another service; or send data to your data warehouse. like your analytics platform and other services.
Most of your integration effort involves setting up sources. To get data into Customer.io, you’ll typically incorporate our libraries and set up calls from your sources to Customer.io—like identify to add people, track to send events, and so on.
Then—if you want—you can set up destinations that you want to forward data to. When you set up destinations, you can re-shape your data in Customer.io to fit the needs of each destination; this lets you use Customer.io as a bridge between your data sources and all the other important parts of your martech stack. But again, you don’t need to set up destinations if you only want to send data to Customer.io.
There’s one special case: we treat Journeys as a destination. So if your data source is your website, then your destinations are Journeys—and anywhere else you want to send your data.
Database)] end subgraph b[Destinations] direction LR e((Customer.io
Journeys)) f(Your analytics
platform) j(Another
Destination) end c-->g-->|Standard/required
integration path|e g-.->f g-.->j h-->g i-->g g((Customer.io
Data Pipelines))
Data Pipelines is free to use with Journeys
Data Pipelines charges for calls to destinations—except when your destination is Journeys. So if you’re only using Journeys, you can use Data Pipelines for free! This sets you up for future integrations if you decide to add more destinations later, without having to pay more now or update your integrations later.
Your people are your data
In Customer.io—and in most Marketing stacks—your “data” typically refers to people who use your services, the things you know about them (their attributes), and the events they perform. You can use this data to trigger and personalize messages, so you send the right data to the right people at the right times.
When you identifyThe Customer.io operation that adds or updates a person. When you identify a person, Customer.io either adds a person if they don’t exist in your workspace, or updates them if they do. Before you identify someone (by their email address or an ID), you can track them anonymously. a person, you’ll usually capture their attributesA key-value pair that you associate with a person or an object—like a person’s name, the date they were created in your workspace, or a company’s billing date etc. Use attributes to target people and personalize messages. Attributes are analogous to traits in Data Pipelines.—things like their name, email address, and more. You can use attributes to personalize messages.
When people do things, you’ll send events into Customer.io that track their activities—like when a person visits a page, clicks a button, or starts watching a video. You can use events to trigger campaigns and personalize messages based on ephemeral data and message them based on the product pages they visit, the videos they watch, the forms they fill out, and so on.
People are most of your data
We’ve simplified things by talking about people, but you can also capture objectsNot to be confused with a JSON object, an object in Customer.io is a non-person entity that you can associate with one or more people—like a company, account, or online course. You can use objects to message people based on changes to their company, account, or course itinerary. to represent groups that people are related to—like companies they work for, online classes they take, or recreational sports leagues they belong to.
Plan your integration
Different kinds of data use different functions across the system. Knowing what data you want to capture can help you understand what calls you’ll need to make and when. For example, when you want to record attributes, you’ll use an identify call.
As you integrate with Customer.io, think about the data that you want to store:
- The identifierThe attributes you use to add, modify, and target people. Each unique identifier value represents an individual person in your workspace. values you want to use for people and the attributesA key-value pair that you associate with a person or an object—like a person’s name, the date they were created in your workspace, or a company’s billing date etc. Use attributes to target people and personalize messages. Attributes are analogous to traits in Data Pipelines. you want to capture about them. you’ll add/update people with
identifycalls. - The events you want to record: you’ll record events with
trackcalls. - The groups and relationships you want to maintain: you’ll record objects and relationships with
groupcalls.
You can store all kinds of data in Customer.io. But be careful when handling certain kinds of data. In general, you should not send us sensitive personal information like bank account information, credit card numbers, personal health information and so on.
You don’t have to store everything in your workspace
When you integrate with Data Pipelines, you can choose which data you want to store in your Customer.io workspace and which data you want to forward to other destinations.
Integrate with Customer.io
You’ll integrate with Customer.io through Data Pipelines. You’ll set up sources, like your website, to send data to destinations—like our Journeys platform, your analytics platform, or your backend database. Almost all the work you’ll do is in setting up your sources. Then you can set up and customize the data you forward to destinations.
Add a JavaScript Source
In most cases, we suggest that you start with your web source using our client-side JavaScript library, because it not only acts as a data source but it also lets you send in-app messages to your audience. We’ll reference this library in our examples. But we also offer server-side SDKs in other languages and other sources.
- Go to the Data Pipelines tab. On the Connections page under Sources, click Add New.
- Select a source and then click Add Source.
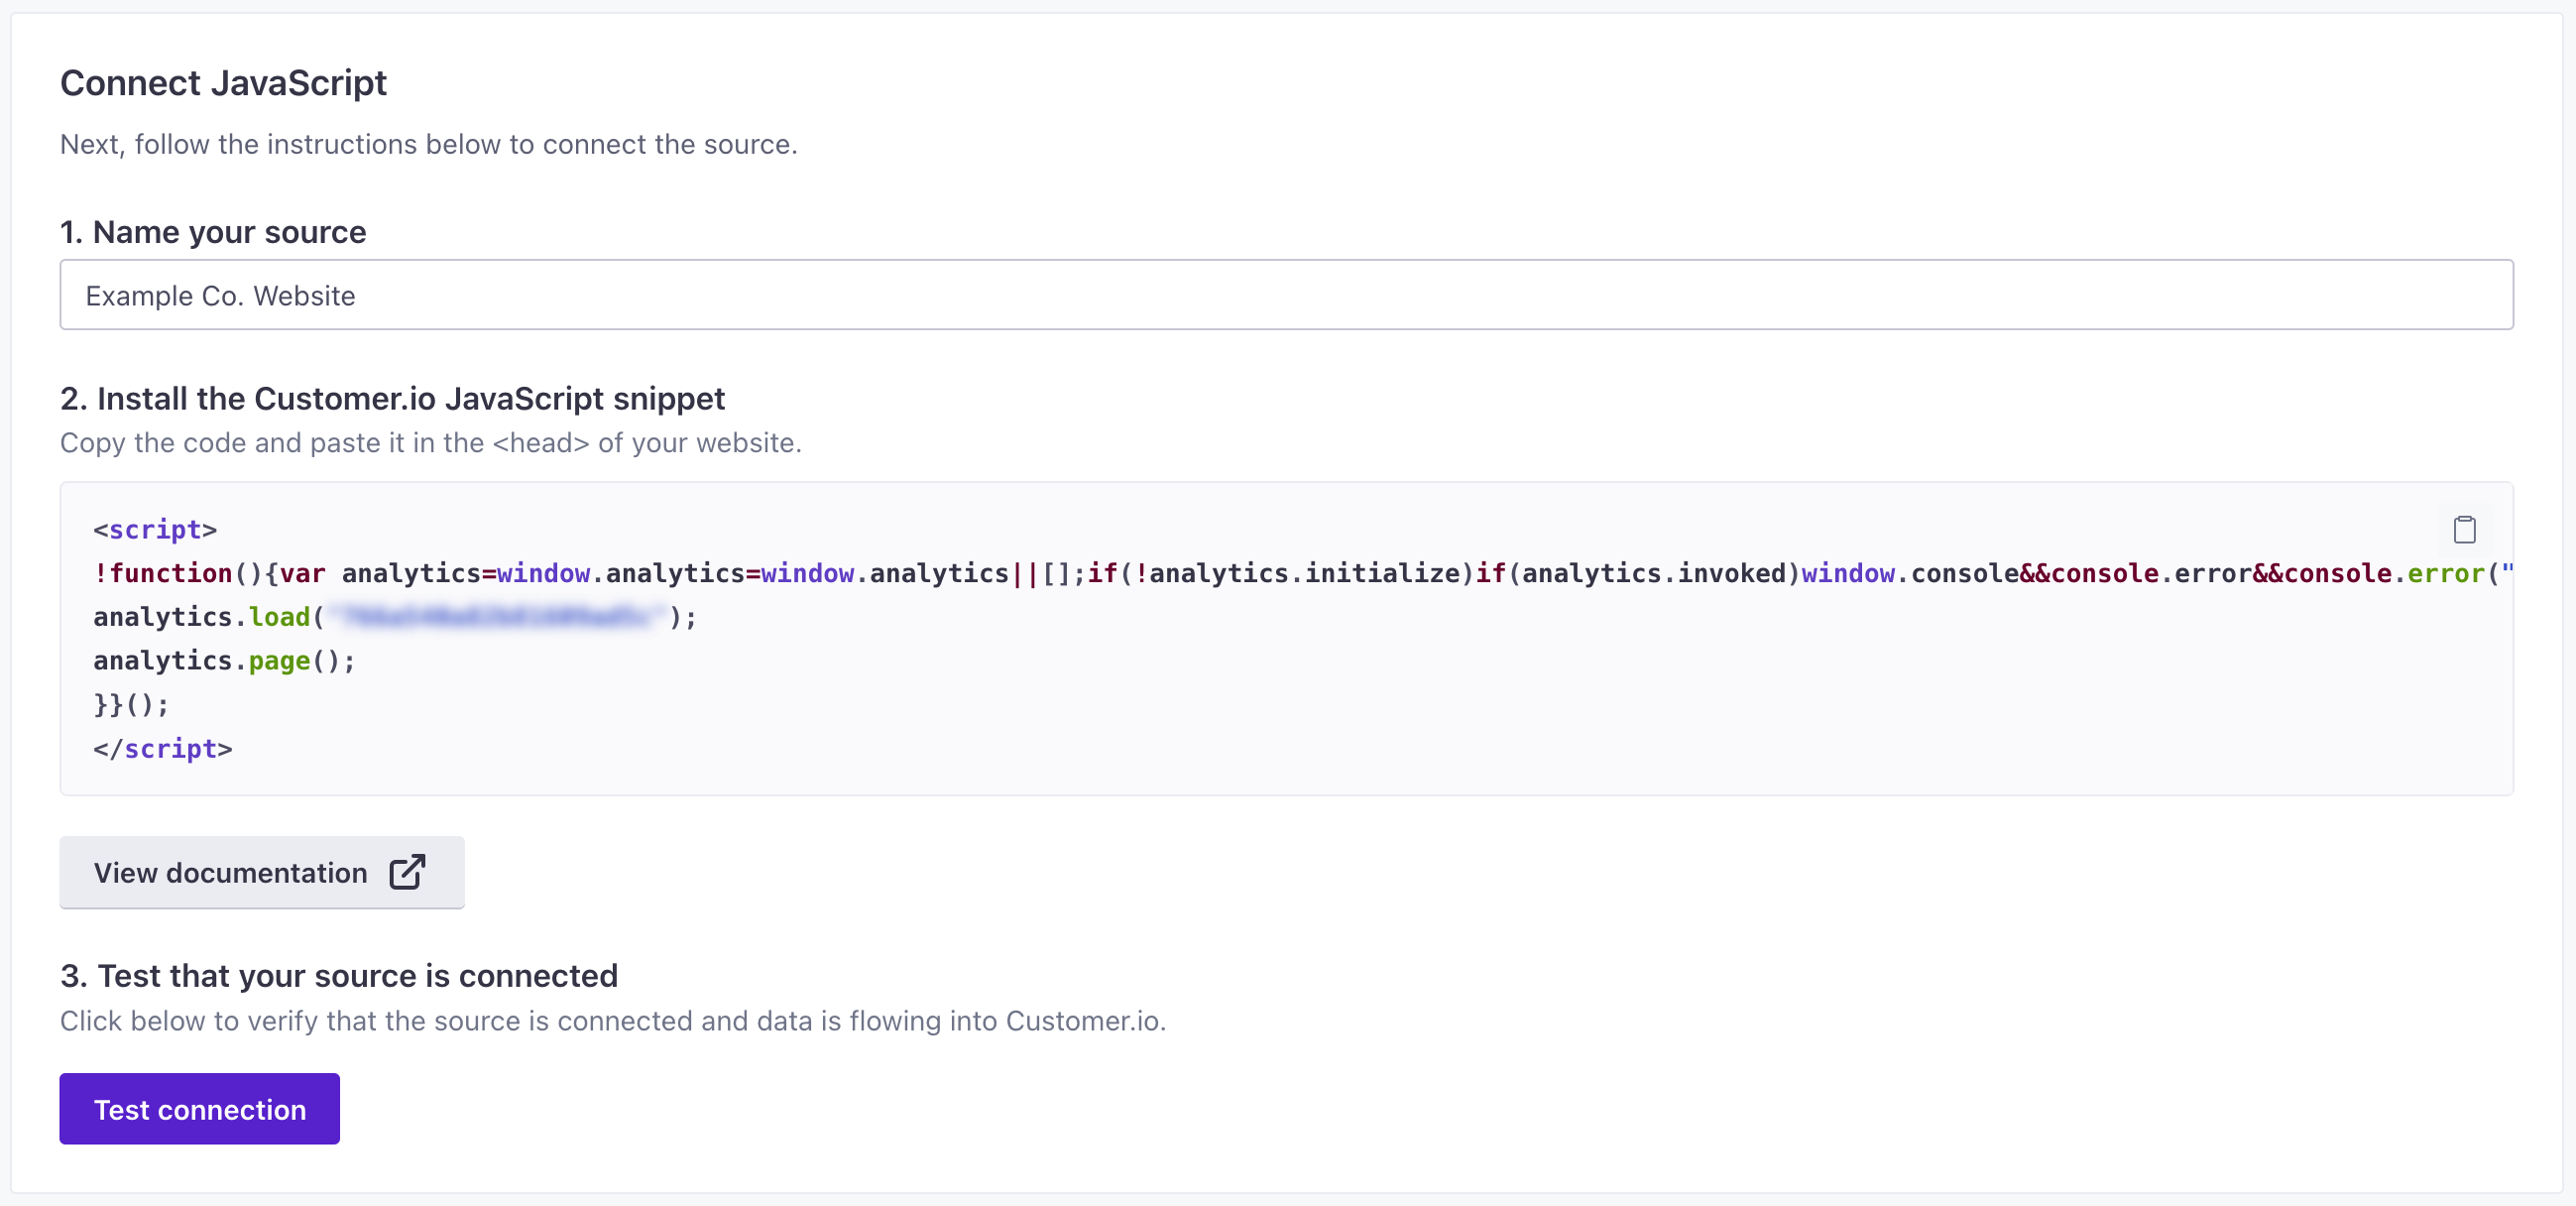
- Enter a Name for the source, and click Submit. You should give your source a name that helps you identify not only the source medium (“JavaScript” in this case), but helps you identify the resource you’re capturing data from—like “company website” or “community forums.”
- Under Installation Instructions, you’ll find relevant code that you need to add to your website. Using our JavaScript source as an example, you’ll paste the code snippet in your website’s
<head>tag.
You’re now ready to start sending calls to Customer.io. But we also recommend that you incorporate in-app messaging support so you can send relevant messages to your website visitors.
Add in-app messaging support
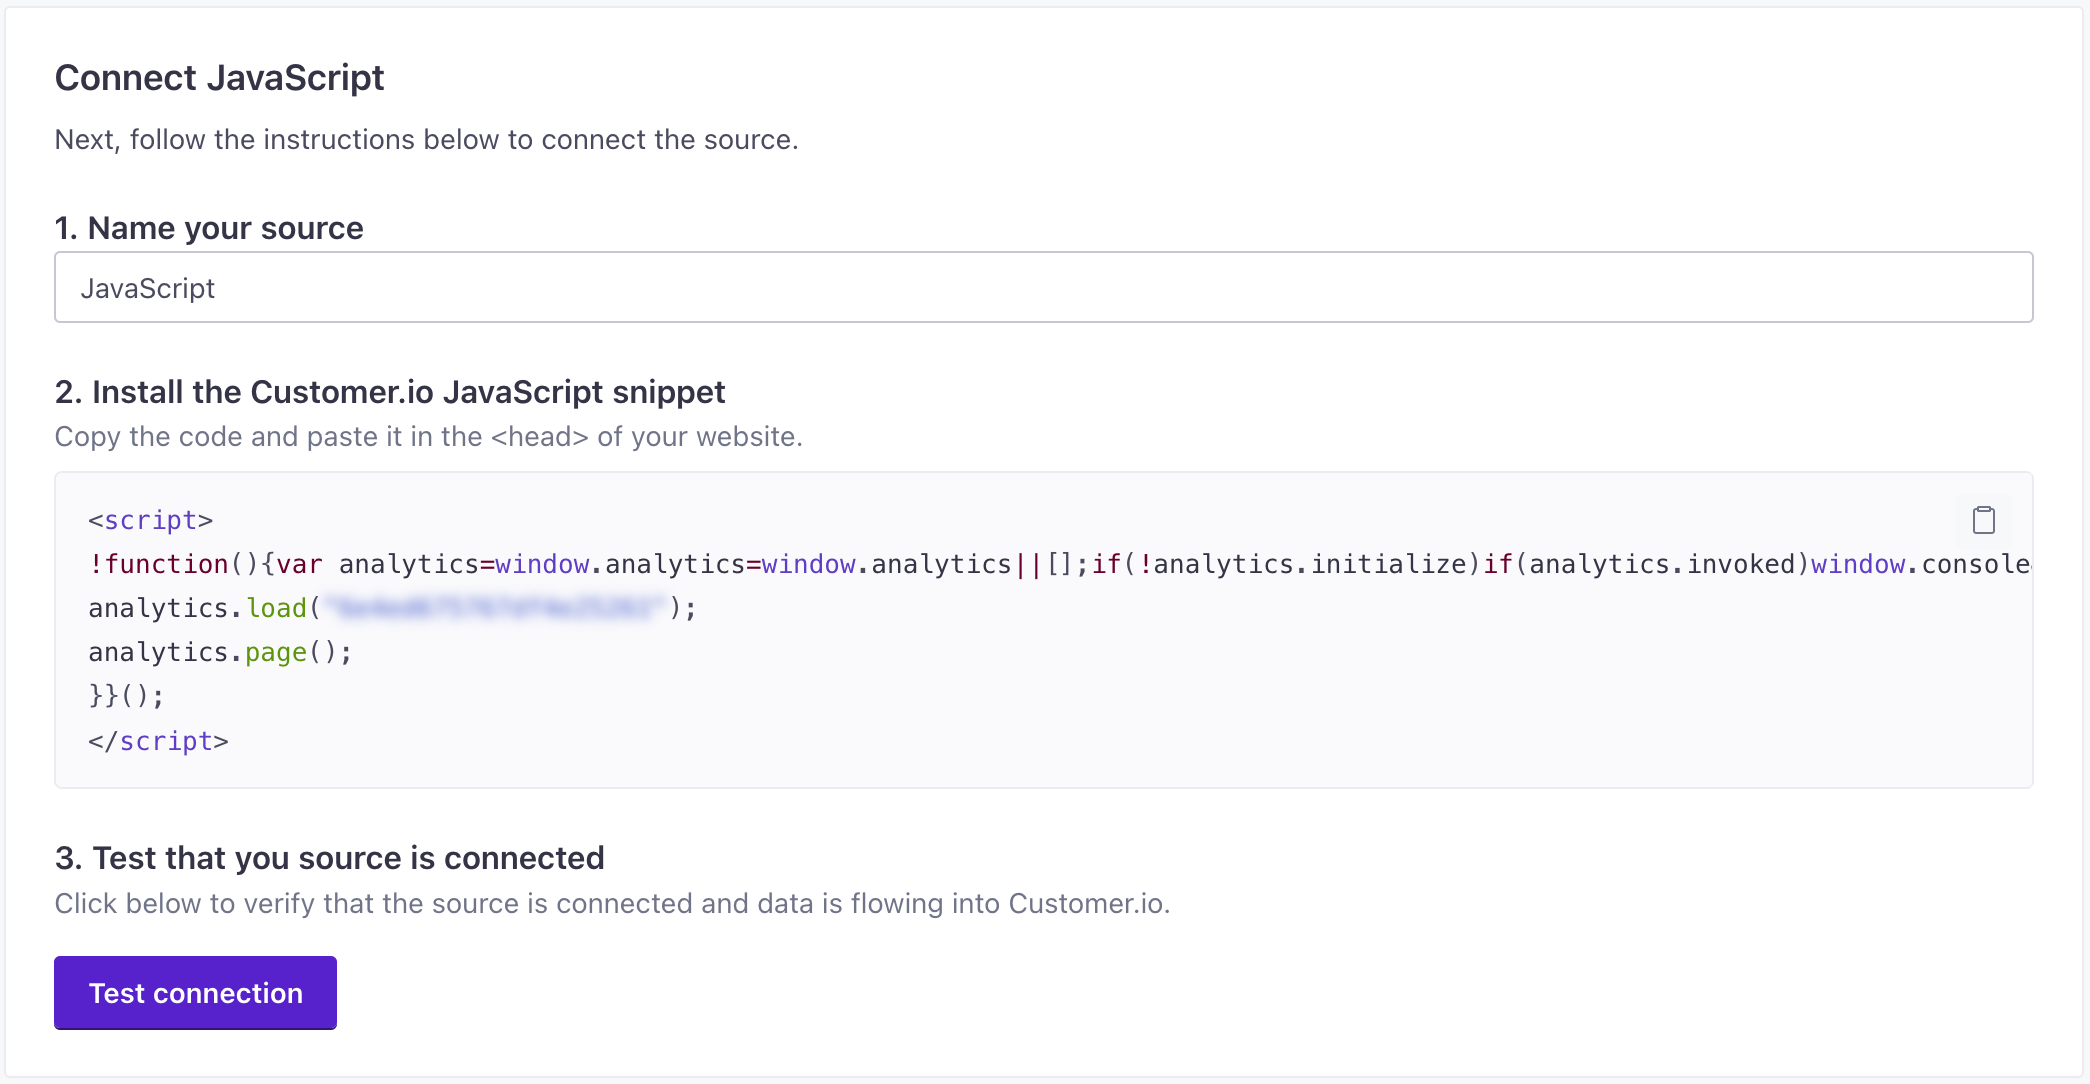
If you want to support in-app messaging, you’ll need to add a couple of lines to the JavaScript snippet.
Go to Settings > Workspace Settings and click Get Started next to In-App.
Click Enable in-app.
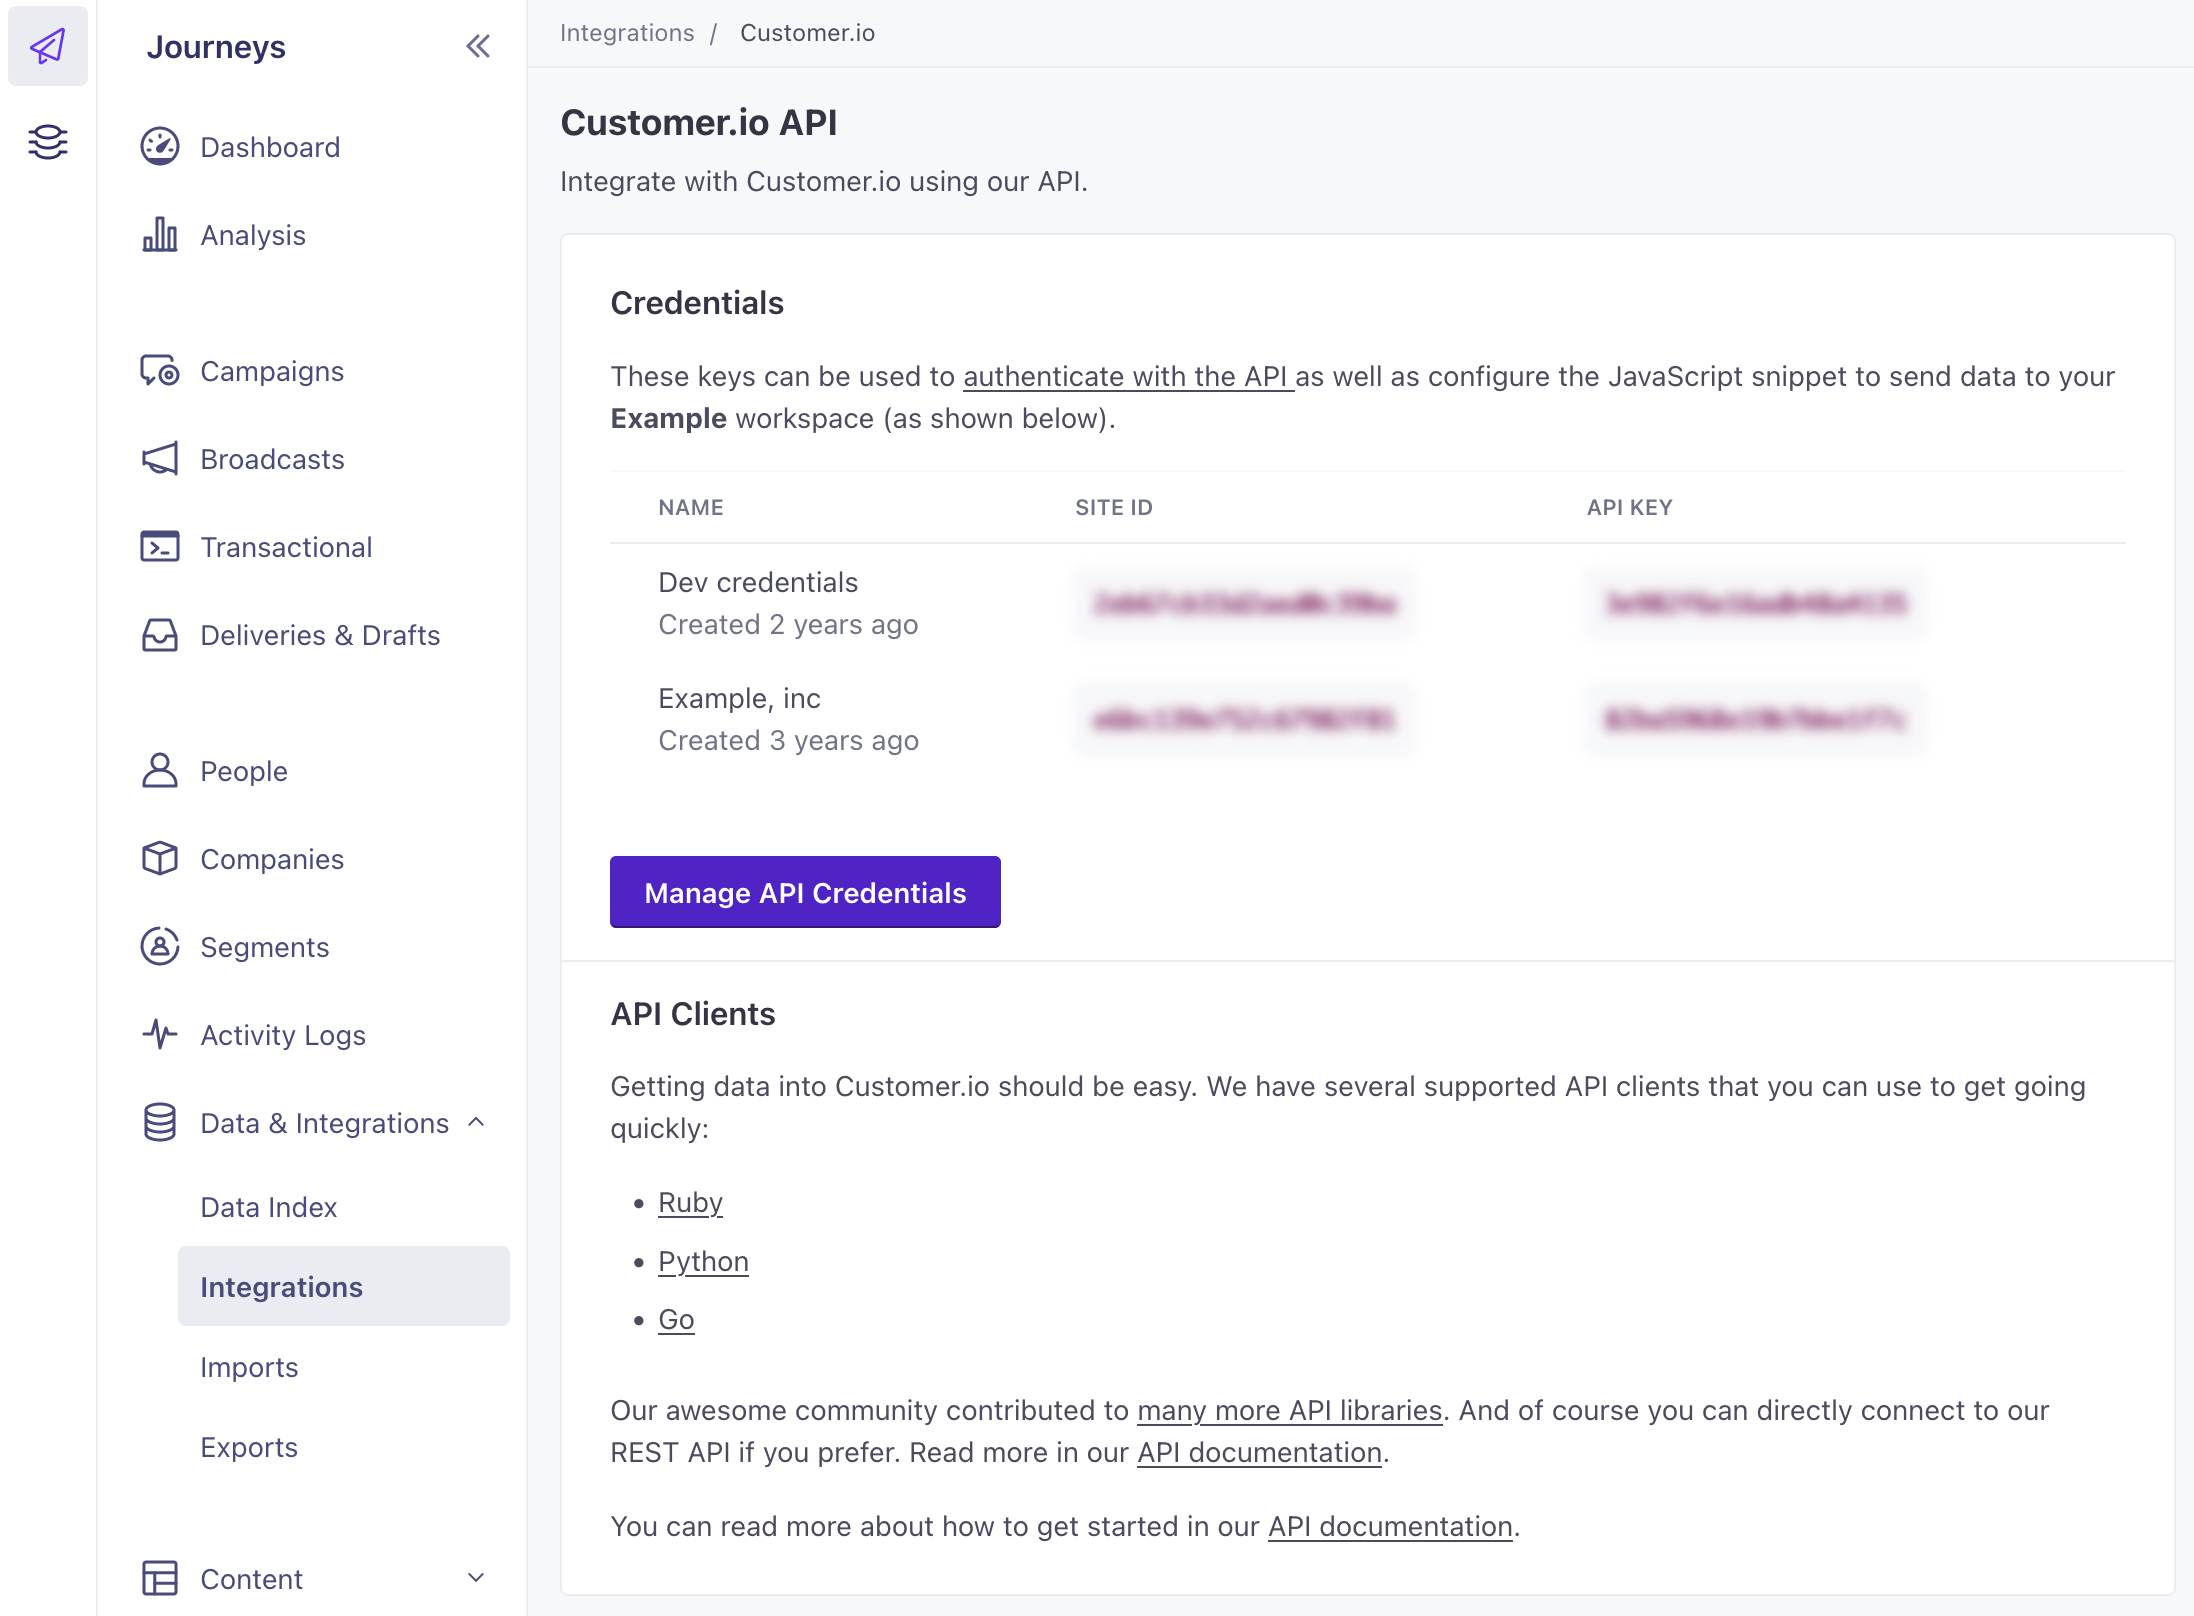
Return to your Workspace Settings and go to API and Webhook Credentials.
Copy the Site ID for the set of credentials that you want to send your in-app messages from. If you don’t have a set of credentials, click Create Tracking API Key.
Paste the Site ID into your JavaScript snippet or SDK configuration.
 !function(){var analytics=window.analytics=window.analytics||[];if(!analytics.initialize)if(analytics.invoked)window.console&&console.error&&console.error("Snippet included twice.");else{analytics.invoked=!0;analytics.methods=["trackSubmit","trackClick","trackLink","trackForm","pageview","identify","reset","group","track","ready","alias","debug","page","once","off","on","addSourceMiddleware","addIntegrationMiddleware","setAnonymousId","addDestinationMiddleware"];analytics.factory=function(e){return function(){var t=Array.prototype.slice.call(arguments);t.unshift(e);analytics.push(t);return analytics}};for(var e=0;e<analytics.methods.length;e++){var key=analytics.methods[e];analytics[key]=analytics.factory(key)}analytics.load=function(key,e){var t=document.createElement("script");t.type="text/javascript";t.async=!0;t.src="https://cdp.customer.io/v1/analytics-js/snippet/" + key + "/analytics.min.js";var n=document.getElementsByTagName("script")[0];n.parentNode.insertBefore(t,n);analytics._writeKey=key;analytics._loadOptions=e};analytics.SNIPPET_VERSION="4.15.3";
 analytics.load(
     "YOUR_API_KEY",
     {
         "integrations": {
             "Customer.io In-App Plugin": {
                 siteId: "YOUR_SITE_ID"
             }
         }
     }
 );
 analytics.page();
 }}();
Now you’re ready to send in-app messages to your website visitors!
Add Destinations
Destinations are the places you want to send, and act on, data. Sending source data to all the places where it’s useful to you eliminates “data gaps” in your stack.
Check out our destination catalog to see all the destinations we support. If you don’t find one you need, let us know!
- Go to the Data Pipelines tab and click Connections.
- Click Add New under Destinations.
- Select the Destination you want.
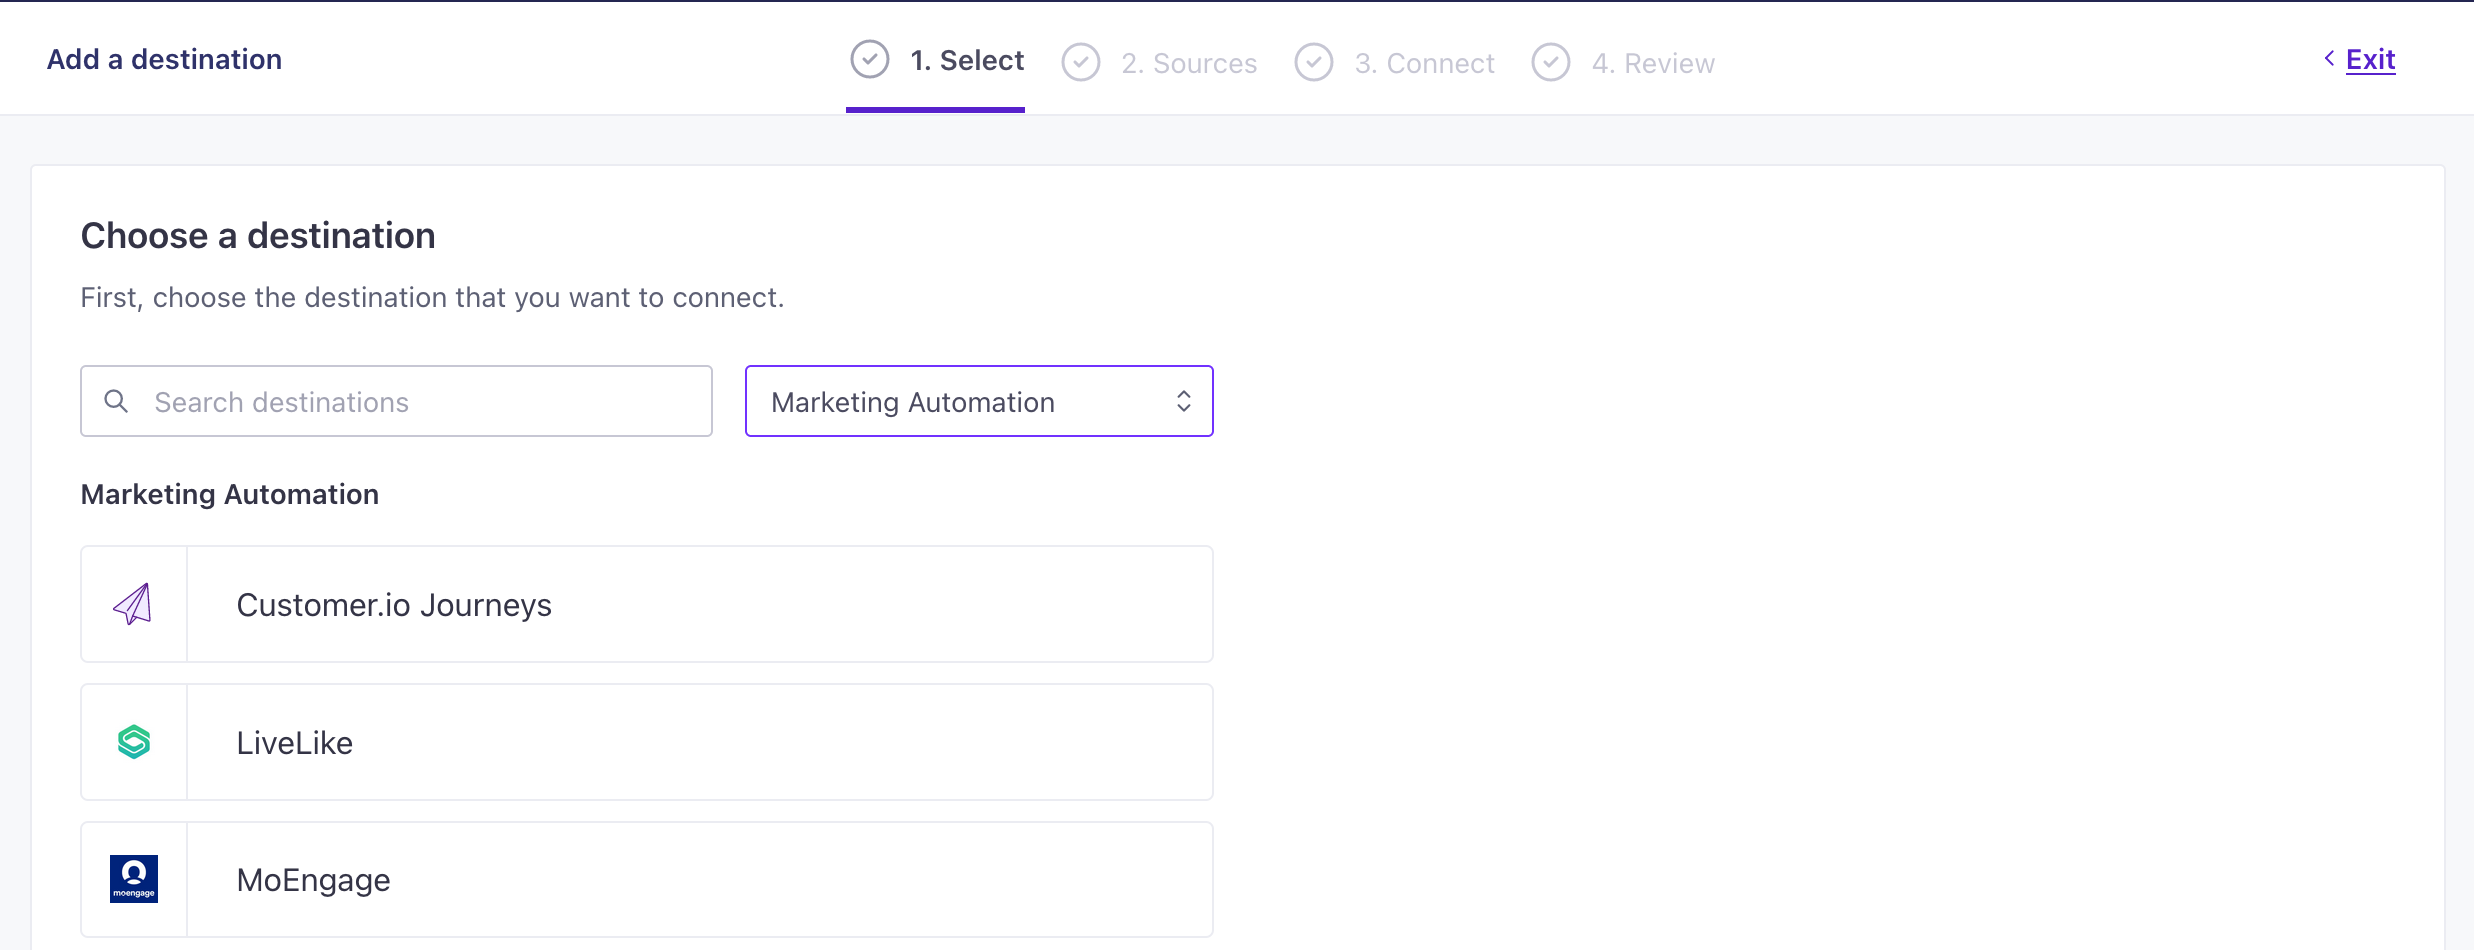
- (Optional) Select the sources that you want to connect to this destination. You can always connect sources to your destination later.
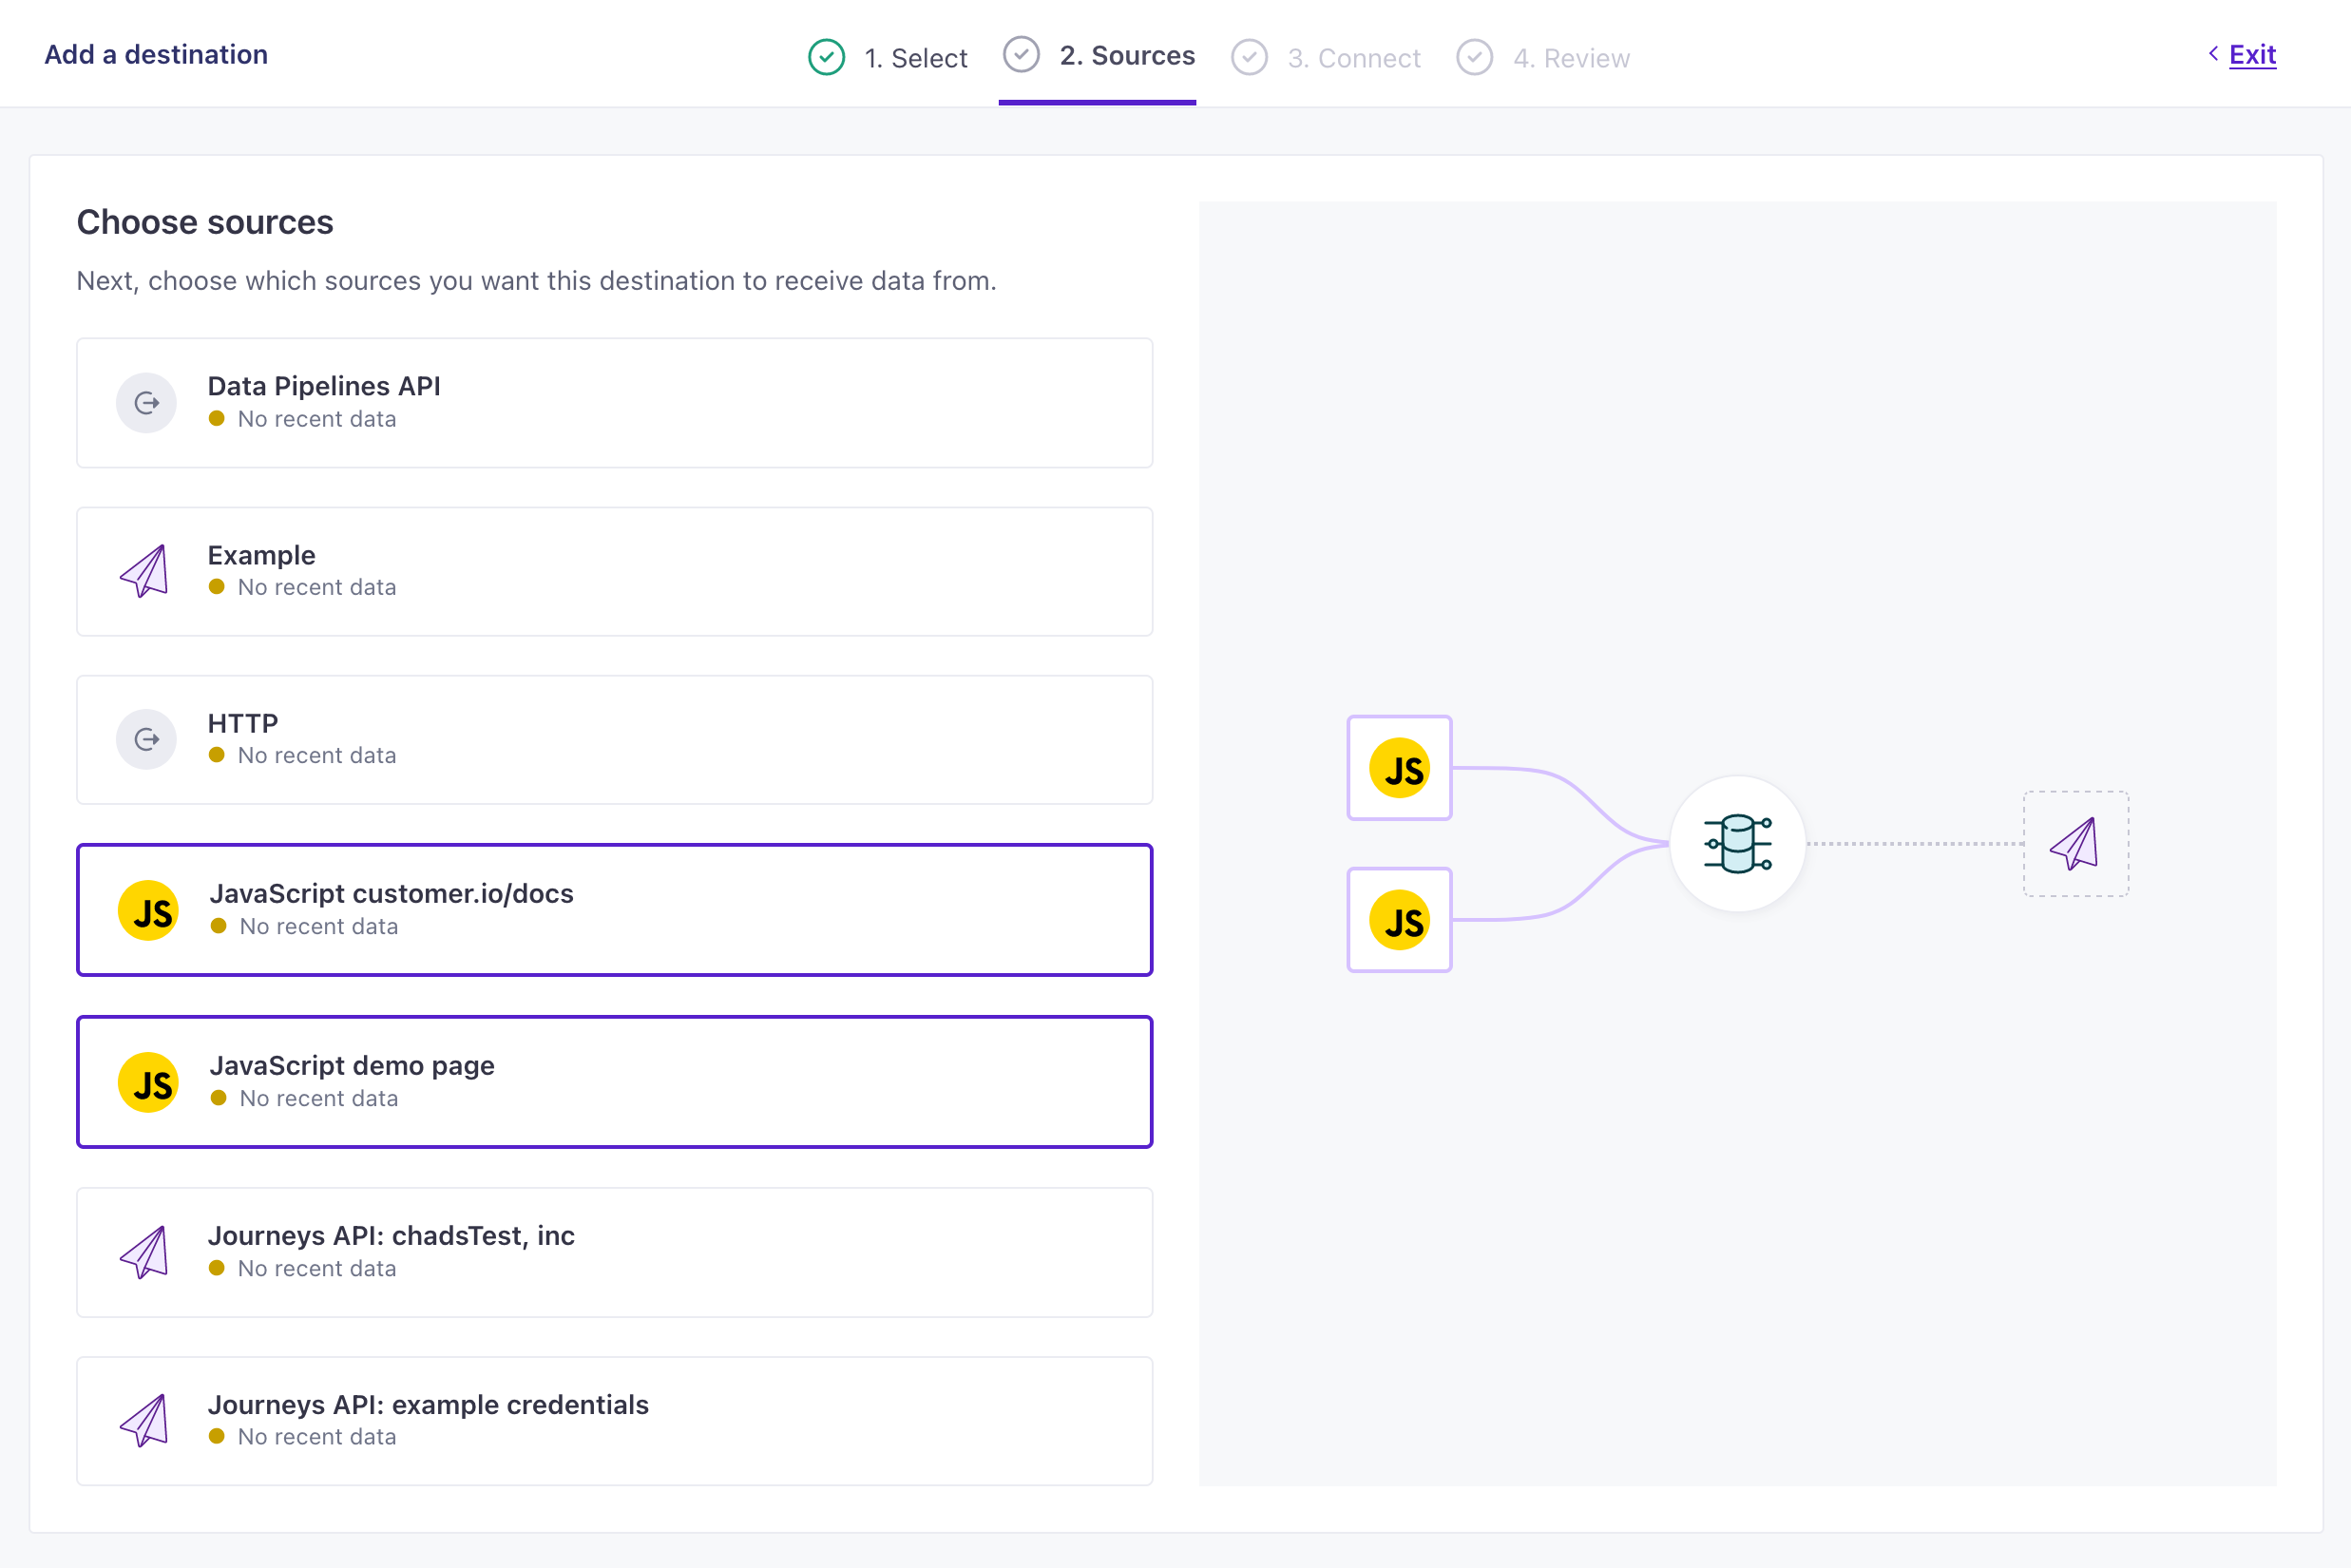
- Configure your destination and click Continue. We’ve provided an example of the Customer.io Journeys destination, but yours may contain different fields based on the destination you pick.
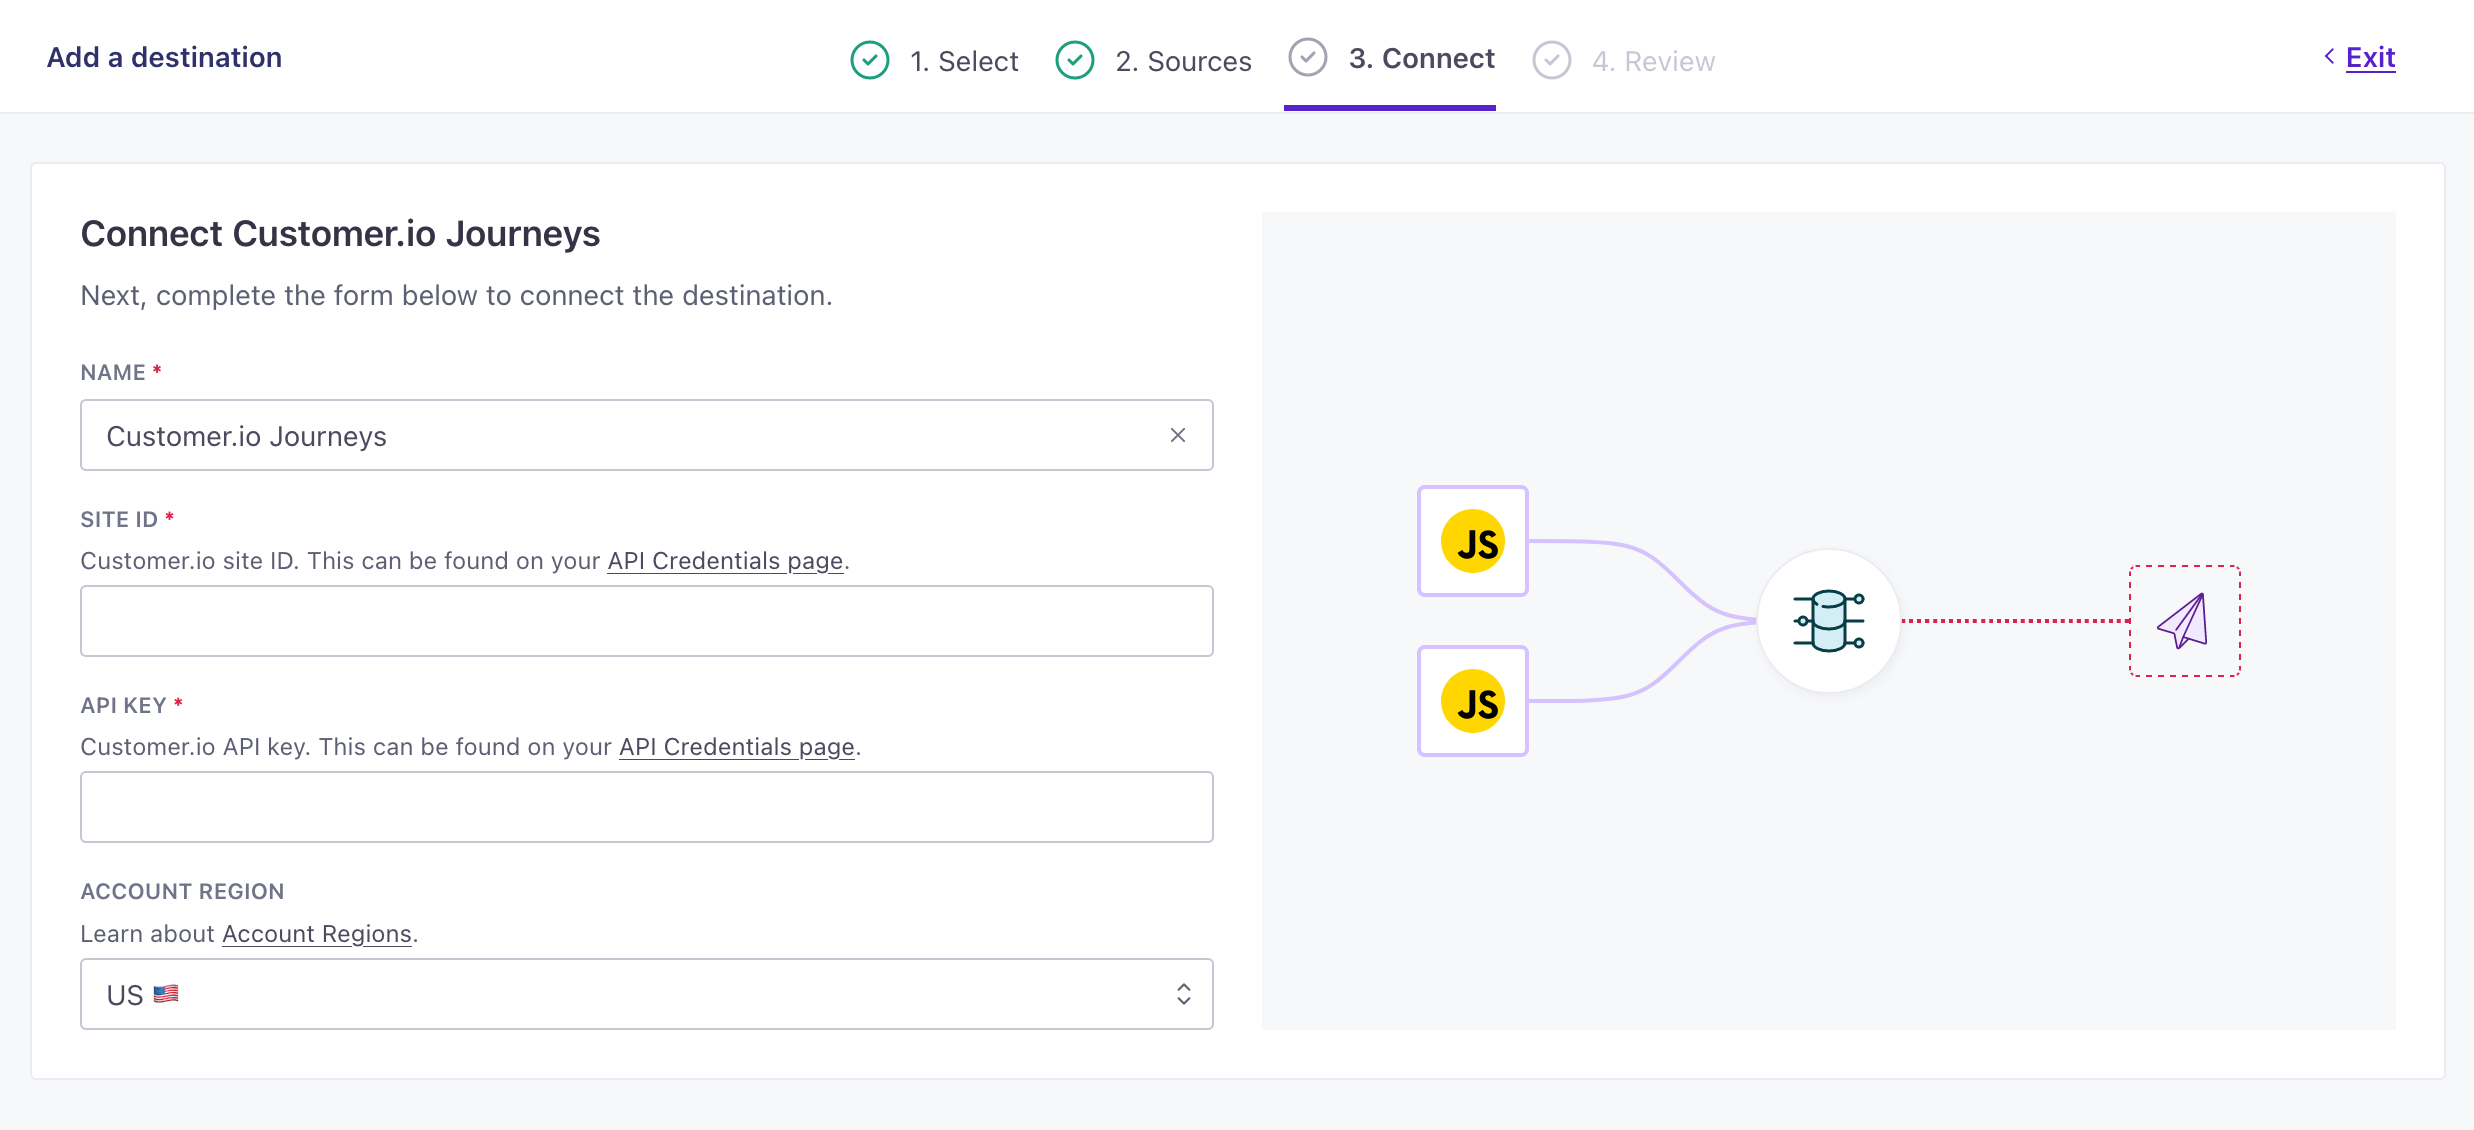
Example Customer.io Journeys destination settings - Click Enable Destination.
Now your destination is set up and will start accepting data from your sources. If you want to tailor the data that your sources send to destinations, go to your destination’s actionsThe source event and data that triggers an API call to your destination. For example, an incoming identify event from your sources adds or updates a person in our Customer.io Journeys destination. tab. See Actions for more information.
Integrate your mobile app(s)
While you can write your own integration with our APIs, we strongly suggest that you integrate your mobile apps using our SDKs.
At a basic level, you must use our SDKs if you intend to send in-app messages. Beyond that, they’re already set up to help you identify people, track events, and receive push notifications, making it easy to get set up with Customer.io without writing all your own code from scratch.
When you integrate mobile apps, you’ll need to enable push and in-app messaging in your workspace. You’ll also need to set up push notifications with your push provider. See our Push Notifications documentation for more information.
Other ways to integrate
Beyond the data sources we laid out here, you can also integrate directly from a database or other sources in Data Pipelines.
Database and Reverse ETL integrations
We offer a number of reverse ETL integrations that help you send data from your database into Customer.io. If you already aggregate your data in a database or data warehouse, you can use a reverse ETL integration to keep your Customer.io workspace up to date with your latest data.
Capture message responses from Journeys
To better integrate with all your products, you can send metadata about your messages from Journeys to other services—whether people open them, click them, and so on. This kind of integration treats information from Journeys as a data source, so you can forward behavioral data from Customer.io to other services.