Create your workspace
After you create your account, you’ll make a workspace. You can think of a workspace as a container for your people, data, messages, integrations, etc. You can have more than one workspace, but, in general, you won’t share information across workspaces.
Create your account and workspace
After you create your account, you’ll follow the on-screen steps to make a workspace. If you’re new to Customer.io, we encourage you to use the default settings. They support most use cases and you can change them later!
When you create your account, you’re considered an administrator. You can add other users to your account and determine their roles within your account and workspaces.
Adding additional workspaces
You can always setup extra workspaces when you go to Settings > Account-settings > Workspaces and click Add Workspace.
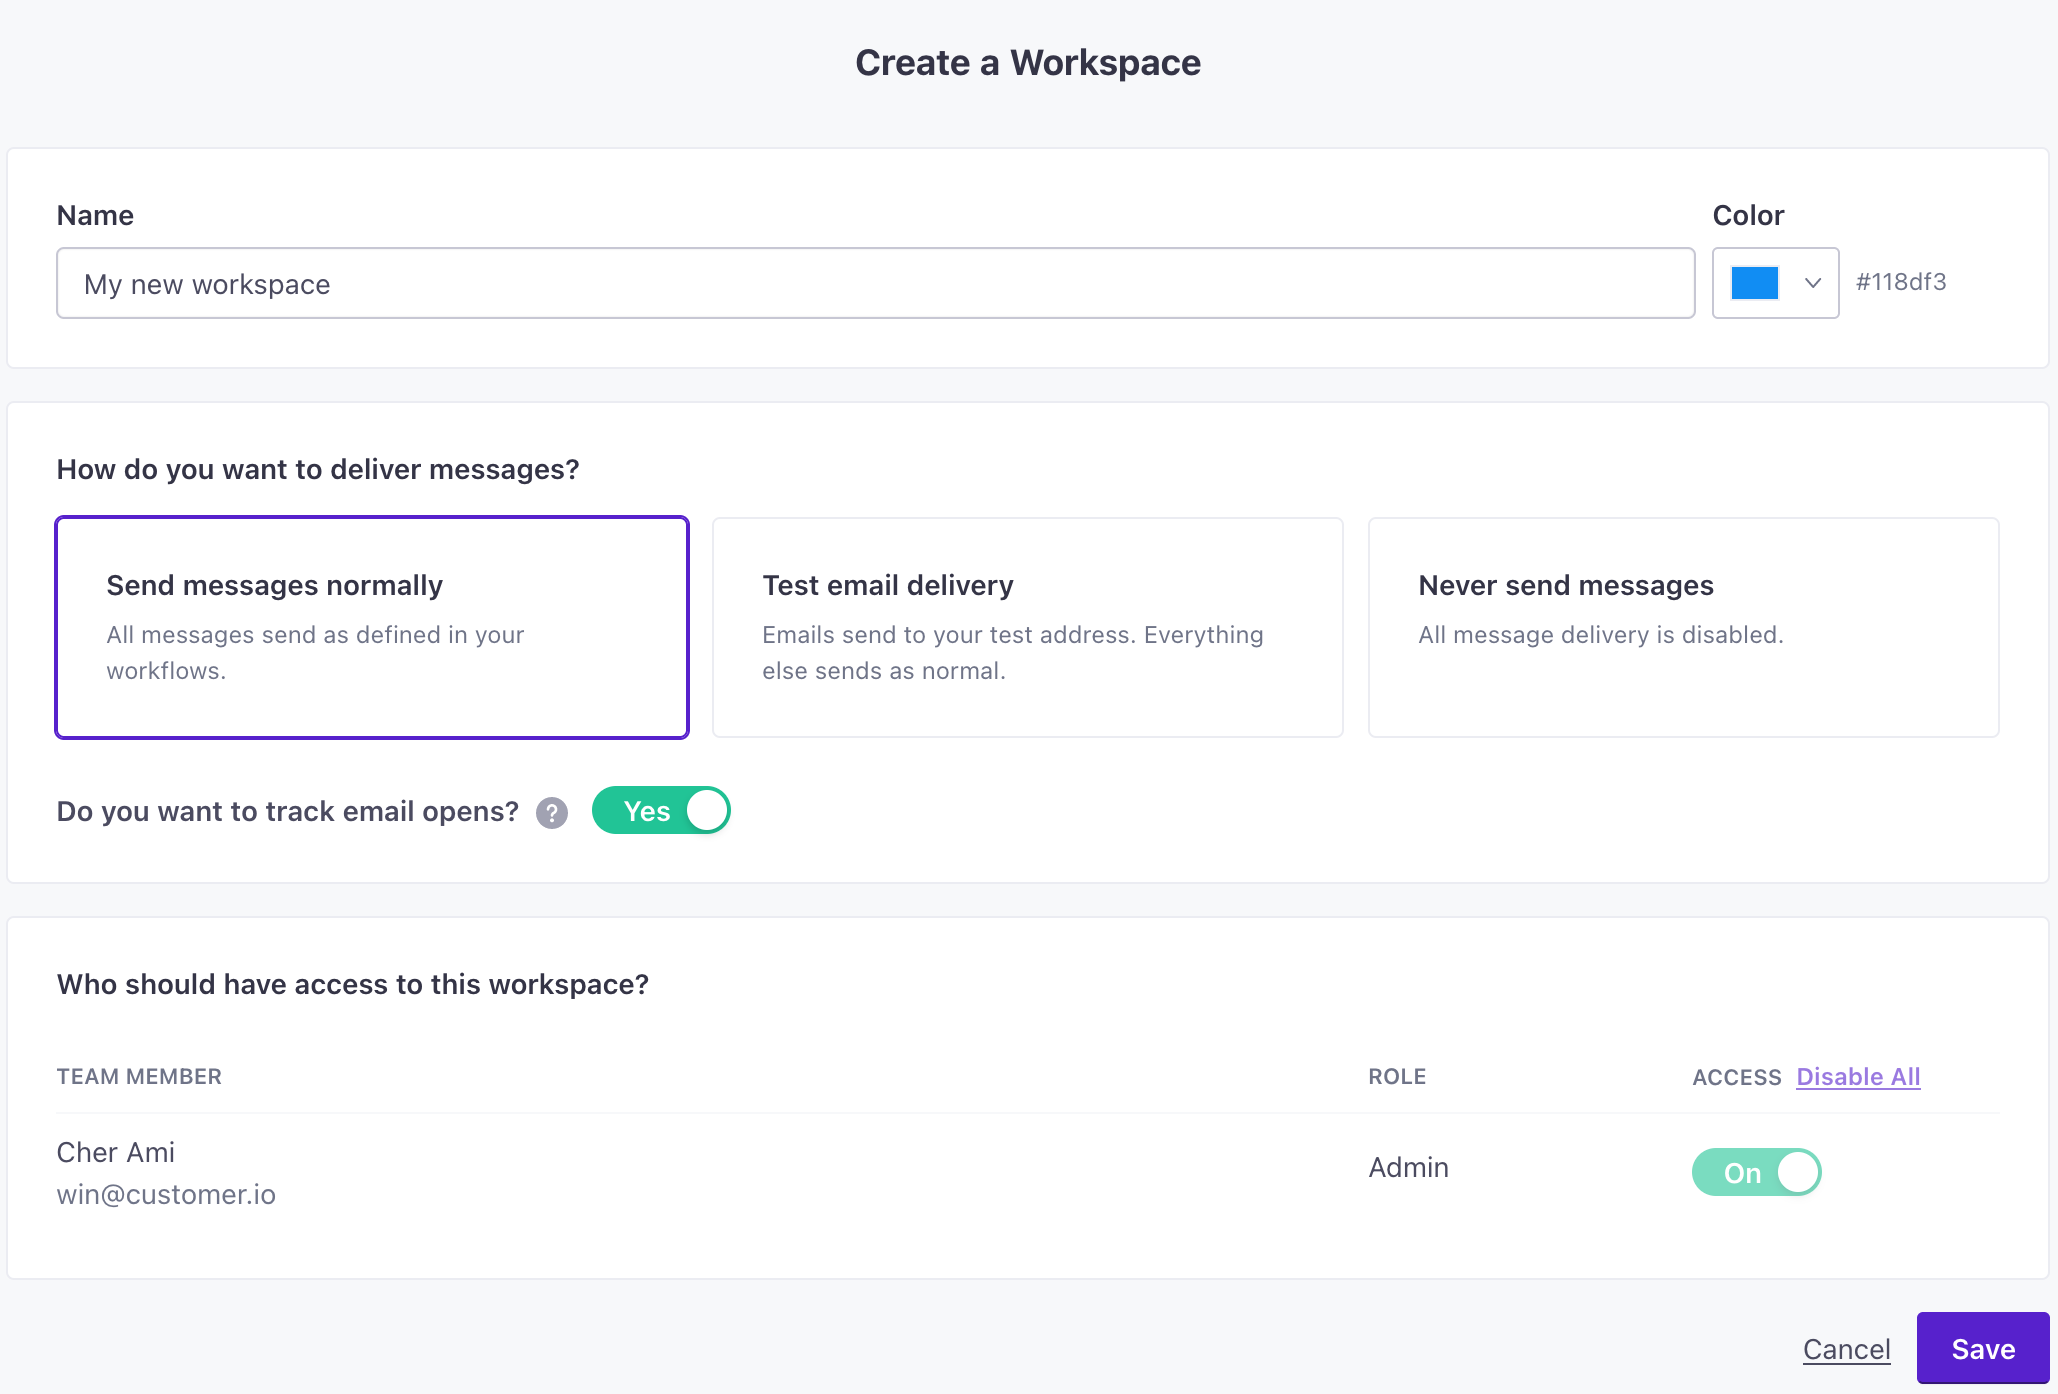
When you create a workspace, you’ll get all the same options as when you created your first workspace, and you’ll see the setup guide again.
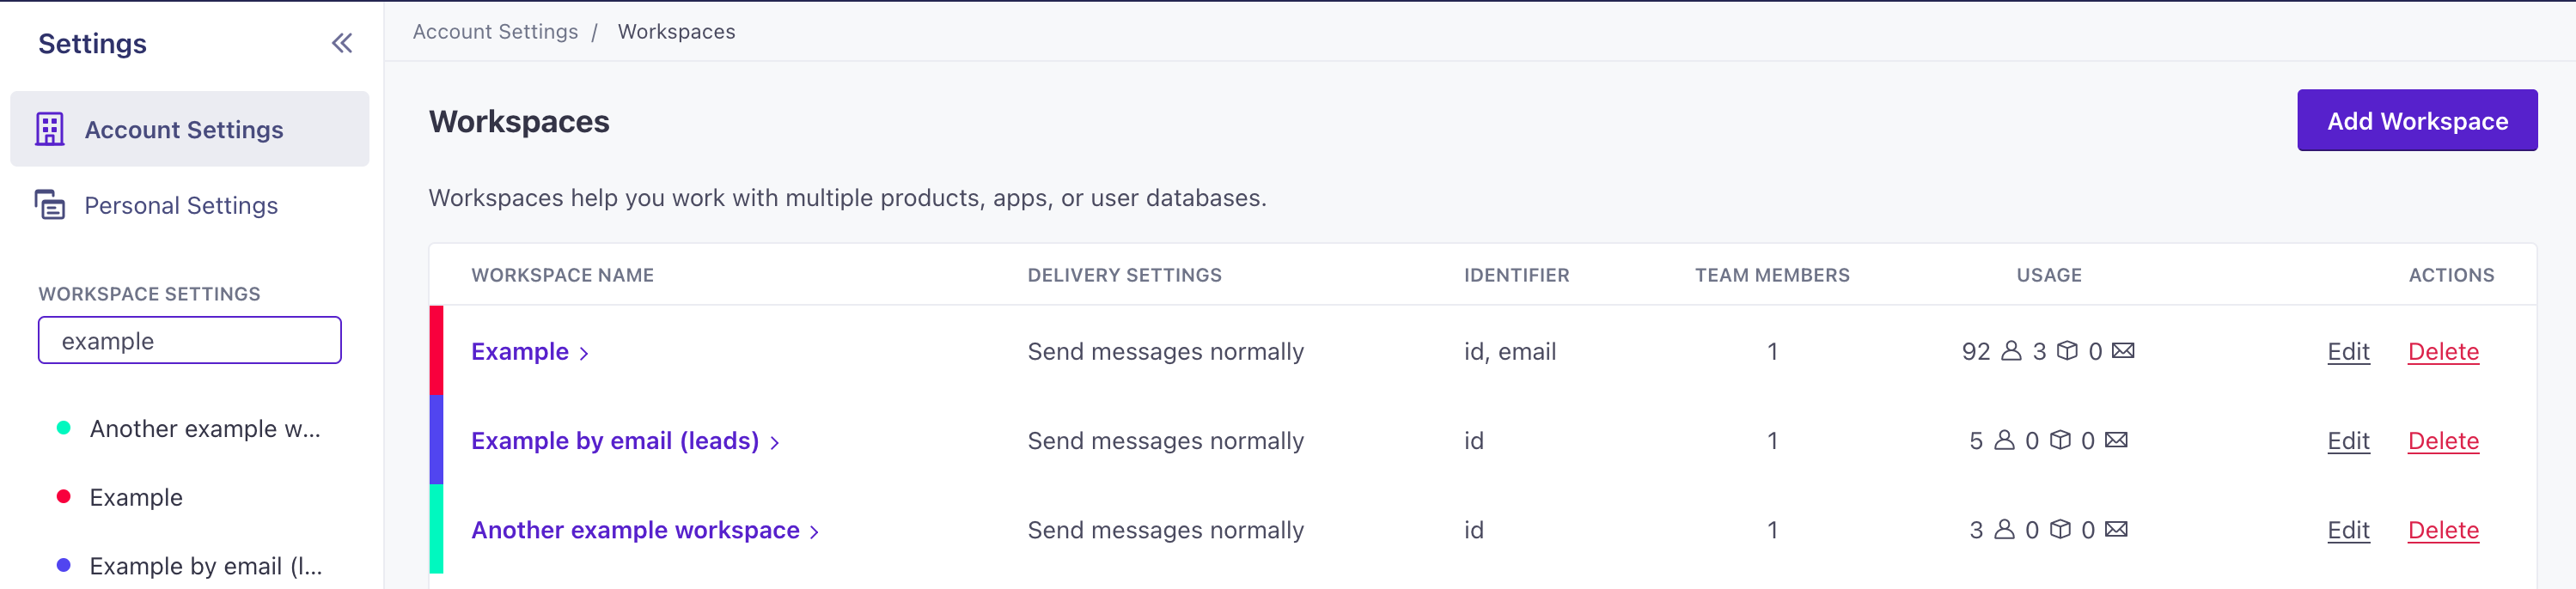
Don’t forget to color-code your workspaces
If you have multiple workspaces, providing handy names can help you understand which workspace you’re working in. But you can also color code your workspaces, making it easy to tell your workspaces apart at a glance.
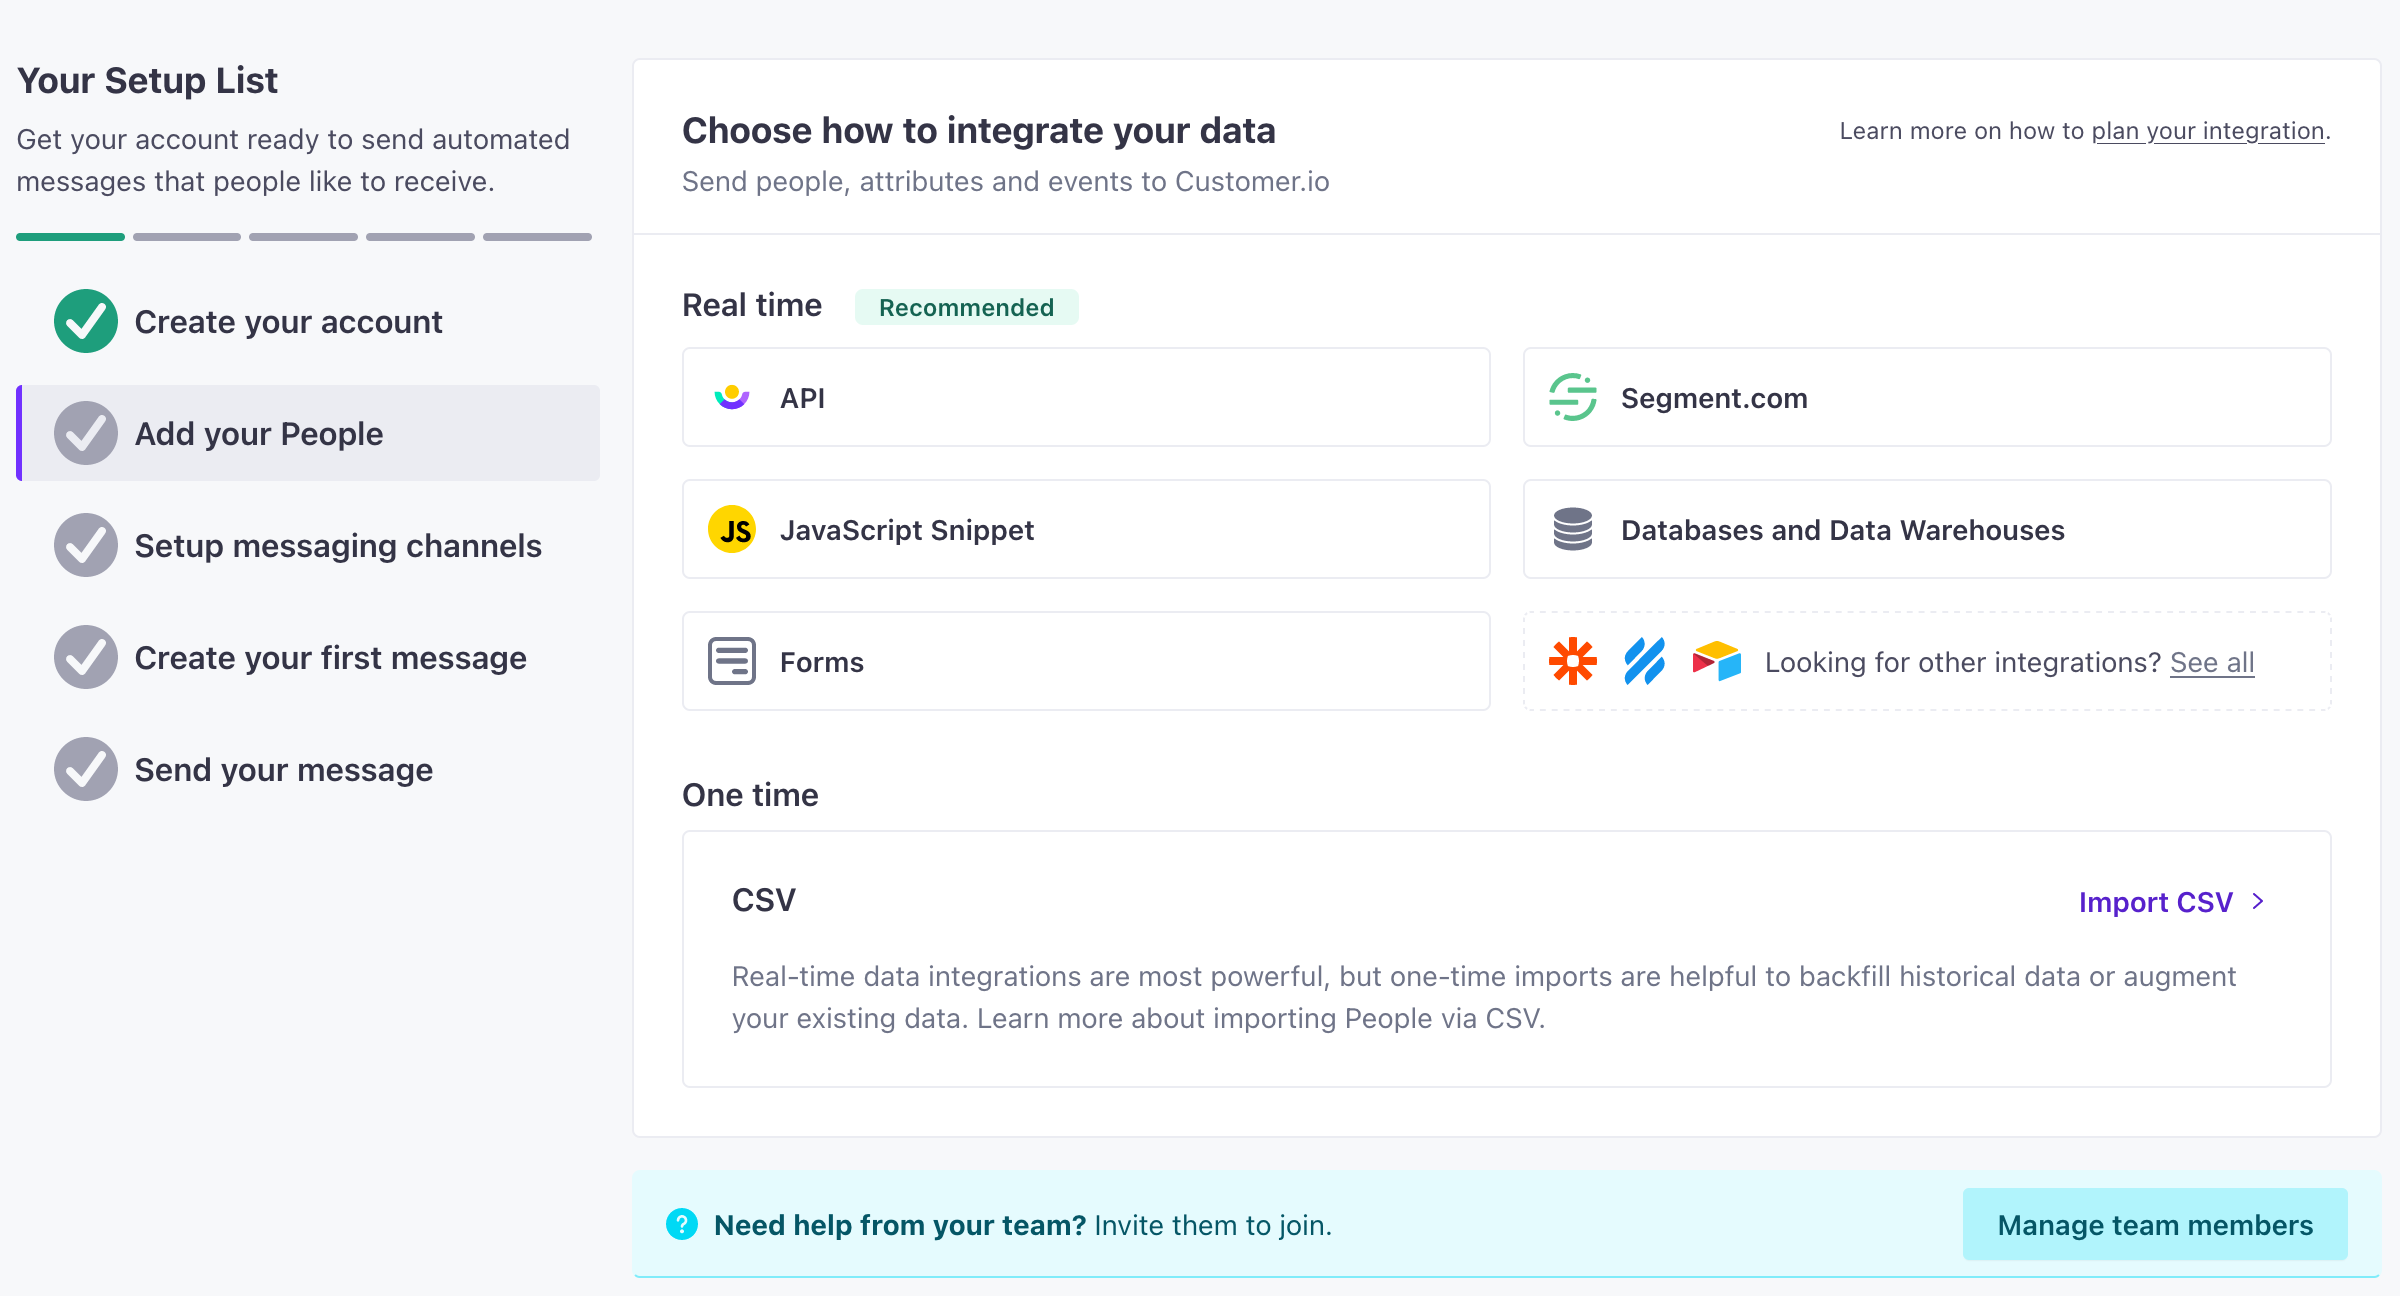
The setup guide
When you create a workspace, we provide a setup guide on the Dashboard page. The pages in this section of our documentation loosely follow that guide!
You can follow the guide to set up your workspace, or you can skip it and set up your workspace later. But the setup guide contains the major steps involved in getting set up and using Customer.io.
Invite your team to your workspace
You’ll invite team members and grant them access to your workspace at the account level. If you create a new workspace after you add team members, you may need to grant them access to your new workspace.
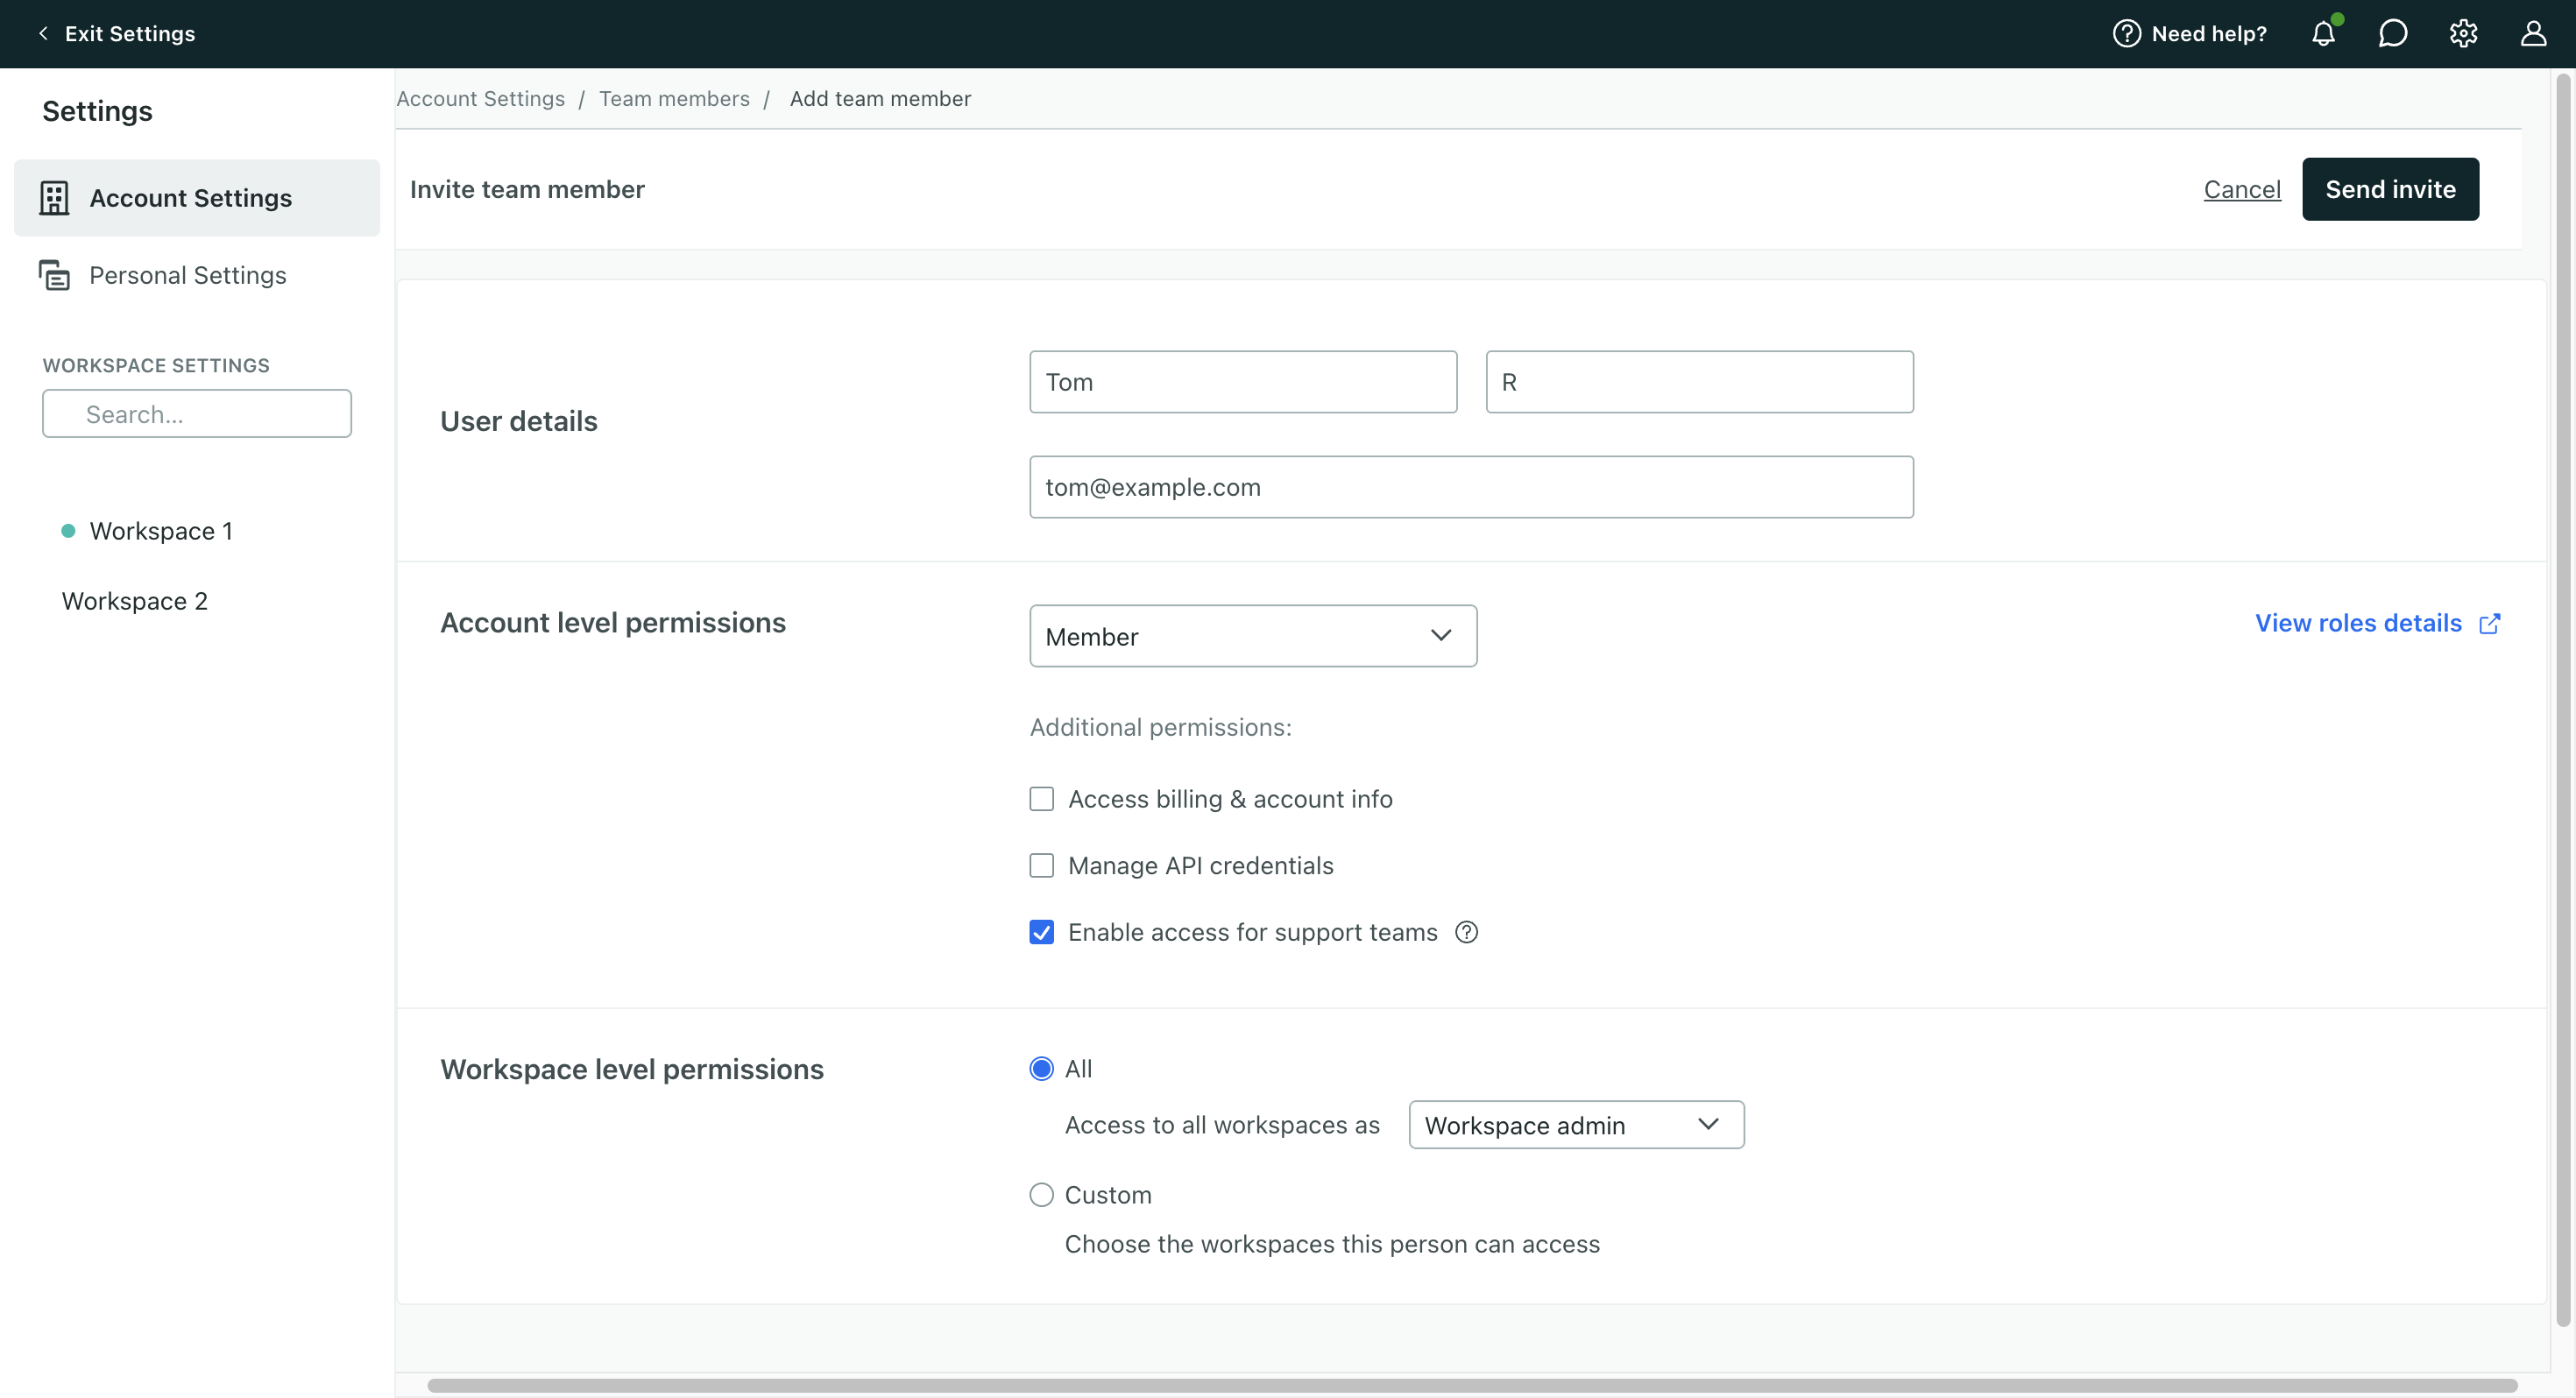
Add team members and grant workspace access
You can invite team members to your account by going to Settings > Account settings > Team members and clicking Invite team member.
When you add a team member, you assign an account-level role and, optionally, a role for each workspace they should have access to.
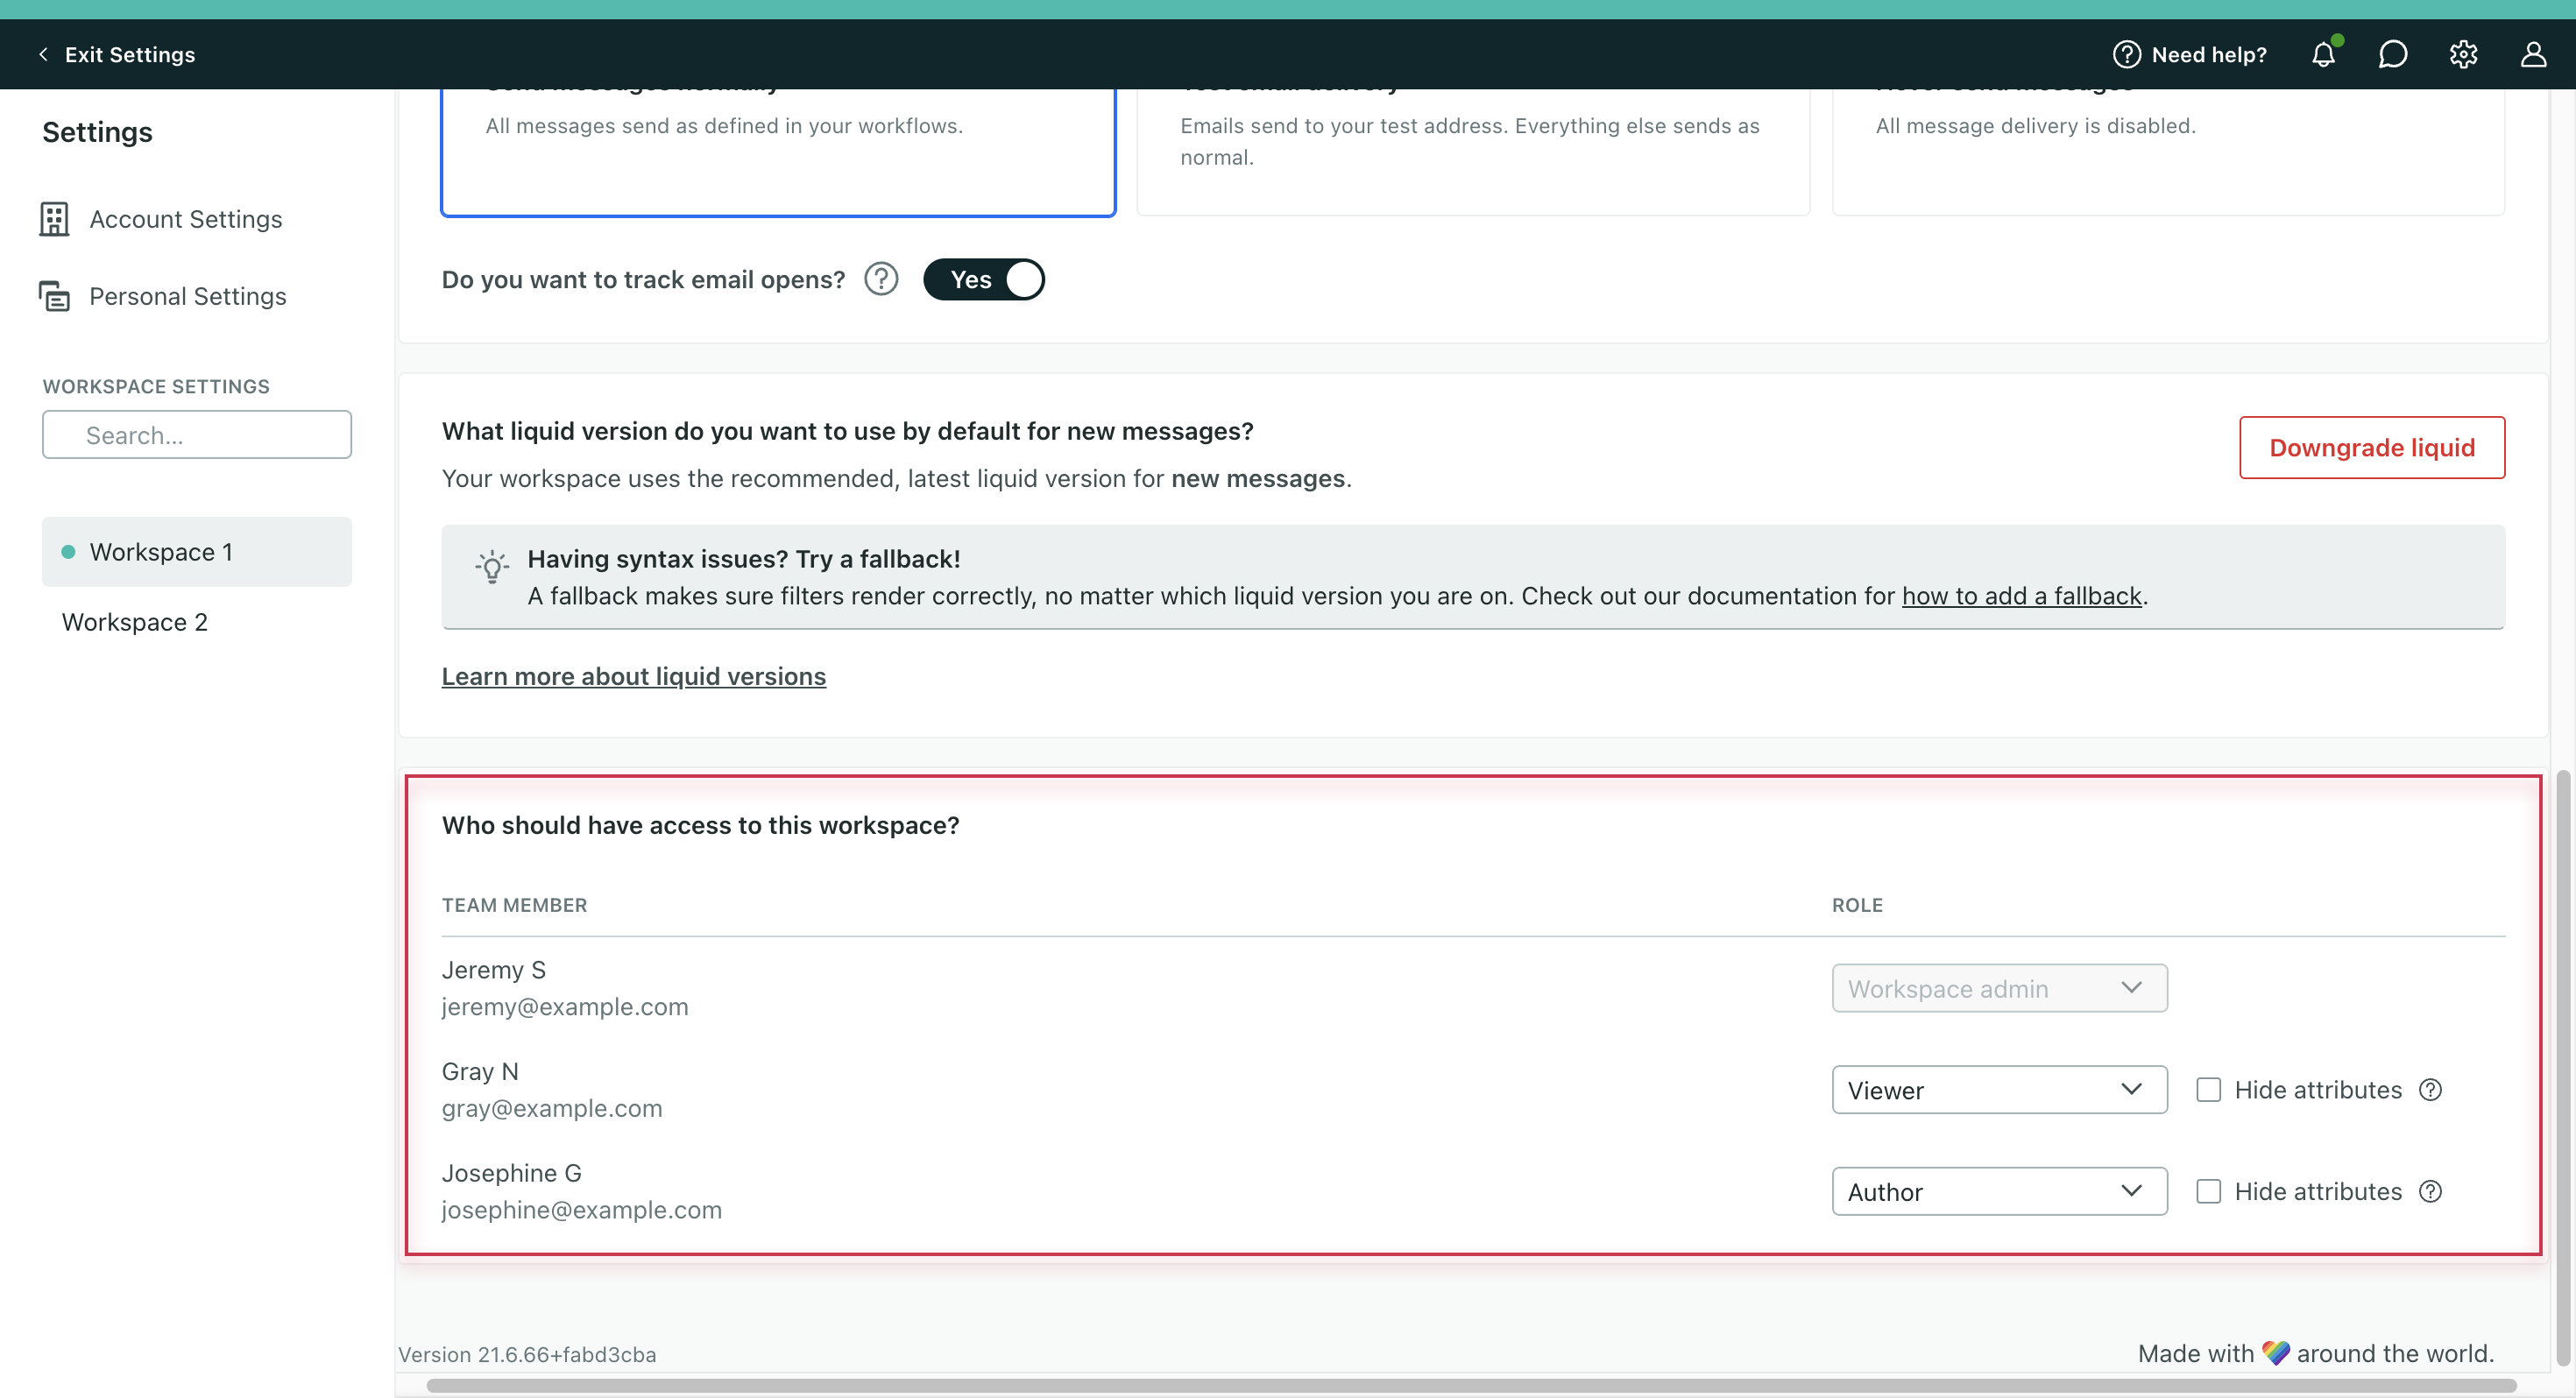
See who has access to your workspace
When you add a new workspace, you decide which existing team members should gain access to it.
You can see who has access to your workspace when you look at your workspace settings. Go to Settings > Workspace settings > General workspace settings.