Salesforce Source: Getting Started
The Salesforce source lets you send data from your CRM to destinations where you can activate it. For example, you can send Salesforce data to Customer.io where you can automatically message people—follow up with leads, message contacts when it’s time to renew their contracts, and so on. This makes Salesforce a part of your larger marketing stack without needing developers to write a complicated integration.
Did you want to send data to Salesforce?
Check out our Salesforce Destination. With the Salesforce source and destination, you can set up a native, end-to-end integration.
Before you begin
When you use Salesforce as a data source, you’ll answer two questions:
- How do you want to get data from Salesforce? Choose whether you want to sync data on a schedule or push updates from Salesforce in real-time. Whether you sync or stream data may depend on your Salesforce plan! See Scheduled syncs and real-time streams for help determining your setup.
- How do you want to use your Salesforce data? How you import Salesforce data—as People, Events, Custom Objects, or Relationships between people and objects—may depend on where you send your data and what you want to do with your data downstream. See Working with Salesforce Data for help mapping data.
Working with Salesforce data
Unlike Customer.io and other platforms, Salesforce doesn’t have generic concepts like People and Groups—or things that map easily to those terms. Instead, Salesforce has highly structured data: your leads, contacts, opportunities, accounts, and other things are all separate.
When you send Salesforce data to Customer.io, you’ll have to determine whether each type of data represents People, Events, Custom ObjectsNot to be confused with a JSON object, an object in Customer.io is a non-person entity that you can associate with one or more people—like a company, account, or online course. You can use objects to message people based on changes to their company, account, or course itinerary., or Relationships between people and objects. In most cases, this should be easy: contacts are people, because you’ll send them messages; an account is something many people are connected to, so it’s probably a custom object.
On this page, we recommend that you start with Contacts because they map to people. For other types of data, see Using Salesforce with Customer.io Journeys to learn more about using data with Customer.io specifically, or Mapping Salesforce data to destinations to learn more about mapping Salesforce data to other destinations.
with >1 person?} c--->|yes|d(Custom
Object) c-.->|no|e{Does it have an
email or phone?} e-->|yes|b e-.->|maybe/no|h{Does it relate a
person to a group?} h-.->|no|f{Is it something people do?
Will it trigger messages?} h--->|yes|i(Relationship) f-->|yes|g(Event) f-.->|no|d
Prerequisites
To connect Salesforce to Customer.io, you need:
- A Salesforce Data Cloud (sometimes called Sales Cloud) account that is either:
- At the Professional, Enterprise, level or higher.
- Includes Web Services API access.
- A Salesforce user with access to the data you want to send from Salesforce to Data Pipelines. In general, we suggest that you set up a user specifically for your syncs, making it easy to limit the data Customer.io can access and control your integration independently of your day-to-day Salesforce users.
Set up your Salesforce source
When you set up your source, you’ll configure your first Sync—the type of data that you want send to one or more destinationsA destination is a place that you want to send data from one or more sources to. You can use your own workspace as a destination; send data to another service; or send data to your data warehouse.. We suggest that you start with Contacts because it’s the easiest, and most natural thing to map to most destinations, including Customer.io Journeys.
You’ll set up subsequent syncs after you finish configuring your source, where each sync brings in a different kind of data (leads, opportunities, and so on).
- Go to the tab and click Sources.
- Click Add Source, pick Salesforce, and click Next: Connect Salesforce.
- Set up your source connection:
- Give the source a friendly Name so you’ll recognize it in Customer.io.
- Pick how you’ll send data to Customer.io. See Syncs and streams:
- Real-time Stream: Send data to Customer.io Data Pipelines as it changes in Salesforce.
- Scheduled Sync: Sync data on a schedule you choose.
- If you’re logging in with your Salesforce Sandbox account, you’ll need to enable the Sandbox setting to test your integration.
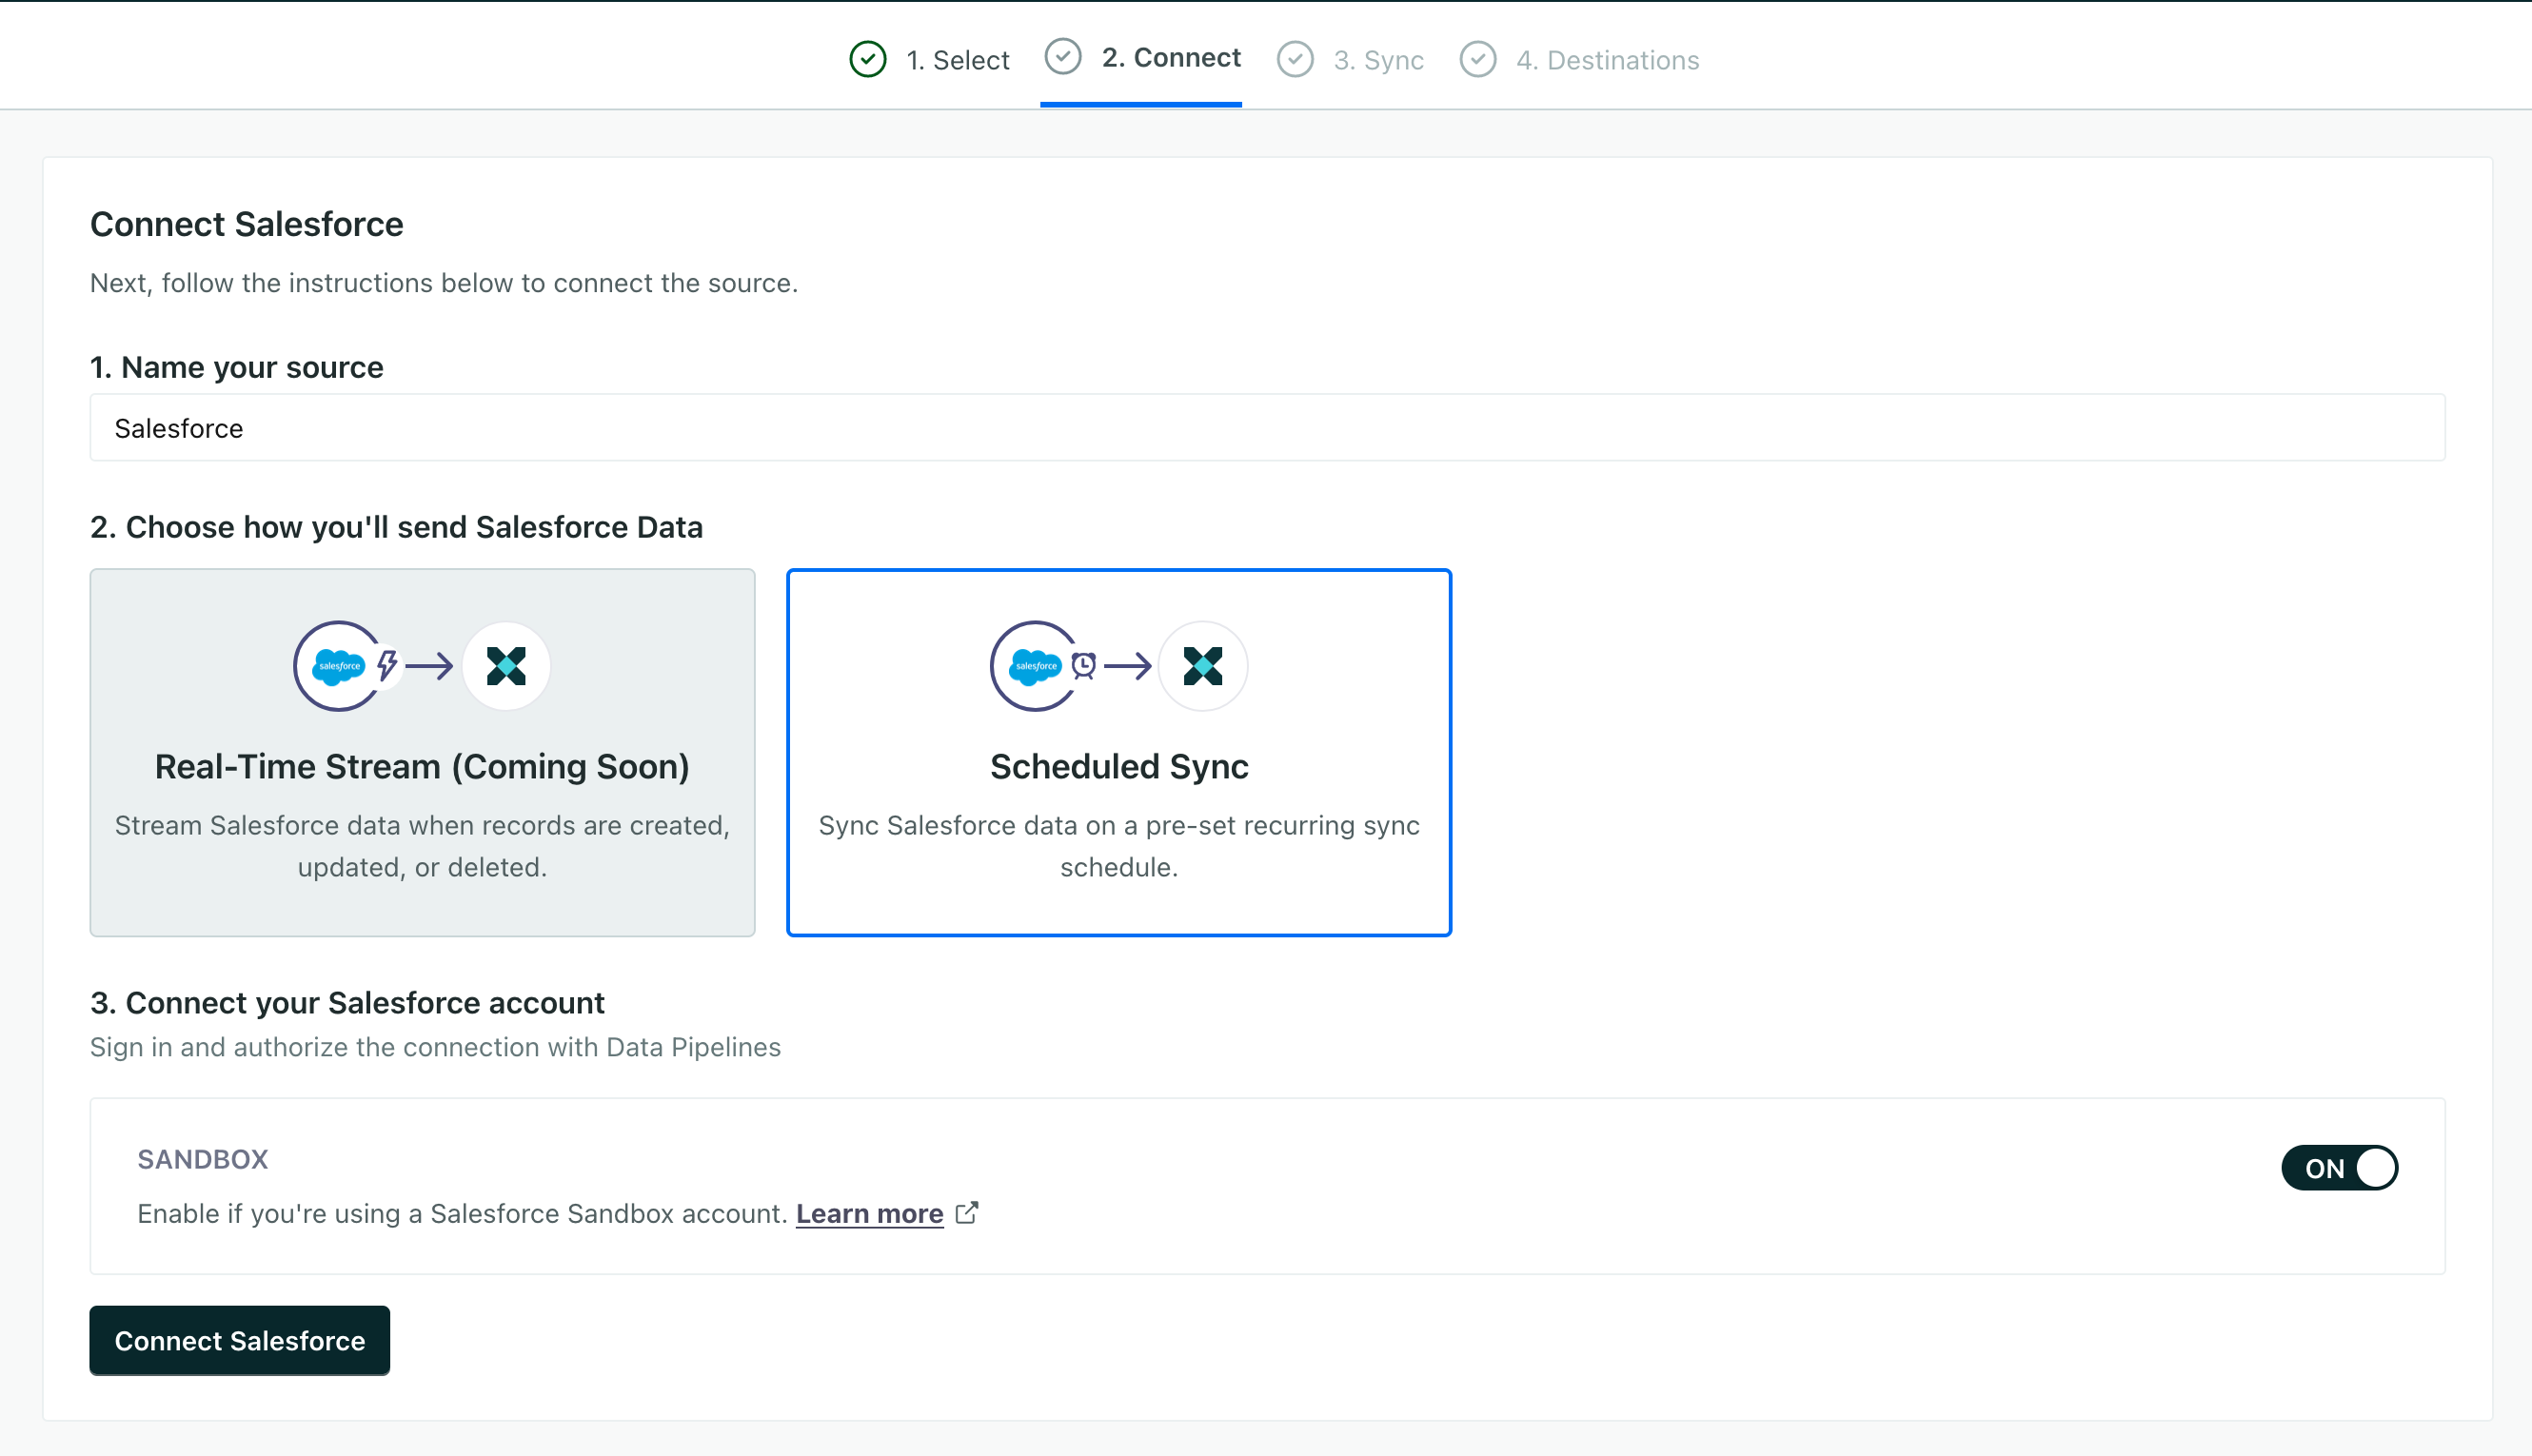
- Click Connect Salesforce and log into Salesforce. Click Create Sync when you’re done.
- Create your first sync. This is a type of data that you send through your pipeline. For more information about syncs and mapping your data, see Syncs and streams
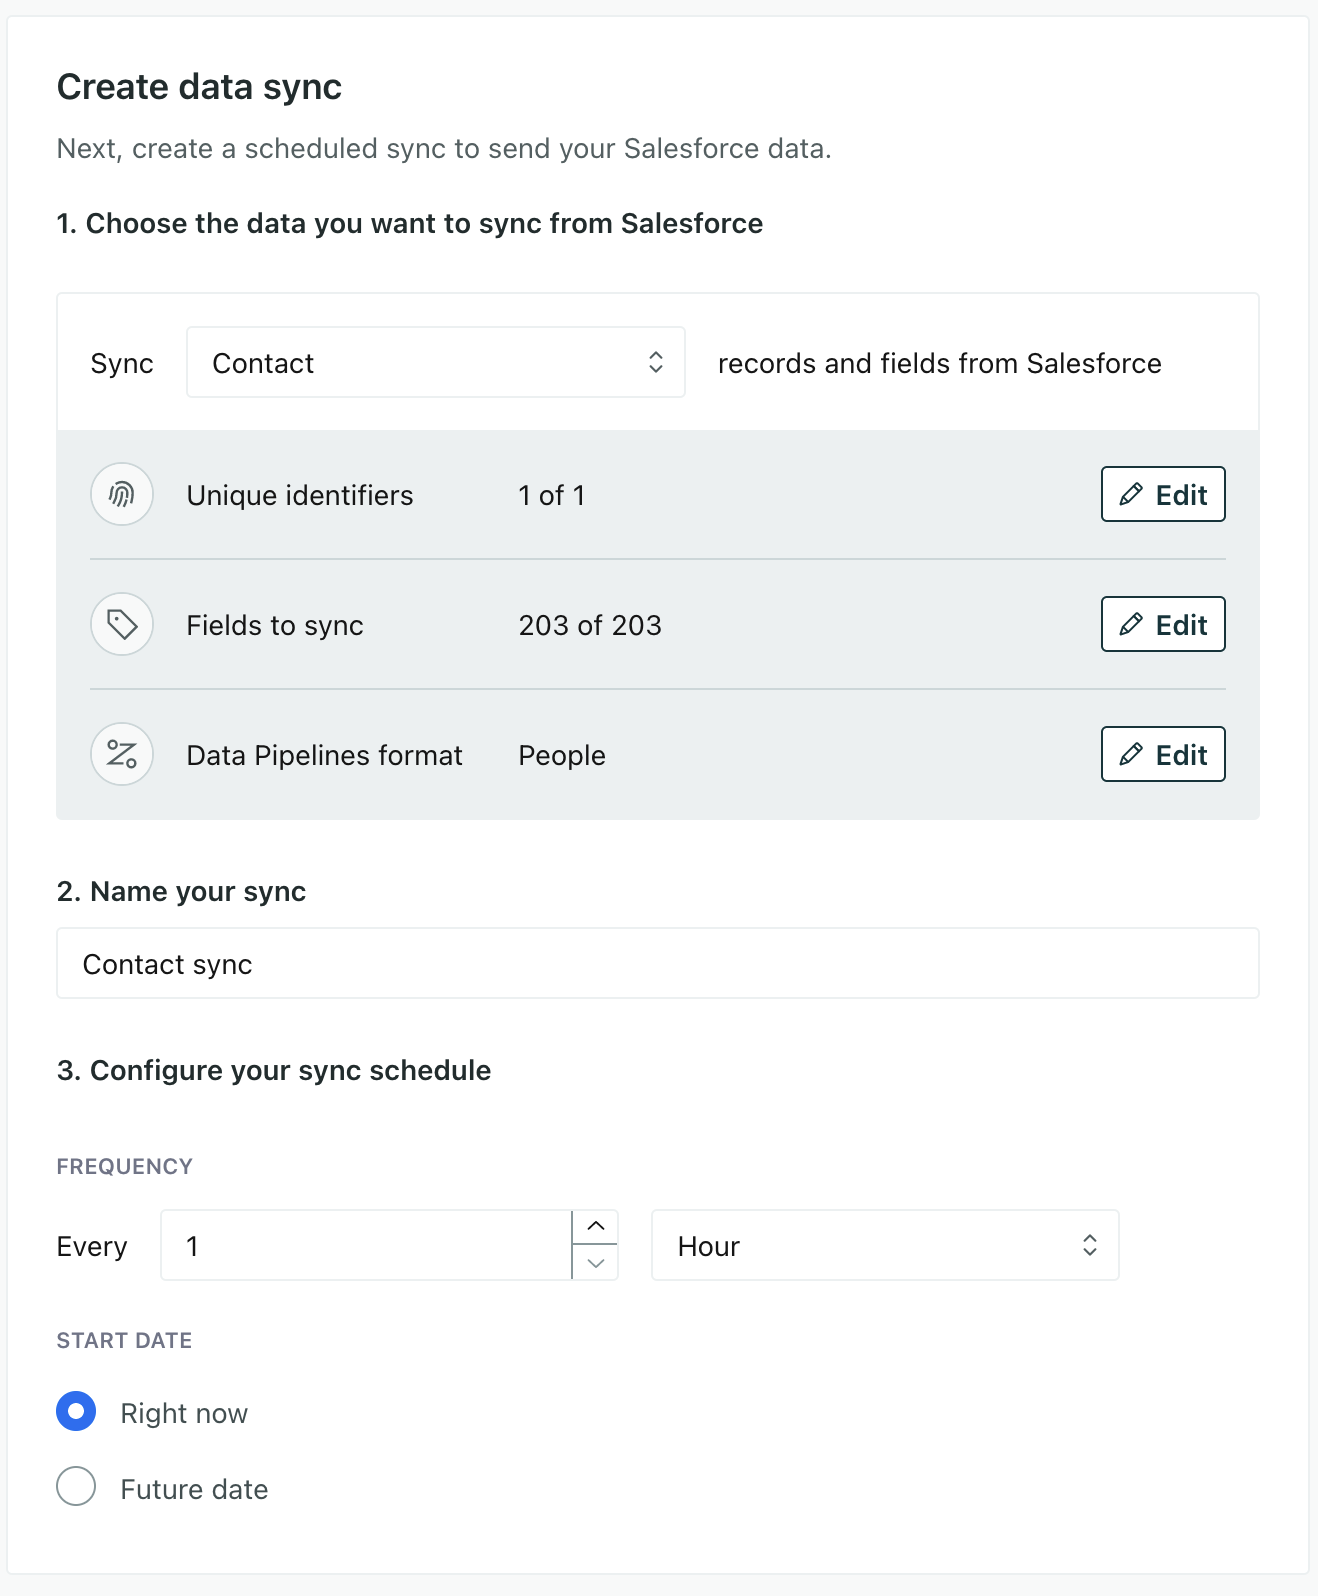
Give your sync a Name—something that describes the data you’re importing and what you’re mapping it to.
In the Sync dropdown, pick the kind of Salesforce record you want to send to Customer.io. Again, we suggest starting with Contacts.
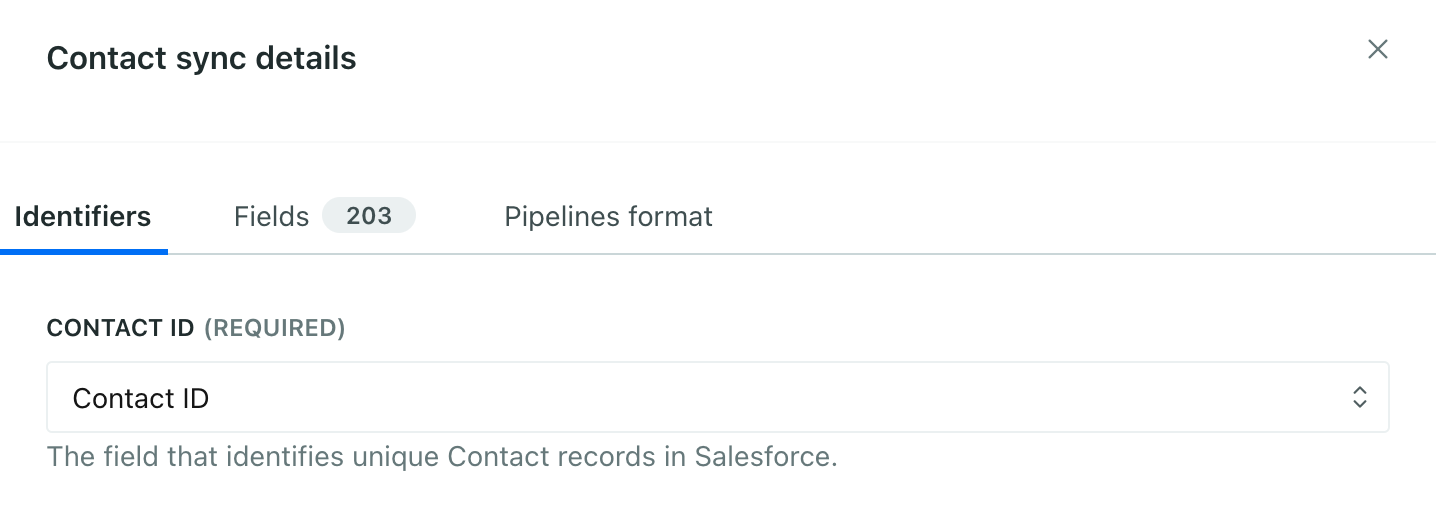
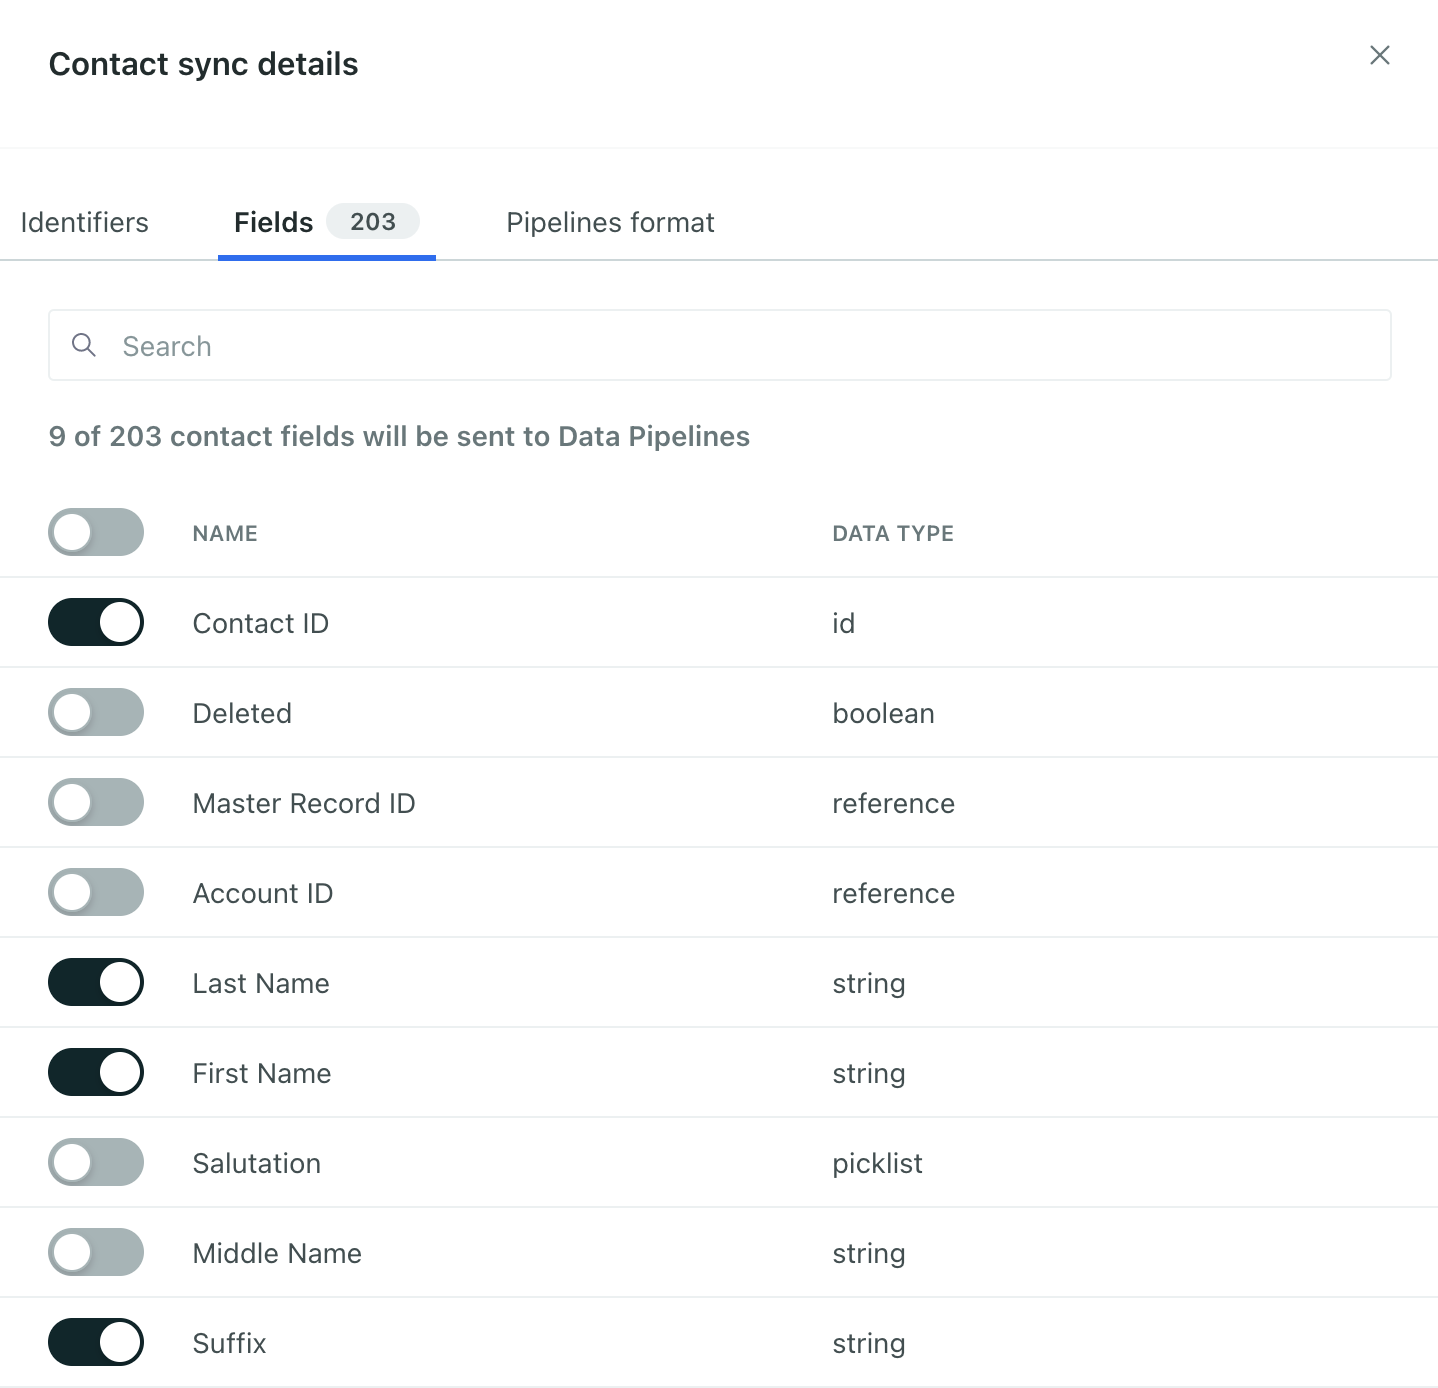
Click Edit next to Unique identifiers map your identifier—the field that uniquely identifies each person or object. If you’re using Contacts, pick the Contact ID as your Contact ID.
Go to the Fields tab and pick the fields you want to capture in Customer.io. Salesforce contains a lot of data, not all of which is useful in Customer.io. For example, you don’t need the mailing latitude or longitude to send email.
Choose how often you want to sync data and when you want to start.
- Click Next: choose destinations and select the destinations you want to connect your Salesforce source to. The destinations you connect to might depend on how you model your data! See Syncs and Imports for more information.
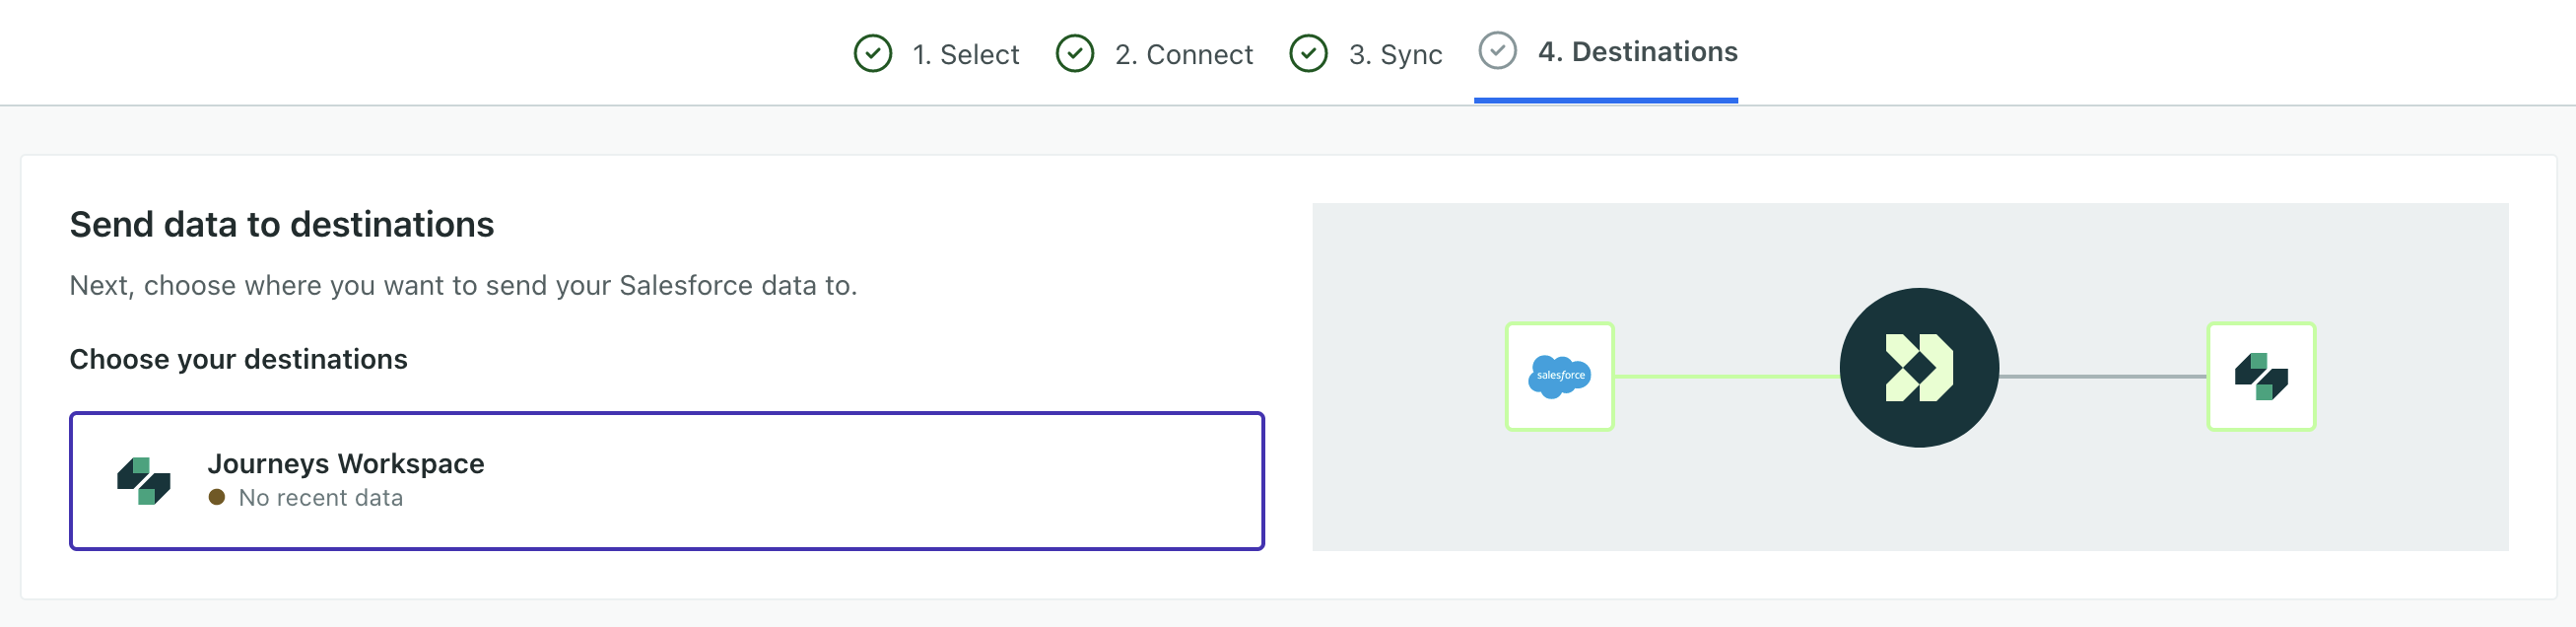
- Click Enable Salesforce.
You’re successfully set up your first sync! You’ve created a sync for one type of Salesforce data, but you may also want to create syncs for other kinds of data you want to import from Salesforce.
The Syncs tab will show the status of your sync and note that we’re processing your Salesforce data. If you go into , you should begin seeing your Salesforce data—though it may take a few minutes to populate all your people, especially if you have millions of records.
Set up additional syncs
During the initial setup you’ll create a single sync when you set up your Salesforce source. After that, you can set up additional syncs to import other kinds of data from Salesforce. To learn more about whether your data types are people, objects, or events, see Mapping Salesforce data to destinations.
- Go to your Salesforce source’s Syncs tab and click Add Sync.
- Give your sync a Name—something that describes the data you’re importing and what you’re mapping it to.
- Pick the kind of Salesforce record you want to send to Customer.io. If you’ve already synced contacts, you might want to sync the Accounts they’re connected to.
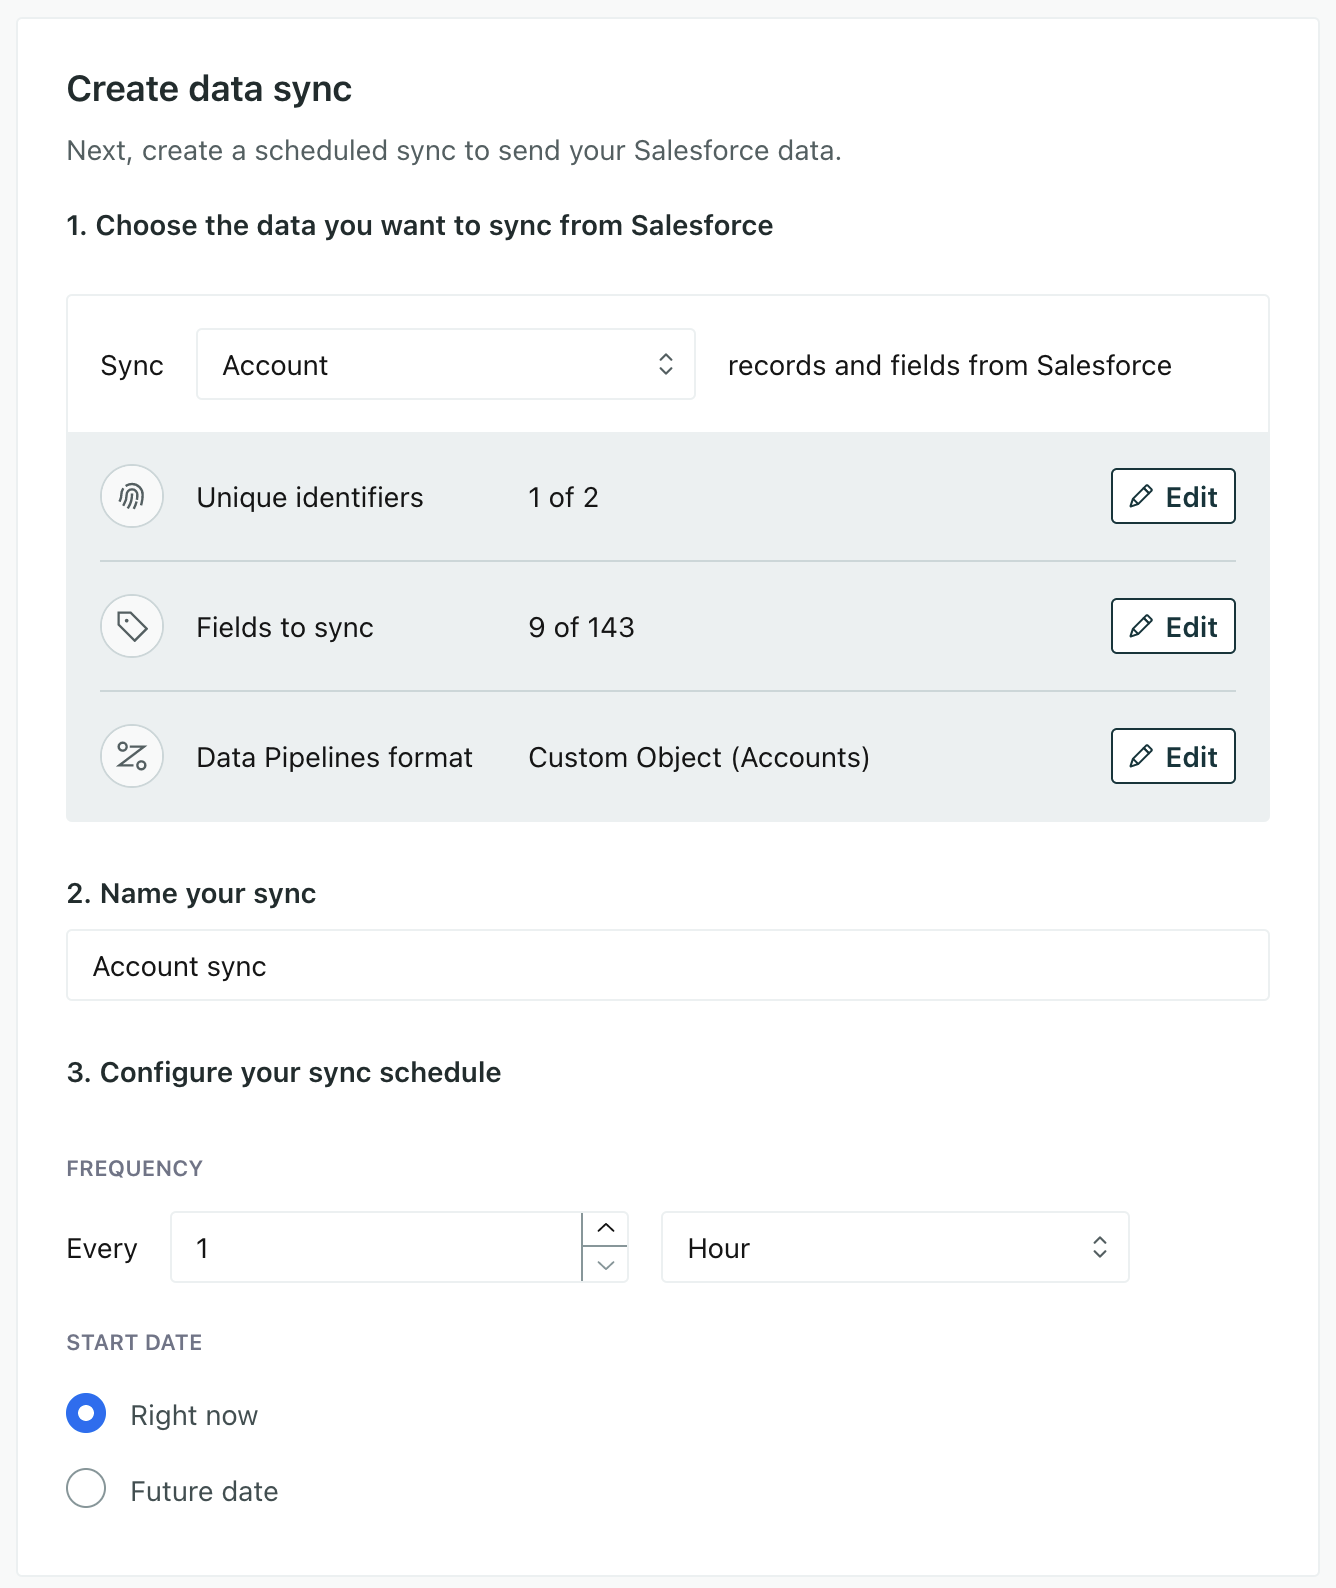
- Click Edit next to Unique identifiers map your identifier—the field that uniquely identifies each person or object. For Accounts, this is usually the Account ID.
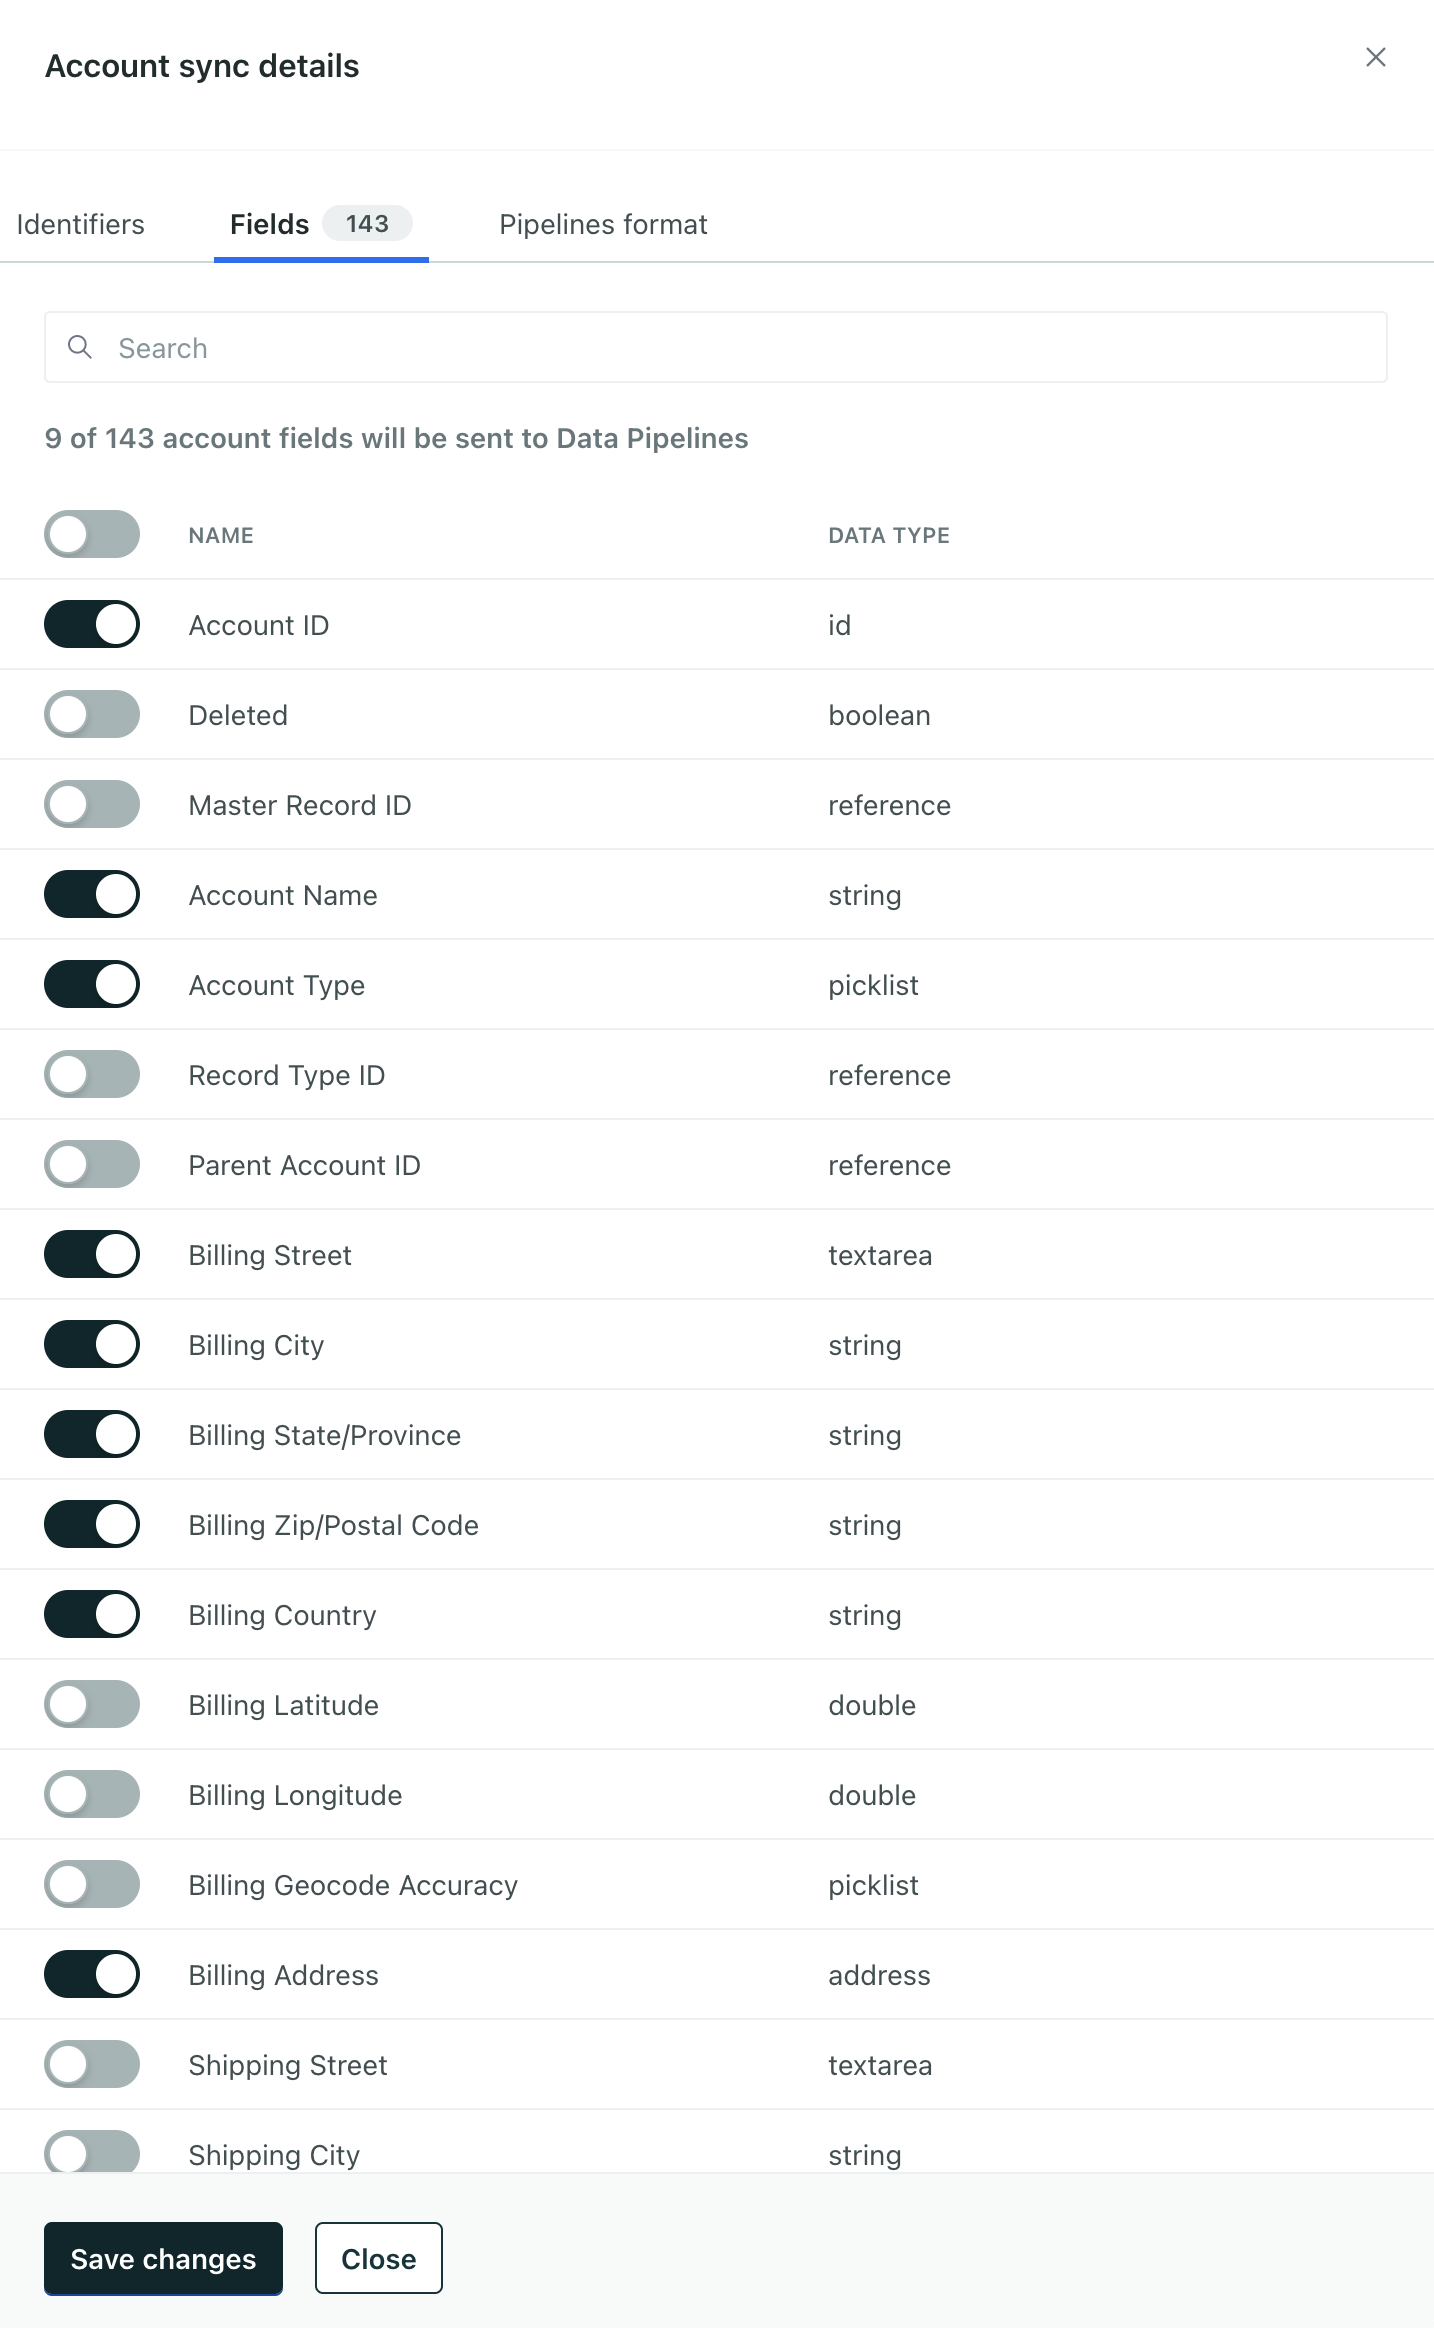
- Go to the Fields tab and select the fields you want to capture for that data type and then click Save Changes.
- Choose how often you want to sync data and when you want to start.
When you finish setting up your sync, the Syncs tab will show the status of your new sync and note that we’re processing your Salesforce data. If you go into the Journeys tab , you should begin seeing your Salesforce data—though it may take a few minutes to populate all your people, especially if you have millions of records
What data is captured in each sync?
Your first sync captures all your current Salesforce data of the specified type. Subsequent syncs capture records that changed since the previous sync. This means that your first sync may take longer than subsequent syncs, as we gather all your Salesforce data with the initial sync.
For example, if you sync contacts, your first sync will send all of the current contacts in your Salesforce environment. The next sync will gather all changes to contacts—all your new contacts, updates, and deleted contacts—since the first sync.
We handle deletions differently from create and update operations!
When you delete records in Salesforce, we send events to record the deleted items. Customer.io handles these events automatically. But you may need to set up actionsThe source event and data that triggers an API call to your destination. For example, an incoming identify event from your sources adds or updates a person in our Customer.io Journeys destination. to delete data in other destinations!
Updating syncs and streams
When you update a sync to add or remove fields, your updates take affect at the next sync interval or stream operation. This means that your changes don’t affect data that you’ve already sent from Salesforce.
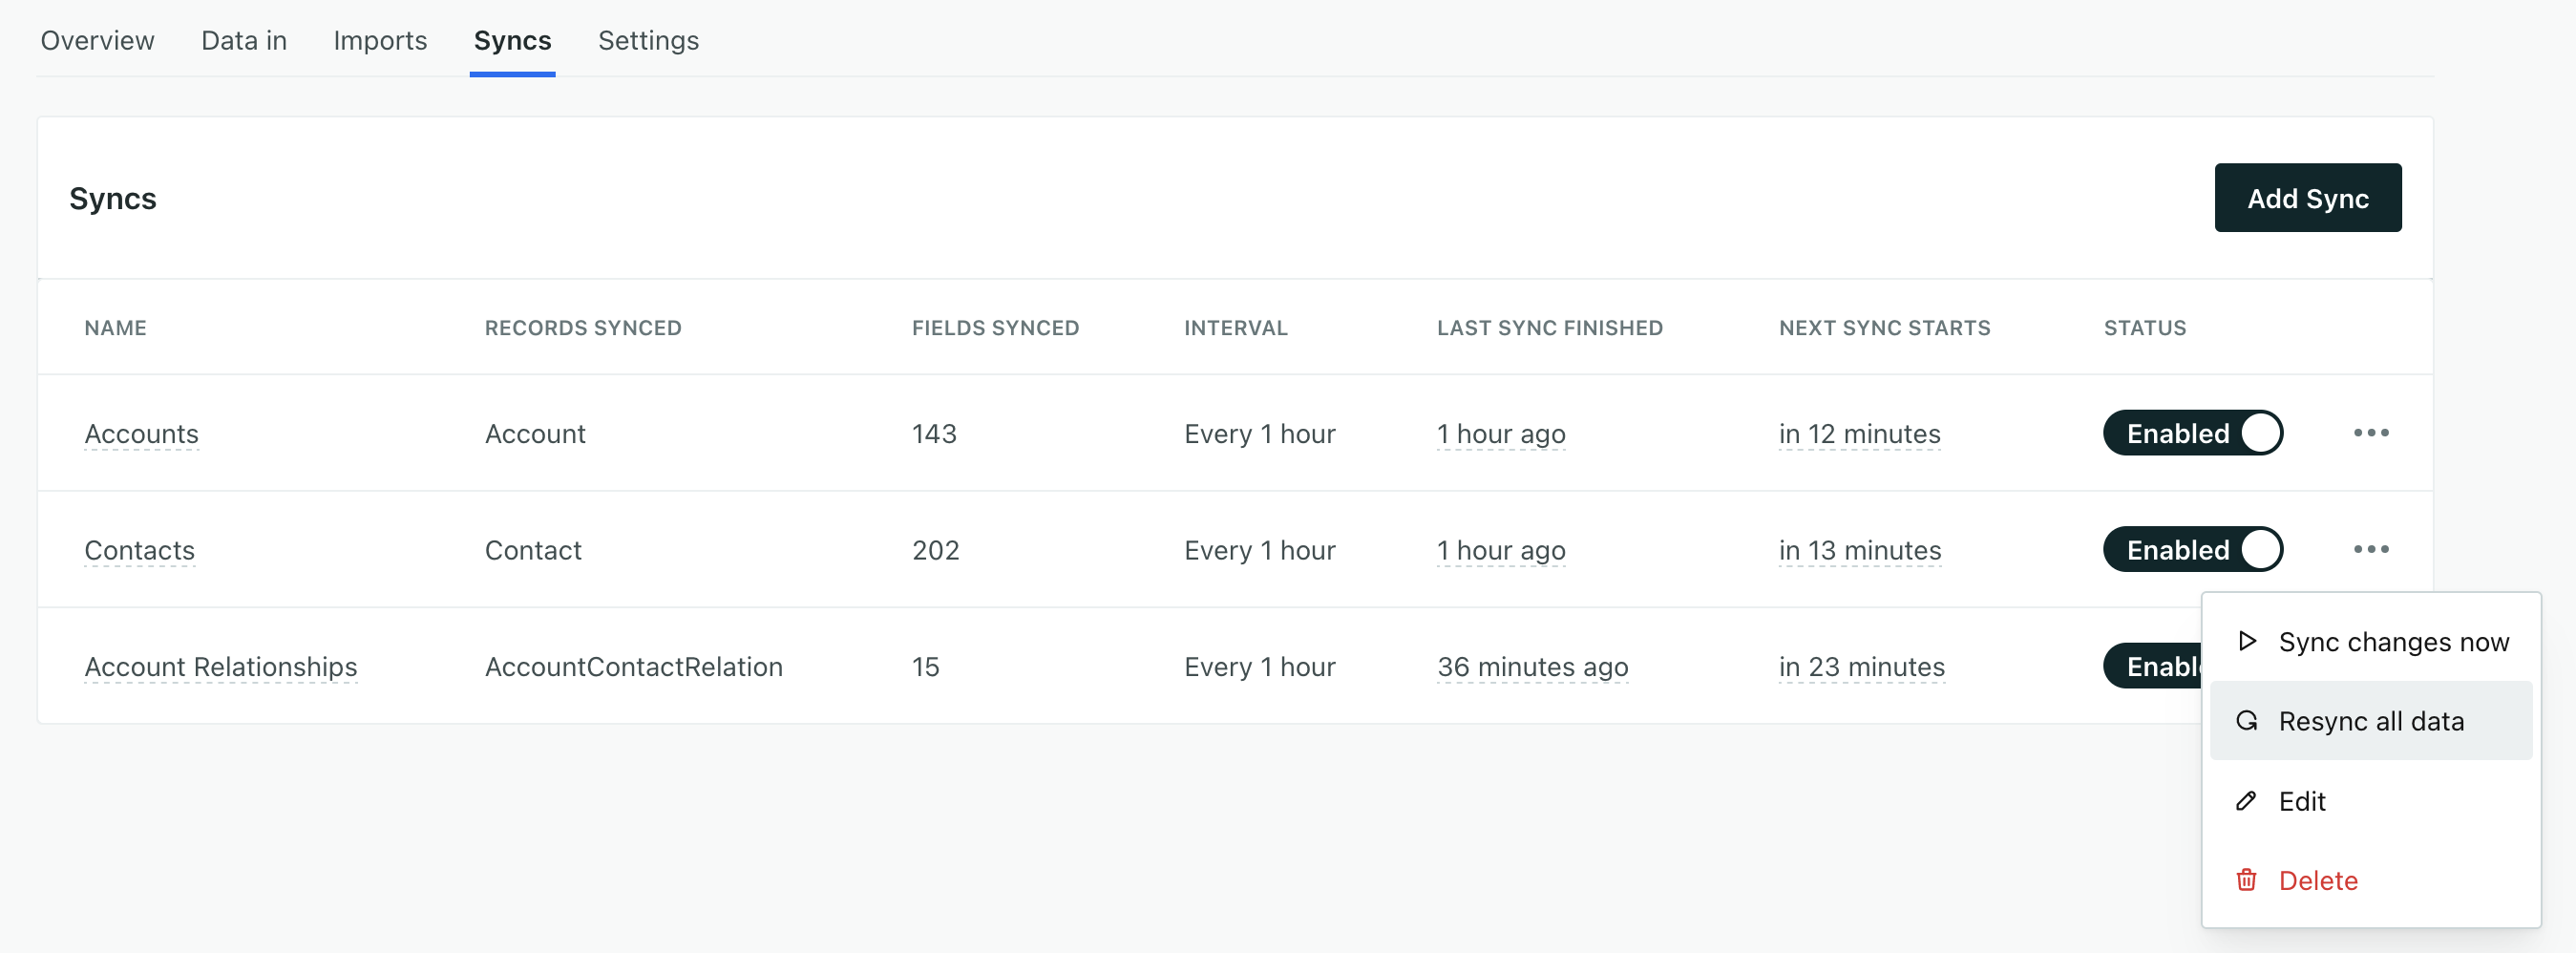
To update all data you’ve passed from Salesforce to Customer.io (and other destinations), you can Resync all data. This sends all of your corresponding Salesforce data through Data Pipelines again, updating all of your records with the changes you made to your sync.
On the Syncs tab, click next to the sync you updated and click Resync all data.
End-to-end Salesforce integration
We support Salesforce as both a source (discussed on this page), and a destinationA destination is a place that you want to send data from one or more sources to. You can use your own workspace as a destination; send data to another service; or send data to your data warehouse.. This means you can set up an end-to-end integration.
For example, you might set up a round-trip integration, sending Salesforce data into Customer.io to nurture leads; and then send information about how your leads respond to messages back into Salesforce to determine whether your leads graduate into opportunities or not.
In this example, you’d connect Salesforce to Customer.io Journeys, and then Journeys Message Metrics back to Salesforce. See our end-to-end Salesforce integration recipe for more information.