Set up your Salesforce source and syncs
Connecting your Salesforce data to Customer.io is relatively easy. You’ll determine what types of data you want to send to Customer.io, how to map that data to people, events, or objects, and how often you want to sync Salesforce data with Customer.io! Let’s get started.
1. Set up your Salesforce source and sync Contacts
When you set up your source, you’ll configure your first Sync—the type of data that you want to send to one or more destinationsA destination is a place that you want to send data from one or more sources to. You can use your own workspace as a destination; send data to another service; or send data to your data warehouse.. We suggest that you start with Contacts because it’s the easiest, and most natural thing to map to most destinations, including Customer.io Journeys.
You’ll set up subsequent syncs after you finish configuring your source, where each sync brings in a different kind of data (leads, opportunities, and so on).
- Go to the tab and click Sources.
- Click Add Source, pick Salesforce, and click Next: Connect Salesforce.
- Set up your source connection:
- Give the source a friendly Name so you’ll recognize it in Customer.io.
- Pick how you’ll send data to Customer.io. See Syncs and streams:
- (Coming soon) Real-time Stream: Send data to Customer.io Data Pipelines as it changes in Salesforce.
- Scheduled Sync: Sync data on a schedule you choose.
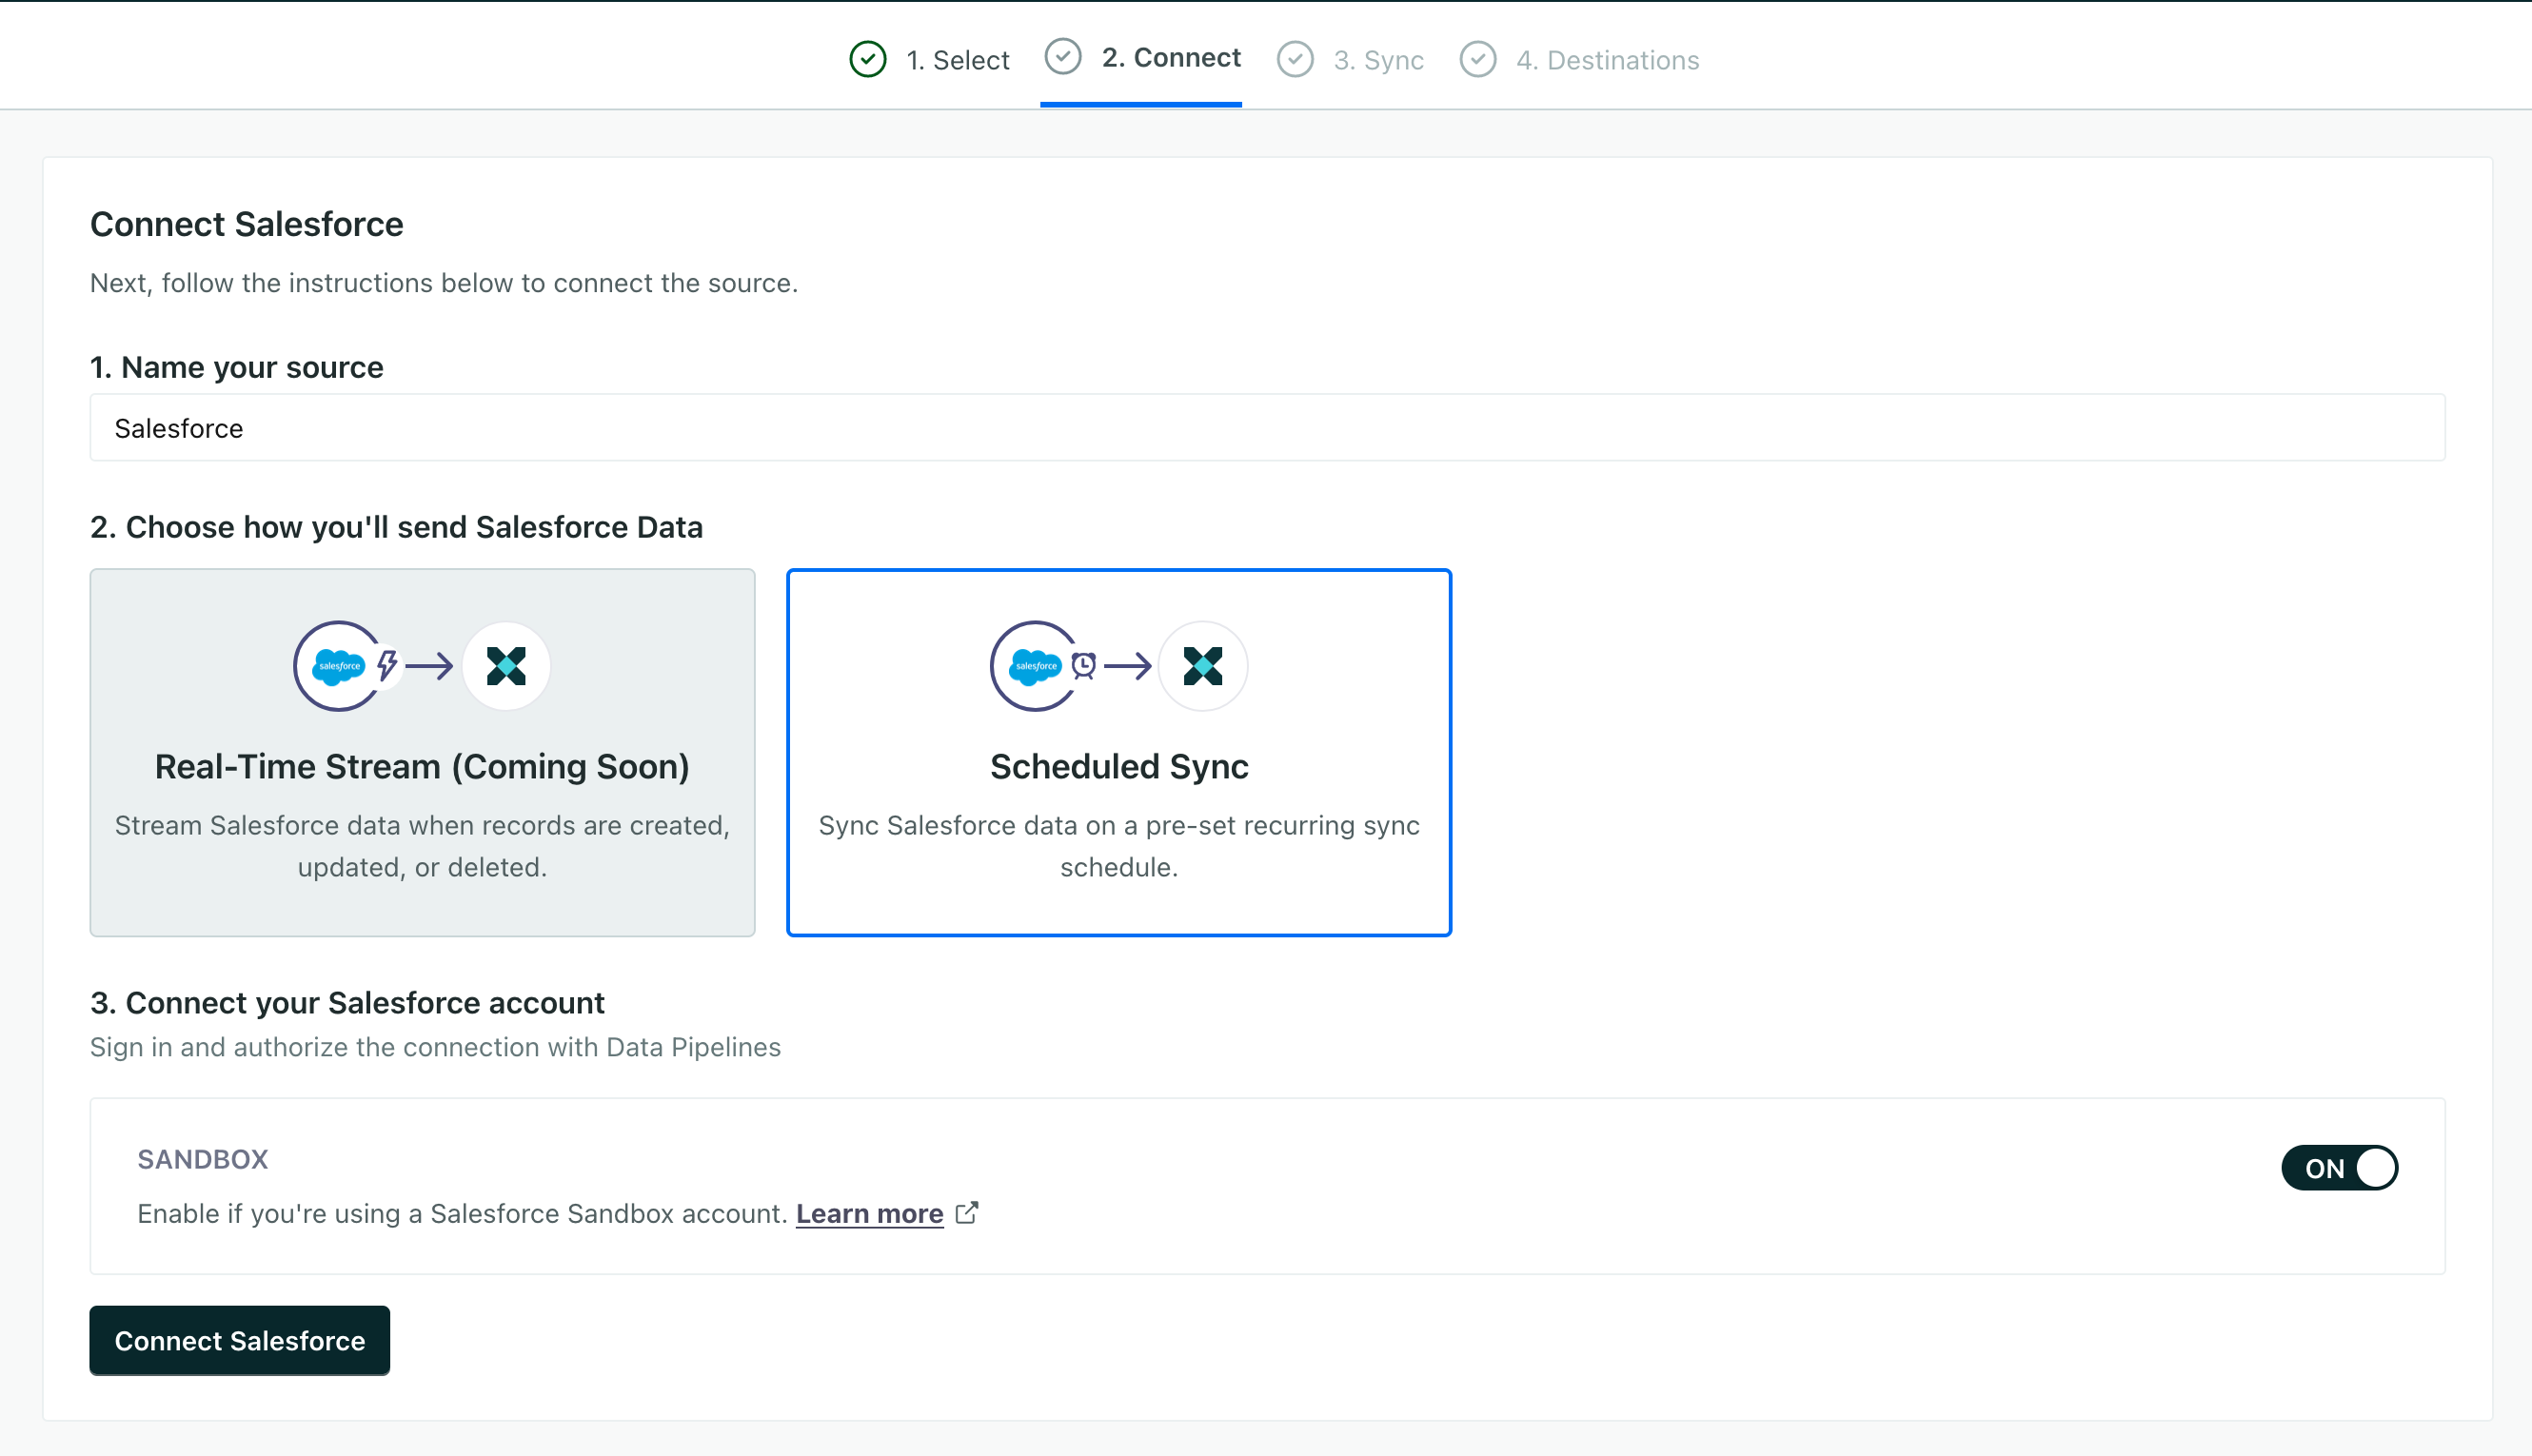
- Click Connect Salesforce and log into Salesforce. Click Create Sync when you’re done.
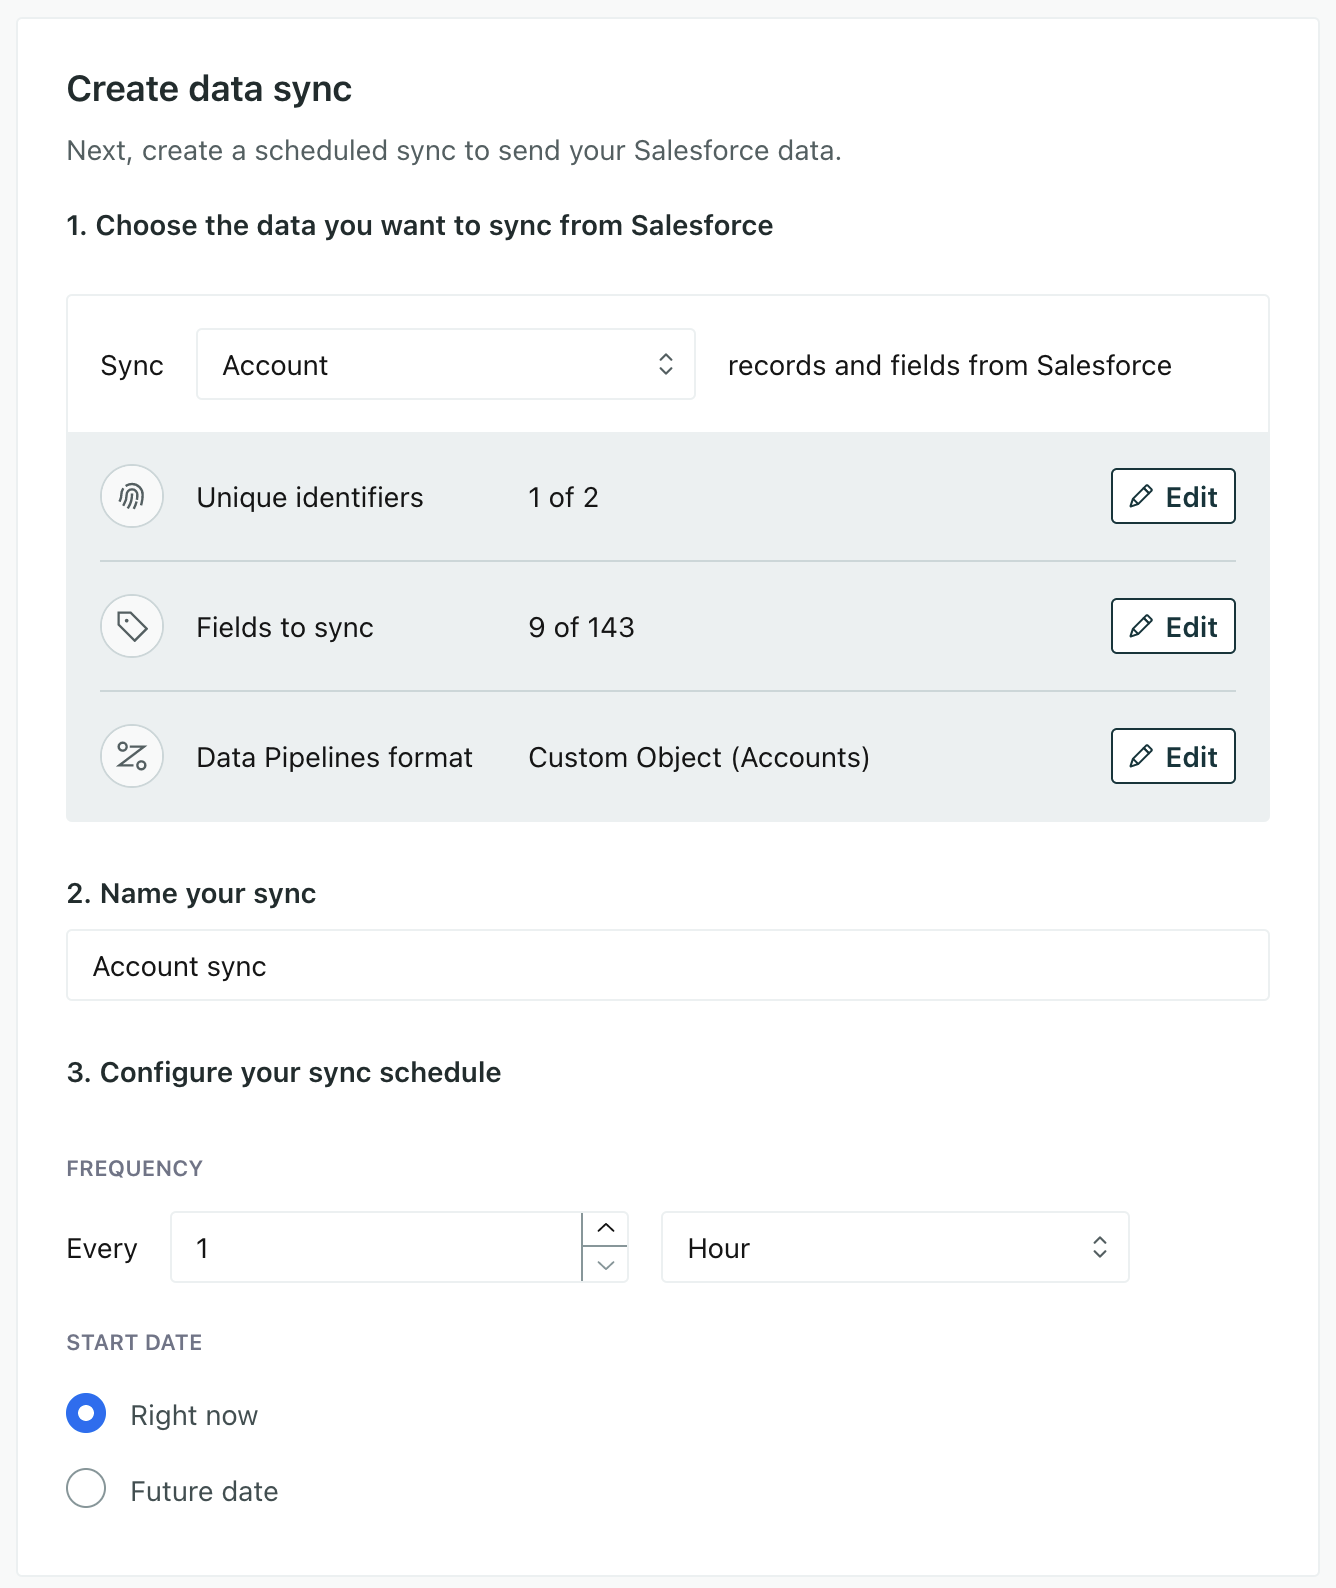
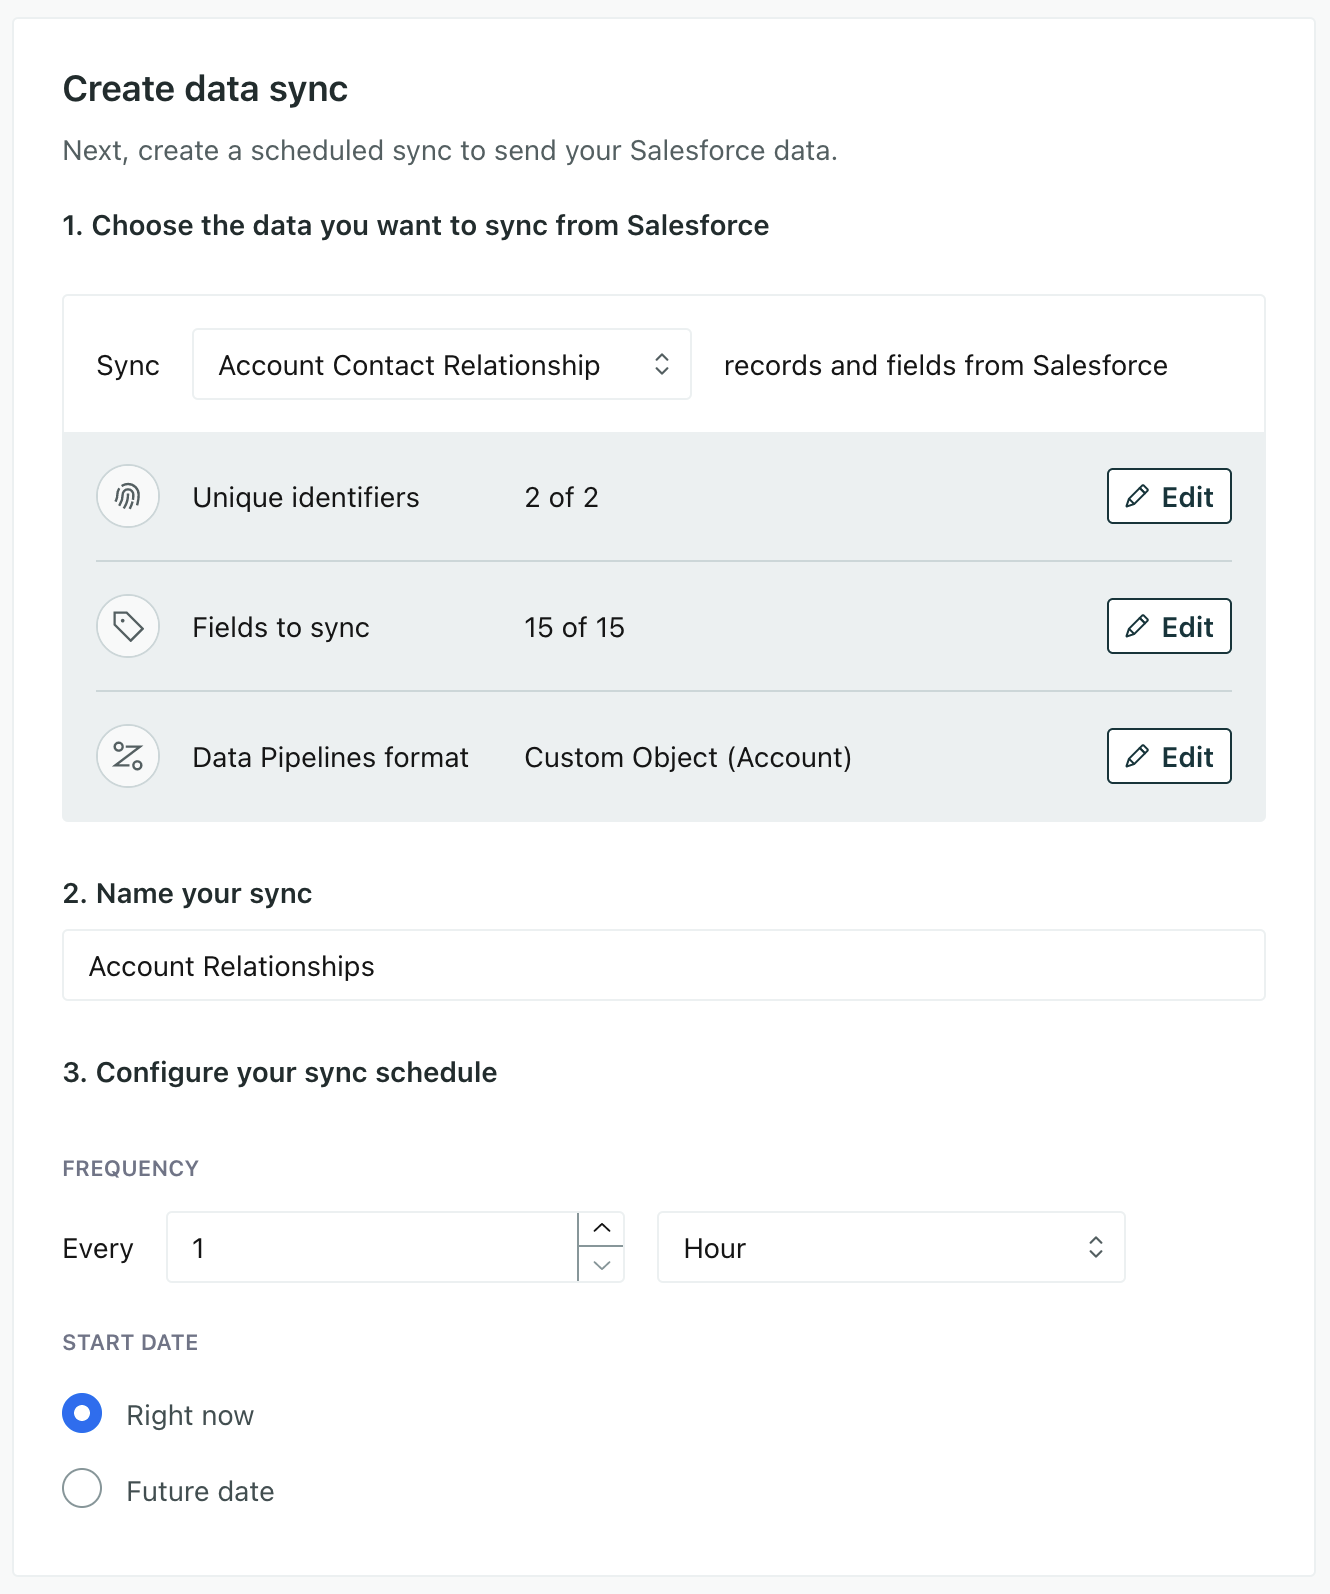
- Create your Contacts sync. For more information about syncs and mapping your data, see Syncs and streams
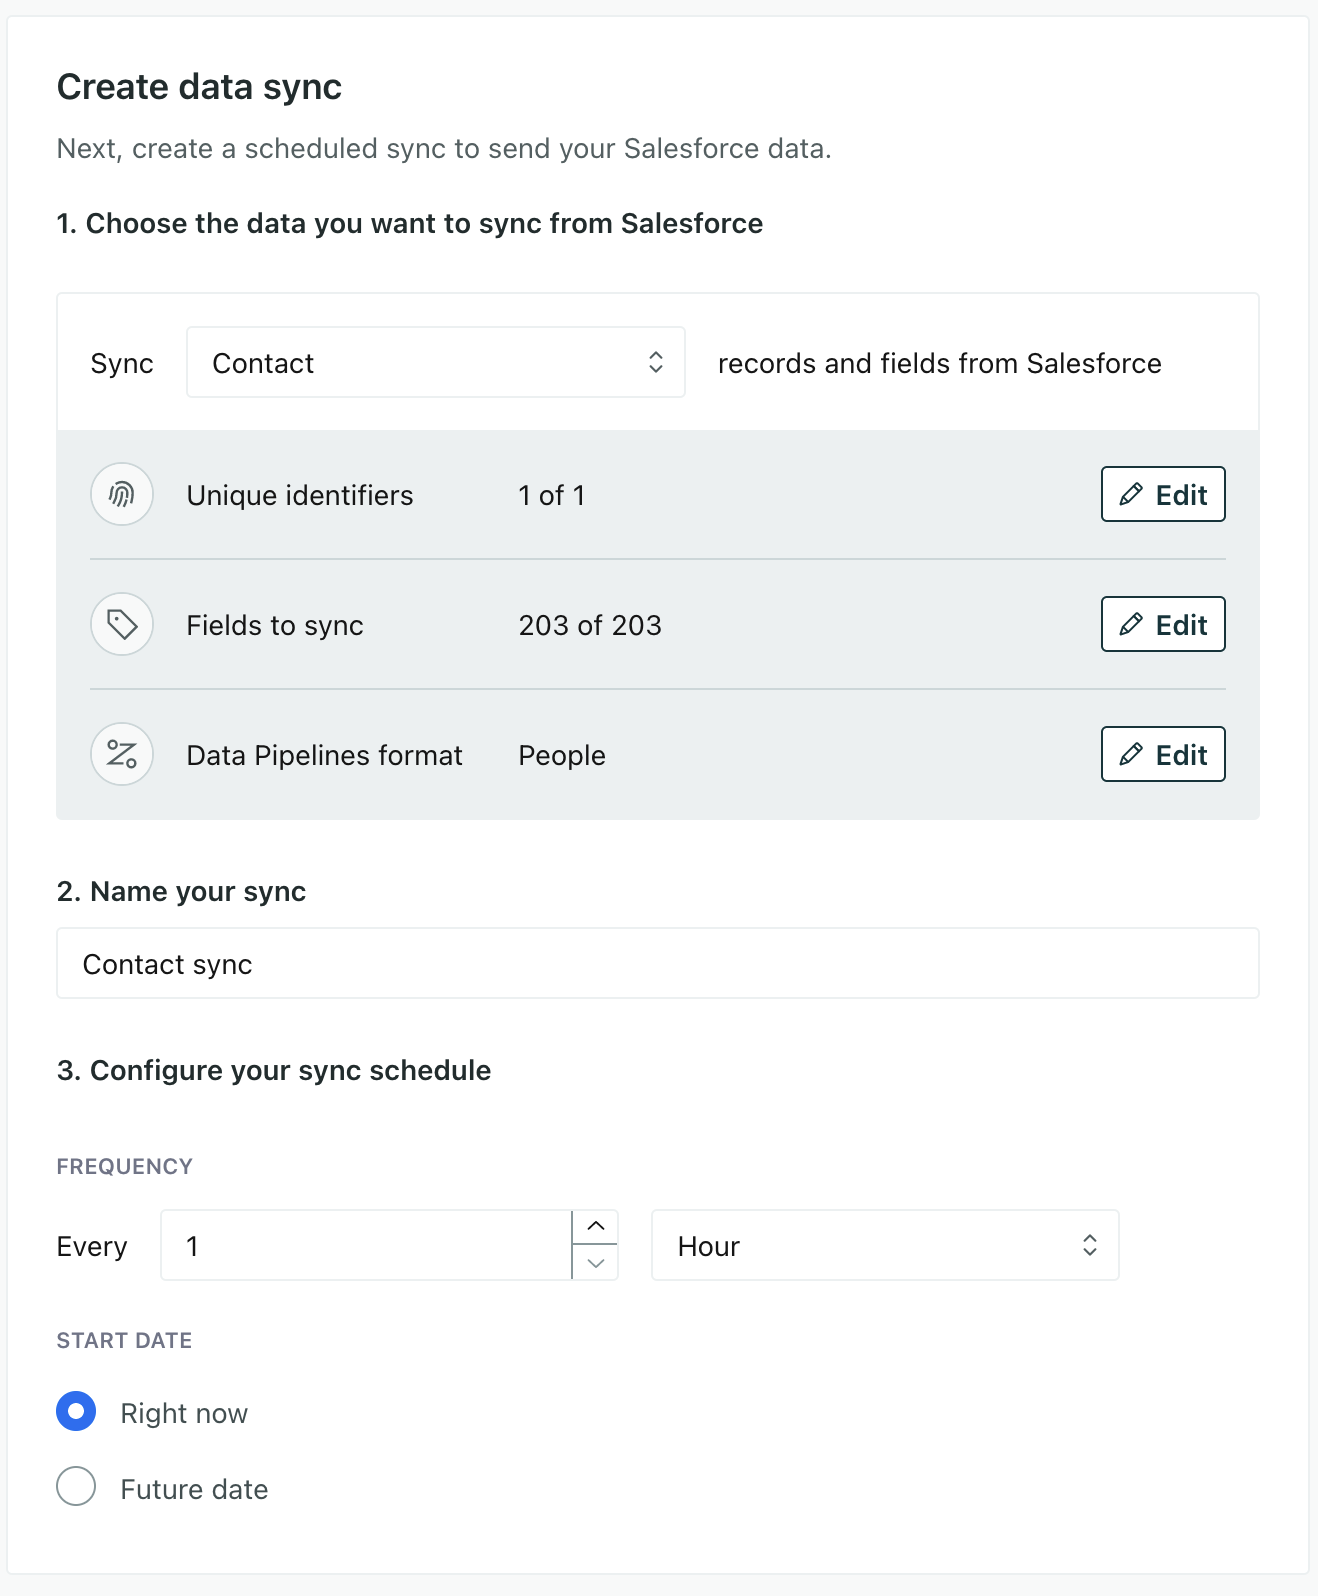
- Give your sync a Name. For now, let’s call it Contacts.
- In the Sync dropdown, select Contacts.
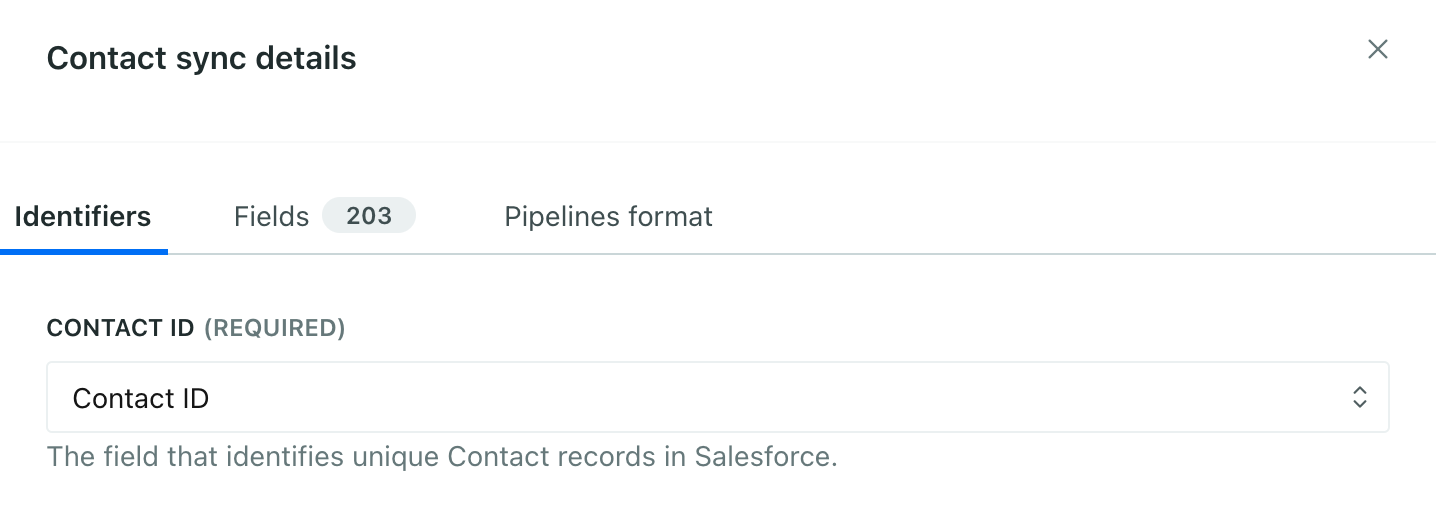
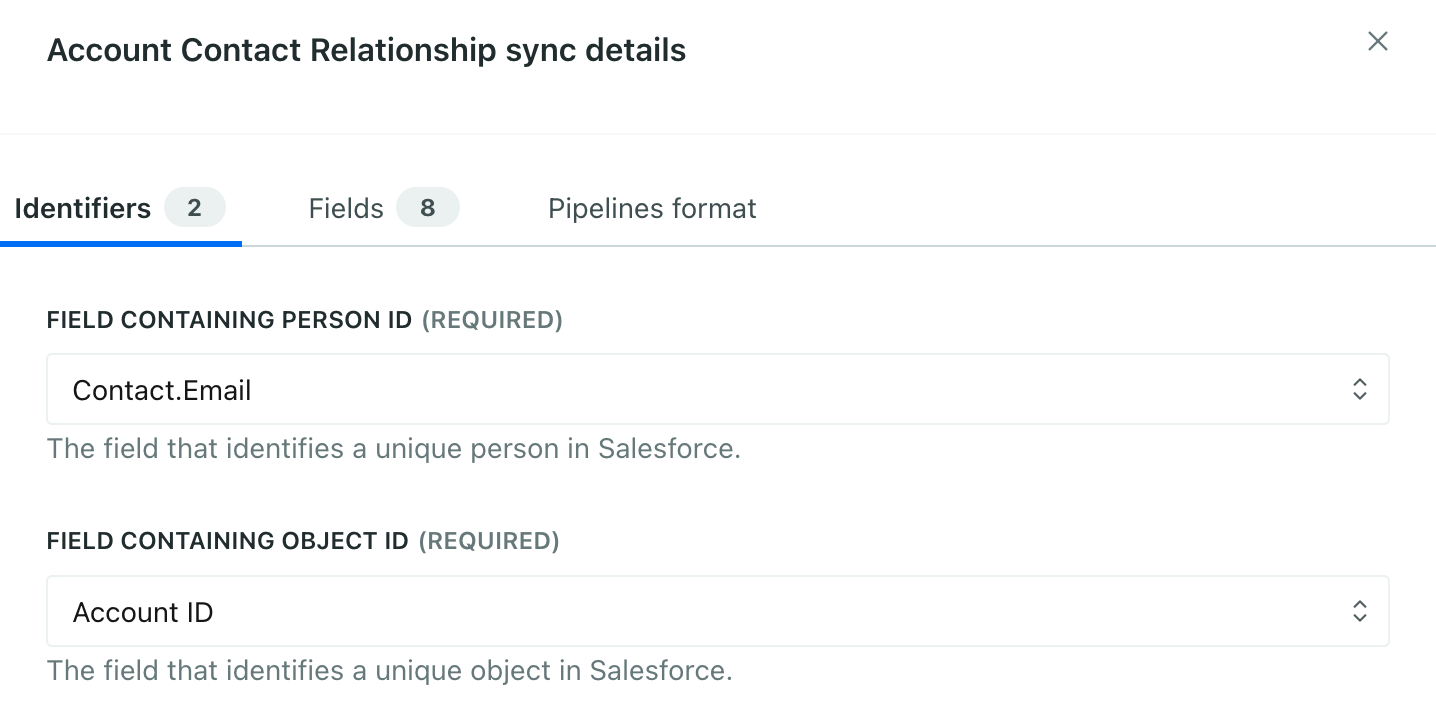
- Click Edit next to Identifiers and pick Contact ID as your Contact ID.
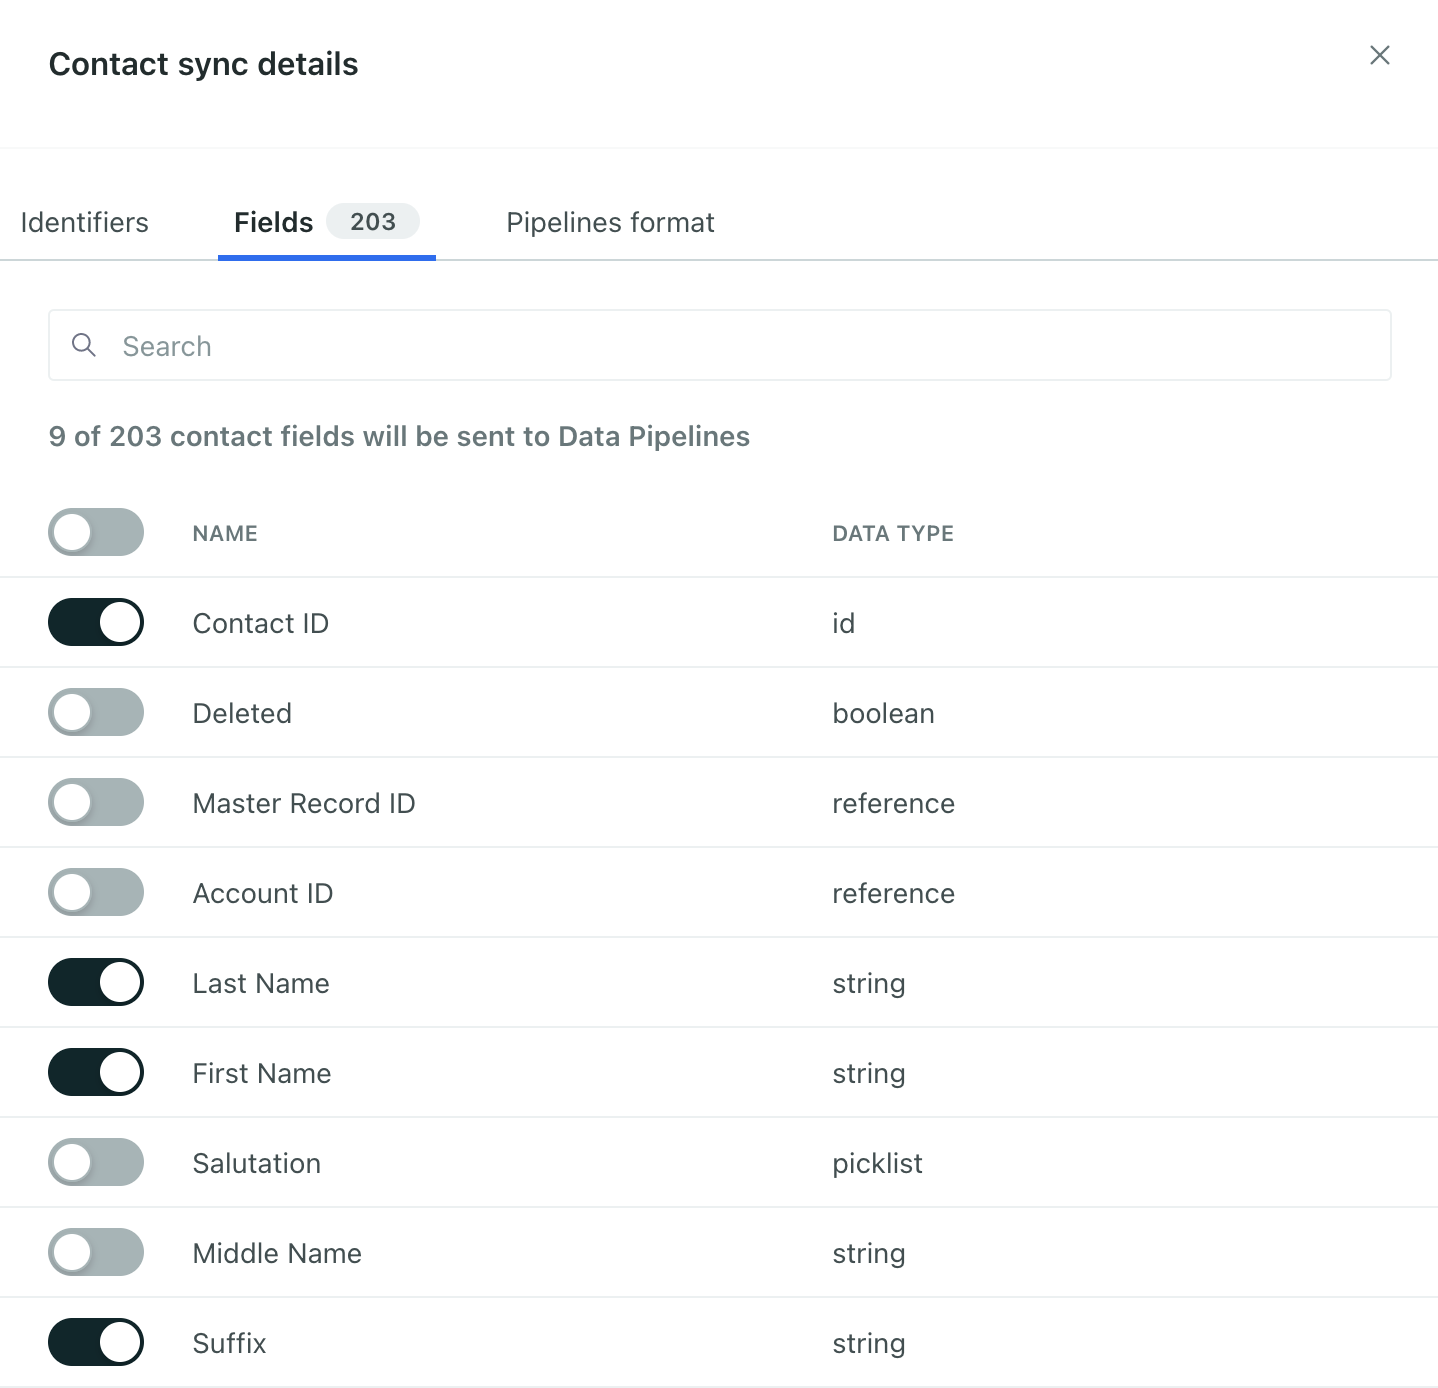
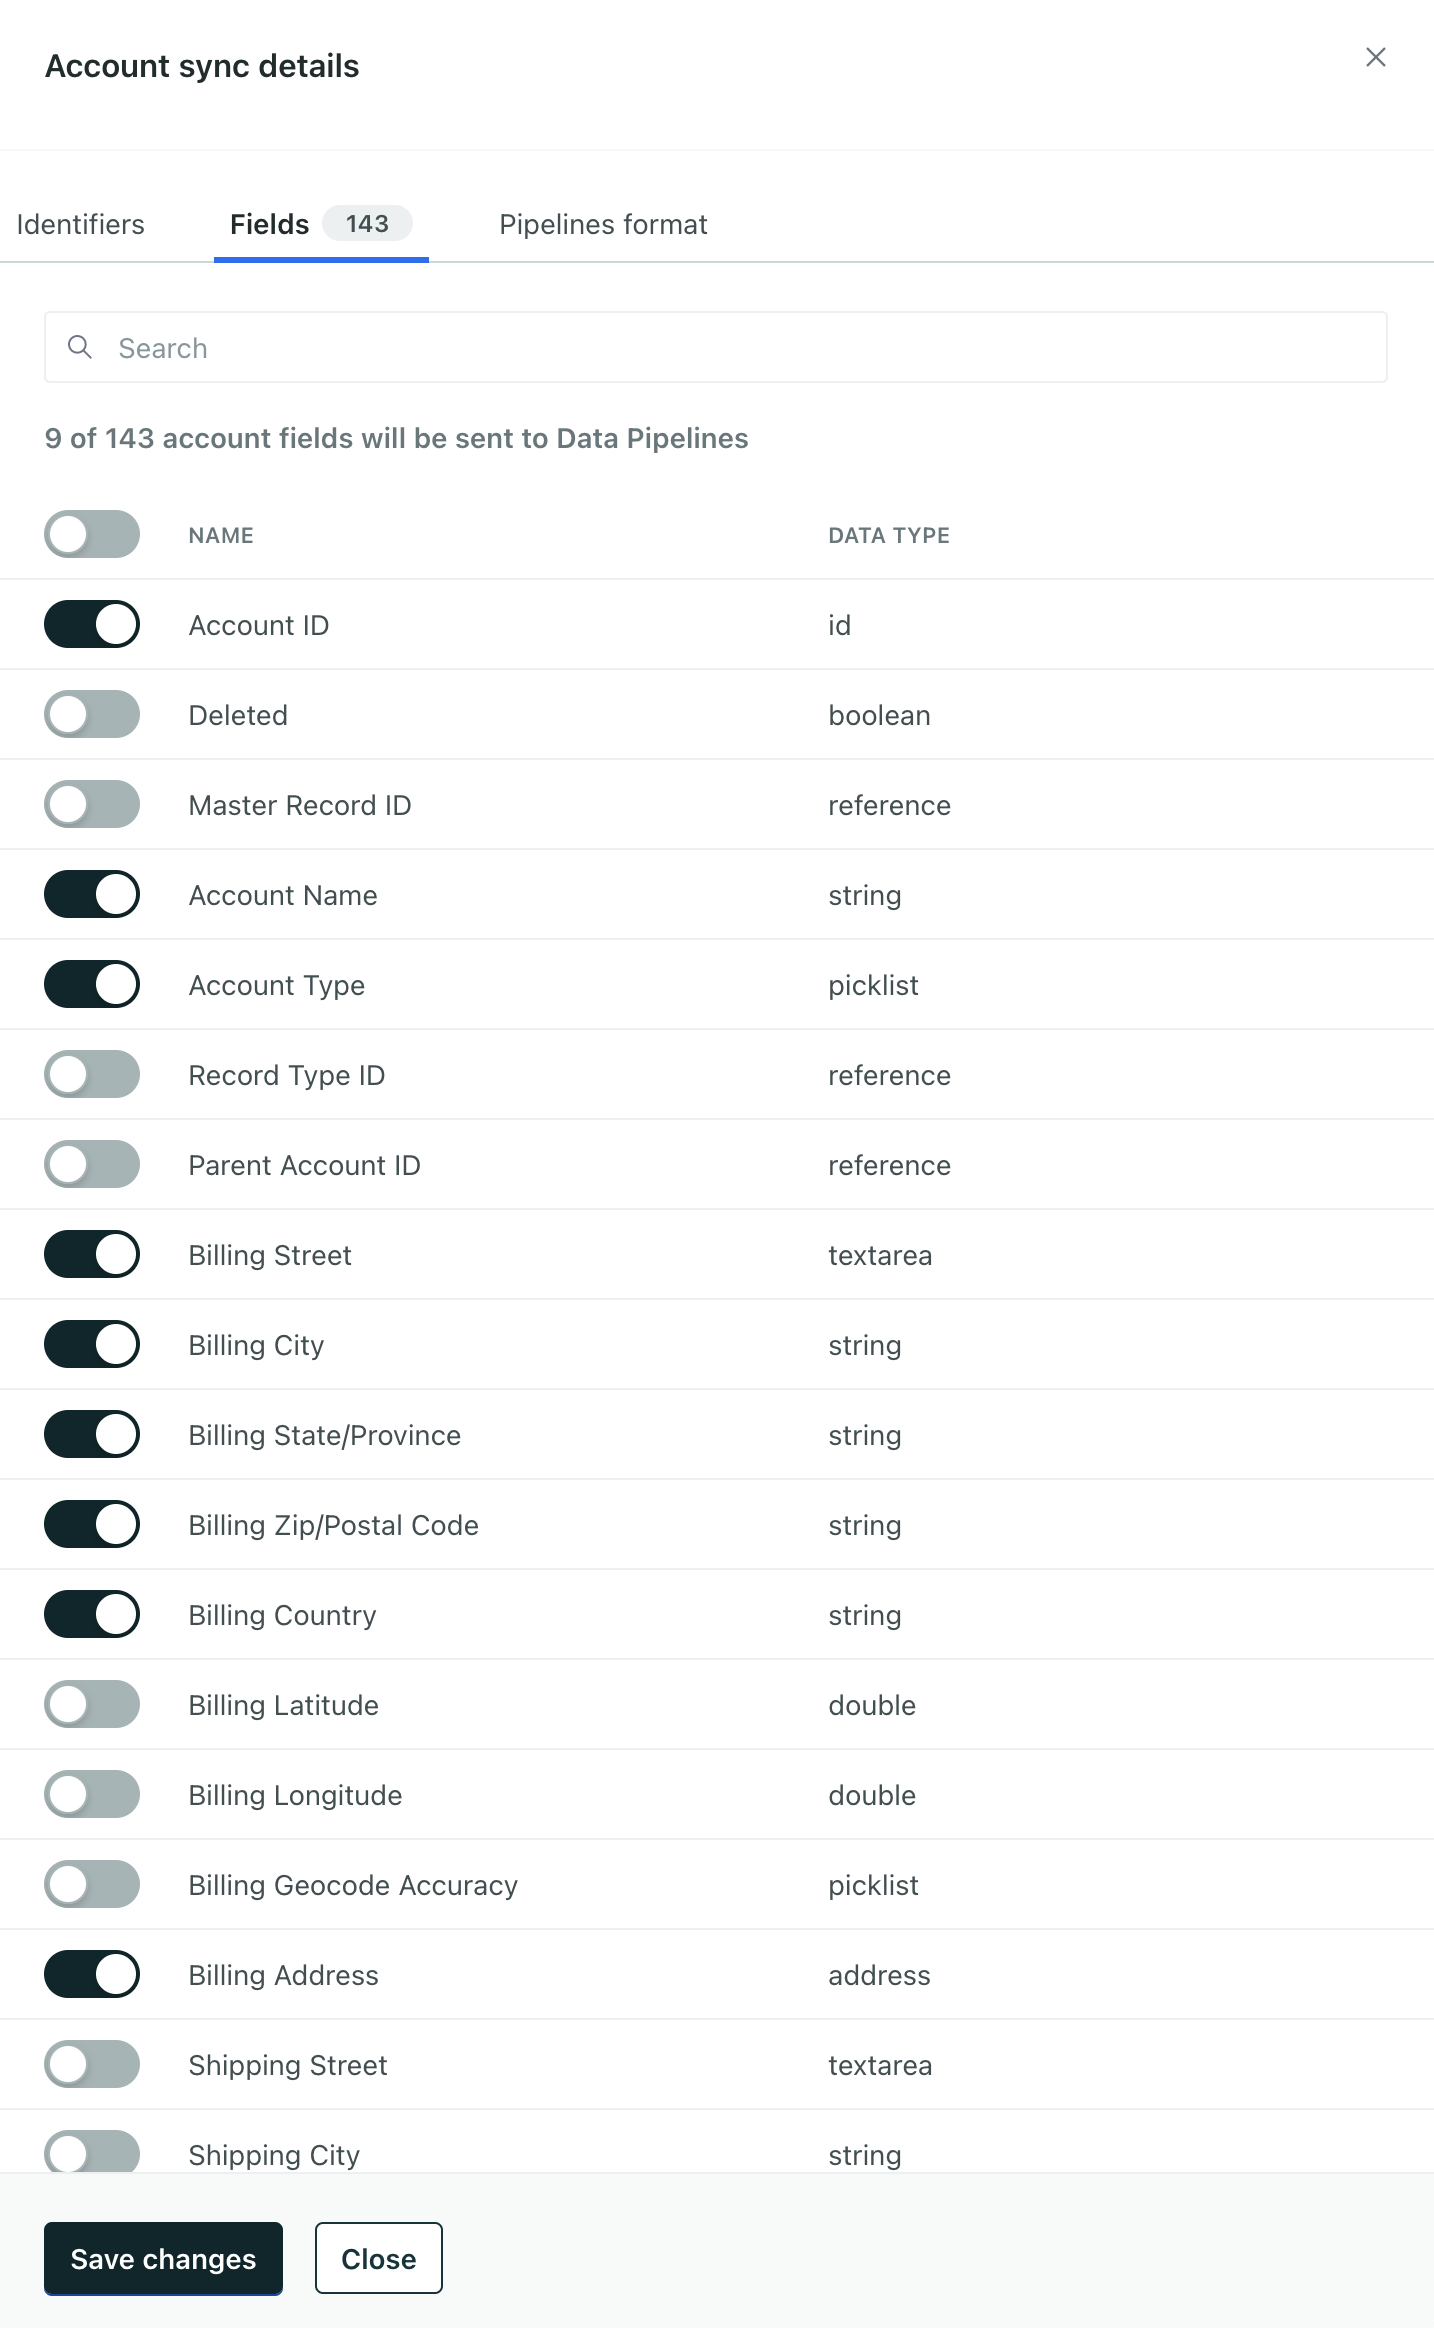
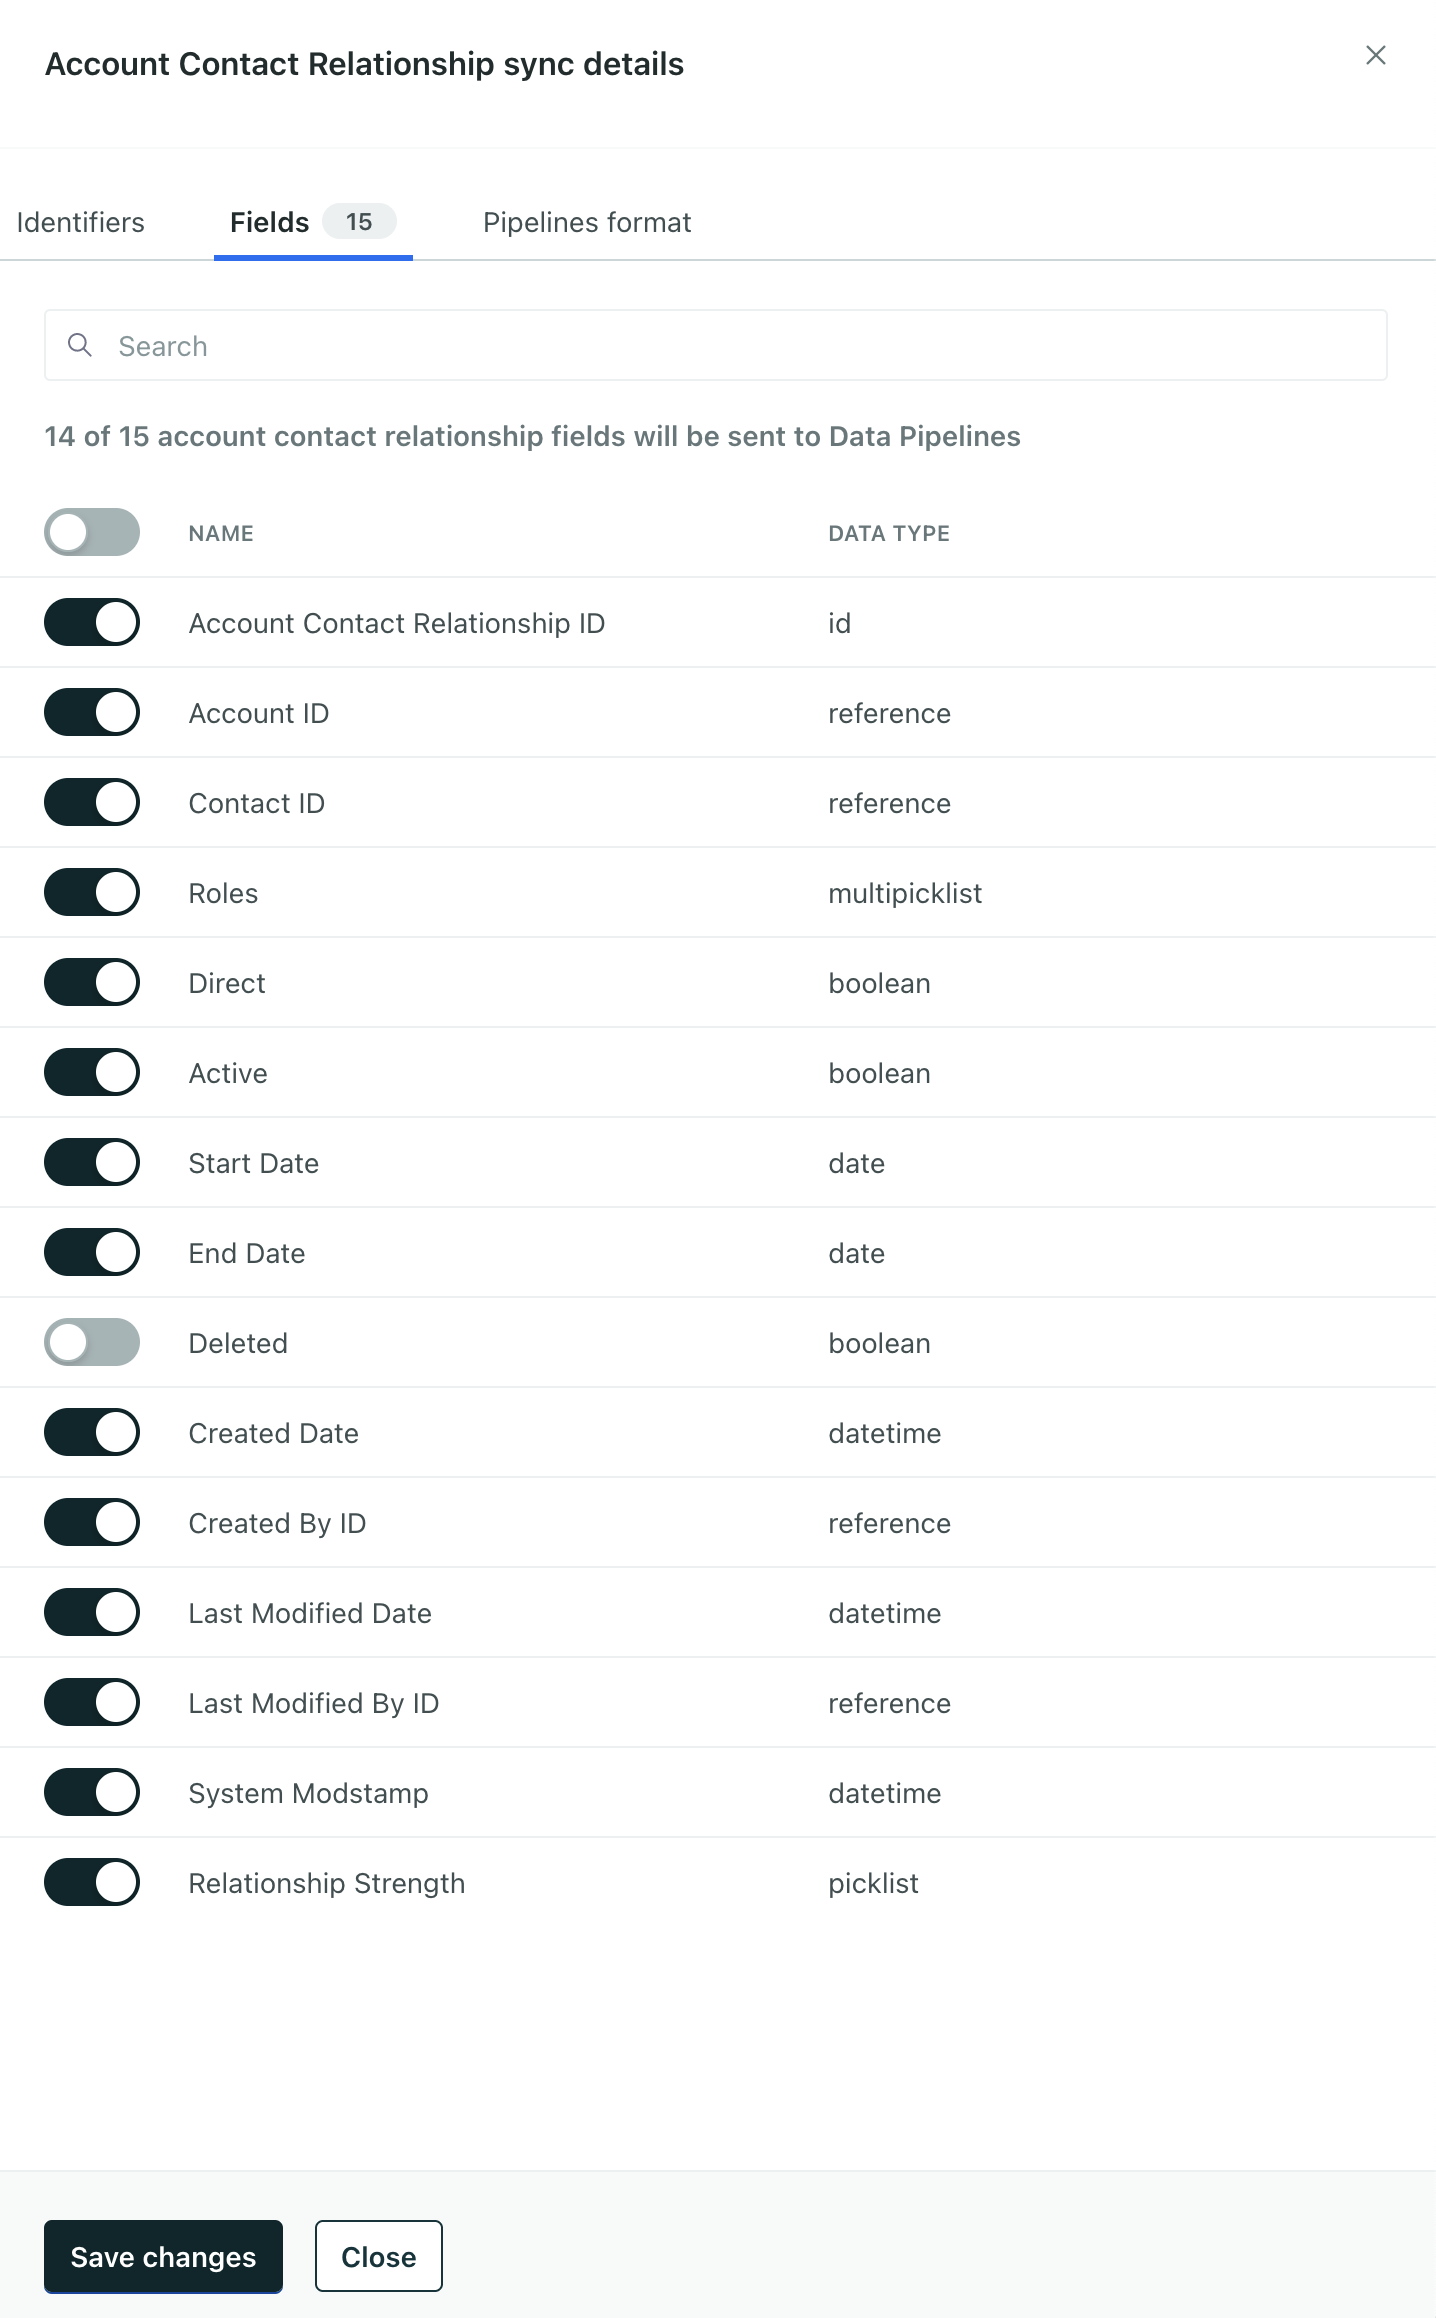
- Go to the Fields tab and pick the fields you want to capture in Customer.io. Salesforce contains a lot of data, not all of which is useful in Customer.io. For example, we don’t need the mailing latitude or longitude to send email.
- Choose how often you want to sync data. For now, let’s leave these settings as they are. You can always change them later.
- Click Next: choose destinations and pick your Journeys workspace as the destination. This means we’ll send Salesforce data—specifically your Contacts—into Customer.io
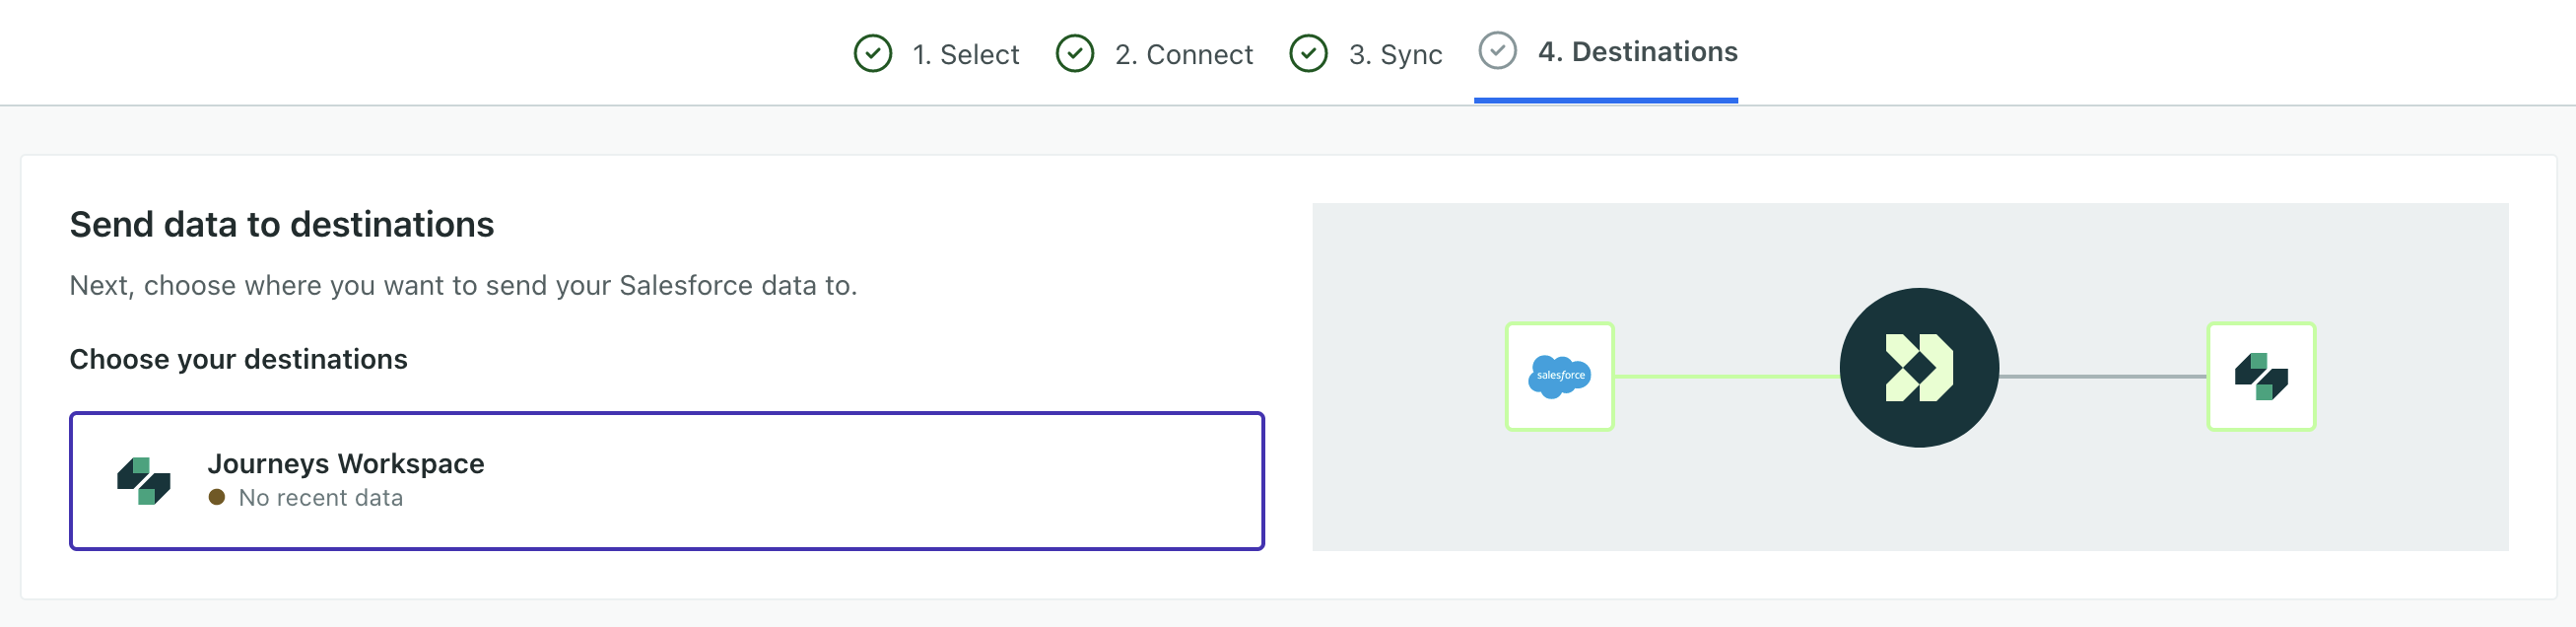
- Click Enable Salesforce.
The Syncs tab will show the status of your sync and note that we’re processing your Salesforce data. If you go to the People page, you should begin seeing your Salesforce contacts—though it may take a few minutes to populate all your people, especially if you have millions of contacts.
Now you’re ready to sync your accounts!
2. Sync Accounts
Now we’re ready to get Accounts from Salesforce into Customer.io.
Go to your Salesforce source’s Syncs tab and click Add Sync.
Call the sync Accounts and pick Accounts as the type of data you want to send through your pipeline.
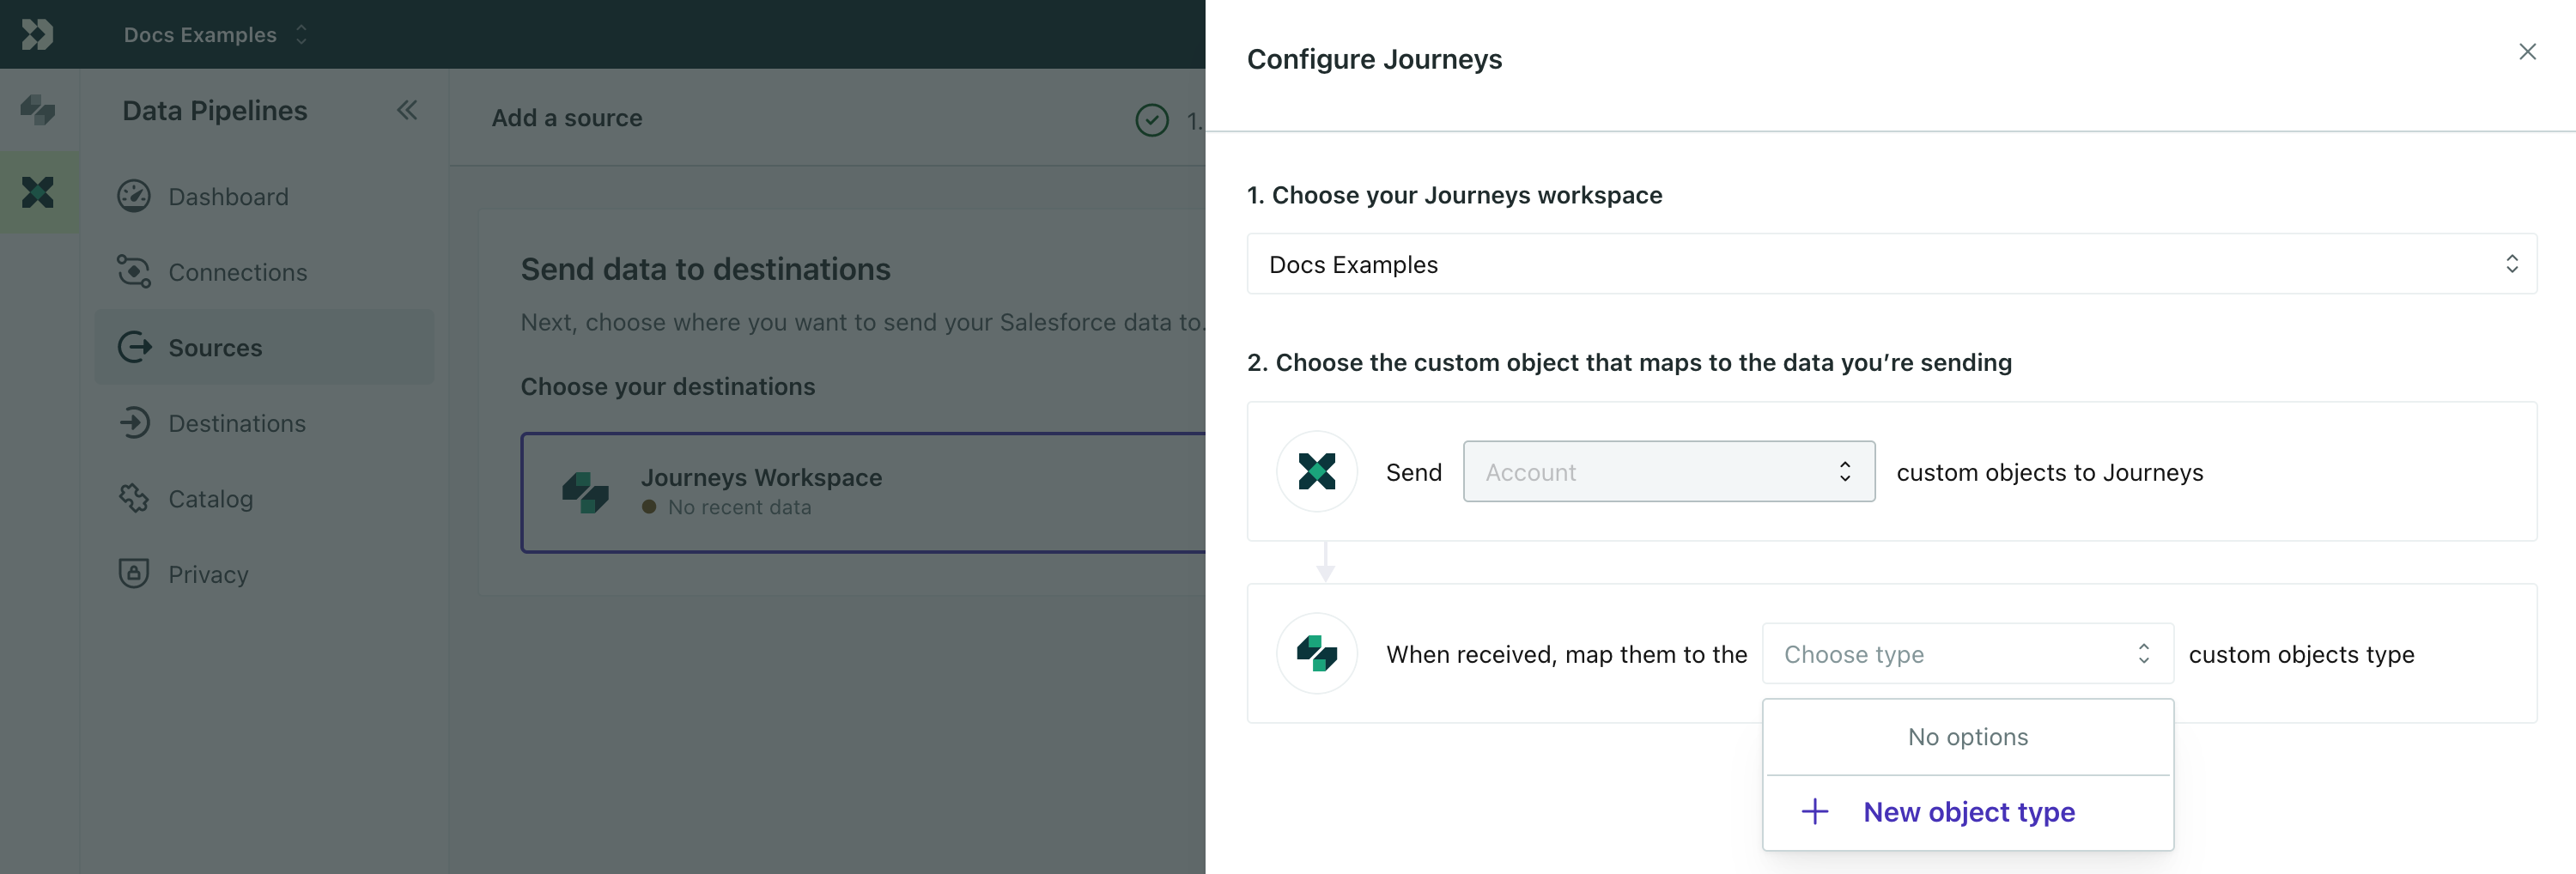
Map your accounts to Custom Objects and set the Object Name to Accounts.
Click Edit next to Unique Identifiers and set Account ID to Account ID. Leave the Related Record ID empty.
Go to the Fields tab and pick the fields you want to capture for each account, then click Save Changes.
In the Map objects to box, click the dropdown and select New Object Type. Here you’ll enter the singular and plural names—like Account and Accounts—and click Save Object Type. Now Journeys is ready to accept your Account data.
Set your sync settings to the same as the Contacts you set up earlier and click Enable Sync
Now you can go back to Journeys and you’ll see an Accounts entry in the sidebar. Click on an account and you’ll see your Salesforce populated in Customer.io! But if you check the Relationships tab, you’ll see that your Accounts aren’t related to Anybody. That’s what we’ll do next: sync relationships between your accounts and contacts.
3. Sync Account-Contact Relationships
When you set up syncs for Accounts and Contacts, you’ll also need to sync the Relationship between the two. Salesforce calls this the Account Contact Relationship. This same principle applies to other kinds of relationships between people and objects: simply find the associated Relationships data type in the dropdown.
- Call the sync Account-Contact Relationships and select Account Contact Relationships in the Sync field.
- Click Edit next to Unique Identifiers.
- Now we’re going to map the two identifiers that you used for your Contacts and Accounts respectively.
- Set Account Contact Relationship ID to Account ID.
- Set Related Record ID to the Contact ID.
- Go to the Fields tab and select the fields that you want to capture for each relationship. These often tell you how someone is related to an account—whether they’re the primary contact, a secondary contact, and so on.
- Finish creating the sync and enable it.
Now, go back to your Accounts and click the Relationships tab. You should see the people related to each account. You can even click on a person to see the details of their relationship!
Now you’re capturing data from Salesforce in Journeys, but you’ll need to follow step 2 or step 3 in this recipe to send data back into Salesforce.

