Send Salesforce data using Webhooks
While you can send data directly to Salesforce, you can also update Salesforce records based on any logic in Customer.io—people belonging to a particular segment, performing a specific event, responding to a particular message, and so on. This is a more advanced use case, but it’s a powerful way to keep your Salesforce data up-to-date with your Customer.io data.
For example, you might capture web forms in Customer.io and use this data to add leads or contacts to Salesforce automatically from Customer.io. This is a much more advanced use case, and requires some understanding of APIs. But, we can show you how it works and give you some examples to get you started.
How it works
Imagine that you want to update contacts in Salesforce when they agree to join your beta program. We’ll capture this information in Salesforce using a custom field called Beta Program Participant.
Now, there are two ways to send beta participant responses to Salesforce from Customer.io:
- You can call the Salesforce API directly using webhooks.
- Use the Customer.io API to send data to your Salesforce Destination, which sends data to Salesforce.
There are a couple of differences between the two options. In general, the first option is easier to setup but requires an understanding of Salesforce’s APIs, and you’ll need an API key from your Salesforce environment. Also, if Salesforce ever changes their APIs, your webhooks will break. The second option is harder to set up, but is more durable and would potentially let you send data to Salesforce and other destinations.
into beta) a-->|Send event to
Customer.io|b(Trigger campaign
containing a webhook) b-->d{Using Data Pipelines?} d-..->|no|e(Option 1: Update Salesforce
using Salesforce API) d-->|yes|f(Option 2: Send
trackcall to Data Pipelines) f-->g(Update Salesforce
via Data Pipelines) f-.->|optional|h(Update other destinations
via Data Pipelines)
Option 1: Use Salesforce’s API directly
Our example uses Salesforce’s REST API to update contacts, but you could recreate these steps for any other Salesforce objects you want to create or update (like accounts, relationships, etc). Before you use the Salesforce API, you’ll need Salesforce API credentials—this is a bearer token that you’ll get from the Salesforce UI.
For this example, imagine you have a campaignA series of actions that you perform for each person who matches criteria. Campaigns typically send people a series of messages, but you can also use campaigns to send webhooks, update attributes, etc. that triggers when someone responds to a request to participate in your beta program and you want to pass your contact’s beta response to Salesforce. In the Workflow step of this example campaign, you will:
- Drag the Send and Receive Data block into your workflow.
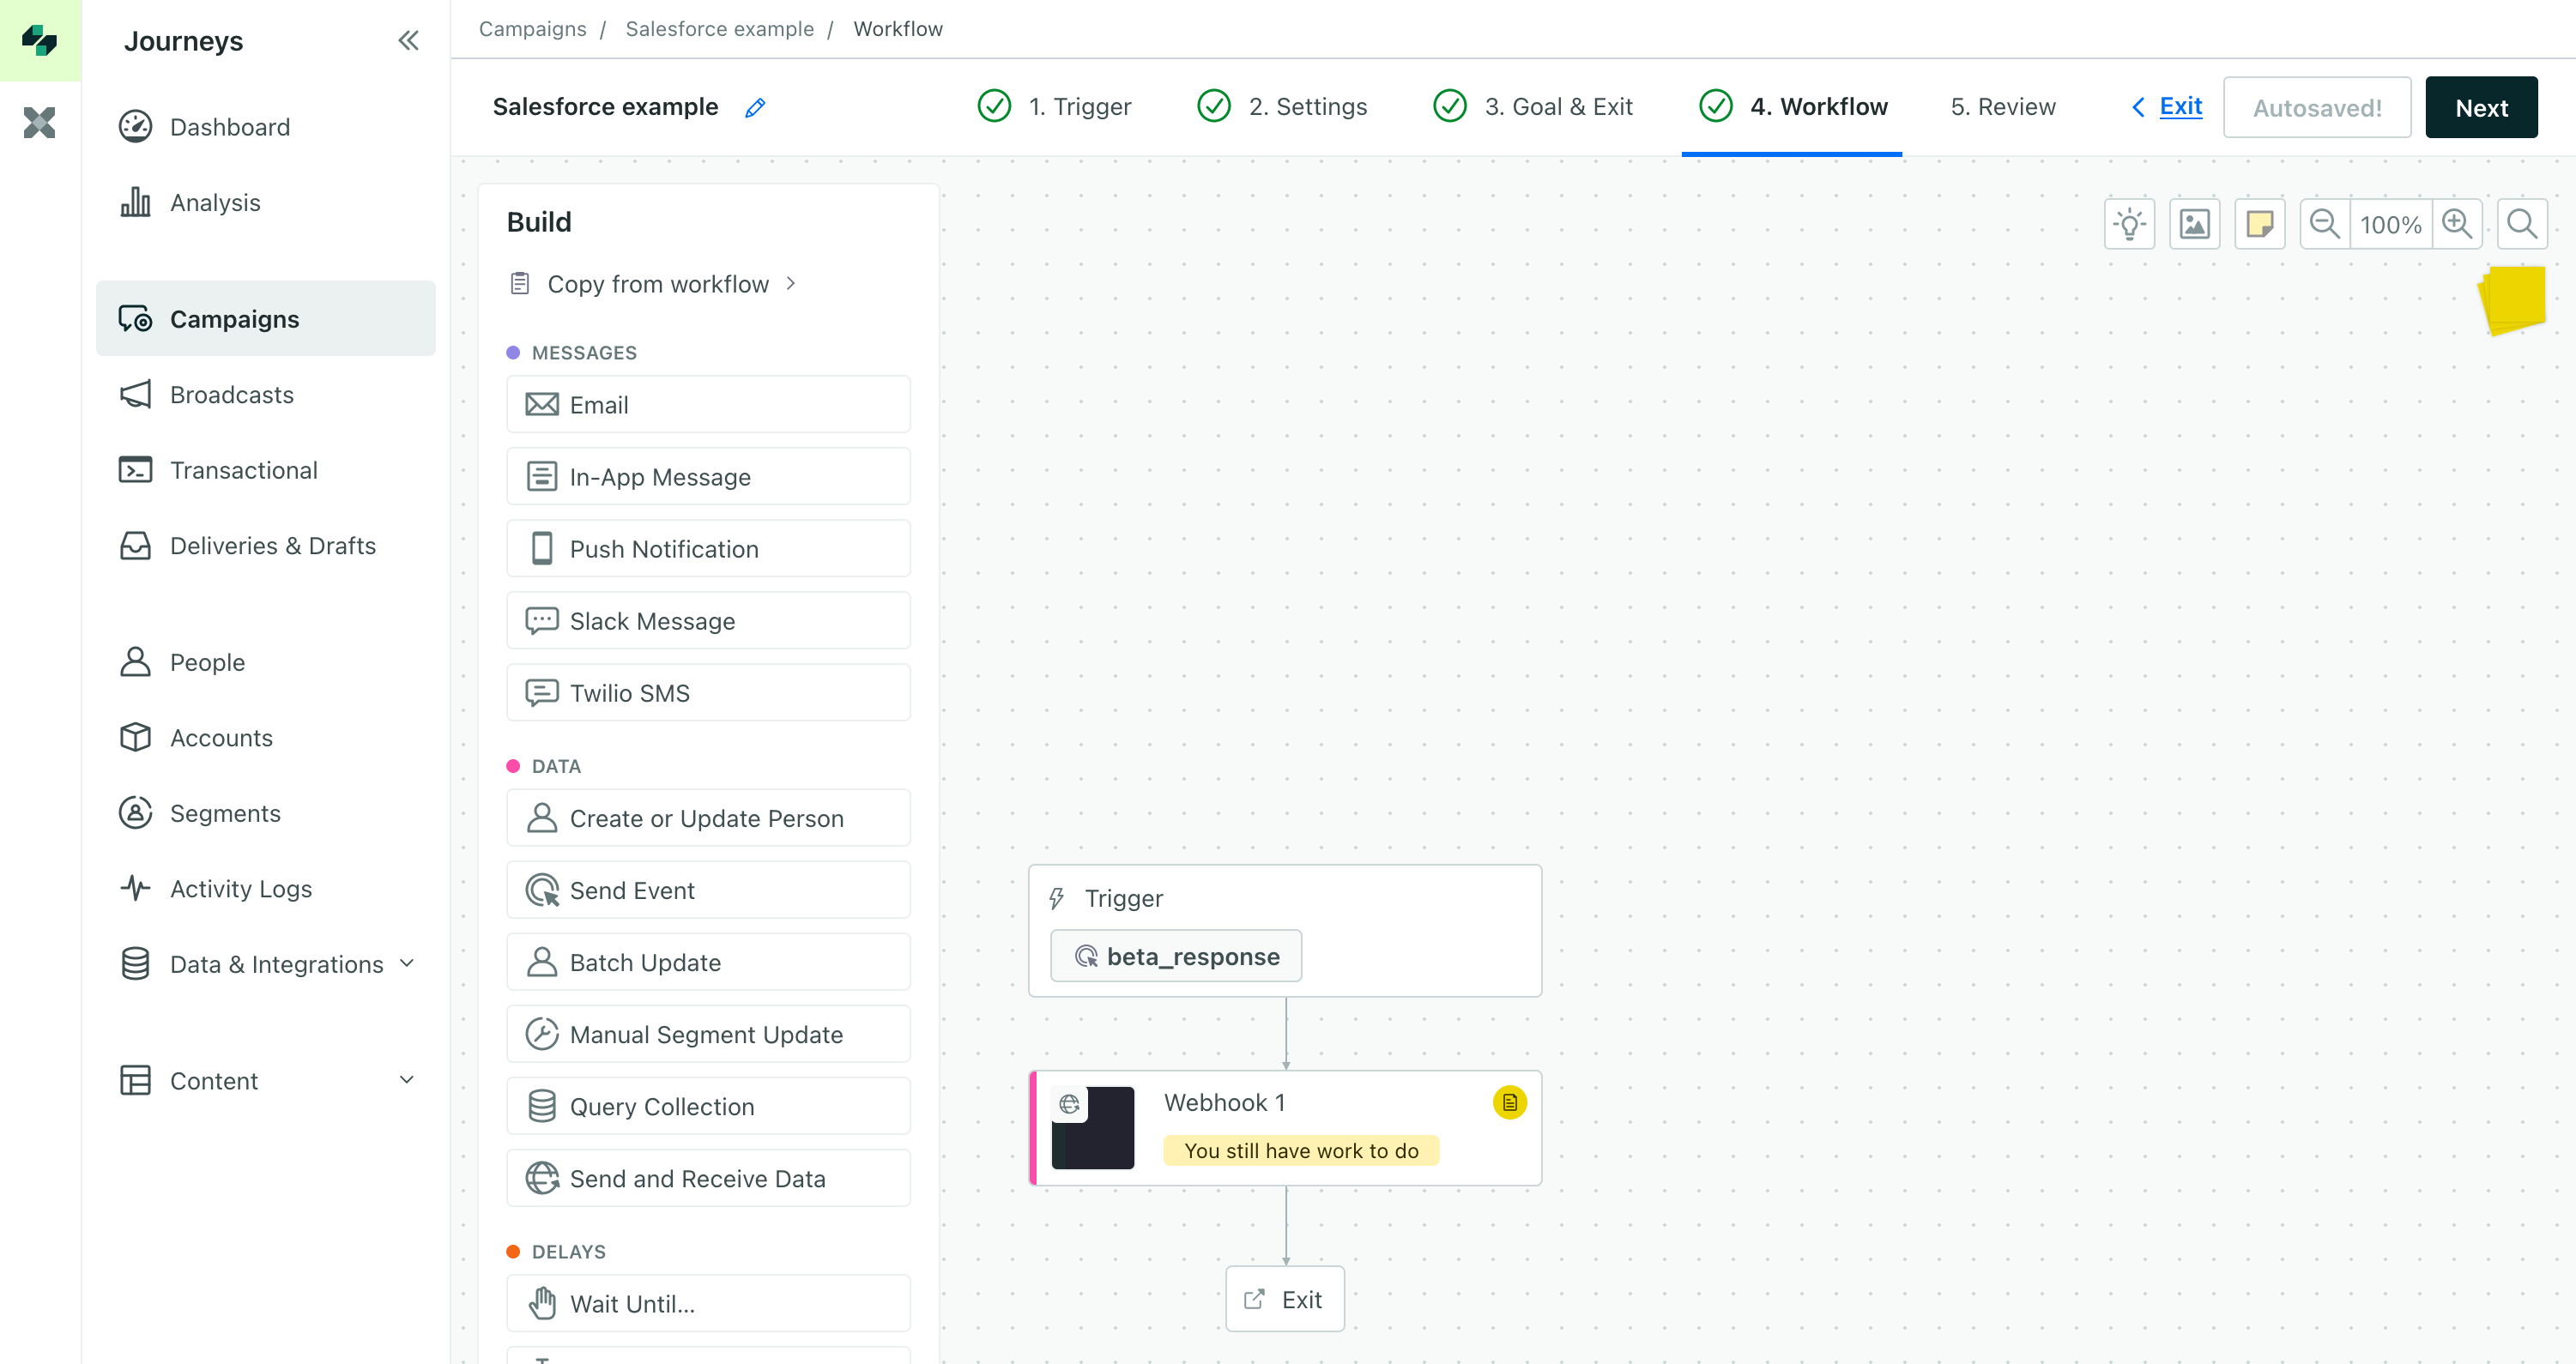
- Select the new Webhook block, give it a Name, and click Add Request.
- Change Post to Patch and enter your URL for contacts. It looks like
https://<YourDomainName>.my.salesforce.com/services/data/v61.0/sobjects/Contact/{{customer.id}}whereYourDomainNameis your Salesforce domain. Our example uses Salesforce API versionv61.0, but you may want to update this depending on changes to the Salesforce API. - Click Add Header. Set the Name to
Authorizationand the Value toBearer <your-api-key>. If you don’t have your API key handy, you’ll need to get it from the Salesforce UI.
- In the payload, we need to match the person in Salesforce and update their
betaProgramParticipantfield.{ "betaProgramParticipant": "{{event.beta_participant}}" }
Now, when you save and activate your campaign, Customer.io will send a PATCH request to Salesforce’s Contacts API to update the contact’s record as a part of your workflow.
Option 2: Use Customer.io’s APIs and a Salesforce Destination
This process is a bit more complex but provides more flexibility; you can use a webhook to send data to Salesforce and other destinations. To do this, you’ll need to set up a new source in Customer.io and make sure that you have a Salesforce destination to receive your data.
1. Set up your HTTP source
The HTTP source is how you’ll send data from your campaigns to Salesforce. To set up your source:
- In the Data Pipelines tab, click Sources.
- Click Add Source and select HTTP under the General category.
- Give your source a Name and copy API key. Keep it handy because we’ll use it in future steps!
- Click Complete Setup.
You’ll notice that we didn’t test your connection. We don’t have a connection to test because we haven’t set up our webhook yet!
2. Set up your Salesforce Destination
If you didn’t set up a Salesforce destination to support engagement data, you’ll need to do that now.
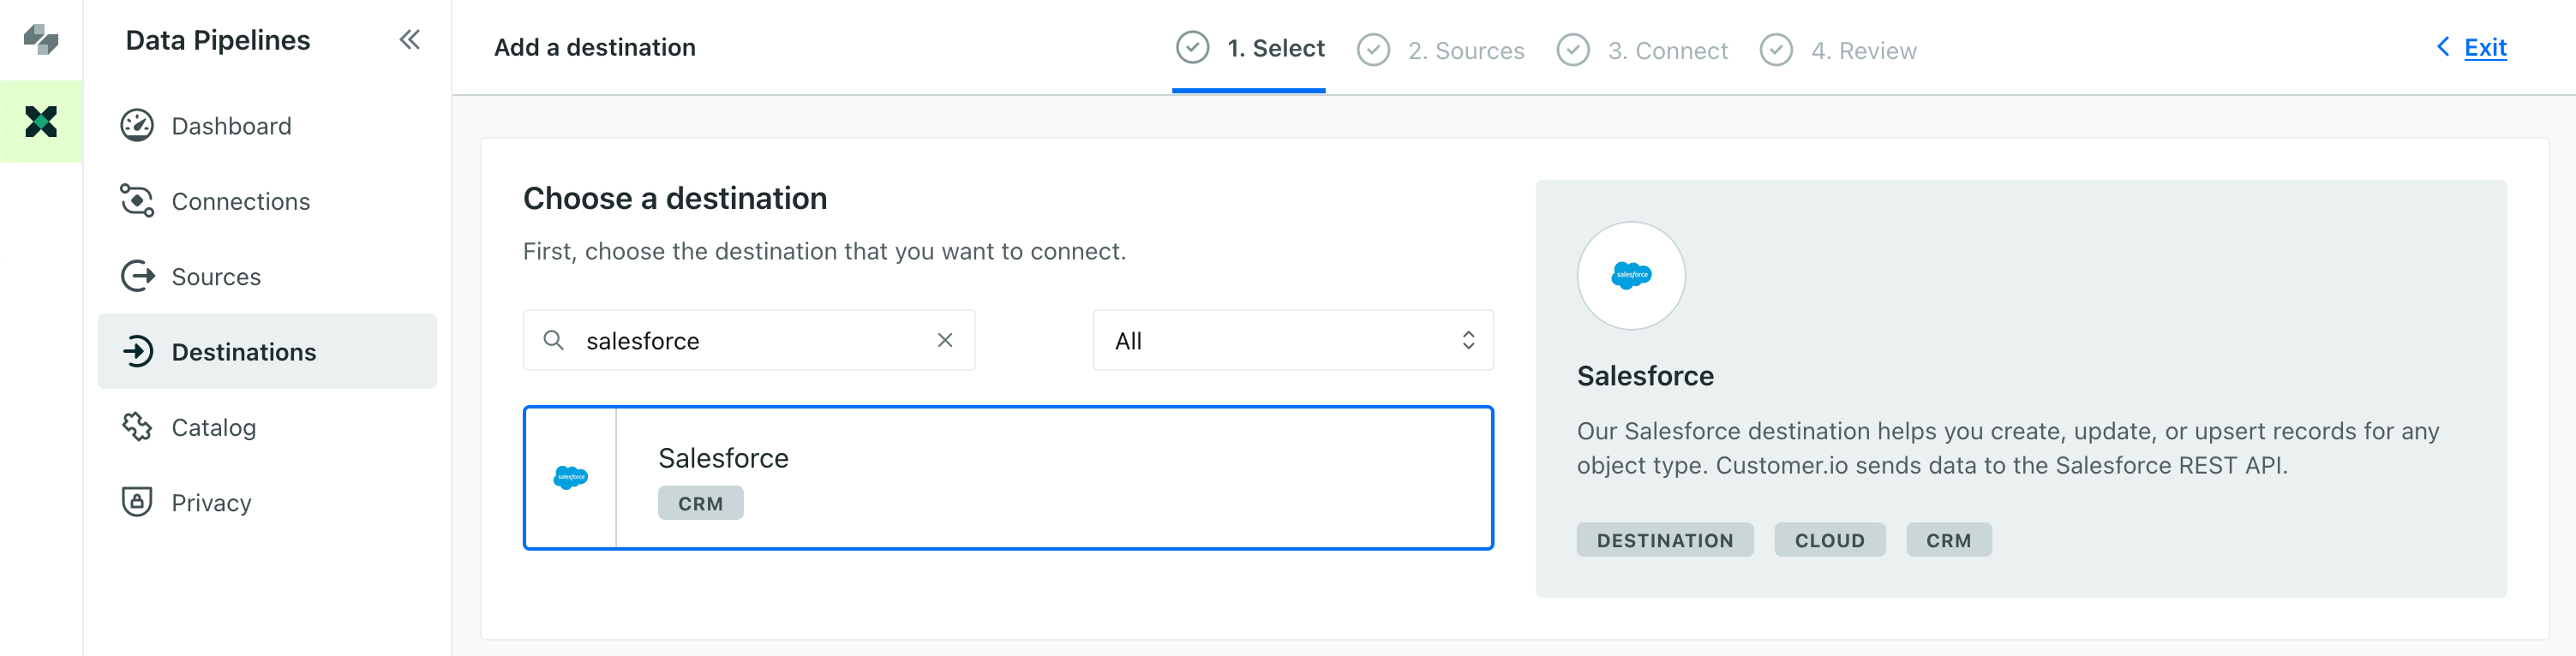
- Go to the tab and click Destinations.
- Find the Salesforce destination and click Next: Choose Sources.
- Pick the HTTP source you set up in previous steps and click Next: Connect Salesforce.
- Click Connect Salesforce and enter your Salesforce credentials. This authorizes us to send data back to your Salesforce instance. Now the connections page shows Salesforce connected to your HTTP API source. This lets send incoming API calls—like the one you’re about to set up in the next step—to Salesforce.
3. Set up an action to update people
The action tells Customer.io what to do with your webhook. Don’t worry if you haven’t set up your webhook first. We’ll show you how to do that later and we’ll try to explain some of the steps. Essentially, we’re mapping the Customer.io data to Salesforce.
If you already set up an action as a part of sending engagement data back to Salesforce, you can modify your existing action to handle your webhook. Skip ahead to step 6 below.
Now go to your Salesforce destination on the right of the Connections page, and go to the Actions tab. Click Add Action.
For the Action, select Contact—this is who or what you want to update in Salesforce when you send message metrics (or webhooks) to Salesforce.
Under Data Structure, set the first box to Update. This tells Salesforce to update a record when a contact does something in a campaign.
You might use the Create operation if you use webhooks or you use a form integration to capture leads from a website. But those are both much more advanced use cases!

Use
$.userIdnot$.user.idIf you map data to
$.user.id, you’ll get an error:Undefined Traits when using update operation.At the bottom of the page, click Add Key/Value. Enter your field on the left and
$.properties.betaParticipanton the right. This tells Salesforce to update the Beta Participant field with the value from your event (and webhook). You can pass additional fields here as well.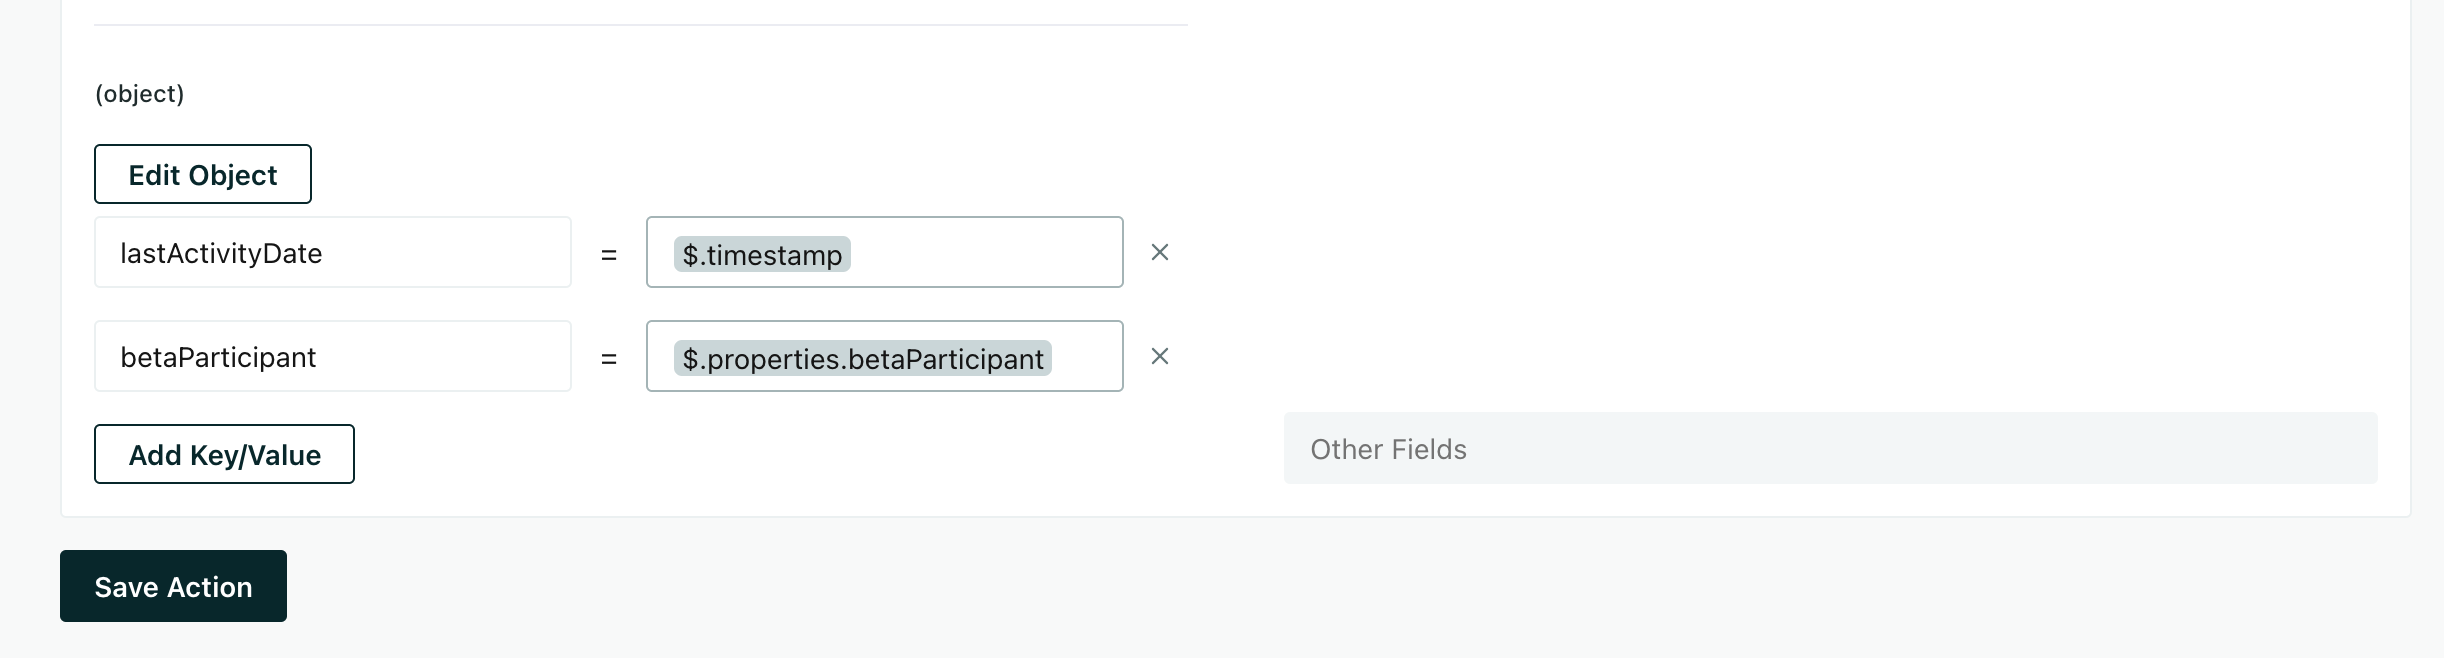
Leave the remaining fields as their defaults and click Save Action.
4. Set up your webhook
Now we’re ready to set up your webhook. When someone agrees to join your beta program, you’ll use a webhook to update the contact’s record in Salesforce. If you use custom fields, like our betaProgramParticipant field below, you’ll need the Field Name from Salesforce, not the field label. You’ll find field names in Salesforce under Settings > Object Manager.
Imagine you have a campaignA series of actions that you perform for each person who matches criteria. Campaigns typically send people a series of messages, but you can also use campaigns to send webhooks, update attributes, etc. that triggers when someone responds to a request to participate in your beta program. In the Workflow step of that campaign:
Drag the Send and Receive Data block into your workflow.
Select the new Webhook block, give it a Name, and click Add Request.
Set the URL to
https://cdp.customer.io/v1/trackand make sure Post is selected.Click Add Header. Set the Name to
Authorizationand the Value toBasic {{ "<your-api-key>:" | base64 }}, where the API key is the one you copied when you set up your HTTP source. The colon after the write key is significant; it is not a typo!In the payload, we need to match the person in Salesforce and update their
betaProgramParticipantfield.{ "userId": "{{customer.id}}", "traits": { "betaProgramParticipant": "{{event.beta_participant}}", "signupDate": "{{event.signup_date | date: '%Y-%m-%d'}}" } }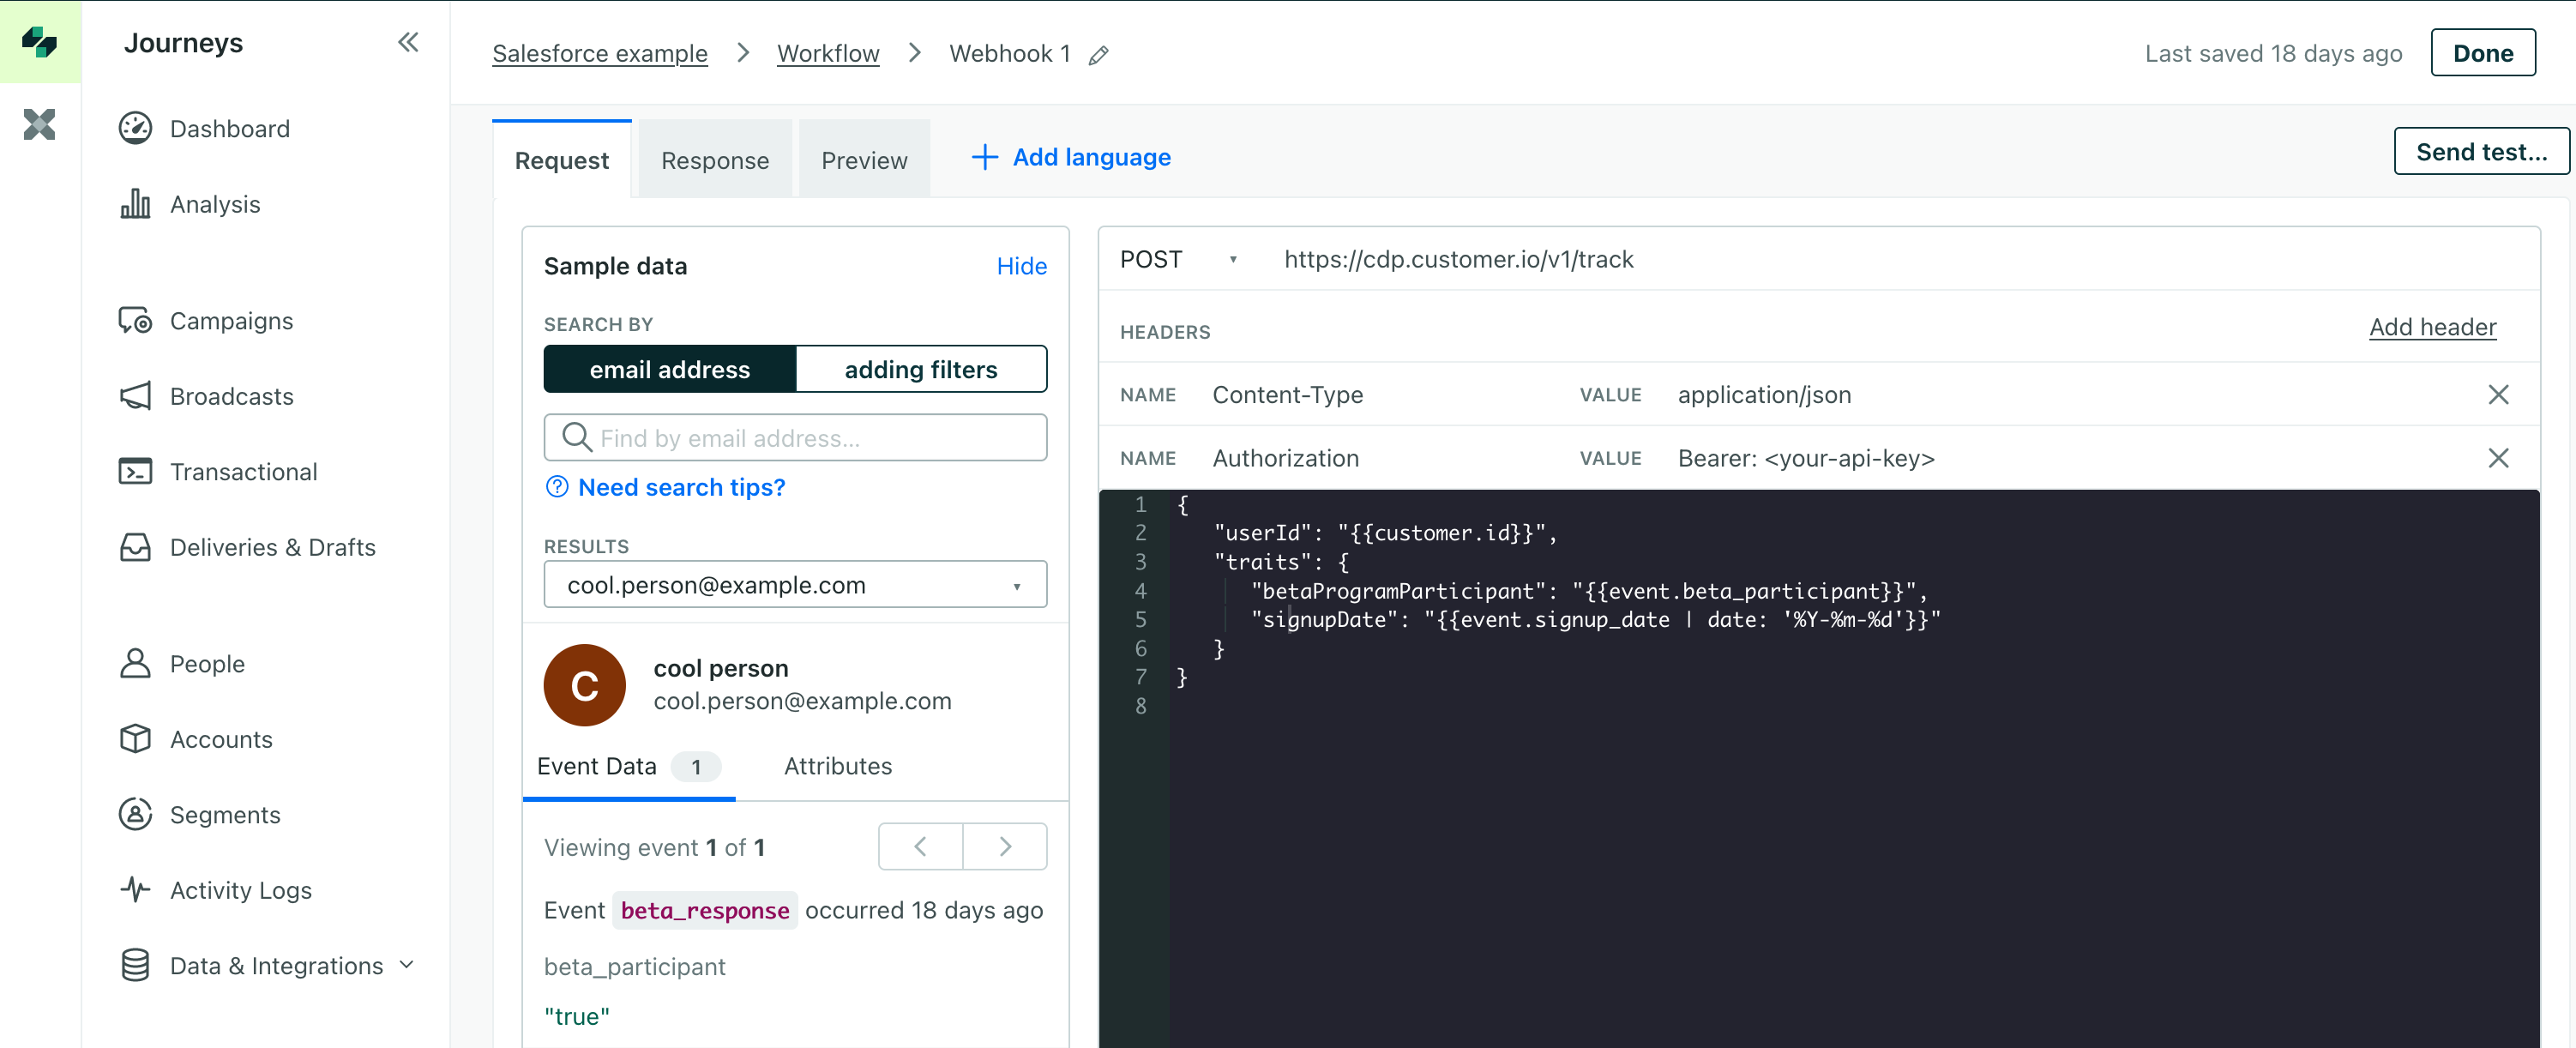
You need to convert dates!
Customer.io stores dates as Unix timestamps. You need to convert them to ISO 8601 formatted dates and times for Salesforce. You can do this with liquidA syntax that supports variables, letting you personalize messages for your audience. For example, if you want to reference a person’s first name, you might use the variable
{{customer.first_name}}. using thedatefilter in the example above. See dates and times for more information.
Now, when you save and activate your campaign, Customer.io will send a PATCH request to Salesforce’s Contacts API to update the contact’s record as a part of your workflow.

