Send email activity to Salesforce
Your Journeys Message Metrics source captures engagement data: information about messages you send your contacts. When you send an email to a contact, we’ll record the message you sent—whether they open it, click a link, and so on. You can send this data back to Salesforce to keep records of the messages you’ve sent, so you know how to keep the conversation going with your leads and customers.
Want to update Salesforce data for other reasons?
If you want to send other data to Salesforce, and you’re not particularly interested in engagement data, learn how to send attribute updates to Salesforce. There, we’ll show you how to use webhooks to update Salesforce records as a part of a campaignA series of actions that you perform for each person who matches criteria. Campaigns typically send people a series of messages, but you can also use campaigns to send webhooks, update attributes, etc..
Set up an Email Sent action
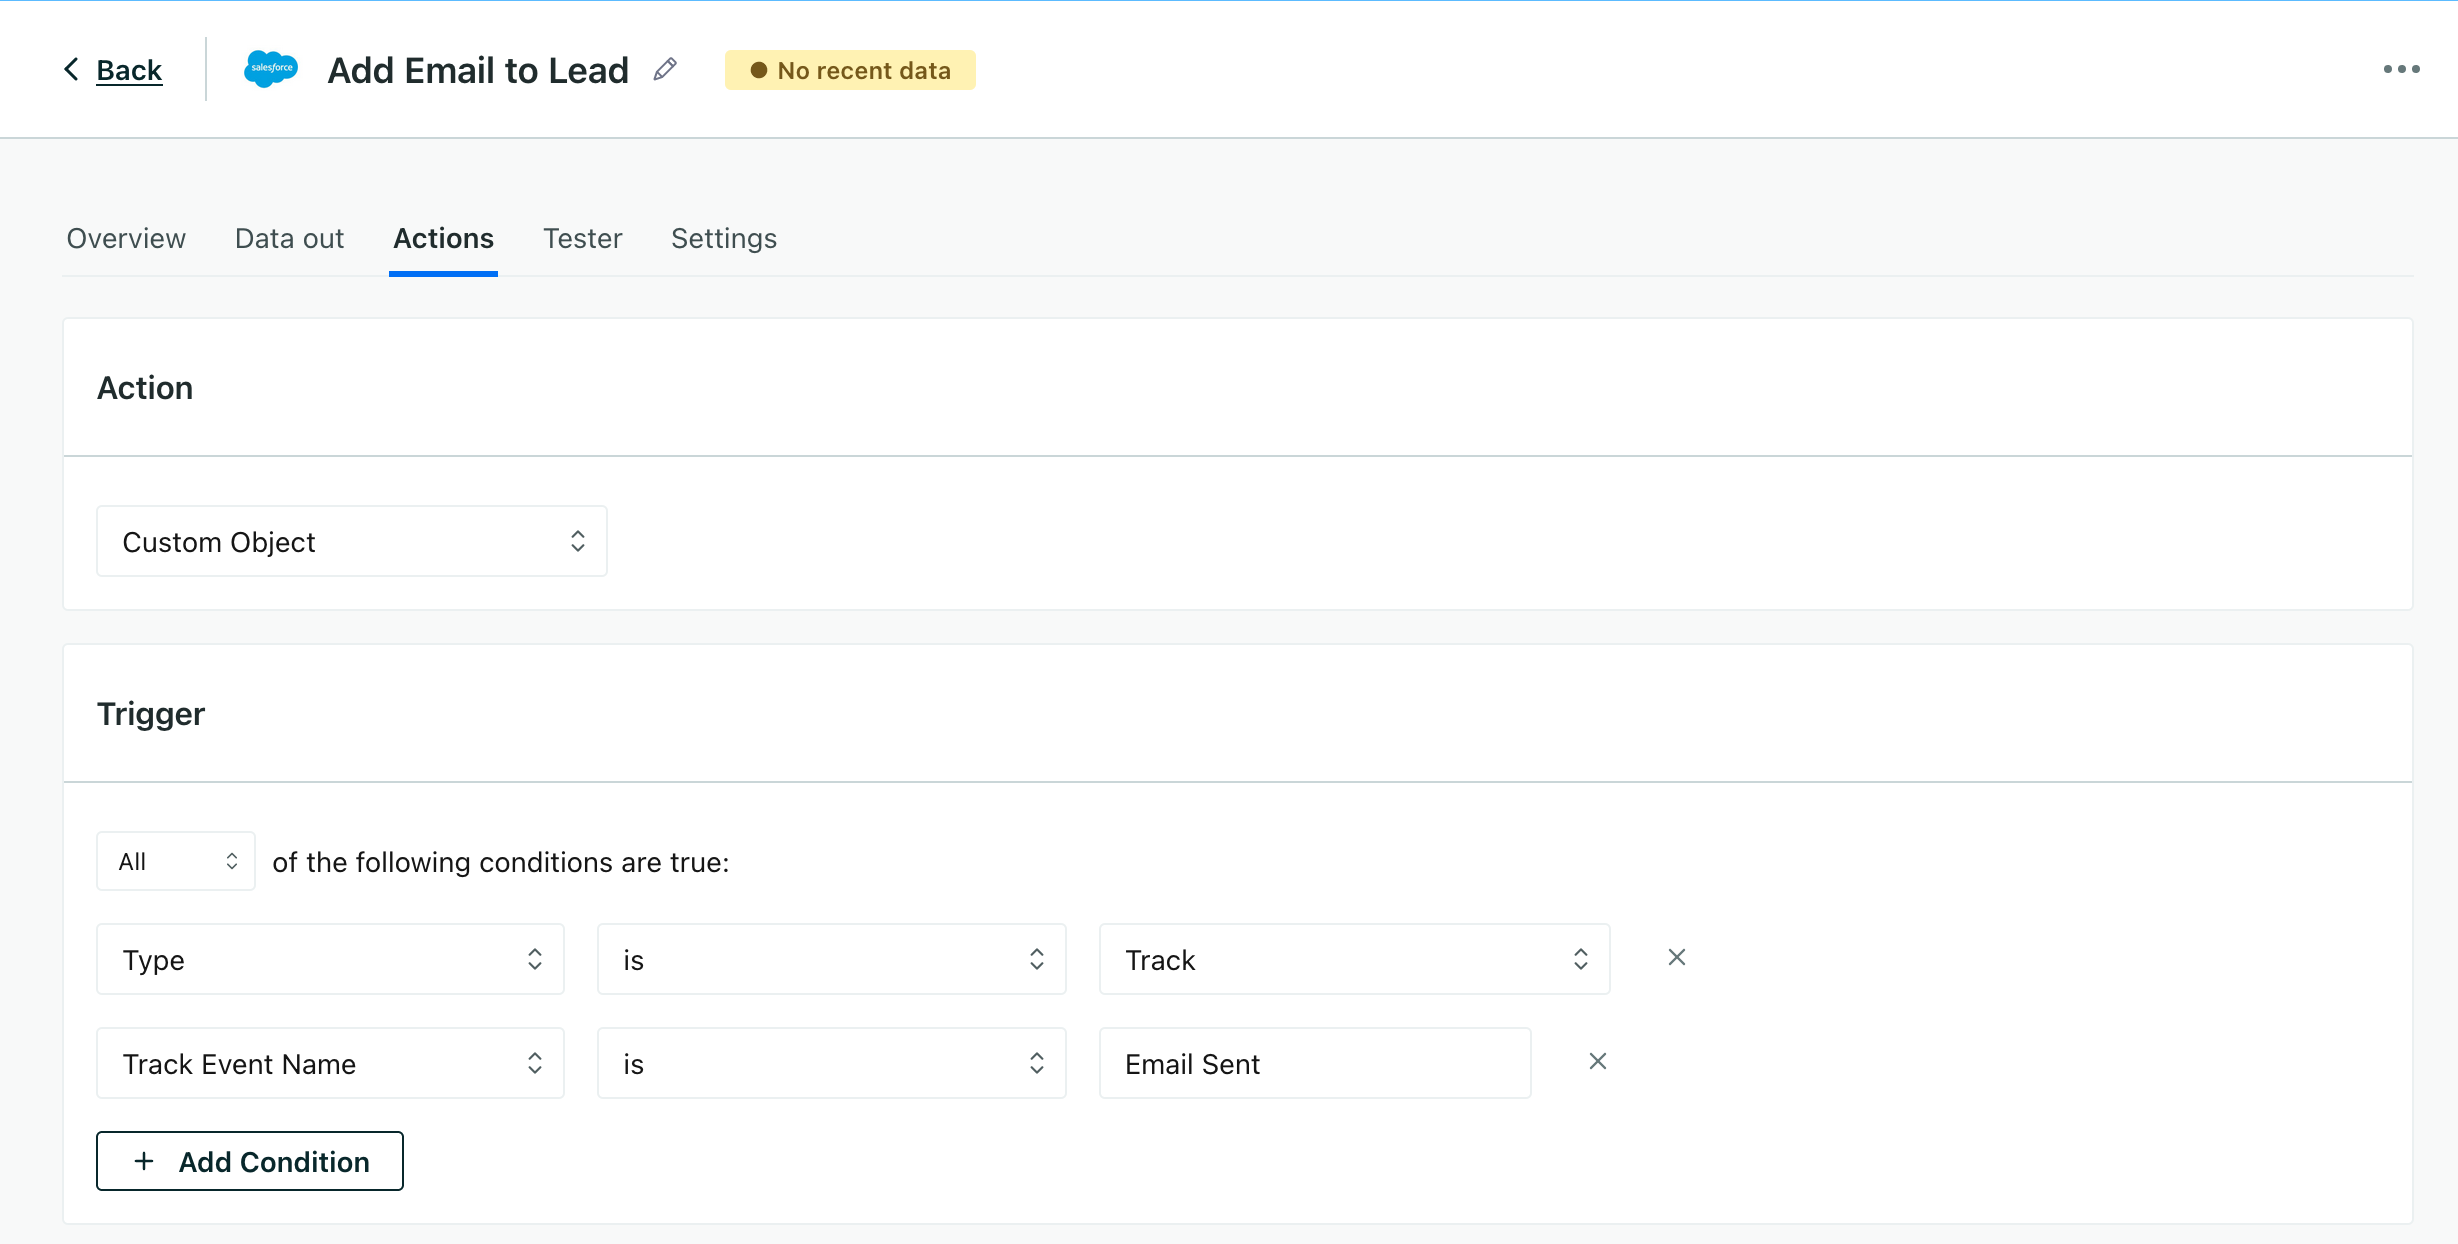
Actions determine when and what data you’ll send to Salesforce. In this case, we’ll set up an action that tells Customer.io to send data to Salesforce whenever you send an email to a contact so that Salesforce is aware of the messages you send. While we’re using Email Sent as an example, you can use any other email event or events for other channels, like Email Opened or SMS Sent events.
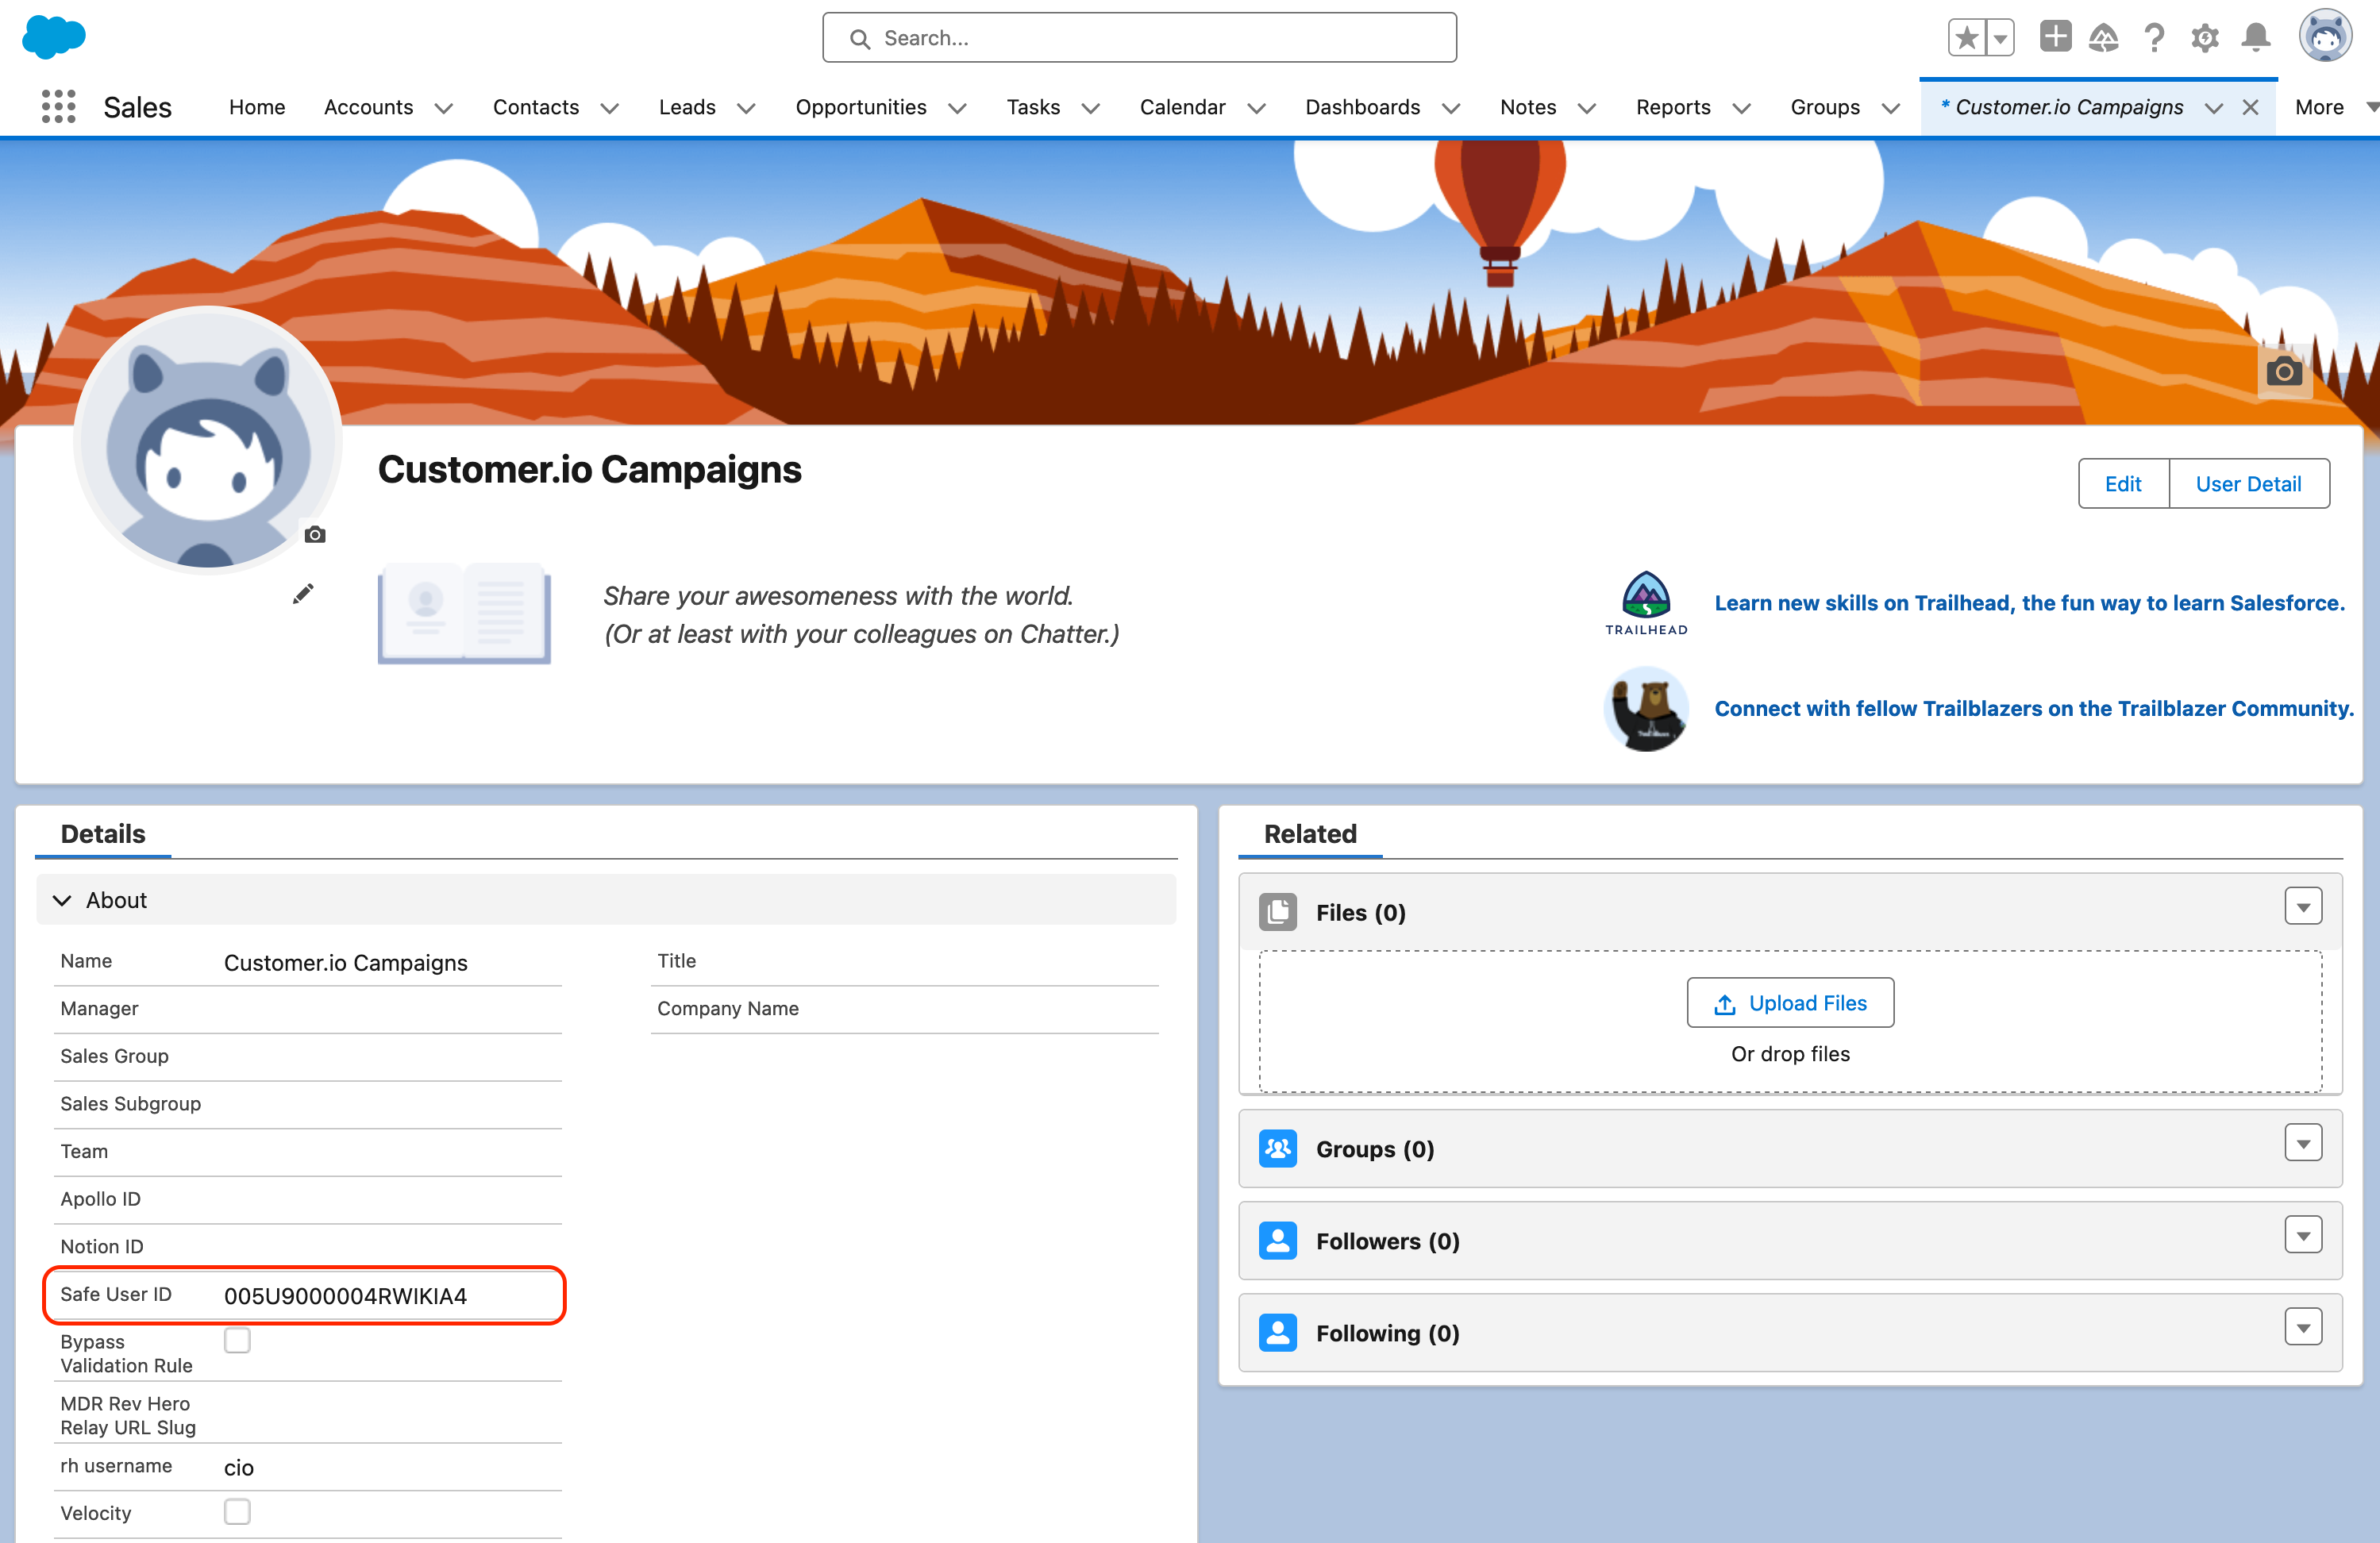
We’ll record your emails in Salesforce as Tasks, because it’s the best (and most common) way that we’ve found to show emails in Salesforce. But, in Salesforce, you need to attribute a task to a person (by their Safe User ID). Because you’ll automate messages in Customer.io, a specific “person” probably won’t be responsible for sending messages to your contacts. So we recommend that you create a Salesforce user specifically for this purpose. In our example below, we’ll use a user named Customer.io Campaigns.
In Customer.io, go to your Salesforce destination on the right of the Connections page, and go to the Actions tab. Click Add Action. If you don’t see Salesforce on the right side of the Connections page, you’ll need to add your Salesforce destination first!
For the Action, select Custom Object.
Scroll down the page to the Salesforce Object field and set it to Task. We’re logging events as Tasks because they’re a standard type of Salesforce object that works well for this purpose, but you could use any other kind of Salesforce object that works for your use case.
Just under the Salesforce Object field, you’ll find Other Fields. Click Add Key/Value and add keys and values for the following things:
Use the Variables dropdown!
You can’t enter variables like
$.properties.subjectdirectly into Other Fields, or we’ll treat it as a literal value. Instead, you’ll need to enter your variable in the drop-down box and click Use <variable name> as a variable.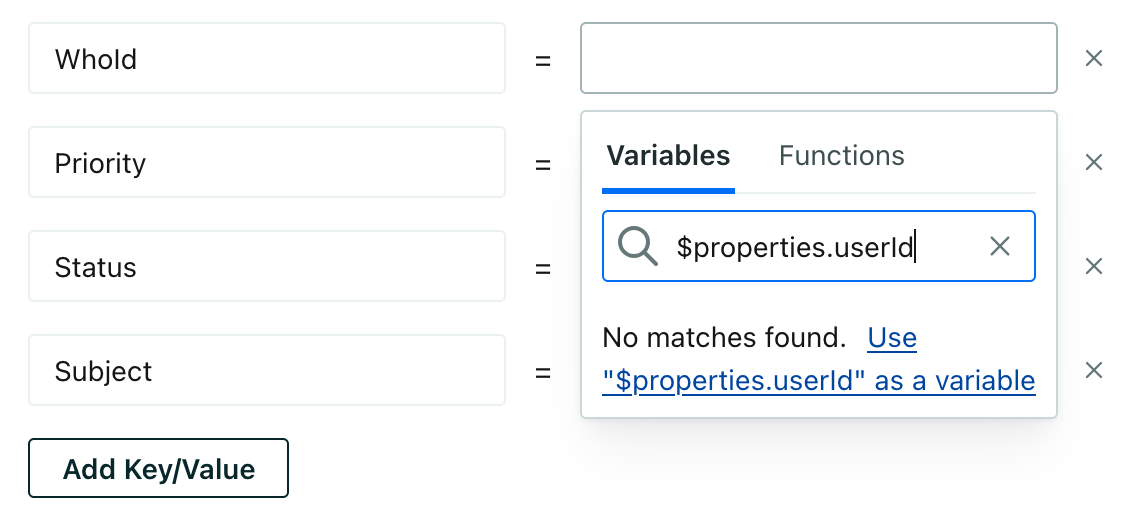
- TaskSubtype: Set this to
Email. This tells Salesforce that the task is an email task. - Subject: Set this to
$.properties.subject. This is the subject of the email you sent. - Priority and Status: set these both to
0. - OwnerId: Set this to the Salesforce ID of the user you want to attribute the task to. In our example, we’re using a user named
Customer.io Campaigns. You can find the OwnerId of the person you want to associate tasks with in their Salesforce profile under the Safe User ID. - WhoId: Set this to
$.properties.userId. This is the ID of the person you sent the email to.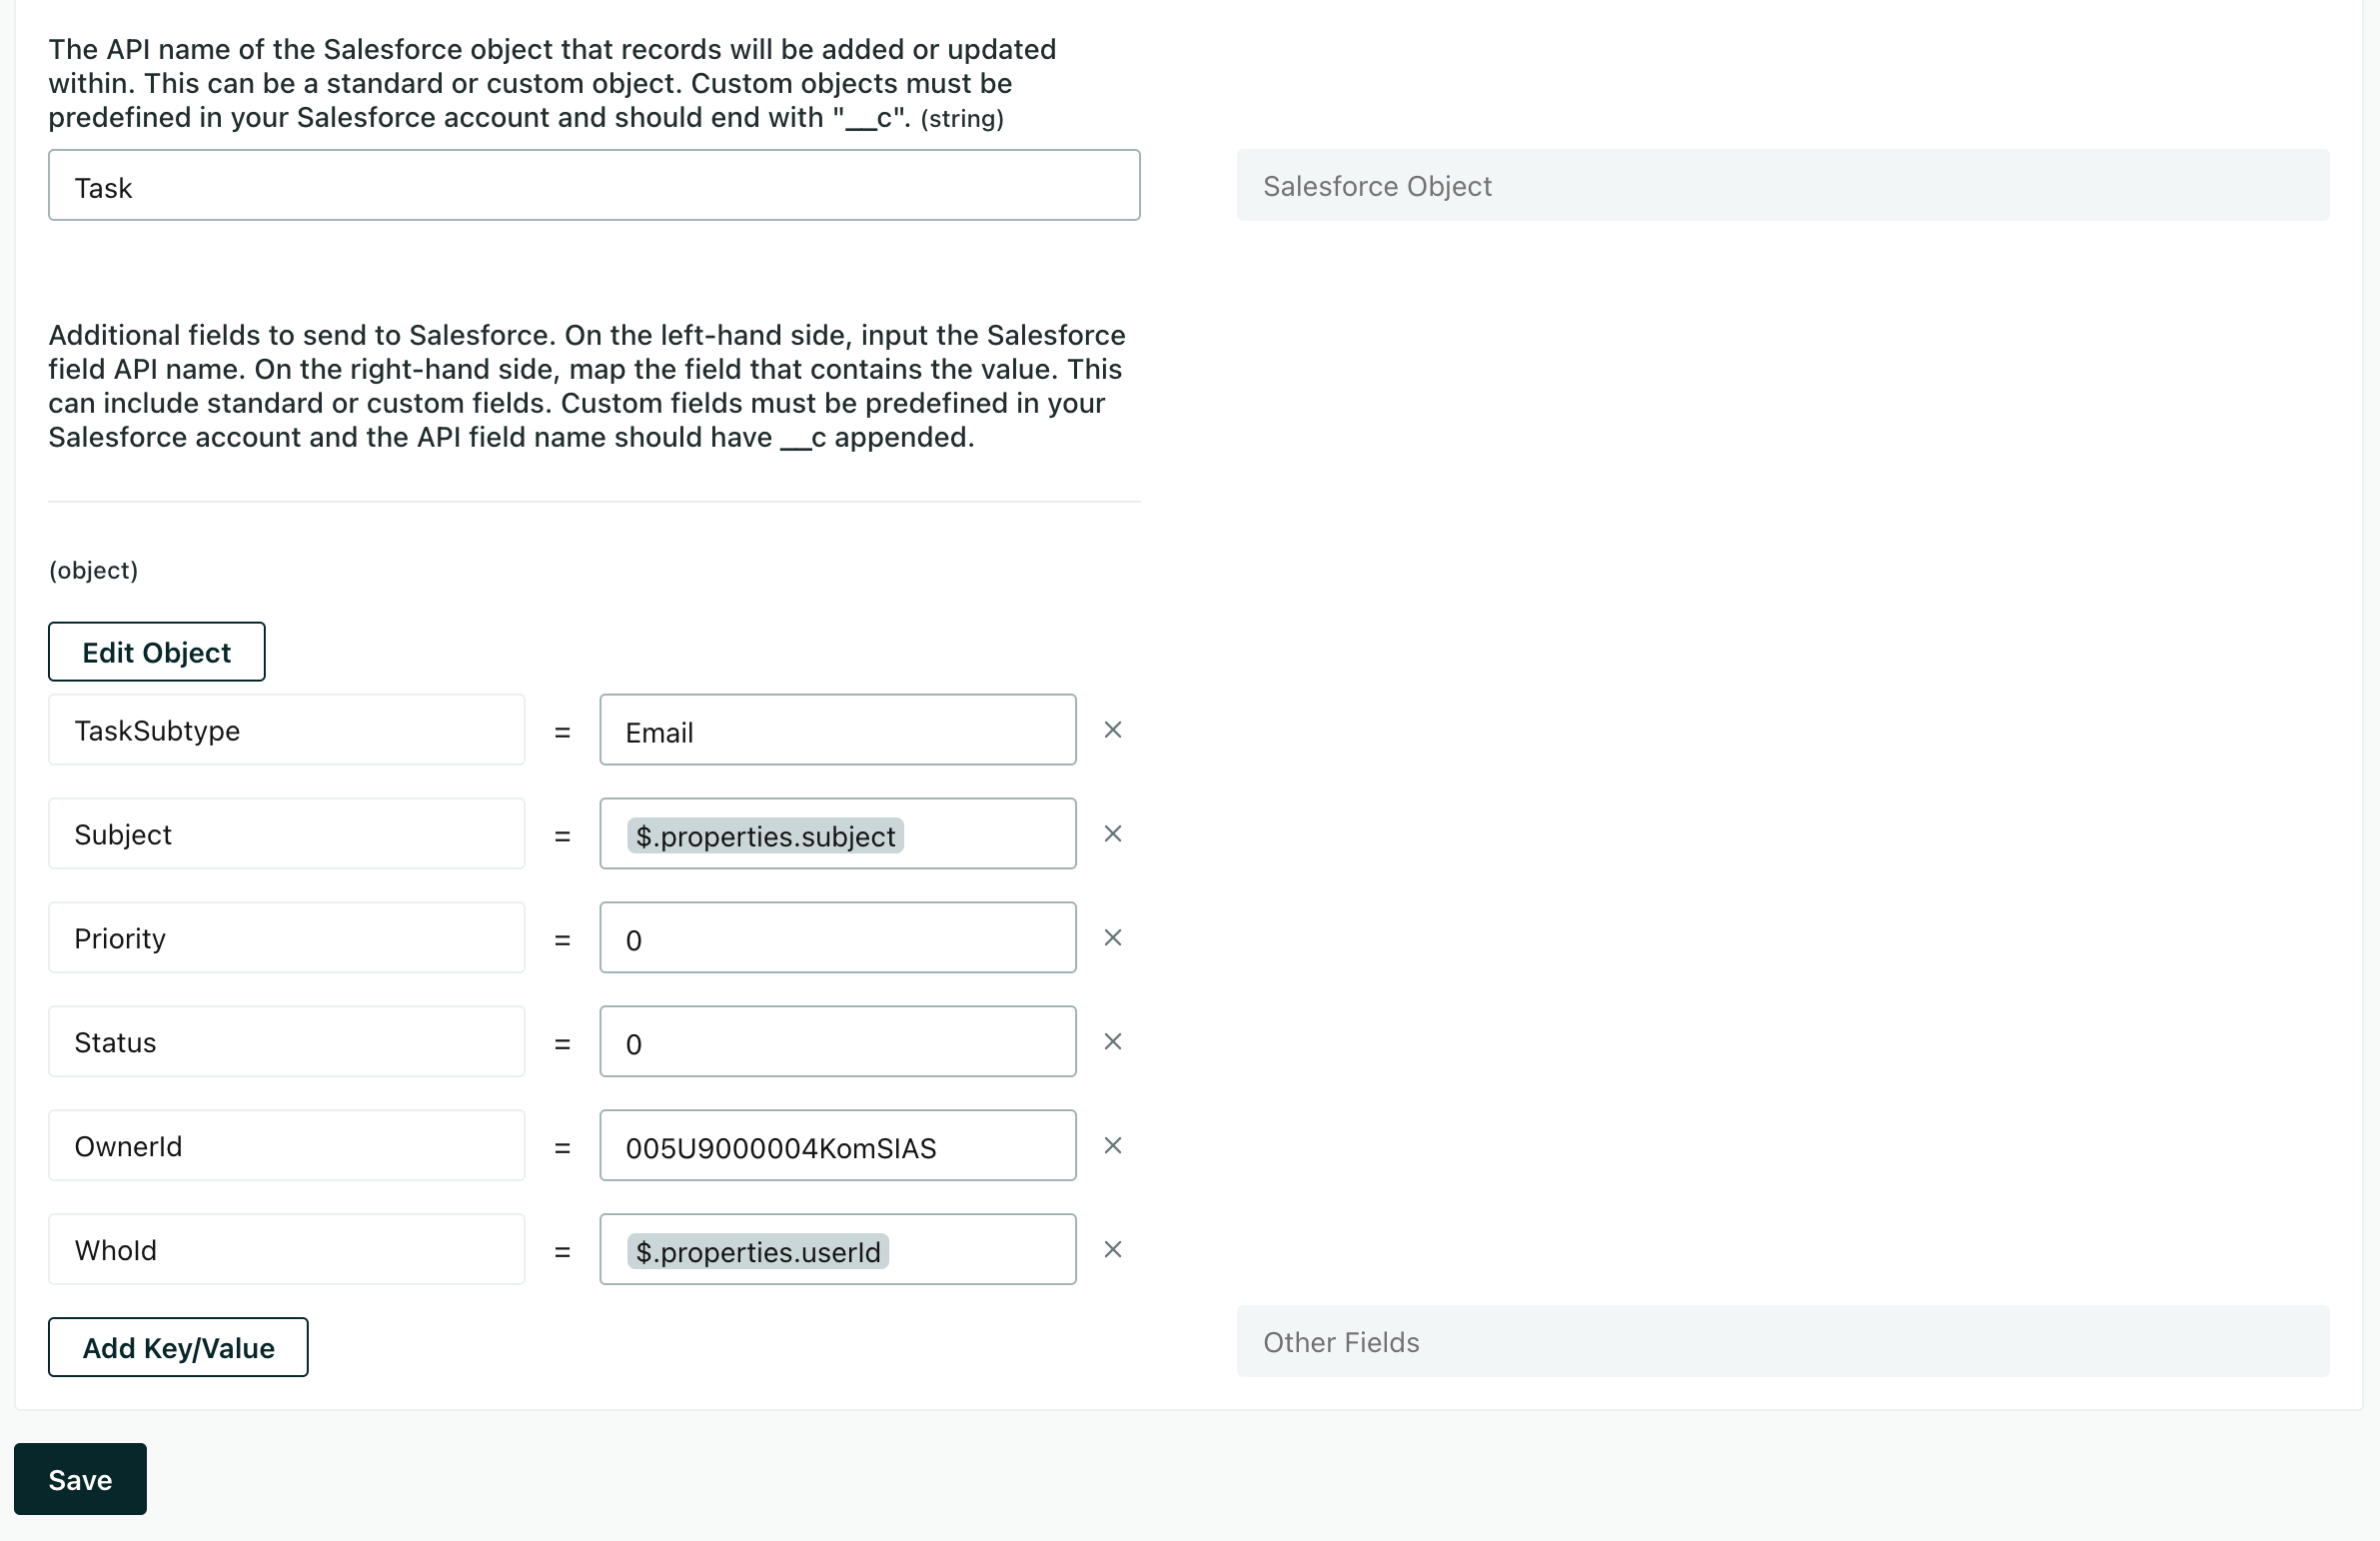
- TaskSubtype: Set this to
Save the action.
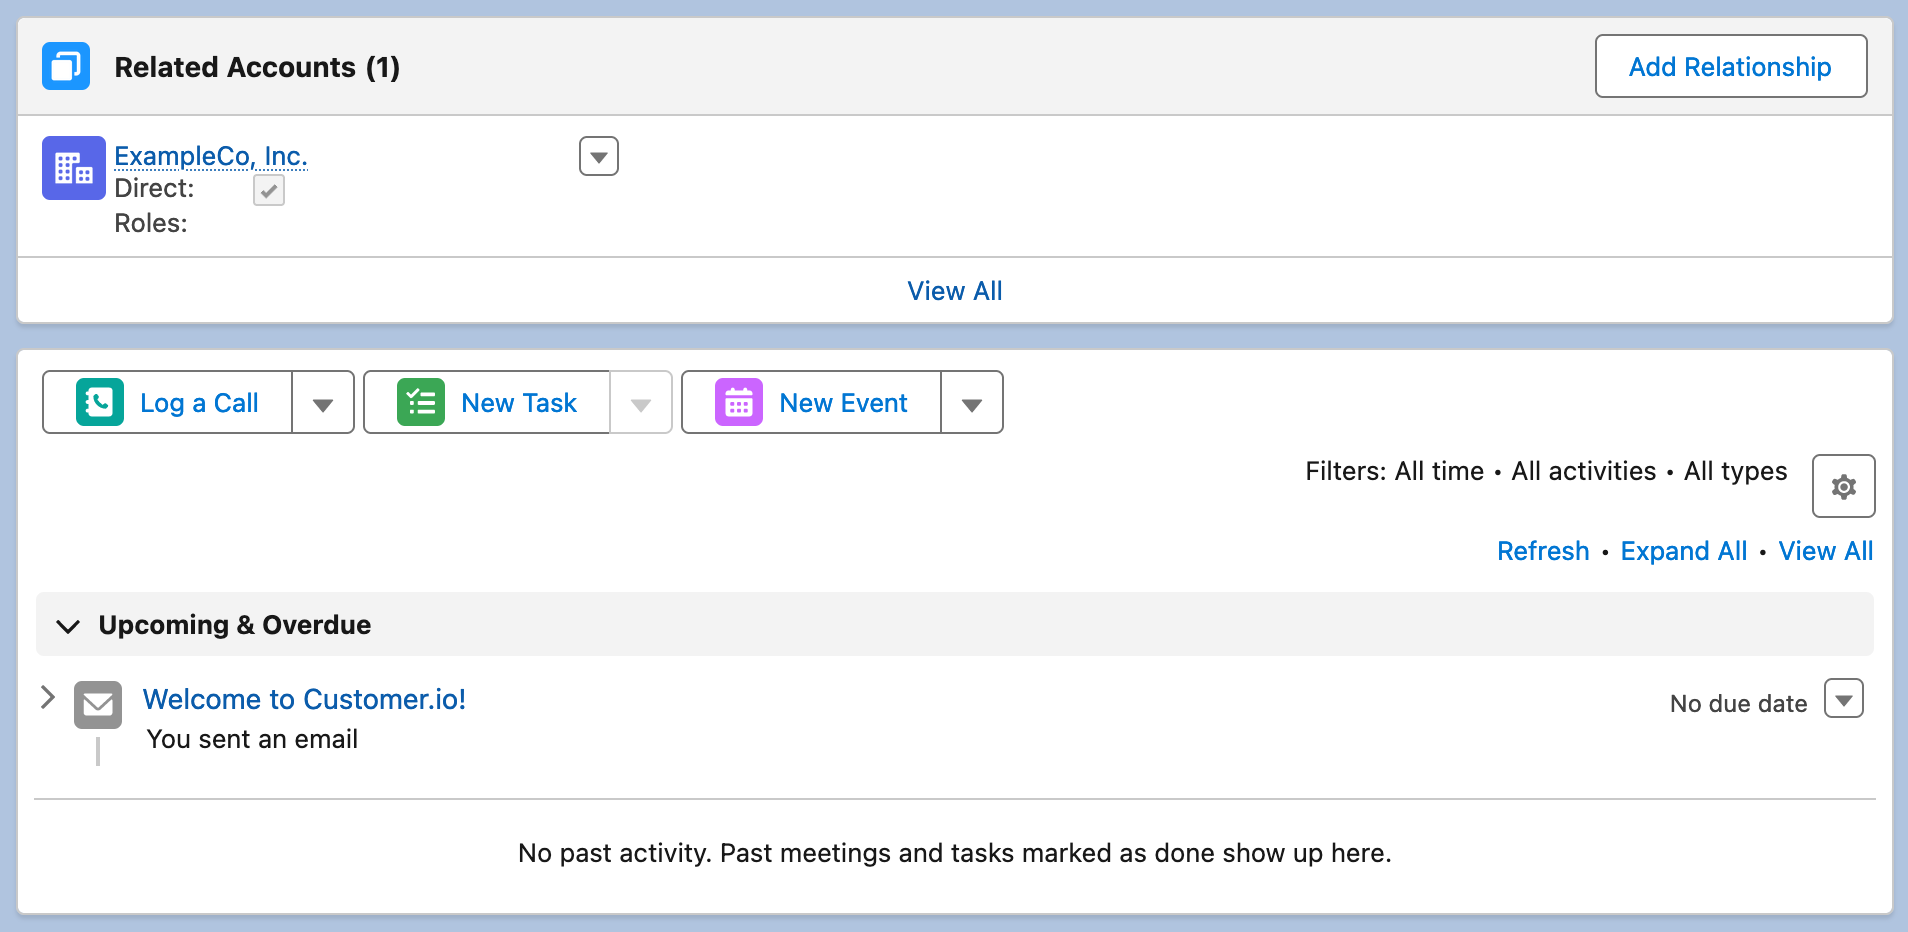
Now in Salesforce, when you send an email, you’ll find the email in the Tasks section of both your account and contact records! You can do the same thing for other kinds of events, like Push Sent or SMS Sent events.
Find your Safe User ID (OwnerId)
You can’t attribute tasks to people in Salesforce dynamically, because that information isn’t set in Email Sent events. Instead, you’ll need to attribute tasks to a specific user in Salesforce.
In Salesforce, you’ll find your Safe User ID—the person you want to attribute tasks in Salesforce to—in their profile.