Send engagement data from Journeys back to Salesforce
Engagement data is how you engage with your contacts and how your contacts respond—like when you send an email to a contact and whether they open it, click a link, and so on. We sometimes refer to engagement data as message metrics. You can send this data back to Salesforce to update their last activity date and determine whether your contacts are active, at risk to churn, and so on.
Want to update Salesforce data for other reasons?
If you want to send other data to Salesforce, and you’re not particularly interested in engagement data, set up your Salesforce destination and go on to the next page. There, we’ll show you how to use webhooks to update Salesforce records as a part of a campaignA series of actions that you perform for each person who matches criteria. Campaigns typically send people a series of messages, but you can also use campaigns to send webhooks, update attributes, etc.
How it works
You’ll set up a Salesforce destination. It’s a bit like the Salesforce source you set up before, but data flows back into Salesforce. Then you’ll set up an actionThe source event and data that triggers an API call to your destination. For example, an incoming identify event from your sources adds or updates a person in our Customer.io Journeys destination. to handle engagement data. We’ll show you how to set up your first action, and then you can add as many as you need to handle different engagement events.
1. Set up your Salesforce destination
Your Salesforce destination is where we’ll send your engagement data.
Go to the tab and click Destinations.
Find the Salesforce destination and click Next: Choose Sources.
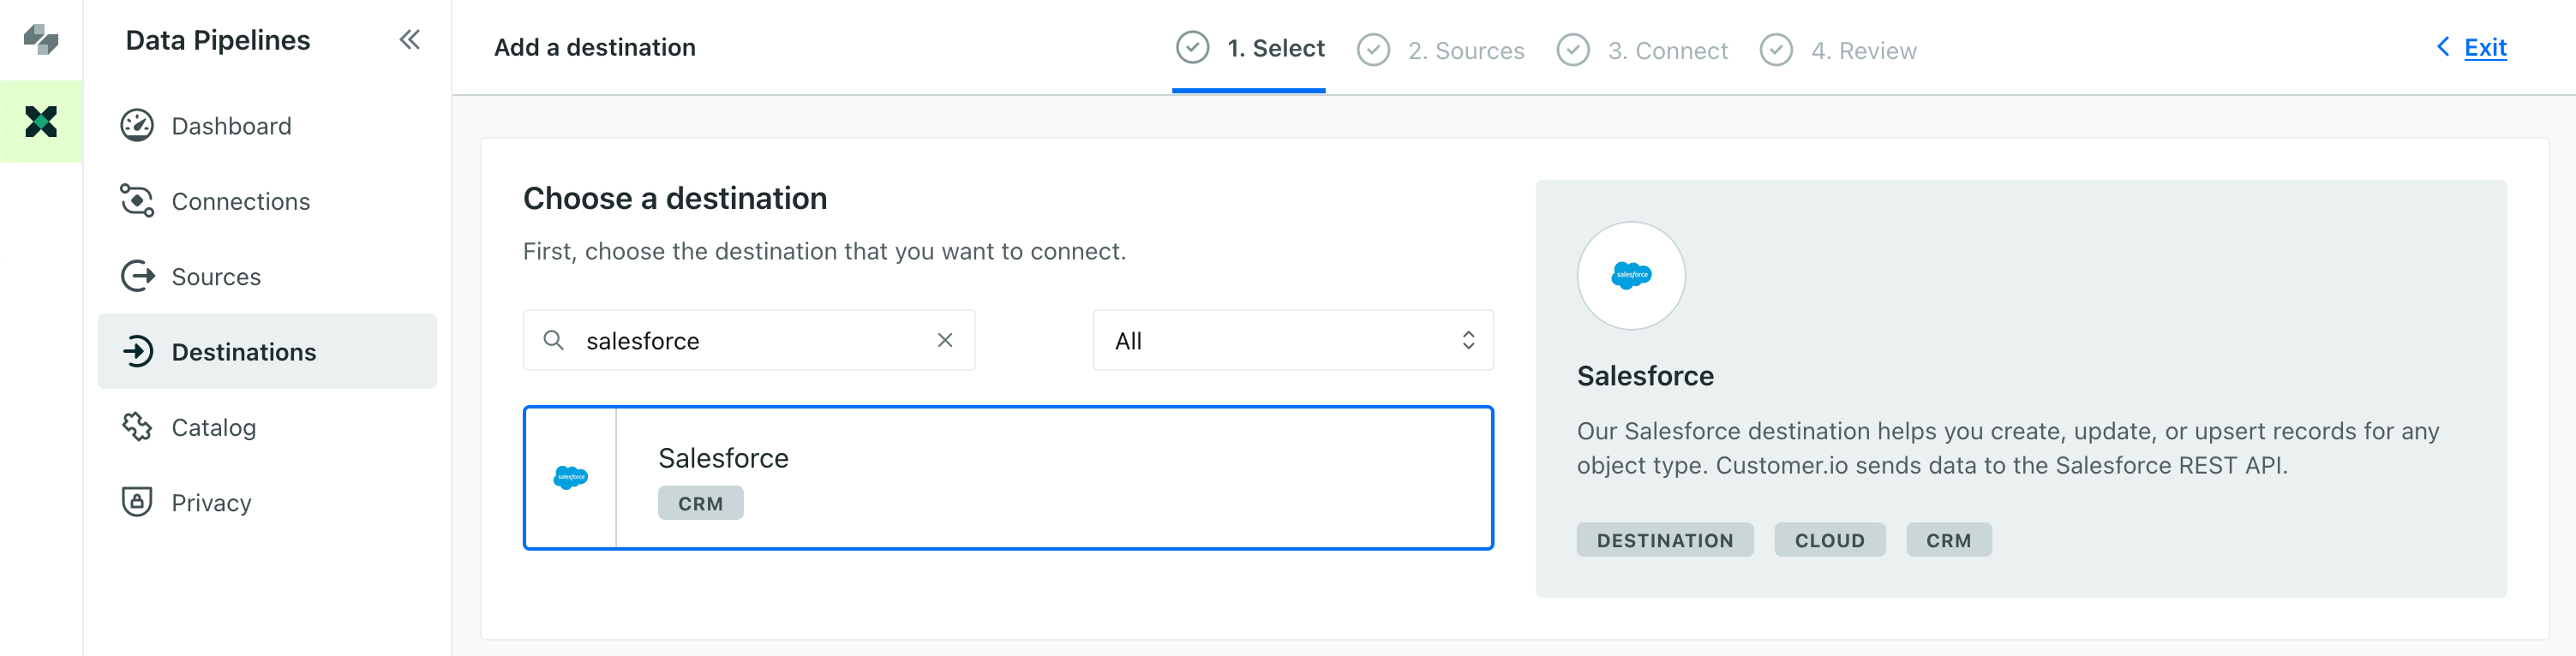
Pick Journeys Message Metrics and click Next: Connect Salesforce.
Click Connect Salesforce and enter your Salesforce credentials. This authorizes us to send data back to your Salesforce instance. Now the connections page shows Salesforce and Journeys as both sources and destinations. This lets your data go from Salesforce to Journeys and back to Salesforce.
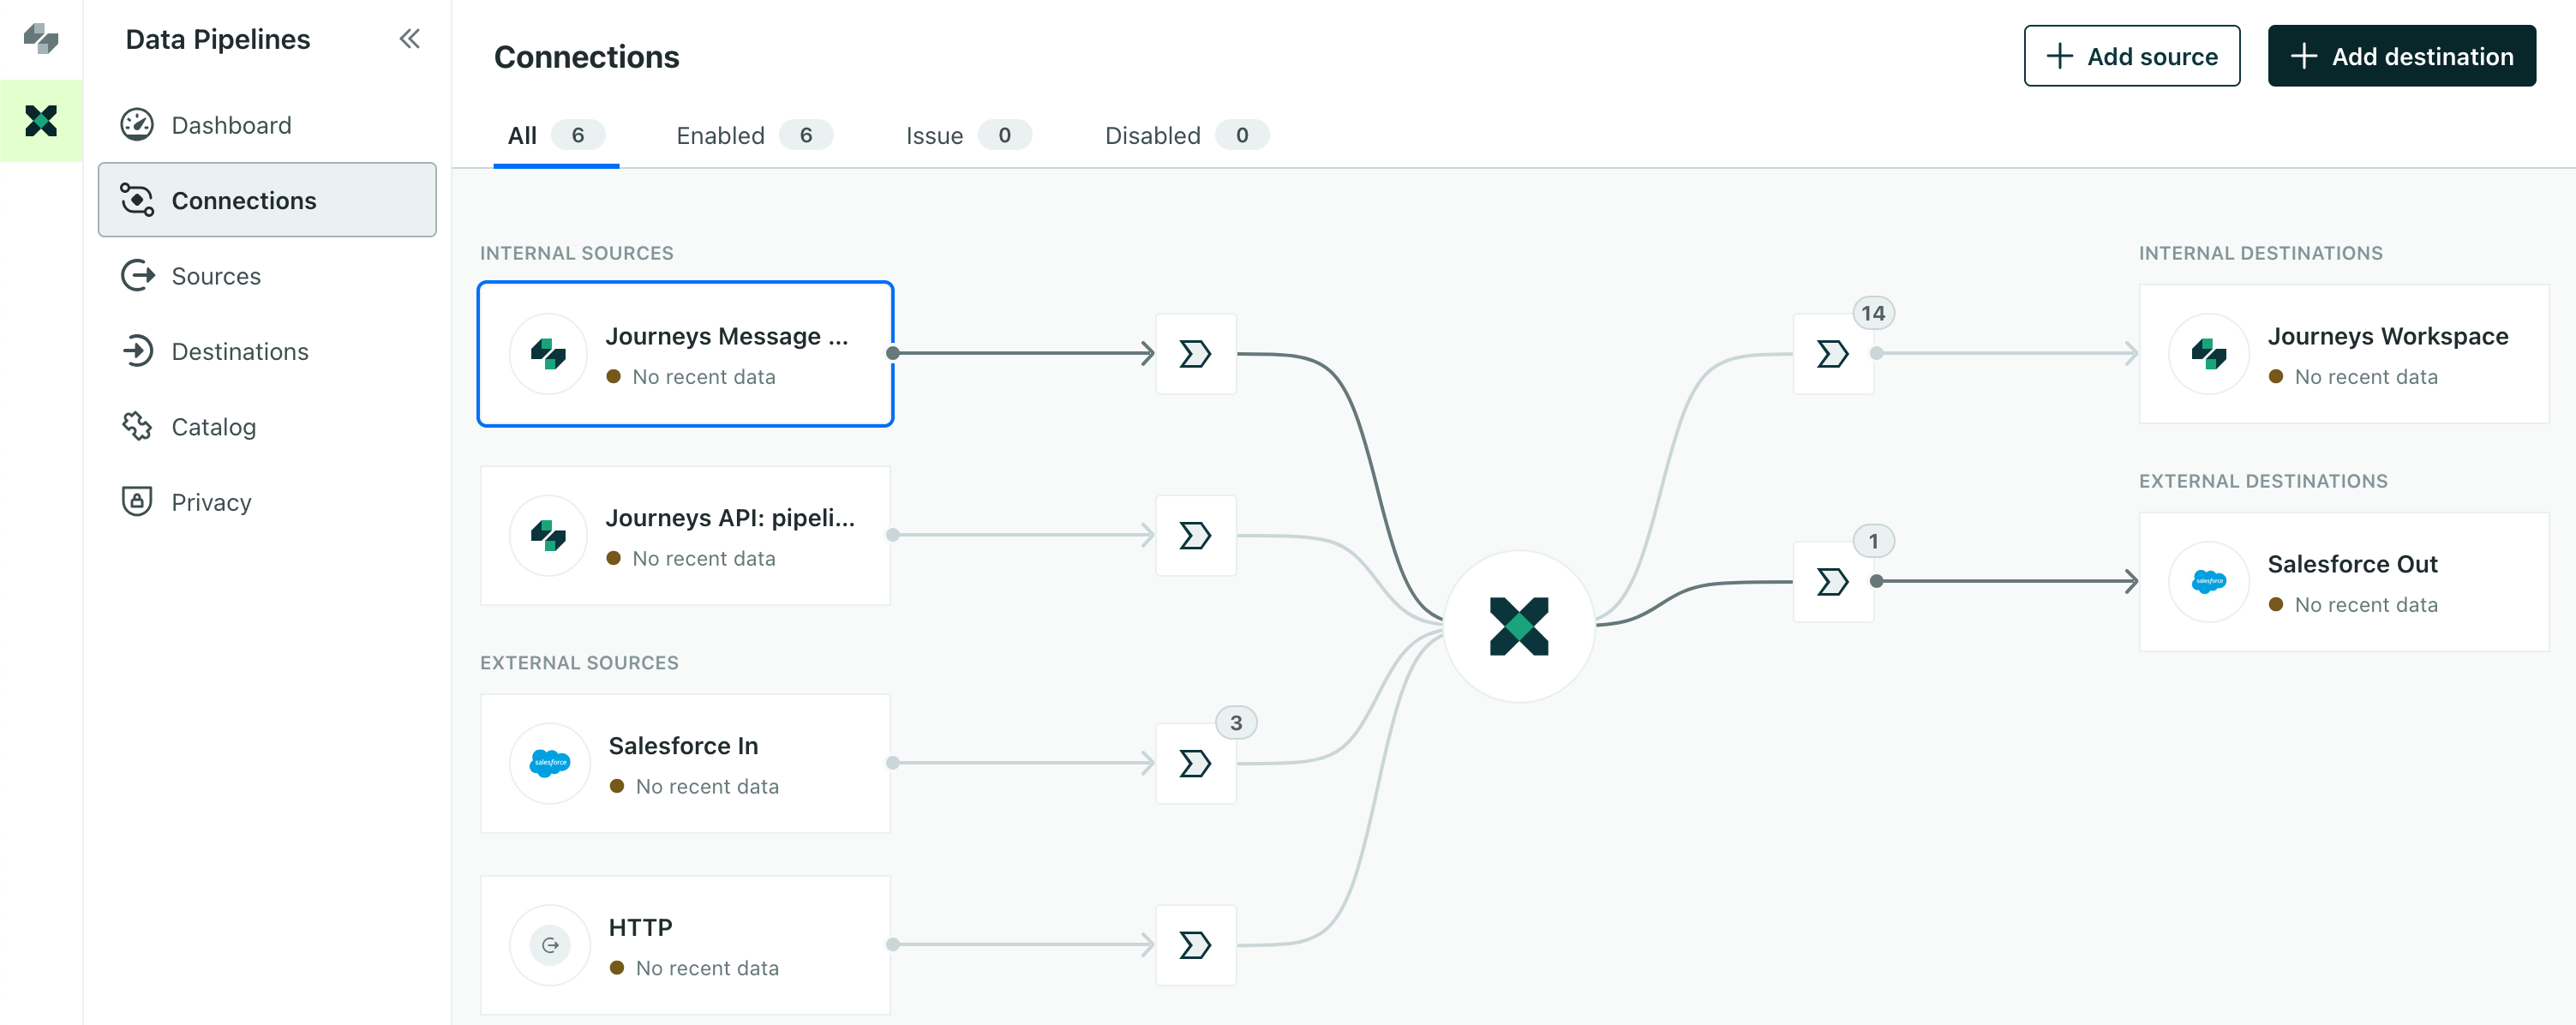
But you’re not done yet! While you’re connected to Salesforce, you’re not sending data there yet. You still need to set up an action to tell us what data to send to Salesforce.
2. Set up a Salesforce action
Setting up an action can be a little daunting because there are so many settings. The process below will tell you what settings to change. For everything else, you can leave default settings.
Now go to your Salesforce destination on the right of the Connections page, and go to the Actions tab. Click Add Action.
For the Action, select Contact—this is who or what you want to update in Salesforce when you send message metrics (or webhooks) to Salesforce.

Under Data Structure, set the first box to Update. This tells Salesforce to update a record when a contact does something in a campaign. You don’t want to create contacts based on engagement information.
You might use the Create operation if you use webhooks or you use a form integration to capture leads from a website. But those are both much more advanced use cases!

Use
$.userIdnot$.user.idIf you map data to
$.user.id, you’ll get an error:Undefined Traits when using update operation.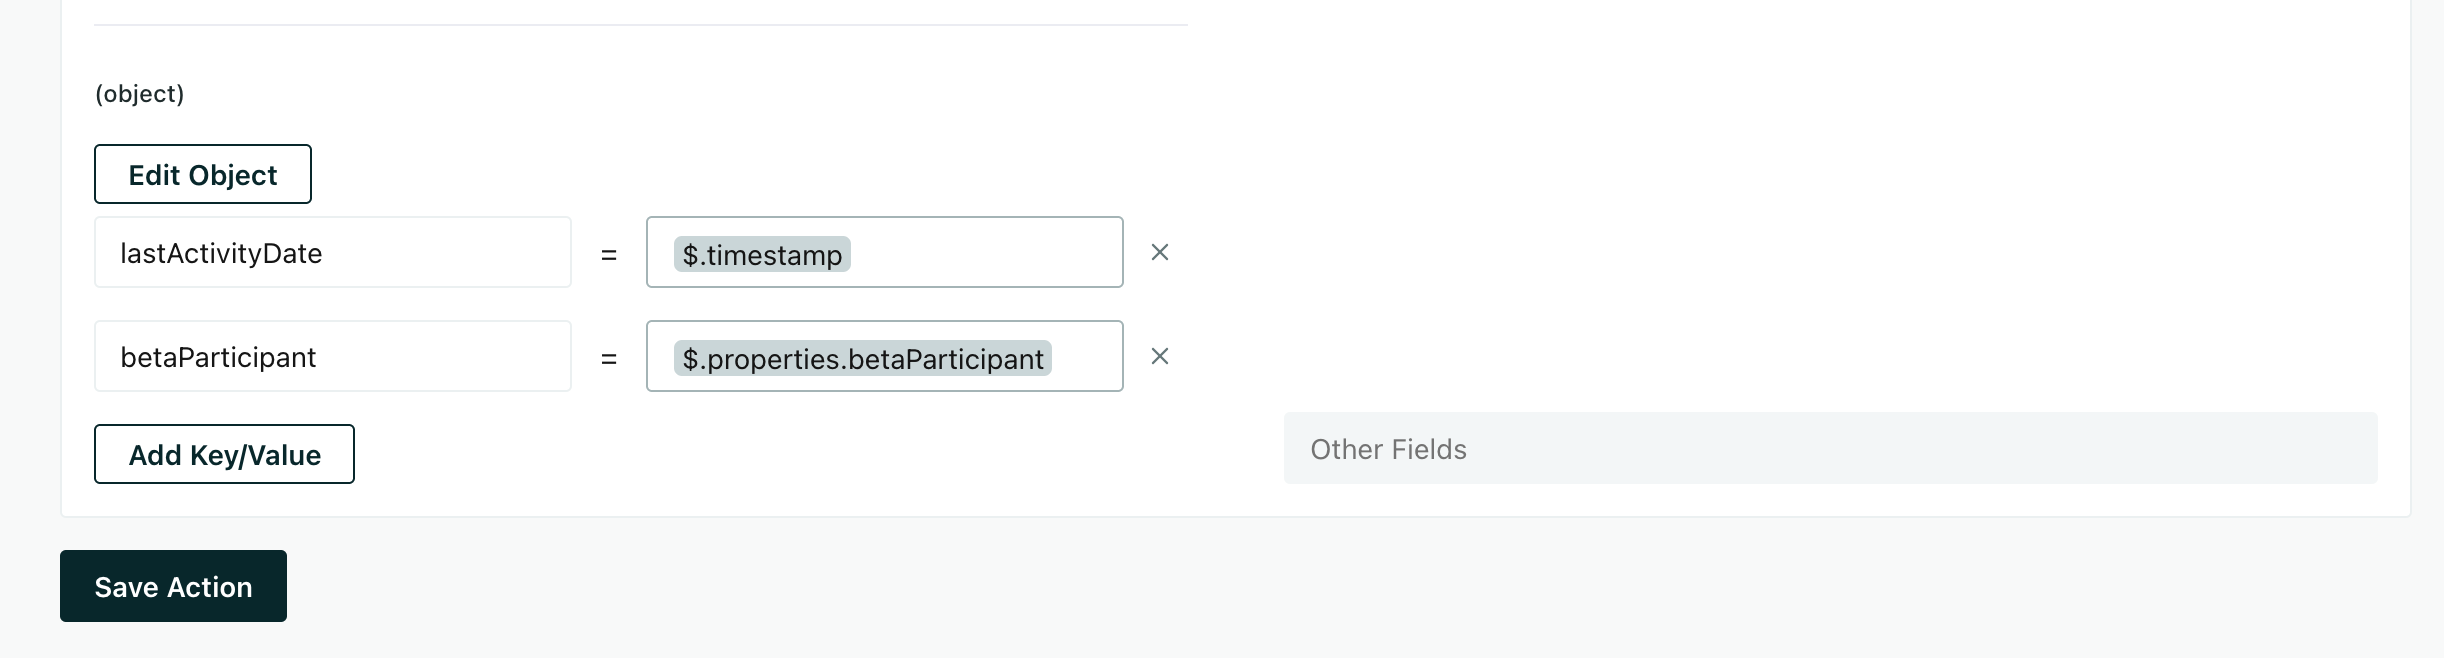
Leave the remaining fields as their defaults and click Save Action.
Now we’ll update the Last Activity Date in Salesforce whenever you send a message or your audience responds to the message. You can either set up other actions—like using bounced events to update the Is Email Bounced field, or the Email Opt Out field when you get an Email Unsubscribed event.
Move on to the next task if you want to update Salesforce records based on activity in a campaign.
Undefined traits when using update operation error
This error typically occurs if you try to match records in Salesforce to $.user.id instead of $.userId. The $.user.id property doesn’t contain any data (it’s undefined), so Salesforce won’t be able to update a record.
Make sure that your Salesforce actions are set up to use $.userId instead of $.user.id. See Set up a Salesforce action above for help updating your actions.

