Mobile App Sources
Unlike most other sources, our mobile sources aren’t just a way to pass data from one platform to another. They support push notifications and in-app messages from Customer.io Journeys!
How mobile sources work
When you integrate our mobile sources into your app, you’ll gain support for mobile messages and the ability to send your app data to downstream destinations like your analytics platform, your marketing automation suite (Customer.io Journeys), and so on.
We currently have SDKs for iOS (Swift), Android, React Native, and Flutter.
to your audience|a b-.->d(Your analytics platform) b-.->e(Your CRM) b-->c(Customer.io Journeys)
Why don’t I see my mobile platform when I add a source?
When you look in the source list, you may only find the iOS and Android sources. What about other mobile platforms?
While we have SDKs for iOS (Swift), Android, React Native, and Flutter, you’ll use our React Native and Flutter SDKs as Track API sources. The integration process for these SDKs is nearly identical to an iOS or Android source; you’ll just use different credentials for these sources.
If you run a version of our iOS or Android SDKs based on the Track API, we recommend that you update to the latest version of our SDKs to take advantage of the benefits of our native Data Pipelines sources, like support for anonymous activity.
| Platform | Latest version | Native Data Pipelines source (Recommended) | Journeys (Track) API source |
|---|---|---|---|
| iOS (Swift) | 3.3.2 | < 2.13.2 (Upgrade recommended) | |
| Android | 4.0.1 | < 3.11.1 | |
| React Native | 3.8.0 | ||
| Flutter | 1.5.0 | ||
| Expo | 1.0.0-beta.15 |
For the most part, you won’t notice significant differences between our native Data Pipelines sources and other SDKs. But we’ve detailed the few minor differences below.
Differences between native mobile sources and Track API-based mobile sources
Our iOS 3.x and Android 4.x SDKs are designed to work with Data Pipelines natively. Our other SDKs work with Data Pipelines through the Track API. While we’re updating our other SDKs to use Data Pipelines natively, you may notice the following differences with React Native and Flutter sources in the meantime.
- Calls will read as coming from the Track API: when you use a Customer.io Journeys-based integration with Data Pipelines, you’ll need to set up a Journeys Track API source. This means that all calls from your mobile app will read as coming from the Track API, not from your website, mobile app, server, etc.
- Calls don’t collect
contextfor each request: our iOS and Android SDKs collectcontextfor each call, with basic information about thedevice,page,locale, etc of the person or object causing the call. Journeys API-based SDKs don’t collect this information with every call. - Less robust support for anonymous activity: You can capture anonymous events and perform other calls for people you haven’t identified yet. Our Journeys-based SDKs typically require you to identify your user before you can do anything.
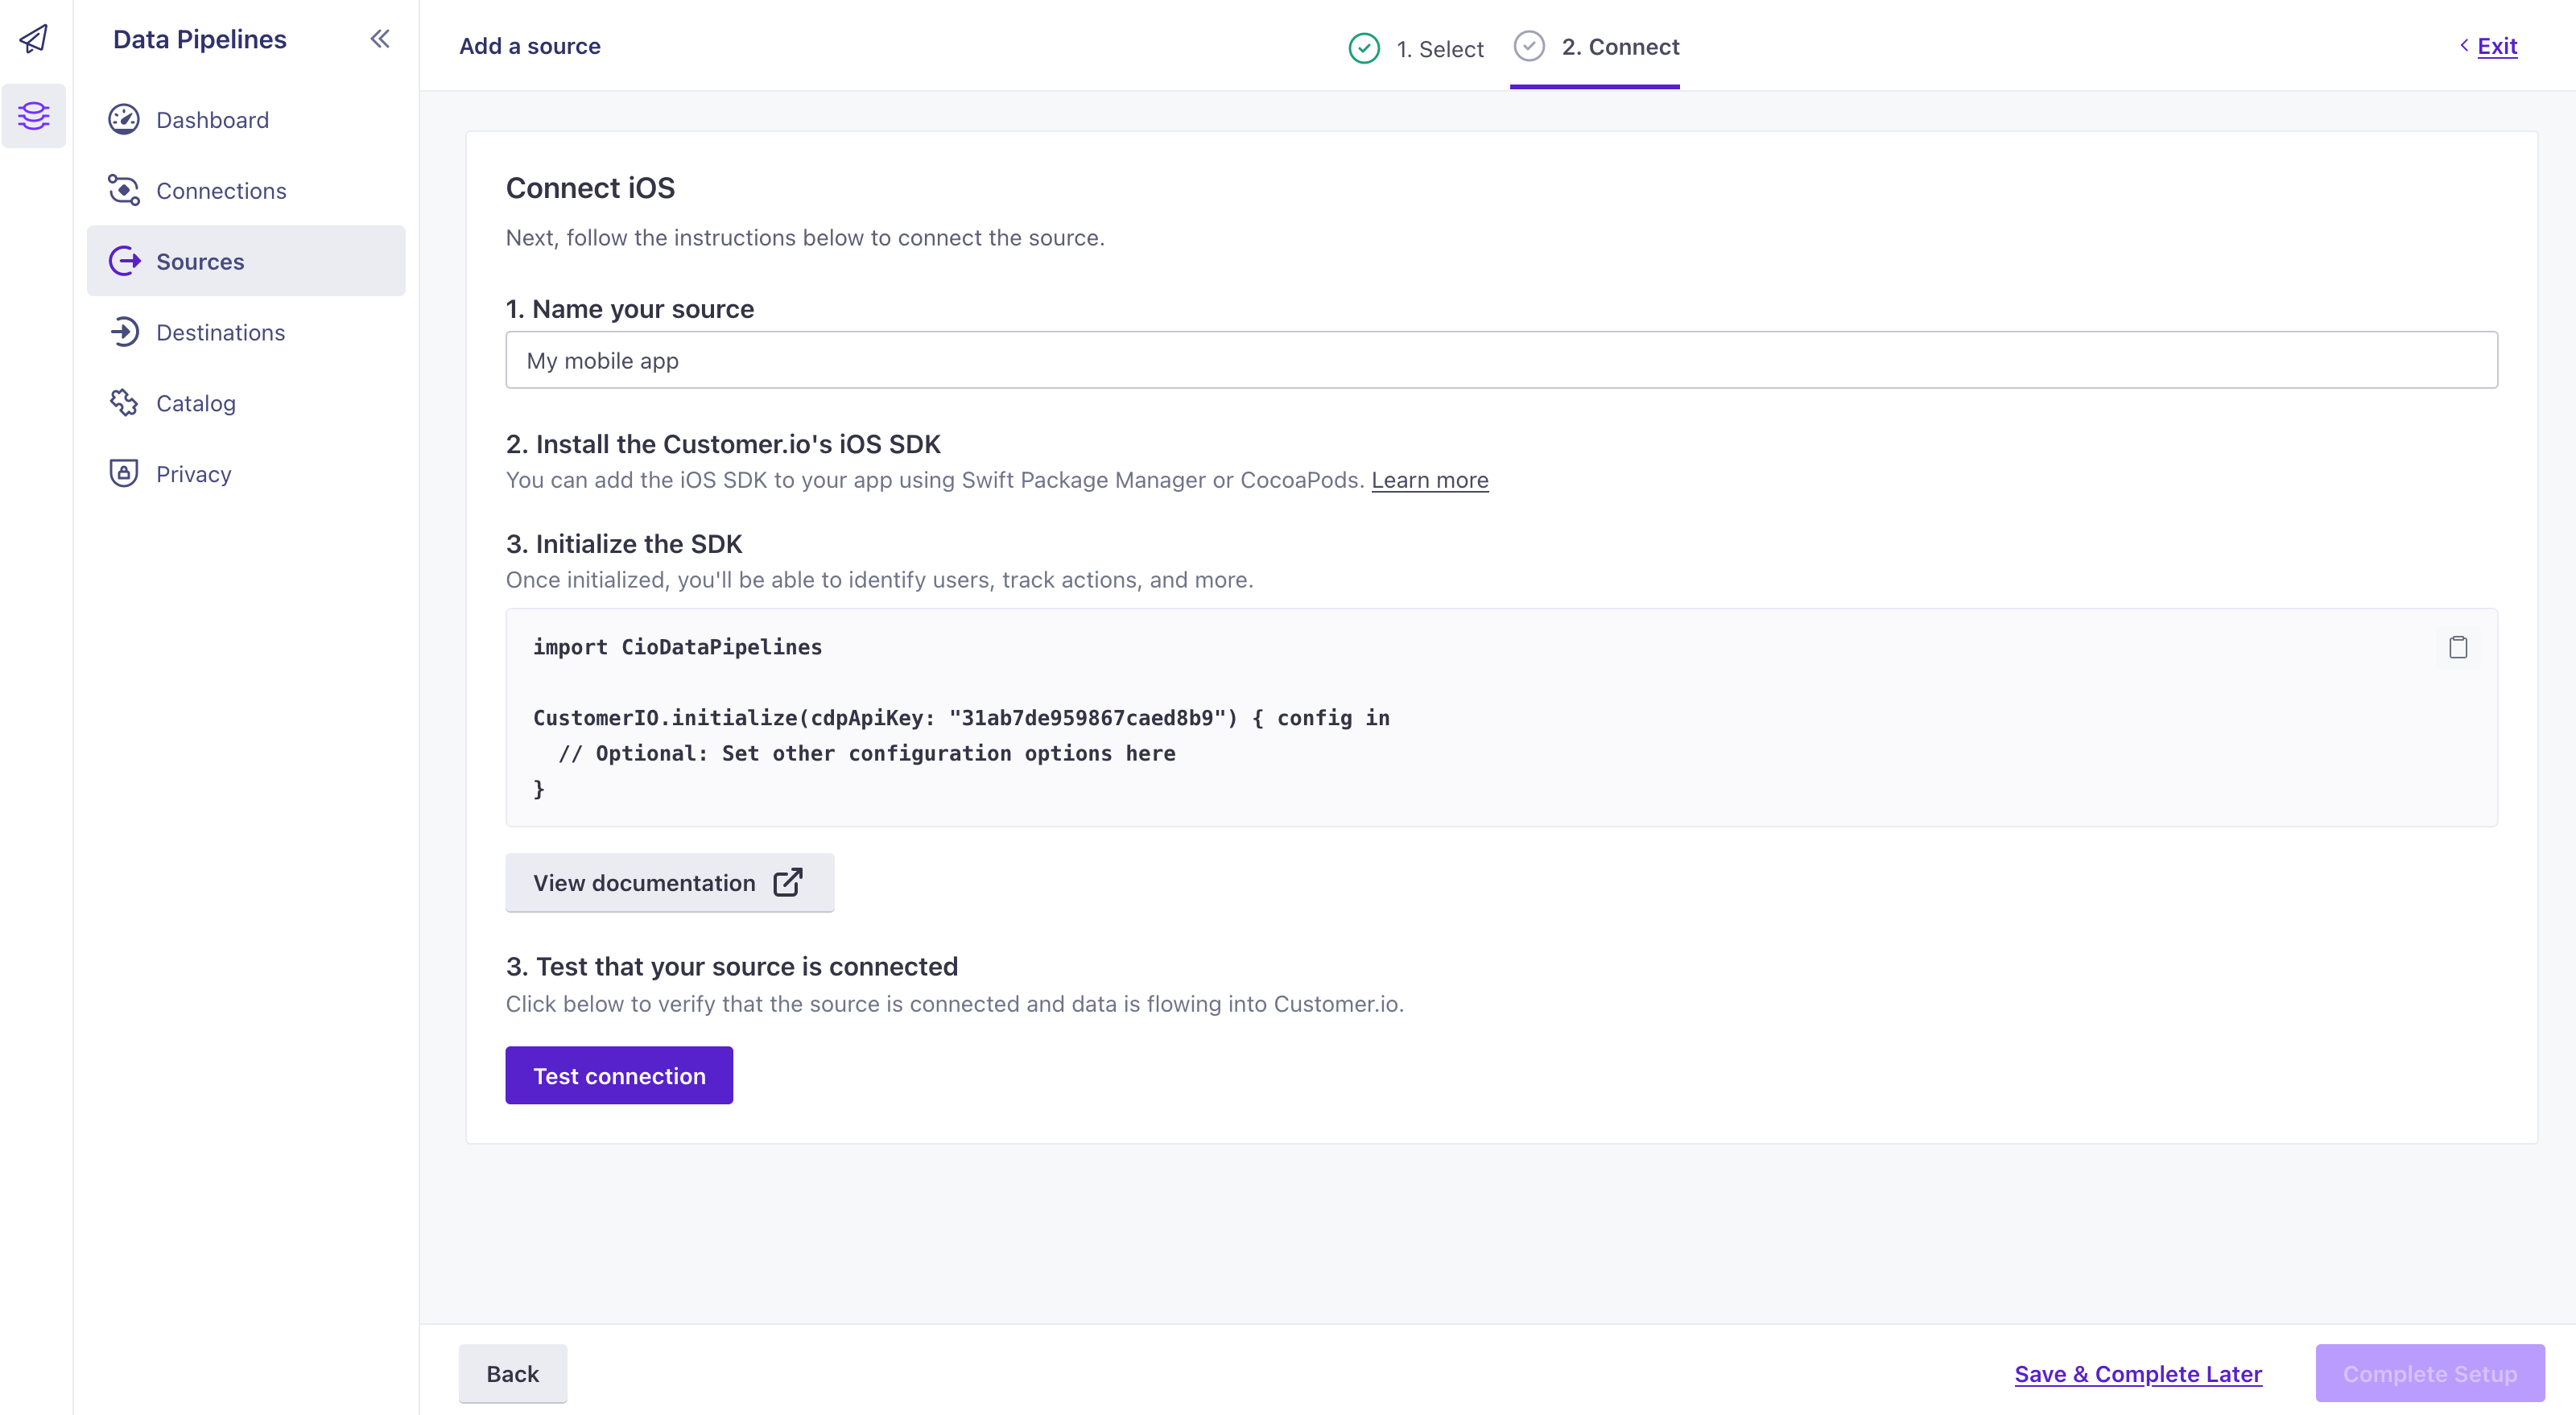
Create an iOS or Android source
To support our mobile SDKs, you’ll first need to create your sourceA source is a website or server that you want to capture data from—it’s a source of data!, providing you with API credentials you’ll use to initialize the SDK and communicate with Customer.io.
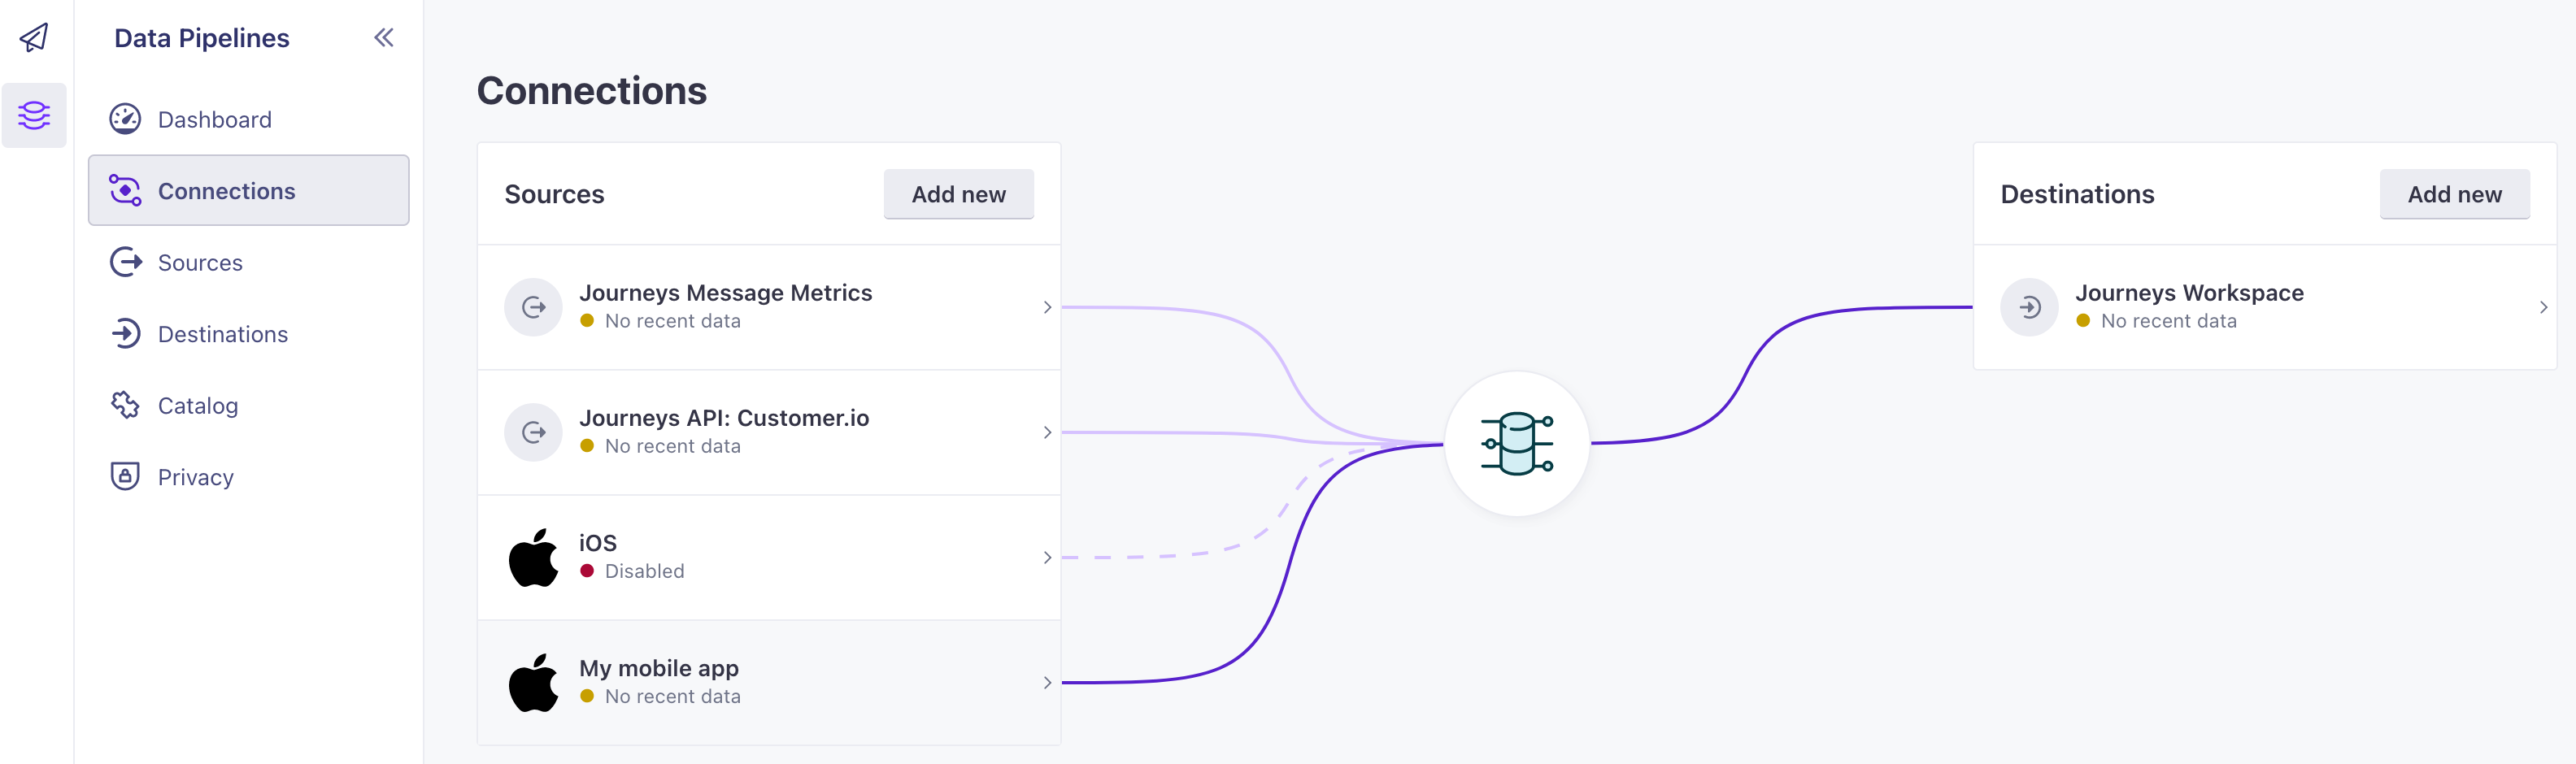
By default, your iOS source isn’t connected to anything; you have to tell us where you want to send your mobile data. As a part of this process, you’ll connect your mobile source to your Journeys workspace—Customer.io as both source and destination. You must connect your source to your Journeys destination to take advantage of push and in-app messaging features.
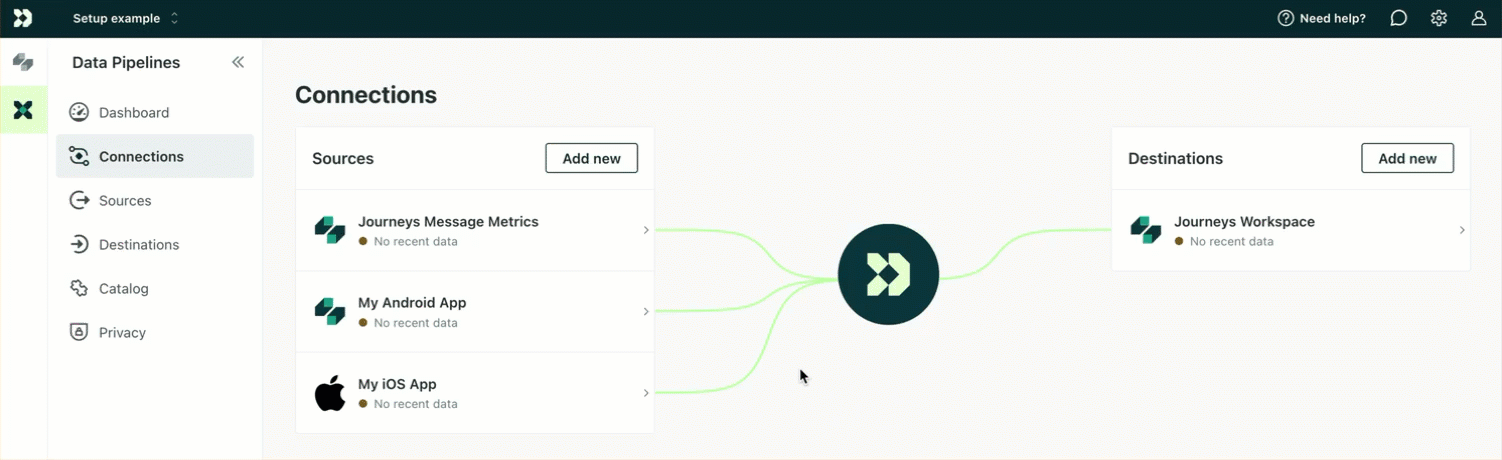
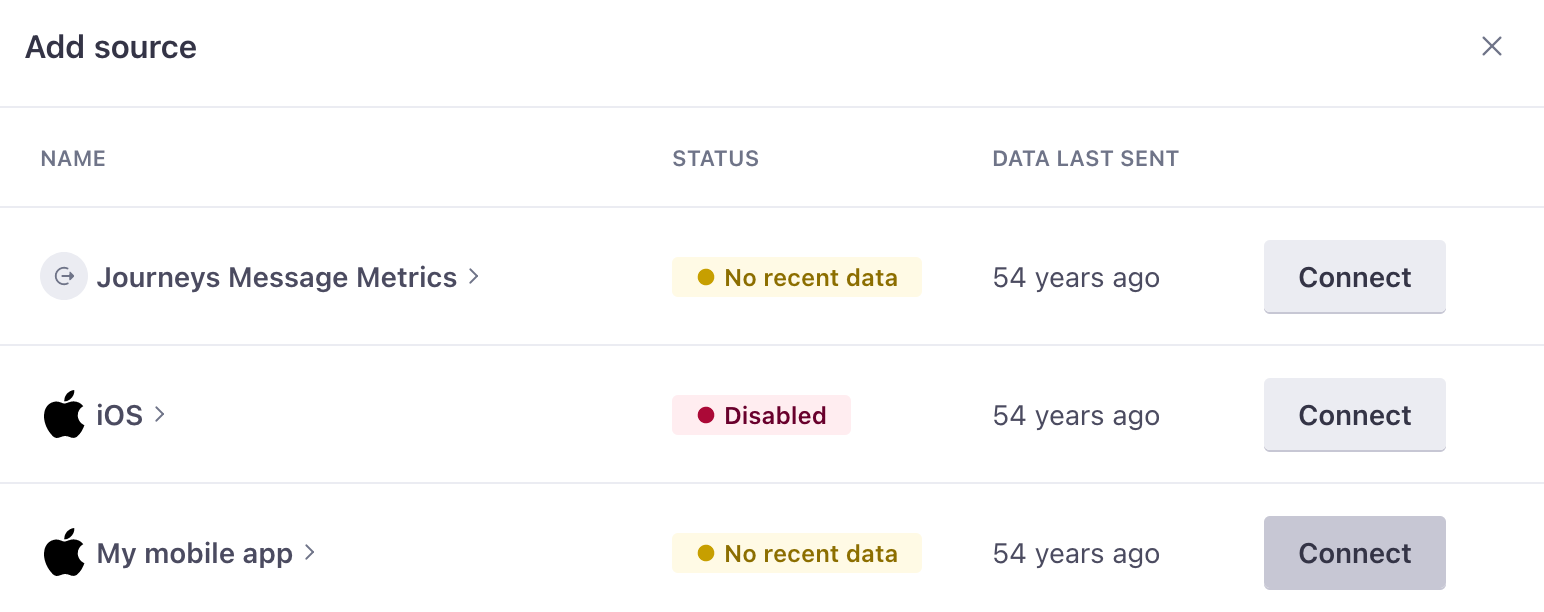
- In the Data Pipelines tab, click Sources.
- Click Add Source and pick a Mobile source.
- Enter a Name your source, like My iOS App.
- We’ll present you with credentials that you’ll use to initialize the SDK. Copy them and keep them handy.
- Click Complete Setup to finish setting up your source. But you’re not done yet!
- Select your Journeys workspace on the right-side of the Connections page.
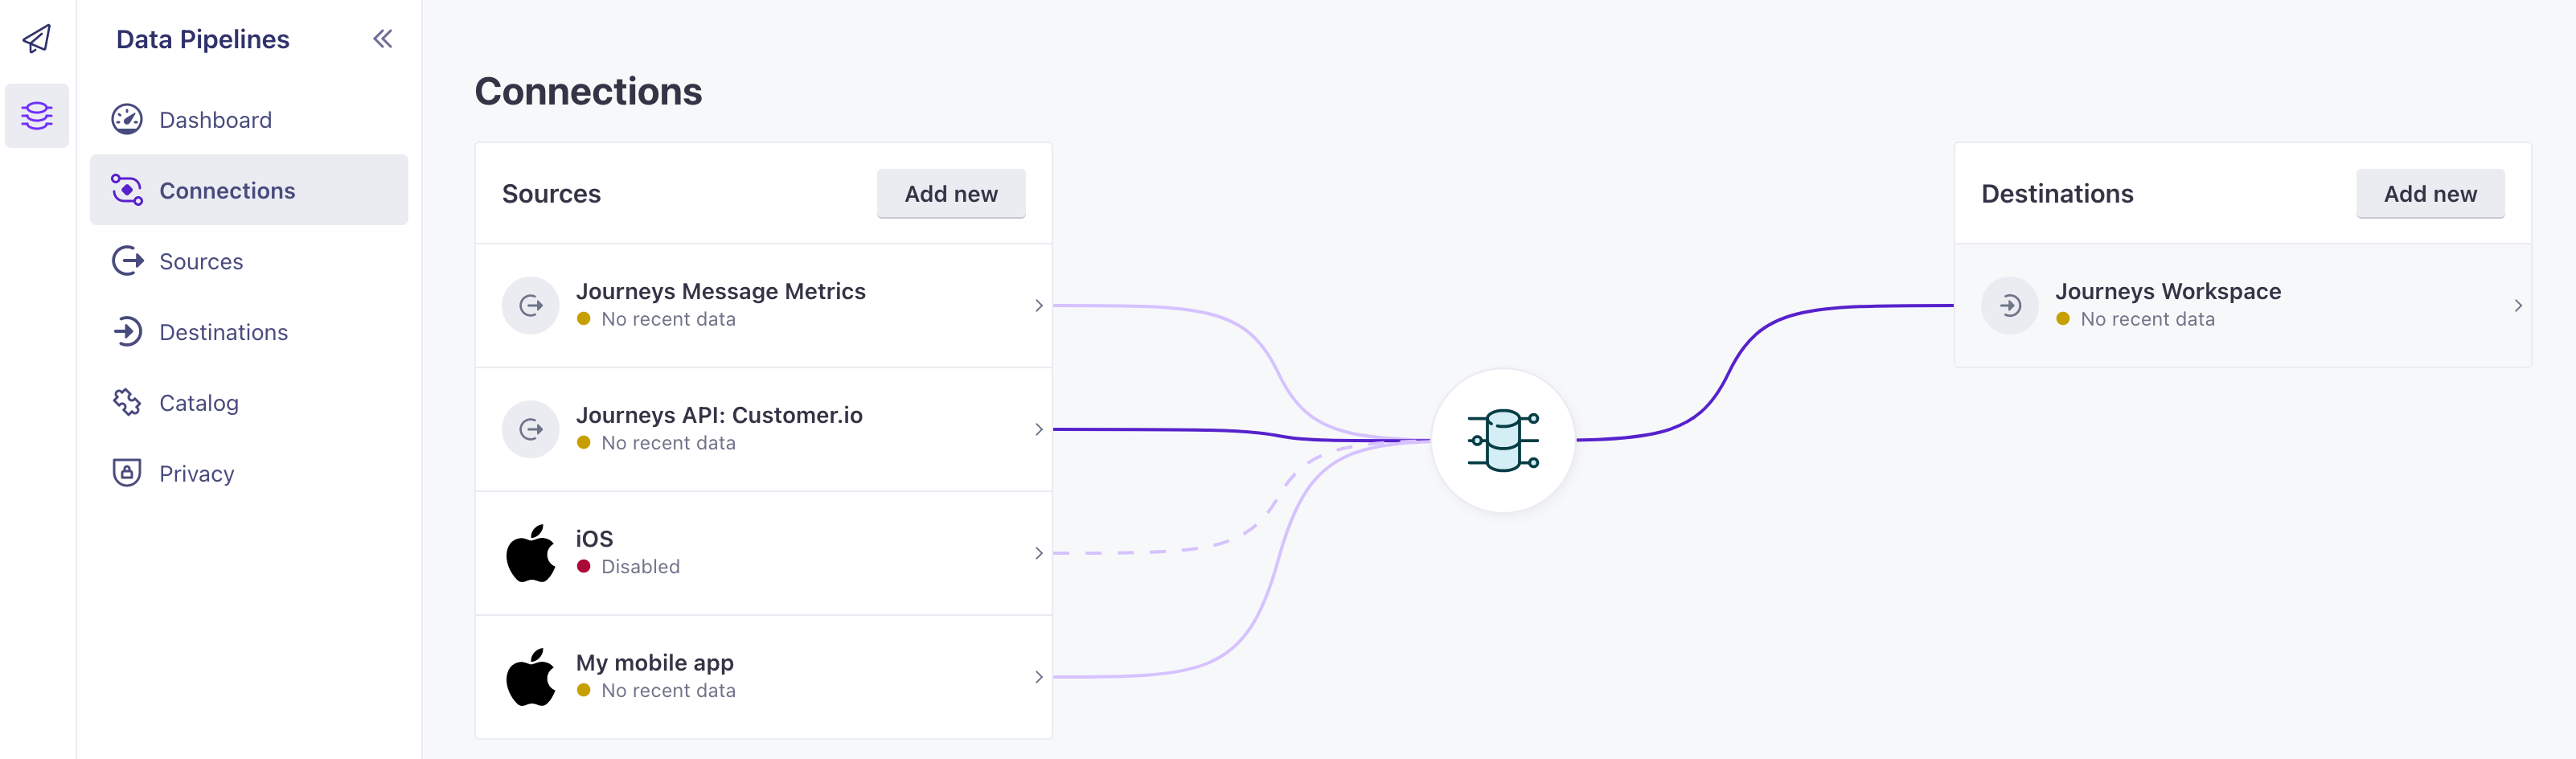
- Click Add source and select the source you set up in previous steps. This tells Customer.io to send data from your app to your Customer.io workspace.
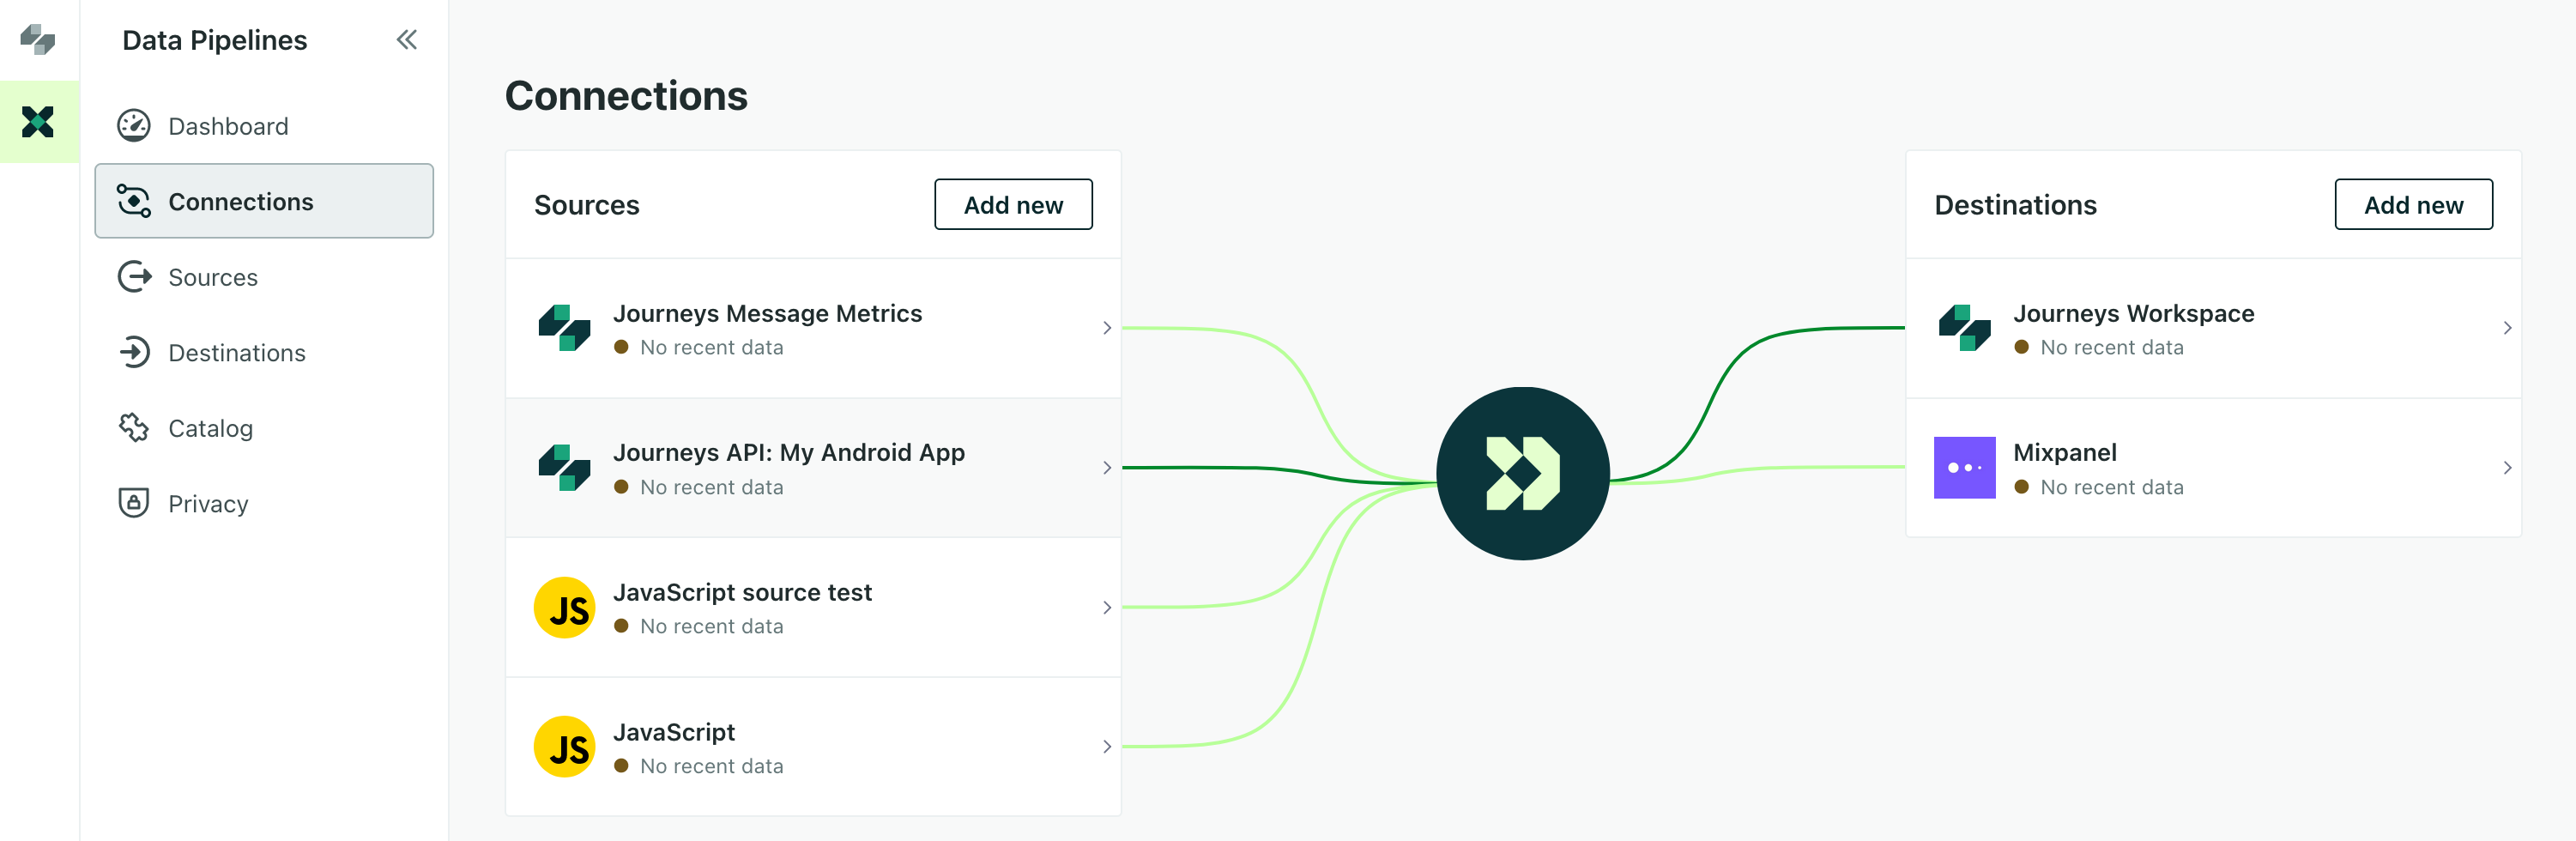
The connections page shows your source connected to your Journeys workspace. Hover over a source or destination to see its active connections. While we connect your source to your Journeys workspace by default, you can connect your source to other destinations so you can use your data wherever it benefits you—like your analytics platform, a CRM, and so on.
Create a React Native or Flutter source
For React Native and Flutter, you’ll create a set of Journeys API credentials. These credentials automatically set up your source and connect it to your Journeys workspace, making the setup process very easy!
In Journeys, go to Data & Integrations > Integrations > Customer.io API and click Mange API Credentials.
Click Create Track API Key.
Enter a Name for your key, like My Android App. This is how you’ll recognize your source in Data Pipelines.
Click Create. Copy your Site ID and API Key and keep them handy; you’ll use these keys to initialize the SDK.
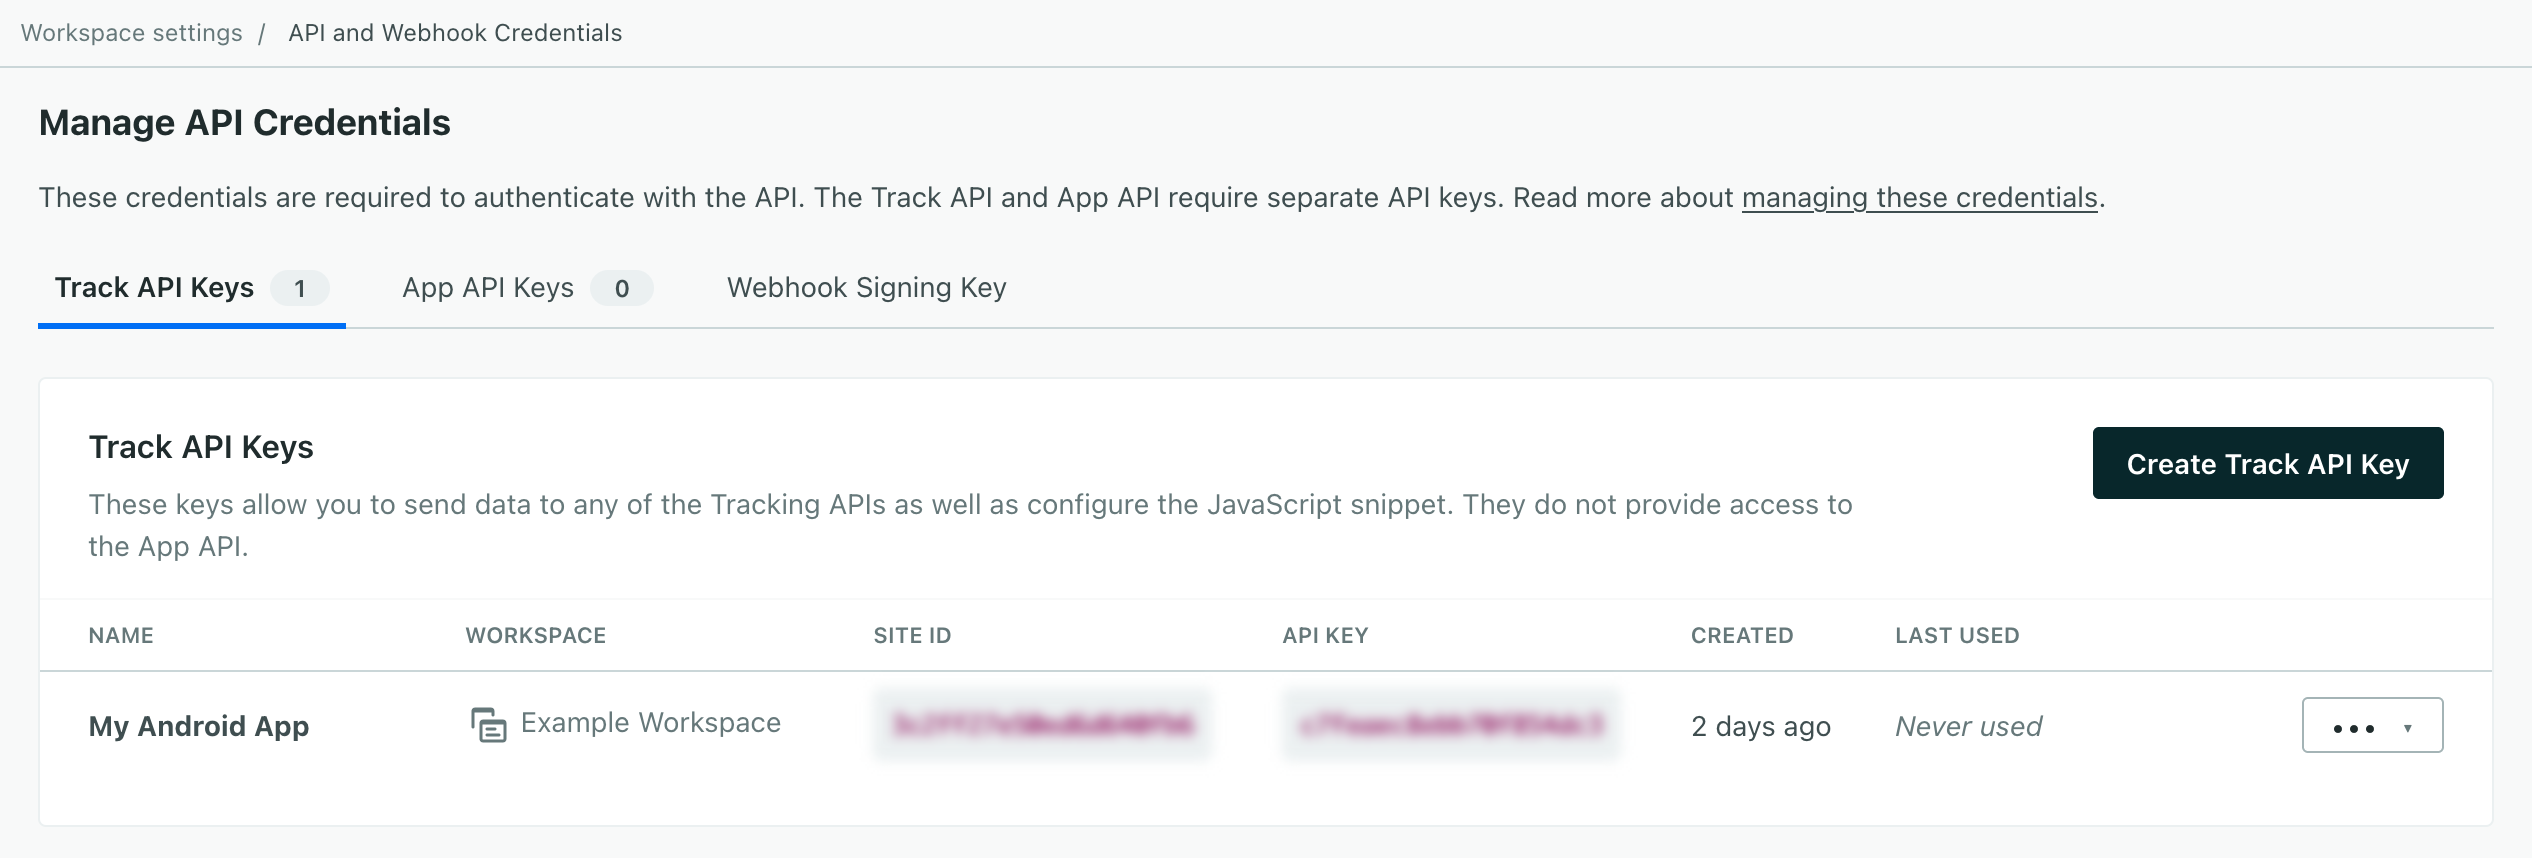
Go to Data Pipelines, and make sure your source appears on the Connections page. You’ll see your source as Journeys API .
Now you’re ready to integrate the SDK into your app! See our SDK developer documentation for help with the integration process.

