Getting started with Data Pipelines
Data Pipelines reshape data from sources to fit your destinations. You can collect data from any number of sources and send it to destinations where you can act on it—for analytics, marketing automation, and so on. This page provides basic instructions to get you started with Data Pipelines, including how to get data flowing from sources to destinations.
Here’s a quick overview of the setup process for Data Pipelines. In this video, we’re using the JavaScript source—our most popular and easy-to-use source.
Basic setup path
The following steps are the basic path you’ll follow to set up Data Pipelines. You’ll find more detailed instructions within each individual source and destination in our catalogs, but this can help you better understand the high-level tasks you need to accomplish to get things up and running.
- Add a source.
- Set up calls to send data from the source.
- Add a destination to receive data from the source.
- Test your implementation.
In this guide, we’ll focus on our JavaScript source library, and show basic page tracking. This is a simple path to get you started and prove your implementation.
to your website) subgraph c [Source Events] direction LR d(
identify)
e(page)
f(track)
g(group)
end
b-->c
e-.->|Sent automatically& anonymously|h(Data Pipelines) h-->i(New destination)
1. Add a source
A Source is a website or server that sends data into Customer.io. You’ll add sources to collect data that helps you understand who your customers are and how they use your product. Create a source for each website or app you want to track.
In this case, we’re going to add the JavaScript source to your website.
- Go to the Data Pipelines tab. On the Connections page under Sources, click Add New.
- Click the JavaScript source and then click Add Source.
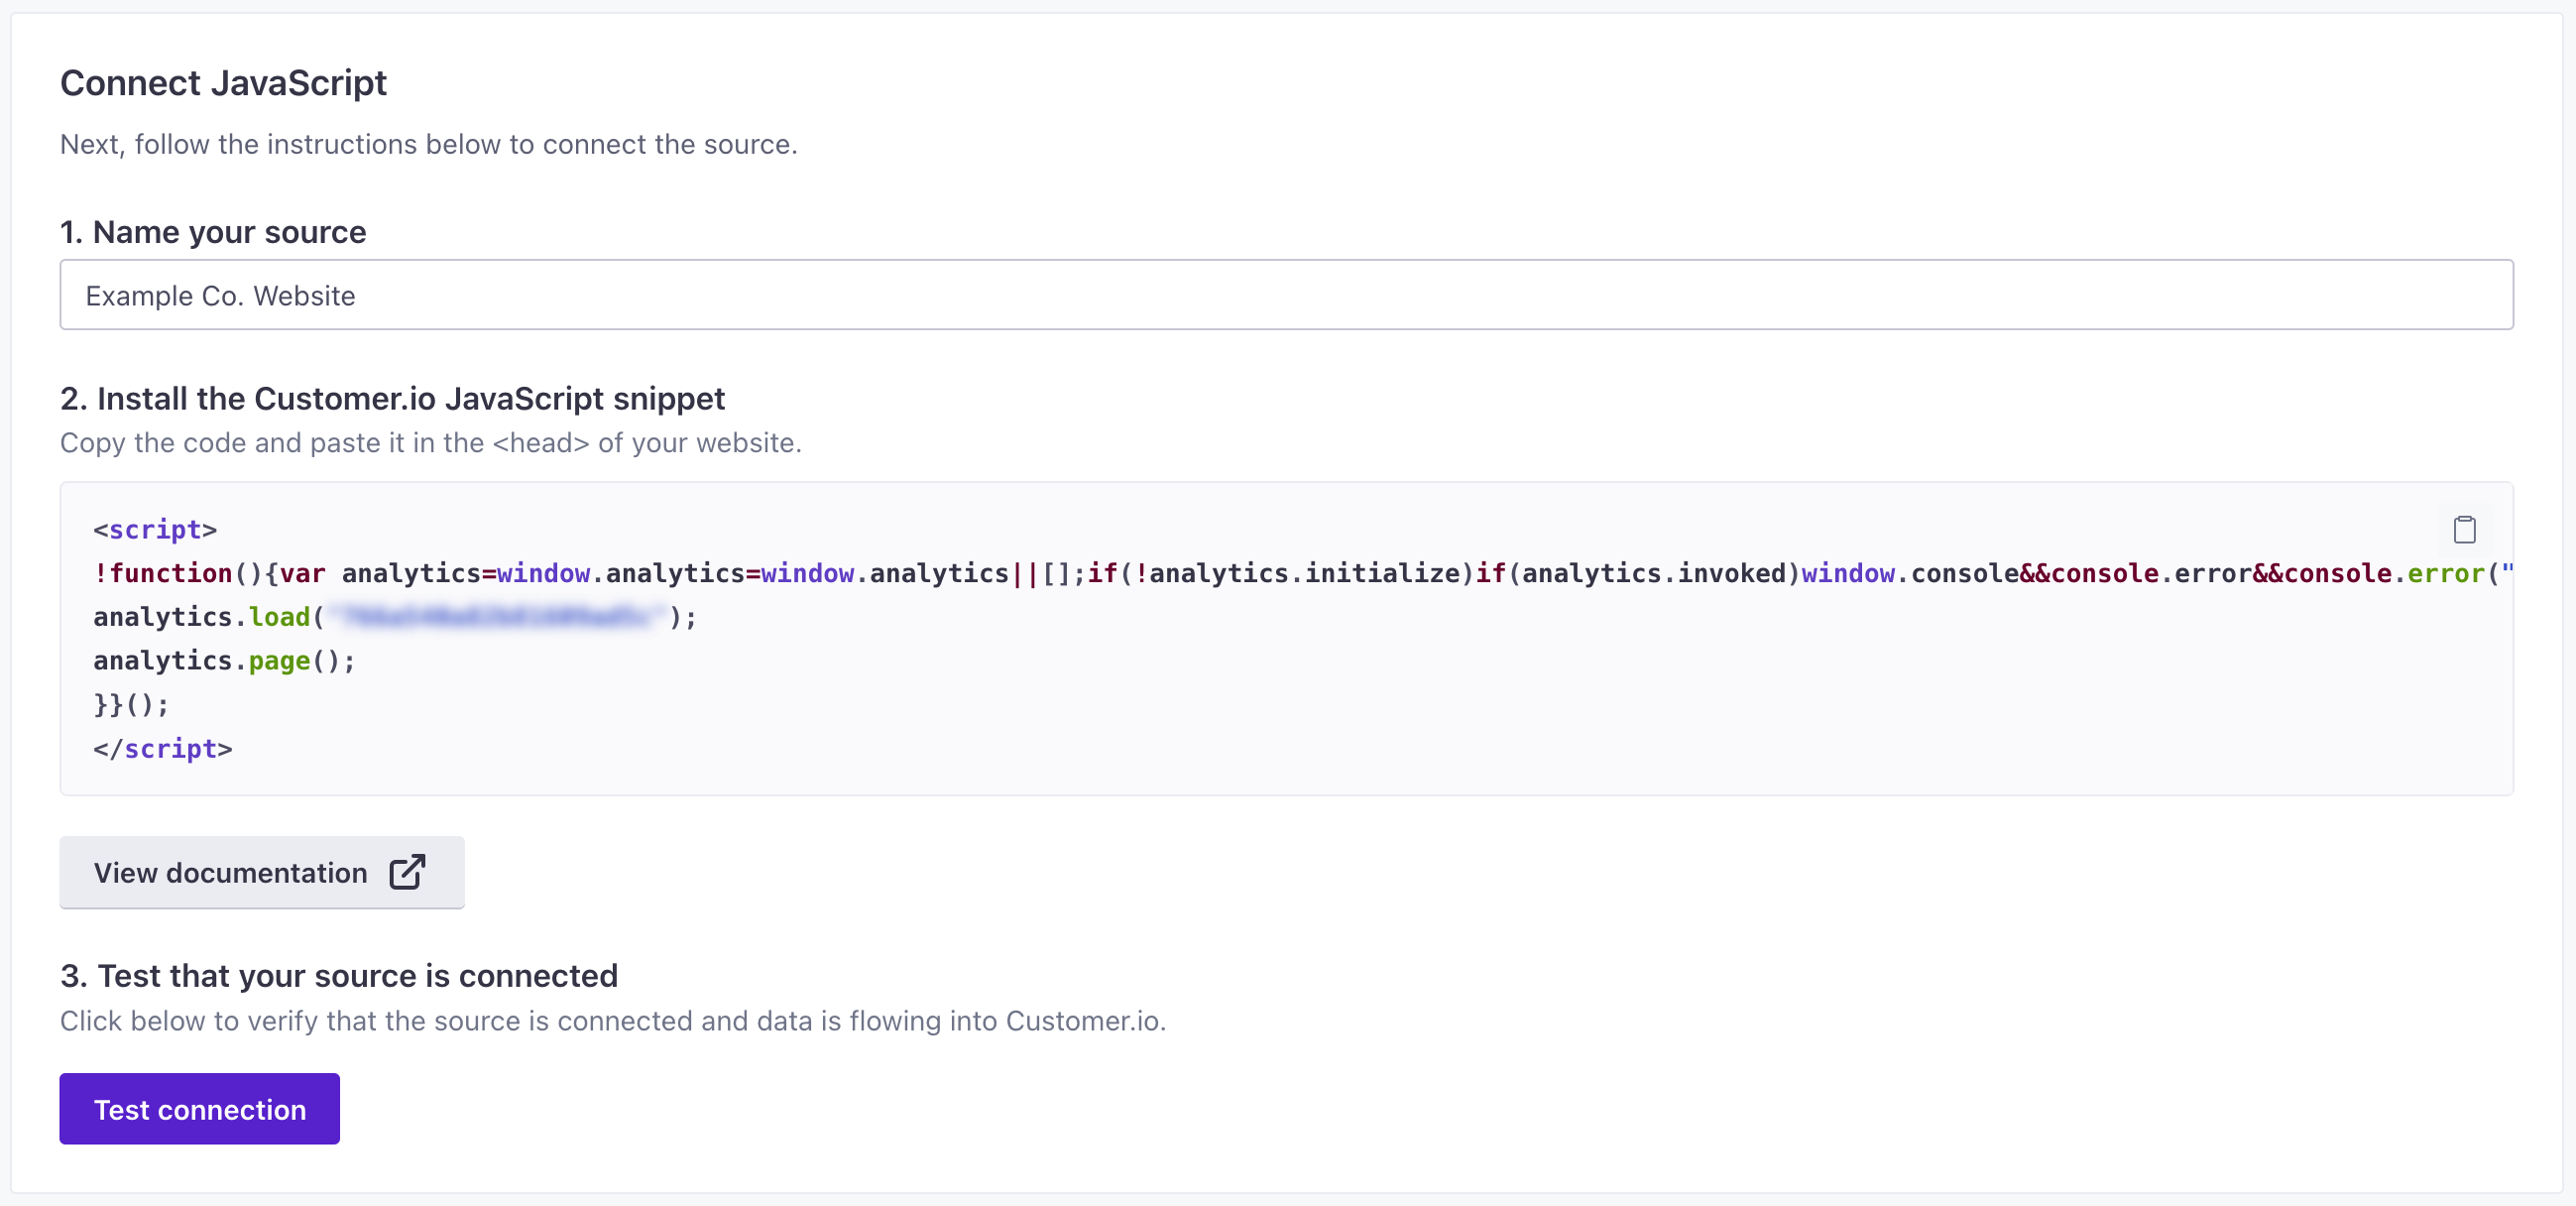
- Enter a Name for the source, and click Submit. You should give your source a name that helps you identify not only the source medium (“JavaScript” in this case), but helps you identify the resource you’re capturing data from—like “company website” or “community forums.”
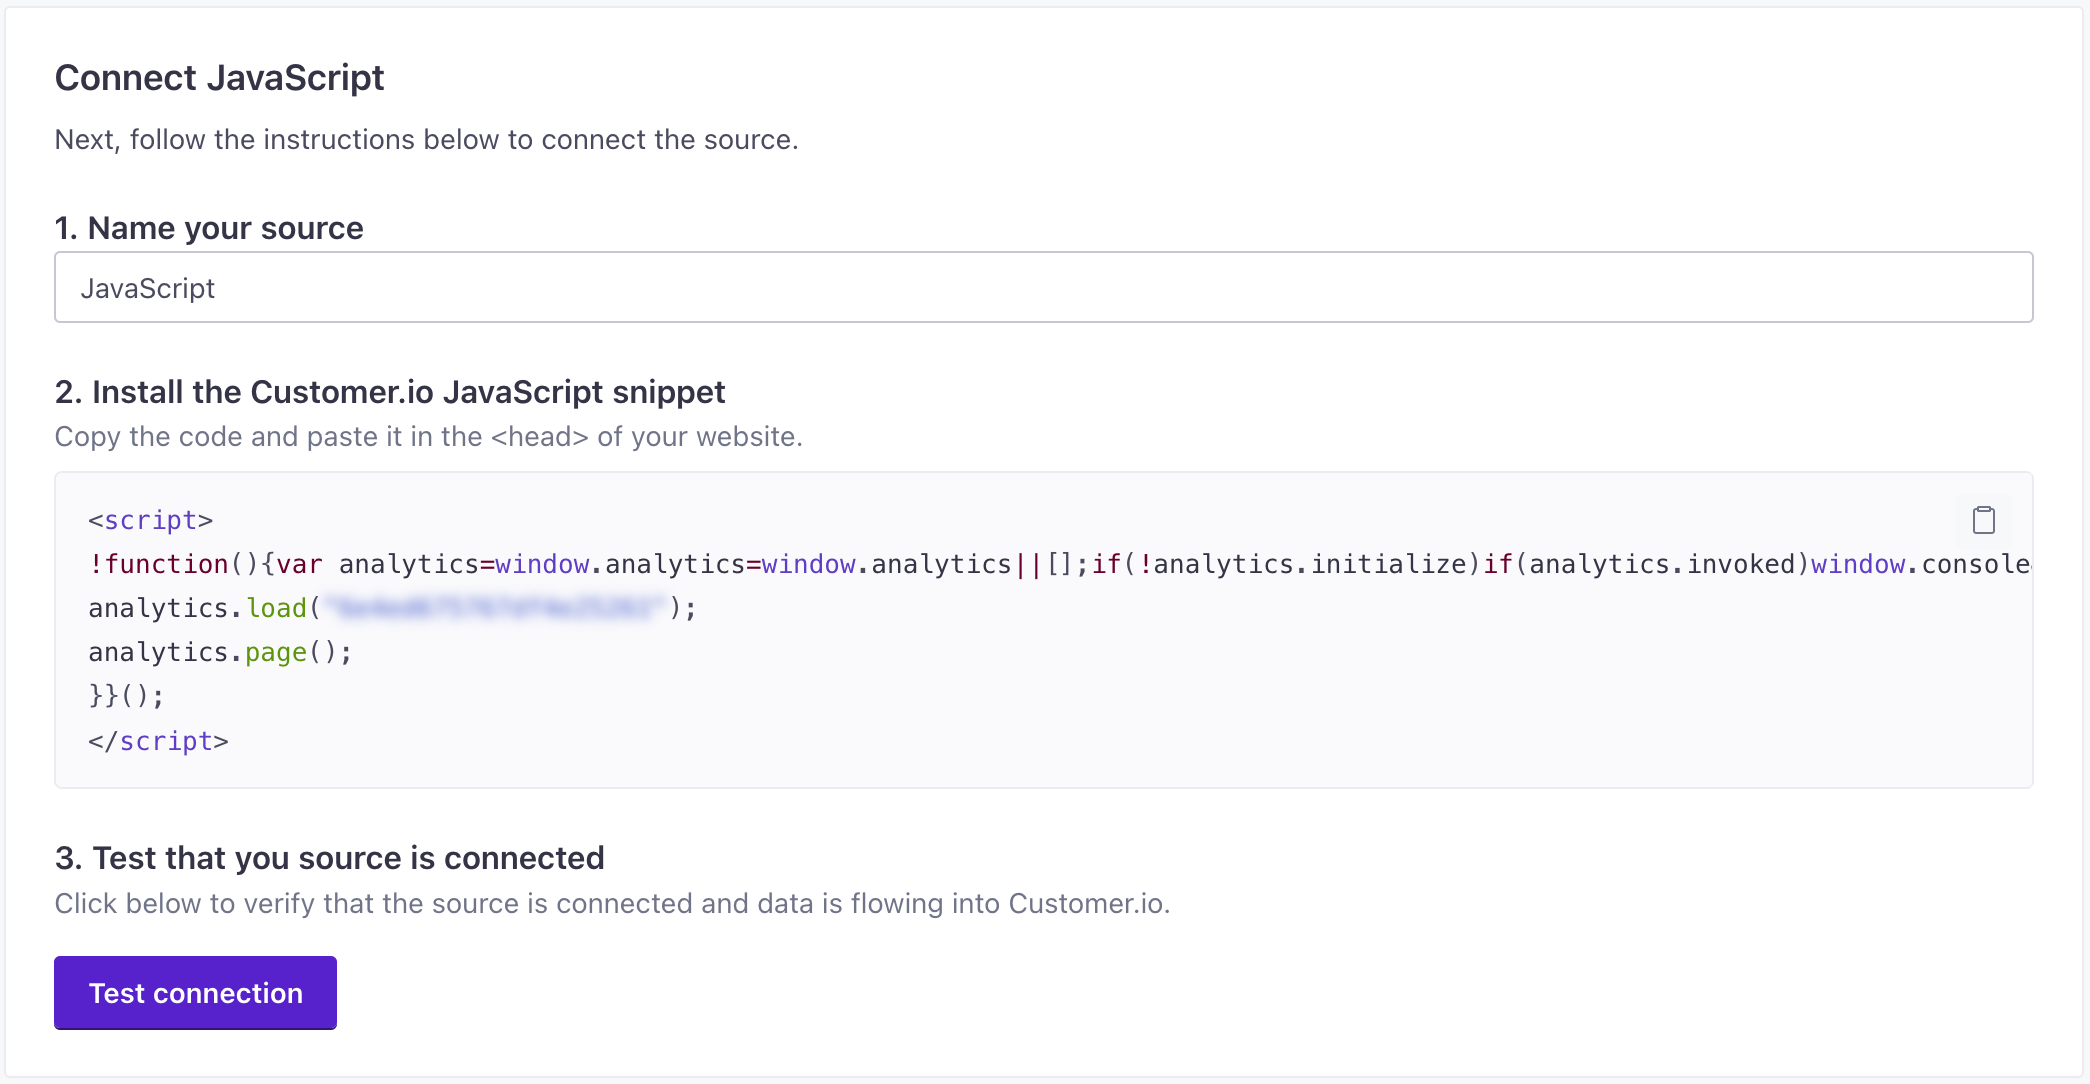
- Under Installation Instructions, you’ll find the JavaScript snippet that you need to add to your website. Copy this code and paste it in your website’s
<head>tag.
That’s it! Now you’re ready to capture data from your website.
2. Make a page call
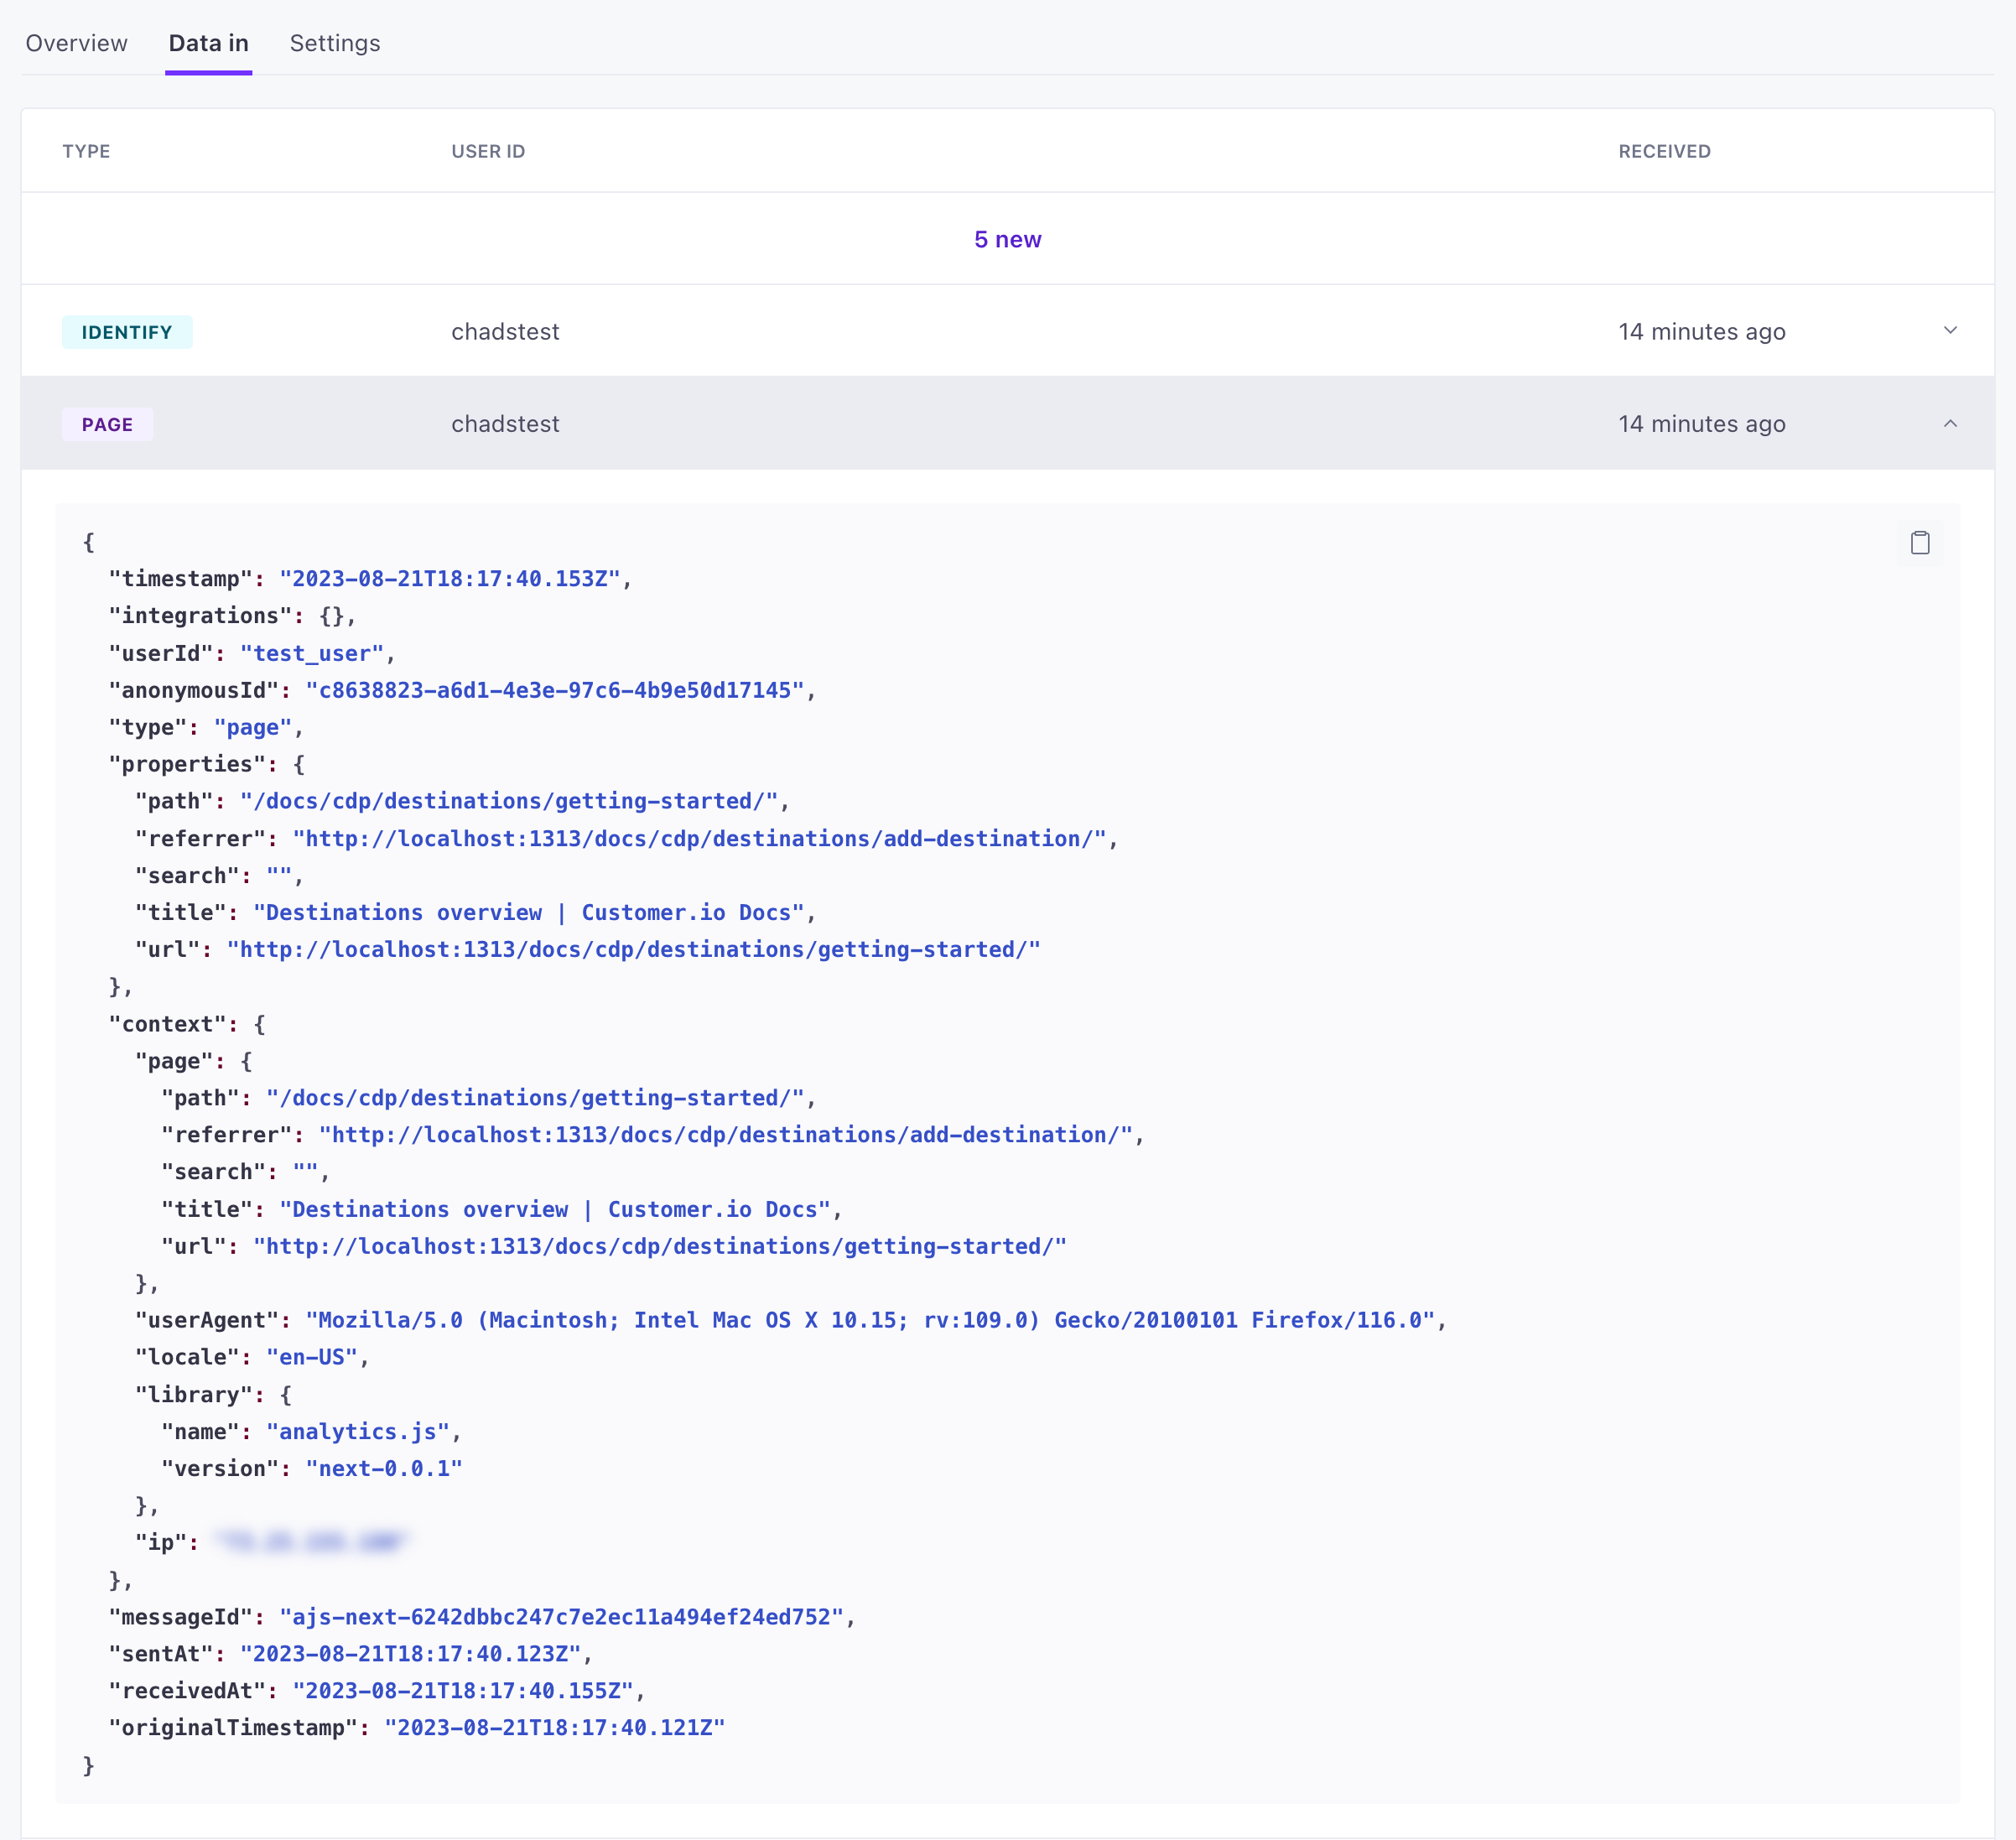
Go to the website where you installed the JavaScript snippet in the steps above and visit a few pages. In Customer.io, go back to your source’s API Calls tab. You should see page events!
A page event represents a page view—a page someone visited in your website or app. The JavaScript snippet automatically captures page events.
However, these events are still anonymous. You’ll need to set up identify calls and other events to associate anonymous data with people you know. You can identify people when they provide their email address on a form, login to your website, and so on. See our JavaScript source for help implementing the full array of events you can (and should) capture from your source.
While your source might change, our event types don’t. You can capture the same events—or a subset of events—from the sources we support.
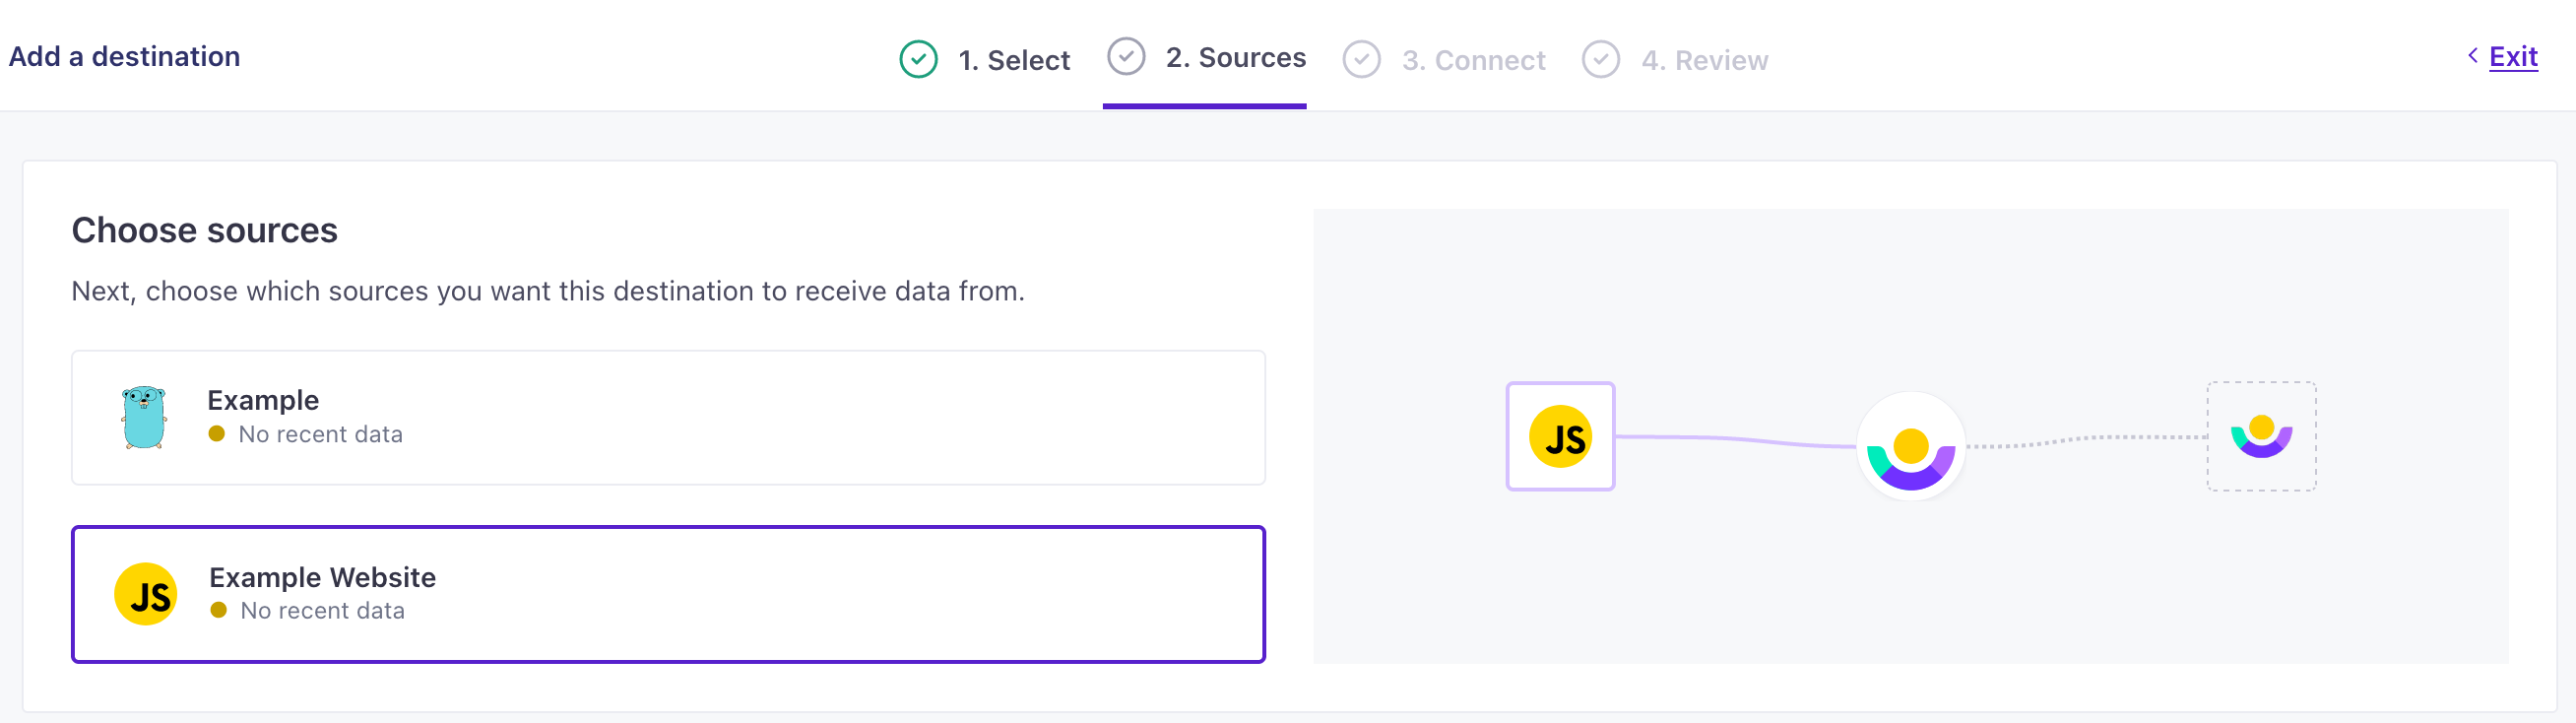
3. Add a destination
A destination is the place you want to send your data to. You can send data to analytics platforms, CRMs, support tools, or other marketing platforms from any of your sources. We reshape data from your sources to fit the shapes expected by your destinations.
- Go to the Data Pipelines tab and click Connections.
- Click Add New under Destinations.
- Select your destination. In our examples, we’re using the Customer.io destination.
- Select the JavaScript Source. This lets you send data from your website (using the JavaScript source) to your new destination!
- Configure your destination. Each destination has its own configuration settings—depending on the ways in which you authenticate with a destination, the types of events it accepts, and so on. See our catalog and select your destination to get detailed instructions.
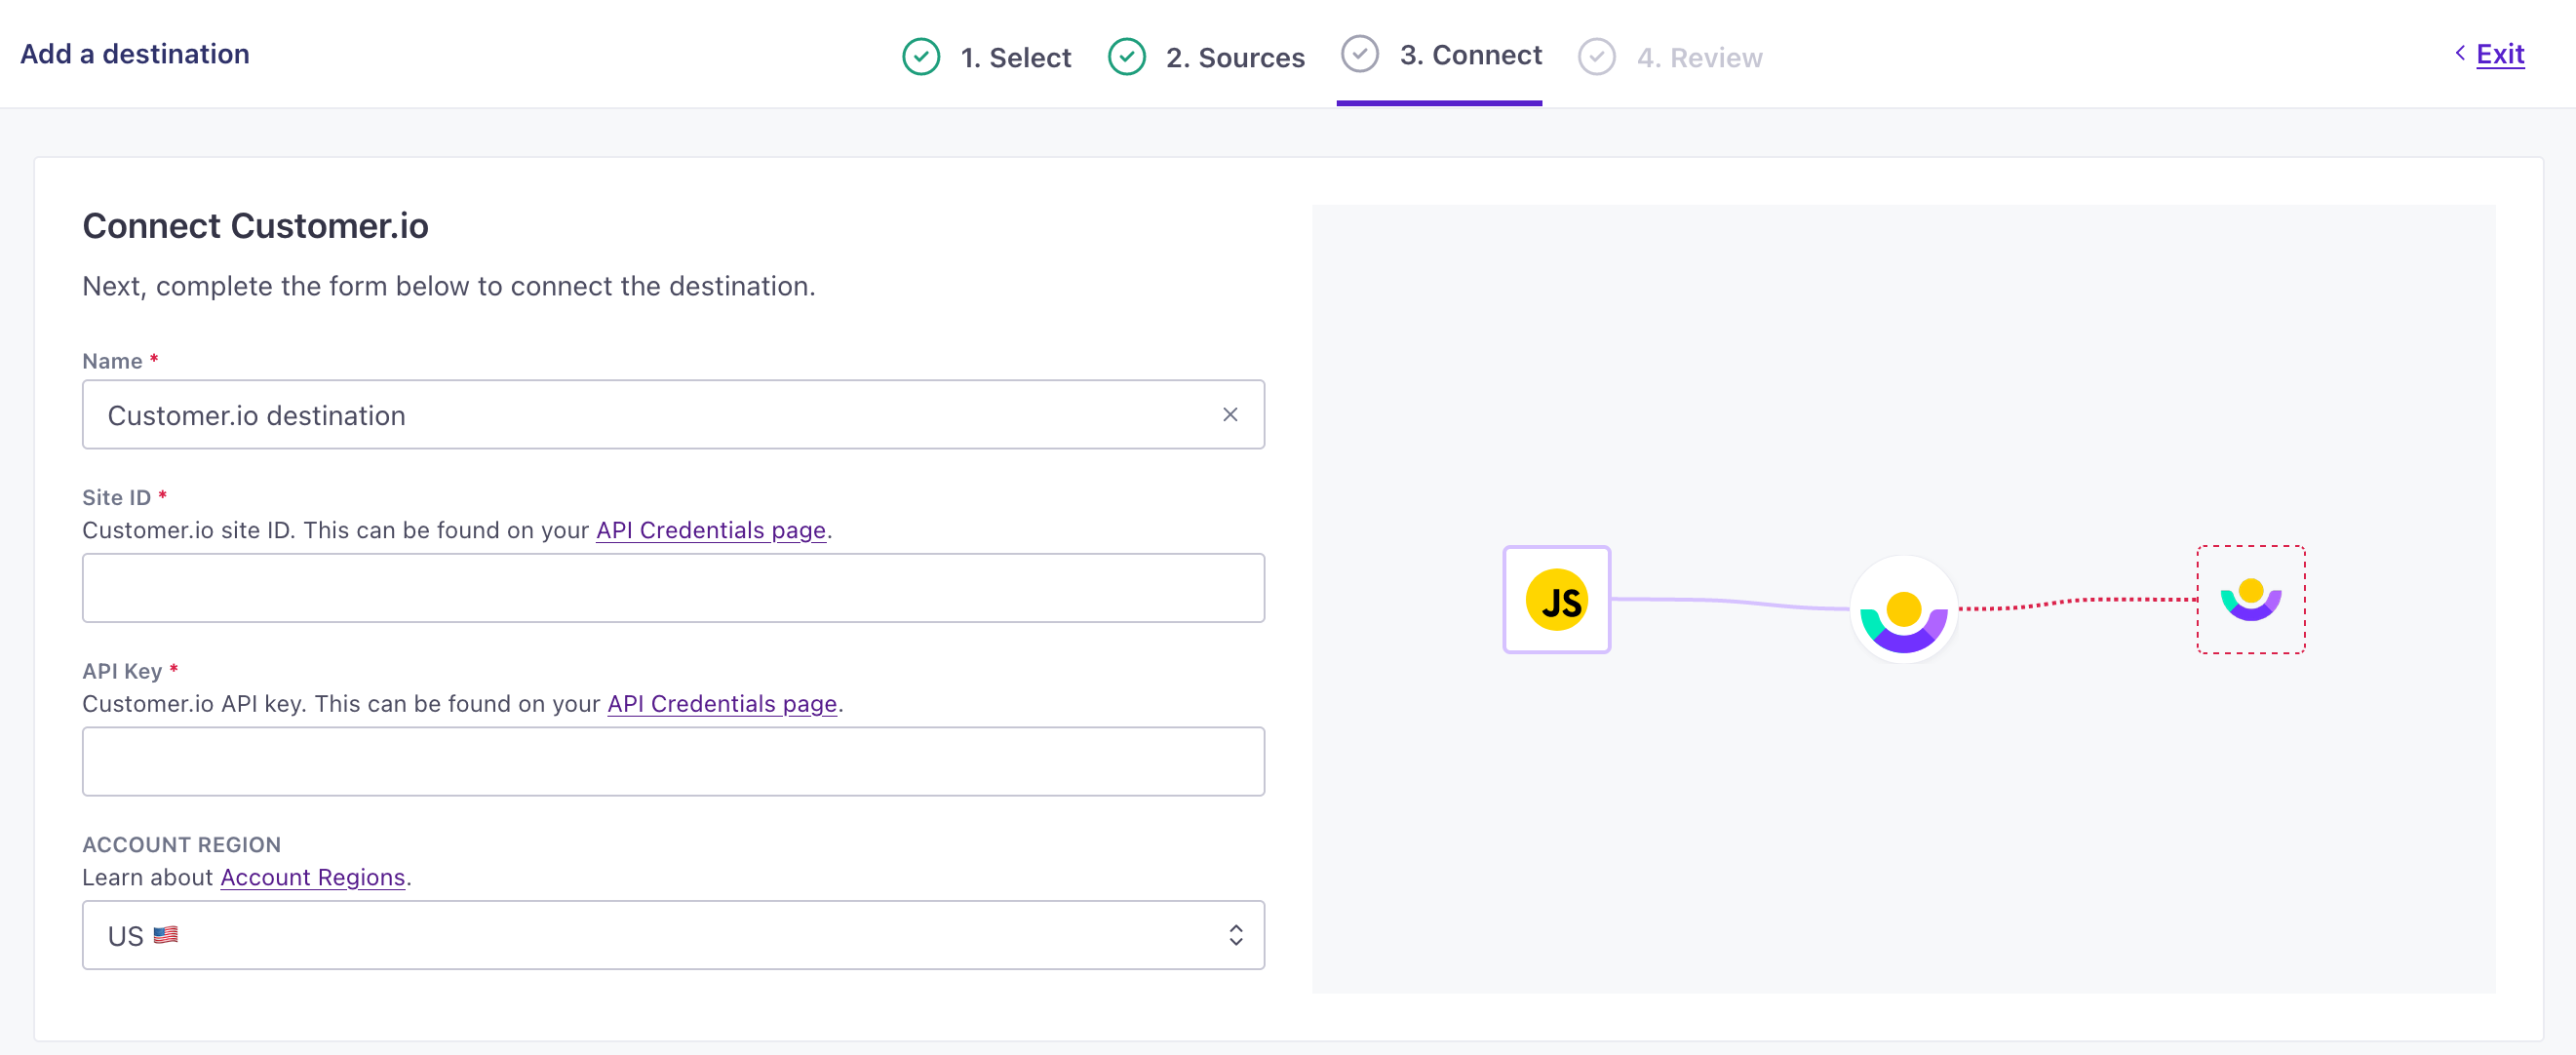
- Click Enable Destination.
If you go back to your website and reload a page, you’ll see data flowing right away! These are anonymous page events—pageviews. But, to take advantage of data in your destination, you’ll need to implement the identify method.
Add identify, track, and other calls to your website to get the most out of Data Pipelines and send actionable data to your destinations.
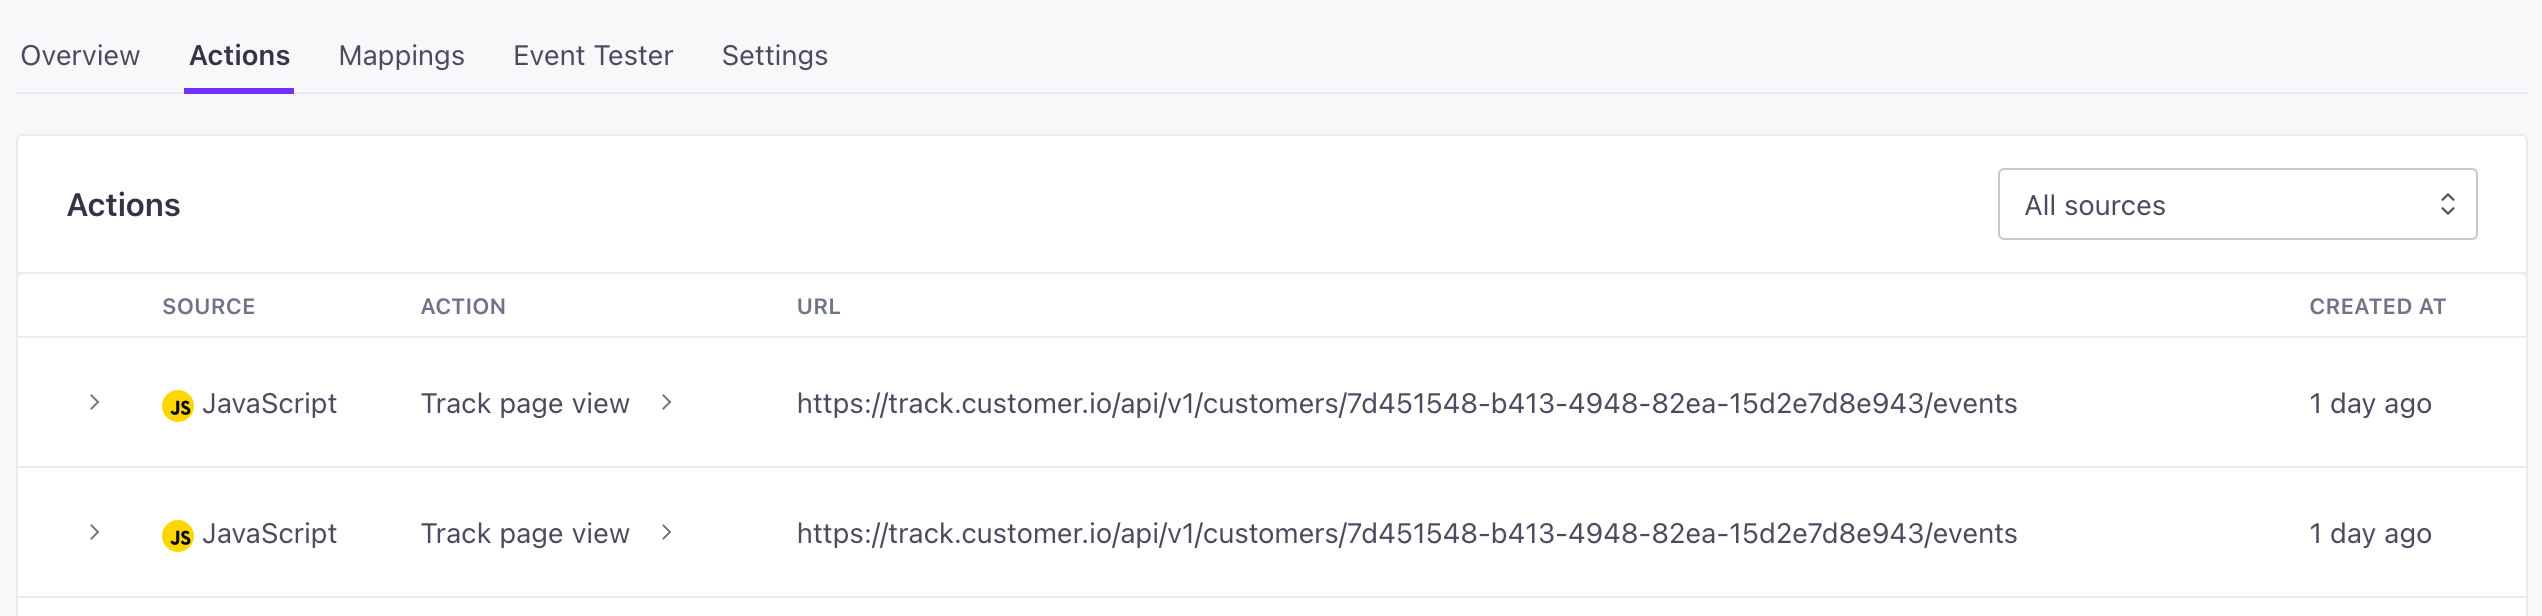
4. Validate your implementation
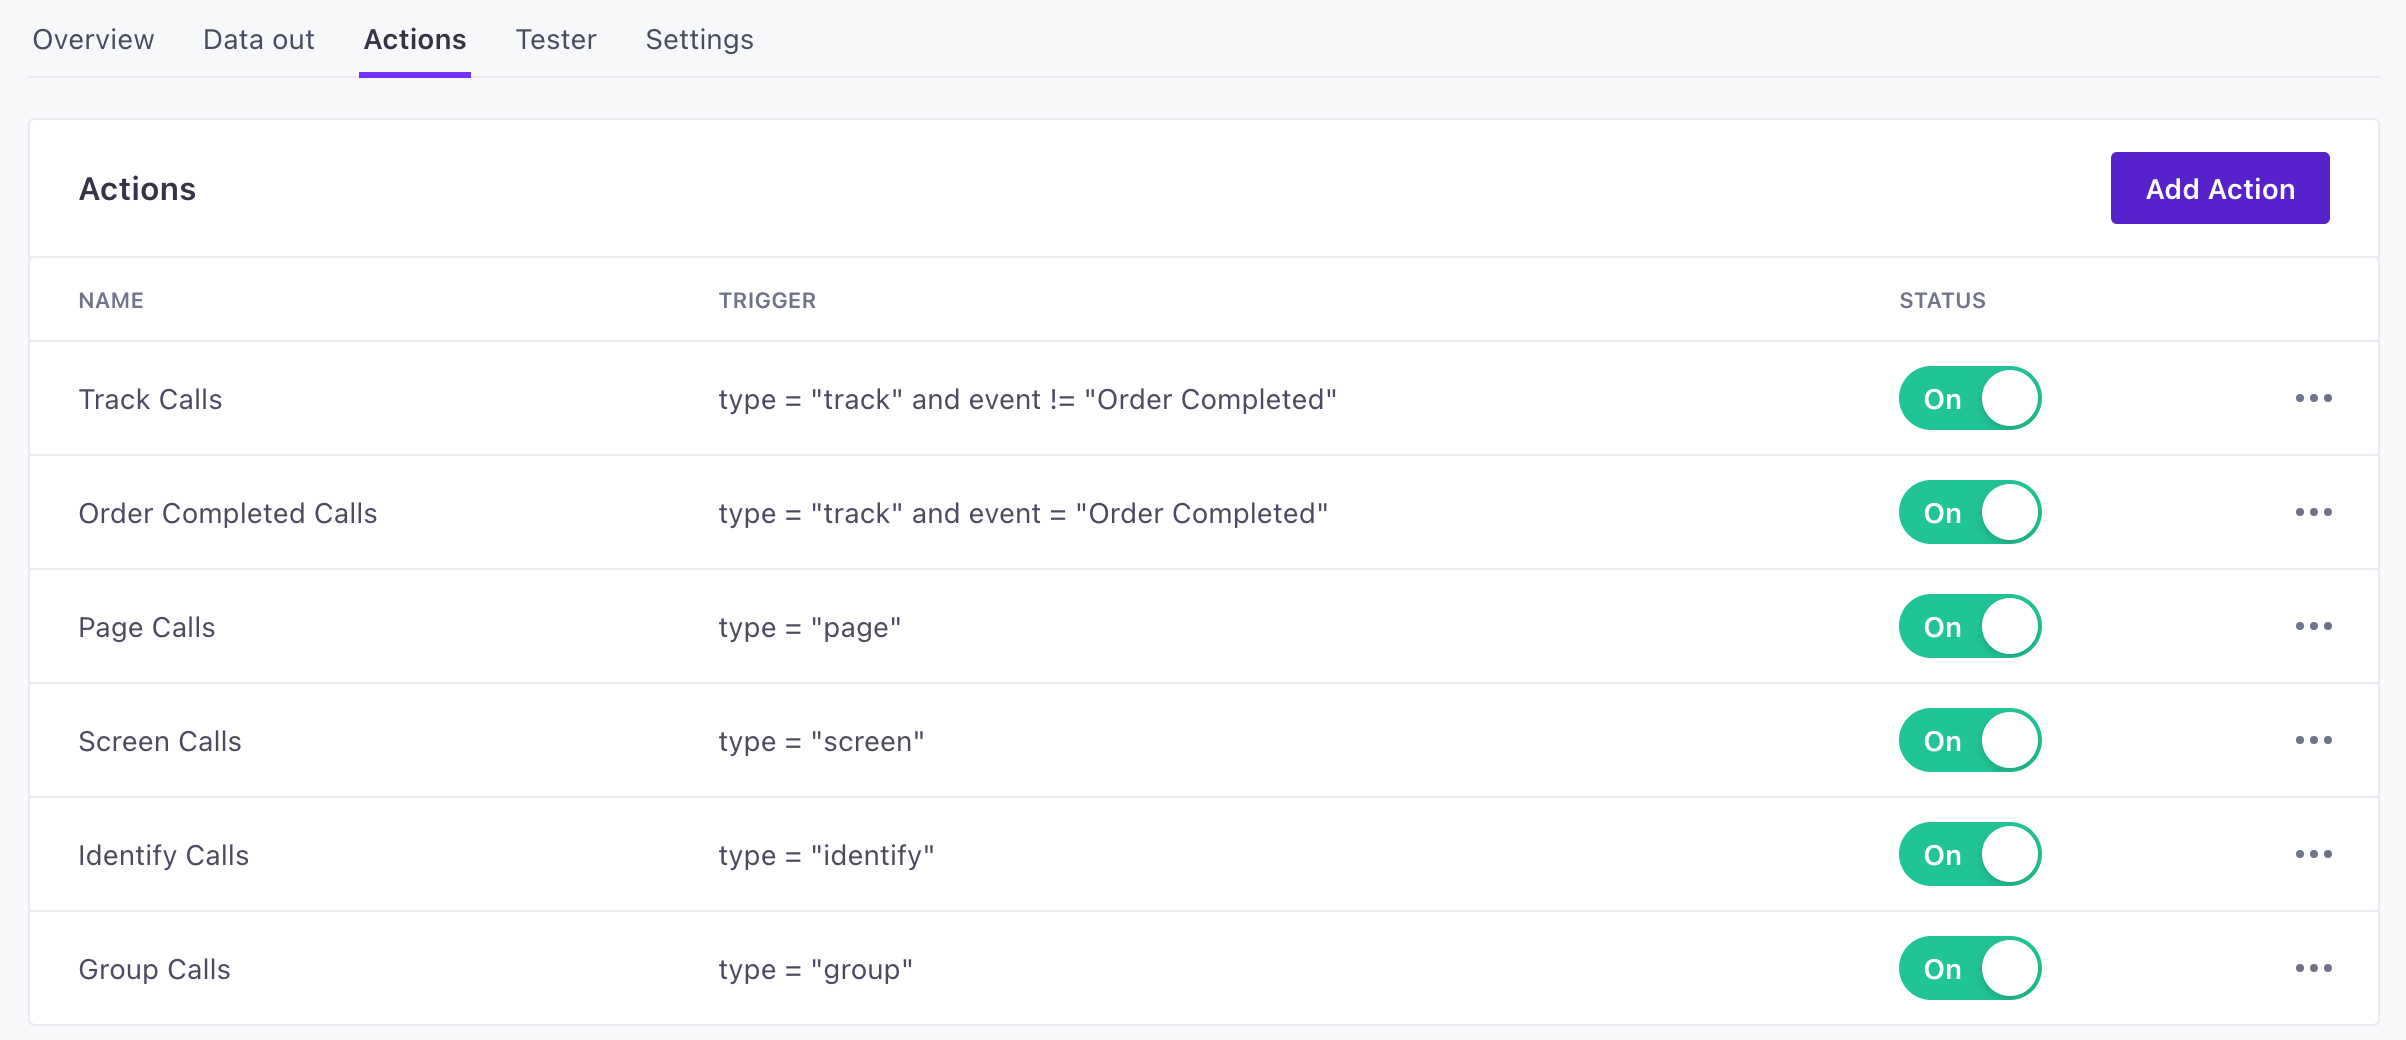
When you look at a source or destination, you can go to the Actions tab to see the individual events that flow from your source, and the calls that we make to your destination.
You can use these tabs to make sure that your source events are set up properly and mapped correctly to your destination. These pages show events as they come in—a nearly live stream.
Events and Actions: How we map source data to destinations
Your source shows Data In. These are the calls that you make in our JavaScript client library or in our server side libraries, and represent things that people do on your website or in your app. Like, when you identify a person, you’ll see an identify call come into your source.
You can check these events to make sure that you’re sending the right information into Customer.io.
When you set up a destination, you’ll see an Actions tab. An action determines the data that we map to your destination. In most cases, you’ll want to stick with our default actions. But you can customize these if you want—like if you want to filter out specific incoming data for a destination or map specific event names to actions in your destination(s).