Zendesk Destination
About this integration
Zendesk is a customer service platform that helps you build better customer relationships. This integration helps you send data to Zendesk, helping you identify your users and enrich their profiles with data from your sources. This helps you provide your customers with better support.
Getting started
Go to the Data Pipelines tab and click Connections.
Click Add New under Destinations.
Select the Zendesk destination.
(Optional) Select the sources that you want to connect to this destination. You can always connect sources to your destination later. We’ll only show you eligible sources.
Configure your destination.
- Subdomain: The subdomain of your Zendesk instance. For example, if your Zendesk URL is https://example.zendesk.com, your subdomain is
example.
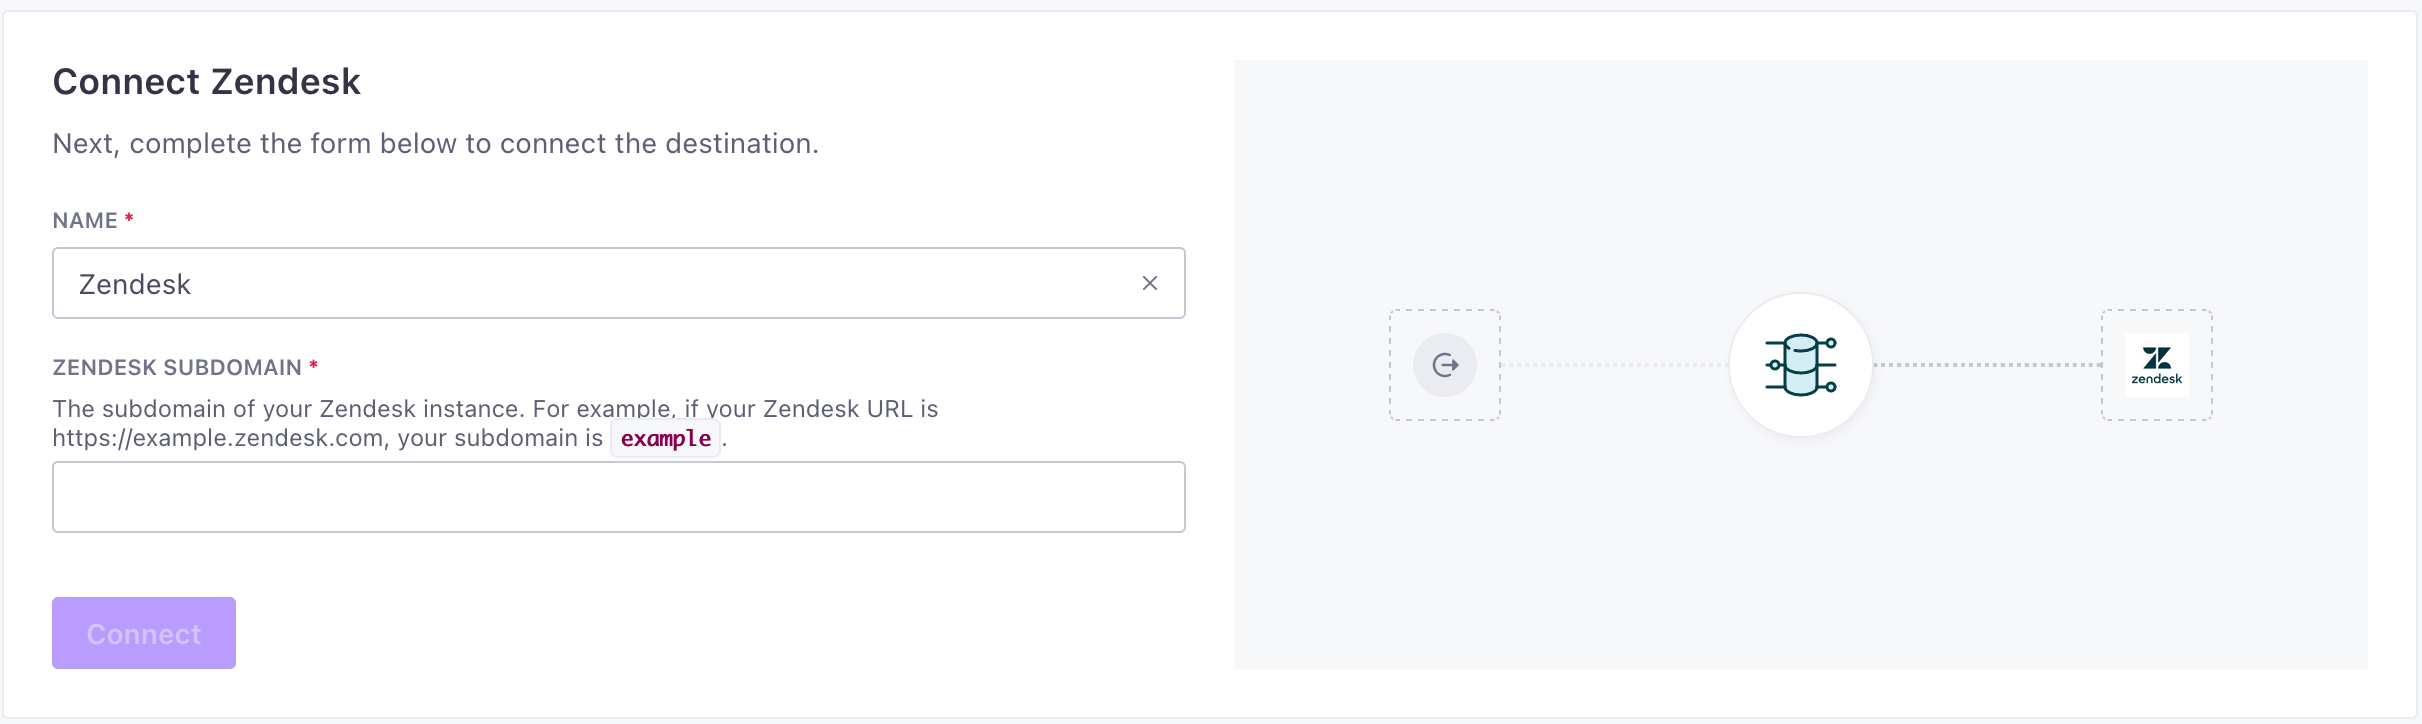
- Subdomain: The subdomain of your Zendesk instance. For example, if your Zendesk URL is https://example.zendesk.com, your subdomain is
Click Enable Destination.
Actions
When you’re done setting up your destination, you can go to the Actions tab to see how we map source events to your destination.
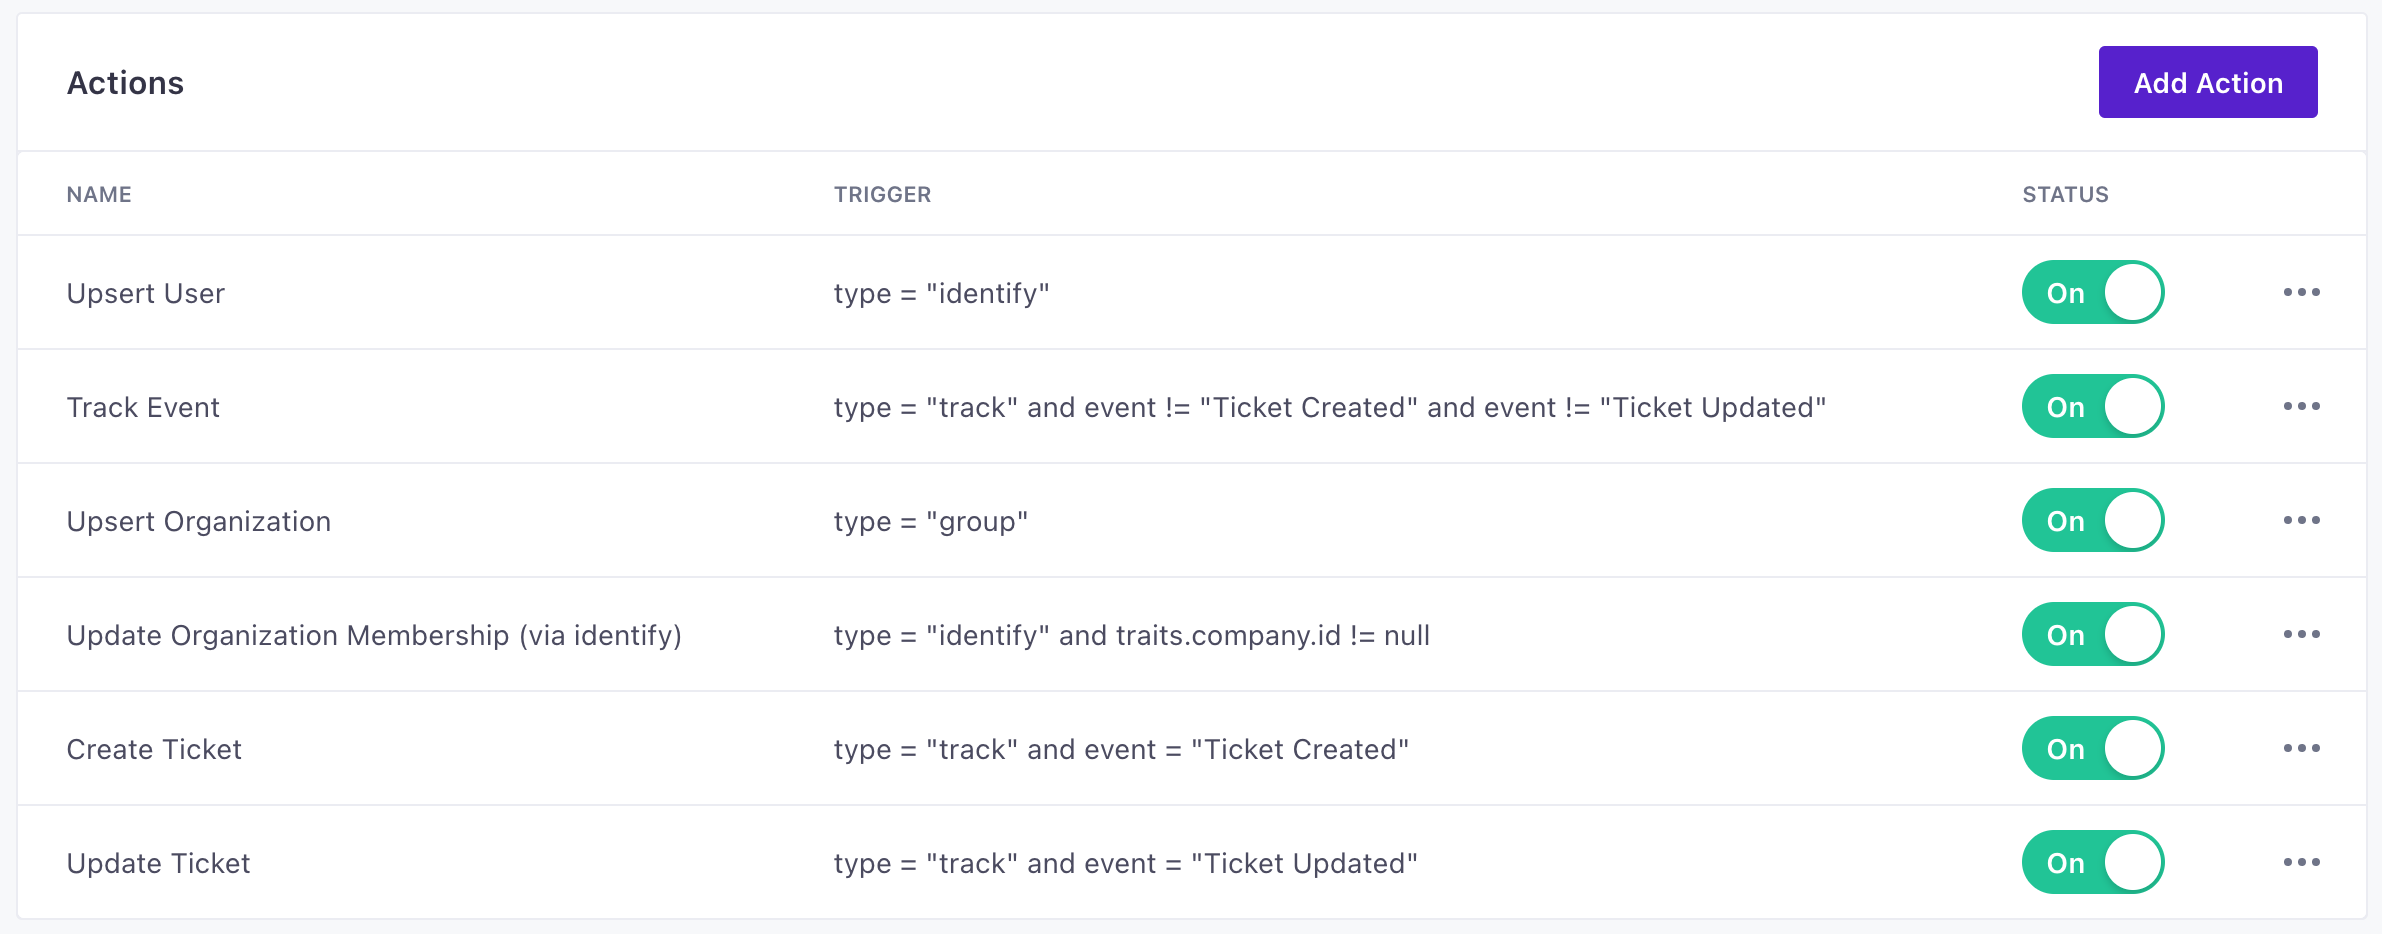
| Action | Default Trigger | Description |
|---|---|---|
| Create Ticket |
| Create a new ticket. |
| Track Event |
| Track a custom event for an existing user. |
| Update Organization Membership (via identify) |
| Associate a user to an organization, or remove them if traits.company.remove is true. |
| Update Ticket |
| Update an existing ticket. |
| Upsert Organization |
| Upsert an organization. If userId is supplied we also associate the user with the organization. |
| Upsert User |
| Insert or update a user record in Zendesk using the provided user email. |
Identify Zendesk Users
When you call our identify API, we add or update a user record in Zendesk. To add people to Zendesk, your calls must include:
traits.email—the email address of the person.- A
nameorfirst_nameandlast_nametraits. If the incoming calls includes afirst_nameandlast_name, we parse it into thenamefield.
When updating user records in Zendesk, we match users based on their email address of a person you identify (typically $.traits.email) or their external_id (typically $.userId). A Zendesk profile can have multiple email addresses, but each address is unique to an individual user in your Zendesk instance.
{
  "action": "identify",
  "userId": "12345",
  "traits": {
    "name": "Homer Simpson",
    "email": "homer.simpson@example.com",
    "timezone": "America/Springfield",
    "organizationId": 6789,
    "phone": "555-555-1234"
  }
}
Mapping traits to Zendesk users
We map incoming traits from your sources to the following standard Zendesk user attributes.
| Customer.io Trait | Zendesk User Attribute |
|---|---|
| name | name |
| organizationId | organization_id |
| timezone | time_zone |
| phone | phone |
| userId | external_id |
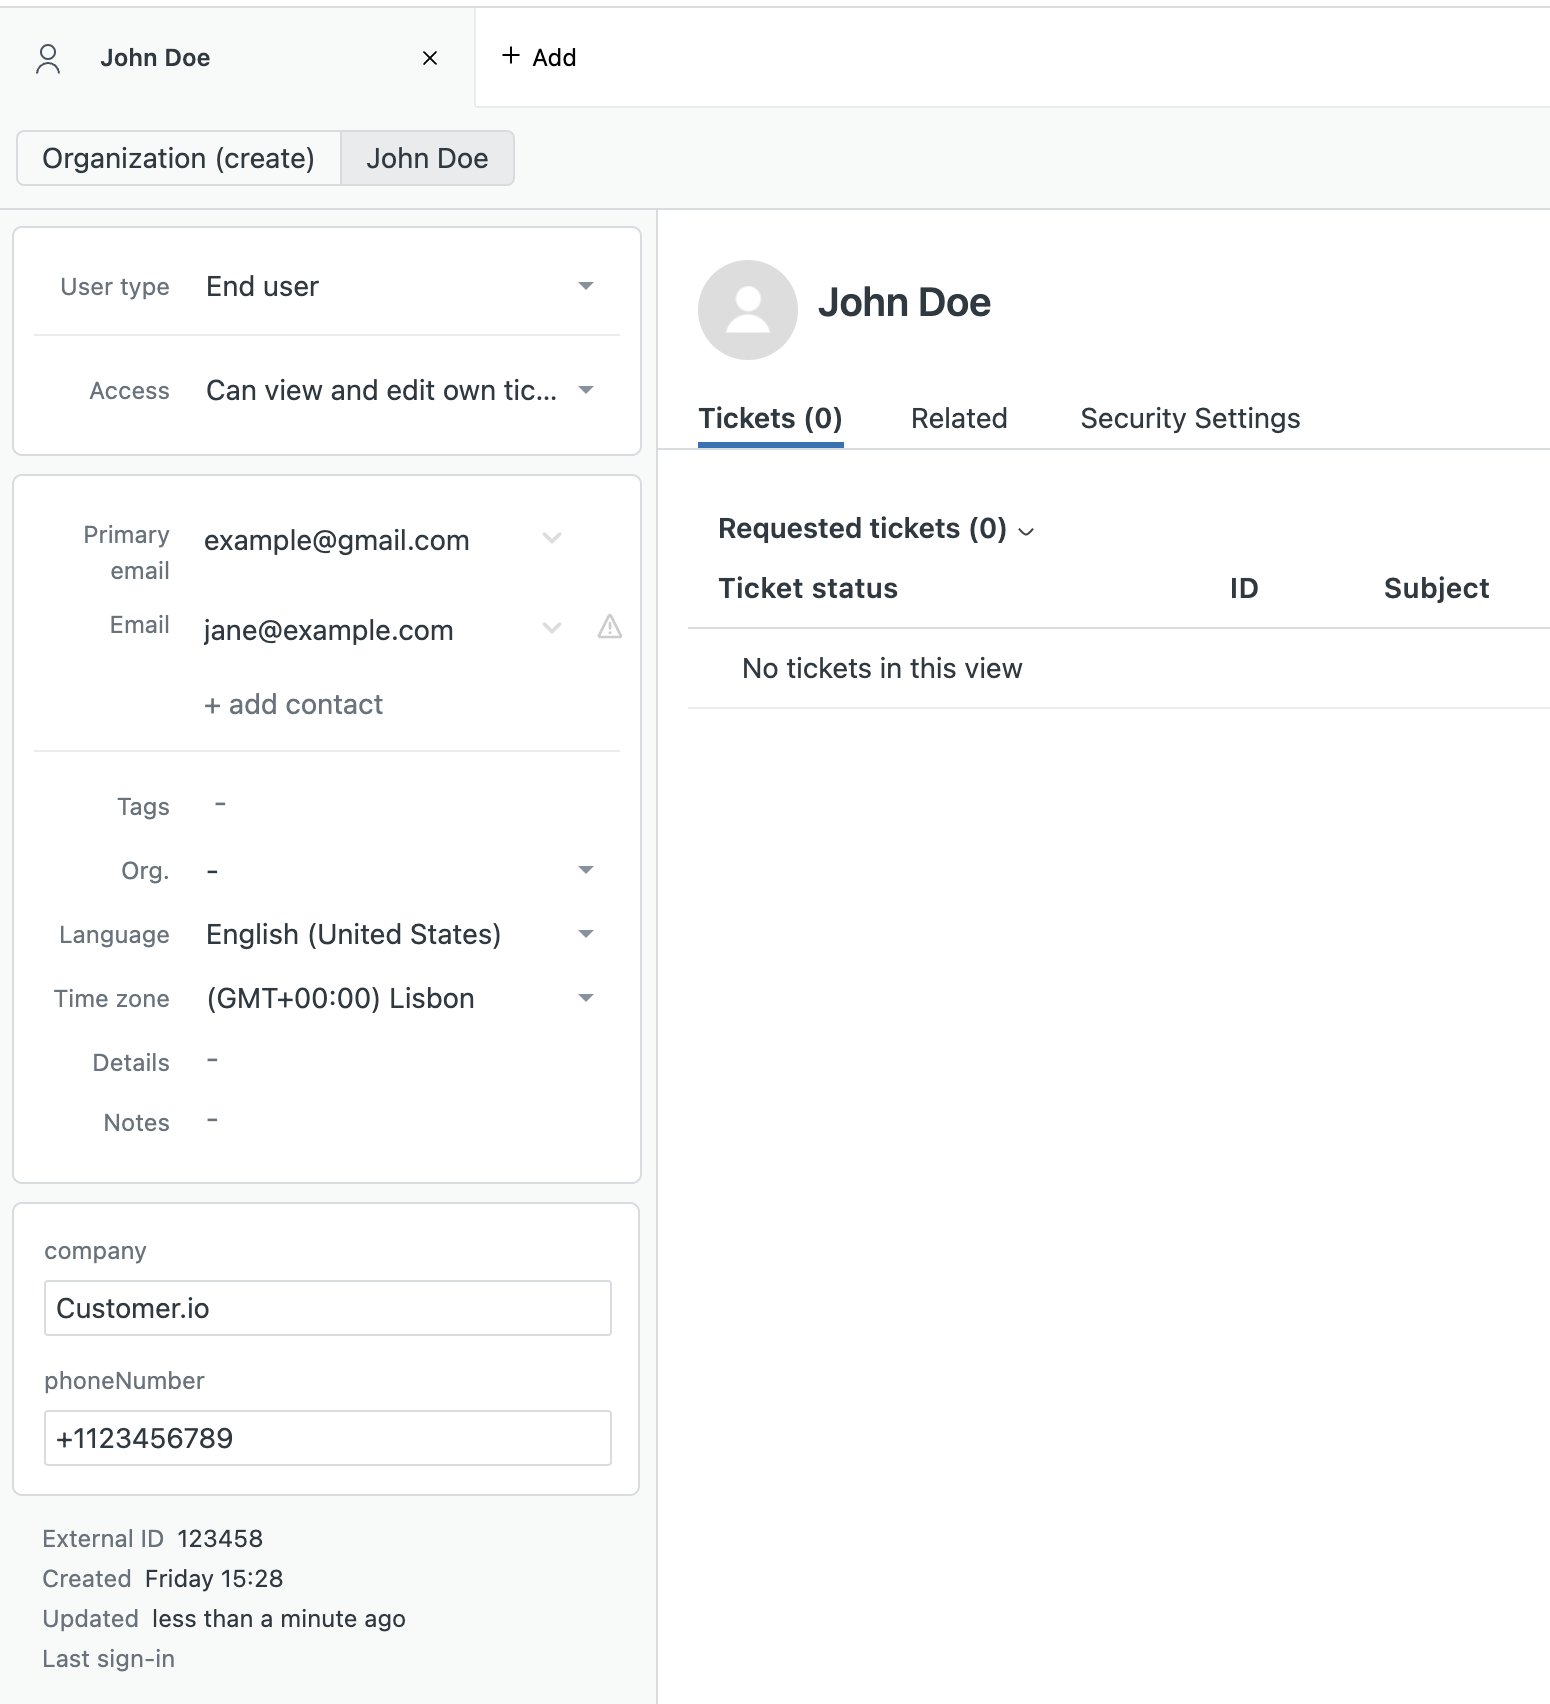
To store other traits in Zendesk, you must first define them as User Fields. If your identify call sends a trait that you haven’t added to your Zendesk configuration, Zendesk will discard it.
You can add your custom traits in Zendesk under Admin Center > People > Configuration > User Fields.
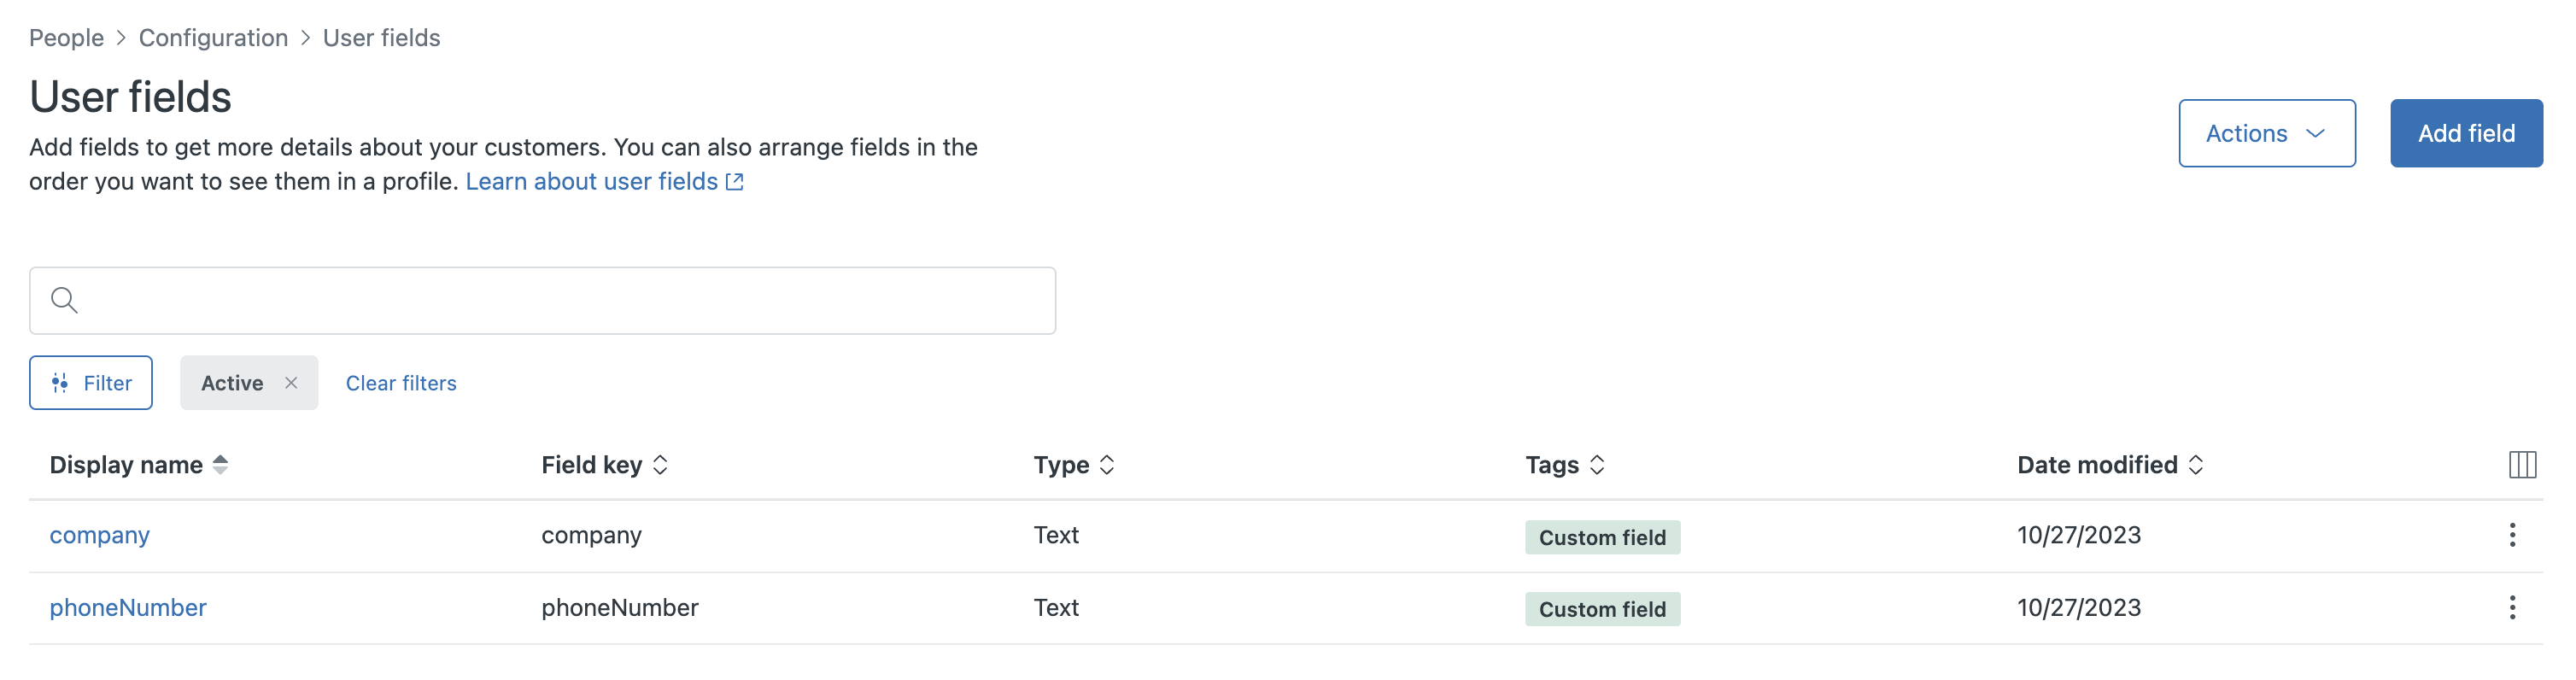
When Customer.io sends data to Zendesk, you should see the populated attributes in the customer’s context. See Adding custom fields to users in Zendesk help for more information.
Adding or Removing Users to/from a Zendesk Organization
You can add a user to a Zendesk organization by passing traits.company.id in your identify calls. You can also remove people from an organization by setting traits.company.remove: true.
| Add person to organization | Remove person from organization |
|---|---|
| |
Removing a person from an organization unassigns their tickets
When you remove someone from an organization, Zendesk schedules a job to unassign all that person’s working tickets and sets the organization_id on those tickets to null
Zendesk Verification Email at User Creation
By default, Zendesk sends a verification email to users when you create them.
You can prevent people you identify from receiving these verification emails by enabling the Skip Verify Email setting. The user’s email may still require verification if the “Create Users as Verified” option is false.
Create Users as Verified
By default all users are created as unverified and may receive a verification email (if the Skip Verify Email is false). If you have already verified your user’s email by other means you may wish to create them as verified in Zendesk.
To do so, set the Create Users as Verified setting to true on the default Create or Update User action on your Zendesk destination.
Track
A track call from your sourceA source is a website or server that you want to capture data from—it’s a source of data! represents an event—something someone does on your website or in your app that you want to report to destinations like Zendesk. When you make a track call, you’re sending information about a user’s activity to Zendesk.
Events must be associated with a user in Zendesk. If you provide a context.zendesk_user_id we will directly track the event under that ID.
Otherwise, if you provide an email and/or external_id we will search for the user and track the event with the found user. If no user is found an error will be returned.
{
  "action": "track",
  "userId": "1234",
  "event": "Article Read",
  "properties": {
    "title": "How to use Customer.io",
    "course": "Intro to Customer.io"
  }
}
Mapping track events to Zendesk Sunshine
Zendesk Sunshine is not required
You can use Sunshine by sending an email as described below, but this destination works without it as well.
If you want to map a track call to a Zendesk Sunshine event by email, you can set the user’s email address in as properties.email in your call. This helps Zendesk tie the event to a user. If your event does not include properties.email, we send the userId as external_id.
When your call includes an email address, a track call (from our JavaScript library) might look like this:
analytics.track('Article Read', {
  title: 'How to use Customer.io',
  course: 'Intro to Customer.io',
  properties: {
    email : 'person@example.com',
  }
});
Group
When you send a group call, we insert or update an organization in Zendesk. We use the groupId in your call to match organization records in Zendesk. If the groupId doesn’t exist, we create a new organization; if it exists, we update the existing organization.
| Create an organization without users | Create an organization and add a user |
|---|---|
| |
Organization attributes
Organizations in Zendesk have standard attributes. We map to the subset of these attributes listed below.
| Segment Field Name | Zendesk Field Name |
|---|---|
| name | name |
| domainNames | domain_names |
| tags | tags |
| groupId | external_id |
| url | url |
| deleted | deleted |
When you pass traits in your group calls, we’ll first try to map traits to known, existing fields in Zendesk—either the standard fields above or custom fields you’ve already created. If a custom field does not exist, we’ll create it.
We format incoming traits to camelCase or snake_case as necessary; if you don’t see custom fields populate in Zendesk, you may need to check the way you format traits in your group calls.

