Webhook Destination
About this integration
Webhooks submit real-time user data to your own HTTP endpoints. A Webhook is an HTTP callback: a simple HTTP POST event to any URL you want when something happens—like when data comes in from a source.
Getting started
Our webhook destination lets you transform and send data to any URL you maintain. It’s basically a custom destination, letting you handle source data however you want.
Go to the Data Pipelines tab and click Connections.
Click Add New under Destinations.
Select the Webhooks destination.
(Optional) Select the sources that you want to connect to this destination. You can always connect sources to your destination later. We’ll only show you eligible sources.
Configure your destination.
- Shared Secret: If set, request will be signed with an HMAC in the "X-Signature" request header. The HMAC is a hex-encoded SHA1 hash generated using this shared secret and the request body.
Click Enable Destination.
Securing webhook requests
We recommend that you use a Shared Secret to secure your webhook URL and ensure that you only ingest requests that come from Data Pipelines. When you use a shared secret, we’ll sign requests with an X-Signature header containing a hex-encoded SHA1 hash from the shared secret and request body. You can use this signature to verify that the request came from Customer.io.
Actions
A webhook request has one action: Send. This action lets you map incoming data to a URL you maintain.
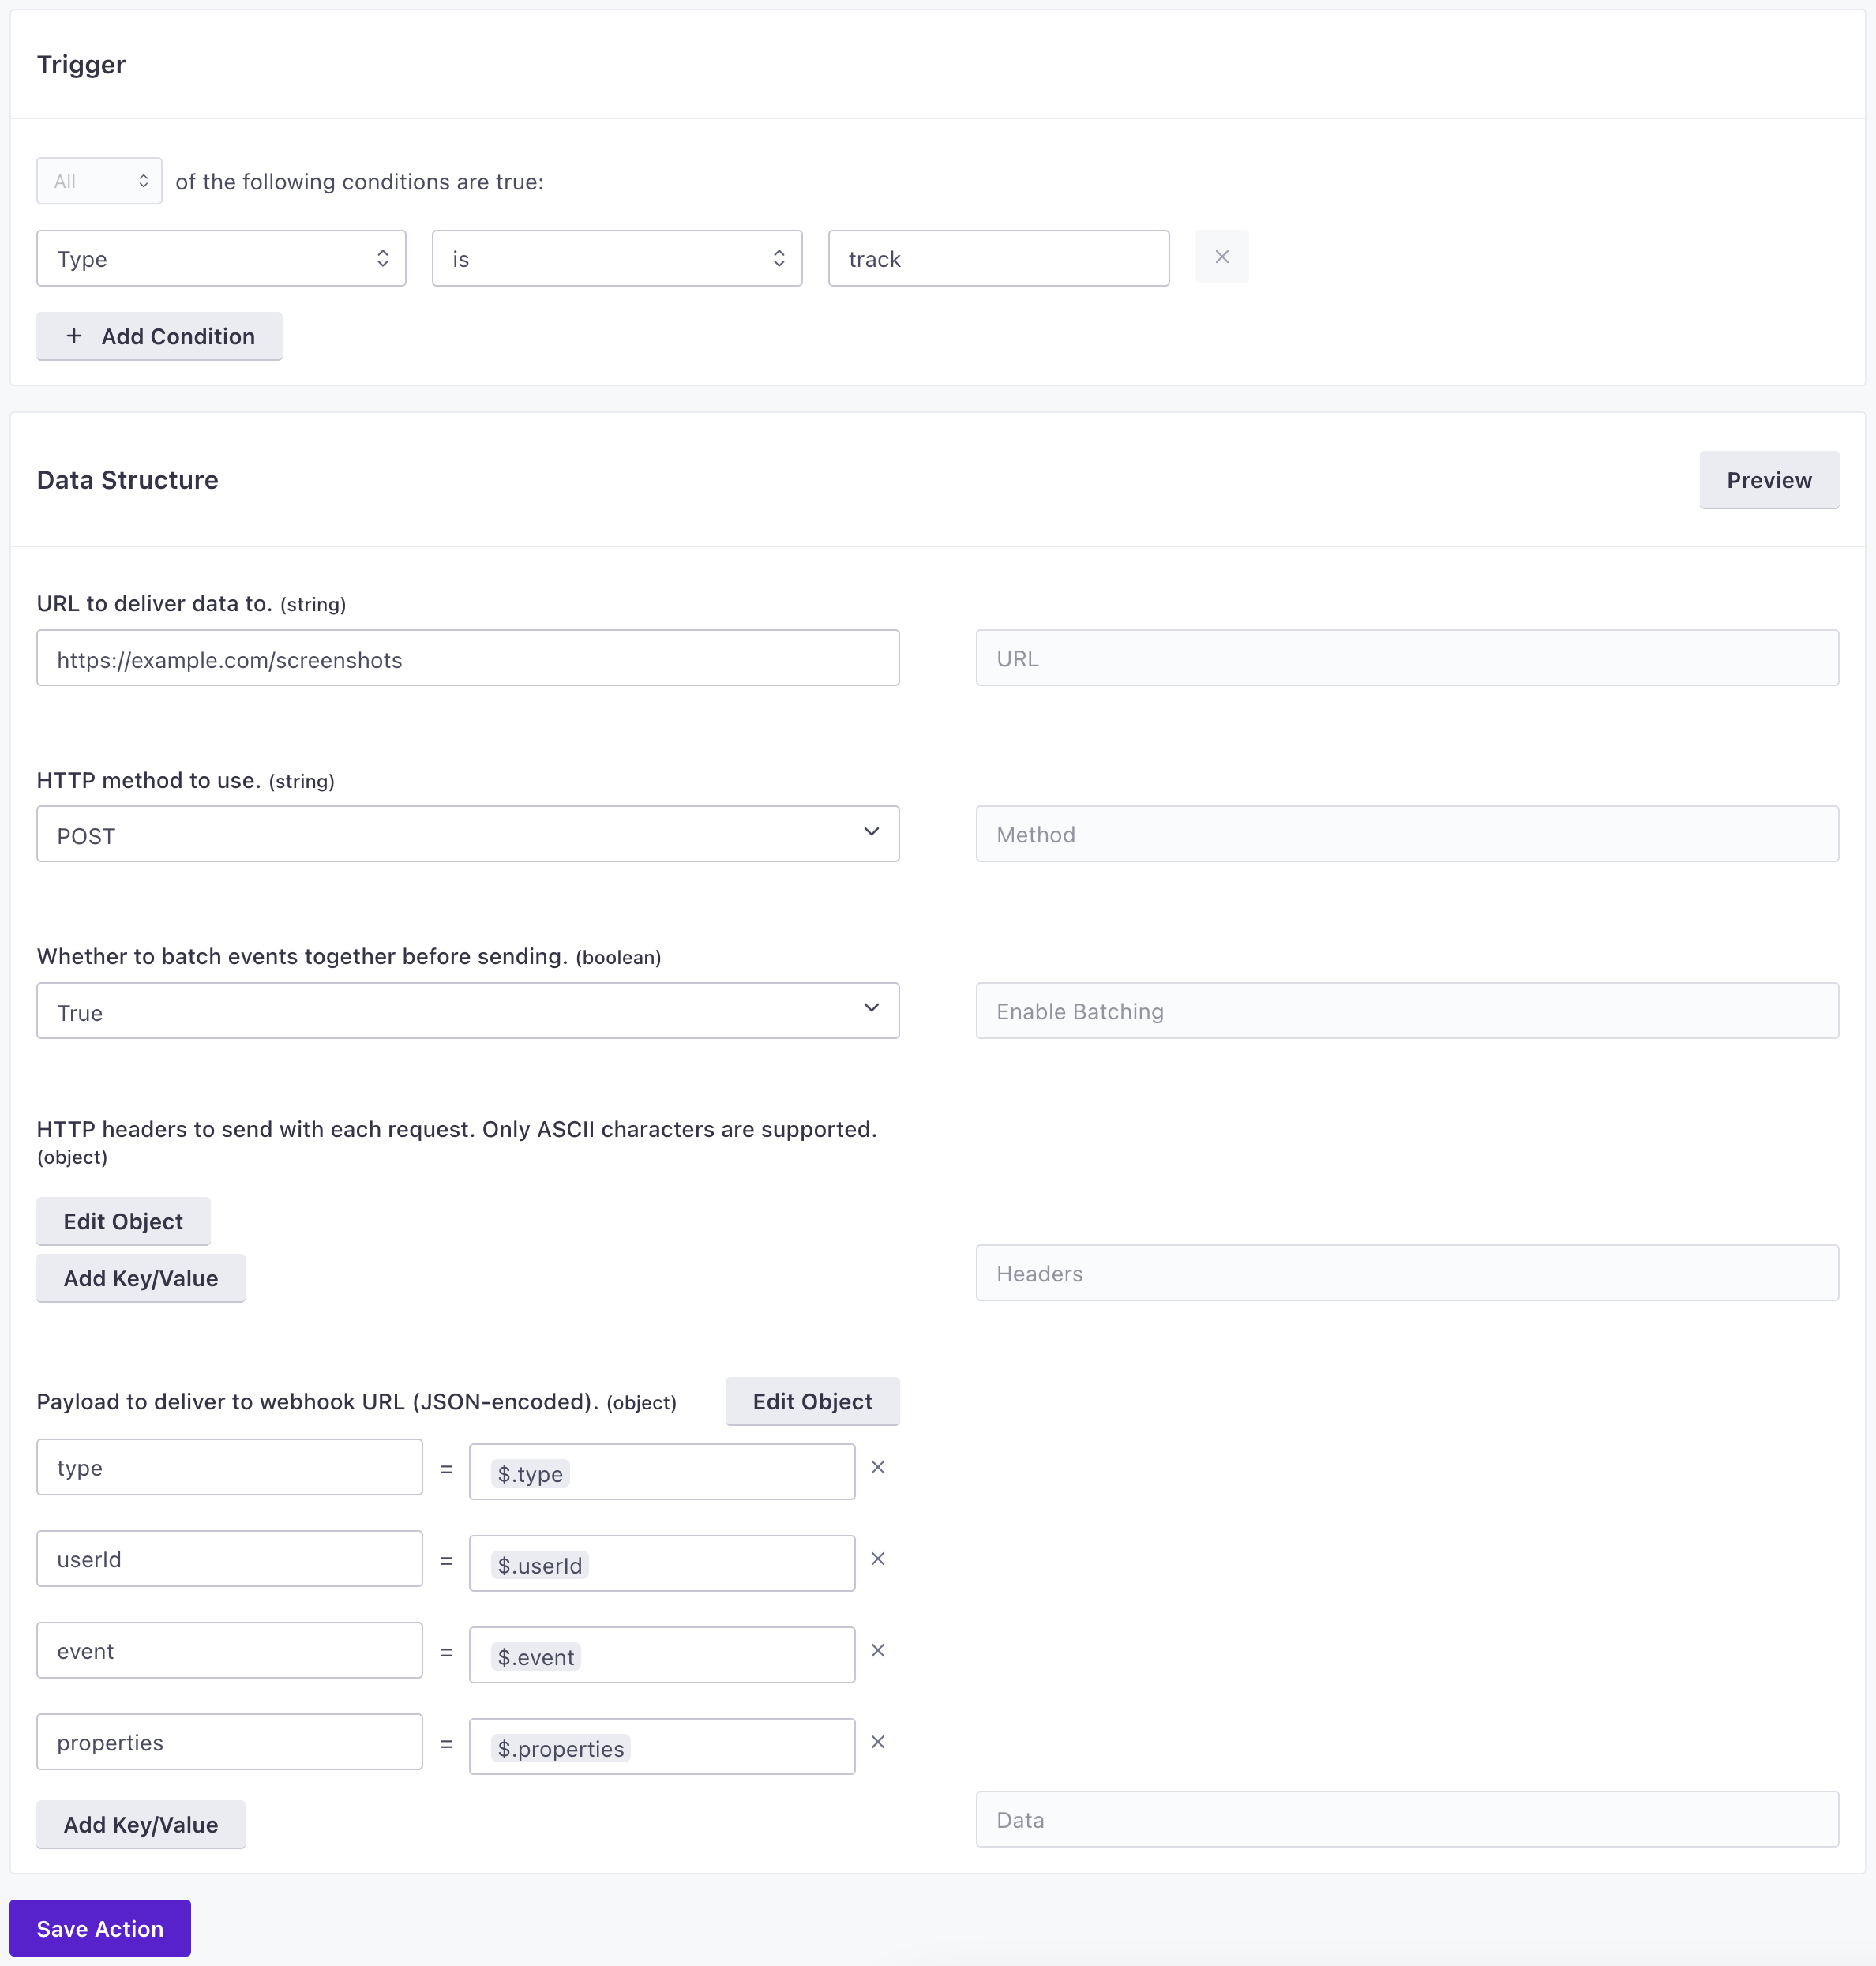
When you set up a webhook Send action, you’ll set:
- The Trigger for the action: typically this is the type of incoming data (
identify,track, etc). But you may also want to send specific events likeemail_openedorproduct_viewed. - The URL to send the data to.
- The HTTP method to use:
POST,PUT,PATCH, orDELETE. - Whether or not to batch events: We batch up to 1000 events matching the trigger in a single request. See Batching for more information.
- Set your HTTPS Headers and the data you want to send in the payload. Like most actions, we typically recommend that you send the
userId, event name, andpropertiesortraitsfrom the incoming call, but you may want to set up specific mappings.
Batching
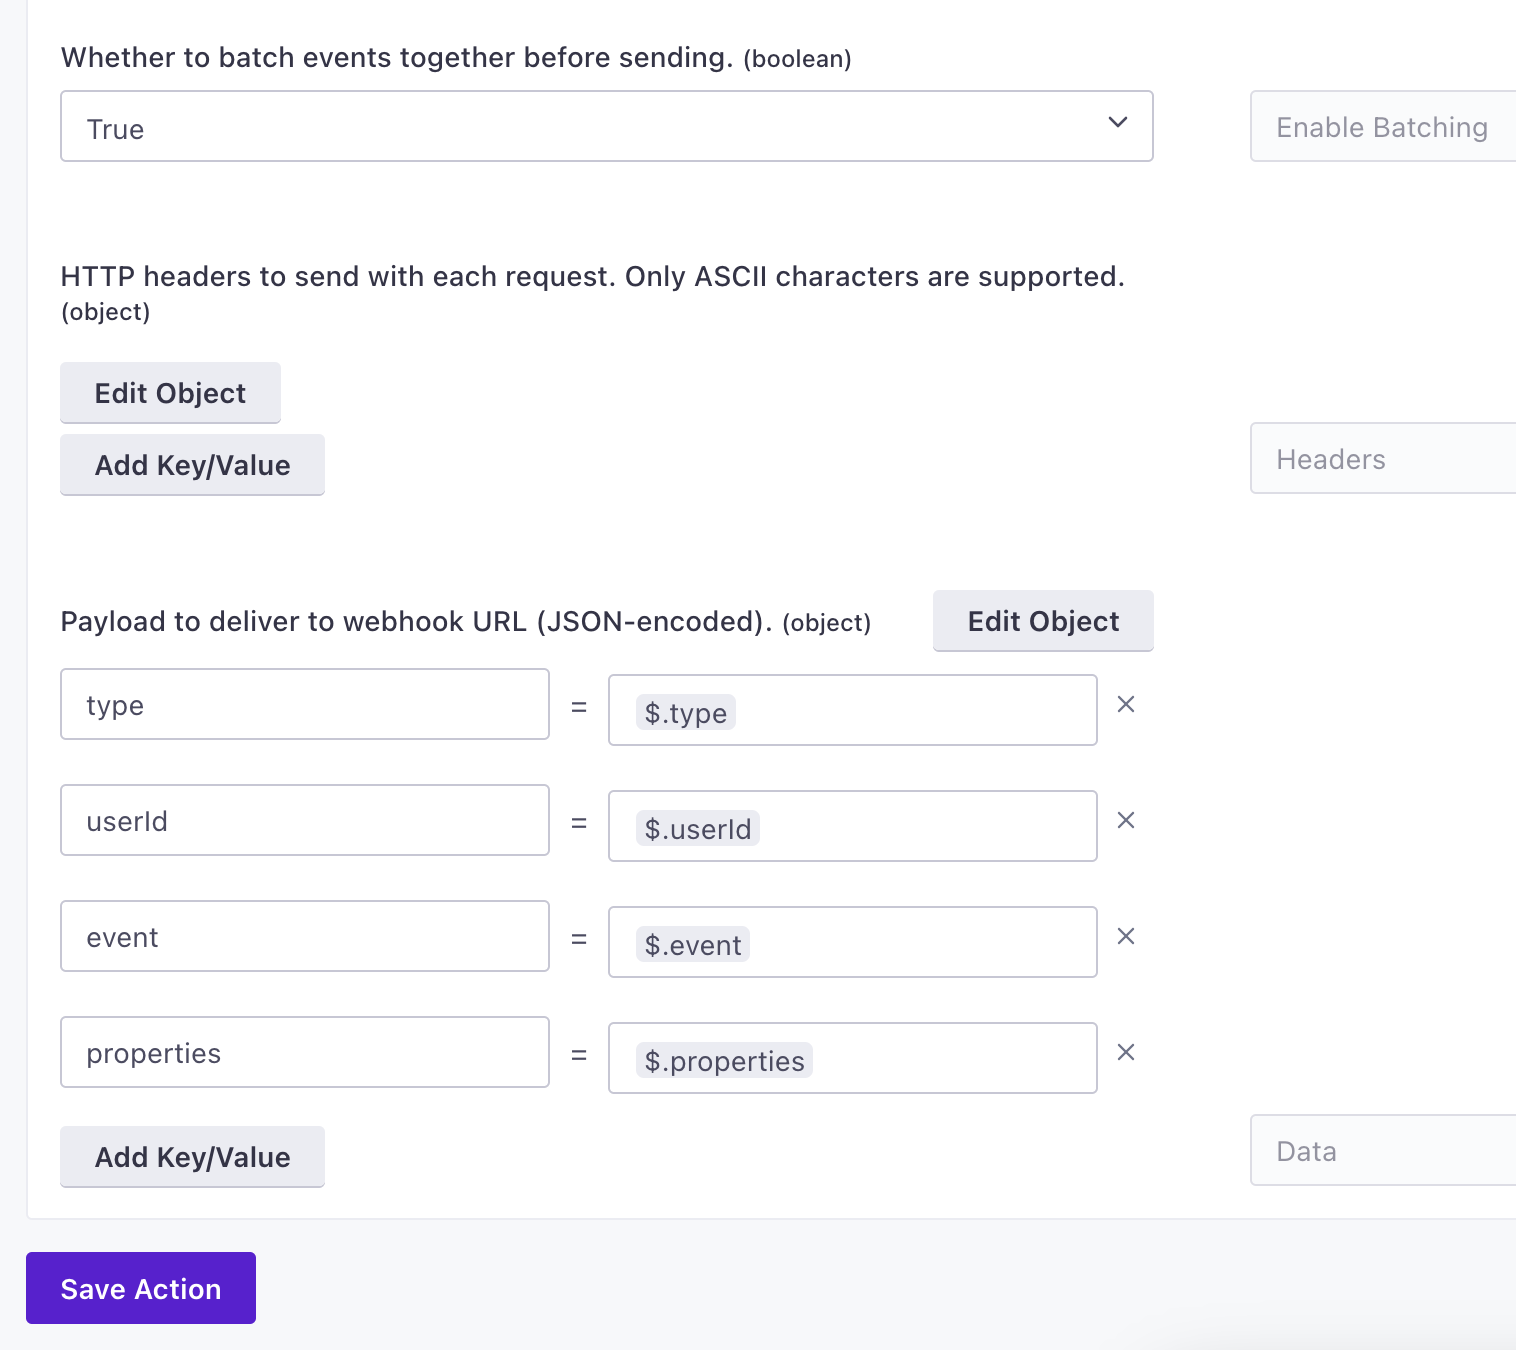
If you want to send fewer calls to your webhook endpoint, you can batch your webhook requests in groups of up to 1000 events. We send each batch as an array of objects where each object is the body of an incoming request that matches your trigger criteria.
For example, imagine that you’ve mapped track events as shown in the image below. The code sample below the image is an example of what we’d send to your webhook endpoint.
[
  {
    "type": "track",
    "userId": "123",
    "event": "Signed Up",
    "properties": {
      "plan": "Startup",
      "referred_by": "Friend"
    }
  },
  {
    "type": "track",
    "userId": "456",
    "event": "Signed Up",
    "properties": {
      "plan": "Free",
      "referred_by": "Ad"
    }
  }
]
