Meta (Facebook) Pixel Destination
About this integration
Meta Pixel helps you measure and optimize the performance of your Ads. It’s an open source library that makes conversion tracking, optimization and remarketing easier than ever.
Getting started
Go to the Data Pipelines tab and click Connections.
Click Add New under Destinations.
Select the Meta (Facebook) Pixel destination.
(Optional) Select the sources that you want to connect to this destination. You can always connect sources to your destination later. We’ll only show you eligible sources.
Configure your destination.
Pixel ID: Your Pixel ID from the snippet created on the Facebook Pixel creation page.
Limited Data Use: The Limited Data Use (LDU) setting controls whether or not Limited Data Use mode is set in the Pixel SDK. When enabling LDU, default user geography options will be sent which will use geolocation.
Send Default Events Automatically: The Facebook Pixel will, by default, send button click and page metadata from your website to improve your ads delivery and measurement and automate your pixel setup. You can learn more about this here. You can disable this functionality by unchecking this setting.
Click Enable Destination.
Migrating from Segment
If you’re coming to us from Segment, you’ll notice that our Meta Pixel destination contains fewer settings than Segment’s Facebook Pixel destination. We’ve moved many of the settings that were globally set in Segment, like custom properties and personally identifiable information settings down to the component actions for this destination—where we think they make more sense.
Limited Data Use
Meta Pixel has a setting called Limited Data Use, pertaining to the ways in which they store data based on US state laws—particularly, California, Colorado, and Connecticut. The corresponding setting in our Meta Pixel destination is enabled by default.
When you enable this setting, we’ll automatically apply the appropriate limited data use settings for members of your audience by geolocating their IP addresses or the $.traits.address properties that we automatically capture in the Identify User action.
Actions
Most of the actions for this destination are based on the names of the events you send. While these events are based on our ecommerce specification, you can update the track-based actions to use whatever event names you use to represent ecommerce actions.
For example, the Track “Order Completed” Event is based on a track call with the event name “Order Completed” by default. If you use “Payment Accepted” instead, you could edit the action to change the trigger.
When you’re done setting up your destination, you can go to the Actions tab to see how we map source events to your destination.
![]()
![]()
| Action | Default Trigger | Description |
|---|---|---|
| Identify User |
| Send user data to Meta |
| Track Custom Event |
| Track an event for a user |
| Track Page View |
| Track the current page |
| Track Checkout Started Event |
| Track the Checkout Started event which will be sent as an InitiateCheckout event to Facebook. |
| Track Order Completed Event |
| Track the Order Completed event which will be sent as a Purchase event to Facebook. |
| Track Product Added Event |
| Track the Product Added event which will be sent as a AddToCart event to Facebook. |
| Track Product List Viewed Event |
| Track the Product List Viewed event which will be sent as a ViewContent event to Facebook. |
| Track Products Searched Event |
| Track the Products Searched event which will be sent as a Search event to Facebook. |
| Track Product Viewed Event |
| Track the Product Viewed event which will be sent as a ViewContent event to Facebook. |
Facebook standard events
You’ll see that as a part of this destination, we’ve mapped six of our standard ecommerce events to Meta Pixel. We forward track events based on our ecommerce specification to Meta using their standard event format.
- “Order Completed” is sent as “Purchase”
- “Product Added” is sent as “AddToCart”
- “Product List Viewed” is sent as “ViewContent”
- “Product Viewed” is sent as “ViewContent”
- “Products Searched” is sent as “Search”
- “Checkout Started” is sent as “InitiateCheckout”
But Meta has more than these six standard events! For events beyond the six we’ve predefined, you can use the Custom Event action, and map incoming events from your sources to Meta’s other standard events.
Purchase events require a currency
Facebook’s Purchase event requires a currency property representing the type of currency used to make the purchase. If you don’t pass this property, we assume that the currency is the US Dollar—USD.
Standard and custom properties
We’ve mapped ecommerce events to Meta using only the properties that Meta expects, but you can send additional properties in track or page calls and map them to Meta’s events.
- On the Actions tab, find the action you want to change, click and select Edit.
- At the bottom of the page, click Edit Object.
- Enter the names of the properties from your incoming events that you want to preserve in Meta.
Timestamps
Meta Pixel expects timestamps in ISO 8601 format without timezone information—for example, 2023-05-27T15:09:41. We automatically send the $.timestamp from source events in this format, but you should format timestamps to fit this format in other fields you want to pass to Meta.
Map event categories to meta content types
Meta events contain a content_type that’s similar to the event category we use in track and page view events from our analytics.js library. By default, we assume that Meta events are centered around products and set content_type to product accordingly.
But if you use real estate, travel, or automotive Dynamic Ads you can map the associated track event category values to content_type values. For example, you might map the category “cars” to the “vehicle” content type so Meta promotes relevant vehicles from your catalog. See Facebook Dynamic Ads to learn more about available content types.
Handling Personally Identifiable Information (PII)
Meta enforces strict guidelines for Personally Identifiable Information (PII). To adhere to Meta’s rules, we automatically filter out the following data representing PII:
- firstName
- lastName
- gender
- city
- country
- phone
- state
- zip
- birthday
We’ll still forward events containing PII to Meta, but we strip these properties from the events before we do.
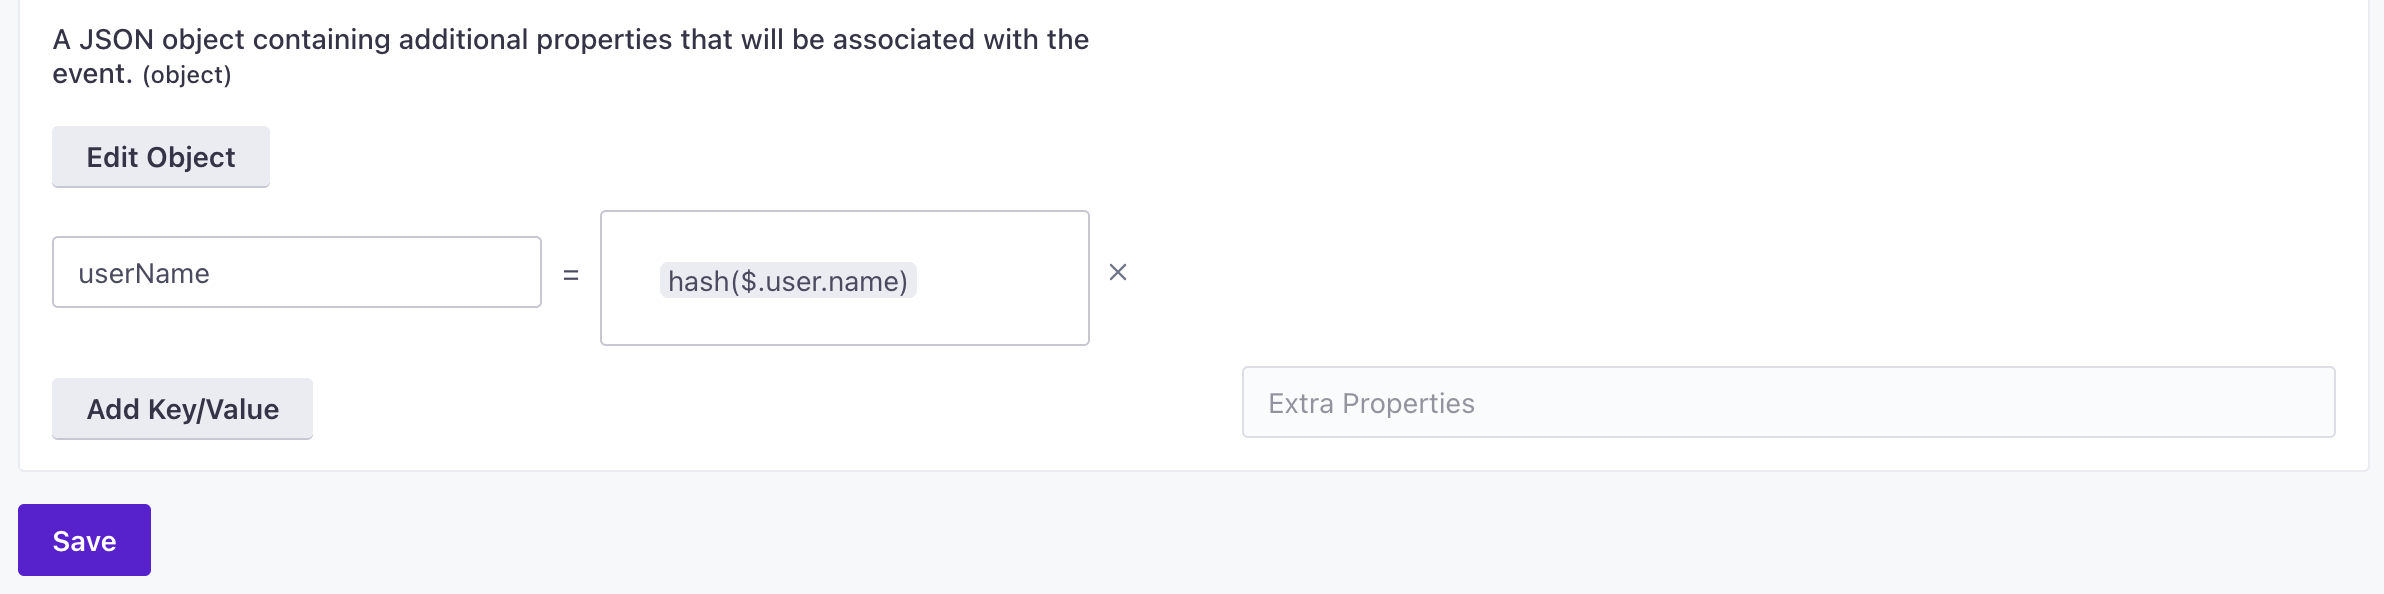
If you want to redact additional PII, you can use the hash function to make sure that you don’t send properties in plain text. The hash applies a sha256 hash to your source data, ensuring that you properly store data in Meta.
- On the Actions tab, find the action you want to change, click and select Edit.
- At the bottom of the page, click Edit Object.
- Enter the name of the property you want to send in events to Facebook.
- In the second box, after the
=, pick the incoming key and then click Functions. - Select the
hashfunction. - Click Add Key/Value to set additional properties.
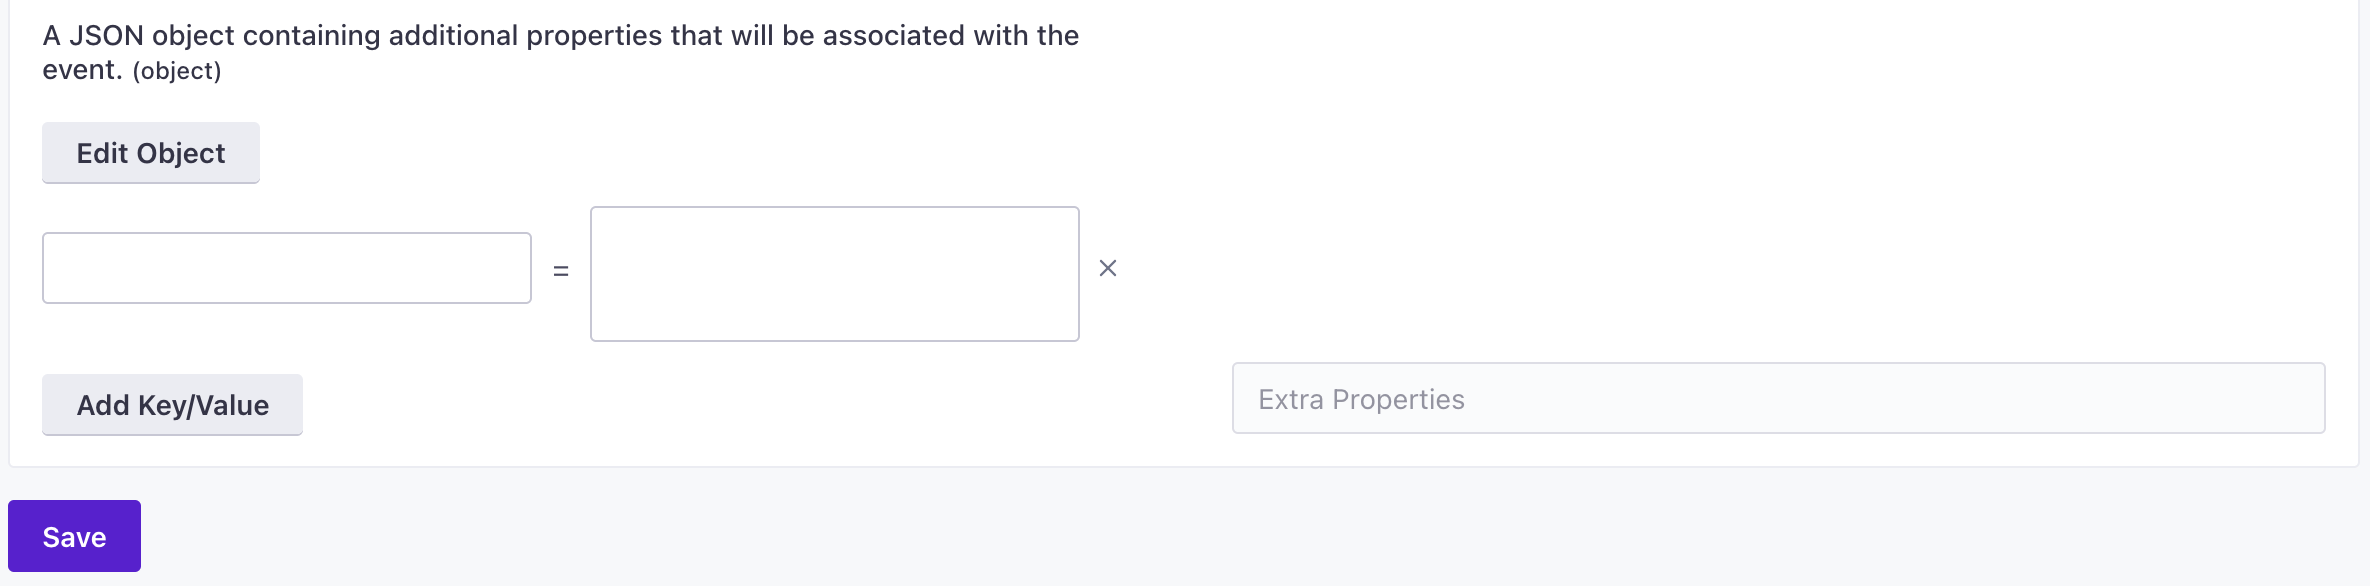
Send additional data with events
By default, actions that forward data to Meta contain default properties expected by those events. If you capture additional information in each event, you can pass that data along to Meta at the bottom of the data structure for any action.
- On the Actions tab, find the action you want to change, click and select Edit.
- At the bottom of the page, click Edit Object.
- Add the keys and properties you want to send. For Custom events, this might be as simple as sending
$.properties. - Click Add Key/Value to add additional properties.
Troubleshooting
Inconsistent or missing conversions
Meta conversion pixels will fire inconsistently if your page redirects or reloads before the pixel has time to load on the page. Make sure your pages don’t redirect or reload for at least 300ms after the conversion event happens.
We recommend using our trackLink or trackForm helpers to delay the page redirect. You can extend the delay by setting the timeout to 500ms.
Extra or duplicate conversions
You might see duplicate conversions if you use the same sources in your development, staging, or testing environments. We recommend that you set up separate sources for each environment so that you can either point events to test conversion pixels in Meta Conversion Tracking or turn off Meta Conversion Tracking in your non-production environments.
If you have separate environments and you still see duplicate conversions, check that your conversion events don’t appear in other places on your site. If your audience reloads the conversion page or otherwise re-triggers conversion events, you’ll count those conversions multiple times.
Meta’s conversion reports count view-through conversions and click-through conversions by default. You can change that setting in Meta under Attribution Settings.
Meta conversions don’t match Google Analytics
Meta counts conversions per person, but Google Analytics counts conversions per browser cookie session (unless you’re using Google Analytics User-ID).
If someone saw or clicked your ad on a mobile phone, and then returned to your site on a different device and completed their purchase, Google Analytics may not know that this was the same person, but Meta would. In that scenario Google Analytics counts 2 unique visits with a conversion last attributed to a direct from the device that completed the purchase. Facebook counts one conversion with the conversion properly attributed to the last ad click/view on the original device.

