Intercom Destination
About this integration
Intercom provides insight into your users, helping you communicate with them through targeted content, behavior-driven messages, and conversational support so you connect with people on a personal level at scale. With this integration, we load Intercom’s JavaScript library for you, allowing you to easily identify your users, track their activity, and interact with them through the Intercom Messenger.
This destination supports both cloud and direct modes
Intercom supports cloud and direct modes. In general, we recommend that you use the cloud mode destination, so that you capture data in Customer.io and can easily debug your implementation, capture a history of events, and so on.
Getting started: cloud mode
Go to the Data Pipelines tab and click Connections.
Click Add New under Destinations.
Select the Intercom destination.
(Optional) Select the sources that you want to connect to this destination. You can always connect sources to your destination later. We’ll only show you eligible sources.
Configure your destination.

Click Enable Destination.
Cloud mode actions
When you’re done setting up your destination, you can go to the Actions tab to see how we map source events to your destination.
You may need to add actions for this destination
While we often have default triggers for actions, we don't always add those actions as defaults. You may need to add actions to make sure that you're sending all the data that you want to send to your destination. See our actions page for help setting up actions.
| Action | Default Trigger | Description |
|---|---|---|
| Identify Contact |
| Create or update a contact in Intercom |
| Identify Company |
| Create or update a company in Intercom and attach a contact. |
| Track Event |
| Submit an event to Intercom. |
Getting started: direct mode
Go to the Data Pipelines tab and click Connections.
Click Add New under Destinations.
Select the Intercom destination.
(Optional) Select the sources that you want to connect to this destination. You can always connect sources to your destination later. We’ll only show you eligible sources.
Configure your destination.
App Id: The app_id of your Intercom app which will indicate where to store any data.
Activator: By default, Intercom will inject their own inbox button onto the page, but you can choose to use your own custom button instead by providing a CSS selector, e.g. #my-button. You must have the "Show the Intercom Inbox" setting enabled for this to work. The default value is #IntercomDefaultWidget.
Rich Link Properties: A list of rich link property keys.
Api Base: The regional API to use for processing the data
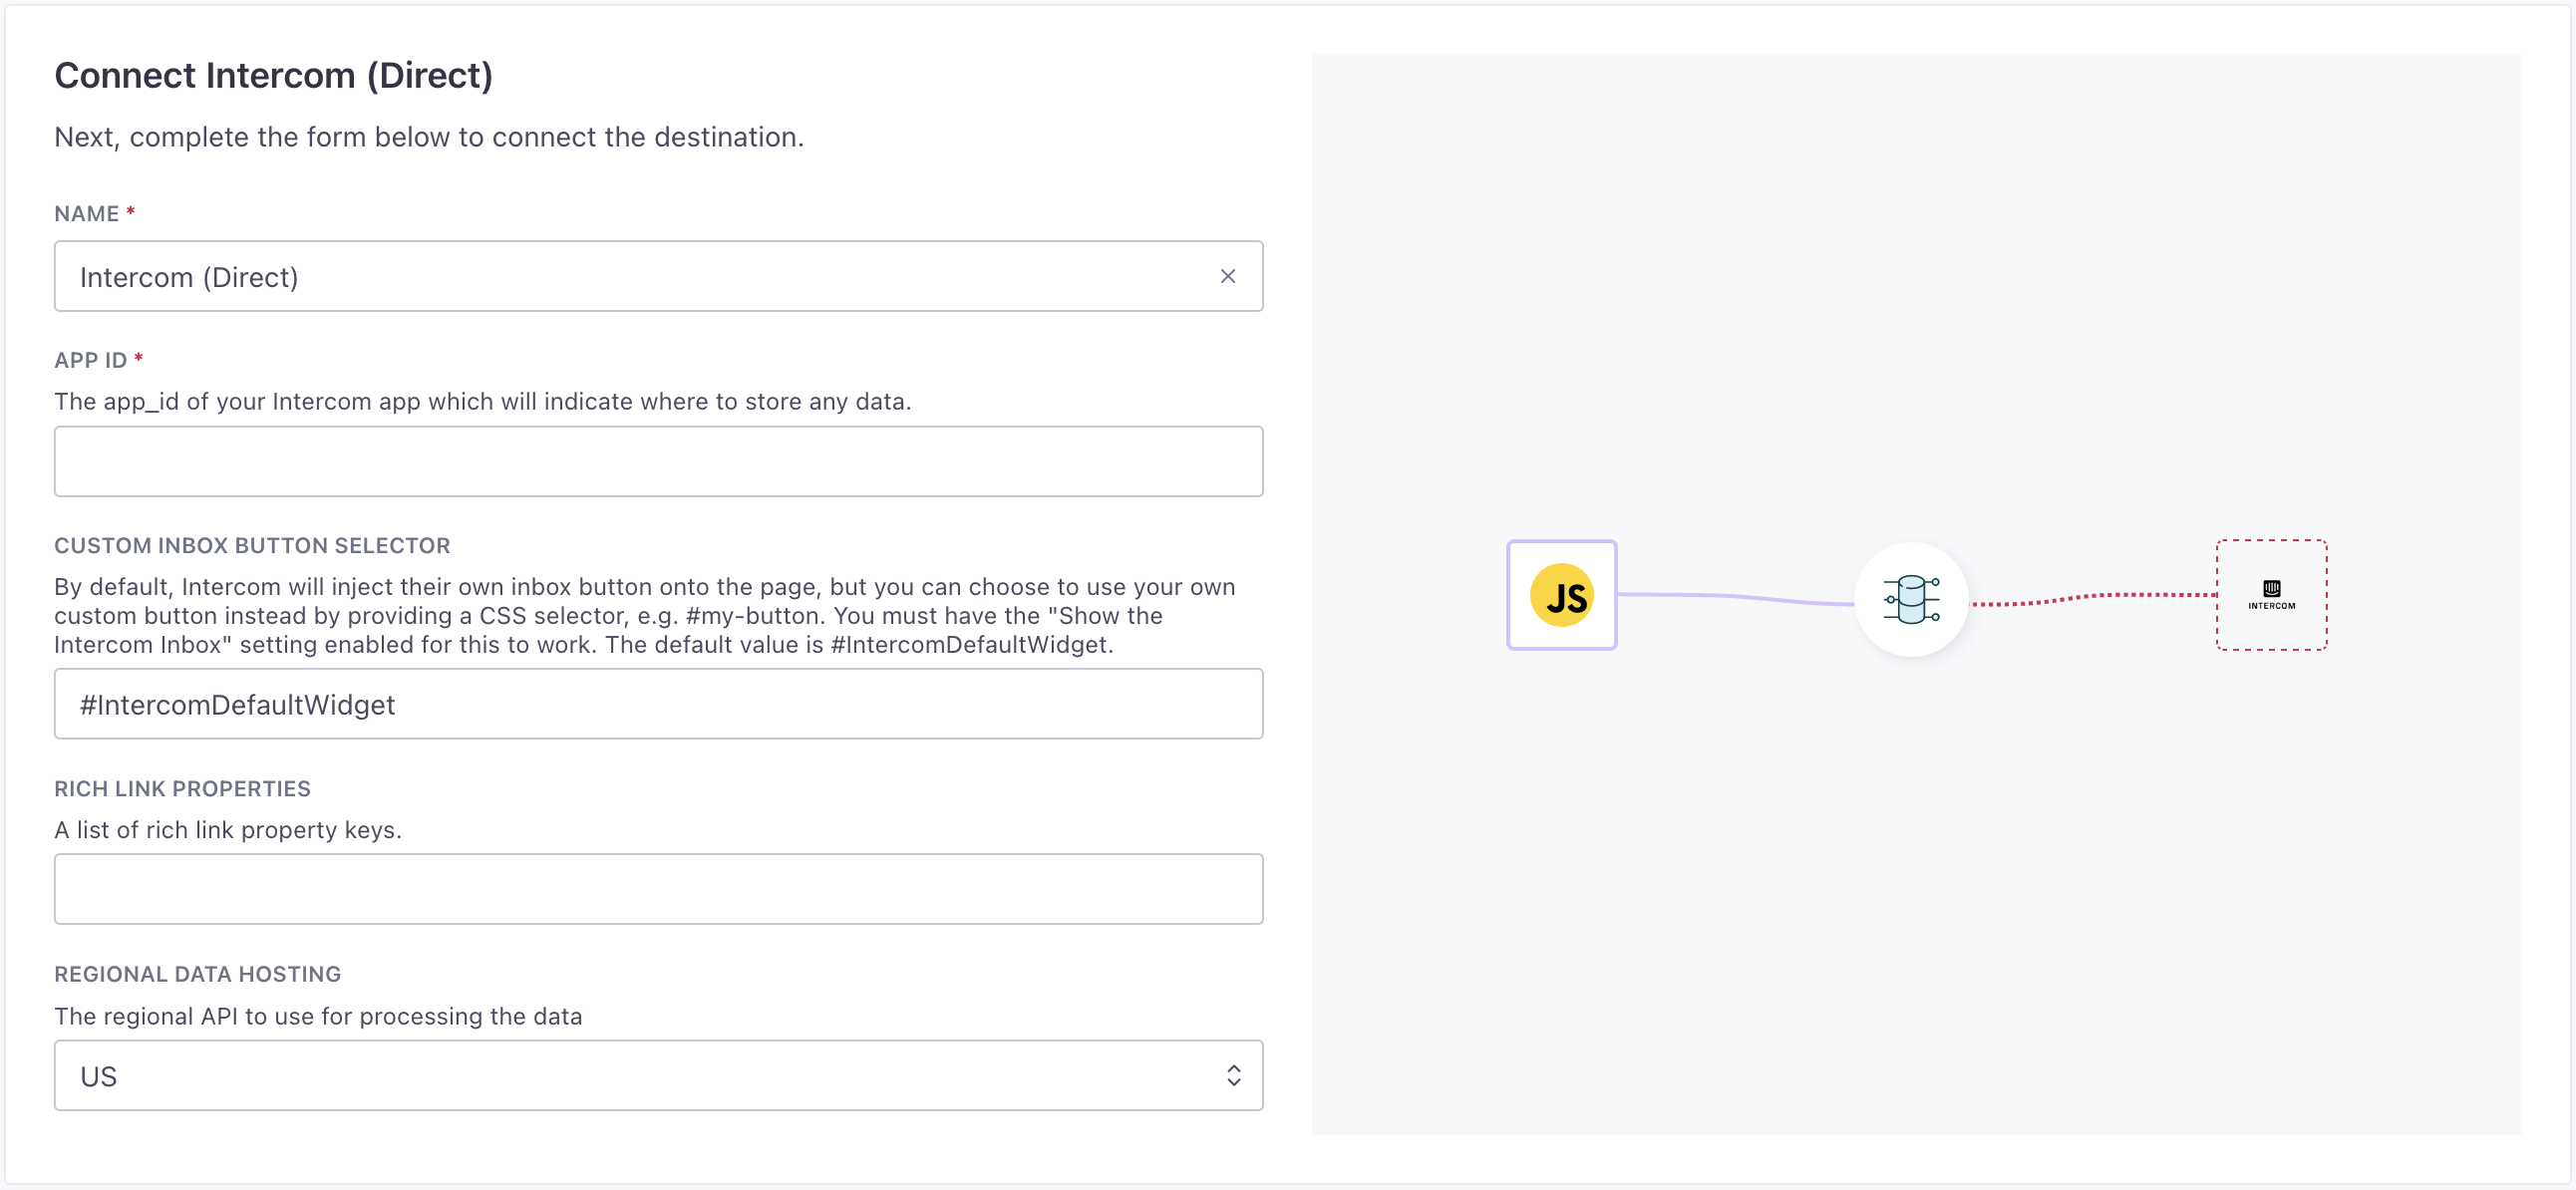
Click Enable Destination.
Direct mode actions
When you’re done setting up your destination, you can go to the Actions tab to see how we map source events to your destination.
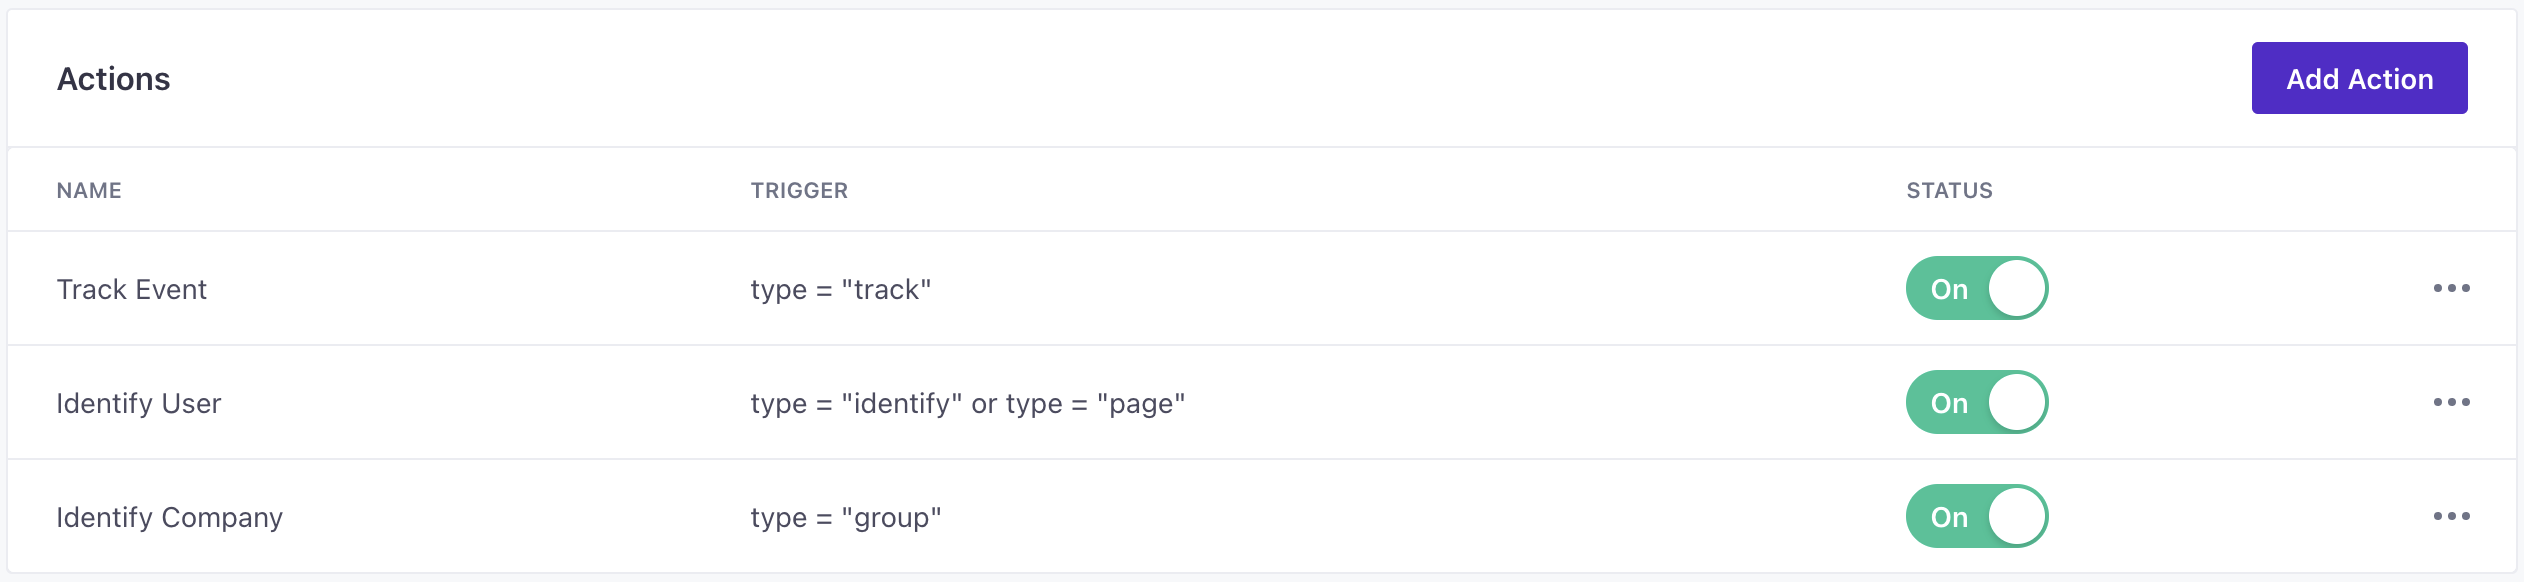
| Action | Default Trigger | Description |
|---|---|---|
| Track Event |
| Submit an event to Intercom. |
| Identify User |
| Create or update a user in Intercom. |
| Identify Company |
| Create or update a company in Intercom. |
FAQ and Troubleshooting
Why is my company not in my Intercom dashboard?
If you create a company without an assigning user (using the group method), the company will not appear on Intercom’s dashboard. This is expected functionality in Intercom. When you associate a person with the company, it will appear in your list of companies in Intercom.
Why isn’t a user getting attached to a company?
When you use the Identify Company action (group calls in your source data), we create or update a company’s information. In the same action, We also attach the user in your group call to that company. If the user doesn’t exist in Intercom yet, we’ll create or update the company but can’t attach the user. You should identify a user before you try to attach them to a company with a group call.

