Google Sheets Destination
About this integration
Google Sheets is a web-based application that enables users to create, update and modify spreadsheets and share the data online in real time.
Getting started
Go to the Data Pipelines tab and click Connections.
Click Add New under Destinations.
Select the Google Sheets destination.
(Optional) Select the sources that you want to connect to this destination. You can always connect sources to your destination later. We’ll only show you eligible sources.
Configure your destination.
Click Enable Destination.
Connect your Google Account to Customer.io
Before you can use the Google Sheets destination, you need to grant us access to your sheets. When you set up the destination, or when you go to the Settings tab after you set up the destination, you can click Connect to sign into your google account and grant Customer.io access to your sheets.
Actions
In this destination, each action represents a sheet that you want to populate with information from your source. Because we don’t know the ID of your sheet or the fields you want to import, you’ll have to set up actions for this destination—one per sheet you want to send data to.
| Action | Default Trigger | Description |
|---|---|---|
| Upsert Sheet |
| Write values to a Google Sheets spreadsheet. If a record with the given record identifier already exists, it will be updated. Otherwise, a new record will be created. |
What does “Upsert Sheet” mean?
“Upsert” is a portmanteau of “insert” and “update”: for each incoming source event, we’ll insert a new row or update an existing row.
We use the Record Identifier field in the action to check if a row exists or not. This means that whatever you set for the Record Identifier should be a unique value—like a userId, anonymousId, groupId, etc. If the field mapped to the record identifier does not exist, we’ll add a new row to your sheet; if it exists, we’ll update that row.
When you send data to Customer.io, we’ll use the properties you specify as data in your sheet: each key is a column heading and each value a cell within that column in the appropriate row. For example, if you pass $.properties.username from a track call to your sheet, you’ll have a column called username populated with the username included in your events.
Because each new key is a column in your sheet, you should make sure that your sources send relatively uniform data to Customer.io. You may also want to specify the exact properties (columns) you want to set in your sheet, rather than sending all event properties to ensure that you only populate data relevant to your sheet.
Adding a sheet
For each Google Sheet you want to send data to, you’ll need to set up an action. Before you begin, you should understand the source data that you want to populate in a sheet—the kinds of track events you send and the properties your source events include, to make sure that you populate your sheets correctly.
Before you begin: make sure you’ve granted Customer.io access to your Google Sheets, or we won’t be able to send data to your destination.
To set up a new Upsert Sheet action:
- In your Google Sheets destination, go to the Actions tab and click Add Action.
- Set your Trigger conditions. In general, you’ll use Track Event Name to determine the kinds of events that’ll add data to your sheets.
- Under Data Structure, set your Record Identifier: this is the value we’ll use to determine whether we insert a new row or update an existing one. That means that this value should be unique to the data you want to keep in your sheet—like a
userIdorgroupId. By default, we use theuserIdif it exists, or theanonymousIdif it doesn’t.
- In the next field down, add Spreadsheet ID. You’ll find this value in the URL for your sheet, like
https://docs.google.com/spreadsheets/d/{SPREADSHEET_ID}/edit. - In the next field, enter the exact name of the sheet you want us to add data to. In Google sheets, this is the tab at the bottom of the page, named Sheet1 by default. If you don’t enter the sheet name exactly as it appears in Google, your action will fail.
- Determine whether to import Raw data to your sheet or to use the User Input setting.
- Raw: your sheet imports data exactly as sent in your source events. This prevents your sheets from automatically formatting or modifying values it identifies as currencies, numbers, dates, etc.
- User Input: your sheet applies formatting to your data, allowing your sheet to modify and format values it identifies as currencies, dates, etc.
- In the last field, add the properties that you want to send to your google sheet. Each key will be a column in your sheet.
We stringify nested JSON
Google sheets won't handle nested properties. If your actions reference a property containing a JSON object or array value, we'll flatten and stringify the values, meaning cells in your sheet will contain stringified JSON values.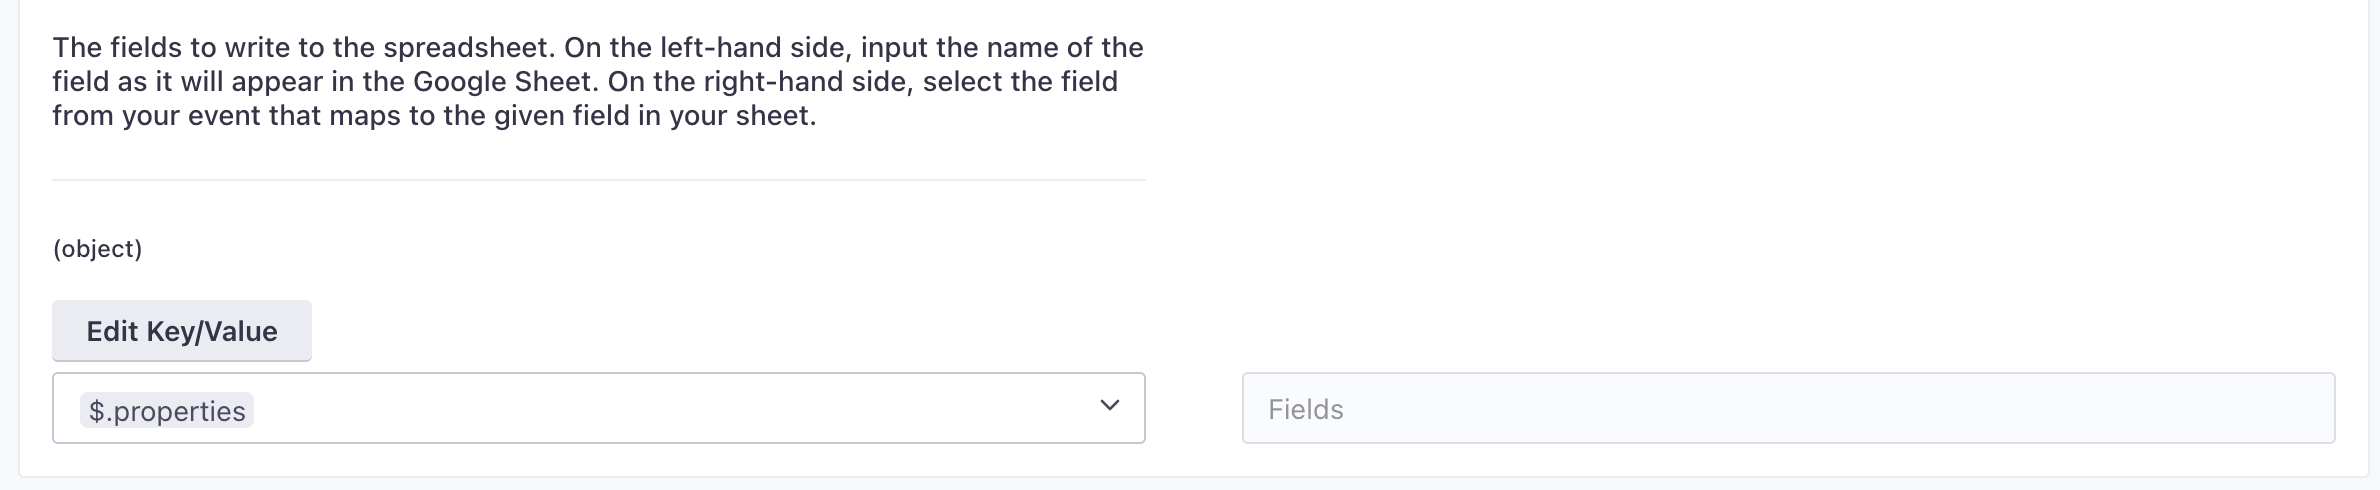
- Click Save Action.
If you’ve connected a source, you should start seeing data flow into your sheet as soon as matching events come in.
Troubleshooting
Errors in Data Out
If you see errors in Data Out, make sure that you’ve granted Customer.io access to your Google Sheets. If you haven’t granted Data Pipelines access, you’ll receive errors for every entry in the Data Out tab.
Make sure that you’ve set the correct Sheet Name as well. Your action must use the sheet name exactly as it appears in Google Sheets—the same case, length, no trailing characters, etc—otherwise we’ll report 404 errors for your sheet.
Why is there extra data in my sheet?
When you set up the Data Structure for your sheet, you can specify the keys (columns) that you want to send to your sheet. If you send $.properties you’ll capture all event properties in your sheets, whether you want to or not!
To keep a clean sheet, you may want to specify the exact event properties that you want to capture, like $.properties.product_name, so that your sheet’s data is uniform.
We stringify nested objects and arrays
Google Sheets doesn’t handle nested objects or arrays, so we flatten and stringify them. If you send a property with an object or array value, we populate that column with stringified JSON.

