Google Ads (Gtag) Destination
About this integration
The Google global site tag (gtag.js) is a JavaScript-based tagging framework and API designed to send web conversions to Google Ads. With this destination, we load gtag.js automatically so you can make more efficient use of your existing tracking implementations and map events to page load and click conversions.
Don’t use this destination if you use Google Tag Manager
You should only use this destination if your Google Ads account is using Gtag. If you’re using Google Tag Manager, don’t add the global site tag (gtag.js) in your GTM containers, otherwise you’ll end up duplicating Gtag on your site—once through your Data Pipelines source and again through Google Tag Manager.
Getting started
This destination maps .page() and .track() calls from your web sources to Page Load Conversions and Click Conversions respectively.
Migrating from Segment?
If you’re moving your integration from Segment, you won’t see as many settings when you set up this destination. We’ve pushed many of the settings you set in Segment down to the individual actions that they affect. This makes it easier to use our defaults, and gives you granular control of settings at the action level.
Go to the Data Pipelines tab and click Connections.
Click Add New under Destinations.
Select the Google Ads (Gtag) destination.
(Optional) Select the sources that you want to connect to this destination. You can always connect sources to your destination later. We’ll only show you eligible sources.
Configure your destination.
Account ID: Enter your GOOGLE-CONVERSION-ID. You can get this value from your global site tag snippet. It should look something like
AW-901243031Floodlight Account ID: Enter your DoubleClick Floodlight Advertiser ID to have it passed to Gtag's 'config' parameter. This ensures tags are loaded by first-party cookies. This value should look like DC-1234567. For more information, see Google's documentation.
Disable Ad Personalization: Disable ad personalization. For more information, see Google's documentation.
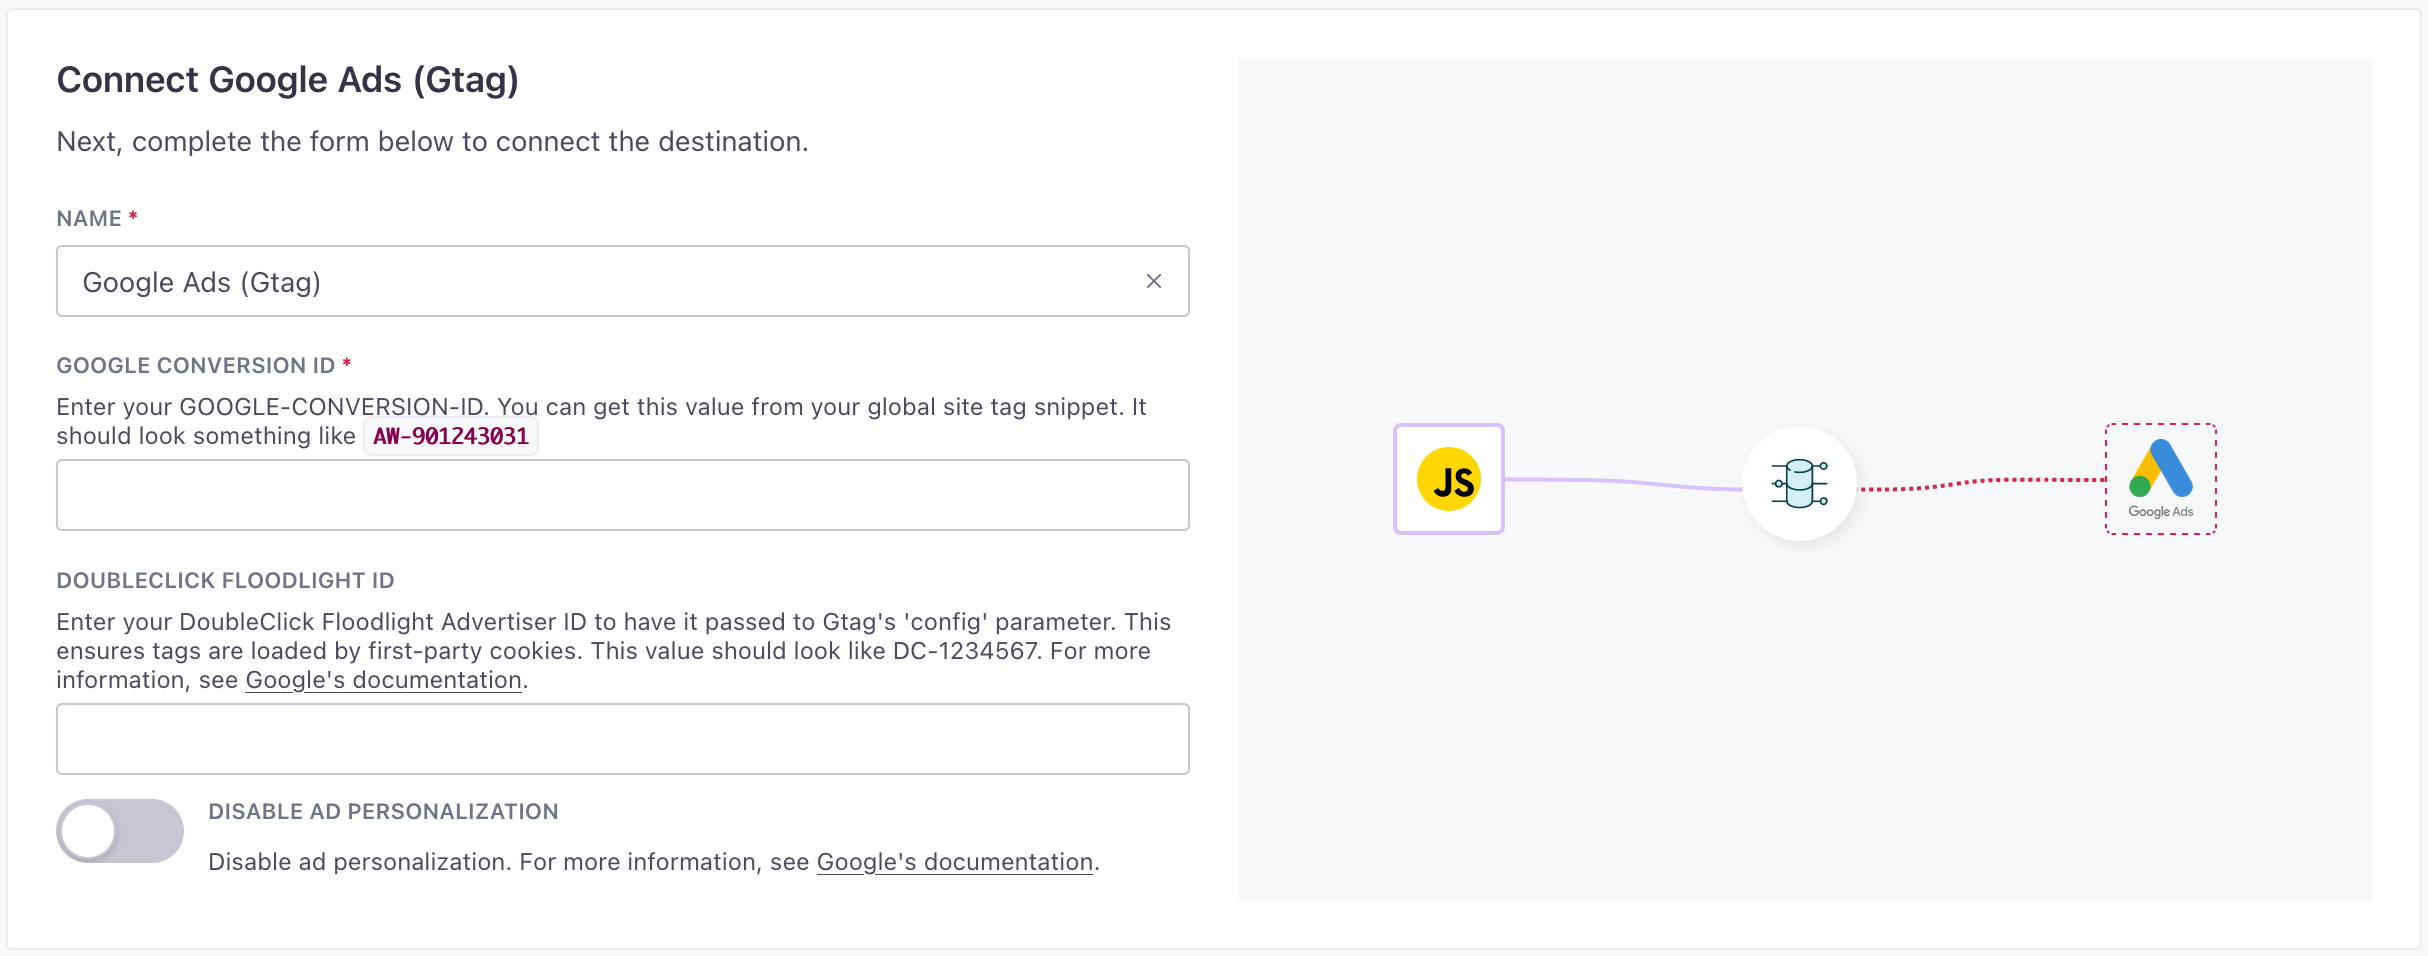
Click Enable Destination.
After you set up your integration, you should check the Actions tab and map conversion labels if you track different kinds of conversions.
Actions
When you’re done setting up your destination, you can go to the Actions tab to see how we map source events to your destination.
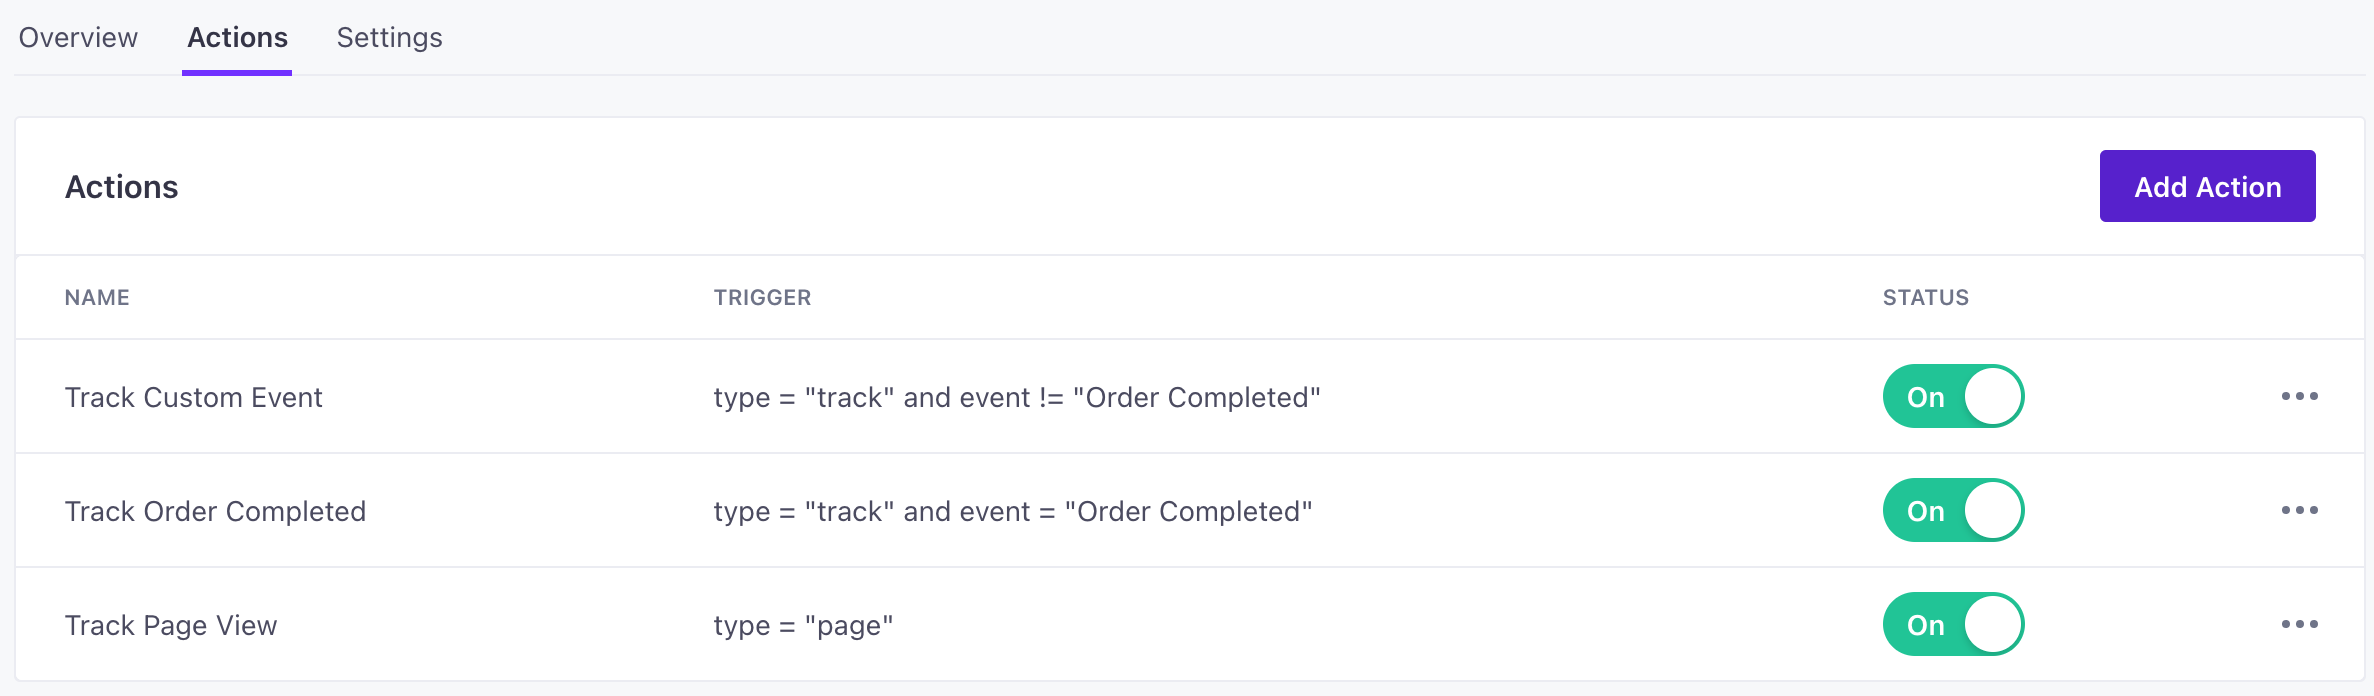
| Action | Default Trigger | Description |
|---|---|---|
| Track Custom Event |
| Track an event for a user |
| Track Order Completed |
| Track an event for a user |
| Track Page View |
| Track the current page |
Conversion Labels
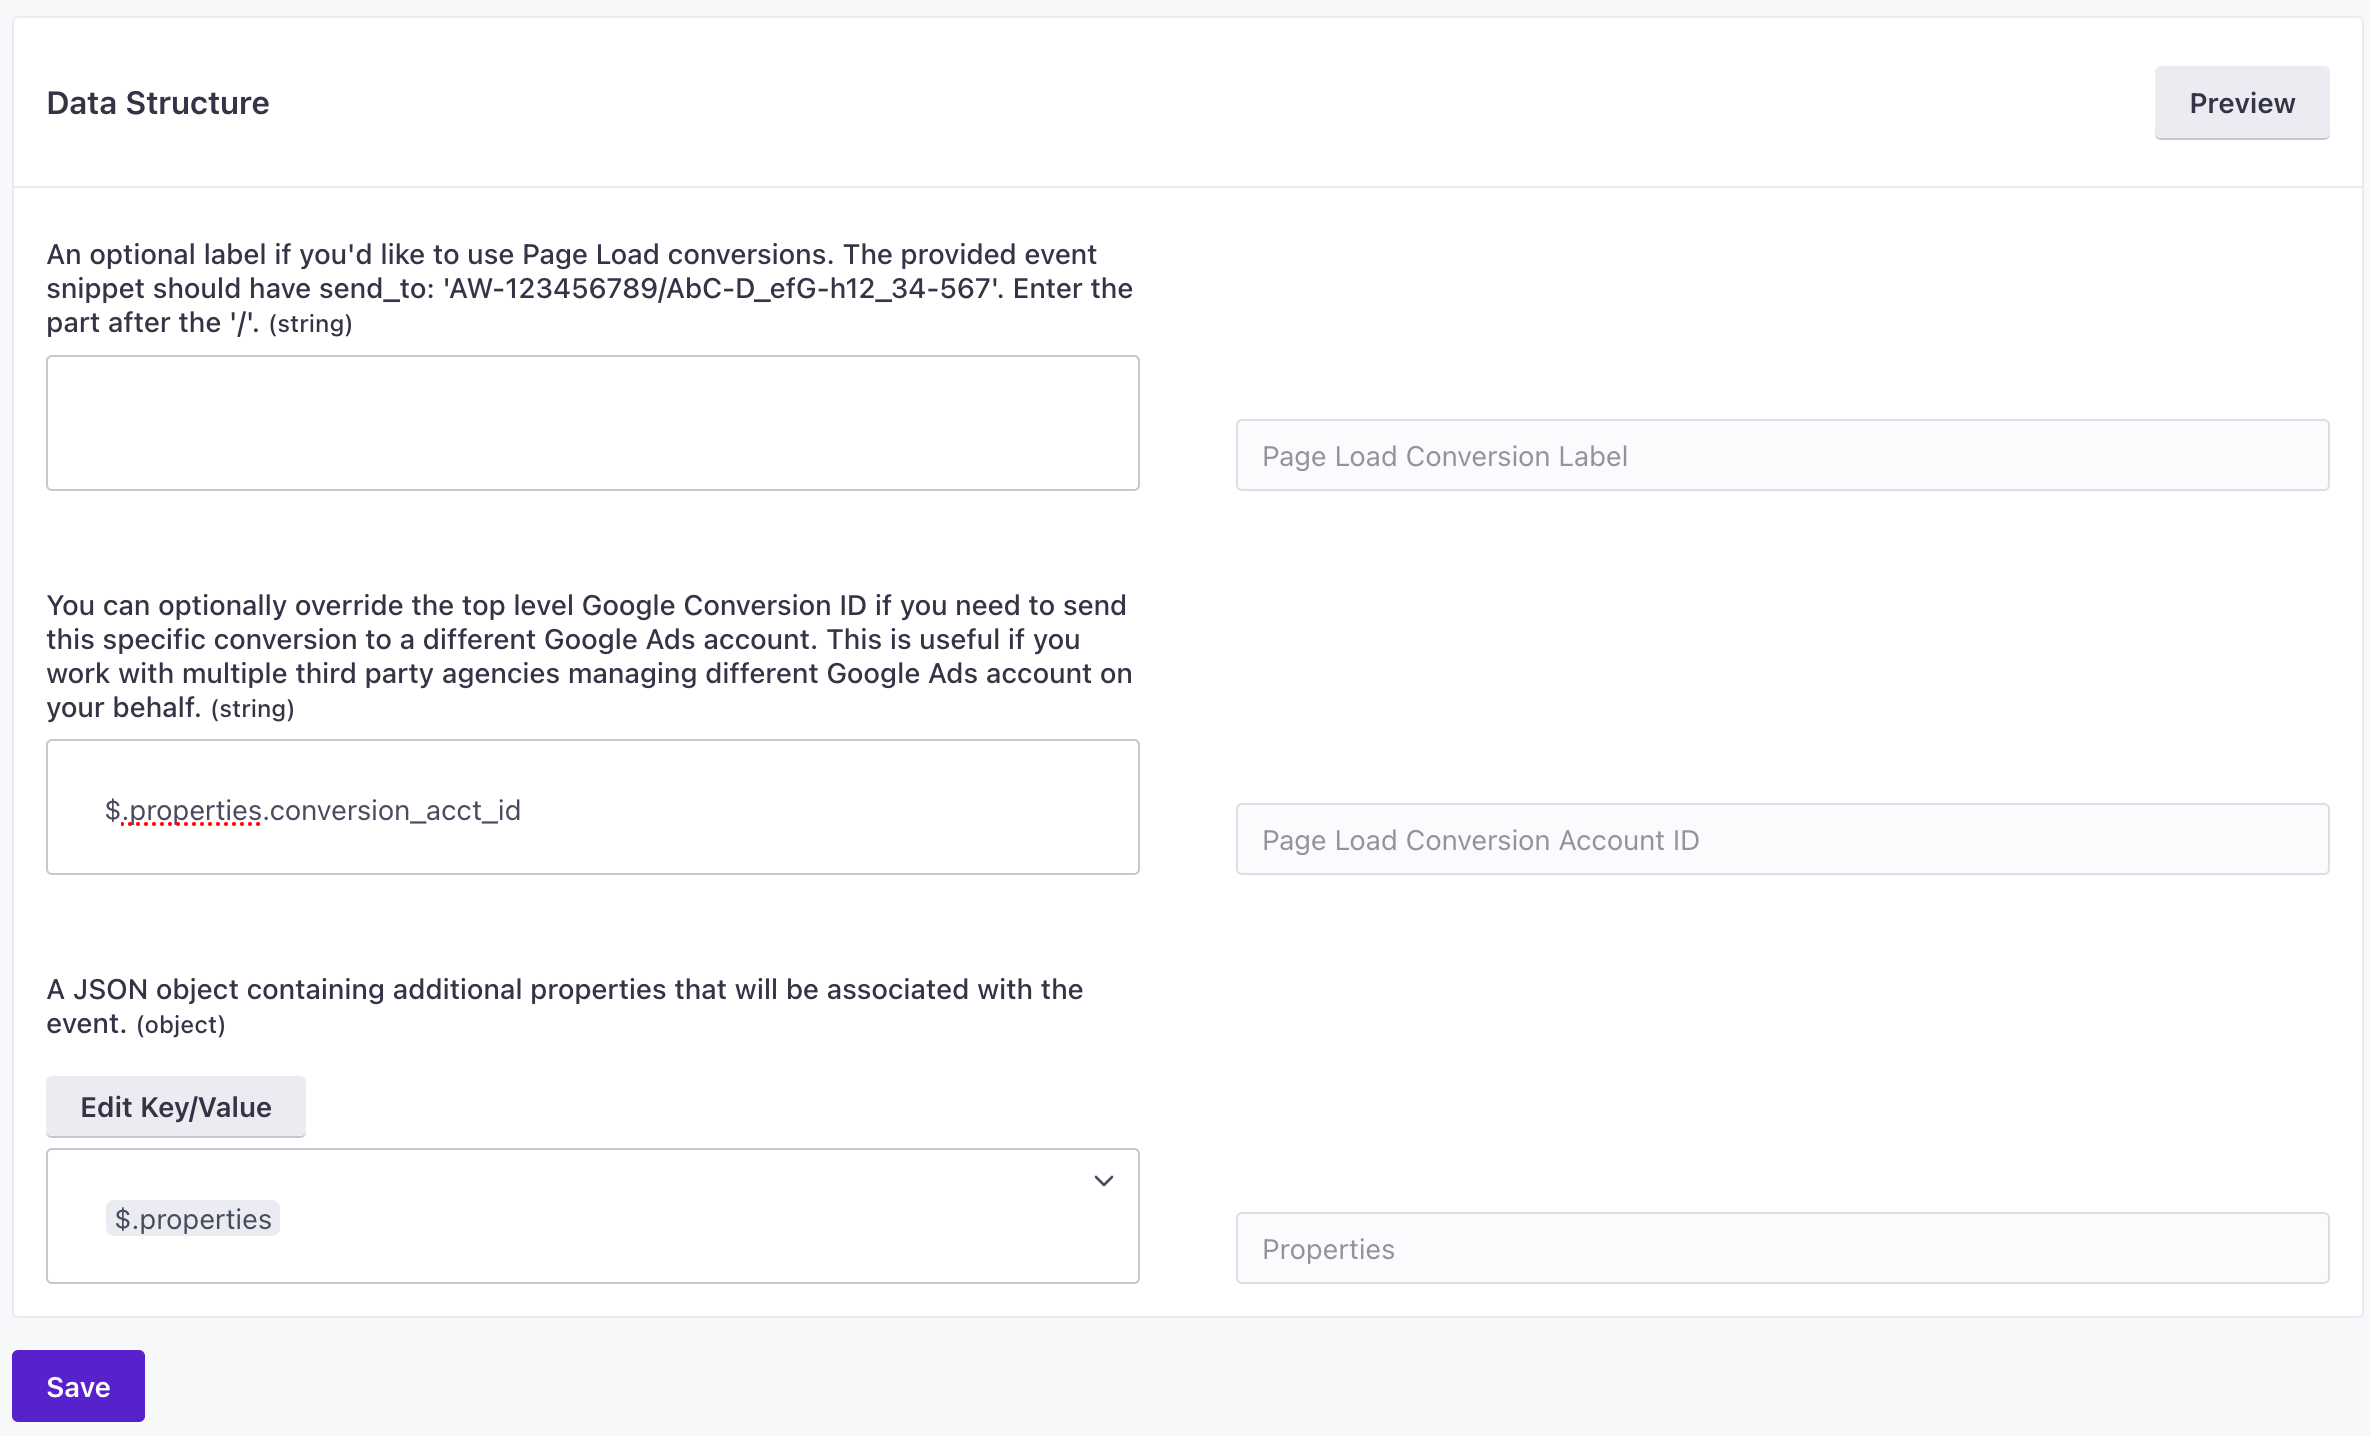
Actions for this destination include fields for Page Load Conversion Label and Click Event Conversion Label for page and track events respectively.
If you use the same conversion for all page or all click events, you can set a static value. Otherwise, you might want to pass the label as a property in your events, so you can measure conversions against the appropriate labels in Google Ads.
For example, I might pass a conversion label in an event as follows and then use it in my page conversion action as $.properties.conversion_label.
analytics.page({
    conversion_label: "AbC-D_efG-h12_34-567"
})
Page load conversions
If you want to map all your unnamed .page() calls to a default Page Load Conversion, you can enter the conversion ID as a static value for your Page Load Conversion Label in the default Page action.
But, if you created specific Page Load Conversions in Google Ads you can pass that value as an event property and pass it as a variable and set the variable (e.g. $.properties.conversion_id) as the Page Load Conversion Label.
We forward all the properties in the page, like the path, title and url, so that they’re available in Google Ads (Gtag) for your remarketing campaigns.
You can also send semantic properties, like value, currency, or order_id, as options in the integrations object of your source calls. In general, we recommend that you use the Click Conversion action for these kinds of properties instead, and map them to .track() calls. But, if you want to send them as a part of page events, you’d pass them like this:
analytics.page({}, {
  'google-ads': {
    value: 25,
    currency: 'USD',
    order_id: 'order123'
  }
});
Track calls and click conversions
You can map your custom .track() events to Click Conversions that you created inside Google Ads. We pass event properties from your source calls to Google Ads so you can use them in remarketing campaigns.
If you pass properties.value, properties.currency, or properties.order_id, Segment maps them to Google’s semantic value, currency, or transaction_id properties respectively.
The only exception is that for Order Completed events, we map Google’s semantic value field to your properties.revenue or properties.total. If you pass both as properties, properties.revenue takes precedence.
Multiple Google Ads Accounts
If you have multiple Google Ads Gtag accounts (usually managed by various third party agencies) simply pass the conversion ID as a variable in your page and track source events and map it to the Conversion Account ID fields in your actions.
This field lets you override the default Account Id that you set when you configure your destination.
Troubleshooting Conversions
If you don’t see the correct events in Google Ads, you can take the following steps to trace incoming events to their destination and make sure that everything’s set up properly.
Confirm that the events mapped to a Google Ads conversion are actually sent from your Analytics.js source:
- Go to Connections > Sources in your workspace and click your source.
- Go to the Data In tab.
- Click an event and make sure that the library name is
analytics.js. Your events should include a snippet that looks like this:
  "library": {
    "name": "analytics.js",
  }
Verify that the Google Conversion ID in your Google Ads destination settings is correct.
Find your ad online and click on it. This redirects you to your website.
Open the Network tab in your browser and select the setting to preserve logs. In Chrome, this is a simple checkbox called Preserve log; in Firefox, you’ll click the settings icon and select Persist Logs. Keep this Network tab and webpage open.
In a new browser tab, go to the Actions tab for your Google Ads destination and open settings for the Click Conversions action. Make sure the events are mapped to the correct Conversion Label.

Go back to your website and trigger the event that’s mapped to the click conversion action.
Go to the Network tab in your browser and enter the Conversion Label linked to the event you triggered in the Filter field.
See if the value for the
ct_cookie_presentchanged totrue. Iftrue, it means that Google Ads counted the event as a conversion.

