Workspaces in Customer.io
Workspaces are a way of working with multiple products, sites or apps from a single Customer.io account. Everyone starts with one (its name is the same as your account name), and you can add or remove them as needed.
Manage workspaces
To create, edit, or delete a workspace, you must be an Account Admin.
Click your workspace in the upper left corner and then click Manage all workspaces to see a list of your workspaces. From here you can add, edit or delete workspaces (if you have more than one).
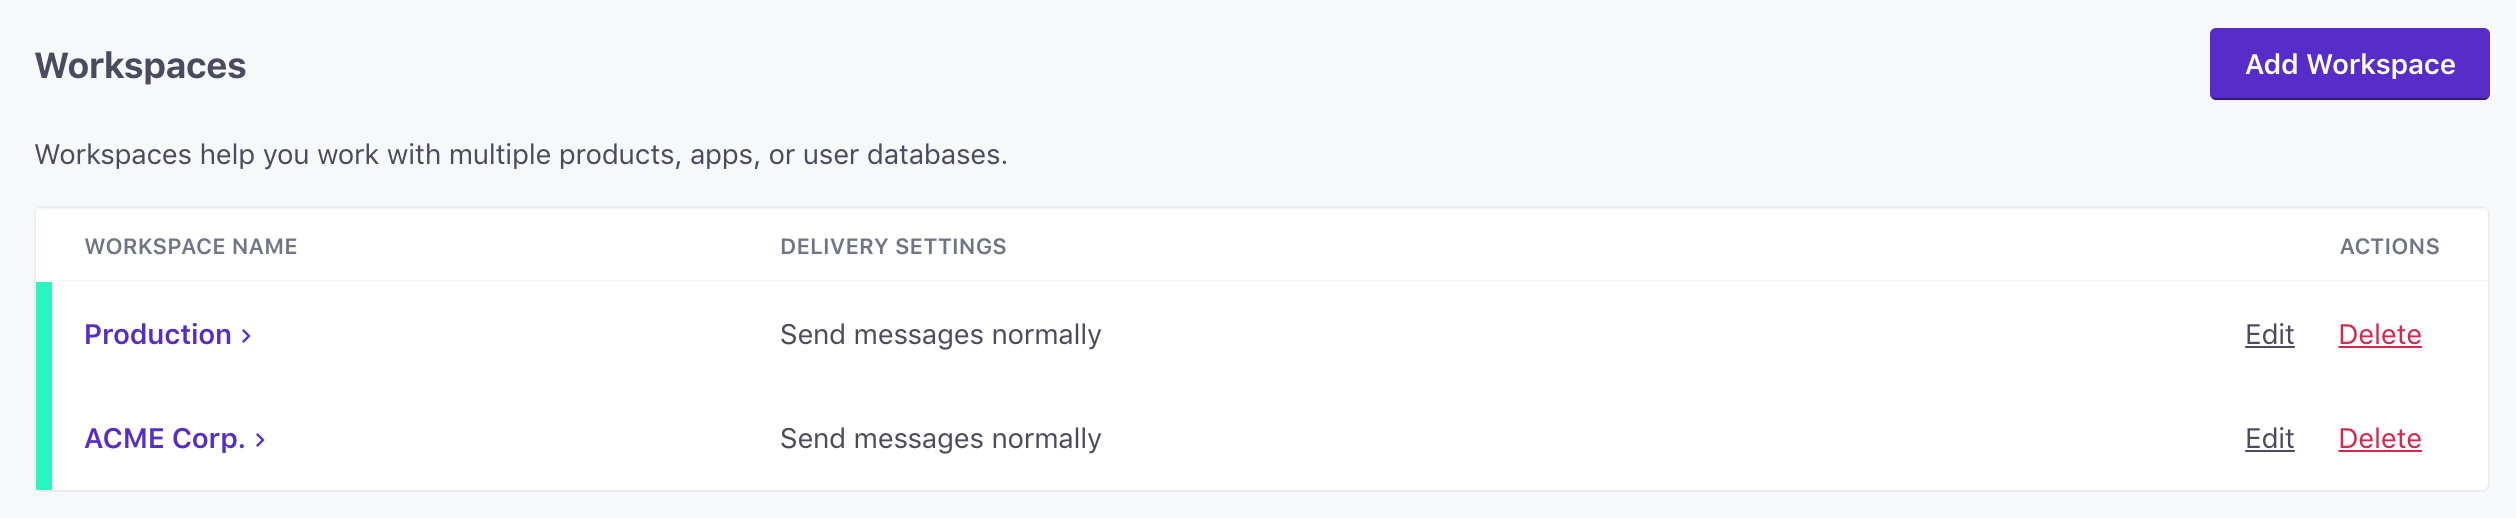
Add a workspace
By default, new workspaces use both email and id as identifiersThe attributes you use to add, modify, and target people. Each unique identifier value represents an individual person in your workspace.. You can change identifiers after you create your workspace.
If you’re on our Essentials plan…
You can create two workspaces. If you already have two workspaces, you’ll either need to upgrade to our Premium Plan or delete a workspace first.
- To get to your Workspaces page, click your workspace in the upper left corner and then click Manage all workspaces.
- Click Add Workspace.
- Give your new workspace a name and a custom color to help you differentiate between your workspaces.
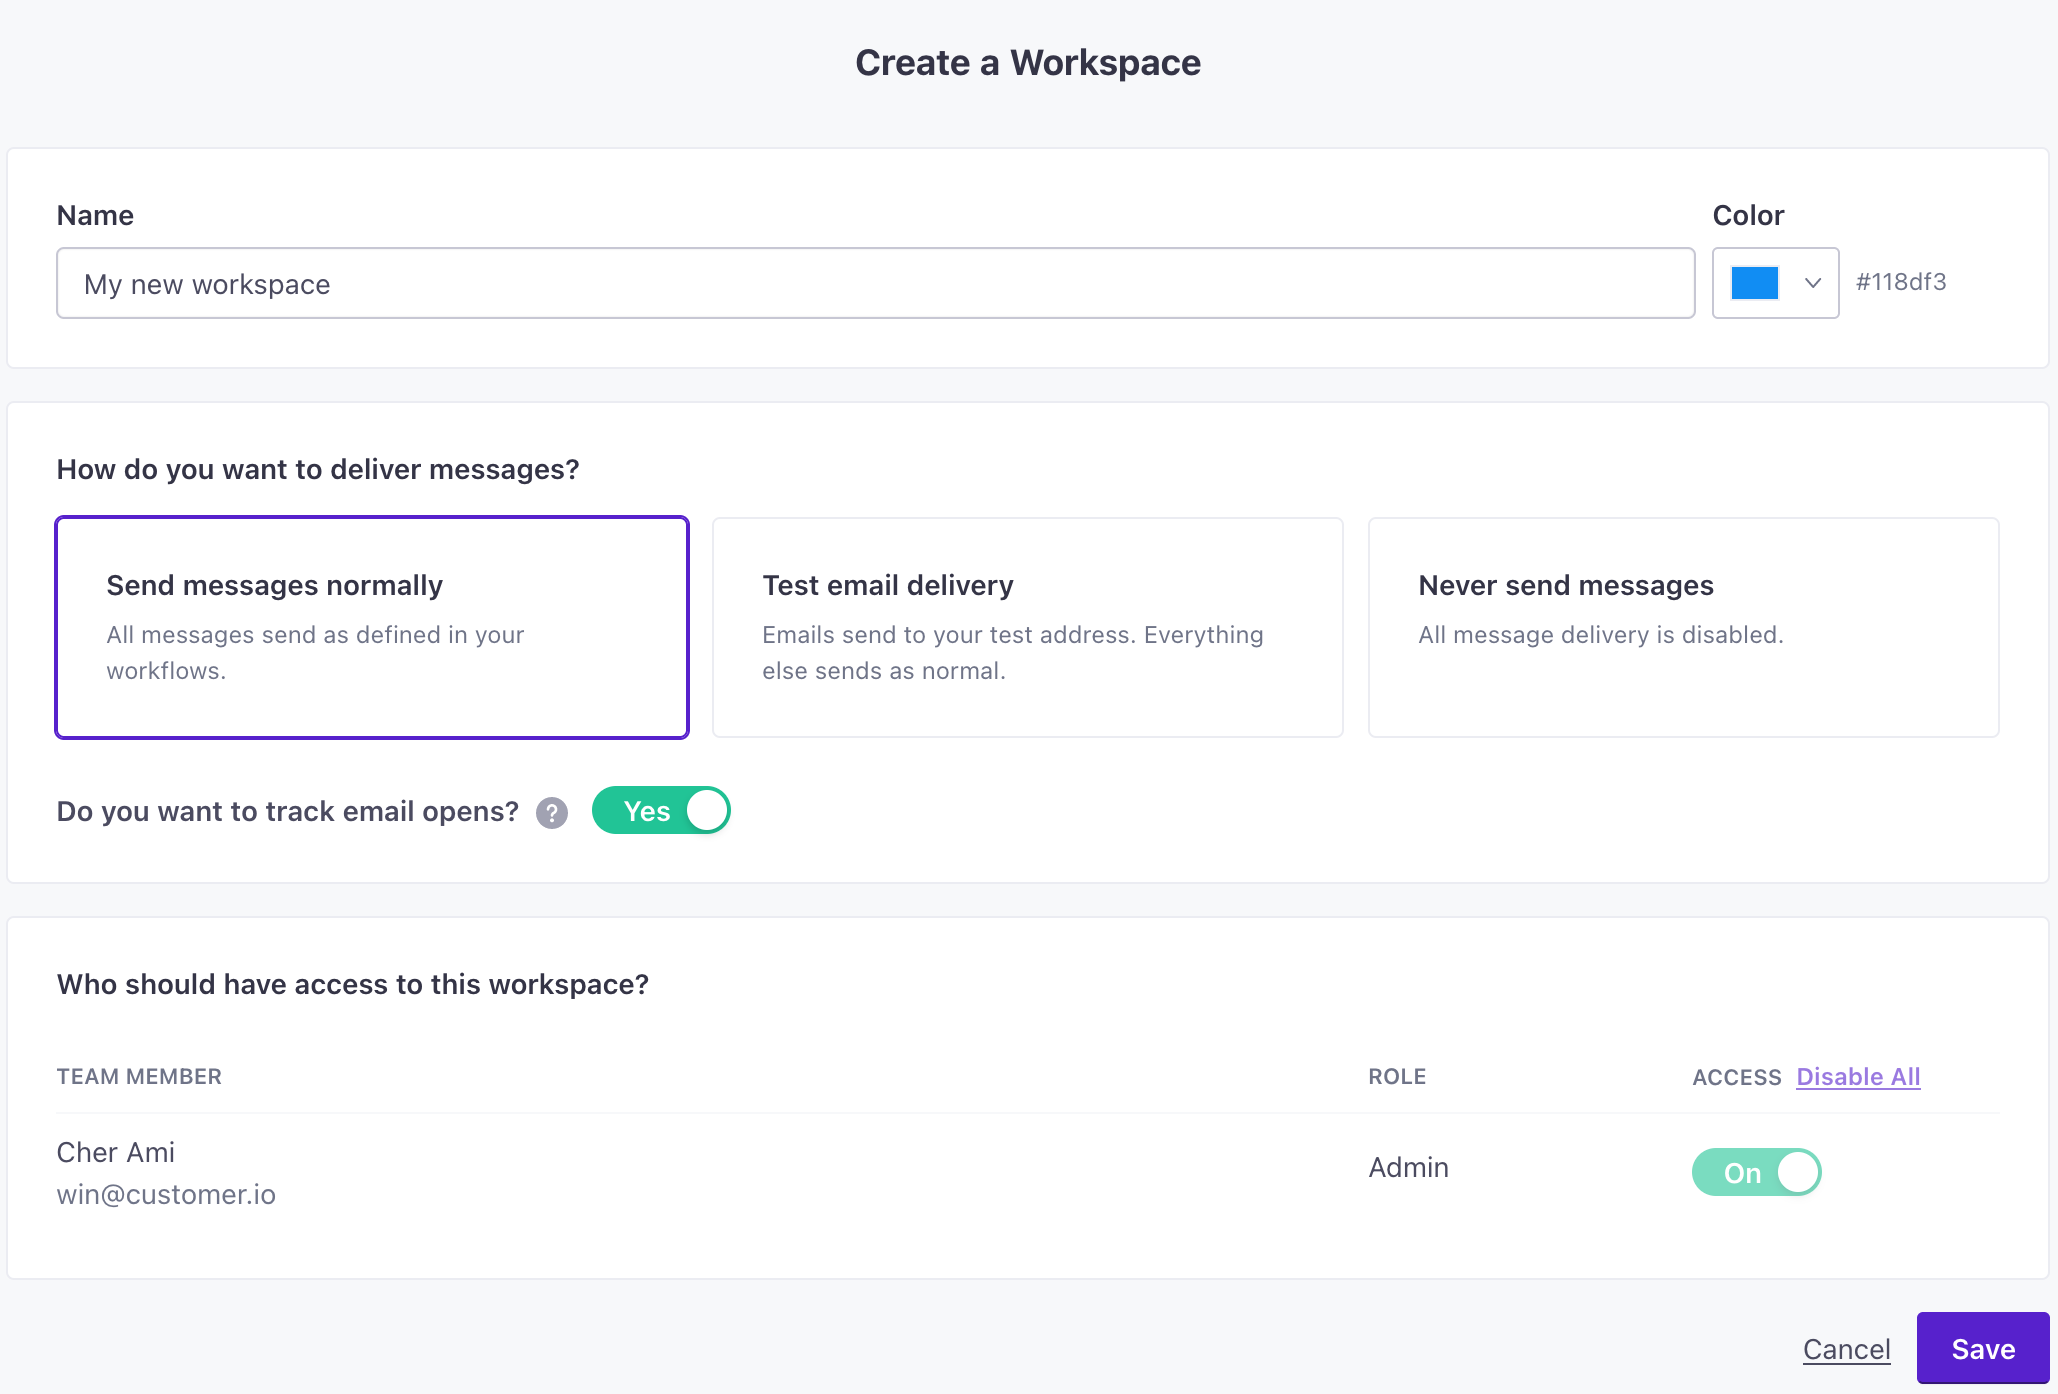
- Set the default send behavior for the workspace:
- Send messages normally: All messages send as defined in your workflow.
- Test email delivery: Emails will send to a defined test address; other messaging types (Slack, webhooks, etc.) send as normal.
- Never send messages: Message delivery is disabled.
- Select the team members who can manage and access the new workspace. You can’t disable access to a workspace for an Account Admin; Account Admins can access all workspaces in an account.
- Click Save.
When you’ve finished adding your workspace, you can switch between workspaces from the main navigation bar.
Edit a workspace
To edit an existing workspace, go to the Workspaces page and click ‘Edit’ in the Manage settings:

You can change your workspace’s name, delivery settings or access permissions for team members. You can also change the color assigned to the workspace to help you differentiate between them.
Delete a workspace
Deleting a workspace permanently removes all data associated with the workspace—including campaigns, emails, people, etc. You may want to export your data before you delete a workspace.
To remove a workspace, go to the Workspaces page and click Delete. You must type your workspace’s name (case-sensitive) to delete it.
Deleted workspaces are not recoverable.
Deleting a workspace permanently deletes all campaigns, emails, customers, deliveries, metrics, and data contained within a workspace. Make sure you’re prepared to lose this data before you delete a workspace.
General workspace settings
To edit general workspace settings, you must be an Account Admin or Workspace Admin.
After you create a workspace, you can change settings by going to Settings > Workspace Settings > General Workspace Settings.
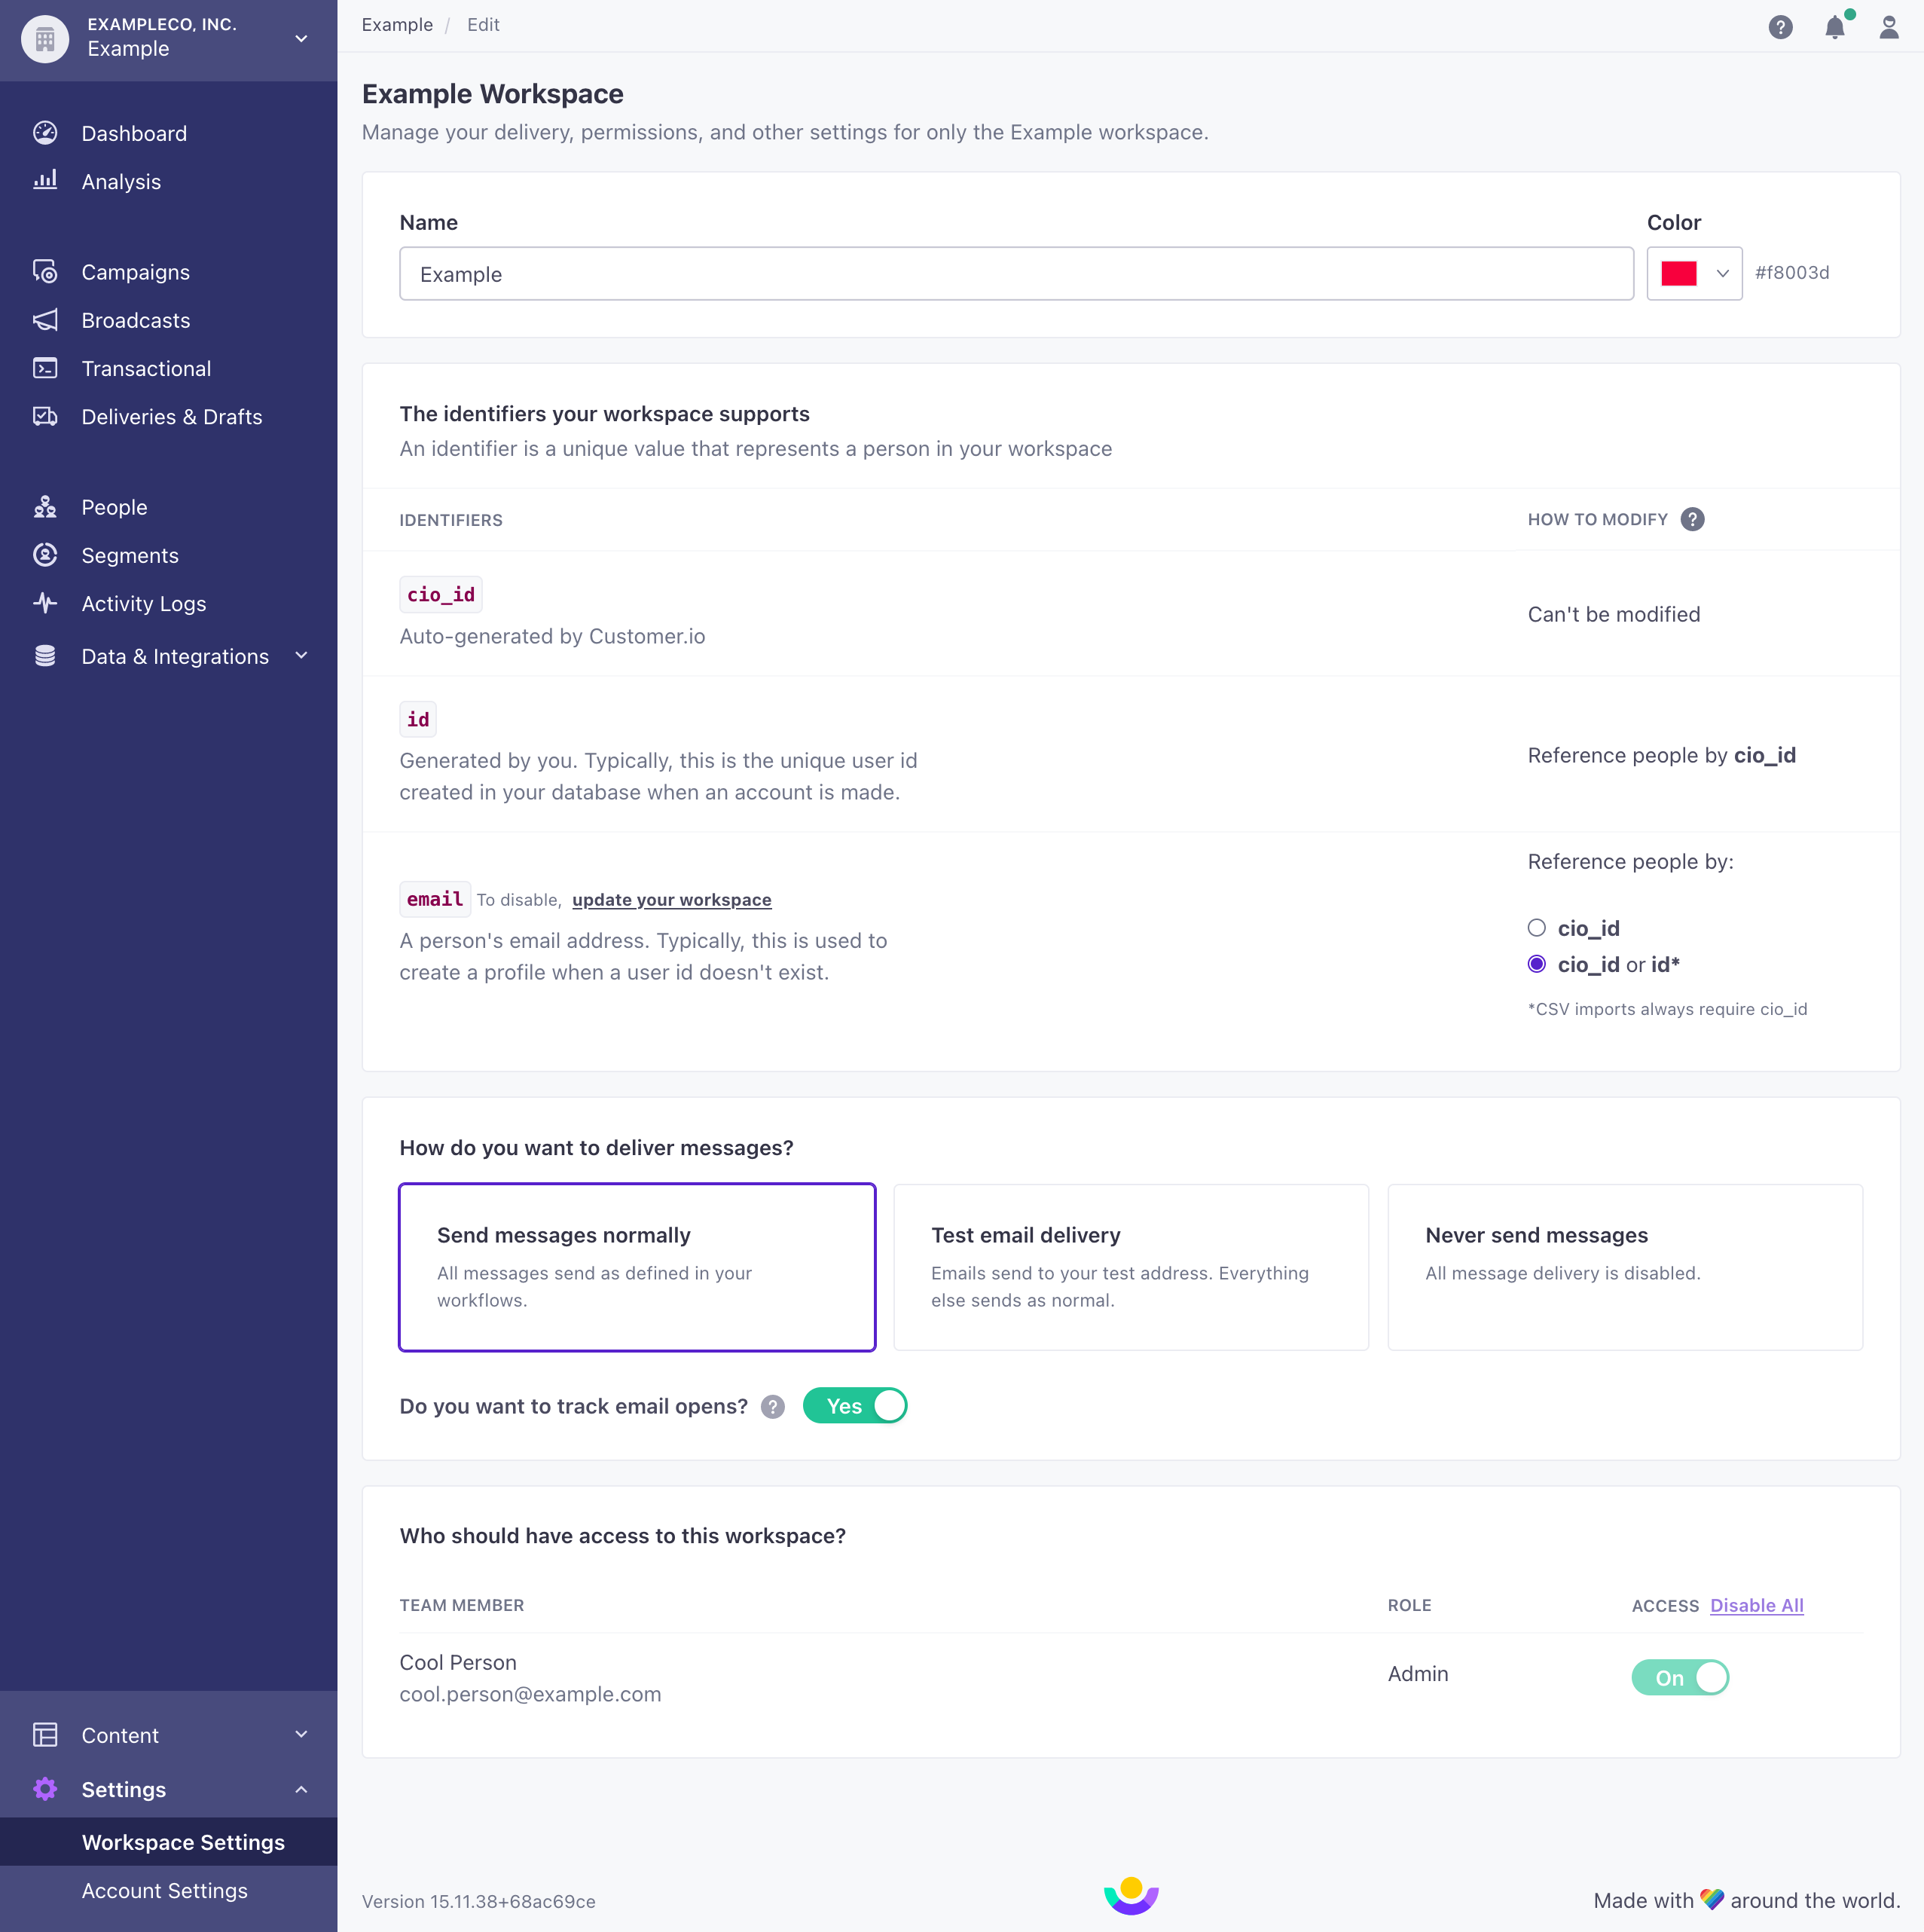
Enable or disable email as an identifier
New workspaces treat email as an identifierThe attributes you use to add, modify, and target people. Each unique identifier value represents an individual person in your workspace. by default, but you can disable it. Disabling email as an identifier only prevents you from using an email address to add or update people; you can still use it as an attributeA key-value pair that you associate with a person or an object—like a person’s name, the date they were created in your workspace, or a company’s billing date etc. Use attributes to target people and personalize messages. Attributes are analogous to traits in Data Pipelines..
The default configuration—in which email is an identifier—can be helpful for cases where you initially identify people who are interested in your product (leads) by email address and then assign them IDs later, when they become customers.
When you enable email as an identifier, we’ll automatically merge people who have the same address.
To enable or disable email as an identifier:
- Go to Settings > Workspace Settings and click General Workspace Settings.
- Click update your workspace next to
email.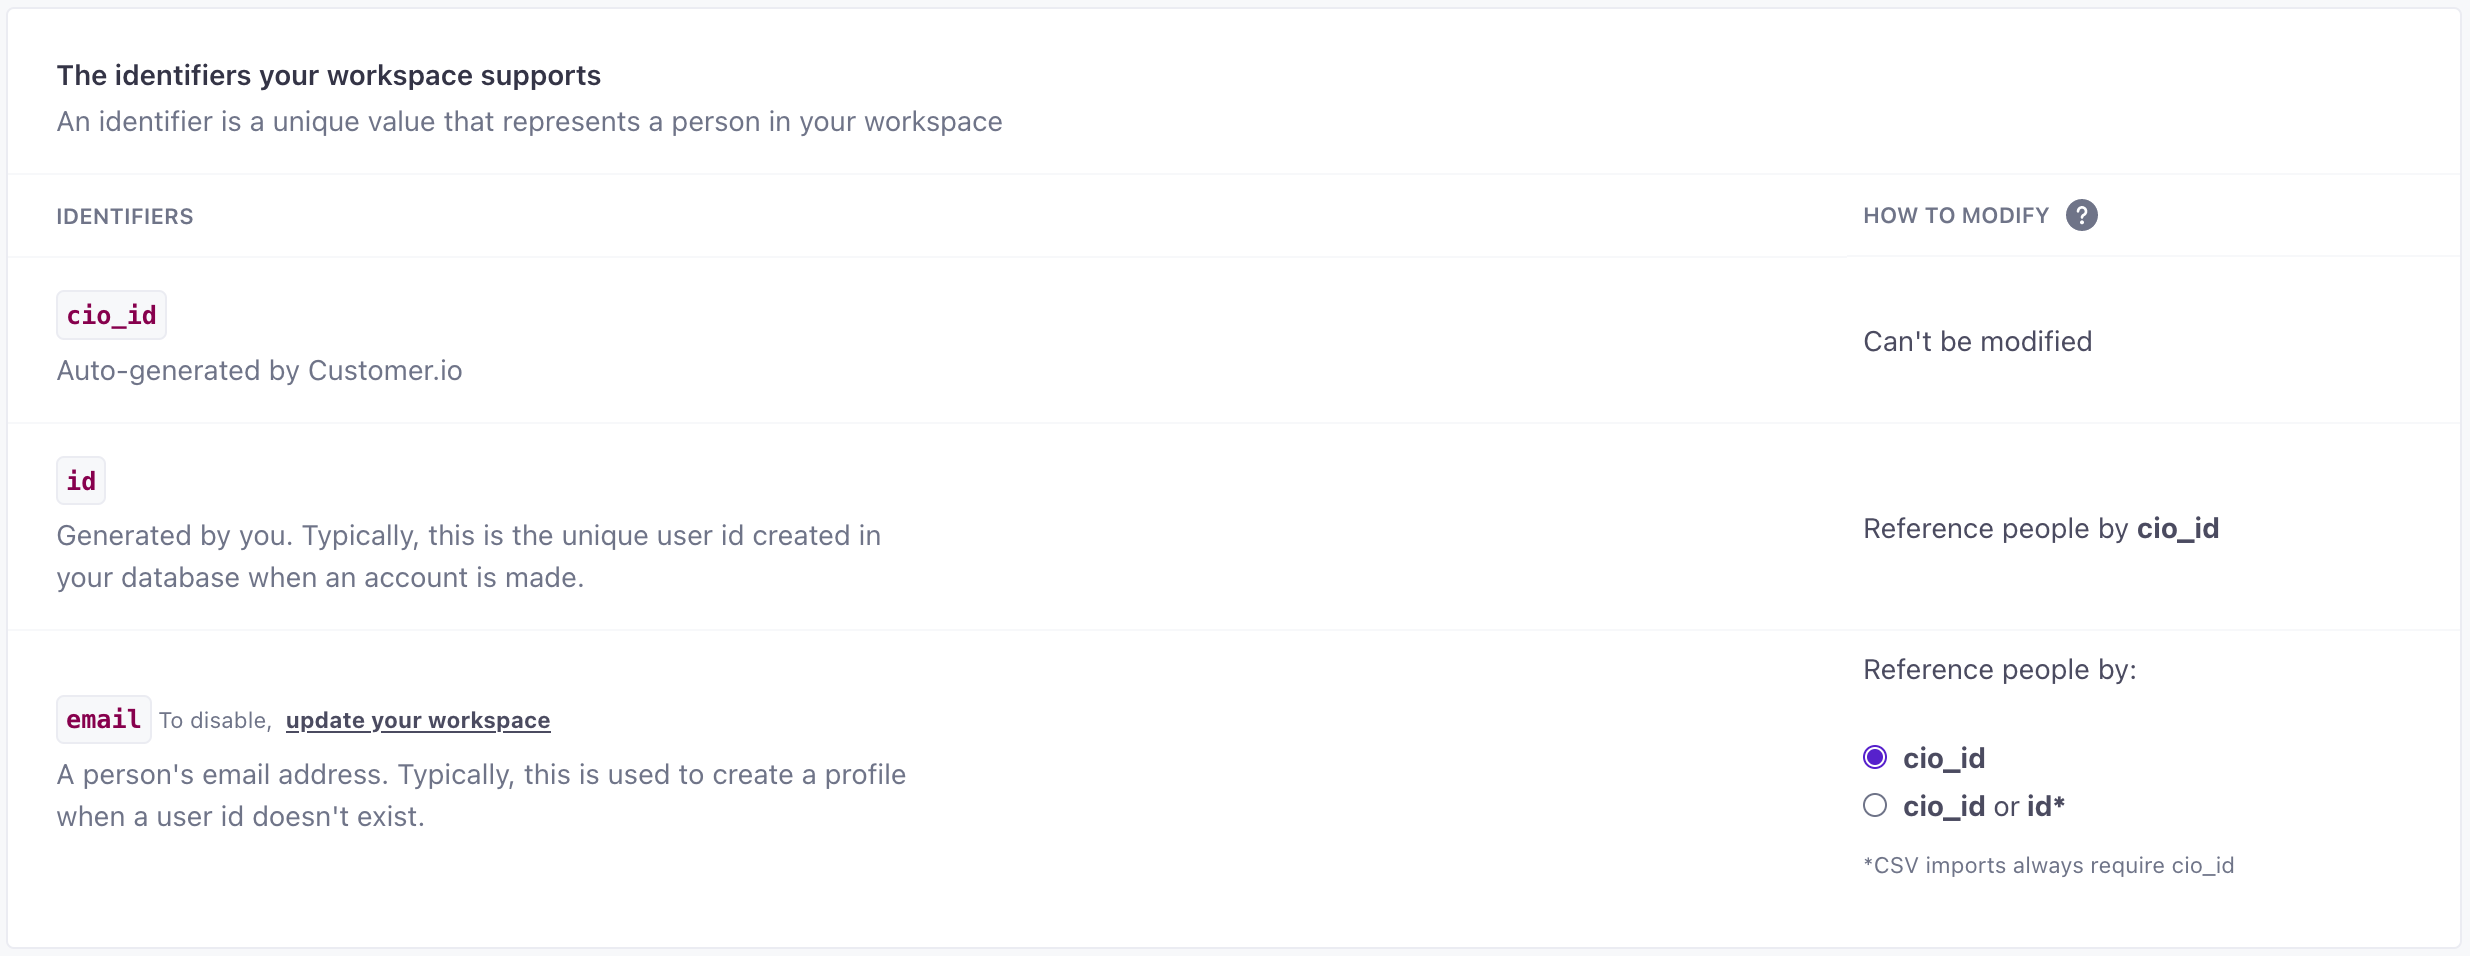
- Carefully read about the behaviors that will change for your workspace. When you’re ready, click Change configuration. If you’re enabling email as an identifier, we’ll merge people that have the same email addresses.
Changing your workspace configuration can take up to a day.
Behaviors for people with an email but not an ID
When you enable email or ID as identifiers, you may notice slightly different behaviors from other workspace types.
- Reporting Webhooks: the
customer_idkey is null if you add a person without an ID (by email only). You should update your endpoints to use the newidentifiersobject. See our webhook documentation for more information. - Segment Source events: After you migrate, message opens, clicks, etc. for people without an
idare sent with theemailaddress as ananonymousId. You can map these anonymous events to another destination or drop them.
Allow updates to email using ID
If your workspace uses both email and ID as identifiersThe attributes you use to add, modify, and target people. Each unique identifier value represents an individual person in your workspace., this setting determines the requirements to change a person’s email after you set it. If you created your workspace after January 28, 2022, this setting is on by default.

In general, if you see a lot of failed “Attribute Change” requests in your workspace, or a significant number of your identify calls fail, you might try turning this setting on. You can also try enabling the Multi-identifier profile merge.
This setting does not effect CSV imports
You cannot change a person’s email using a CSV import unless you use the Update setting and identify people by their cio_id.
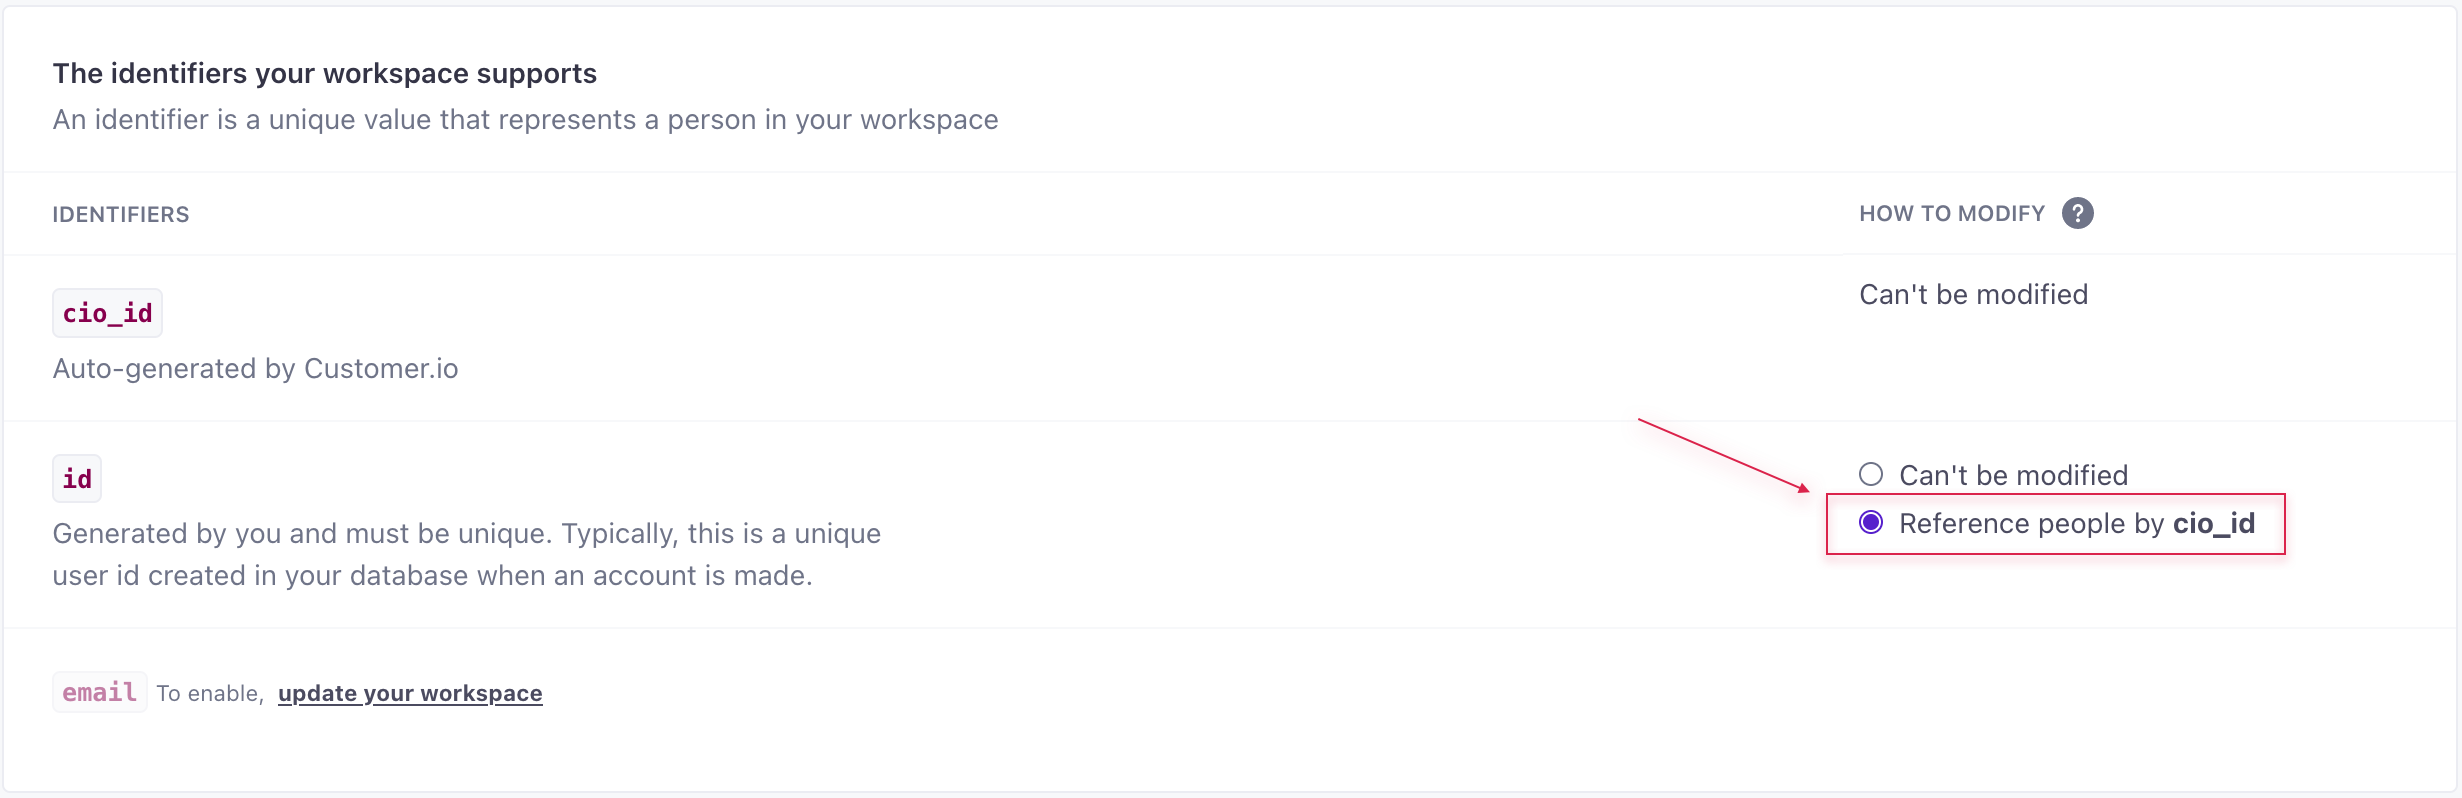
Allow updates to IDs
If your workspace uses email as an identifierThe attributes you use to add, modify, and target people. Each unique identifier value represents an individual person in your workspace., you can change a person’s id using cio_id.
But, if your workspace does not use email as an identifier, you have to change the default setting so ids are modifiable:
- Go to Workspace Settings and click General Workspace Settings.
- Next to
id, select Reference people by cio_id.
Message sending
Under “How do you want to send messages?” you can choose from:
- Send messages normally
- Send emails to a test address - note that this only applies to emails
- Never send messages
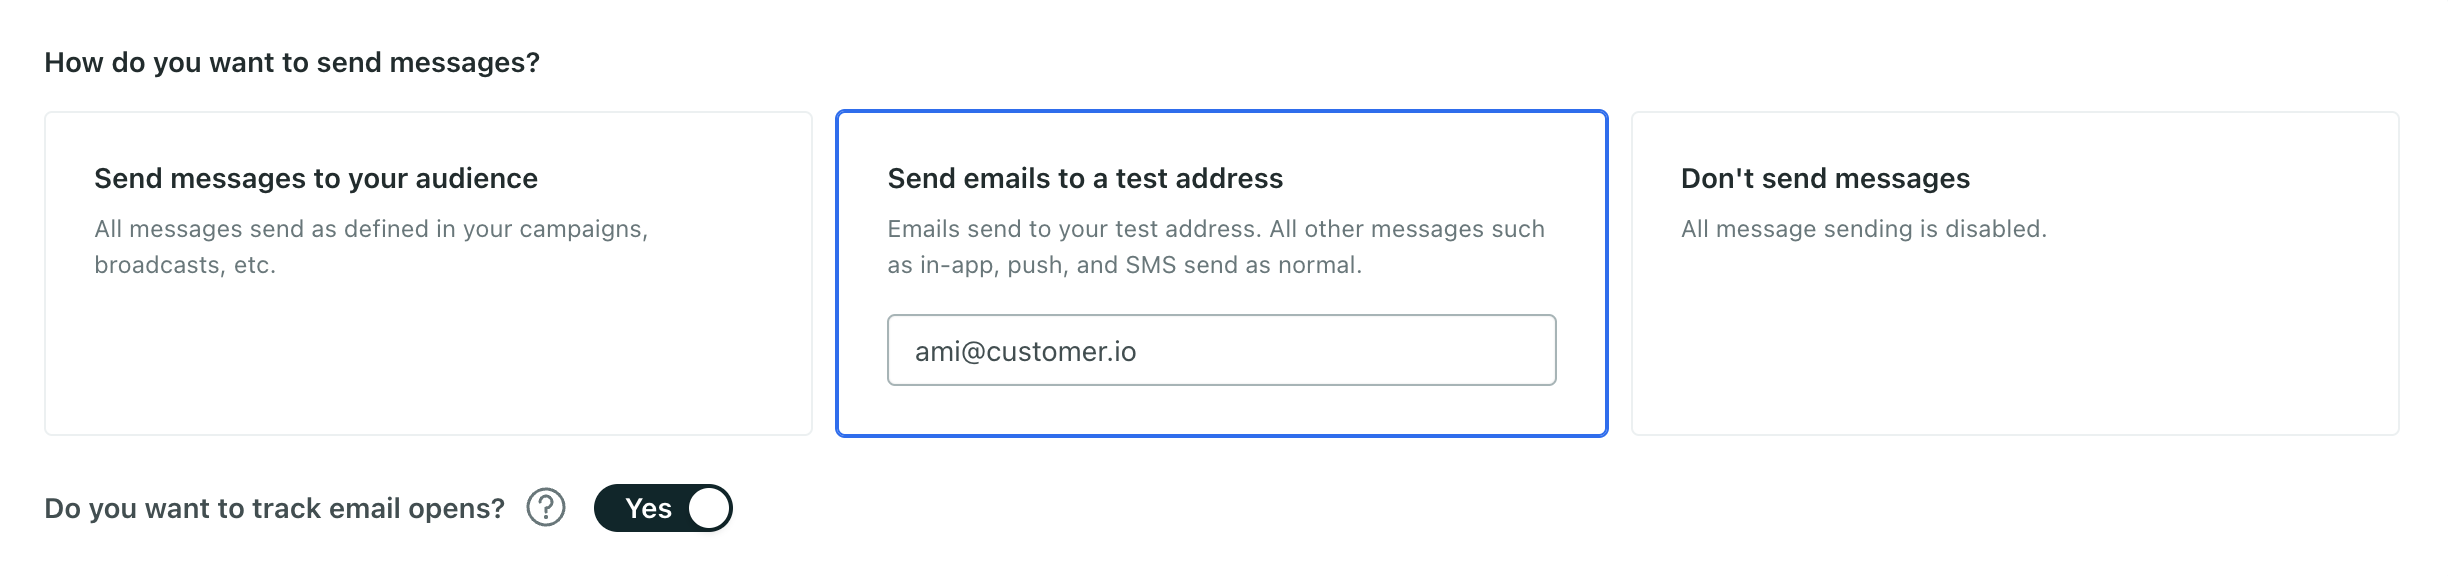
When you first sign up for Customer.io, your account will send emails to a test address. This lets you send emails to a person in your account without verifying a domain so you can test your emails right away. You can see who will receive test emails in the top-left of your workspace. If you’ve integrated with other channels like in-app, those will send normally when “send emails to a test address” is selected.

By default, we’ll send test emails to the address that created the account. Account Admins and Workspace Admins can select another team member to receive test emails from the dropdown. The address for “send emails to a test address” is the same for all team members in the workspace; it’s not unique to each team member.
After you verify your domain and are ready to send emails, click Send messages normally. Unless you are explicitly sending a test email, this setting ensures your messages send to actual recipients, as specified in the To field of your message.
You can also choose to Never send messages of any type (email, in-app, etc.). This disables all message delivery and ensures no one can receive a message from any campaign, broadcast, or transactional message. You might choose this option for test workspaces.
Disable open tracking
Open tracking relies on a tracking pixel—a small image—in your messages; when a user opens an email containing the tracking pixel, the image loads from a remote location and tells us that a user opened the message.
However, open tracking is not always reliable. In the interest of user privacy, Apple and the makers of other email clients have started providing options to prevent images like tracking pixels from loading when users open messages; this prevents us from tracking open events. In some cases, email clients and corporate firewalls immediately download images when a person receives an email, causing us to record an open events even if a person didn’t actually open the message.
You can go to Settings > Workspace Settings > General Workspace Settings to disable open tracking at the workspace level and prevent tracking pixels from being added to your emails entirely. This setting overrides the message-level Track opens and link clicks in this message setting. Disabling open tracking this way can help you both respect your audience’s privacy and prevent you from focusing on sometimes-unreliable open rates, as opposed to clicks or conversions.
When you disable open tracking, open metrics for emails may still appear in some charts or tables (in campaign metrics, etc), but will always show zero results.
Whether you continue to track opens or not, we recommend setting conversion goals for your messages and tracking link clicks as more reliable ways to determine the success of your messages and campaigns.
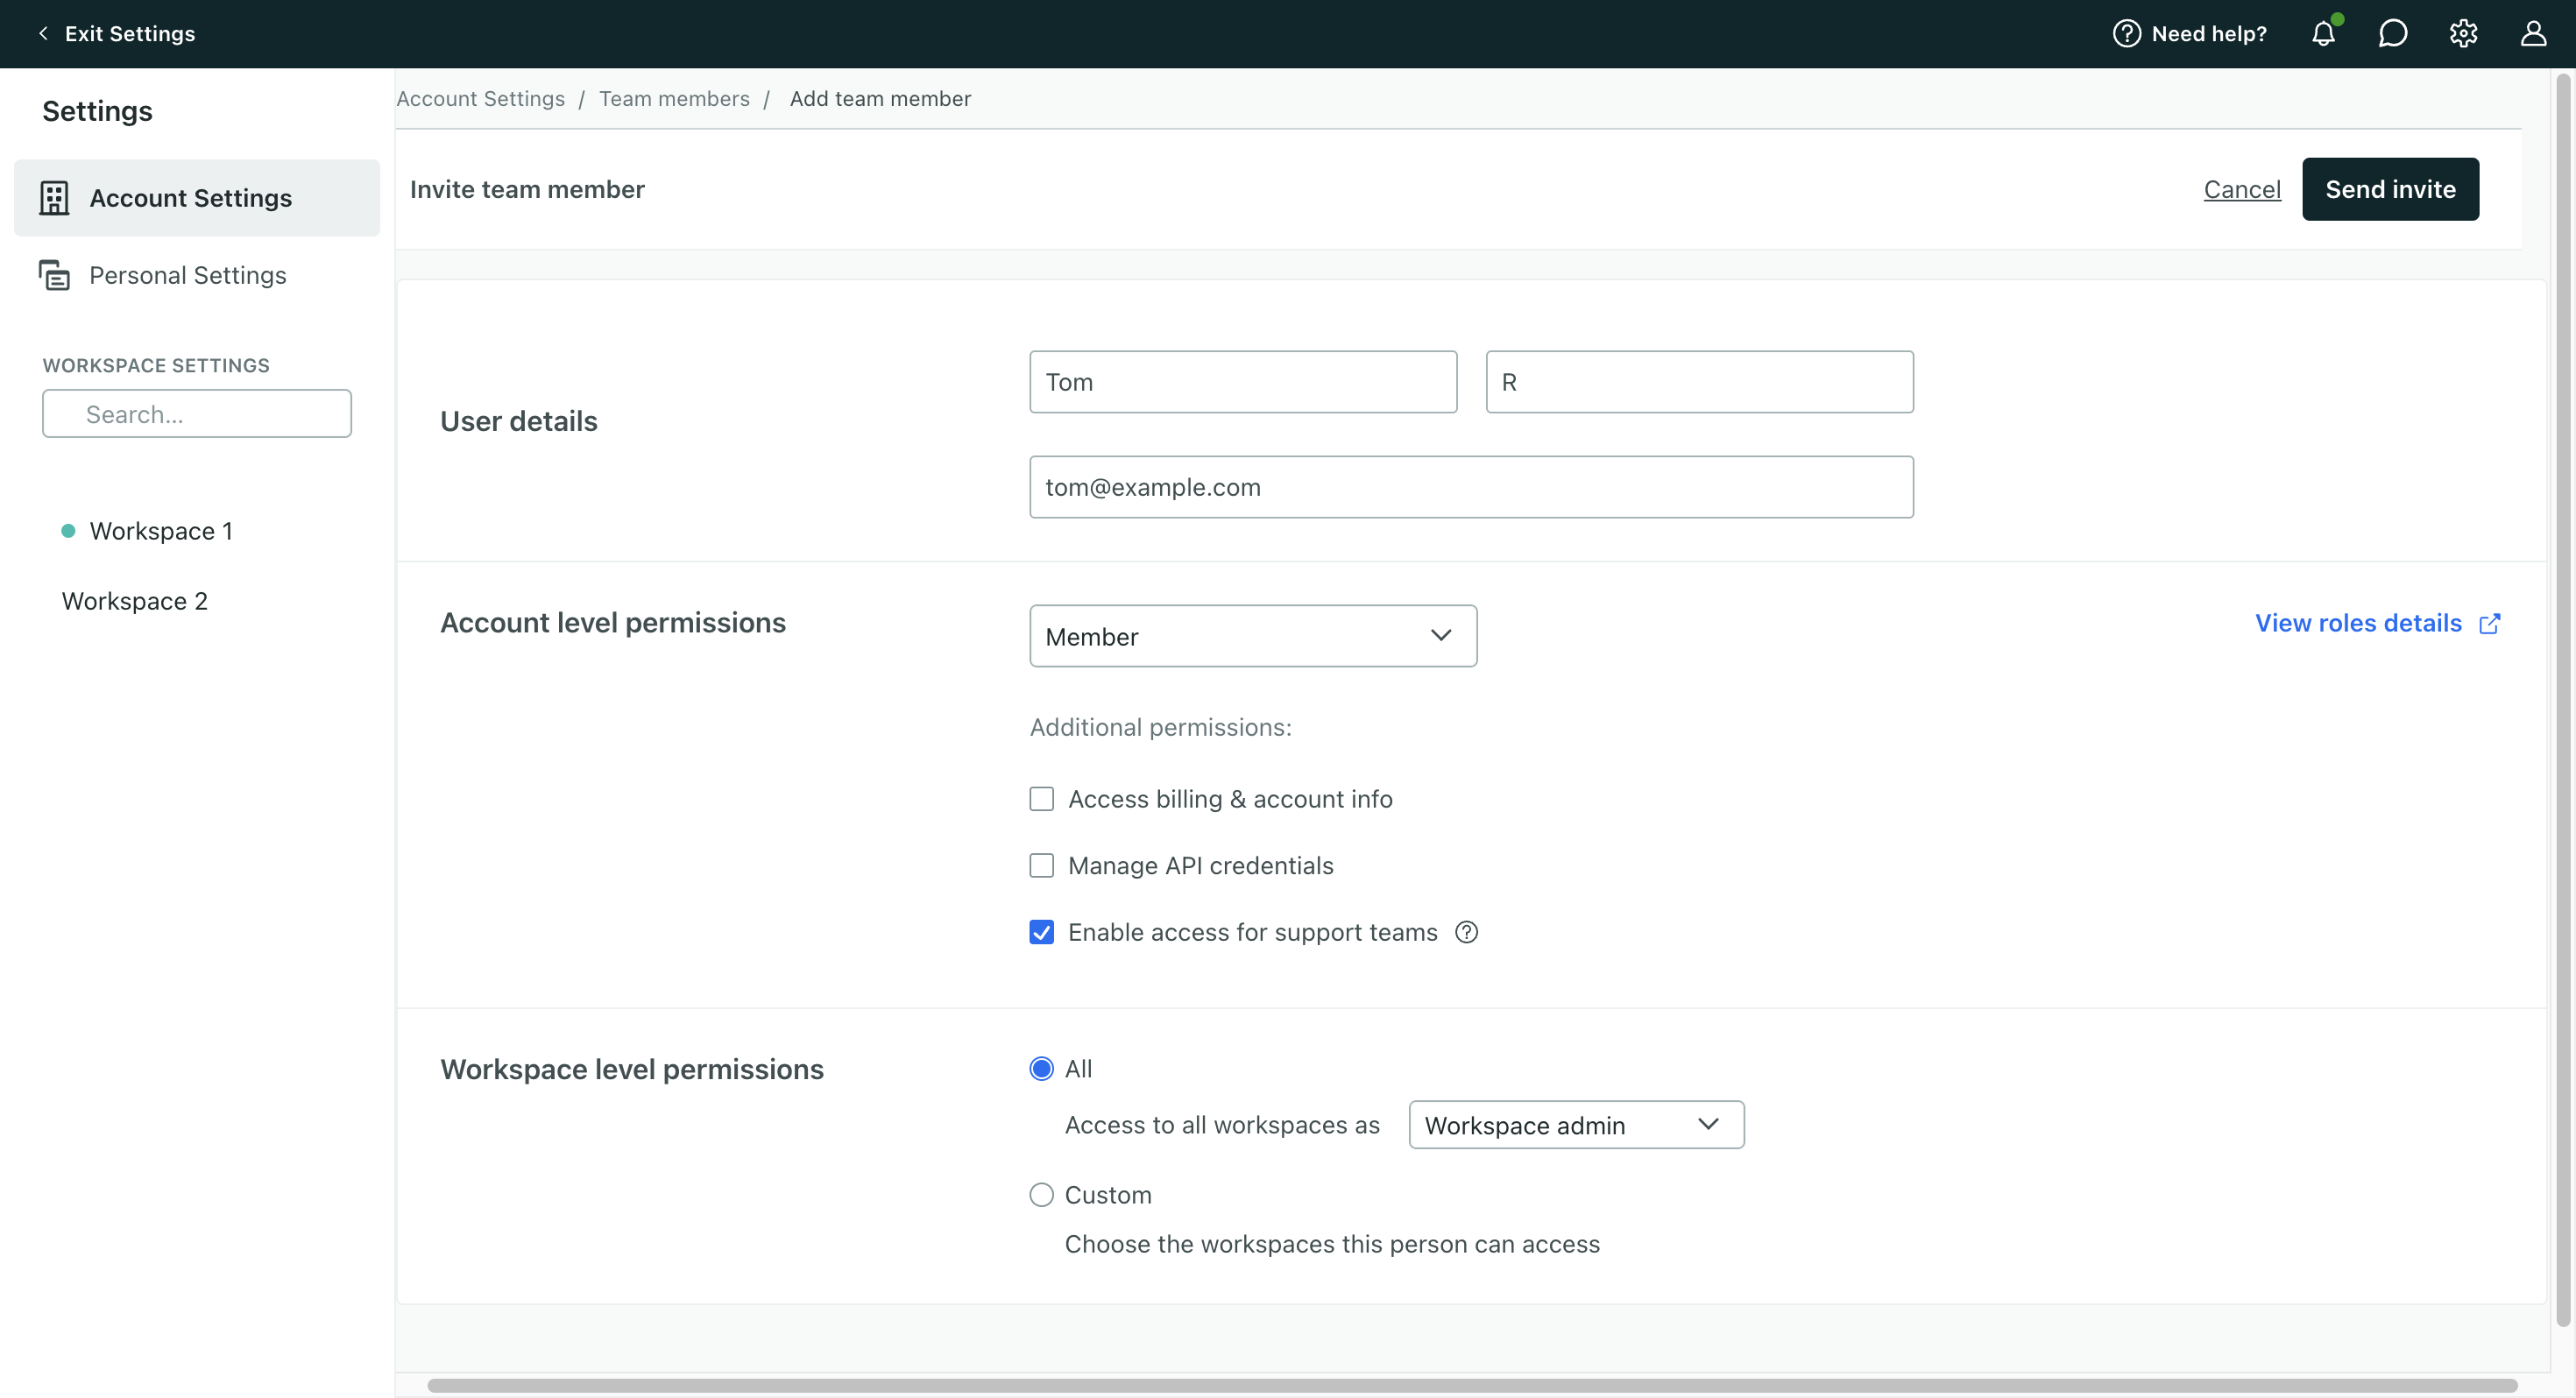
Assign workspace access
If you isolate workspaces by project, client, app, etc, you may want to limit who has access to each workspace. You assign access based on workspace, so your team members can have full access to one workspace and partial access to another.
Only Account Admins can manage access for team members. They can change access when:
- creating or editing a workspace
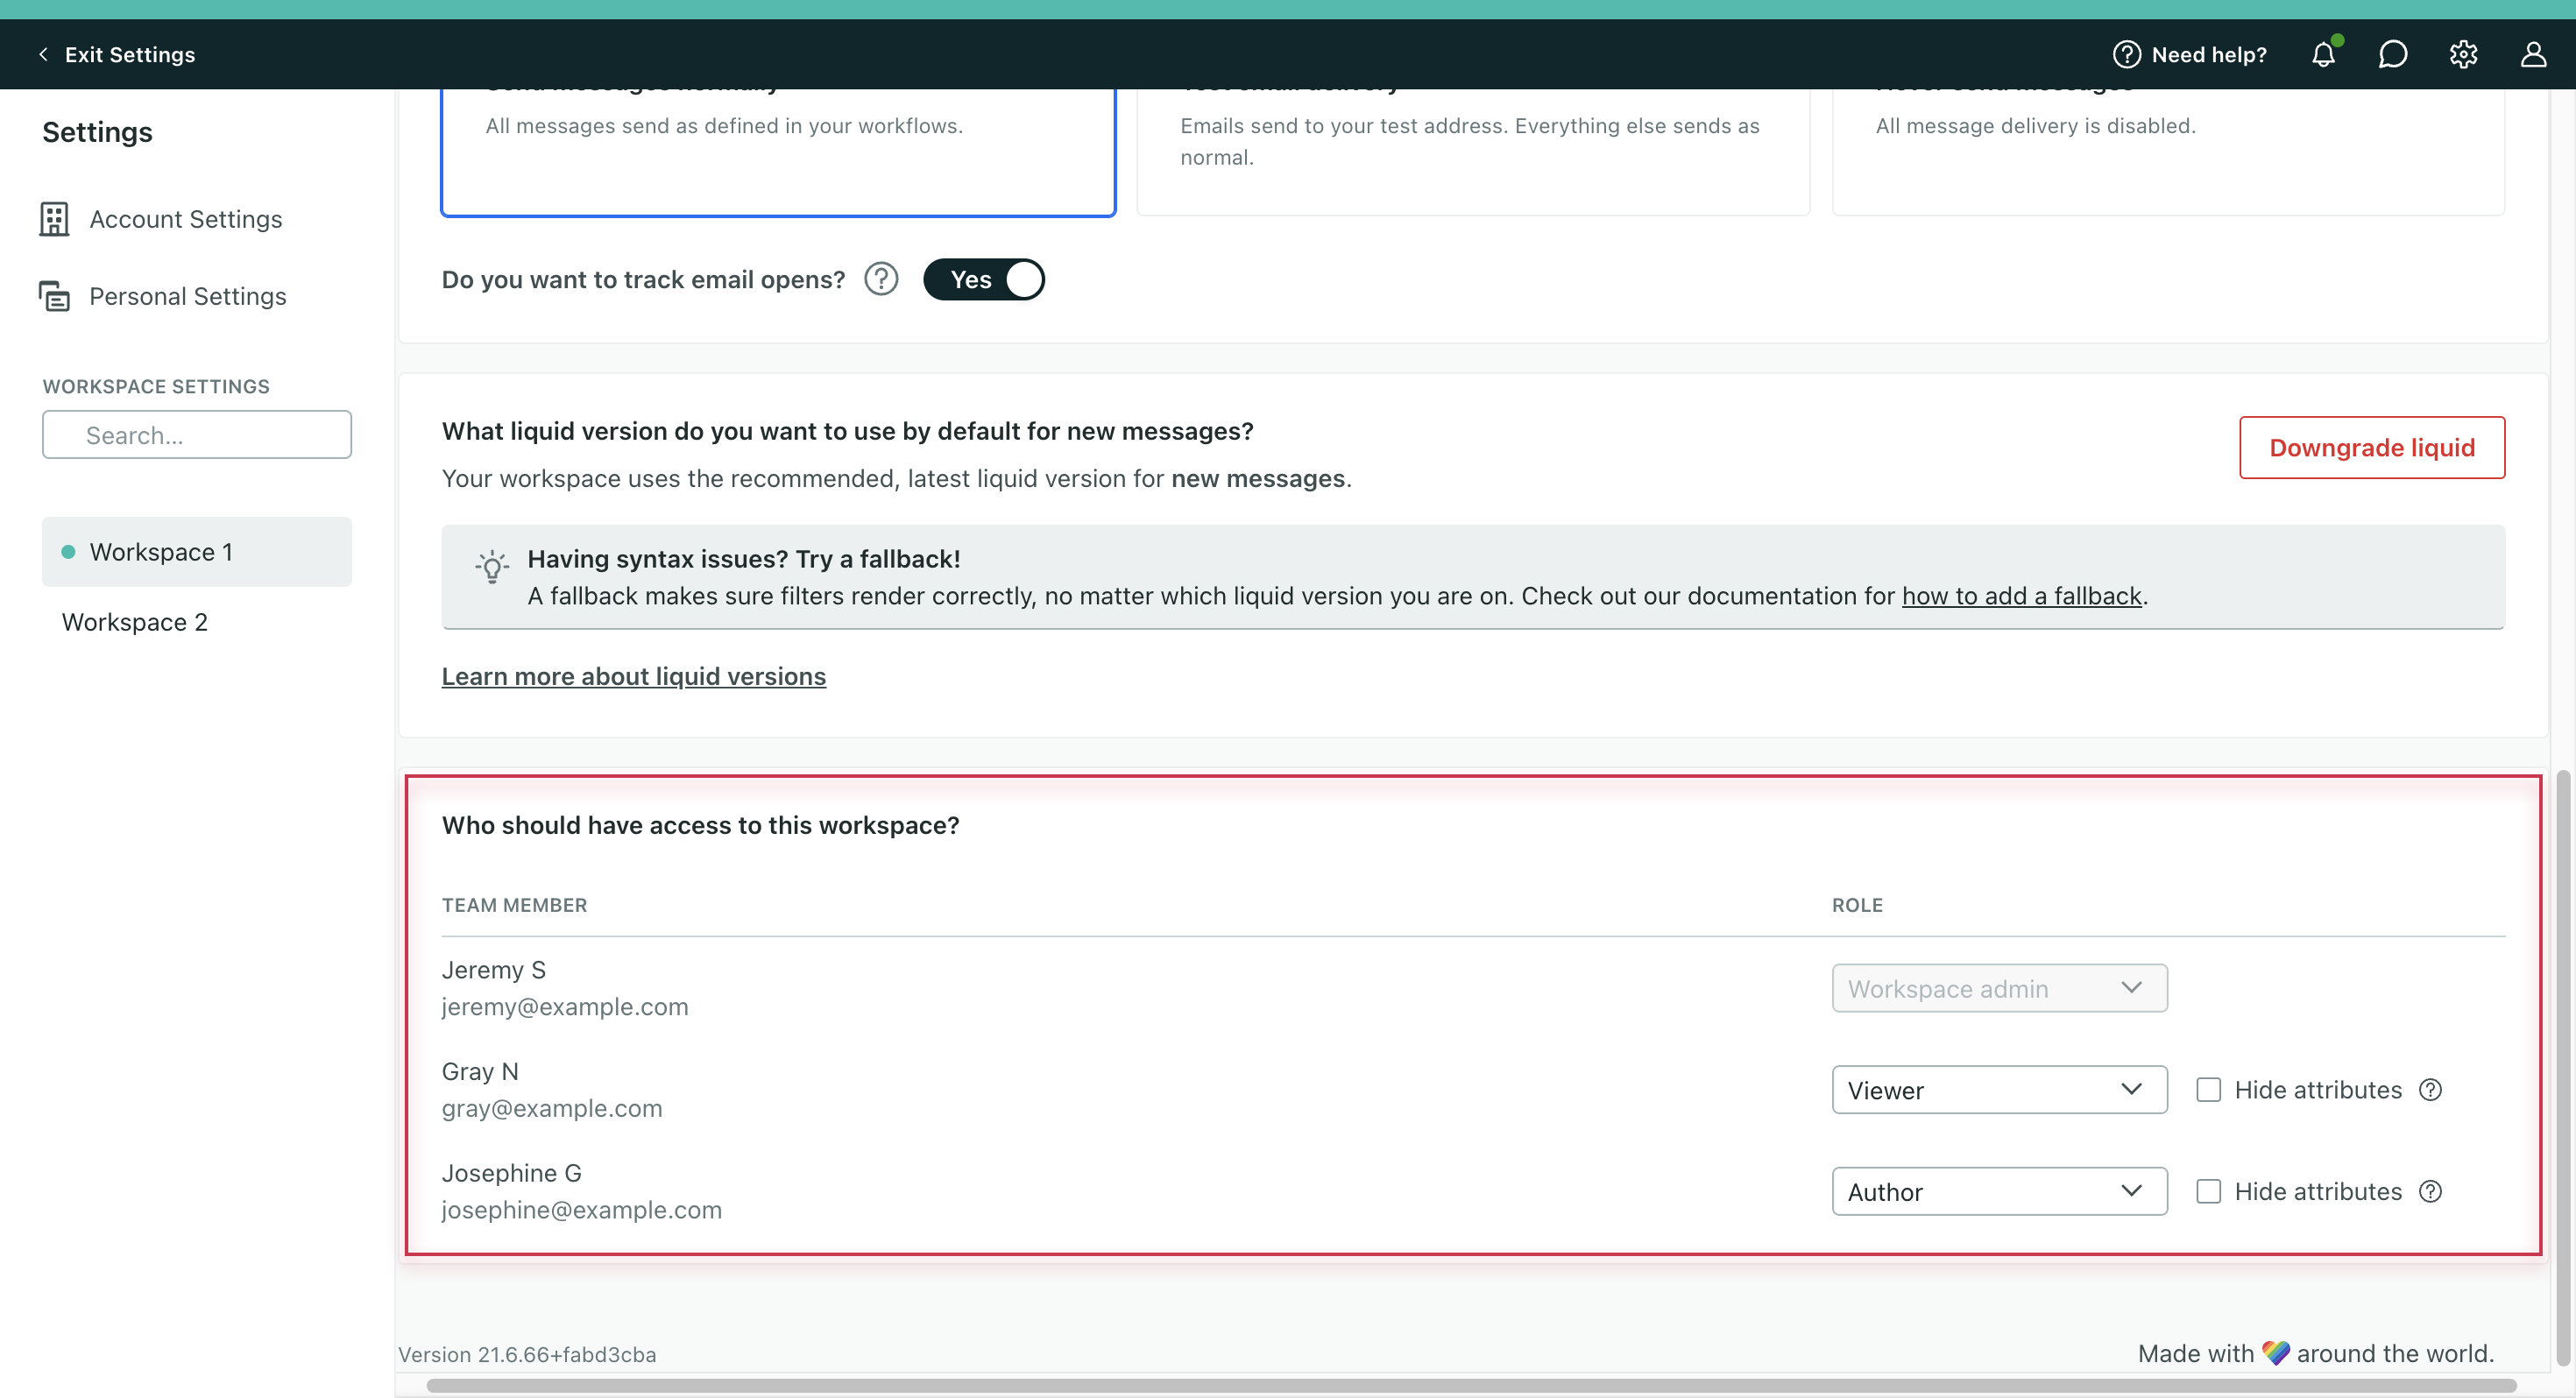
- adding or editing team members
Account Admins have access all workspaces in the account. You cannot disable an Account Admin’s access to a workspace.
FAQs
What data is shared across workspaces?
No information is shared between workspaces.
Workspaces are essentially separate instances of Customer.io. Each workspace has its own people, campaigns, metrics, and other data.
How is billing calculated across workspaces?
We bill based on people, objects, emails sent, and Data Pipelines API calls across all your workspaces. Check out How We Bill for more info.
Is there any way of sharing data between workspaces?
Workspaces are completely separate instances of Customer.io, each with their own people and associated data. This prevents sharing information and potentially messaging the wrong person. However, you can copy workflow actions across workspaces.
What about testing? Are workspaces a way to do that?
Although not designed specifically for testing, workspaces can be used to set up testing/staging environments. Each workspace is assigned its own set of API keys and are completely separate from your other workspaces. Once you’re ready to migrate a Campaign or message from test to production, you can copy entire workflow actions from one Campaign to another across workspaces.

