API-Triggered Broadcasts
An API-triggered broadcast is like an event-triggered campaign, but the event—the trigger—represents a group of recipients.
How it works
API-triggered broadcasts provide a way to send a one-to-many campaign on demand. It may help to think of API-triggered broadcasts like event-triggered campaigns, except the event comes from your backend integration and represents a group of people. For example, you might use an API-triggered broadcast to:
- Send news alerts to a group of people interested in a specific topic
- Alert users interested in an event when tickets go on sale
- Alert students when registration opens for a new online class
When you trigger a broadcast, you can set a custom set of recipients and custom data that you reference in your campaign with liquidA syntax that supports variables, letting you personalize messages for your audience. For example, if you want to reference a person’s first name, you might use the variable {{customer.first_name}}..
Try our Postman collection!
You can use our Postman collection and associated environment to get started with the Customer.io API. Our environment is based on our US endpoints; if you’re in our EU region, you’ll need to add -eu to track_api_url and app_api_url variables.
You cannot trigger a broadcast more than once every 10 seconds.
This is because broadcasts are meant for a wide audience of people per trigger. They’re not intended for one-to-one interactions with individual people. You can still personalize messages in API-triggered broadcasts with liquid, for instance, but you should not use them for personalized, transactional messages like password reset requests, receipts, and shipping confirmations. For those, use Transactional messages.
Set up an API-triggered broadcast
The steps to set up an API-triggered broadcast are fairly simple, but each step includes settings that we’ve explained in the sections below.
- Go to Broadcasts and click Create Broadcast.
- Pick Messages triggered via API.
- (Optional) Set your Recipients; you can always override a list of manual recipients when you trigger your message via the API.
- Set a Goal and exit conditions for your newsletter.
- Set up your Workflow.
- Review and activate your broadcast.
- Trigger your broadcast.
Define your recipients
You don’t need to define a set of recipients for an API-triggered broadcast because you can set your recipients in your trigger.
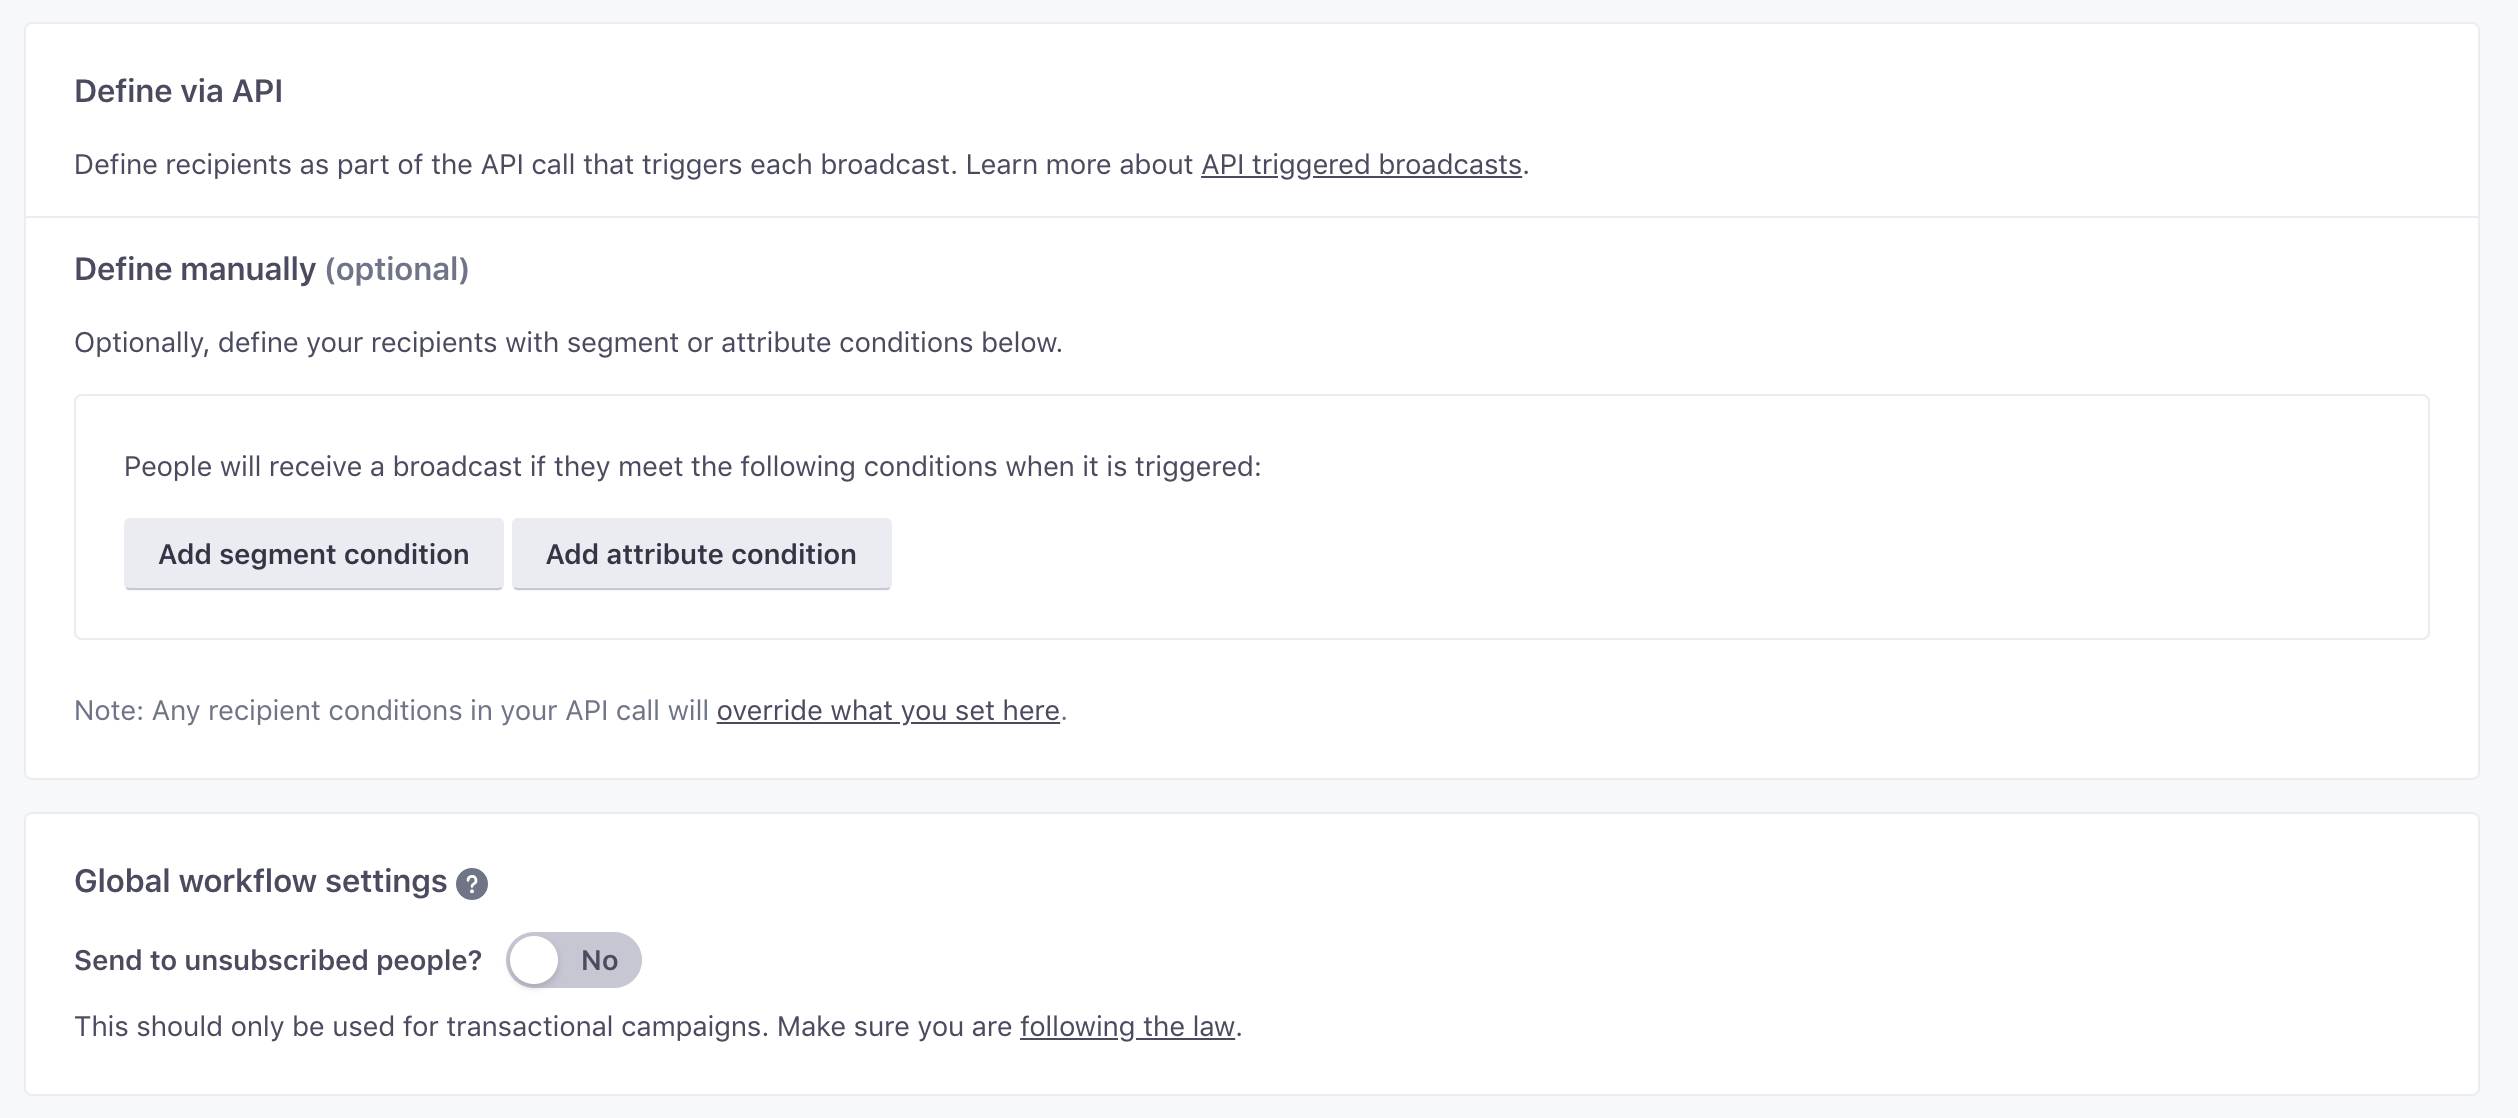
But, you might want to set a default set of recipients if your broadcast always goes to people who meet the same conditions or you know the most common characteristics of people who’ll receive your broadcast.
Recipients that you pass in your API call to trigger messages override the audience that you set in the UI.
Define recipients in your API call
When you trigger a broadcast, you can define recipients using a complex set of filters. We’ve provided some examples below. You can see the exact specification for recipients in our API documentation.
You can nest and and or filters`
Nest filters to create complex filters where you have different sets of and and or criteria that a person must meet to receive your broadcast.
The “And” filter is an array of objects, where each object represents criteria for your audience. Each object must be true for a person to receive the broadcast. You can nest other compound filters—or or not—to set up complex audience conditions.
{
  "recipients": {
    "and": [
      {
        "attribute": {
          "field": "first_name",
          "operator": "exists"
        }
      },
      {
        "attribute": {
          "field": "likes_baseball",
          "operator": "eq",
          "value": true
        }
      }
    ]
  }
}
-
-
- field stringRequired The name of the attribute you want to filter against.
- operator stringRequired Determine how to evaluate criteria against the field—
existsreturns results if a person in the audience has the attribute;eqreturns results if the audience has the attribute and the attribute has thevalueyou specify.Accepted values:
eq,exists - value stringThe value you want to match for this attribute. You must include a value if you use the
eqoperator.
- notReturns results if a condition is false. While and/or support an array of items,
notsupports a single filter object.- and array of [ objects ]Match all conditions to return results.
- or array of [ objects ]Returns results matching any conditions.
-
- id integerThe ID of the segment you want to return people from.
-
The “Or” filter is an array of objects where each object represents criteria for your audience. At least one object in the array must be true for a person to receive the broadcast. You can nest other compound filters—and or not—to set up complex audience conditions.
{
  "recipients": {
    "or": [
      {
        "segment": {
          "id": 4
        }
      },
      {
        "attribute": {
          "field": "likes_baseball",
          "operator": "eq",
          "value": true
        }
      }
    ]
  }
}
-
- and array of [ objects ]Returns results matching all conditions.
-
- field stringRequired The name of the attribute you want to filter against.
- operator stringRequired Determine how to evaluate criteria against the field—
existsreturns results if a person in the audience has the attribute;eqreturns results if the audience has the attribute and the attribute has thevalueyou specify.Accepted values:
eq,exists - value stringThe value you want to match for this attribute. You must include a value if you use the
eqoperator.
- notReturns results if a condition is false. While and/or support an array of items,
notsupports a single filter object.- and array of [ objects ]Match all conditions to return results.
-
- id integerThe ID of the segment you want to return people from.
A condition that, if true, excludes people from your audience. The not filter is an object, but can take a complex filter, like and or or.
{
  "recipients": {
    "not": {
      "and": [
        {
          "segment": {
            "id": 3
          }
        },
        {
          "attribute": {
            "field": "likes_baseball",
            "operator": "eq",
            "value": true
          }
        }
      ]
    }
  }
}
-
- and array of [ objects ]Returns results matching all conditions.
-
- field stringRequired The name of the attribute you want to filter against.
- operator stringRequired Determine how to evaluate criteria against the field—
existsreturns results if a person in the audience has the attribute;eqreturns results if the audience has the attribute and the attribute has thevalueyou specify.Accepted values:
eq,exists - value stringThe value you want to match for this attribute. You must include a value if you use the
eqoperator.
- notReturns results if a condition is false. While and/or support an array of items,
notsupports a single filter object.- and array of [ objects ]Match all conditions to return results.
- or array of [ objects ]Returns results matching any conditions.
-
- id integerThe ID of the segment you want to return people from.
A ID of a segment that people must belong to.
{
  "recipients": {
    "segment": {
      "id": 3
    }
  }
}
- id integerThe ID of the segment you want to return people from.
Filter your audience based on an attribute value. In this case, you’ll provide:
field: the name of the attributeoperator: One ofexists(true if a person has a value) oreq(true if a person matches avalue).value: Required if you use theeqoperator. The value a person’s attribute must equal (eq) for the condition to be true.
{
  "recipients": {
    "attribute": {
      "field": "likes_baseball",
      "operator": "eq",
      "value": true
    }
  }
}
- field stringRequired The name of the attribute you want to filter against.
- operator stringRequired Determine how to evaluate criteria against the field—
existsreturns results if a person in the audience has the attribute;eqreturns results if the audience has the attribute and the attribute has thevalueyou specify.Accepted values:
eq,exists - value stringThe value you want to match for this attribute. You must include a value if you use the
eqoperator.
Goal & Exit
You can set up a conversion goal to track the success of messages and journeys based on whether or not a person performs an event, enters a segment, or exits a segment after they receive a message from your broadcast.
If a person performs your goal criteria within a configurable time frame after they receive a message in your workflow, we’ll mark the messageThe instance of a message sent to a person. When you set up a message, you determine an audience for your message. Each individual “send”—the version of a message sent to a single member of your audience—is a delivery. and journeyA person or data object’s path through your campaign. converted.
Goals help you determine the success of your broadcast, and follow conversion rates over time to try and improve your messaging strategies. See Conversion goals and exit criteria for more information about conversions.
We track conversions for the following message/delivery types:
| Conversions attributed | Conversions not attributed |
|---|---|
| Slack Message | |
| Twilio SMS | Create or update person action |
| Customer.io Push Notifications | |
| Customer.io In-app Messages | |
| Webhooks1 |
Slack and Create or update person actions are often internal or used for analytics purposes; they don’t always send messages to end-users. For that reason, we don’t attach conversions to them. You can enable webhook conversions on individual webhook actions.
Set up your workflow
The workflow defines the journey for people who receive the broadcast—the messages they receive and the actionsA block in a campaign workflow—like a message, delay, or attribute change. you perform. API Triggered Broadcasts perform all actions in the workflow at the same time, so you can’t use delays or time windows in your workflow.
You can, however, send multiple messages if you want, or add additional actions like updating people’s attributes, sending events, and so on.
Review & activate your broadcast
This is the final step of the broadcast creation process. It provides an overview of the entire broadcast, so you can make sure that your broadcast is set up the way you want it. We apply a Needs fixing label to anything that prevents you from activating your broadcast.
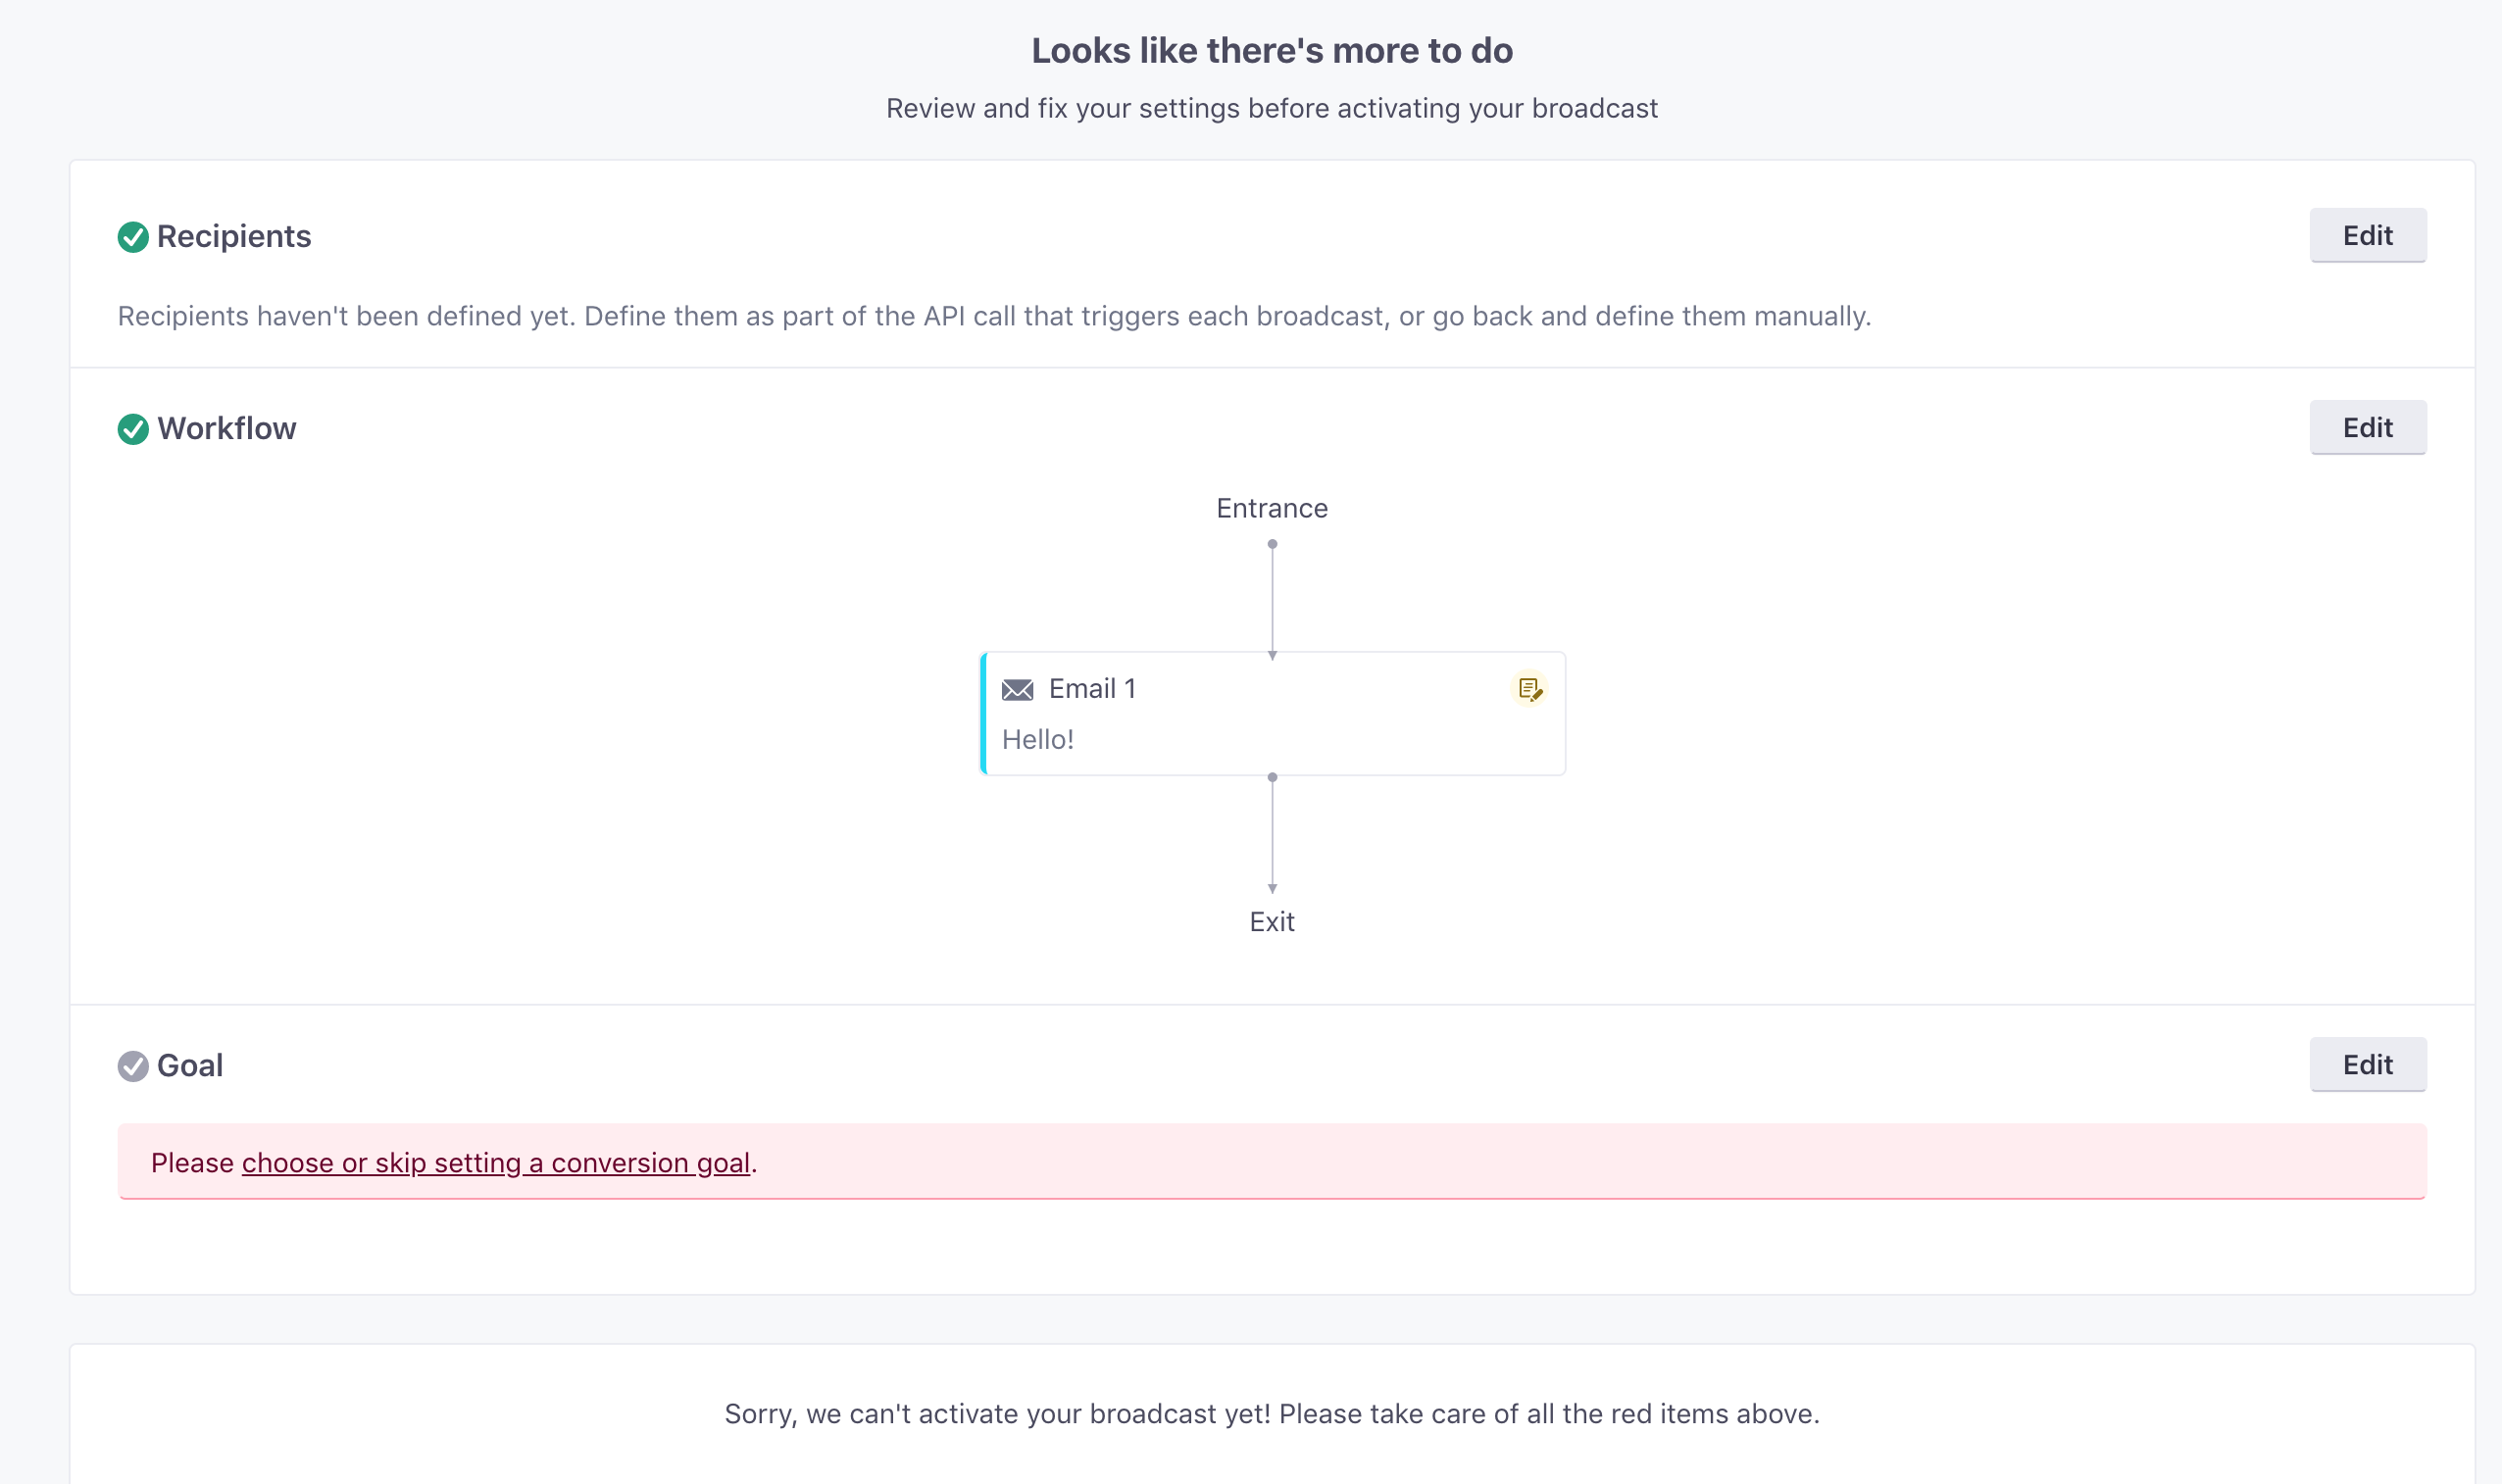
If everything looks right, you can activate your broadcast! Curious about what happens when you modify the recipients or messages in active broadcasts? We have answers.
It can take a few minutes for us to process changes to your snippet.
This means your customers may receive outdated content if, for instance, your campaign is active, you update a snippet in an email, then 30 seconds later we send that email. This could also happen if the message is at the beginning of your workflow, you update a snippet in the message, then immediately activate a campaign or trigger a broadcast, newsletter, or transactional message that contains it.
Trigger your broadcast
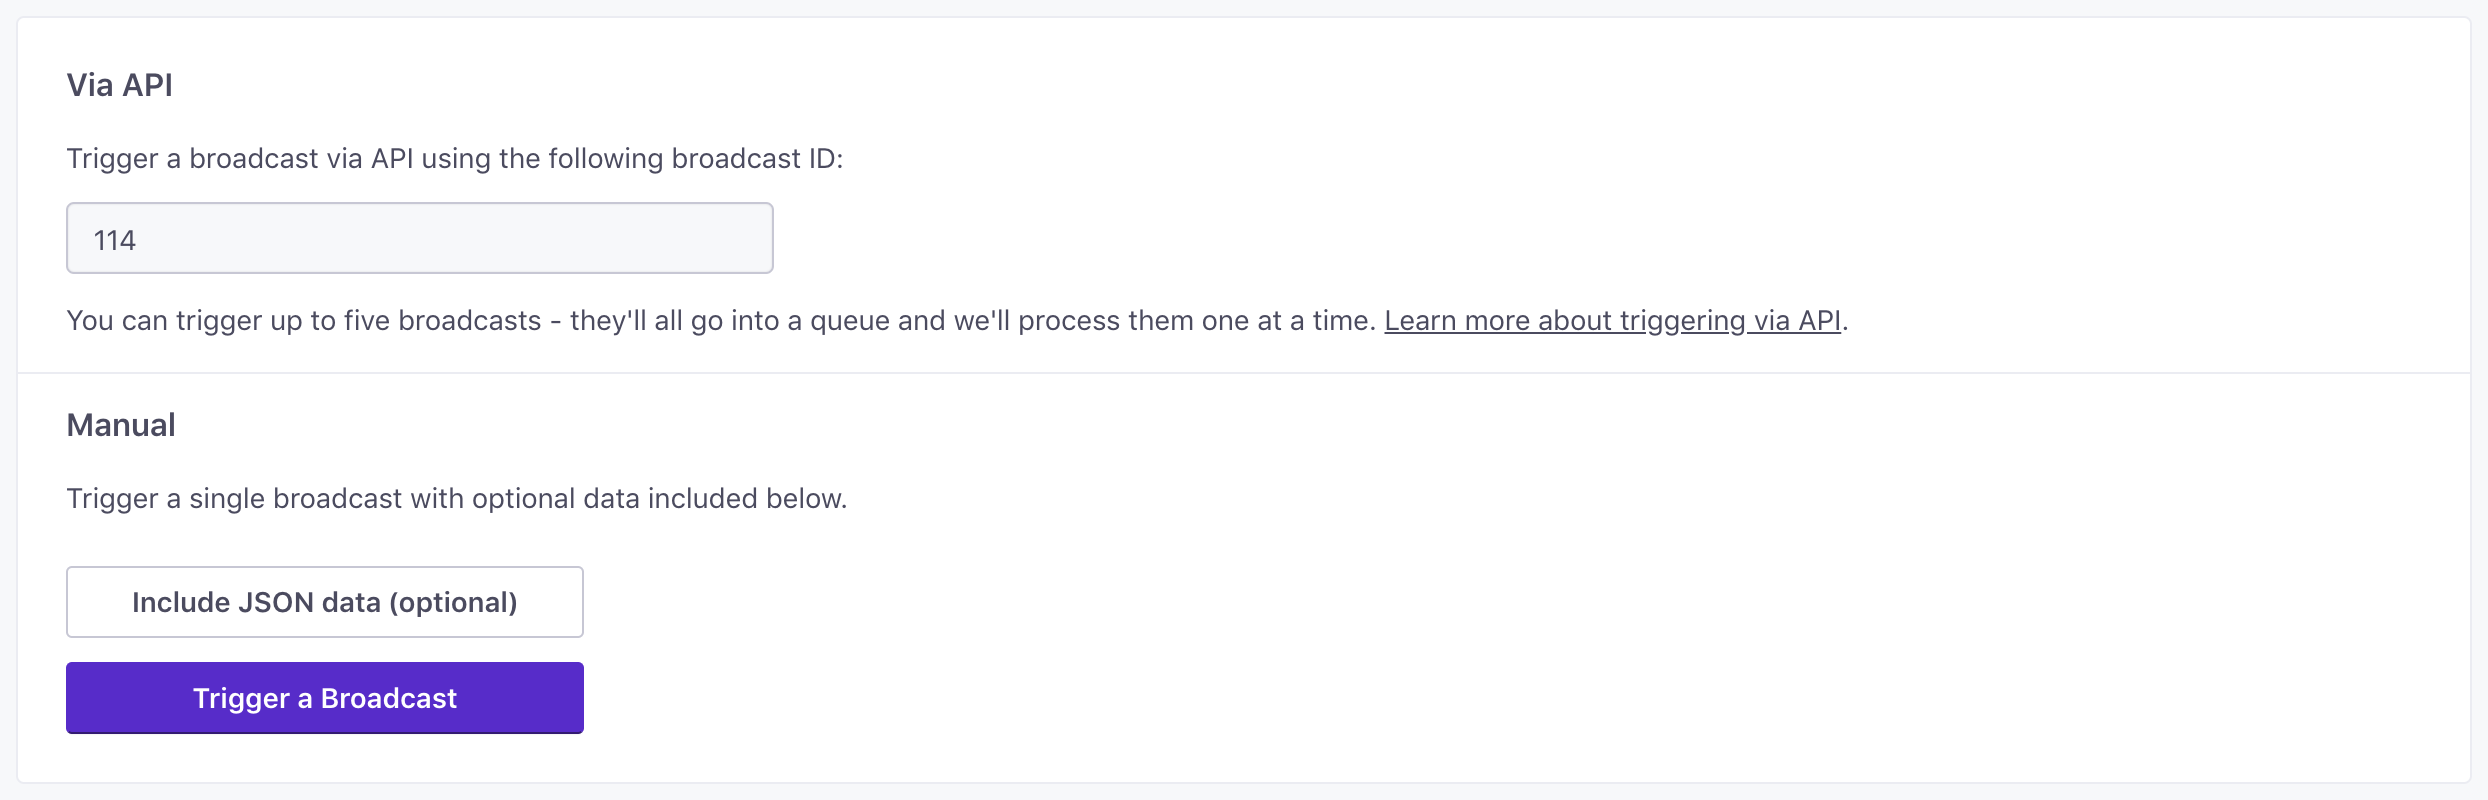
After you activate your broadcast, we’ll send you to a page containing all the information you’ll need to trigger your broadcast.
For more comprehensive information on structuring your API calls, check out our API documentation or any of our client libraries. The following example is for our US region; if your account is in the EU, send your request to https://api-eu.customer.io
curl --request POST \
  --url https://api.customer.io/v1/campaigns/{your-broadcast-id-here}/triggers \
  --header 'Authorization: Bearer <your-bearer-token>' \
  --header 'content-type: application/json' \
  --data '{"recipients":{"segment":{"id":4}},"data":{"foo":"bar"}}'
You’ll enter the ID from your broadcast tab and your bearer token to trigger a broadcast. We’ve got a lot of details on data formatting, as well as different ways to trigger via the API.
If you define your recipients in the trigger, the people you set must already exist. An API-triggered broadcast cannot create new people. Using an ID or an email that doesn’t belong to a person in your workspace will produce errors.
Use custom data in your trigger
You can send custom data in your trigger using the data key. You can preview your sample data in our Composer preview.
{
  "data": {
    "headline": "Roadrunner spotted in Albuquerque!",
    "date": "January 24, 2018",
    "text": "We've received reports of a roadrunner in your immediate area! Head to your dashboard to view more information!"
  }
}
Use custom data for each recipient
You can send custom data for each member of your broadcast using per_user_data or data_file_url. You can match data to people by id or email. For example, using the example below, you could use {{trigger.voucher_code}} to provide a custom coupon or voucher for your individual broadcast recipients.
Go to our API docs and select User Maps under Request Body to learn more.
{
    "data": {
        "headline": "Roadrunner spotted in Albuquerque!",
        "date": 1511315635,
        "text": "We received reports of a roadrunner in your immediate area! Head to your dashboard to view more information!"
    },
    "per_user_data": [
        {"id":"wiley","data": {"voucher_code": "FESwYm"}},
        {"email":"road@runner.net","data": {"voucher_code": "cYm6XJ"}}
    ]
}
Go to our API docs and select Data file URL under Request Body to learn more.
{
    "data": {
        "headline": "Roadrunner spotted in Albuquerque!",
        "date": 1511315635,
        "text": "We received reports of a roadrunner in your immediate area! Head to your dashboard to view more information!"
    },
    "data_file_url": "https://myFile.example.com"
}
Trigger your broadcast manually
You can trigger your broadcast manually if you prefer. When you trigger a broadcast this way, we give you the opportunity to include any data you want to send as part of that broadcast in JSON format.
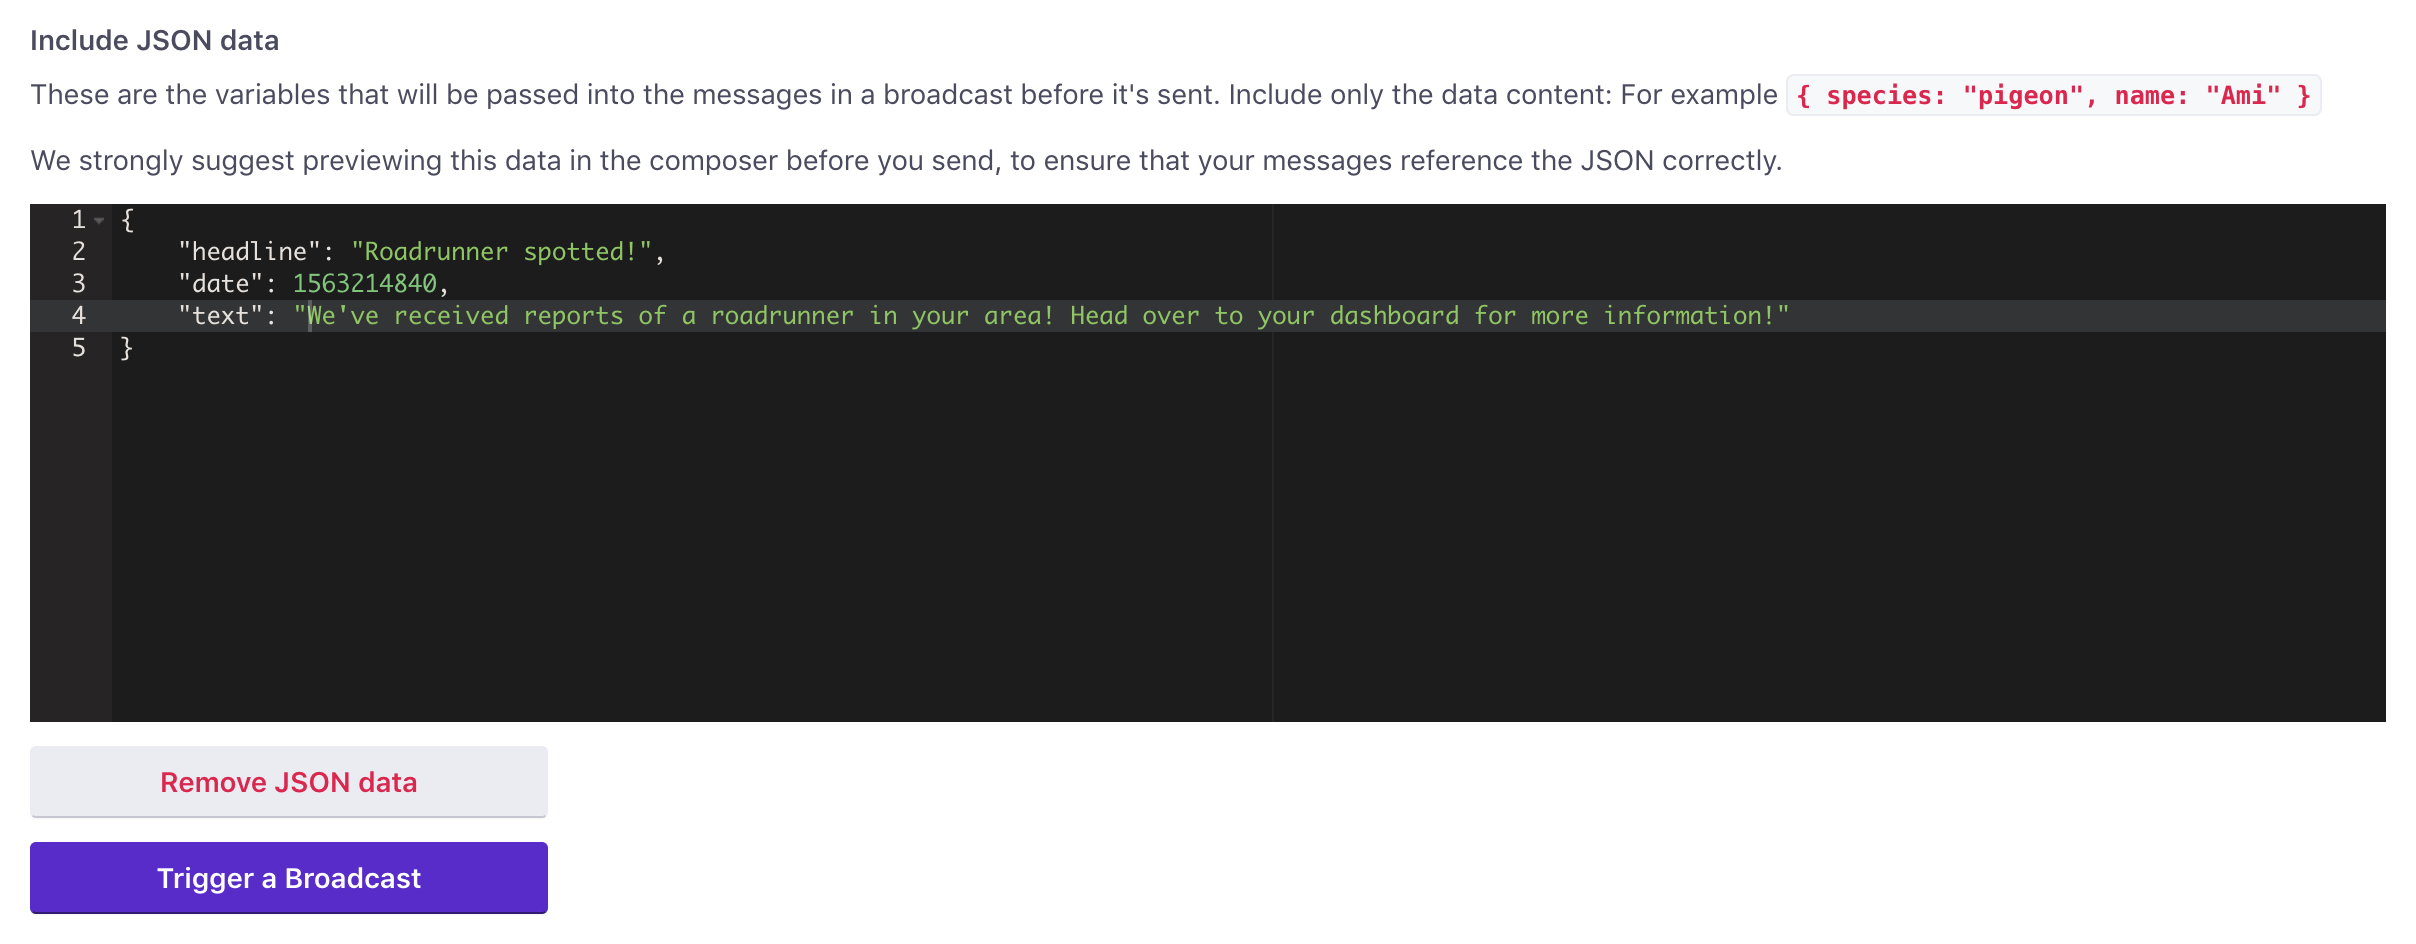
In general, we recommend that you preview your data in the composer first, because we can’t validate it for you!
We have a lot more information on how to trigger this in the API documentation, as well as our developer docs, but let us know if you find yourself struggling with it!
Tracking API Triggered Broadcasts
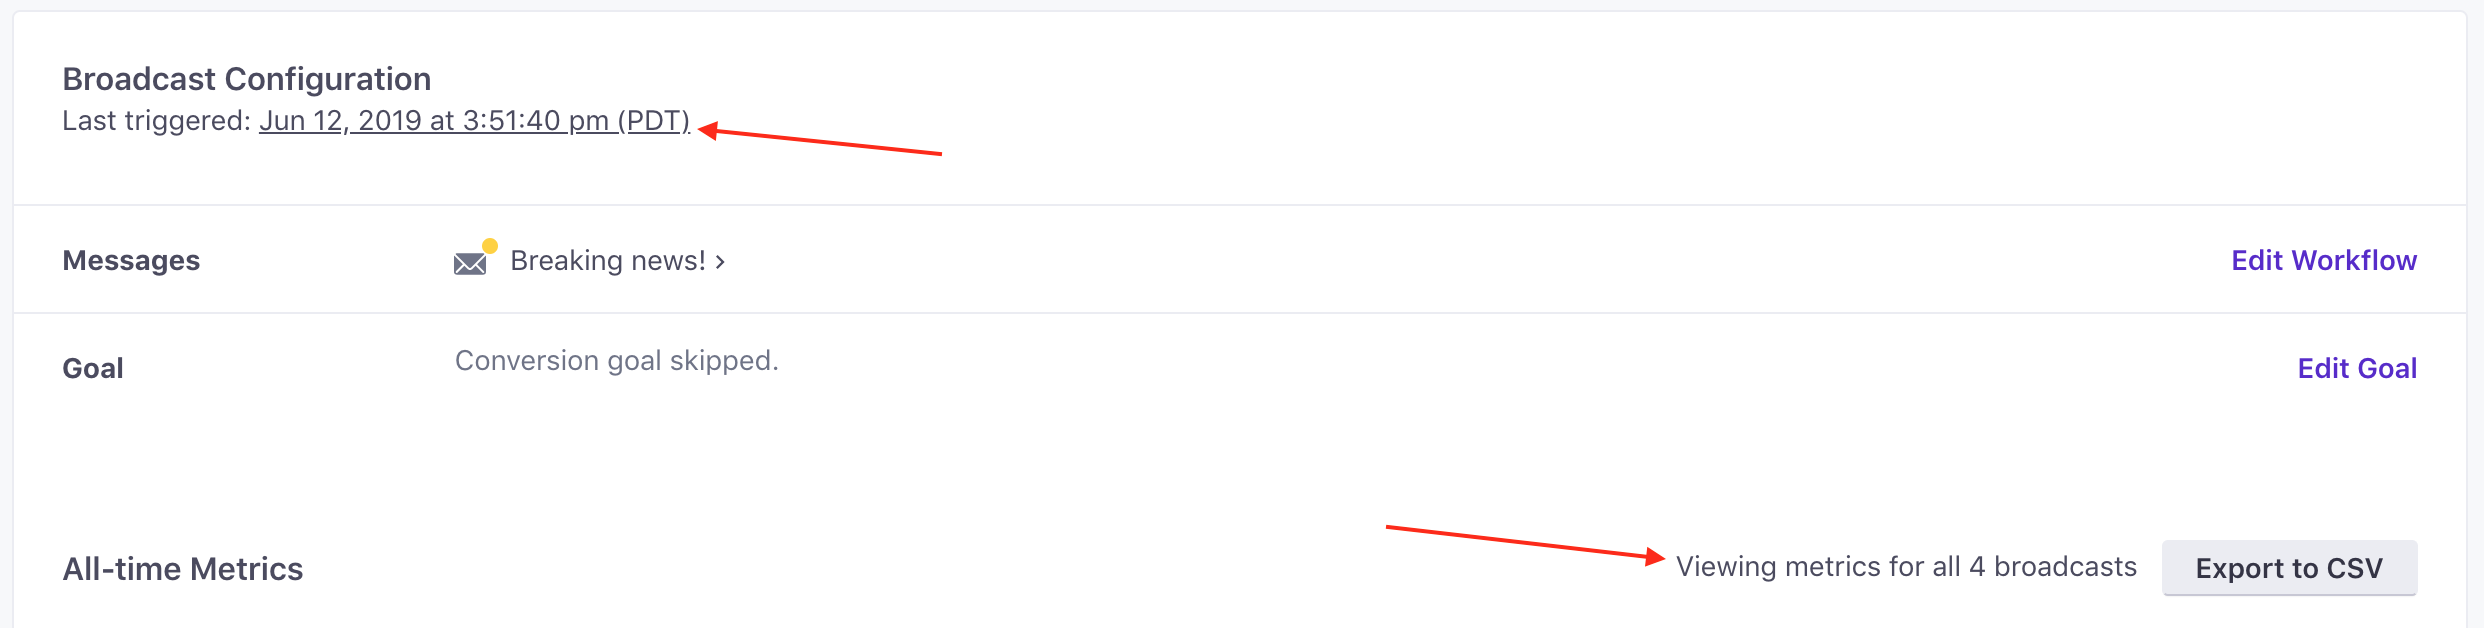
When you activate your broadcast and send a trigger, you can track metrics for your broadcast. Go to the broadcast overview page to see when you last triggered your broadcast. We’ll also show metrics across all sends:
In the Broadcasts tab, you’ll see a history of all the times you triggered the broadcast, and how many recipients there were for each trigger.
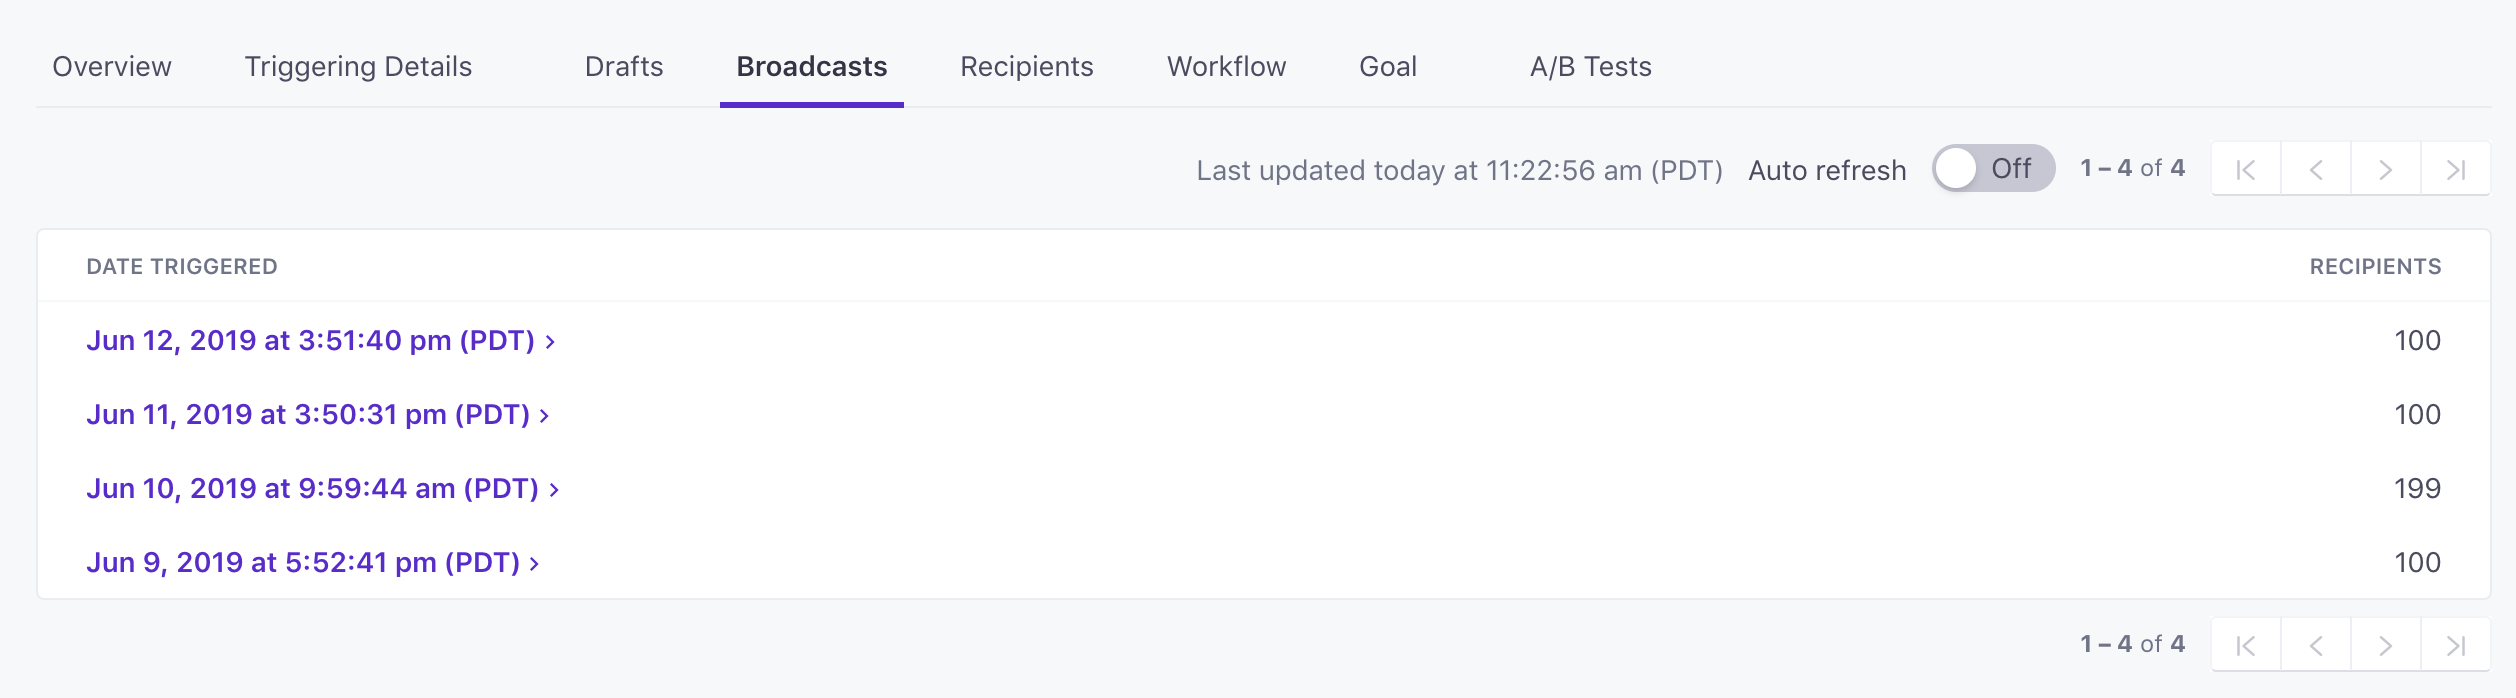
Click into an individual broadcast on the Send History tab to check its performance.
Copy broadcasts to another workspace
If you use similar messages in different workspaces, you can copy a broadcast or a newsletter to another workspace. Go to Broadcasts, find the newsletter or broadcast that you want to copy, and click Copy to. Then select the workspace you want to copy your items to, and click Continue.
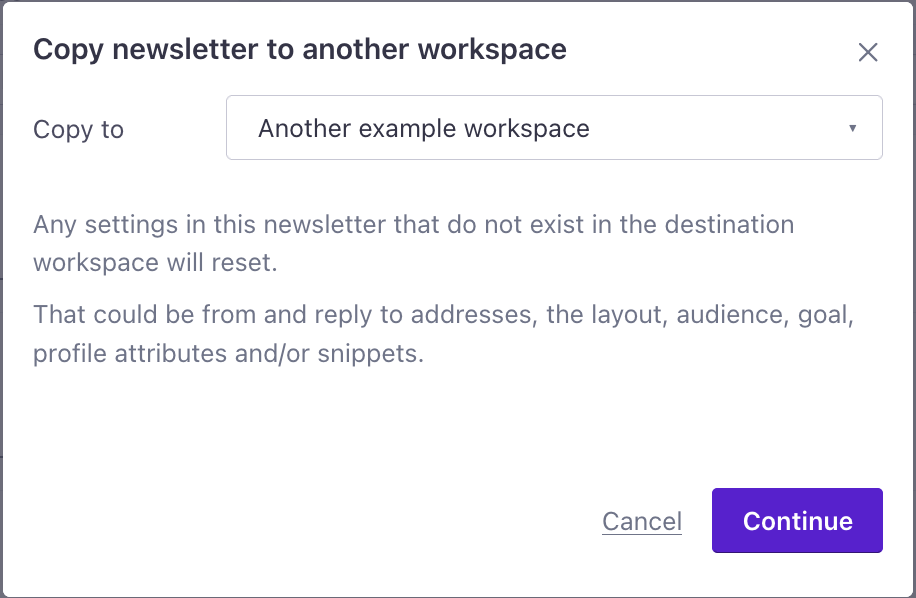
Note that when you copy newsletters and broadcasts, we’ll reset settings that don’t exist in the destination workspace—like layout, audience, etc. You should also check your liquidA syntax that supports variables, letting you personalize messages for your audience. For example, if you want to reference a person’s first name, you might use the variable {{customer.first_name}}. syntax in your destination workspace. You may not have the same attributes or other variables in your destination, so you may need to update liquid statements to make sure that your messages render and send properly.
Frequently Asked Questions
What does “queueing” mean?
When you send an API call to trigger a broadcast, we put it that broadcast in a queue. When it reaches the front, we start creating and sending messages or storing drafts depending on the sending behaviour you’ve selected. When it finishes, it drops out of the queue!
Per workspace, there is a queue limit of 5: while you can create as many API Triggered Broadcasts as you like, you can’t send us more than 5 triggers at one time. If you send us any more, we’ll show you an error, and you can retry the rest once they’re finished.
Why can’t I add delays and/or time windows? The idea behind API Triggered Broadcasts is to send one message to many people quickly or immediately, in response to an API call or a recent change. For that reason, we haven’t added delays or time windows to the first iteration of the feature. That said, if you have a specific use case that necessitates time windows or delays in your Broadcast, please let us know!
How many people can I message with a single API Triggered Broadcast call? There is no limit. You can pre-define a segment within Customer.io with the profiles you wish to message, or host a data file containing all profiles you wish to have messaged. For more on how hosting a data file works, click here.

