Localize messages in broadcasts and newsletters
How it works
After you’ve set your language attribute, you can add one or more languages to a newsletter or messages in a broadcast workflow.
When you send a localized message, people whose language attribute matches one of your message’s languages will receive the localized version of your message matching their language attribute. Anybody whose language attribute doesn’t match a language in your message receives the Default message.
When you set up a broadcast workflow, you’ll localize every message in your workflow individually.
message] --> D{Does a person's language
attribute match a message?} D -->|no| H[Person gets
Default message] D -->|yes, lang=es| E[Person gets
Spanish message] D -->|yes, lang=fr| F[Person gets
French message] D -->|yes, lang=de| G[Person gets
German message]
Set up a multi-language broadcast
You’ll repeat this process for each message in your broadcast workflow. The icon indicates that a message in your workflow contains multiple languages.
When you create a message with multiple languages, you should always begin by drafting your Default message. This is the message intended for anybody who doesn’t match another language and should represent your “template” for other languages.
If you plan to send email content to a translation vendor, you’ll want to set up and export your Default message first, and then add languages when you receive them. Check out our best practices for help exporting email messages for your translation vendor and the quickest way to add your multi-language content.
In your Workflow:
- Drag a message into your workflow then click it to view settings on the left.
- Set a Name for your message, and click Add Content.
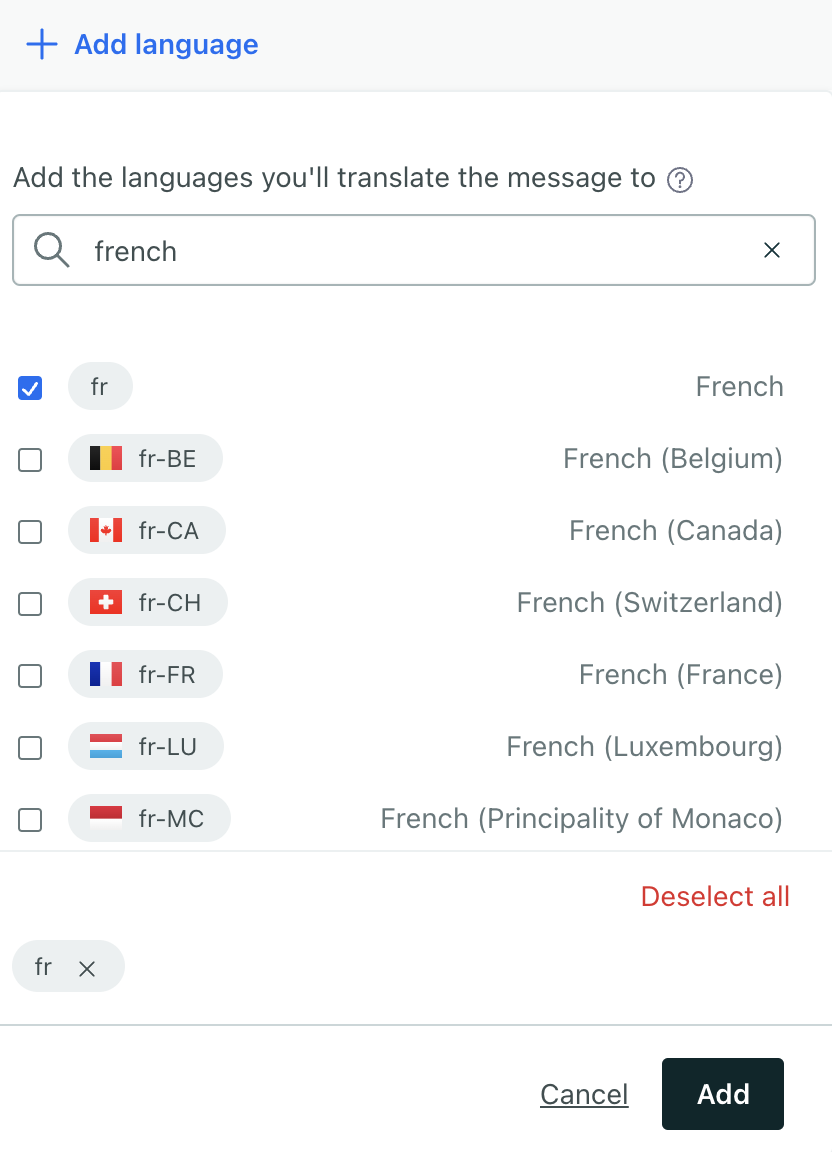
- Click Add language then check the languages you want. Click Add.
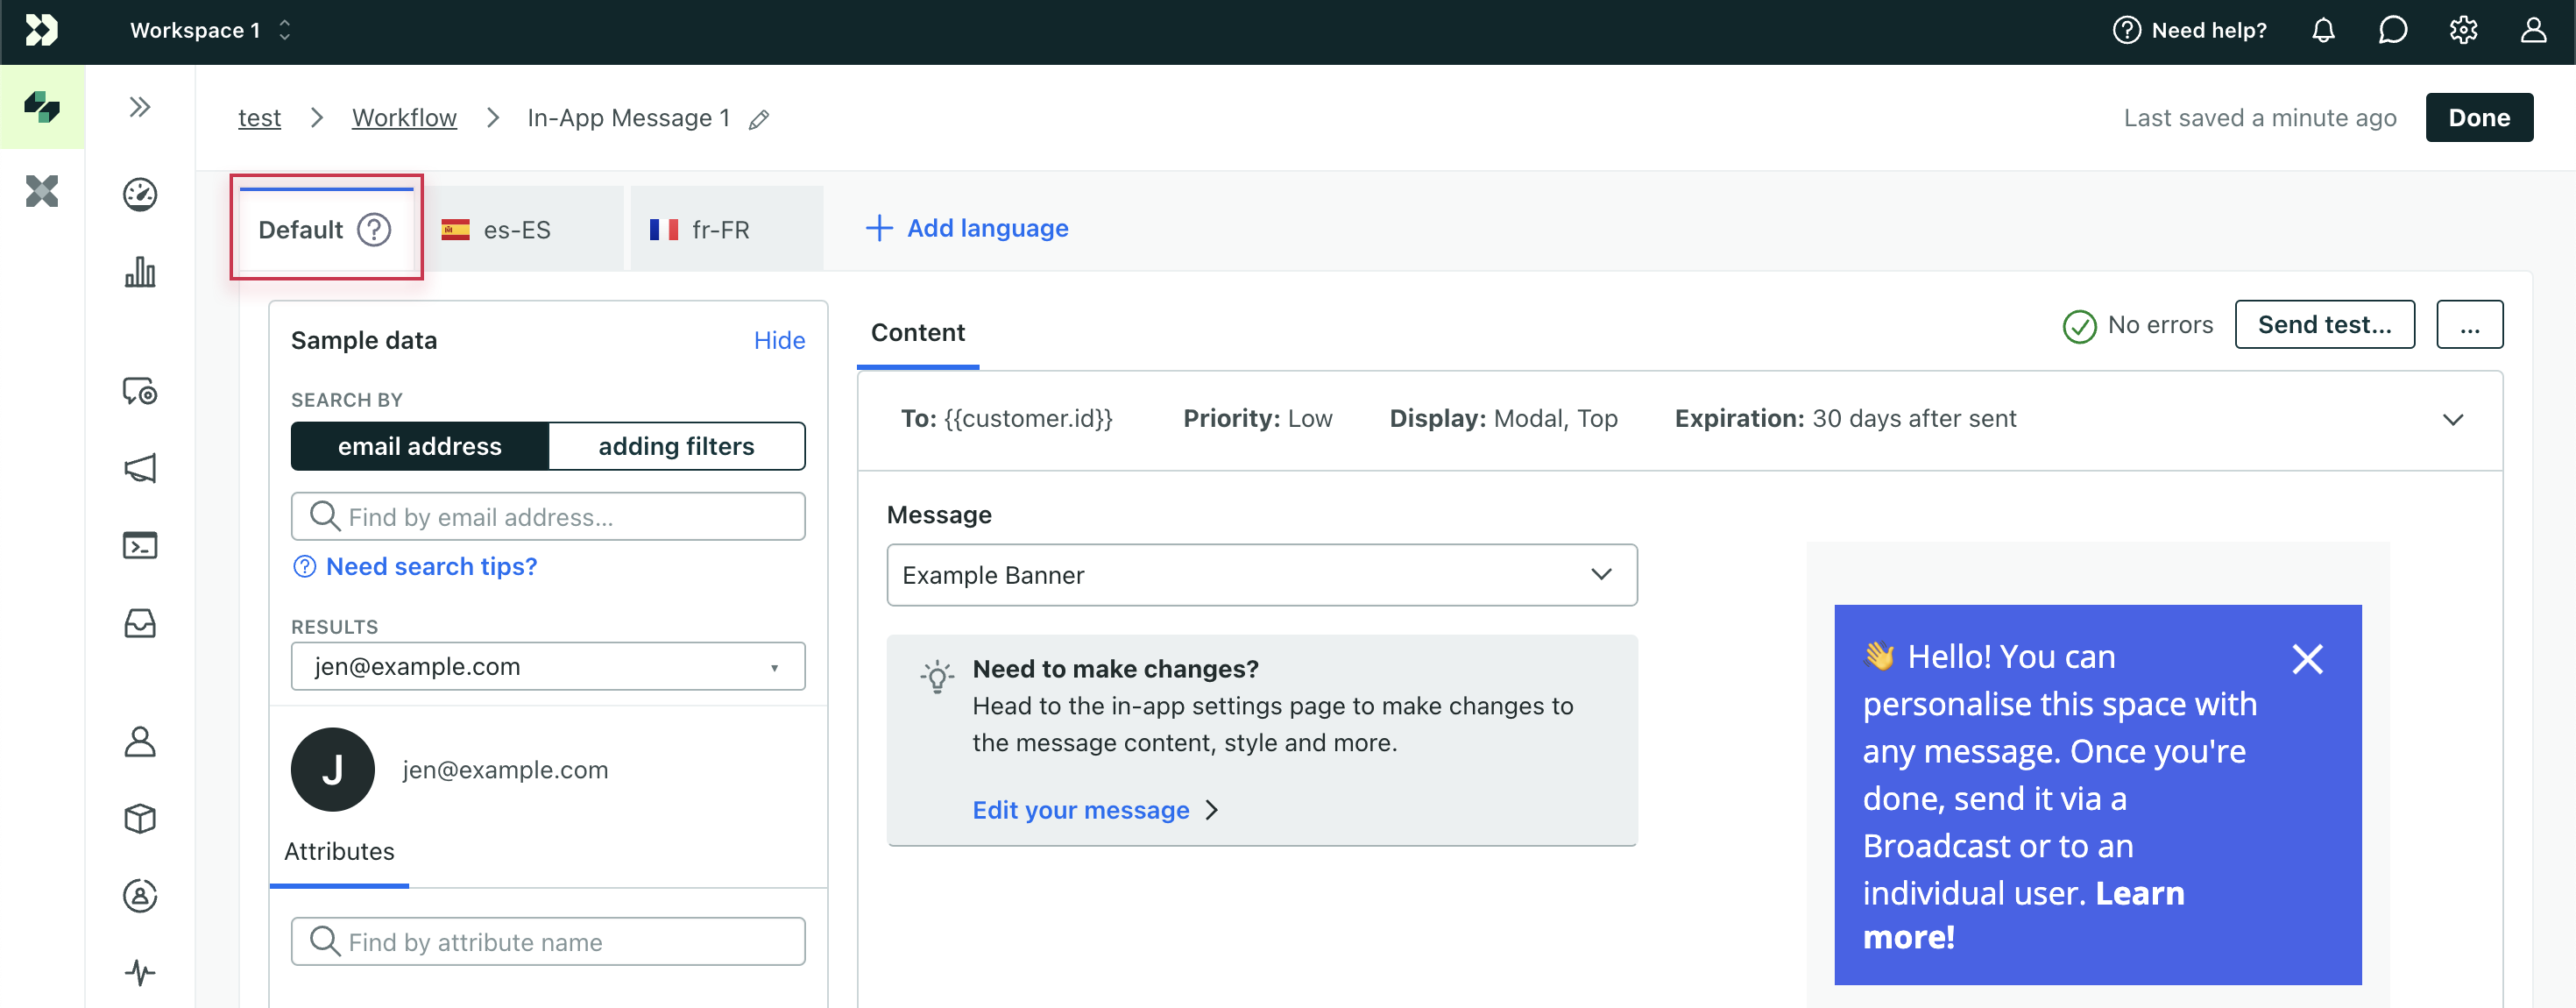
- Draft your Default message. This message should act as a “template” for your other languages. It will be the fallback if your customers do not have a language attribute.
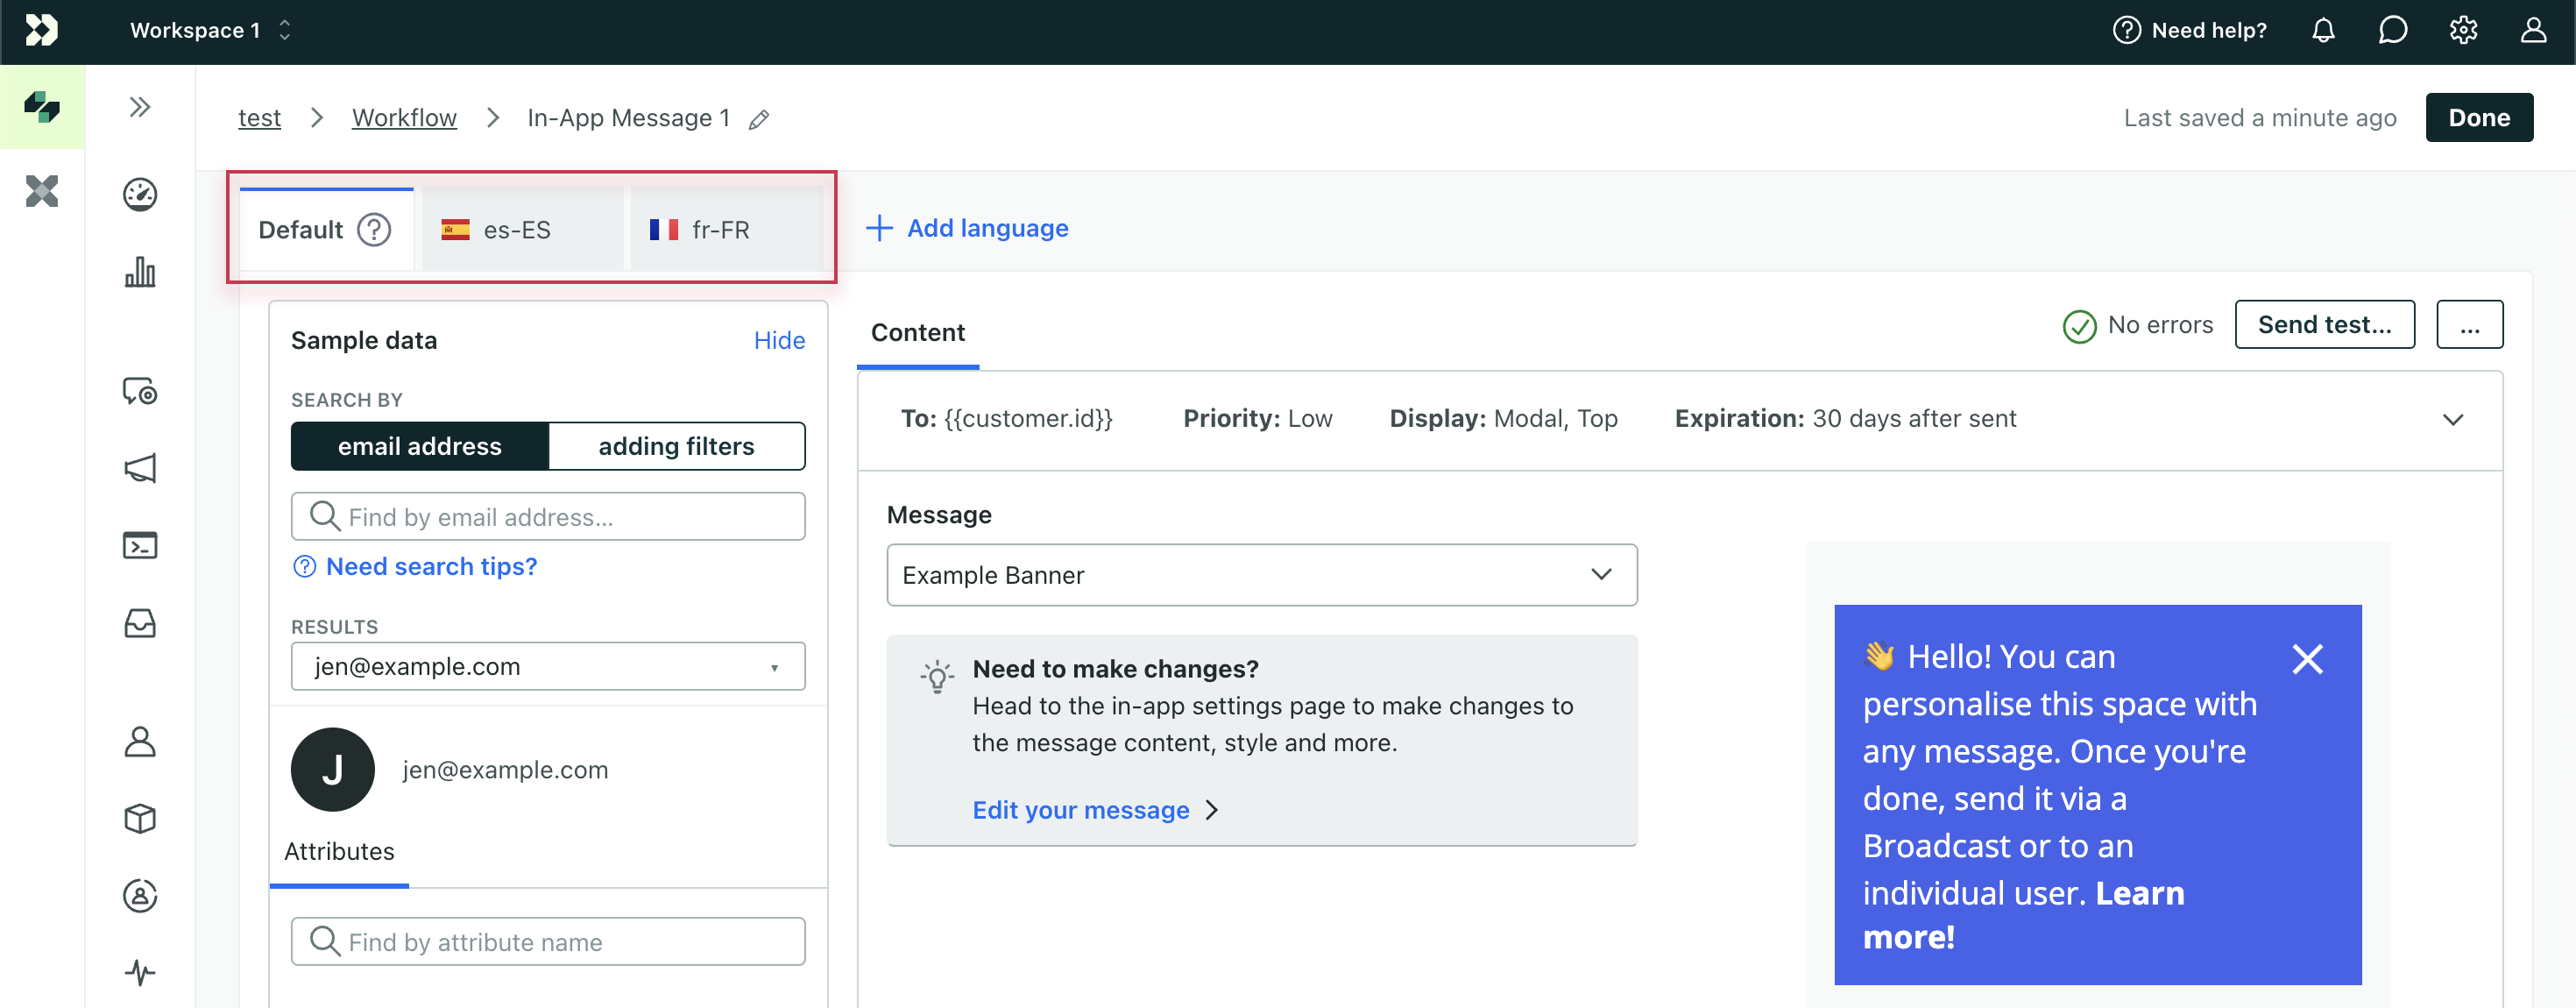
- Add your content for each language. Use the tabs at the top of the message to switch between languages.
- When you’re done, save your changes.
Create and style your Default message first!
If you plan to send email contents to a translation vendor, you’ll want to set up and export your Default message first, and then add languages when you receive them. Check out our best practices for help exporting email messages for your translation vendor.
Set up a multi-language newsletter
When you create a message with multiple languages, you should always begin by drafting your Default message. This is the message intended for anybody who doesn’t match another language and should represent your “template” for other languages.
If you plan to send email content to a translation vendor, you’ll want to set up and export your Default message first, and then add languages when you receive them. Check out our best practices for help exporting email messages for your translation vendor and the quickest way to add your multi-language content.
- Go to Broadcasts, select Newsletter, enter a Name for your newsletter, and then click Create Broadcast.
- Select who you want to send your newsletter to - people matching conditions or everyone in your workspace - and then click Save & Next.
- In the Content step, click your message channel, then click the content block beneath it.
- In your message editor, click Add language then check the languages. Click Add.
- Draft your Default message. This message should act as a “template” for your other languages. It will be the fallback if your customers do not have a language attribute set.
- Add your content for each language. Use the tabs at the top of the message to switch between languages.
- When you’re done, click Save or Done, depending on the type of message you’re creating.
Delete a language from your message
When composing your message, you can remove languages that you add by mistake.
- Click the tab for the language you want to remove.
- Click .
- Confirm the action.
Removing a language means that people bearing the language code in their localization attribute will receive the default message.
Newsletters only: set up an A/B test with localizations
You can set up multi-language newsletters with A/B test variants. When you do this, you’ll create your newsletter tests as you normally would, and then add languages for each variant in the test.
If you set up languages for each variant in your test, we’ll split users into the test before we check their language attribute(s). So, while your audience is split according to your settings, your languages might not be split evenly within, or across, variants.
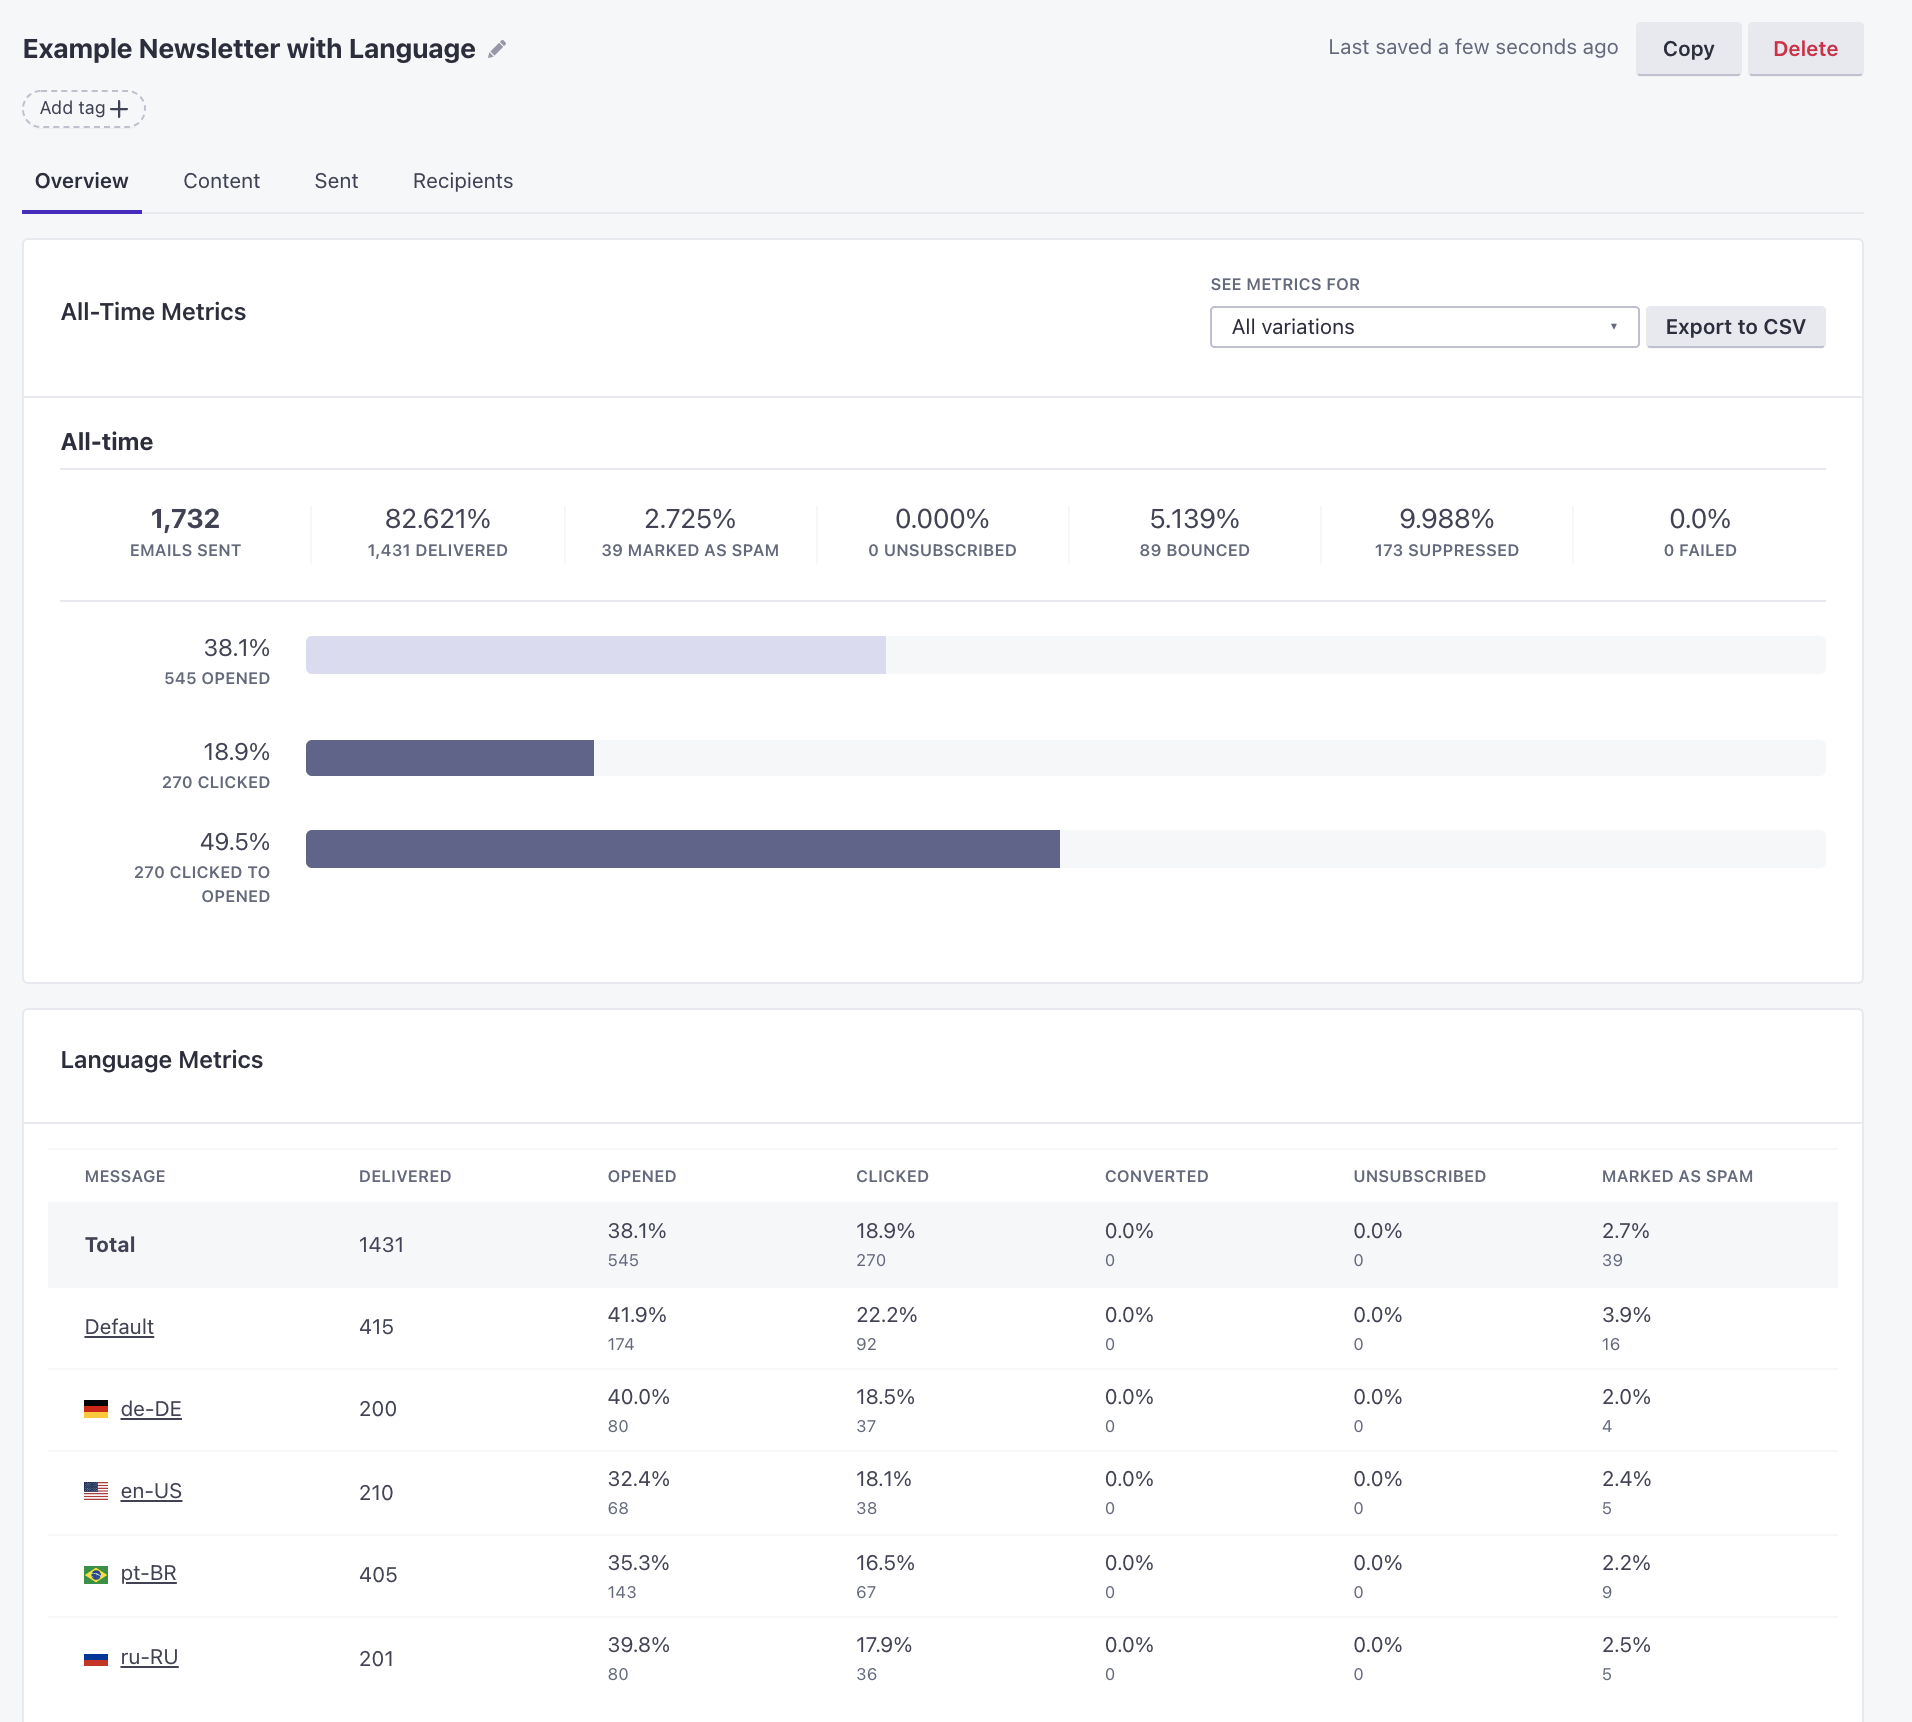
Metrics for localized messages
When you send a message with multiple languages, we show metrics for each language. These metrics can help you make sure that your messages perform well in all of your audience’s languages.